 Reddit reviews AutoEC 3pc 12V 20A Car Truck Round Rocker Toggle LED Switch Blue Light SPST On-off Control
We found 3 Reddit comments about AutoEC 3pc 12V 20A Car Truck Round Rocker Toggle LED Switch Blue Light SPST On-off Control. Here are the top ones, ranked by their Reddit score.
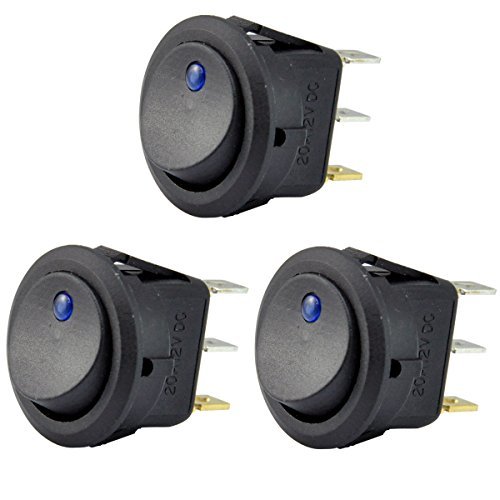
SPST: ON-OFFRating: 12V / DC. 20A.Illumination: DOT styled, 12V LED LightSPST 2 pole design (On/Off) 3rd poles with LED to be connected to earthMaterial: Frames are nylon Terminals are silver plated brass.
https://www.amazon.com/dp/B012IJ35VQ/ref=cm_sw_r_cp_apa_i_OJN-AbA3J0G0W
Something like this, of you want you can go to your local hardware store, they will have switches there, just tell them you need one rated for 12 volts and 10 amps. I did that because all the ones on Amazon are a little expensive for switches IMO
It’s just an electrical connection. You’re basically going to bypass the +12v wire that activates the valve flaps from the control module with a +12v wire that is activated by an accessory source(think cigarette adapter, radio, etc.).
What I would do is use one of these:
https://www.amazon.com/AutoEC-Rocker-Toggle-Switch-Control/dp/B012IJ35VQ/ref=mp_s_a_1_6?keywords=12+volt+power+rocker+switch&qid=1566944665&s=gateway&sr=8-6
That way you can have it “always on” until you flip it into the other position, and have it managed by the control module. Essentially one of the connectors will go to the flap, the second one will be the +12v from the original source, and the third wire will be the +12v from a cigarette adapter (which should only be “on” when the ignition is on). It’s a bit more complicated than that since you’ll have to worry about heat shielding the wires, where they come into the cabin, and where you put the switch. You may have to remove some molding/trim/carpet but it shouldn’t be much harder than wiring up an aftermarket amp/sub.
Based off Inkbird ITC-106RL
Parts:
Controller: Inkbird ITC-106RL
This is 12v so it is easy to use with cheap computer fans and has a built in relay to make for less wiring. Can also be ran off of a battery. Downside of the built in relay is the life span is a little lower, but it is cheap enough and easy enough to replace that I will take the trade off.
https://smile.amazon.com/gp/product/B01MS138DM
Power Supply: 12v. Can be a “wall wort” converter or hooked up to any 12v battery. I used an old power adaptor from an external power supply. Just make sure it is 12v output with at least 1 amp.
https://smile.amazon.com/Adapter-100-240V-Transformers-Switching-Adaptor/dp/B019Q3U72M/
Fan: At least 5 CFM needs to get to the drum, but keep in mind a lot will be lost going down a valve/pipe/elbow. With this controller it will run the fan as need to maintain the temp, so larger will be fine, but too large can cause problems. I did 80mm computer case fan (with LEDs) with a 3” to 1.5” ABS adaptor hacked up get it funneled into my box. I did this because I wanted the look of a big LED fan and a 80mm LED fan was cheap. I think a lot of the 32 CFM of the fan I used is being wasted with my setup with the funnel and riser pipe, and I am OK with that as I love the look. My 32 CFM fan is running about 30% of the time to maintain temp. I want to be able to glance from the house and see it light up. If you are just going for ease of build I would do 2 40mm fans screwed into the cover of the box. Then you don’t need to make the funnel/adaptor which was hard to make.
Mine: https://smile.amazon.com/gp/product/B000S396YU/ref=oh_aui_detailpage_o01_s00?ie=UTF8&psc=1
Easier:https://smile.amazon.com/2packs-0-15A-Brushless-Cooling-AB4010M12/dp/B01CZFUOD0
Temp Sensor: Any “K Type” sensor will do. The controller supports a ton of different types, but a K type is the easiest. I picked this one for the length of the sensor and the spring wire guard for having it on the side of the drum.
https://smile.amazon.com/gp/product/B00899A4LY/
This one looks great if you want to be able to remove it quickly.
K Type Adjustable Compression Spring Bayonet Sensor Thermocouple 5M https://www.amazon.com/dp/B018HX0DLM/ref=cm_sw_r_cp_apa_Ls-VzbD60N3WS
I plan on adding a clip using it on the grate as the sidewall is running about 50 degrees hotter than the air around the meat on the top grate. I think I wouldn't make this one my first choice if you going to have it on the grate because of the spring guard and size.
https://smile.amazon.com/BBQ-Butler-Meat-Thermometer-Probe/dp/B01AS23FHE/
Case: 2" Type LB PVC Conduit Body with a pvc plumbing reducer on the bottom to get down to 3/4” pipe thread that connects to my valve (kept so I can shut it down after cooking) and a solid plug on the back drilled out to allow for a wire connector. I didn't glue either of the plugs in so I could take it off the smoker easily and for future upgrades. The holes in the face of the case were cut with a hole saw and jigsaw.
https://www.menards.com/main/electrical/conduit-conduit-fittings-raceways/pvc-conduit-fittings/carlon-reg-2-type-lb-conduit-body/p-1444444974150-c-6424.htm
https://www.menards.com/main/plumbing/rough-plumbing/pipe-tubing-hoses-fittings-accessories/fittings/pvc-fittings/nibco-reg-2-plug-pvc-schedule-40/p-1444449168970-c-8557.htm
https://www.menards.com/main/plumbing/rough-plumbing/pipe-tubing-hoses-fittings-accessories/fittings/pvc-fittings/nibco-reg-2x3-4-spigot-x-female-pipe-thread-reducer-bushing-pvc-schedule-40/p-1444449164005-c-8557.htm
https://www.menards.com/main/electrical/conduit-conduit-fittings-raceways/metal-conduit-fittings/sigma-3-4-nm-connector-3-bag/p-1444430908358-c-9538.htm
Wiring: Image from facebook.com/boganbbq
The ITC-106RL has the same wiring.

I didn’t add the switches as I am just plugging it in or unplugging it. I think I will add a switch for the fan in the future. https://smile.amazon.com/AutoEC-Rocker-Toggle-Switch-Control/dp/B012IJ35VQ/
I had to flip my probe wiring.
You may need to use a multimeter to figure out which wire is hot vs common coming from the power adaptor. Set your meter to 12v and touch the probes to the wires from the adaptor. If you get POSITIVE number close to twelve your positive/red probe is on the positive/”red” wire. If you get a NEGATIVE number on the multimeter you have them switched. I tested the adaptor on the fan first. My fan would not spin/light up with the wires switched.
My final wiring (not in the case):

Controller Settings:
The manual for the ITC-106 is bad. Luckily the IPC-16 is the same system and the manual is much better.
See: http://pmod79883.pic31.websiteonline.cn/upload/IPB-16UserManualA42.pdf
Press SET button for 3 seconds to enter into the main menu, there are Input Parameters, Output Parameters, Alarm Parameters, PID Parameters and Unit Parameters can be selected. Then press shift button to enter into the submenu if need to change the settings.
Here is what I changed to get it working. Everything else is left on the factory settings.
IP -> SC (Sensor Calibration) AS NEEDED. Once you have it running turn it on and put the sensor in the some boiling water. Use this setting to adjust as needed, keeping in mind water boils at different temps depending your elevation. I had to do a + 3.
PID -> CTL (Control Period) to 15 seconds. Basically, the system will check the temp every 15 seconds and then run the fan for the amount it guesses it will need to keep the temp correct. Lower time is more accurate temp, but on/off cycles for the relay, and it is only rated for 100,000 cycles. I think I will test this at 30 seconds and 60 seconds in the future. 15 worked well and had about a 1-2 degree swing. I am ok with more of swing if it means less wear and tear on the built in relay.
UNITS TO F if think in those terms.
In the future I will play with the autotune/self-tuning function and will add an update for that if I can figure it out and get noticeably better results.
You are done. Light your smoker, power up the controller and set your temp (you can hold the up and down buttons or use the select button and move the decimal point to change by 100s, 10s or 1s). Bottom number is your set point, top is the current temp.
I leave my 2nd valve open till 200 degrees to help the drum get to temp faster, then I closed it and let the controller do the rest, but you can start with just the fan open and walk away if you want. Exhaust open all the way. It ended up running the fan about 5 seconds on, 10 seconds off to maintain 225 degrees.