 Reddit reviews CJESLNA 50 pcs Alligator Clip Stick for Airbrush Hobby Model Parts
We found 11 Reddit comments about CJESLNA 50 pcs Alligator Clip Stick for Airbrush Hobby Model Parts. Here are the top ones, ranked by their Reddit score.
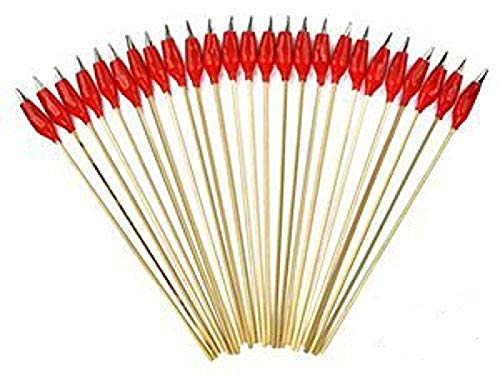
50 pcs Alligator Clip Stick for Airbrush Hobby Model Parts
It's just cheap alligator clips on bamboo skewers. You can buy 25 pre-made for like $5. https://www.amazon.com/dp/B00CWRCO6M/ref=cm_sw_r_cp_apa_8ffRzbMP2AFNG
Not worries, just sharing my experience and offering some advice ;)
That back of 200 clips is only $14 which comes out to $0.07 a piece for very high quality clips. Paired with 4mm skewers and they offer a far superior tool.
I do like these little tiny ones for the smaller parts though. I picked up this set for $0.11 a piece and while the red insulation is useless, they're good clips for small parts as long as you secure them with some other adhesive.
I've seen people selling them at hobby stores, but I just make my own.
For example, you can get a premade set on Amazon for pretty cheap
But that's not how I do it. I went to Wal-Mart and bought a styrofoam block, a package a bamboo skewers (from the grilling section) and a couple packs of alligator clips (from the electronics section). The clips fit perfectly on the end of the skewers, and you just stab them into the styrofoam to dry/cure.
My issue is I am not comfortable with the hobby knife, I feel like I have to put to much pressure into removing the nub even with a fresh blade. I will do the alligator trick, would these clips be to large for the method you suggest, some parts seem to small with those clips. Also I make my own sanding sticks but I do have a few sheets of sandpaper left so I will start cutting strips for other kits. Would you recommend I go higher than 2,000? I go 1,000 < 1,500 < 2,000 < Nail Buffer Block < Nail Polish and Shine. But I still see some marks after all this which makes me think I need a higher grit or maybe a fresh stick.
What I like to do is as I build the Model, i do not fully assemble but test fit to get a feel for what is covered/not covered as well as if I need to fill any gaps. From there, I put the parts on some clip sticks to prime and spray. I use a piece of styrofoam to hold all the clips while I'm painting. Once the colors are all where I want them to be, then I assemble it all and do touch ups where needed.
As for general airbrushing, I practiced on ping pong balls before I tried painting models. It's something somewhat challenging to practice getting even costs on a uneven surface as well as a good way to learn control for your brush. Along with that, I also sprayed on paper just to experiment with spray patterns at different angles and pressures.
Here's a link to those clip sticks I was talking about. Good luck on your next build!
http://www.amazon.com/Bluecell-Alligator-Stick-Airbrush-Hobby/dp/B00CWRCO6M
I wouldn't recommend spraying them while they're still on the runners. When you remove them, you'll have to sand down the nubs and paint over that area. Would work better if you got some of these and a small block of styrofoam to stand them up in. Then you can remove pieces, sand the nubs, and paint the whole piece at once.
I use Testors brand paint for most of my car models, haven't done much gunpla for a while, but I'm getting back to that and am going to try out my Testors spray cans on one.
I started typing and this ended up being really long, hopefully it helps. I might have gone overboard, so if you need / want a TL;DR or more info on anything just say the word and I'll do what I can :)
My personal preference is to add details and touch-ups to my figures. I've done a few full repaints, and I'm working on my first airbrushed figure, but I really like adding in details where the factory didn't :)
---
Paints:
I've had good results using alcohol based acrylics like Tamiya, Model Master, or Testors Acrylics (I think Enamels are Testors' main line, so make sure to check what type it is). Alcohol-based acrylics thin and clean up nicely with 91% isopropyl alcohol, I usually pick it up from whatever pharmacy is nearby (don't get the 70%, it doesn't work at all).
Citadel and Vallejo make nice water-based acrylic paints in additional colors, you'll definitely need a primer if you're working with Vallejo (I've only used a couple of Citadel paints, so I can't really speak to them).
You'll want to stay far away from acrylic craft paint, I've tried it in the past and it doesn't come out well at all (I just use some empty glass or plastic jars from stuff like sour cream or salsa since they're not too big).
Some folks like enamel paints, and there might be another kind of model paint, but the chemicals in those paints and their thinner tends to be quite strong so I avoid them. I used un-thinned enamels when I first started painting, and when I tried to use the thinner it ended up melting my paint tray and making a mess, so I'm not too keen to give them another try.
---
Tools are going to differ a bit depending on how you want to paint (hand painting vs airbrushing or spray painting).
---
Hand Painting:
You'll need paints, some soft bristle brushes (I have a set like these), something to stir your paint (I use a Badger Paint Mixer and love it to bits), thinner (depending on your type of paint), a mixing tray, some pipettes for measuring paint and thinner, something to hold your parts while painting (I like these Aligator Clips), something to stick the clips into (I use a styrofoam block wrapped in plastic from a craft store, but I've seen folks use taped together cardboard like from Amazon boxes or the cheap foam coolers), some fine grit sand paper or nail buffing blocks to help rough up the surface slightly to help the paint stick, and something for topcoat (I absolutely love Pledge Multisurface Floor Care, aka Future Floor Wax, it's a clear acrylic wax that dries to a semi-gloss to gloss shine, it brushes on nice and self-levels for a smooth finish, and one bottle will last a REALLY long time; I got a bottle a few years ago and I've used it on a LOT of gundams and TFs and the bottle is still half full). You may also want some smaller containers or jars to hold your thinner, brush cleaner (alcohol or water), and topcoat if you're using Pledge just so you don't need to keep the big bottle out on your workspace.
---
Airbrushing:
You'll need an airbrush and compressor, and then a lot of the same supplies as above. You'll also want some small-ish jars to store your thinned paint so you can re-use your leftover paint instead of having to toss it, and some painter's tape to mask off parts you don't want to paint and to keep your paint lines clean.
You can airbrush inside the house, but you'll want to do it in a well ventilated area if you don't have a spray booth (box with a fan and air filter to help move the fumes out the window and help keep the paint from spraying everywhere). I'm still learning to paint with my airbrush, so I don't have too many tips here.
---
Spray painting:
You'll need your choice of spray paints, alligator clips, fine sand paper, and some painter's tape to mask off areas so it doesn't get everywhere. I definitely wouldn't advise using spray paints indoors, the fumes tend to be really strong. I haven't really used spray paints in a long time, so I'm not a lot of help here either.
---
Markers:
Some folks might recommend sharpies or paint pens / markers, but I've never had good luck with them.
I do highly recommend using a Micron, Graphix, or Prismacolor marker / pen for highlighting panel lines in .005 thickness for most figures. The .01 and even .05 markers can work well too, but they might be too thick for some figures, so a couple different thicknesses can't hurt (I've got a pencil case full of lining markers from those brands). Don't use sharpies for panel lines, unless things have changed, even the thinnest ones tend to dry a purpley-blue instead of black, and the lines are still really thick compared to the Micron.
---
Painting Tips:
I recently started to gather a startup airbrush supplies and tools.
I purchase some alligator clips from amazon (https://www.amazon.com/dp/B00CWRCO6M/ref=sr_ph_1?ie=UTF8&amp;qid=1484095804&amp;sr=sr-1&amp;keywords=alligator+clips)
while waiting for my other supplies to arrive i realize i didn't have any styofoam laying around to use as a base given that most stuff is packed using inflated air bags now. while i was watching some airbrush guide on youtube it gave me idea
Correct!
Bluecell 50 pcs Alligator Clip Stick for Airbrush Hobby Model Parts by Generic
https://www.amazon.com/dp/B00CWRCO6M/ref=cm_sw_r_cp_apip_GgJ5aIplWSoA2
http://www.amazon.com/Bluecell-Alligator-Stick-Airbrush-Hobby/dp/B00CWRCO6M/ref=sr_1_2?ie=UTF8&amp;qid=1417441276&amp;sr=8-2
I bought these and they are pretty decent
You can do with out the Testors enamle paint. Also remove the future...its about$5 for shipping you're better off picking it up at Walmart with some Windex to clean up the air brush after you use it.
Here's a better option for the alligator clips
https://www.amazon.com/Bluecell-Alligator-Stick-Airbrush-Generic/dp/B00CWRCO6M/ref=sr_1_1?ie=UTF8&amp;qid=1473748283&amp;sr=8-1&amp;keywords=Paint+clips
You might need more thinner than 32ml.