Best conductive adhesives according to redditors
We found 19 Reddit comments discussing the best conductive adhesives. We ranked the 11 resulting products by number of redditors who mentioned them. Here are the top 20.
We found 19 Reddit comments discussing the best conductive adhesives. We ranked the 11 resulting products by number of redditors who mentioned them. Here are the top 20.


I have an MIA P-bass and a MIM Jazz, and I love them both dearly.
Most of the differences are superficial. Some parts like the string tree and saddles on the MIA will be die cast while on the MIM they will be stamped. There are other details, such as the rolled edges on the MIA fingerboard, graphite reinforced neck, upgraded bridge, etc - but when it really comes down to it, they both play extremely well, they both stay in tune, and they both sound great.
The cool thing about the MIM is that it's a good platform for upgrades, which will make it a fantastic professional quality instrument for a really reasonable price. You can get a nice used MIM for $300-$350, then for another ~$120 buy some really nice pickups and you're basically already there (hell, stock it's still really good!). Then if you have upgraditis like me you can move on to the bridge, tuning machines, etc - but these things won't do much to affect your actual sound or playability. Some will argue a nicer bridge will give you better sustain and such, but I'm still skeptical - I don't think it really makes that much of a difference and if it does make any difference then my ears aren't good enough to tell. I just upgraded it because big fat beefy bridges look cool to me.
The only thing I'd really make sure of is that it's properly shielded where the electronics are (under the pickguard), but for that you just need some shielding tape, which can be had for $10.00.
Sure!
Dein Username prüft übrigens aus.
The Light Units
The Chips x4: 98.6$
The Driver x1: 74.9$
CPU Cooler
x4: 55.96$
Thermal Adhesive Paste x1: 7.9$
4way pin for the coolers x1: 9$
Lights Total: 246.36$
Framing and stuff
Most guys build their framing out of aluminium profiles. I bought mine here from the %%% section: https://www.alu-verkauf.de/ALUMINIUM-ALUMINIUMPROFILE
Every country has its own manufacturers for these. Mine cost about 30$.
You also need cables. The veros are pretty flimsy. so take pretinned gauge x1: 9,95$
In order to screw the frame you might wanna cut holes swith a thread. This will do x1: 8.43$
Be careful these drills suck and break easily.
Screws x1: 12.98$
Wago Connectors
x1: 6.35;$
Were at about 315$.
Lets see what we can do with it.
my frame is build with 6 L-Profiles in which the COBs just lay around and one center piece: Link to Pic
You might additional hangers, cold device cables and another power source for the cooling fans. If you decide to buy the MeanWell HLG-320H-2100B you will need to connect a 10kOhm potentiometer to the Driver. This is to dim the light and safe money in vegphase. The HLG-320H-2100A has a build in dimmer which you can access via a screwdriver. I would recommend A, since its easier to operate. You can also regulate the fans of the cooler via a 150Ohm poti. If you dont like the sound, you can run them at 1/3 to 1/2 speed.
have fun!
Don't use the permatex stuff they sell at the chain stores. I've had defroster tabs fall back off after a short period of time.
This conductive epoxy is a better and tougher solution. I've used it several times and have always been happy with the repair. You'll clean up the back of the defroster tab and the part it sticks to on the window with a little sand paper, clean them with isopropyl alcohol, mix the epoxy according to the directions HERE, apply a fair amount to the back of the tab, and then affix it to the window allowing the epoxy to set per the temperature/cure schedule HERE. Once it cures I personally leave it set 24 hrs before re-attaching the wire to the tab.
Basically follow this video but using that conductive epoxy.
When I run into a project that might use conductive ink, I almost always have better luck using copper ribbon tape with conductive adhesive. It is stronger, I can solder to it easily, and cheaper. Not to mention a lot of conductive ink is not truly conductive, but can have up to 100 ohms/mm resistance.
Why did you drill that panel and screw it down? No offense but it looks sloppy and seems unnecessary. You should consider simply using a conductive epoxy instead for the copper plate to attach it to the box, and solder the mosfets to the copper piece. That way you can keep the outside clean looking. Rest of your build looks pretty good though. Are you going to finish the outside too? If you epoxy the copper plate, you can use metal and body filler to fill in the holes before you paint.
Example: https://www.amazon.com/Nickel-Electrically-Conductive-Adhesive-AA-DUCT/dp/B00EPYCUDC
Use a fda/food safe epoxy! Epoxy is pretty much the gold standard when it comes to gluing things back together.
https://www.amazon.com/AA-BOND-FDA22-Medical-Grade-Adhesive/dp/B00EPYDV0S/ref=sr_1_12?ie=UTF8&qid=1494207874&sr=8-12&keywords=fda+epoxy
Umm I'm not a peasant?
I use the good shit
Edit: fuck that $3.99 shipping is a little too much nvm
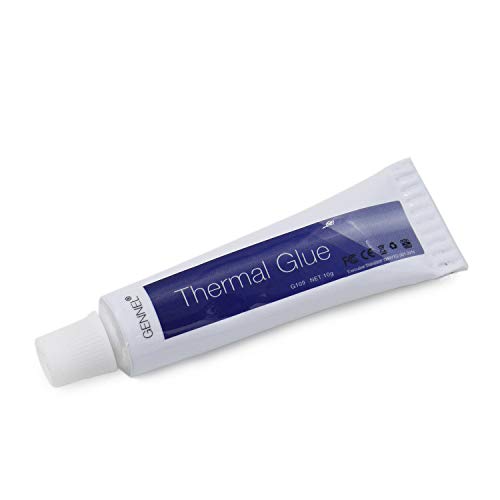
This is what I used:
Thermal glue:
https://www.amazon.com/gp/product/B072MSXHJD/ref=ppx_yo_dt_b_asin_title_o01_s00?ie=UTF8&psc=1
Shim pads
https://www.amazon.com/gp/product/B01N2XYFJ4/ref=ppx_yo_dt_b_asin_title_o01_s01?ie=UTF8&psc=1
LOL, I always make shit too complicated...
Yeah, THIS is what you need.
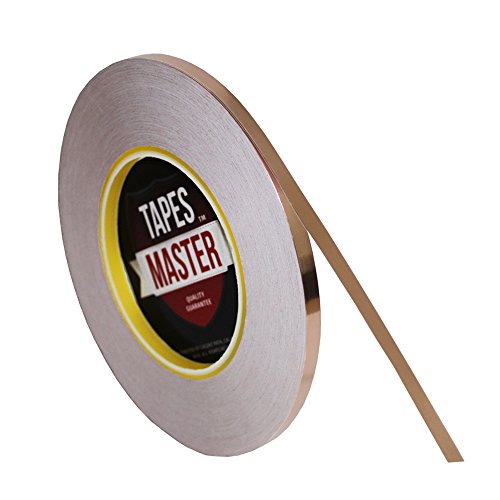
Get some copper tape and shield the cavity. Easy to do and will do wonders for noise coming from single coils.
If you have humbuckers, it's not necessary.
https://www.amazon.com/DRILLPRO-inch-Copper-Foil-Tape/dp/B01EJLT8RG/ref=sr_1_4?ie=UTF8&qid=1474921318&sr=8-4&keywords=copper+tape
Soldering is fairly easy with a little bit of practice, but to you will end up spending close to the cost of those cans to get an iron, solder, and extra wire to practice on.
SO, before buying a new set, use this opportunity to try and take them apart and see if you can spot the loose connection. If you can see it, it may be able to be fixed using some soldering glue or paste, like this stuff: http://www.amazon.com/Resist-Electrically-Conductive-Adhesive-AA-DUCT/dp/B00EPYD1YO/ref=sr_1_3?s=industrial&ie=UTF8&qid=1462460247&sr=1-3&keywords=cold+solder+glue
Related question, I've always wondered is it possible to buy cheaper unshielded risers then shield them myself with this kind of copper foil tape?
Food grade epoxy can be purchased here: http://www.amazon.com/AA-BOND-FDA15-Administration-Medical-Adhesive/dp/B00EPYDOTQ/ref=sr_1_2?ie=UTF8&qid=1419869809&sr=8-2&keywords=food+safe+epoxy#product-description-iframe
Sometimes the lenses will just press fit snugly into the holes in the star, but you definitely don't want normal super glue that close to the LEDs, even with the wiring tidied up the star can get pretty hot with a small heatsink like that one.
I know you can get thermal glue designed for CPU heatsinks, and there are probably other glues designed for high temperatures that would work.
Looks like a few people have used something like this... Electrically Conductive Epoxy, Silver Adhesive, Room Temperature Cure, Air Dry AA-DUCT 902 , 2.5gm kit https://www.amazon.com/dp/B00EPYCIGQ/ref=cm_sw_r_cp_api_i_M3S0Db3Z27B84
Nice, yes those are mounted correctly. The biggest reason for me to go with thermal adhesive was the tape on my heatsinks was barely tacky. Here’s what I ended up getting: GENNEL 10gram Thermal Conductive... https://www.amazon.com/dp/B072MSXHJD?ref=ppx_pop_mob_ap_share
Arctic Silver is just paste, you need actual adhesive. That stuff seems to work very well after a 24hr cure.
Couldn’t agree more about the horrible A4988 noise. I shake my head seeing people mess around with stepper dampers and stuff, TMCs in Stealthchop are simply unbelievable. I ended up installing Noctuas everywhere since the cooling fans became the loudest part of the printer.
Biggest advantage IMO of UART is you can enable hybrid mode in Marlin. Automatically switches between Stealthchop and spreadcycle based on movement speed. I believe spreadcycle is a bit cooler, definitely noisier though. But it does provide more torque and reduces risk of skipped steps on fast moves. My average print is 95% Stealthchop, so still very quiet overall. And spreadcycle is still quieter than stock.
UART also lets Marlin automatically reduce stepper driver voltage if it detects overheat which sounds like would be valuable for your peace of mind. For what it’s worth, mine have never been triggered which is what I based my original comments on.
When first getting into mechs there are a few costs that are unavoidable. They are as follows:
Good batteries
Sony VTC5 or VTC4 from illumn.com or another trustworthy battery supplier.
A good charger
Nitecore i2, Nitecore i4, Efest LUC v4, or Xtar brand chargers.
Ohmmeter
http://www.fasttech.com/product/1519800-atomizer-resistance-tester-ohm-meter
Kanthal
28 gauge
http://www.amazon.com/gp/aw/d/B00FBSVQX6?cache=38a824a0030f01bef8e0aaea10a9fb59&pi=SX200_QL40&qid=1411501324&sr=8-1#ref=mp_s_a_1_1
24 gauge
http://www.amazon.com/gp/aw/d/B00K22JQ2E?cache=38a824a0030f01bef8e0aaea10a9fb59&pi=AC_SX110_SY165_QL70&qid=1411501449&sr=8-6#ref=mp_s_a_1_6
Organic cotton balls or rayon (sold as cellucotton 100% rayon)
This stuff will need to be bought no mater what mechanical mod you get (Gauge of kanthal can be different sizes)
Now for the fun part, picking mods. The nemesis is a solid performer.
Nemesis
http://www.fasttech.com/products/3027/10009160/1604509
This should immediately be done to the switch. It is the best modification that I have ever made and it is free.
http://www.reddit.com/r/electronic_cigarette/comments/1yczcg/my_fix_for_the_nemesis_button_and_how_to_shorten/
Switch Magnets
http://www.fasttech.com/products/3099/10005773/1558901-switch-magnets-for-nemesis-mod-10-pack
If you want power regulation you can use a kick module which regulates wattage between 5 and 12 watts.
Kick Module
http://www.fasttech.com/products/3099/10006524/1501000-variable-wattage-kick-module-for-mechanical-mod-pv
If you are using a kick then you don't need to worry about voltage drop, but if you are going for more than 12 watts (which you are most likely going to do unless you are using a kayfun or clearo) copper tape will reduce voltage drop significantly.
Copper Tape
http://www.amazon.com/gp/aw/d/B00CBPK0FW?cache=38a824a0030f01bef8e0aaea10a9fb59&pi=SY200_QL40&qid=1411500089&sr=8-1#ref=mp_s_a_1_1
Also optional, to reduce voltage drop and overall length of your mod. This one is specifically made to fit the nemesis and kayfun.
Nemesis Hybrid Connector
http://www.fasttech.com/products/3023/10009156/1662400
I use one of these to connect the nemesis in 18350 mode with a kayfun 3.1. It stands at 4 inches tall and is great for putting in your pocket when you're out drinking, causing trouble, or whatever it is that the kids are doing these days.
If you are looking for something a little cheaper to just get the feel of a mech, I started with an M16 telescopic mod.
http://www.fasttech.com/products/1411/10005307/1627200-sentinel-m16-style-telescopic-mechanical-mod
You won't be able to put a kick in it or use copper tape and it is made mostly out of aluminum, but it is a solid mod to start with and can take 18350-18650 batteries. Any 18350 batteries that you get should be AW IMR or purple Efest batteries.
Of course you will need an atomizer to go with your new mech. Most 3 post drippers are good to start out with. I prefer the IGO-M because of the large air holes and 2 screw positive block, but there are a lot of options for drippers. The Kayfun 3.1 is usually a good starter rebuildable tank atomizer (RTA)
And last, but not least, we get to battery safety and types of mods. Godofsteam.wordpress.com/intro-to-vaping/ is the best site that I have ever visited for research into mechs and rebuildables. It should be all you need to help you get started.
It's actually copper tape meant for stained glass projects. It can be purchased at many craft stores.
There is a version used for EMI shielding that has a conductive adhesive that may be a better option, but I don't know how it compares with adhesive strength and material thickness. The stained glass stuff is crazy sticky, and surprisingly tough.