Best cooling racks according to redditors
We found 124 Reddit comments discussing the best cooling racks. We ranked the 46 resulting products by number of redditors who mentioned them. Here are the top 20.
We found 124 Reddit comments discussing the best cooling racks. We ranked the 46 resulting products by number of redditors who mentioned them. Here are the top 20.


My "first apartment lineup" would look something like this:
I'm an old hand at pretzel making. Throw away the paper, and bake your pretzels on these on cookie sheets. They'll allow a little air to circulate on the bottom, while letting excess water from the bath to drain through without making a sticky glue. Your pretzels will come right off the rack with a lovely cross pattern on the bottoms.
As an extract brewer this step is done for you in the extract you put into the water.
In short you steep (mash) the grains for an hour at approx 150*F to allow enzymes in the malts to turn the starches into sugars that yeast can use. You then stop the reaction and wash some of the remaining sugars out of the grains using a sparge (water at about 170 degrees) This helps to improve efficiency and bring the water for the boil up to pre-boil volumes.
Most people build a stand to keep a HLT (Hot Liquor/Liquid Tank) elevated above the mash tun (the vessel that holds the grain/water mixture) as the mash tun drains into a boil kettle either on the floor.
All grain really only adds another hour to hour and a half to your brew day and you get much more control over the end product. It is also cheaper. I am doing sub 20 dollar recipes including the yeast. (although I am using a backlog of hops that I have on hand)
You can try all-grain brewing for cheap using BIAB. (all you need is a bag which runs about 5 bucks from your LHBS and either a strainer or I used a baking cooling rack like this one. I just finished doing 3, 3 gallon batches BIAB for experimentation. Now I am going to try doing a full 5 gallon batch this weekend.
I use a half sheet pan and a half sheet pan cooling rack. There are some others on Amazon, but those are the two I use. You can probably get away with any stainless steel or aluminum rack and sheet pan.
Another thing that helps me with the crispiness is to bake them on a rack. I have a couple of nice cooling/baking racks like this that keep roasted veggies up so they heat more evenly all the way around and don’t stick. Great for oven fries, too!
Get on Amazon and buy some of these.
http://www.amazon.com/gp/aw/d/B0001MS3DI/ref=mp_s_a_1_2?qid=1462935978&sr=8-2&pi=SX200_QL40&keywords=half+sheet+pan+and+rack&dpPl=1&dpID=41PBvlflBmL&ref=plSrch
And an equal number of these.
http://www.amazon.com/gp/aw/d/B000G0KJG4/ref=pd_aw_fbt_79_img_2?ie=UTF8&refRID=18X6H5MZZ2GQTT8RGT0D
Put the one in the other and put whatever you're drying on the rack and put one on each rack in your oven. Set the oven to the lowest temp possible. Prop the door open with a wooden (not plastic) spoon and wait.
Ovens are usually a little hot for fruits to do well so you can go on for an hour, off for an hour, etc... Until it gets dry to keep from cooking as you dehydrate. Ovens work well for meats and jerkys as I feel most home model dehydrators don't get hot enough to dehydrate meat.
Also get one of these.
http://www.amazon.com/gp/aw/d/B019DT4EBE/ref=mp_s_a_1_17?qid=1462936323&sr=8-17&pi=AC_SX236_SY340_QL65&keywords=mandoline+slicer
Makes uniform slices and you can julienne things like carrots and potatoes.
These really help for doing fruit as well.
http://www.amazon.com/gp/aw/d/B00629K4YK/ref=mp_s_a_1_2?qid=1462936445&sr=8-2&pi=SX200_QL40&keywords=silpat&dpPl=1&dpID=41MTUhWaO%2BL&ref=plSrch
If you do something that's really sticky like pineapple or mango, put the slices on this in the sheet pan. You'll have to turn your pieces a few times but they'll make cleanup so much easier.
If you're gonna buy a dehydrator. Get this one.
http://www.amazon.com/gp/aw/d/B001K246KW/ref=mp_s_a_1_2?qid=1462936599&sr=8-2&pi=SY200_QL40&keywords=lem+dehydrator+10+tray&dpPl=1&dpID=51XOjbSNSdL&ref=plSrch
Has 10 trays, easy to clean, all stainless, and has a thermostat. It's pricey, but if you make all your meals for one or two trips instead of buying freeze dried, it will pay for itself.
I make all my meals for big trips for 4-6 people for 6+ days. Mine paid for itself the first trip.
Perfect name
For me!
Those rack things are part of the dehydrator.
These are what you want for this recipe:
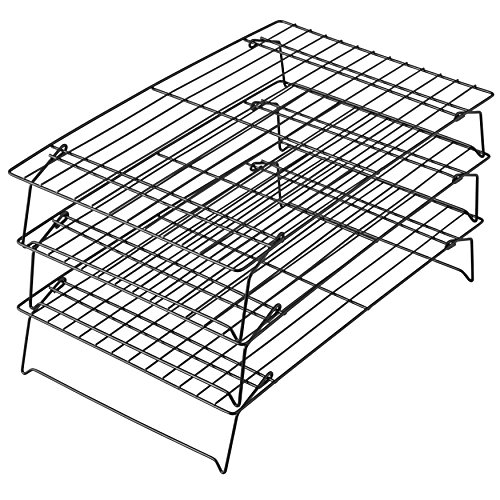
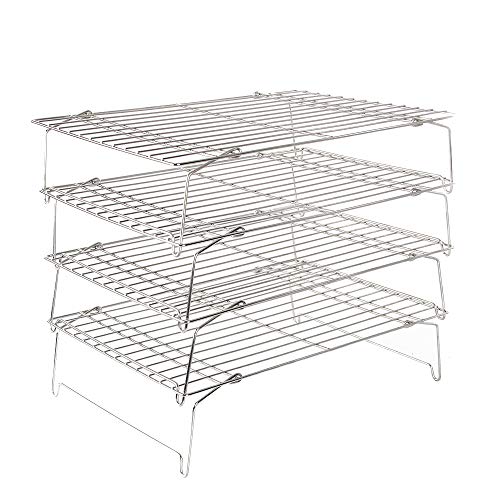
https://www.amazon.com/Wilton-2105-459-Excelle-3-Tier-Cooling/dp/B00030CGKY/ref=lp_289721_1_6?s=kitchen&ie=UTF8&qid=1482362869&sr=1-6
Here's the quarter sheet pan, and here's the wire rack! Pro-tip: get two wire racks, and a half sheet pan (2x the size), and you've got two sheets pans with wire racks to fit either!
EDIT: Whoops the above rack is a half-sheet rack! Here's a set of two quarter-sheet racks - thanks /u/abedfilms for pointing that out
Pots are sitting on one of these, set in side this. Suck the water out with this.
I have a similar system, but mine is a rectangular Rubbermaid container, about 15x20 inches, and about 6 inches deep. It’s the perfect size to fit two cooling racks for baking (like this), so I have a handy draining rack and don’t have to hold the plants while they drip. I also use the lid of the container, it’s a nice strong one, not a wobbly one, with another couple of racks so I can do more plants at the same time. :) I wonder if your bucket could fit a round rack?
While I prefer to deep fry mine, I use a wire cooling rack placed on top of a bakers pan / cookie sheet.
This works well with just about anything you put in the oven.
Stackable cooling rack? Done.
https://www.amazon.com/dp/B00030CGKY/ref=psdc_289721_t2_B00076VGQ4
All one piece? I got nothing.
i use a mesh cookie cooling rack on top of a large pan so the wings don't bake in their liquids which ruins the crispyness. i make chicken tenders this way too, dry rub with cajun seasoning.
if you have something like this and you put your bacon on top while you cook it in the oven, the grease will drain away from the bacon.
Nothing weird at all, the only thing weird about using a 'cooling rack' as a 'baking rack' is if the cooling rack is cheap and can't handle the heat.
A standard kitchen grade stainless steel baking rack should work fine.
I tried a flat one first, then the elevated one with skewers.
Rack (I just take the middle rack out)
https://www.amazon.com/gp/product/B01HQRWXY0/
Flat rack
https://www.amazon.com/gp/product/B017MWU59Y/
Skewers
https://www.amazon.com/gp/product/B005D6GCSA/
Other people also about cooking unexpected items in their instant pot because they're in a dorm, for example, and the instant pot is the only item they have to cook with.
As others have said, saute would probably do the trick, and splattering would be minimized, but not eliminated, since the action is at the bottom of the pot instead of near the top of a skillet.
I was about to suggest baking, or if you have the money/room, maybe look into an air fryer, which is really just a small convection oven, so you're not heating up the whole oven.
> because it usually ends up super Smokey in the house and I don't particularly like the splashing grease and me standing over the stove.
I cook bacon in the oven for this reason, plus, it remains flat. I put this wire rack into a 1/2 baking sheet to keep the bacon out of it's own grease, but be careful, because a full baking sheet of bacon has a crazy amount of fat in the pan, which is easy to spill if you're not careful. Lined with foil, once the fat solidifies, toss it and the foil into the trash. With the rack, you don't need to flip what you're cooking because it remains elevated above the fat.
However, it can get smoky if the pan is too close to the source of heat, and either way, your house will reek of bacon for a few days (if that's a bad thing). I've heard this can be minimized by adding some water to the pan before baking, but haven't tried it myself.
Now this is a conversation I can get in on.
Let's begin with my stainless steel measuring cups. I bake a lot so these are so useful. The 1/8 cup comes in so much more use than I ever imagined it would. And they're just so much nicer than plastic ones. I want to get a set of stainless steel measuring spoons but haven't yet.
Next, I would probably say my French Press. Coffee is important, and my French Press makes some delicious coffee.
I absolutely love this skillet. Works like magic.
I also recommend this 3 tier cooling rack to everyone. It's so useful and stores so well.
In the fall/winter I use my crock pot a whole lot. I also find having large mason jars to be useful for storing food, though I also have this tupperware.
Finally, my KitchenAid stand mixer. Self explanatory. It's fucking awesome. I just want to spend every waking moment putting it to good use and baking everything under the sun.
Let's do it in the kitchen.
Nordic Ware Round Cooling Rack, 13 Inch Diameter https://www.amazon.com/dp/B00004RFPU/ref=cm_sw_r_cp_apip_Vr1RUG7jFQ18U
Here ya go!
I love these for roasting. Heavy gage, no rolled edges so water can't collect... beautiful. I noticed an instant improvement in my roasted veggies and meats when I got them; I actually gave away a small stack of kitchen equipment that because obsolete once these entered the kitchen. I paired them with this wire rack because it was inexpensive but good quality, but there are a lot of standard-sized half-sheet compatible racks out there, just check the dimensions before ordering.
MyFitnessPal on your smartphone.
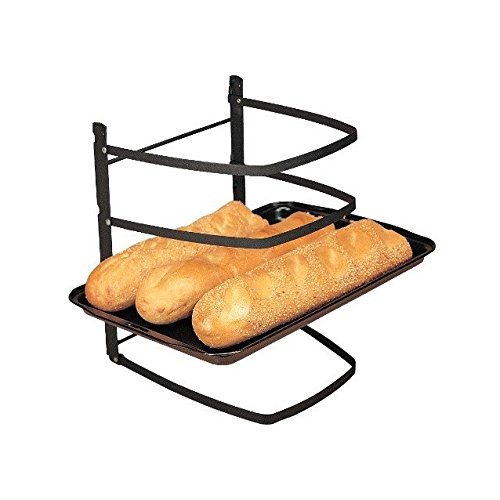
Grease Keeper
Baking Cooling Racks
Whoopie Pie Pans
Kitchen Scale
/r/ketorecipes
www.cavemanketo.com
No need to buy any extra gadgets - save your money for all the bacon and coconut oil you're going to buy.
I found them on Amazon - https://www.amazon.com/gp/aw/d/B00030CGKY/ref=s9_top_hm_awbw_b1DMv_g79_i3?pf_rd_m=ATVPDKIKX0DER&pf_rd_s=mobile-hybrid-11&pf_rd_r=2251DGTVFGPYZPD0XVE9&pf_rd_t=30901&pf_rd_p=09ed5729-304e-5efd-9238-7a2a8c797f93&pf_rd_i=289721
[a cooling rack]
(http://amzn.com/B00030CGKY) because I bake a lot of cakes and don't have one and this would help the cooling process. :)
Home sweet home :)
I don't use a pizza stone. Personal preference. it is Not necessary but some do love them and swear by them. I just put the dough right on my oven rack or on a cake cooling rack placed over a baking sheet. Like these items.
Baking sheet:
http://www.amazon.com/Excellante-Inch-Half-Size-Sheet/dp/B001BR10DW/ref=sr_1_4?s=kitchen&ie=UTF8&qid=1458588276&sr=1-4&keywords=half+sheet+pan
cake cooling rack that I set inside the pan.
http://www.amazon.com/Bakers-Secret-1061483--16-Inch-Nonstick/dp/B00091PNTI/ref=sr_1_1?s=kitchen&ie=UTF8&qid=1458588324&sr=1-1&keywords=cake+cooling+rack
Hope it helps maybe give you another option.
Chances are you aren't going to find a covered one as that will result in the moisture from the steam being retained, cooled and will condensate back down on to the product. Personally I would recommend something like this and if you are super concerned about dust or stuff in the air just put a plastic bag over it. Chances are though if it is sitting out overnight the amount of dust or other things is so minimal unless you have a fan pushing the air around in the room.
You’re very welcome!
Don’t forget to get a pair of these to go with your Bull supplies:
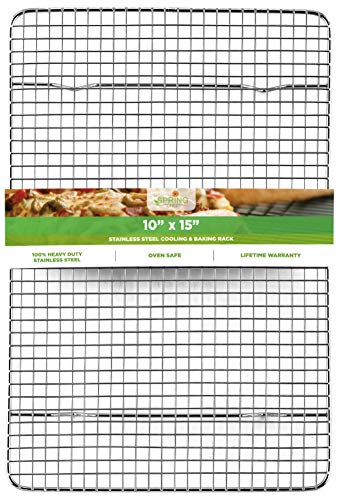
Spring Chef Cooling Rack - Baking Rack - Heavy Duty, 100% Stainless Steel, Oven Safe, 12 x 17 Inches Fits Half Sheet Cookie Pan https://www.amazon.com/dp/B00XZ81GBQ/ref=cm_sw_r_cp_api_i_lirTCb0VDM77Q
They fit side by side, are super heavy duty, fully stainless and you can just toss them in the dishwasher when you’re done. These are my most utilized racks and are invaluable for heavy items, like pork butts. Tip: Spray them with oil before using them. It helps to keep things from sticking to them.
I could only find square ones: https://www.amazon.com/ARROW-EAVES-Stainless-Cooking-Cooling/dp/B07CMN6158
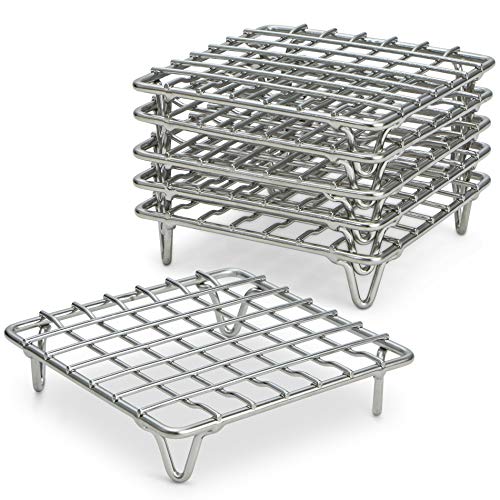
Use cooling racks for baking. I used similar things in my kamado for smoking. Mine are small squares with high stacking legs on them
As an example, this looks cool. Never used it before.
https://www.amazon.com/Betty-Crocker-Cooling-Rack/dp/B07DKPPZKQ?ref_=Oct_CAMWishedC_289721_1&pf_rd_r=5F24F6ARCWBT5BFRVRZR&pf_rd_p=f2d69f9d-fb8a-597e-8a8b-20d5760aecac&pf_rd_s=mobile-hybrid-10&pf_rd_t=30901&pf_rd_i=289721&pf_rd_m=ATVPDKIKX0DER
The best advice I can give you is to check out the America's Test Kitchen equipment reviews. Some of the things they recommend will be out of your budget, but most of the things will get you great quality at an affordable price. I'm very active in my kitchen and I don't buy anything without first looking to see if it's an item they've reviewed.
Example: Victorinox Fibrox Knives. Commercial quality, BIFL knives, and a fraction of the price you'll spend on department store BS.
$600 is a stretch to outfit a kitchen, but there are soooooooo many kitchen items sold that you DON'T need. Stay away from gadgets that only have one purpose. You can do MOST of what your really need with simple, multi-purpose tools. So here's the basics:
vegetable peeler, grater, liquid & dry measuring cups, measuring spoons, thermometers (instant read), spatulas (plastic & metal), Wooden Spoons, Ladel & Larger Spoons, Tongs, Colander
I'm sure I missed some things, but this will get you started. My recommendations added up will take you over your budget but you can decide what's most important to you. Don't skimp on the knives or the pots and pans.
After seeing a rack similar to this on the sub, I checked Amazon and eBay and found this one on both. It has a real quality look and feel.
Linden Rack
https://imgur.com/a/7FfLcr7
I am not sure of what you already have or what you would need, I am listing a few things on top of my head:
Thanks for the idea man. I just found these on Amazon for $3.99 & free shipping, though they're only 9.25" diameter: link
It's too quiet in here!
...or is it?
This would make my cookies better, so you'd make me and those I give my cookies too very happy. But then again so would this, so I'll let you choose. xP
Sorry to push my nose in, but do you have any baking racks? Like what you might let cookies cool on? You can use those to elevate the poppers on the dish to help keep them from wallowing in the grease.
Example of what I mean
Thank you!
They're cooling racks for baking! I got these on Amazon.
[oh this called to me for you:) i have them and there a lifesaver] (http://www.amazon.com/Wilton-2105-459-Excelle-3-Tier-Cooling/dp/B00030CGKY/ref=wl_it_dp_v_nS_nC?ie=UTF8&colid=38W1Z3F273TAJ&coliid=IQL2E476DR51O)
[cus mine broke and my memory is awful] (http://www.amazon.com/Taylor-5849-Kitchen-Timer-Whiteboard/dp/B006OK7RRO/ref=wl_it_dp_o_pd_nS_nC?ie=UTF8&colid=38OC92IYAVF5P&coliid=I3L9WY93LW8ACA)
This cooling rack would help with my baking hobby. I love cooking for others, even though I'm dieting. So I feed my need for sweets by creating delicate works of art to bring to my bingo or book club.
Ah - so you really are packing everything in. On another note, if it were me there's no way I'd haul an entire grill in. I'd just bring a rectangle grill grate and build a makeshift grill on the spot with two smaller logs. Throw a few good firestarters in your pack to make things easier. My hands down favorite right now is Quickfire. It's more rustic but also more satisfying to do it this way.
I've read that this can happen on the bottom of the pots because they often sit right on a saucer which means there's no air between the bottom of the pot and the saucer so no pruning can happen. The post I read recommend using a bakers cooling rack between the smart pot and the saucer so the bottom roots get air pruned too. I found these on amazon and they seem to be a great option, but I'm using the 3 gal smart pots so you might need bigger ones..
A cake rack/cooling rock should work, you can get them with differing leg heights
https://www.amazon.com/Chrome-Plated-Cross-wire-Cooling-2-Height-Adjusting/dp/B000HLO8XM
Almost every episode of Good Eats
Watch them all, even the ones that deal with non paleo foods because the techniques are all solid. There are three basic cooking methods you need to worry about. On the stove, in the oven and in the microwave.
For the stove, all you need is a good cast iron skillet, but I recommend having a teflon pan as well. The iron will cook everything you can imagine. I like having the teflon for eggs mainly, iron will do eggs as well, but it can take some practice getting the temperature and lubrication levels correct. Teflon is much more forgiving. I have not used any of the newer nonstick pans so I cannot comment on those.
For the oven, get a aluminum half sheet pan and a oven safe cooling rack. Also get some sort of glass dish or casserole. Always wrap your sheet pan in aluminum foil, or line it with parchment paper when you cook with it. Makes clean up so much easier. Always grease your casserole dish. Baking, roasting, broiling are all pretty simple. Follow the recipes, and keep your eye on it. Get a probe thermometer and it'll tell you when your meat is cooked to your desired doneness.
For the microwave, all you need is a microwave safe plate, plastic wrap and some parchment paper. You can steam so many vegetables just using the microwave, it's ridiculously easy.
I hope this helps out, feel free to PM any questions. Don't forget a good sharp knife too. I still can't stress enough to just watch all the Good Eats episodes, they really have a lot of good techniques and explain the science behind it all. And if you ever want and/or get to cheat, there are some pretty awesome cheats there too.
EDIT: Forget to add this It is a great article on some really cheap tools you should pick up.
.223 are going to be pretty hard to pan lube no matter what because of the small size mixed with the length. You could dip the bullets into liquid lube, but doing that is pretty slow and not really something you will want to to with bullets you will shoot mainly in bulk.
Another option would be use some small wire strung across the pan to form a grid pattern, drop the boolits in nose up to each square before pouring lube into the pan. Along the same lines as that, a baking cooing rack or some hardware cloth should work great and be easier than wire.
That said, is there a reason that you don't want to powder coat the .223 bullets?
Instead of the large Rec Tec shelf, you could get two of these:(I asked the manufacturer and said they can hold up to 20 lbs.)
https://www.amazon.com/dp/B071GX7FP8/ref=cm_sw_r_cp_apa_i_OMyFCb42PGPPW
​
Full disclosure, I haven't gotten my Rec Tec Bull yet but been researching accessories and someone on the Rec Tec FB group had these and said they work well and can fit in the dishwasher which I like. And two of those is $50 which is cheaper than the large shelf.
​
I think must musts are the front shelf, some shelf for inside and the grill grates. I also plan to get the comp cart but if you want to save money, do the wheel mod. That will save you a couple hundred bucks.
You can buy these for a reasonable price and they accomplish the same thing. Love them for making oil-free sweet potato fries.
I could really use the Baker's Secret Cooling Rack because I don't have any and I do a lot of baking. Thanks for the contest!! Easy Peasy Lemon Squeezy
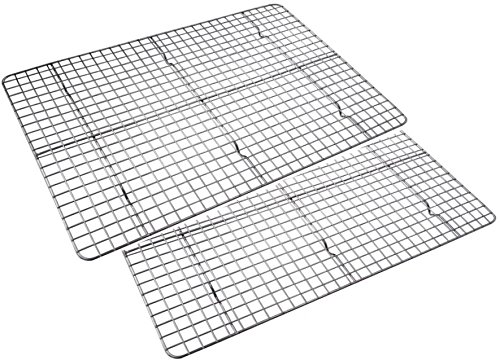
I have these. No complaints. Baker's Secret 1061483 10-by-16-Inch Nonstick Cooling Rack, Set of 2 https://www.amazon.com/dp/B00091PNTI/ref=cm_sw_r_cp_api_9Tj6xbG73SXWQ
Not a dumb question. Usually a wire rack that can be set in a baking sheet. The best ones are stainless steel but they can be pricey, ~$20. You can get cheaper ones at most grocery stores but they will have a tendency to rust and may have non-oven-safe coatings.
So this?
http://www.amazon.com/Bakers-Secret-1061483--16-Inch-Nonstick/dp/B00091PNTI/ref=sr_1_1?s=kitchen&ie=UTF8&qid=1369259282&sr=1-1
My fiancee's entire family brews and her dad came up with that one. He originally used a roasting rack (like this) but the BIAB kept catching on the sharp edges. Then he tried a pizza tray (like this) but during the boil it kept lifting off the bottom and it was hard to lift out. Large metal colander did the trick.
We were also concerned about the nonstick materials' effect on the brew.
I use 1 and
2. This works too
I use one of these racks I got from a kitchen supply store on top of my sheet pan which I think makes it especially crispy.
https://smile.amazon.com/gp/aw/d/B00XZ81GBQ/
I make these just like that. Throw them in the oven around 425-450 for maybe 30-45 minutes. I always wing it, so I can never remember exactly, but just bake until the peppers are nice and soft. Also, if you have a cooling rack you can put them on that and then on top of a cookie sheet so that the grease has somewhere to go and the bacon isn't just soaking in it.
http://www.amazon.com/gp/aw/d/B000HLO8XM/ref=mp_s_a_1_1?qid=1453595741&sr=8-1&pi=SY200_QL40&keywords=tall+cooling+rack&dpPl=1&dpID=51m9hsLqQkL&ref=plSrch
Maybe something like this? I have something similar.
I've been very happy with this:
https://www.amazon.com/gp/product/B00R0M2TSC
This is a really cool thing (self-explanatory haha).
It's on my main wishlist. Thanks for the contest! :)
For my small items, I'm using a Japanese yakitori rack. I place it over my cast iron pan and go to work. The rack kinda looks like this (not my photo).
For bigger items, I plan on using my half-sheet baking pan and a rack. I'm using a set that has been used and abused so I don't care if they get discolored.
A friend of mine is planning on just putting the meat on his Weber kettle grill, searing, and flipping.
A simple deep dish cooking pan and one of those cookie cooling racks on top would work (and probably be more practical) than an animal cage.
could drop one of these in the bottom - https://www.amazon.com/Andersons-Professional-Cooling-Heavyweight-9-25-Inches/dp/B000HM9TGM/ref=pd_lpo_79_lp_img_4?ie=UTF8&psc=1&refRID=DE67ZP4QXC01N0CRQ3QC
"Homemade" pizza is one of my favorites to do if my parents are out and I'm home alone! Or sometimes I just like making it with my mom. =)
Ingredients:
Directions:
I'm really bad at cooking (much better at baking!), but I can handle this, even when I'm by myself. I hope you try this out and enjoy it!
And thank you so much for this contest! If I happen to win, I'd really love this! Again, I'm actually decent at baking, hehe. =) Butter Off dead!
It looks like a simple cooling rack
Hmm, okay, thanks! So you do also use a rack. Maybe I'll look for a round rack for my skillet. Thanks! For your consideration. Thanks again!
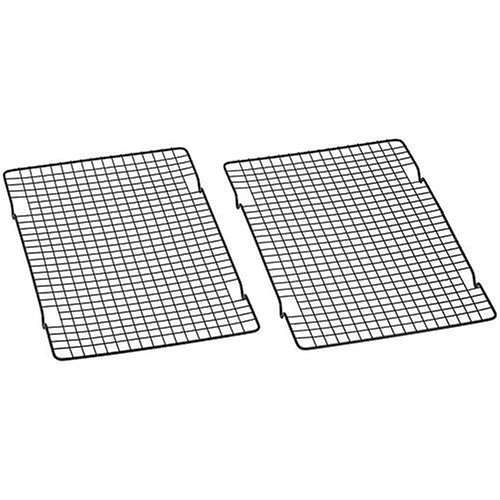
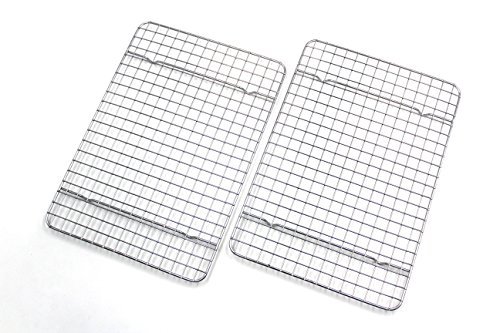
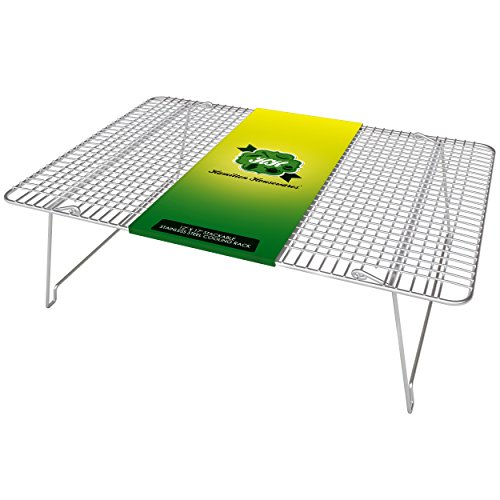
My go to way of fish cooking on a grill is using two of these with the fish sandwiched inbetween them. I prep the fish, spray these with Pam,place the fish between them and cook. turn the whole thing over as needed inside the grill. No spatula or tongs needed: http://www.amazon.com/Professional-Cross-Wire-Cooling-Sheet/dp/B0001MS3DI/ref=sr_1_cc_1?s=aps&ie=UTF8&qid=1371335355&sr=1-1-catcorr&keywords=mesh+rack+cooking
I used this https://www.amazon.com/dp/B07F821DKQ?psc=1&ref=ppx_pop_dt_b_product_details
In one of these
https://www.amazon.com/Sterilite-Gallon-Plastic-Storage-Steel/dp/B014840E86/ref=sr_1_17?keywords=plastic+tub+with+lid&pd_rd_r=b1958485-951d-4906-a386-981da029ac04&pd_rd_w=VltlO&pd_rd_wg=WD9l7&pf_rd_p=67c9d84c-d98a-4415-a549-dd3360e9d207&pf_rd_r=S5XB569X9DYX8ZVV9VRX&qid=1568856011&sr=8-17
$12 from staples homedepot walmart
And one of these
https://www.amazon.com/Checkered-Chef-Cooling-Racks-Baking/dp/B06X9KLW1P/ref=sxin_3_ac_d_rm?ac_md=1-1-Y29va2luZyByYWNr-ac_d_rm&crid=3UVQLY9087W72&keywords=cooling+rack&pd_rd_i=B06X9KLW1P&pd_rd_r=d5976832-1c76-4173-8b8e-9b72b1ce31d7&pd_rd_w=ZICAS&pd_rd_wg=4WK2M&pf_rd_p=404c4843-2c96-4d0d-a5fe-2b0598693e61&pf_rd_r=QSFME0XHTVFA2RCS6V4P&qid=1568856190&sprefix=Cooling+r%2Caps%2C432
So the booch isnt just sitting on the mat
I leave the lid cracked and check twice a day
Hope this helps alittle
Basics off of Amazon:
Nordic Ware Natural Aluminum Commercial Baker's Half Sheet
https://www.amazon.com/dp/B0049C2S32/ref=cm_sw_r_other_apa_i_yNAEDbPZTJCMJ
And
Oven Safe, Heavy Duty Stainless Steel Baking Rack & Cooling Rack
https://www.amazon.com/dp/B017MWU59Y/ref=cm_sw_r_other_apa_i_IOAEDbNBBYC1V
I ended up using baking trays with the small grid racks that fit flush in them (cooking supply store or Amazon) and used Duplo (the bigger style of Lego) on the corners to stack them.
So, tray, rack, blocks, rack, blocks, rack.
These are the racks, they fit half sheet pans
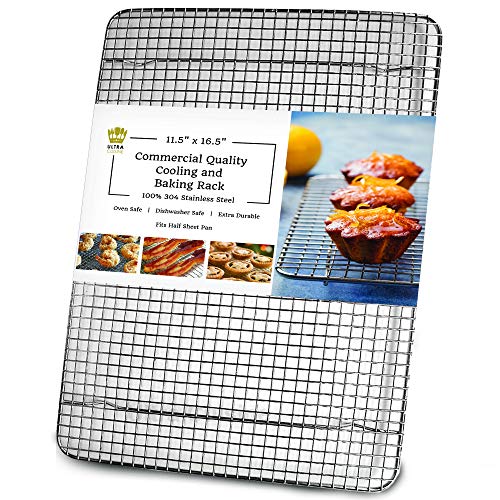
Ultra Cuisine 100% Stainless Steel Wire Cooling Rack for Baking fits Half Sheet Pans Cool Cookies, Cakes, Breads - Oven Safe for Cooking, Roasting, Grilling - Heavy Duty Commercial Quality https://www.amazon.com/dp/B00R0M2TSC/ref=cm_sw_r_cp_apa_i_obdEDbTT9TTZW
I got a few paint trays that I have some cooling racks like these resting on.
The water just drips down into the tray, comes towards my tent door, and I vacuum it out with a little wet/dry vac.
You can't overwater. Don't use too much perlite in the coco mix or you may have to water multiple times a day(I mixed nutes once a day). I just got a blumats drip kit because I was getting tired of mixing nutes and watering nonstop.
You'll be able to tell if it needs it based on look/weight/feel soon enough. Just stick your finger in knuckle deep to feel if it's damp and don't worry about overwatering until then. I can even tell the color difference in my smartpot fabric/feel that there is a good amount of water in the bottom by touching the outside fabric.
No photo but was really simple. I use these racks between the prime ribs. Nothing installed in the cooler just placed to add flow spaces and keep meat away from the bottom. https://www.amazon.com/Wilton-2105-459-Excelle-3-Tier-Cooling/dp/B00030CGKY
I couldn't find the exact ones, but these would work.
https://www.amazon.com/dp/B07JJR6265/ref=cm_sw_r_fm_apa_i_Bm3SDb8S77921
I have that CIA cooling rack, and unfortunately it rusts if you put it in the dish washer, which is something you'll likely want to do if using it as a searing base.
I recommend this cooling rack, which is exactly the same size and design but is made in stainless steal:
http://www.amazon.com/dp/B00H94EPJ2
You could try a cookie rack.
Something like this: https://www.amazon.com/dp/B00WS3OCWE/ref=cm_sw_r_cp_apa_rFg9BbCHZHMAF
And here I am, coming in with stuff 10 times more expensive than the next guy......I'm Ron Burgundy?
My favorite sports memory was going to a 49ers game when I was ~10 with my mom and step dad. We didn't have a lot of money and didn't get to go to a lot of big games like that, but it was my step dad's favorite team and somehow they got us the tickets to go. I remember how excited they were to take me. I fell and scraped my knee badly and had to visit the first aid tent, but I made it on the big screen that night! I'm 24 now and my mom still asks if I remember everyone seeing me up there. It was a good family memory :)
Under $10
.amazon.com/Professional-Cross-Cooling-Sheet-Grate/dp/B0001MS3DI/ref=sr_1_1?ie=UTF8&qid=1459467027&sr=8-1&keywords=frying+rack
The best way I have found to drain fried food.
I use https://www.amazon.com/dp/B000HM9TGM/ref=cm_sw_r_cp_apa_i_SzxsDbHXSKP83
With parchment paper on top.
Come, gather 'round my children. Let me tell you the story of sad, soggy-toast Matt.
Matt was a young man of 23. He lived life to the fullest. However, his toast did not. Every night, Matt liked to have some toast with peanut butter. He'd toast a nice slice of whole wheat bread and put a glass of milk in the freezer to super chill it.
But these were dark times, and the toast, it did not follow the law of the land. For it could not, even if it had wanted. This time, you see, was cooling rack-less. Yes. Not a cooling rack to be had in the entire apartment.
So the toast would lay on the plate, and get soggy with its own humidity. And Matt would weep, for his delicious crispy toast forever turns to mush before his very eyes.
But alas! What's this?! It's - No! It cannot be! A Cooling Rack!
Rejoice! For with this cooling rack comes a new dawn! It brings a new era of crispiness as it tears the cloak of sogginess from the land. No longer would Matt need to stare heart broken at what was once toast.
The time of mush is at an end. And the era of toast is upon us!
pesky
I'd really like these for when I'm baking! Cooling things on napkins just isn't the same, it makes bottoms all soggy and that's no fun....
X-Ray and Vav!!!
Buy a cooling rack and cook the bacon on the rack, no need for draining. Just remember to put a pan under the rack to catch the grease :P
Sort of the same, except sandwiched between two of these cooling racks. I end up not needing to touch anything until done, and the bacon is fully drained while cooking.
Make sure it's fully unfrozen before cooking. The package I get from Costco with 2 or 3 thighs each can take 2 to 3 days to fully unfreeze.
You can also get a baking rack for your tray to keep the chicken elevated out of the water. See below. And cook it skin side up.
Checkered Chef Cooling Racks For Baking - Quarter Size - Stainless Steel Cooling Rack/Baking Rack Set of 2 - Oven Safe Wire Racks Fit Quarter Sheet Pan - Small Grid Perfect To Cool and Bake https://www.amazon.com/dp/B06X9KLW1P/ref=cm_sw_r_cp_apa_i_UxCvDbWBZJGG4
Hairdryer should be safe, so long as you don't choke the flow. I'd recommend laying the components out on a grate (or just put small items under the corners if you don't have one) to get airflow underneath, setting your hair dryer to full blower/moderate heat, and letting it blow on the components over night. Probably good to turn them at least a couple times. Your case should also be dried, because water can be trapped between metal surfaces and promote rust, and may wick or drip back onto your components when you reinstall them.
If you have more than one hair dryer in the house, I suggest employing all of them. Hair dryers only; no heat guns. (Obviously.)
Like this, but higher up - https://www.amazon.com/Andersons-Professional-Cooling-Heavyweight-9-25-Inches/dp/B000HM9TGM
And stainless steel