(Part 2) Best roofing materials according to redditors
We found 171 Reddit comments discussing the best roofing materials. We ranked the 82 resulting products by number of redditors who mentioned them. Here are the products ranked 21-40. You can also go back to the previous section.
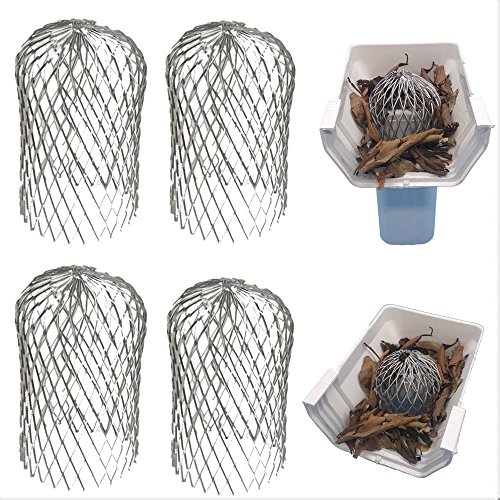


Probably some sort of guard like these: https://www.amazon.com/LEOCORZ-Balloon-Gutter-Filter-Downspouts/dp/B074XL83YX
Here's one that looks like it could be an exact match: https://www.amazon.com/Strainer-Aluminum-Blockage-Downspout-Pack-Massca/dp/B07541DM59/
Example of way to keep water out
Roof Protector thingy
Basically the rail system secures it to roof and these protect the screws into the stud from having water. They slide up under the shingles to the point of water shed is on top and can’t get below.
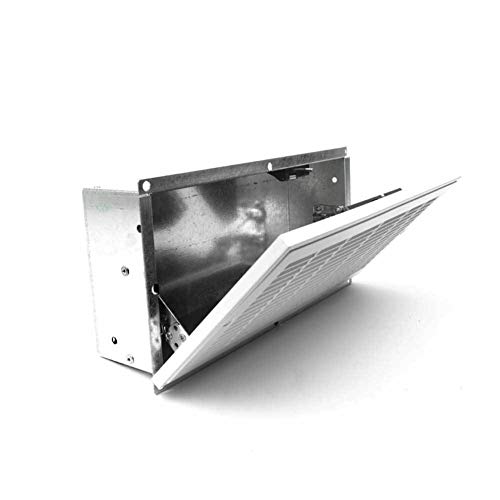
They make covered roof vents for bathroom fans, but they usually need to be sealed with roofing material. You can probably just throw one of these onto your existing outlet.
Are the spikes being pulled out?
My house was built in the 60s and the metal gutters were looking similar. Tried the screw style spikes with metal ferrules, but that didn't work.
Ended up finding these metal clips with a screw that catch on the outer lip.
5 inch Premium Quick Screw Gutter Hanger with clip (50-Pack) https://www.amazon.com/dp/B01GN9V3GG/ref=cm_sw_r_cp_apa_i_3-BTDbPWHBWFJ
Works great.
I also have a set side by side the width of my ladder
('.......'......."..."......'......' if that makes sense)
So I can rest the ladder on the gutter without damage.
This worked great for me and was hard to find:
Dektite Premium #6 Red Silicone Metal Roof Pipe Flashing, High Temp, Square Base, Pipe OD 5" to 9" https://www.amazon.com/dp/B0189UGN76/ref=cm_sw_r_cp_apa_i_cgIUDb6HK2YNM
This is a bit lengthy, but I will try to get across all the different combat tools and ideas that I have ended up using to help me stay organized and efficient in combat.
To start, I use a homemade magnetic initiative tracker. Only costs about $5 to make. I got an 8x12 galvanized steel shingle from Home Depot for a dollar, and some magnetic tape that I wrote the Character names on. Then made some spare blank magnetic name tags that I put tape on for dry erase markers to write enemies on. I just slid this into a paper slot of my DM screen. It could also simply be held on via strong magnet on the other side of the screen.
Then I just use sticky notes to track different damage on the NPC's. If they are weak I will have 2-3 on one sticky note or use just one if it's something big. Side note I add up to their health in a fight as I can do addition faster then subtraction in my head.
The sticky notes are also nice for writing down the names of spontaneously created NPC's, places, etc.
Another thing is that I got a cheap Chess set and used the pieces for the enemy NPCs. Though they could be used for both if you want. Then I just wrote numbers on the pieces to make keeping track of them easier. Here is an example of the chess pieces I use at the end of one of my sessions. As you can see I have also adopted the lego character figurine idea.
If possible I try to print the enemy Stats before hand, and if not I have 3 bookmarks in my monster manual for keeping multiple types of enemy stats readily available. I made this to make keeping track of generic enemy humanoids simpler. I used this to help with the encounter pictured earlier. I used the different types of pieces to signify the different stat blocks, and black and white to signify good and bad guys.
Just drill circles and put round vents. Don’t over complicate things.. 4 holes and pop these in. I added glued in fruit fly screen for my frog tanks. They also make them with just screen.
Rannb 20pcs Stainless Steel Round Air Vent Louver for Cabinet Bathroom Office Kitchen Ventilation
https://www.amazon.com/dp/B07CTD4G73/ref=cm_sw_r_cp_api_i_u0CSDbAFZG4C6
2" Round Open Screen Vent - Mill - Pkg of 6
https://www.amazon.com/dp/B01DXAANQY/ref=cm_sw_r_cp_api_i_M3CSDbRKMMA8Y
I like this one.
https://www.amazon.com/Quick-Vent-Safe-with-RFID/dp/B00P9QM9YA
It depends on a lot of things so try and get some pictures of the leaky area when you get up there. But it shouldn't be that hard. Use a scraper and get off all the more caked up and loose coating removed. Then apply Henry's elasotmeric:
http://www.amazon.com/280DC-White-Elastomeric-Roof-Coating/dp/B00GMMQXUQ
That's a five gallon bucket which is probably enough to coat an entire single-wide mobile home roof. You probably don't need that much. It comes in one gallon and maybe even in quarts.
You just paint it on with a brush. Don't apply it in super cold weather or it won't dry right.
Get some pics and I can give you a better idea of what it is you need to do.
Also you can post on /r/DIY (do it yourself) They are very helpful there. They will want to see some pic to.
This is really nice looking.
I know you used treated wood, but it will get wet and swell with any moisture. I'd suggest pulling that axle and putting a really good enamel paint down on the underside.
Also, people are asking about cross venting for heat. Why not put a couple of these on the sides? http://www.amazon.com/Maurice-Franklin-Louver-2-5-Aluminum-Louver/dp/B00AFESMDS/?ie=UTF8&qid=1408463010&sr=8-6&keywords=eave+vent+covers
You could easily add a 12v solar cell just wire it directly to two 3" computer fans (one on either side). Have a couple lower ones on her side and then a couple upper ones in the back with the fans.
These would install quickly and not damage your aesthetic.
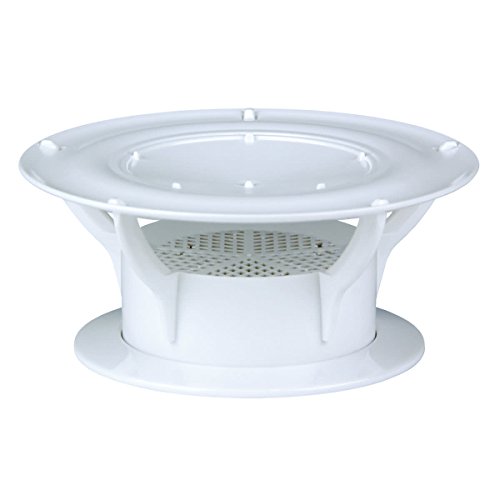
https://www.amazon.com/Lippert-Components-389381-White-Siphon/dp/B01CZQ9Y6M/
That will create suction on the end of the hose if it's in the wind. Ideally, on the roof. I suppose you could try mounting it under the floor, reversed. No idea if that will help.
Otherwise you may have to do something to upgrade your fan situation. The tiny computer fan that's in there just can't compete with the other pressures. A 12 cm fan with higher capacity might be able to do the job but fitting it onto the hose would take some fabrication work.
You'll just have to keep your windows closed when you drive so the pressure in the van isn't dramatically lower than it is outside.
Other people have had this same issue when they have all their other ventilation closed, and turn their Maxxair or Fantastic fan to warp speed. The huge fan and all those cubic feet per minute of air just completely overwhelm the tiny little fan in the toilet and it doesn't have a prayer of keeping the air flowing the right way.
No. You can't connect two thermostats to a single HVAC. That is why you need this Nest Sensor.
​
Maybe this one would help you, but not sure
https://www.amazon.com/Keen-Home-Smart-Vent-x12/dp/B0157BU44I
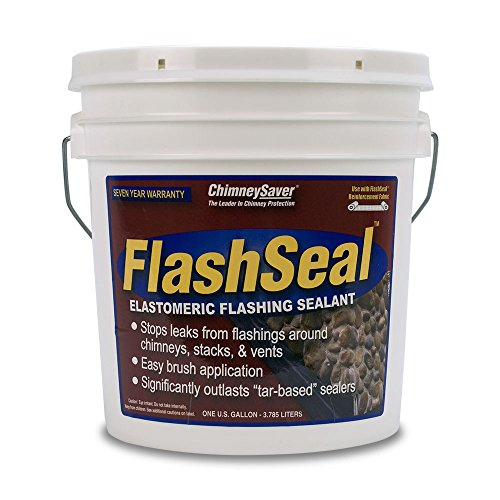
For the chimney, what the hell is the inspector talking about when he says the chase need "prep and recoat"? I've never heard anyone in this profession say anything like that, unless he's talking about the crown. If that's the case, you could apply Crown Coat to it, the company technically doesn't sell their products to the general public because they'll always recommend a professional to do the work, but it looks like somebody is selling it on Amazon. It's pretty easy to apply, just pretty much paint a couple coats of it over the top of the crown, and it's cured in about 2-4 hours, plus there's directions on the bucket.
For the flashing, I also recommend another one of ChimneySaver's products, Flash Seal. It's another fantastic product and works great. Just put that flashing back against the roof and apply the seal as directed.
The relining of the flue is something I will absolutely insist you hire a professional to do, you are literally playing with fire here, not to mention inside your home. Contact a reputable CSIA certified chimney sweep to get an estimate on getting that properly relined. I don't know what the companies in your area do for relining, as there are several ways to do it. My company only does it one way since it's the only method that has been proven to us to be completely reliable without breaking up quickly or being an overall shitty job, and that is with a stainless steel liner, so try to find a good company that will do that.
For the rain cap, there are also several approaches to do that. If you get the stainless steel liner like I recommend, they will probably have to break out your old damper to access inside your smoke chamber to parge it and seal around the bottom of your new liner, so what they should do there is apply a top-mount damper, which basically works like this, so it kills 2 birds with one stone, plus the flue is sealed air-tight when it's not in use with these, as it has a silicone gasket seal. If not the damper, you could either get a cap that covers that lone flue, or else one that will cover the whole chimney chase, depending on if you have more flues on that chimney or not, and your personal taste. I will recommend getting stainless steel ones no matter what though.
That should be everything for the chimney, unless you REALLY trust these sellers, I'd recommend getting credited for the work, as they'll probably have someone half-ass it for as cheaply as possible, and that's one thing you do NOT want to half-ass.
I have not replaced the rubber on my roof but I have worked on it in the past. It sounds like your roof is an EPDM roof. Which, as you have seen, is made by putting a complete piece of rubber over the roof and then sealing it to the roof.
EPDM rebuild kits are available. Essentialy you have to clean up and prep the area that needs replacement, then put the new piece of EPDM in place. The edges that would overlap flat on the roof could be sealed with a combination of eternabond and dicor. The part of the roof that goes around the edge of the camper might need some more thought. Mine is rolled and has gutters along with downspouts along the edge. In my estimation that would be the hard part. Sealing the roof where it meets the body of the camper.
I am pretty sure it can be done if you are handy and take your time to properly prep at each step. (I learned that this summer when I redid my roof).
You can find enclosure exhaust ports with a hood on Amazon. Like this guy:
https://www.amazon.com/BUD-Industries-IPV-1116-IP32-Vent/dp/B00L3QU294/ref=mp_s_a_1_3?keywords=project+enclosure+vent&qid=1564685836&s=gateway&sr=8-3
Try one of these on the vertical part of your downspout.
You will have to periodically clean it, but it's much easier than clearing buried drain pipe.
I bought a "cheap" setup on amazon for my greenhouse. ~$175 while the expensive units are about $300. Its not nearly powerful as i wanted but makes my plants dance so i continue to use them
ECO-WORTHY Solar Power Attic Gable Fan with 65-Watt 18-Volt Efficient Brushless DC Motor and 25-Watt 18V Solar Panel https://www.amazon.com/dp/B01MQRU3B1/ref=cm_sw_r_cp_apip_jF34WLG9u8hmY
Edit: something else i learned during my search, the roof mounted ones are for boats and RVs
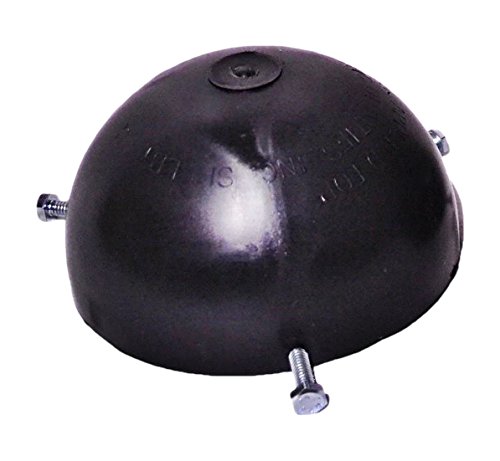
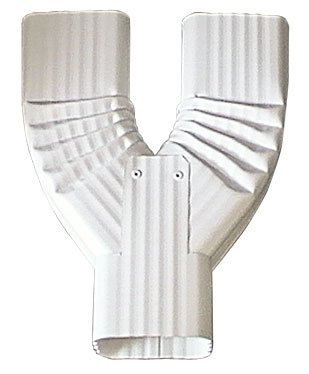
You could get a gutter downspout Y fitting and then run a flex fitting from there to the perf pipe in the ground. I would make sure that perf pipe is clear and free flowing first though.
This isn't unusual for fiber cement siding (or really, ANY siding, but fiber cement in particular). However, the installer should have flashed behind the butt joints with some sort of metal flashing in the first place, instead of caulk. Trying to fight the expansion and contraction with caulk will never work. There are companies that actually make pre-bent flashing just for this purpose. The flashing is dark colored so it doesn't pop out as much when the siding contracts.
This might work for you if you put a 90 degree elbow on the outlet, and let it roll out parallel to the house:
https://www.amazon.com/Rainguard-9309W-Automatic-Downspout-Extension/dp/B008CCHQ7S?th=1