(Part 2) Best router parts & accessories according to redditors
We found 446 Reddit comments discussing the best router parts & accessories. We ranked the 265 resulting products by number of redditors who mentioned them. Here are the products ranked 21-40. You can also go back to the previous section.


It really isn't. Just buy one of these things to open up the cart, pop the contacts off the old battery with a tiny screwdriver or something, slip on a new (obviously same-sized) one, then tape the contacts back on. I've done this for four different cartridges (Mario Land 2 and 3, and Pokemon Silver and Crystal) and I've never had a single problem. (As well, while you have the cartridges open you can (and probably should) also clean off the contact pins)
Just happened to come across the body pillow of the character
she'she's cosplaying as for no particular reason.A lot less scary. I used this on a project i posted recently.
I use this bit , it's nice and wide and won't break the bank so if you are roughing down some "less than clean" lumber and get a nick in a tooth it won't leave you crying.
http://www.woodcraft.com/Product/828680/freud-16108-mortising-router-bit-12-sh-114-d-12-cl.aspx
this one is wider but I have to use a custom base I made with a wider opening.
http://www.amazon.com/gp/product/B0006B0QXE/ref=pd_lpo_sbs_dp_ss_2?pf_rd_p=1944579842&pf_rd_s=lpo-top-stripe-1&pf_rd_t=201&pf_rd_i=B0006B0PX0&pf_rd_m=ATVPDKIKX0DER&pf_rd_r=1EFKC8R24CGDR82TCZ4X
Deep clean your games.
To do this I would recommend a deep clean. These games have 25+ years of dust build up and corrosion from people blowing in them. And simply dusting it out might not be enough.
To deep clean the games you will need to open them up this can be accomplished with a 3.8 security bit screwdriver. You can get those here from amazon for a few bucks. After it’s opened gently remove the chip and wipe out the inside of the cart with some isopropyl alcohol to remove any dust inside and set it aside. Then move to the game contacts these are the gold slips at the bottom of the game. Dip a q-tip in the isopropyl alcohol and firmly scrub the contacts until the q-tip stops getting a dark color. Use as many q-tips as you need.
After that there should still be some alcohol on the contacts. Use a pencil eraser on the contacts and firmly rub off any hunk that might have built up. I found the pink rectangular ones work best.
Next take a magic eraser and buff out the last of anything remaining on the contacts. Do this to both sides and then take a paper towel and some alcohol and gently rub off any dust or eraser markings left behind. Let everything dry for a minute or so and the put the game back together.
If doing that doesn’t solve the issue it’s a problem with the 72 pin connector. Turn the NES upside down and use a Phillips head screw driver to remove the 6 screws on the bottom so you can lift the top off. After that remove the silver heat shield there are 2 screws on the left 2 at the back and 3 or 4 on the right side. Once that’s off blast the insides with compressed air to get all the dust out that has built up. After a good dusting remove the tray and 72 pin connector there are 3 screws on either side with the middle screw being longer then all the other screws. Side the tray foreword and up to remove them pull the 72 pin connector off the back.
You can bend the pins back up or boil it to clean it if you don’t want to buy a new one or really care about having all Nintendo parts ( if so let me know and I’ll explain how to do that as well), but I personally usually just replace it at this point. If you don’t really plan on using your NES very often you can get a basic 72 pin connector on amazon for $10.00. If you play it often you might look into upgrading to a Blinking Light Win it’s more expensive but it’s designed so you don’t push down on the game and loosen the pins so it should last much longer and it will circumvent the region lock chip. Personally I love mine.
I think that’s everything. Let me know if you need to know anything else. Good luck with the repairs
I've ordered this bit based on the recomendation of some people on this subreddit: http://www.amazon.com/dp/B0006B0QX4/ref=pe_385040_30332190_TE_3p_M3T1_ST1_dp_1
There's also a 2.75" but that just sounds kind scary (http://www.amazon.com/Magnate-Surface-Planing-Bottom-Cleaning/dp/B0006B0QXO/ref=pd_bxgy_hi_img_y)
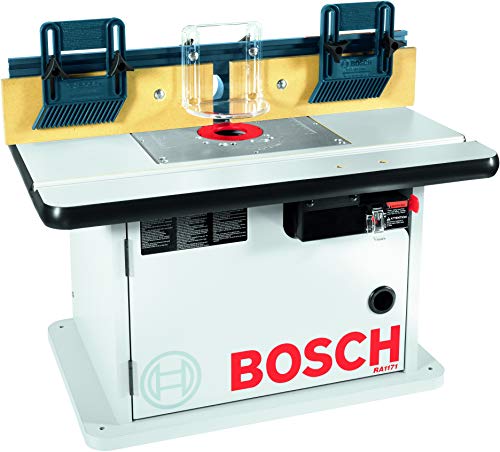
I really like the Bosch router I have. Plenty of power and you can swap out the fixed base for a plunge if you want.
My router spends most of its life in this table, which I also like.
It's really durable, as well. It's been in daily use for almost a year without issue.
Another point of reference -- I'm assuming you're using the standard 1.5kw/2.2kw spindle. I've been doing 0.9mm DOC, 1000mm/min at 12000rpm using single-flute 12mm CEL cutters in 6061. The shorter flute length is key -- I went through a pack of 17mm CEL cutters on one part, but then cut almost 10 pieces with slightly more aggressive settings using the shorter tools.
Another very important thing is to evacuate the chips in deep slots. I was mostly doing 1/4" aluminum, and I ended up using an air compressor pointed at the cut to blow out the chips reliably at the bottom. I had to use a ton of WD40 to flush out the chips, which is not economical. Standard isopropanol (rubbing alcohol) actually worked just as well, if not better since the evaporation carries away more heat.
Another thing I've been meaning to try is trochoidal milling for cutting out aluminum plates like that. Should save a lot on tool life.
One last hint I forgot -- you need a VERY STIFF machine to go this aggressively! On my little X-carve clone, the best settings I got was 0.25mm DOC, 800mm/min, 20krpm. The "chips" were basically just aluminum dust. The new machine I'm using is an old retrofitted CNC router with linear rails and servos, and actually cuts nice solid chips at these settings.
Bottom cleaning bit:
https://www.amazon.com/Magnate-Surface-Planing-Bottom-Cleaning/dp/B0006B0QXO
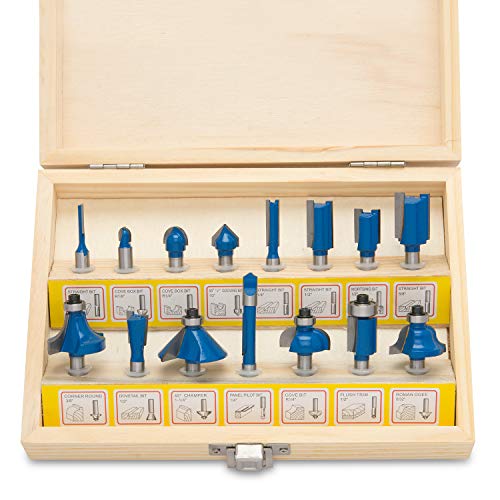
I don't remember the exact set of bits but this set seems fairly similar.
Biscuits attaching the side panels to legs. Dove tails for drawers to faces...and if you notice I used a dovetail in the little piece that separates the two drawers. The panels were made using a pair of matched rail and stile bits, with a round over cove. Like this:
Yonico 12335 Raised Panel Cabinet Door Router Bit Set with 3 Bit Ogee 1/2-Inch Shank https://www.amazon.com/dp/B00KZM0M1K/ref=cm_sw_r_cp_api_bJHnzbC5H9SZQ
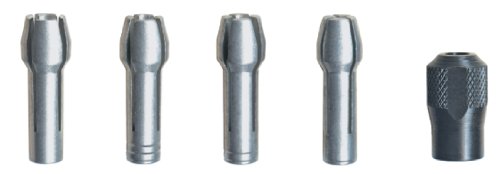
The dremel is great but it comes with the quick change keyless chuck. Normally that is a good thing but the brass stock will get notches from the three teeth that bite down on it. I picked up these collets to take care of that. You can also try these no name brass collets if you have the locking nut.
This one is what I used. A lot cheaper than those Amana cutters with inserts.
https://www.amazon.com/Whiteside-Spoilboard-Surfacing-Router-Shank/dp/B071748JQN
plug cutter bits
https://www.amazon.com/Drill-Warehouse-Straight-Tapered-Cutting/dp/B0765SGHQB
Bottom cleaning bits are literally made just for this: http://www.amazon.com/Magnate-Surface-Planing-Bottom-Cleaning/dp/B0006B0QXO
Quite a few Kreg products seem to be dipping at both Amazon/Home Depot.
TheirKreg KMS7102 Table Saw Precision Miter Gauge Systemfor $70 below the typical $150 caught my eye but I don't know if even at $80 it would be useful enough over my sleds.This one is a goner.
Few other things:
Kreg PRS2100 Bench Top Router Table $144 (Normally around $250)Kreg KMS8000 Precision Trak and Stops Kit $72 (Normally around $140)Update: All gone.
Gladly. I bought 1"x4"x8' clear-heart redwood boards. I also borrowed a router and router bench and bought a [tongue and groove set] (https://www.amazon.com/gp/product/B00KZM2AIS/ref=oh_aui_search_detailpage?ie=UTF8&psc=1) and ran all of my boards through the router. You can definitely buy wood already tongue and grooved which is a lot easier, but I was really specific about the wood I wanted to use so I had to do it myself. If you're going to do it yourself and haven't done it before, definitely test it out on some throwaway wood to practice before you start cutting into your stock.
Once they were all t&g'd I started mounting them against the plywood walls and they just stack on top of each other. I cleaned off all the wood sticking out past the walls with a router template bit. I used Lexel to seal the edges between the redwood siding and the plywood, then cut some 1/8" plywood as trim to cover the gap, you can see me clamping the trim on here. I also had to cut out my doors/windows, etc.
For the outer roof and hatch, I used 1/8in Marine grade plywood. It's super durable, and bent easily over the frame. For the inner roof I used 1/8in maple plywood, and in-between both those layers I filled it with insulation. You can kinda see the process here.
I finished the siding and redwood with Waterlox Sealer & Finish. It's a tung oil sealer, and the finish is marine spar varnish that protects against water, UV...etc. The best part is if it ever needs a new coat you don't need to sand, you just add on a new layer and it kinda 'burns' in.
As for cost....I'm not sure, I stopped keeping track :P - Redwood can get expensive, but I really liked it so I splurged. You can get just as beautiful a finish with pine, which is much easier to find already tongue and grooved. Pine is great as long as you seal it.
Here's some photos of the process and the finish. Please let me know what other questions you have!
I purchased the smaller version of this. It does a solid job of flattening. Also makes a good rabbet.
I just bought a giant round bit for use on a cutting board. Do you think this would work?? https://smile.amazon.com/gp/product/B00004T7DQ/ref=oh_aui_detailpage_o00_s00?ie=UTF8&psc=1
Cuttable area
Btw I am using the dual endstops I think that is critical for what I am doing
It makes it much easier to split up jobs or change a bit etc
HQMaster CNC Router Bits, 10 Pack... https://www.amazon.com/dp/B07F35WQYG?ref=ppx_pop_mob_ap_share
These are the bits I used so far
They measure 3mm with my calipers
you need this:
https://www.amazon.com/Bosch-RA1100-Threaded-Template-Adapter/dp/B0009H5INI
and this:
https://www.amazon.com/Bosch-RA1126-Change-Template-Adapter/dp/B005HPUP80/
Now you need one of [these.] (https://www.amazon.com/dp/B0009H5INI/ref=cm_sw_r_cp_apa_i_QzI5AbGQVTQM5)
https://www.amazon.com/dp/B01J7IGLV2/ref=cm_sw_r_cp_apa_i_Hk53AbKP7AVKG
https://www.amazon.com/dp/B071V4DB6K/ref=cm_sw_r_cp_apa_i_Hm53AbGA6WHGV
And unfortunately I can't find my rem one.
I've had luck with shallow passes using a dish bit. Not my idea, some redditor who will get no credit who probably got the suggestion from someone else. The radius means little to no chipping/tear out (so I'm told and so I've experienced). I use a 1/4" radius, 1 1/4" diameter dish bit. Works great with end grain. https://www.amazon.com/Freud-Radius-Carving-Shank-99-026/dp/B00004T7M5
Just got stuck in the workpiece—I cut waaay too deep. This is the set, if you're interested: https://www.amazon.com/dp/B000KSOOLI/ref=cm_sw_r_cp_apa_UMYhzbHH2WF4G
There seems to be a bigger set on Amazon for $30 now, though.
I use a cnc spoilboard bit for the replaceable carbide cutters.
Before that I used this bit and it worked well, but sharpening it all the time got annoying. I've also used this bit before and got really good results but it takes a lot longer with the narrower width.
If you have a lower HP router, stay under 1 1/2" diameter.
I got the 15 piece Hitex set for less than $20. They seem to be working fairly well - haven't sent more than 100 feet of wood through any of them yet though.
I assume I'll mess them up sooner or later as I'm starting out too, but it's a pretty cheap set, so no real loss. I literally had bits come loose and fly off the router before I realized that I needed to really tighten up the collet too ...
https://www.amazon.com/gp/product/B000KSOOLI/ref=s9_top_hd_bw_bD4kJ_g469_i1?pf_rd_m=ATVPDKIKX0DER&pf_rd_s=merchandised-search-4&pf_rd_r=DXPDQ1W2HBGTWW78PK73&pf_rd_t=101&pf_rd_p=7771a85c-b1fb-5864-a037-c5d8ffd938b4&pf_rd_i=3116511
I primarily use 1/4 & 1/2" roundover bits to smooth over the edges of our cutting boards. I also have:
https://www.amazon.com/gp/product/B00004T7M5/ref=oh_aui_detailpage_o04_s00?ie=UTF8&psc=1 (for putting handles on the bottom of the board)
https://www.amazon.com/gp/product/B00004T7DM/ref=oh_aui_detailpage_o04_s01?ie=UTF8&psc=1 (for juice trays)
And this bit for mortises based on the Wood Whisperer's method of creating them:
https://www.amazon.com/gp/product/B00004T7K1/ref=oh_aui_detailpage_o08_s00?ie=UTF8&psc=1
Needing quick advice on carbide bits, buying today
Which one(s) would you buy and a very brief explanation to why?
This is what I'm looking at:
Amazon:
Hiltex 10100 Tungsten Carbide Router Bits
CARBIDE ROUTER BIT SET - 35 piece 1/4 shank NEW BITS by EDMBG
Router Bit Set- 24 Piece Kit with ¼” Shank and Wood Storage Case By Stalwart (Woodworking Tools for Home Improvement and DIY)
Sears:
Craftsman 30 pc. Router Bit Set
Harbor Freight:
Carbide Tip Router Bit Set 12 Pc
Carbide Tip Woodworking Router Bit Set Pc
Note: I'm intentionally NOT wanting a $120+ starter kit, that's by design. I'm also having to budget for carving tips which are gonna cost about $25 each, if you have a favorite brand you use, let me know - I'm willing to go ahead and splurge a bit more on these bits as I tend on using them far more.
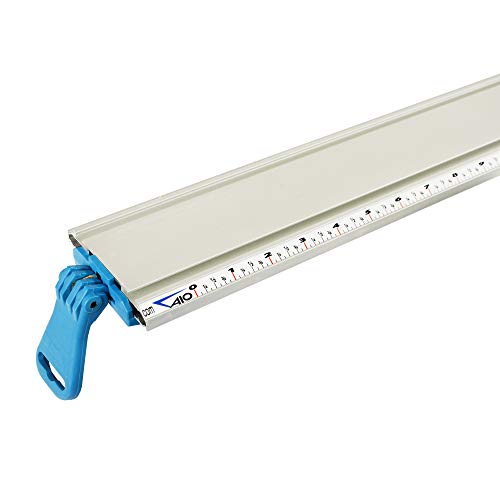
You want something like this to use with a circular saw. many other manufacturers, this is an example of what works.
https://www.amazon.com/Emerson-Tool-Contractor-Straight-Clamping/dp/B07KB7PDZ5/ref=pd_lpo_sbs_328_t_2/136-8550694-4647639?_encoding=UTF8&psc=1&refRID=1TS7W4GR7Z6R027P8SCK
Routers do have quick change collets:
http://www.amazon.com/Dremel-4485-Quick-Change-Collet/dp/B0000302Z6
So...you're telling me the people saying my CNC "Router" isn't a "Mill" are just mad because they paid more?
Are you feeding the stock from your right to left across the bit? Are you using a featherboard to hold the stock against the fence so you only have to push down and through? 2 featherboards would even better so you have 1 pushing down and 1 pushing against the fence.
I have this router table from Bosch: http://www.amazon.com/Bosch-RA1171-Cabinet-Style-Router/dp/B000H14DLY/ref=sr_1_2?ie=UTF8&qid=1409782147&sr=8-2&keywords=bosch+router+table
and it has worked well for my needs with the included featherboards.
It could also be due to a dull router bit but I imagine that is new as well?
Looks like the same straight edge I have.
https://www.amazon.com/gp/product/B07KB7PDZ5/ref=ppx_yo_dt_b_asin_title_o00_s02?ie=UTF8&psc=1
I prefer this style. It slips less, ie. you have more control, and the edge is narrower so it gets into the crack easier.
I need to open a bunch of snap on case backs and don't want to pay a jeweler to do it. Will a $5 case opener do the job? I know that they're poor quality and there's better quality tools, but will a cheap one do the trick?
I was looking at something like this or this
I just never used a router before, I don’t know how flexible I can be with it. Looks like I will get a router and learn it the hard way.
The closest bit I found is this, but it still doesn’t match the bead width: https://www.amazon.com/dp/B00KZM2SSK/
I'm certain this goes without saying, but be certain to get carbide-tipped bits. A teflon coating is probably a good idea too since you'll be running a lot of stock through. Found these:
http://www.amazon.com/Yonico-15227-Matched-Tongue-V-Notch/dp/B00KZM2AIS
Be sure that your router table is well set up with the safety gear in place as well as sufficient infeed/outfeed tables. Spend some time getting your workplace set up so you have an easy and safe workflow (pull stock from here, run it through here while keeping hands in these spots, store the finished pieces there) -- I expect you'll need to do a lot of material, so make it easy on yourself.
Beyond that, this shouldn't be too difficult (just time consuming). Install the floor, sand it in place, finish and you should be good. Post pics when you're done, I'll be interested to see it.
I have this tool. It has a speed control, so I turn it to slow (ish) for drilling. It has a flex shaft so you can hold the tool end a bit more like a pencil or brush when working. I've used it for cutting and sanding/filing as well as drilling.
I had to buy some extra collets to hold my smaller drill bits.
I will say however that most of what I use it on are metal models (I'm an old-hammerer) and like others have said a hand turned drill may be fine on plastics.
Use a router bit with a plunge base:
Yonico 16185 3-Inch Radius Horizontal Crown Router Bit 1/2-Inch Shank https://www.amazon.com/dp/B0799WBJ16/ref=cm_sw_r_cp_api_1svYBbKPWW9VW
Or like this, called “round nose router bit”:
Freud 1" Radius Round Nose Bit with 1/2" Shank (18-138) https://www.amazon.com/dp/B00004T7DQ/ref=cm_sw_r_cp_api_vxvYBbEBBQ16F
The max diameter these guys come in is 2”.
BTW. The dremel I used was not expensive at all. Make sure you get some collets though
For the top face, you need one of these - https://www.amazon.com/Whiteside-Spoilboard-Surfacing-Router-Shank/dp/B071748JQN
​
And then you need to get your spindle pointing nice and accurately straight down, and you're good.
I havent used those exact sawhorses before but the folding saw horses that I have used are pretty flimsy and wobble a lot
you would also need to buy/make a fence
also for less money you can get THIS
or even better THIS
Well, if they were told the border is not a good idea and yet still went for it, it's their problem.
As for the screw holes - do not use putty. Contrary to promises on product labels putty will never match the wood in the long term, and it won't take the stain the same way the wood will. It will look like shit. Instead do this:
Repeat for all screws.
The wood plug would be ideally made of the same cherry you likely still have kicking around. Plug cutters can be had for about $10+ and they are useful. The general idea is that screw-ups or imperfections often look better when they are made to look like a feature rather than and error.
I've got the 1617 set which I'm assuming is what OP has as well and I've been confused by this also. If going the PC style bushings are both of these pieces needed? Is there anything else (aside from the bushings) that is needed?
Bosch RA1126 Quick Change Template Guide Adapter
Bosch RA1100 Threaded Router Template Guide Adapter
This on the inside and this on the outside. Round over 1 long board and then cut it into 4 pieces.