(Part 2) Top products from r/FixMyPrint
We found 23 product mentions on r/FixMyPrint. We ranked the 79 resulting products by number of redditors who mentioned them. Here are the products ranked 21-40. You can also go back to the previous section.
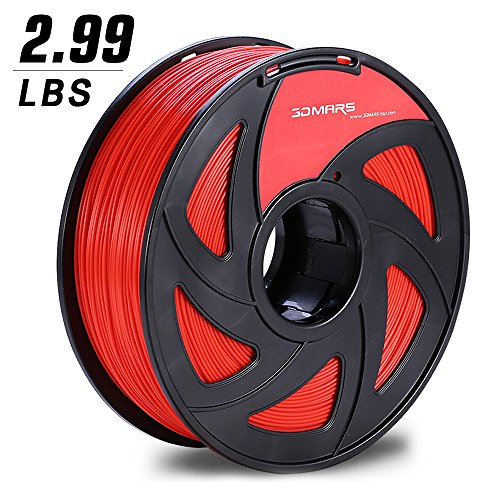
21. 3D Mars RED PLA 1.75mm 3D Printing Filament,3D Printer Filament 1.75mm PLA,Dimensional Accuracy +/- 0.05mm,1.2kg Spool,1.75 mm PLA 3D Filament for Most 3D Printer & 3D Printing Pen
Sentiment score: 0
Number of reviews: 1
*Gross Meter and Weight: Red 3d printer filament is 1.36KG(including spool,approximately 2.95lbs) with 390 meters each*3d Printer Filament 1.75: Eco-friendly Red filament is suitable for high precision while printing.*Better Smell: The air is filled with slightly sweet smell likes candy when print...
 Show Reddit reviews
22. Melca 1.75 3D Printer Filament PLA 1kg +/- 0.03mm, White 1.75mm (#F4F4F4) - New
Sentiment score: 0
Number of reviews: 1
 Show Reddit reviews
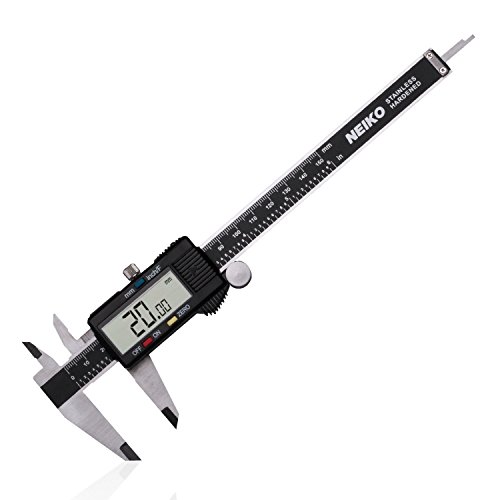
23. Neiko 01407A Electronic Digital Caliper Stainless Steel Body with Large LCD Screen | 0 - 6 Inches | Inch/Fractions/Millimeter Conversion,Silver/Black
Sentiment score: 0
Number of reviews: 1
THREE MEASURING MODES: one button quick change between three measuring modes: inch, fractions, millimeterPRECISION | ACCURACY: Measurement Range: 0 - 6” and 0 - 150mm; Resolution: 0.0005” / 1/128” / 0.01mm; Accuracy: 0.001” / 0.02mmSTAINLESS STEEL: finely polished stainless steel frame with ...
 Show Reddit reviews
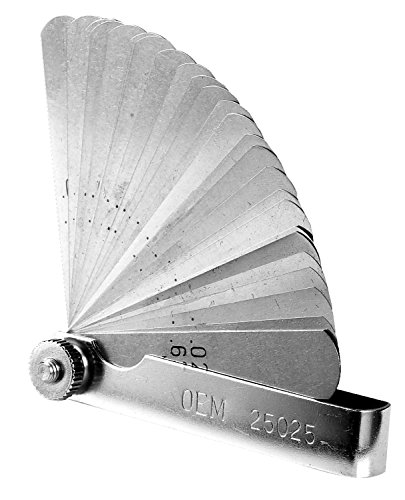
24. OEMTOOLS 25025 26 Blade Master Feeler Gauge
Sentiment score: 1
Number of reviews: 1
26 Hardened, Tempered Steel BladesMeasures: 0.0015 Inch (0.038 mm) to 0.025 Inch (0.635 mm)Chrome Plated Main Shaft for Easy Clean Up and Professional LookEach Blade is Laser Etched with Inches and MillimetersBlade Protector has Thumb Notch to Aid in Removal of Blades
 Show Reddit reviews
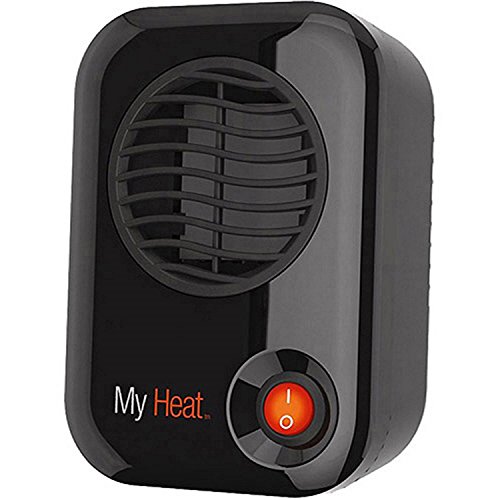
25. Lasko 100 MyHeat Personal Ceramic Heater, Compact, Black
Sentiment score: 1
Number of reviews: 1
KEEPS YOU WARM AT WORK – At 200-Watts and 682 BTUs, this low wattage mini space heater is ideal for use under the desk to keep your feet and legs warm. Best of all, because it’s low wattage, it won’t keep tripping the office circuit breaker every time you turn it on.YOUR PERSONAL SPACE HEATER...
 Show Reddit reviews
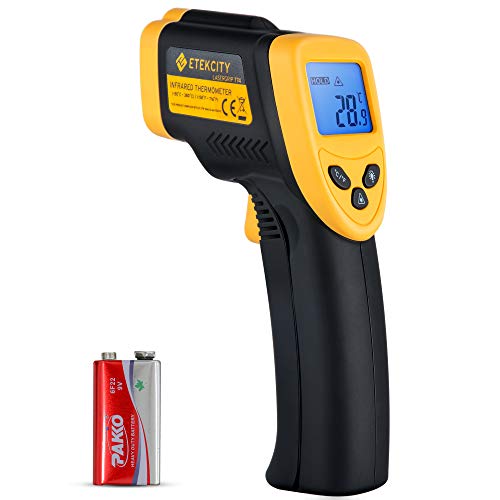
26. Etekcity Infrared Thermometer 774 (Not for Human) Temperature Gun Non-Contact Digital Laser Thermometer-58℉ to 716℉ (-50 to 380℃), Standard Size, Yellow & Black
Sentiment score: 0
Number of reviews: 1
Better accuracy: The distance to spot ratio is 12: 1, meaning the laser grip 774 can accurately measure targets at greater distances compared to most other Thermometers; for best accuracy, the distance between the thermometer and object of measurement should approximately be 14. 17 inches (36cm)Targ...
 Show Reddit reviews
27. uxcell LJ18A3-8-Z/BX 8mm Approach Sensor Inductive Proximity NPN NO Switch DC 6-36V
Sentiment score: 0
Number of reviews: 1
Product Name : Inductive Proximity Switch;Model : LJ18A3-8-Z/BX;Wire Type : DC 3 Wire Type (Black, Brown, Blue);Switch Appearance Type : Cylinder TypeTheory : Inductive Sensor;Output Type: NPN NO(Normal Open);Diameter of Head : 18mm;Detecting Distance : 8mmSupply Voltage : DC 6-36V;Current Output : ...
 Show Reddit reviews
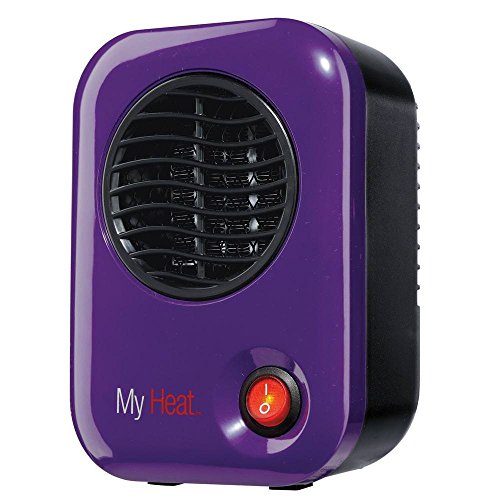
28. Lasko 106 Space Heater, Compact, Purple
Sentiment score: 1
Number of reviews: 1
included components: HeaterUser guideEnergy smart- uses only 200-wattSafe ceramic heater with over-heat protection and cool-touch housingDesigned to heat your personal space, not the entire roomFully assembled, 6.1" tallETL listedmaterial type: Metal Ceramic
 Show Reddit reviews
29. Neewer 24x24 inch/60x60 cm Photo Studio Shooting Tent Light Cube Diffusion Soft Box Kit with 4 Colors Backdrops (Red Dark Blue Black White) for Photography
Sentiment score: 0
Number of reviews: 1
It has a large removable front opening to allow for easy studio images in your home or office.Made from translucent light diffusing white nylon fabric, detachable front door cover with slit for camera lensThe studio kit has a standard with a custom carrying case with both shoulder and hand carrying ...
 Show Reddit reviews
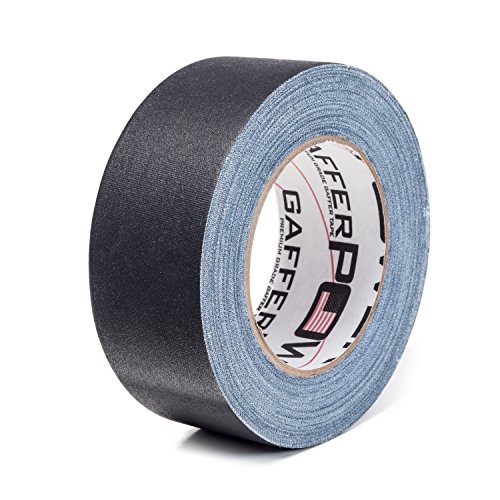
30. Gaffer Power Premium Grade Gaffer Tape, Made in the USA, Heavy Duty gaff Tape, Non-Reflective, Multipurpose. 2 Inches x 30 Yards, Black
Sentiment score: 2
Number of reviews: 1
PROFESSIONAL GRADE GAFFERS TAPE – This tape is what the pros use. It's industry standard, premium grade gaffer tape, not the fake ‘gaffer tape’ being sold on Amazon. Our tape is MADE IN THE USA and has the specifications of ‘premium grade’ gaffer tape.YOUR GEAR, CABLES AND SURFACE ARE SAFE...
 Show Reddit reviews
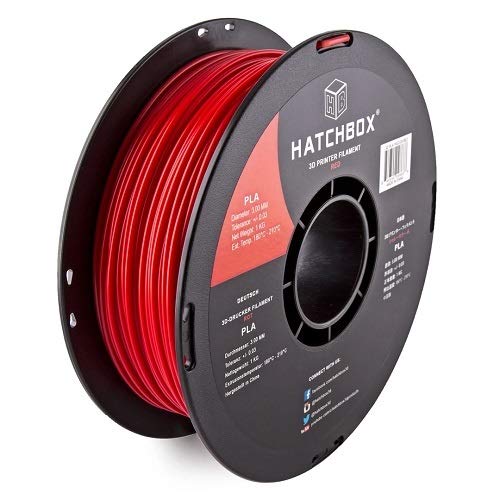
31. HATCHBOX PLA 3D Printer Filament, Dimensional Accuracy +/- 0.03 mm, 1 kg Spool, 1.75 mm, Red
Sentiment score: 1
Number of reviews: 1
1 KG (approximately 2.20 lbs.) Spool1.75mm Filament Diameter (Dimensional Accuracy +/- 0.03mm)PLA (Polylactic Acid) 3D Printer Filament Vacuumed Sealed With DesiccantRecommended Extrusion/Nozzle Temperature 180°C - 210°C (356°F - 410°F)Spool Diameter: 7.88" - Spool Width: 2.69" - Spool Hub Hole ...
 Show Reddit reviews
32. BuildTak 3D Printing Build Surface, 6.5" x 6.5" Square, Black (Pack of 3)
Sentiment score: 1
Number of reviews: 1
Build sheet adheres to a print bed to help the filament stick during printing, while also enabling clean removal of the printed part afterwardCompatible with ABS, PLA, HIPS, PET+, brick, wood, and flexible (TPE) filaments (sold separately)Durable construction allows for multiple uses with either the...
 Show Reddit reviews
33. eSUN 3D Printer Cleaning Filament 1.75mm Natural 0.1kg for All 1.75mm FDM 3D Printers, 1.75mm Cleaning
Sentiment score: 0
Number of reviews: 1
Industry's first 3D cleaning filamentExcellent heat stability, Wide cleaning temperature range of 150 to 260 celsius.Cleans the extruder's interior by removing accumulated residual filaments.Possesses a certain level of adhesive quality. Will not clog extruder.Clean the 3D printer's extruder before ...
 Show Reddit reviews
34. uxcell 400mm x 205mm x 0.5mm Silicone Thermal Pad for CPU GPU Heatsink
Sentiment score: 0
Number of reviews: 1
Product Name : CPU Thermal Pad;Material : SiliconeSize : 40 x 20.5cm/15.7'' x 8.1'' (L*W)Thickness : 0.5mm/0.02''Weight : 103gPackage Content : 1 x CPU Thermal Pad
 Show Reddit reviews
35. IRIS USA, Inc. UCB-LDD WEATHERTIGHT Storage Box, 74 Quart, Clear
Sentiment score: 0
Number of reviews: 1
WEATHERTIGHT storage seal on storage tote is the ideal way to keep stored contents clean and dry.Reinforced lid provides stability for stackable plastic storage bins.6 durable buckle latches on WEATHERTIGHT tote lid secure contents inside.74 quart capacity per large plastic container box.Dimensions:...
 Show Reddit reviews
36. 2 x Aluminum GT2 16T Pulley and 2M Belt for RepRap 3D printer Prusa i3
Sentiment score: -1
Number of reviews: 1
 Show Reddit reviews
37. Switching Power Supply 400W 24V 16.7A for CNC Router Kits 115V/230V S-400-24
Sentiment score: -1
Number of reviews: 1
24V DC 16.7A outputAC input voltage range: 93~132V/176~264VAC115V/230V AC selected by switchHigh efficiency low costForced air cooling by built-in DC fan
 Show Reddit reviews
38. TUPARKA 70Pcs 3D Printer Nozzle Kit MK8 Extruder Nozzles Brass Print Head 0.2mm, 0.3mm, 0.4mm, 0.5mm, 0.6mm, 0.8mm, 1.0mm with Storage Box Compatible with 3D Printer Makerbot Creality CR-10 Ender 3 5
Sentiment score: 0
Number of reviews: 1
3D printer accessories: 60pcs MK8 nozzles, 10pcs cleaning needles, 3D printer nozzles are made of high-quality brass material, sturdy and durable, connect with M6 out the thread, easy to install, NOTE: Small 3d printer accessories, please keep away from childrenThe outer surface and the inner wall a...
 Show Reddit reviews
39. HATCHBOX 3D Printer Filament, Dimensional Accuracy +/- 0.03mm, 1.75 mm, 1 kg Spool, Wood
Sentiment score: 0
Number of reviews: 1
1KG (2.2 lb) SpoolWood 3D Printer Filament Vacuumed Sealed With DesiccantRecommended Extrusion/Nozzle Temperature 175°C - 220°C (347°F - 428°F)1.75mm Filament Diameter (Dimensional Accuracy +/- 0.03mm)Spool Diameter: 7.88" - Spool Width: 2.69" - Spool Hub Hole Diameter: 2.20"
 Show Reddit reviews
40. ROBO 3D R1 Plus 10x9x8-Inch ABS/PLA 3D Printer, White (A1-0002-000)
Sentiment score: 1
Number of reviews: 1
Notice - Amazon is the only authorized seller of Robo 3D items on Amazon.com. Items purchased from other third parties may not be factory new and subject to voided warranties.The improved R1+ includes all new linear motion and lead screws for better quality, performance, and consistency. This includ...
 Show Reddit reviews
I run a campus makerspace with three MakerBots, and I feel your pain. It's been a year since we got them, and we've only just NOW (read: within the last month) figured out how to cut down on about 95% of the warping. Lots of the solutions here seem like they come from folks who aren't too familiar with MakerBot printers and the true shittiness of the flex build plate grip surface. For reference, our machines are used by a campus of about 10,000 students, so the machines are running 9 hours a day, every day.
First, I'd agree with some of the folks on here about throwing the machine out the window. If you're within the 30-day return window, return yours. They are absolute garbage, and if it wasn't for the $250 restocking fee that MakerBot charges after that 30 days, I'd return my three MakerBots in a heartbeat. Both the extruders and the build plates for the Replicator+ are truly awful. The proprietary MakerBot Print software leaves very little in the way of customization, so you can't really expect to even modify some of the slicer settings to test out what some of the folks in here are suggesting. At any rate, you should still print with a raft, because of the lack of a heated build plate.
MakerBot Customer Support, in their infinite wisdom, will typically recommend the following things over and over. I've spent more hours on the phone with them than hours at my job, and I'll preface this by saying none of their solutions worked in the long-term for any of our machines:
Now, the solution that worked miracles: try buying gaffer's tape. Another redditor recommended it, and we purchased this gaffer's tape. Since then, not a single print has failed due to warping issues. We can spread objects across the build plate with little regard for orientation or arrangement without much issue. Granted, on extremely large prints that take up the entire print volume, we might see a slight (maybe 5% at the corner, warping up about 1 or 2mm from the plate) warping issue, but it's nearly perfect compared to before. The same gaffer's tape strips I placed down for the very first test at the beginning of April are still sitting without a scratch on the build plates, so you can bet it doesn't peel or get scratched up easily either.
I can't understate the amazing value of gaffer's tape.
Warping is caused by uneven cooling. As the top layers cool, they shrink and pull on the lower layers. The trick is to minimize the difference between the extruding temperature and the ambient temperature in the chamber. For ABS at 240c you want the chamber around 80c, but any heat helps. This will cause everything to cool more gradually and evenly, reducing the chances of warping. Increasing the heated bed temperature can also help for the same reasons.
I put two 4ohm 50W power resistors on a cpu heatsink to make a small heater, but if I were doing it again I'd just make one of these things blow into the chamber. My heater is 72W, that one is 200W.
Unless you are printing PETG, or the paper you choose is a different thickness, or if it's swolen from humidity.
Paper isn't the best tool, among other things it varies in thickness, a set of feeler gauges (https://www.amazon.com/dp/B000BYGIR4) is a much better tool for this.
But I have completely quit using it. I now print out this link https://www.thingiverse.com/thing:2187071 and, as it's printing, manually adjust the bed screws until it's printing with uniform squeeze out and the print looks good. This works great for printers without automatic bed leveling like mine.
I've got a couple more questions.
First off, I looked your printer up real quick and the images I see online are different from what's shown in your video. So first question would be if you've got any more details about the printer, and where you got it from. Is it an old model, refurbished, bought off e-Bay, etc.? Or did you just take the frame off the printer or something?
Second, would it be possible to get a couple more pictures? I'd be interested in getting a close-up of the printer board, the leadscrews, and both X and Y belts if possible.
You may have some versions of stuff criss-crossed. Since the Robo R1+ on Amazon is sorta different from what you've got, there's a decent chance that it's using different leadscrews with a different pitch which would cause these problems. If you're using firmware meant for one model on a different model then things won't work out right. Also, if it's a refurbished or ancient model then there's a chance there could be other hardware issues at play.
Can we a get a closeup of the first layer only? It will help if we can get a really good look at the size/shape/texture of the first layer extrusions.
Tape and glue and everything can work, but it's always been a huge hassle for me. https://smile.amazon.com/BuildTak-Printing-Build-Surface-Square/dp/B00MN5X304 might be worth a little money. In my experience that printer does just fine with buildtak and a hot bed, as long as you have your nozzle height dialed in and the bed leveled. It might be worth $20 just to remove the surface material from the equation.
As for the nozzle wiping bit, that's a huge pain in the ass. If you're up for learning a little g-code (it's not hard), I recommend changing your pre-print g-code to move the nozzle directly onto the bed during the heatup phase, this keeps the goo in and makes your life a lot easier.
Also, you should change your skirt distance to about 15mm. The point of the skirt is to prime the nozzle. Moving the skirt away from the part will increase the skirt path length, which means more priming, which means you won't have to restart prints after a bad start as often.
This happens for me when the air temperature in my printing room goes below ~22C.
I thought I was going to need a heated enclosure, but I ended up putting a small heater in the room, and it raised the temperature by a couple of degrees and fixed the issue for me.
I hear printing a brim can also help, but I've never tried it.
Not that I recall, but I bought a pretty early version of the Monoprice Maker Select when they dropped the price a few years ago, and the glass bed was one of my first additions.
The mod isn't difficult. I had a 16"x24" piece of window glass cut into four 8" squares. They did it at the hardware store (Lowe's iirc) for no extra charge.
The squares lay on the bed using four 1" (or so) thermal pads. I bought a sheet of the stuff from Amazon and just cut what I needed. It occasionally tears, so I replace it a couple of times per year. Using the thermal pad eliminates the need for binder clips or something more elaborate to hold the glass on the printer's bed.
The Z-Stop adjuster I used is so old that I probably wouldn't use it today. Just search Thingiverse and pick one you like. There are some nice designs out there.
Here's the process I would follow:
​
Ive always used 210 so I thought I'd be good. It looks like you're right though, at 210 it constantly leaks out. At 181 or so it stops.
I did buy the cheapest nozzles ever. After 2 more hours and a dozen more failed prints I'm starting to think they're just crap. Shoulda known at 70 nozzles for 11$ lol.
TUPARKA 70Pcs 3D Printer Nozzle... https://www.amazon.com/dp/B07WTB47N7?ref=ppx_pop_mob_ap_share
So this was PLA printed at 198c (amazon.com/dp/B00J0GO8I0). The print was a "success" in that the catapult works. It loses its springiness after a bit though.
I also used the increased tolerance version
You don't need a micrometer, just calipers with a wheel lock and 3 points after the decimal is fine
https://www.amazon.com/Neiko-01407A-Electronic-Digital-Stainless/dp/B000GSLKIW/
Thanks for the ideas. Here's more info:
Printing in a closed garage, no windows.
Printer is shrouded with a photo light cube to keep temp and eliminate drafts.
Material:PLA
Print Temp: 195C
Bed Temp: 60C
Thanks I'll try bumping up the temp a bit.
The color is a bit weird because of the lighting, but it's just this common filament: https://www.amazon.com/dp/B01092XXD4/ref=cm_sw_r_em_apa_i_kFv4Db1J16DN1
I am also using a Anet. the A8[ with this Sensor.] (https://www.amazon.com/gp/product/B008FZC8F2/ref=oh_aui_detailpage_o02_s00?ie=UTF8&psc=1)
I was also [following this video] (https://www.youtube.com/watch?v=G-TwWfUzXpc) But several things didn't work right.
I shall try what you did right now and see what happens.
PLA: specifically this one
Any ideas? I've only started using this in the past ~3 weeks and surely have a lot to learn. I've tried to review many of the guides referenced here and (so far) not found a likely theory for the cause of this.
It doesn't happen on every print and doesn't happen at the same spot, but at least on this print (the screws for feet on a Wanhao Duplicator, which my MakerSelect v2 is a clone of) the print has failed on at least three attempted prints. I was usually printing 0.06mm layers with from 10% to 50% infill. All trials have led to the screw snapping right off the base.
I can offer other details, but here's what I know:
Thanks in advance for any help!
It looks wayyyyy too hot based on that picture. Get a temperature sensor gun thing and measure the actual temperature at the nozzle - I wonder if the temperature control is broken and it's actually heating up as much as possible. I guess you could also try doing like 150° or something else that should barely melt the plastic and see if that changes it.
Possibly. It has more to do with moisture clinging to the outside of the filament. Nylon actually absorbs water, so you need to keep it super dry all the time. PLA is the least affected of common materials, but it will still suffer performance issues because of this.
My advice is get an airtight container/box and get a big pail of desiccant off of Amazon. Dump a bunch into the container so you have about an inch of desiccant on the bottom. Then just put your spools in their and keep it shut unless you need to get a different spool out. This can recondition material over the course of a week as well. Nylon would probably need a professional dryer of some sort, similar to what injection molding companies use to dry their plastic pellets before using them. I haven't had to dry nylon yet, but I would think that's what you'd have to do.
Don't cheap out on the heated bed. Youre running serious power through these and you don't want to burn your house down because of a cheap bed.
Get a genuine MK2 or MK3 PCB heatbed (not from China). Those can be wired for both 12V and 24V.
http://www.ebay.com/itm/MK2B-PCB-HeatBed-Heat-Bed-RepRap-3D-Printers-12V-24V-Wiring-Thermistor-/251980529712?hash=item3aab35c030:g:8QAAAOSwt6ZWUydd
3.2A isn't even enough for such a heatbed by itself. I'm surprised your printer is even running with that thing (assuming that the heater for your hotend alone can sometimes pull ~2A depending on the rating).
The power supply you linked seems weak too. I'd shoot for a 350-400W supply to be on the safe side. Operating a power supply close to its limit isn't really desireable for these LED supplies.
http://www.amazon.com/Switching-Power-Supply-Router-S-400-24/dp/B00XTHPYMK/ref=sr_1_1?ie=UTF8&qid=1452850033&sr=8-1&keywords=24V+400W
I took your advise and reseated all the connections in the printer but while i was doing that I noticed that the set screws (Look at last picture) on both the x and y motors were missing, I know this is definitely a problem and am going to go get more today but would this cause what I am seeing on my printer?