Top products from r/KingdomDeath
We found 83 product mentions on r/KingdomDeath. We ranked the 137 resulting products by number of redditors who mentioned them. Here are the top 20.
1. BCW Pro 20-Pocket Pages, Pocket Size: 2" x2", 20 Pages - Coin Collecting Supplies
Sentiment score: 16
Number of reviews: 19
20 (twenty) - BCW Pro 20-pocket coin storage page - coin collecting suppliesHolds 20 - 2 x 2 cards, pigs or photo Slides, no PVCBCW 3 inch album (single)Coin albums & portfolios sold separately
 Show Reddit reviews
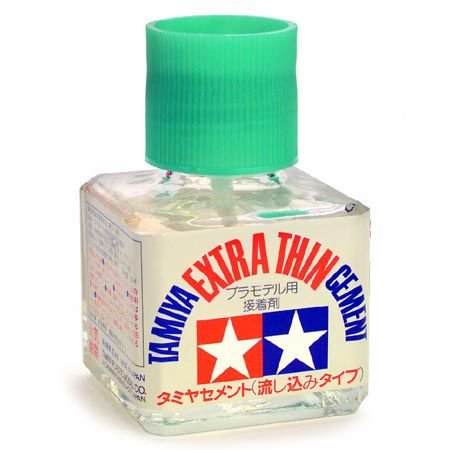
2. Tamiya 87038 Extra Thin Cement Glue Fine Tip 40ml
Sentiment score: 4
Number of reviews: 7
Tamiya Extra-Thin CementItem Weight: 2.1 ouncesThe pointed applicator tip makes it easy to put the cement where desired.This cement is extremely useful when gluing plastic parts to a desired position when holding in place together.The thin cement flows smoothly between the gaps of the fitted parts b...
 Show Reddit reviews
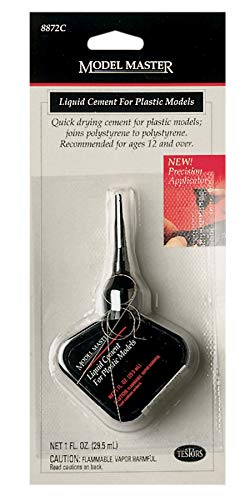
3. Liquid Cement For Plastics 1 oz
Sentiment score: 6
Number of reviews: 6
Testors8872C
 Show Reddit reviews
4. Swan Card Sleeves (52x52mm) - 160 Pack, Thin Sleeves
Sentiment score: 2
Number of reviews: 3
Ultra Clear PolypropyleneAcid FreeNo PVC
 Show Reddit reviews
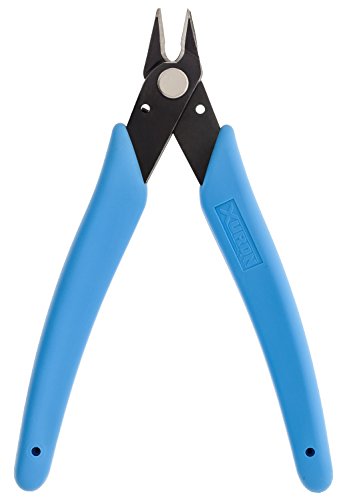
5. Xuron - Xuron - 170-II Micro-Shear Flush Cutter - 170-II
Sentiment score: 1
Number of reviews: 3
Type: Micro-ShearStyle: FlushCapacity: 18 AWGOverall Length (Inch): 5-7/64Blister Pack With Generic Card
 Show Reddit reviews
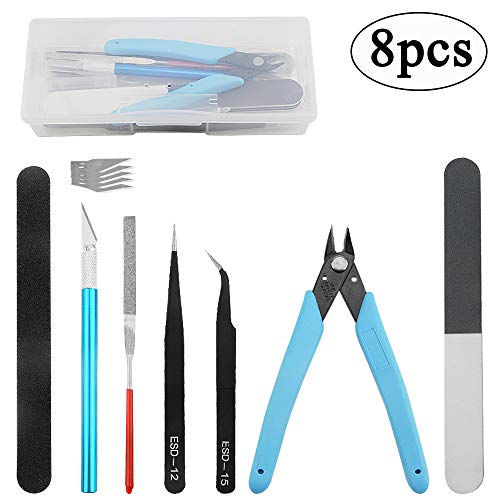
6. BXQINLENX Professional 8 PCS Gundam Model Tools Kit Modeler Basic Tools Craft Set Hobby Building Tools Kit for Gundam Car Model Building Repairing and Fixing(A)
Sentiment score: 1
Number of reviews: 3
● FUNCTION---EASY TO USE---The modeler basic tools set is suitable for a beginner and advanced modeler as well.You can use it to manufacture many toys,such as cars, robots, cartoon, buildings, airplanes and other crafts.● FULL RANGE AND COST EFFICIENT---Package include : 1 X side pliers, 2 X twe...
 Show Reddit reviews
7. Faller Expert 170492 Plastic Glue 25 g
Sentiment score: 2
Number of reviews: 2
Precision quality from Faller of Germany.Assembly required.Glue is not included.Exceptional quality.True to life detail.
 Show Reddit reviews
8. Ultra Pro One-Touch Horizontal Booklet Resealable Bag
Sentiment score: 5
Number of reviews: 2
Great for protecting one-touch holdersHelps the One Touch stay intact during transportHorizontal Design50 bags per packUltra clear polypropylene
 Show Reddit reviews
9. Tamiya America, Inc Plastic Cement 20ml, TAM87012
Sentiment score: 2
Number of reviews: 2
Tamiya TAM87012 Plastic Cement 20ml 87012
 Show Reddit reviews
10. Alumilite Mini Casting Kit
Sentiment score: -1
Number of reviews: 2
Learn how to cast moldsContains all you need to beginCreate 3-D piecesGreat Gift for artistsIncludes a how-to booklet
 Show Reddit reviews
11. CML Supply Mini Micro Drill Bit Set and Pin Vise Chuck 31 pcs
Sentiment score: 1
Number of reviews: 2
CML Supply 30pc. high speed steel drill bit setIncludes sizes from 0.013" to 0.079"Pin Vise with swivel top holds bits from 0-.125"CML Supply Brand Pin Vise features black oxide collet for better grip
 Show Reddit reviews
12. Set of 5 New Ultra-Pro Black Deck Boxes for Magic/Pokemon/YuGiOh Cards
Sentiment score: 1
Number of reviews: 2
Set of five factory-sealed Ultra-Pro Deck Boxes.These affordable poly boxes hold approximately 80 sleeved trading cards each.Each box is individually sealed in original manufacturer's packaging.Set includes five black boxes.
 Show Reddit reviews
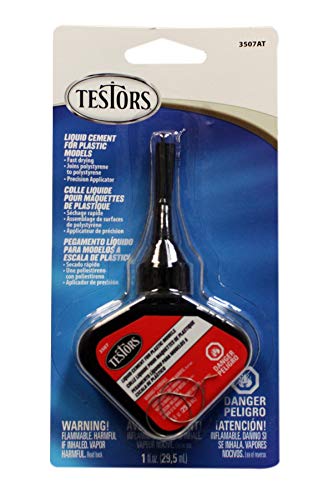
13. Testors 3507AT Liquid Cement for Plastic Models, 1-Ounce
Sentiment score: 2
Number of reviews: 2
This fast-drying adhesive bonds polystyrene and ABS plastics by dissolving and cementing the pieces togetherThe precision plastic needle applicator makes easy work of gluing even small intricate detailed partsThis package contains one 1-fluid ounce bottle of liquid cementConforms to ASTM D-4236Made ...
 Show Reddit reviews
14. Vallejo Face/Skin Colors Paint Set, 8-Colors, 17ml
Sentiment score: 2
Number of reviews: 2
Model color has been formulated with permanent pigments for fine arts; all colors are completely lightfast and opaqueThe consistency of Model color allows for an extremely smooth and uniform paint film, with no trace of brushstrokesThe water based formula of Model color has been specifically develop...
 Show Reddit reviews
15. Ultra Pro 12-Pocket Platinum Page with 2-1/4" X 2-1/2" Pockets 100 ct.
Sentiment score: 2
Number of reviews: 2
Archival quality pages that holds stickers and cards 2-1/4" X 2-1/2" or smallerIdeal for stickers, tags, small cards and other collectibles and memorabiliaPages are clear on both sides and fit in our standard-size 3-ring albumsPolypropylene pages are PVC- and acid-free100 pages per display box
 Show Reddit reviews
16. TEKTON 6655 Needle File Set, 10-Piece
Sentiment score: 2
Number of reviews: 2
An assortment of cross-section styles for hobby models, jewelry, clocks, and watchesIdeal for use on smaller workpieces made of plastic, wood, and soft metalComfortable, nonslip rubber grips increase control and accuracyFiles are 5-1/2 inches longAlways Guaranteed
 Show Reddit reviews
17. Milliput Superfine 2-Part Self Hardening Putty, White
Sentiment score: 1
Number of reviews: 2
2 part epoxy puttyLong shelf lifeSelf Hardening Putty
 Show Reddit reviews
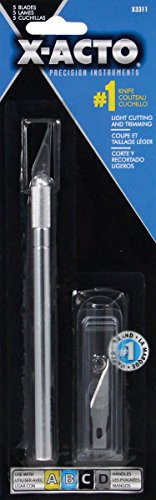
18. Xacto X3311 N0. 1 Precision Knife With 5 No. 11 Blades, #1 Knife
Sentiment score: 0
Number of reviews: 1
Great for delicate, precision cutting, trimming, and strippingCuts paper, plastic, balsa, thin metal, cloth, film and acetateComes with a lightweight handleIncludes No 11 Classic Fine Point BladeThis is an aftermarket of generic partGreat for delicate, precision cutting, trimming, and strippingCuts ...
 Show Reddit reviews
19. BENECREAT 10PCS 6 Compartments Plastic Round Storage Organizer Divider Display Containers Case Box for Jewelry Accessary, Bead, Gem and Other Small Crafts
Sentiment score: 1
Number of reviews: 1
【Quantity】: 10pcs plastic round storage cases which is packed in a carton, each box has 6 compartments to store different stuff【Measurement】: Overall size: about 10.3cm(4") in diameter, 1.7cm(0.66") in height; Each compartment: 4.5x3.5x1cm(1.78"x1.38"x0.39"); For details, please refer to pic...
 Show Reddit reviews
20. Perfect Barrier Card Sleeves (100 Piece), Clear, 64 x 89mm
Sentiment score: 1
Number of reviews: 1
Works with Magic the Gathering (MTG), World of Warcraft TCG, Pokémon, Weiss Schwarzmaterial type: Multiple MaterialsCountry Of Origin : JapanPackage Dimensions : 1.4 L x 7.4 W x 9.4 H in Centimeters
 Show Reddit reviews
Late comment but Yo I'm from Brissy & I can let you know what I did
I was in the Kickstarter and while I waited for the game to finally ship I spent ages devouring information from Gambler's Chest and Add-Ons tabs here.
For sleeves, I originally went for the official KD sleeves which were good, but availability for them had pretty much been once-off, so once the expansions came I was shit outta luck. I then went for Swan Sleeves, which are $3.95 USD per 100 Premium (pretty good price for really good quality, albeit shipping is a bit hefty and will change depending on number of packs ordered). 57x90mm sleeves are a perfect fit, but if out of stock then the 60x90mm are also a good fit. I just had a look, and both are currently out of stock, but just keep them in mind, 'cause AFAIK no one else stocks premium 57x90mm and they (imo) are undoubtedly the best fit for the cards.
As someone who's never sleeved before, it takes waay longer than you think it will, haha.
For gear cards, I personally went with the binder option; it's really convenient to be able to organise them like this. This was just using a 3-ring binder from Officeworks and a couple of these coin pages from Amazon.
For the making of the miniatures, while you can make do with a kitchen knife and some nail clippers for removing pieces from sprues, you'll make your life a lot easier investing in an X-acto knife and sprue cutters. By FAR the cheapest knife is from Bunnings, and at $2.50 it is of fantastic quality and comes with 3 extra blades. Sprue cutters you'll have to look around; best I could find was a cheap pair from Amazon that are fine. Finally, plastic cement is an absolute Must imo. Can't recommend it enough - instead of acting like an adhesive like superglue, it essentially melts the parts together and creates a very strong bond. Tamiya is pretty good and works great, but feel free to have a read around forums; people will have preferences for various brands, regular, thin, extra thin, etc. The making of miniatures is daunting at first, but it's not as hard as you might think (although you're like to make a mistake or two at first, but dw about it lol) and resources from https://build.kingdomdeath.com/, vibrantlantern.com/ and forum threads on https://boardgamegeek.com/boardgame/55690/kingdom-death-monster should see you through most of them :)
That's pretty much it. The storing or shelving of miniatures is up to you, as is whether or not a box insert is necessary.
Hope at least a couple of the things I said were useful. Have fun!
KD was my first time assembling minis. I definitely had some trepidation over the whole thing, but really it's not bad.
Now, I admit, I had some guidance from a coworker, but I'll pass all that guidance onto you right now. All you need are the following three items:
Basically, the key once you have these tools is to take your time. Consult a guide like vibrantlantern.com, which another poster mentioned, and which was an invaluable resource to me.
A mini takes me anywhere from an hour (really complex monster), to 20 minutes, generally. They can go much faster once you get the system down, but I like taking time to figure out exactly what the mini should look like (for the armor kits).
Throw on some music, or Netflix (or whatever helps you pass the time without distracting you too much), maybe grab a beer, and make an evening of it.
It's also worth noting that all you need to start playing is the White Lion, and the four Starting Survivors. These all come on a single sprue, and are really quite simple to assemble given the above directions and tools. That will get you through several hours of gameplay just by itself, and then from there you can move on to creating other monsters and survivors as you need or want them.
Hope this helps!
Malifaux minis are pretty darn close to KD in terms of complexity. I really don't think you are going to find anything cheap, but you could probably buy, assemble, and ebay the minis you build (and anything is cheaper than fucking up a KD model). You'll lose a few bucks, but a well assembled mini is worth almost as much as one on the sprue.
I am new to assembly as well, but after about 20 models I don't even sweat it. Everyone on this sub swears by Tamiya liquid cement -- but I think this applicator is 100x better than the brush for most cases:
https://www.amazon.com/gp/product/B0006N6ODS/ref=oh_aui_search_detailpage?ie=UTF8&psc=1
Basically... take your time, clean up every little piece as it comes off the sprue, dry fit a few times to make sure. It's not that hard, it just takes patience. Sometimes I will sand+dry fit a piece a dozen times before it finally fits perfectly. One thing that I didn't realize for a long time is these things aren't perfect -- sometimes a piece just doesn't fit and its up to you to fix it. A couple of the hands on the Phoenix, for example, were real bastards for me. A really great trick I learned randomly on youtube -- you can use the plastic cement as a kind of seam filler by putting slightly more glue than necessary, so it just barely squeezes out the side. Then cut/sand any excess.
I also recommend grabbing a cheap seam scraper and a very nice sprue cutter (the clippers at home depot are not made for plastic). Also maybe some tools for pinning -- for example, I had a resin base that I wanted to put my antelope on, so he had to be pinned to it rather than glued.
If you are going to paint your models, there's a few more things you should get -- a putty you like, some clay shapers, and some way to do some light sanding.
I did not need to pin him. In fact I've not found the need to pin any of the models because of the glue I use.
https://www.amazon.com/gp/product/B0006N6ODS/ref=oh_aui_detailpage_o07_s00?ie=UTF8&psc=1
That stuff emulsifies the plastic a little to create a nice bond, of course be careful with it, but it works great. The harder you press and hold the parts together until it starts to set up the better it fills in seems too. The applicator tip is very helpful for these tiny miniatures as well.
For the SA use masking tape to hold the disk in place if need be, but if you hold him in place for about 5 min it starts to set up enough to hold the base in place then you can turn him upside down so all his weight is off the leg and let him set up for for a day. Usually this stuff sets really fast, the only things that require more time to set are real "load-bearing" spots like the leg here or the left hand of the Dragon God.
Reminder: this glue essentially melts plastic, but as long as you don't bath your minis in it will not harm your model. It only emulsifies the surface it is applied to. It will not eat your model like acid or something.
Since most of the others have given you the right answers to your questions, I thought I would elaborate more on how you could store your game as well as bling it out. I have around 6 completed campaigns at this point (so maybe 500ish hours in…holy crap that’s a lot more than I expected)
Here’s what my setup looks like: https://imgur.com/a/VMV0NqY
Card Storage and Organization: I found the broken token card organizer (https://www.amazon.com/Broken-Token-Horizontal-Organizer-Wooden/dp/B00OKRAVX0/ref=sr_1_4?crid=IC1XTR4UEYH6&keywords=broken+token+card+organizer&qid=1570577802&sprefix=broken+token+card%2Caps%2C169&sr=8-4) in a hobby lobby art supply case (https://www.hobbylobby.com/Art-Supplies/Storage-Organization/Storage/All-Media-Artists-Supply-Sketch-Box/p/5227) works awesome to store the cards. Hobby lobby routinely has coupons for 50% off of one item. I think I spent $20 for my case. One case will hold all of the non-gear cards for the base game (sleeved) and all of the current expansions. I bought a second one of these cases to store all of the terran, settlement events, settlement locations, gear grids, rulebooks, etc. I no longer use the original box at all.
For the gear cards, I use a coin sleeve sheet (https://www.amazon.ca/20-Twenty-20-Pocket-Collecting-Supplies/dp/B002KDNAU2/ref=cm_cr_arp_d_product_top?ie=UTF8) in a three ring binder.
For sleeves, I primarily used FFG Grey sleeves but I did back the Mage Sleeves kickstarter so I used those for the gear cards, settlement events, and settlement locations (there are likely other places to get them)
For tokens, I used these (https://www.amazon.com/gp/product/B073RBB3NM/ref=ppx_yo_dt_b_search_asin_title?ie=UTF8&psc=1) 28mm coin holders.
For holding them on the table, I used (https://www.etsy.com/listing/611349741/token-holder-vii-for-kingdom-death?ref=shop_home_active_49&frs=1)
Highly recommend having these survival action tokens for each player as well, because it makes it very clear if you have already used the survival actions or not – There are not tokens for this in the game, these are purely helpful addons. (https://www.etsy.com/listing/663667985/survival-action-tokens-for-kingdom-death?ref=shop_home_active_13&frs=1)
Colored rings around the bases is also really helpful for remembering which character is which. The ones I purchased are no longer for sale but something like this (https://www.etsy.com/listing/579130465/identification-rings-for-kingdom-death?ga_order=most_relevant&ga_search_type=all&ga_view_type=gallery&ga_search_query=kingdom+death&ref=sr_gallery-1-7&organic_search_click=1&frs=1)
To hold the gear grids together, these are awesome but pricey (https://www.etsy.com/listing/548000611/kd-gear-grid-for-card-management-updated?ga_search_query=kingdom%2Bdeath&ref=shop_items_search_1)
I would also use these remaster card sheets printed on thick paper (https://boardgamegeek.com/filepage/124496/kingdom-death-remastered-sheets) - Your first campaign will be people of the lantern - I would recommend starting off with around 12 of the character sheets.
It takes a lot of time. You need the right tools. Id' have an exacto knife, some clippers, some files, a good glue, and probably some gap filler. Oh, and a cutting board to work off of.
I linked some examples to give you an idea, you can feel free to find a particular product that works for you, although I do really like the Tamiya glue. There are a lot of little pieces so some people might like some tweezers as well. I use cupcake wrappers to help keep the pieces in one place as I'm assembling and keep them from getting lost. I'd recommend not working over carpet as a dropped piece might get lost forever in there.
As others have said, Vibrant Lantern has some great build guides, which are probably required for more complex models like the Phoenix.
Otherwise, don't let the amount of sprues overwhelm you. Pick a miniature to assemble and finish it before moving on to the next one. Most of them are fairly straightforward. I would really recommend you take your time in assembly, as getting the edges filed and gaps filled will pay off in the long run - nothing worse than a well painted model with gaps and mold lines showing. There are plenty of videos out there on how to do this if you aren't sure or just want some additional instruction.
Start with the White Lion and starting survivors. The Screaming Antelope and Butcher will be the next ones to tackle. All of these are fairly easy to assemble.
I'm certainly no expert on miniature assembly but have done a handful of KDM stuff and have had the best success with Testors Plastic Cement (Testors 3507AT Liquid Cement for Plastic Models, 1-Ounce https://www.amazon.com/dp/B00005CA7S/ref=cm_sw_r_cp_apa_Le3RBbCSM9RR0)
That said, on two models I've done (Antelope and an armor build) there was a bit of difficulty either getting the model to stand correctly (former) or attaching a piece (latter).
If you have a hobby drill and the two joining pieces are large enough (depends on your drill bits) you can drill a small hole that will accept a paper clip or other pliable metal item, insert it in the drilled holes and apply glue. It works GREAT!
I second Tamiya Extra Thin Cement. It rarely gets recommended, but when you look at reviews some of them are crazy good. It took me a couple tries to get the hang of, but it's really solid stuff. Just make sure you give it a couple hours to fully dry.
That's a pretty sweet starting kit for sure, the flush cutters in there alone are like $8. I'd add picking up a whole set of files like this, I've found that having different shapes (needle point, round, etc) has been really helpful for filing some sprue nubs that are in weird places.
Armor kits come with the original game purchase- yes.
I'd recommend this glue:
http://www.amazon.com/gp/product/B000BMYWYC?psc=1&redirect=true&ref_=oh_aui_detailpage_o06_s00
Anyone that has built minis for a while loves Tamiya. It's FAR superior to most super glues.
FYI: You will want to use Plastic Cement for these hard plastic models. It will give superior results when compared to super glue.
I recommend looking for something like this: https://www.amazon.com/Liquid-Cement-Plastics-1-oz/dp/B0006N6ODS
The Model Masters (an offshoot of Testors, so a well-known brand) has a very nice this applique needle to apply very small amounts to precise locations. It'll keep you from ruining your new expensive figures! The game can be played without them. Take your time assembling, fixing, sanding, etc.
I use Paladin's standard sleeves and also perfect barrier sleeves.
The perfect barrier sleeves are amazing value to price, and they're a lot easier to get than the paladin sleeves
Edit: also in case anyone is interested I use these coin sleeves in a trade binder for easy gear and settlement item management
To add to the good info above: for KDM miniatures you are pretty much guaranteed to need to use putty/epoxy for the gaps on them if you want them to look good painted. Most of the big monsters will have some very noticeable gaps when put together, and it is fairly common on some of the armor kit survivors too (especially the unarmored kit mentioned above - serious issues with "ken doll" arm sockets).
For larger gaps, I prefer milliput superfine white. It is firm enough you can shape it (add water to help change consistency if needed).
https://www.amazon.com/Milliput-Superfine-2-Part-Hardening-Putty/dp/B002CNEWAM
For smaller hairline graps, I really like Vallejo Plastic Putty. It doesn't require pre mixing and is easier to work with if you just need to get it into a tiny gap. Usually apply it then wipe off with wet cloth.
https://www.amazon.com/gp/product/B000PHCNLC
I have the base game and all expansions. Every card I have is sleeved, except for the gear cards.
 
For all normal sized cards:
https://www.amazon.com/Clear-Sleeves-Standard-American-Board/dp/1589945131
These fit flawlessly!
 
For settlement locations:
https://www.amazon.com/gp/product/B00J01XP52/
Yes, they fold around and seal on the back, but right now they are the best answer to protecting this huge investment.
 
For settlement events:
https://www.amazon.com/gp/product/B003D06SGE/
These are like 1mm too short. Sometimes it drives me a bit mad, but again, I would much rather they were protected this much, than not at all. They do get shuffled and used every round. I've seen some people use two sleeves per card to cover it completely, but that's a bit much and they tend to split badly when you attempt it.
 
Why did I not sleeve the gear cards? Because I bought these and cut them down to a 3x3 grid:
https://www.amazon.com/gp/product/B002KDNAU2/
This keeps them quite protected during the game and is incredibly convenient as far as storing for next round.
 
Hope this helps!
Personal suggestion:
The only cards that will need shuffling are standard size (Hit Locations, AI, Innovations, Disorders, Hunt Events, etc). So it's easy to get sleeves for those. And since they are standard size you can even colour code the sleeves easily.
Settlement Event cards are the only "weird" sized cards that will be shuffled, but you can get around that for now by using dice or a randomizer until someone releases sleeves that size (which are easy to get and don't require a frigging kickstarter pledge).
Gear cards are strange sized, but you won't need to shuffle those. Use something like a "coin protector page" (similar to this) if you wanna protect them while playing.
I just got this stuff for my brother:
tools
glue
mold line scraper
I'd suggest getting some well reviewed mini brushes from Amazon as well. Make sure you clean them. Enjoy!
I have all of the resources booked marked and ready to go. Plan on starting this project when Spring rolls in. Hope these helps!
Hand drill I purchased:
http://www.amazon.com/Mini-Micro-Drill-Vise-Chuck/dp/B001RJE3X8/ref=sr_1_3?ie=UTF8&qid=1451452019&sr=8-3&keywords=pin+vise
Magnetizing guides:
http://macharianthunderguard.blogspot.com/2015/09/kingdom-death-monster-unboxing-and.html
http://roguepainter.com/kingdom-death-survivor-magnetization-tutorial/
Magnets I plan on purchasing (also used in the guides):
1x1mm
^ Woops the 1x1mm I linked are sold out. But you can look up and buy any 1x1mm neodymium magnets on ebay.
1x2mm
2x2mm
You're welcome! I appreciate that you're open to suggestions - it's easy to get attached to a plan. Since you seemed receptive I'm going to elaborate:
I ordered KD:M and then this Vallejo flesh tone set and this Vallejo basic colors set, which got me going. Like I said, i had to supplement with a lot of citadel paints from my LGS that ended up being frustrating, so I wish I had gotten some more saturated base colors in the beginning, maybe something like this, that comes with purples and oranges.
I was able to assemble my entire core set plus 11/12 expansions with these items:
https://www.amazon.com/gp/product/B0006N6ODS/ref=oh_aui_detailpage_o05_s00?ie=UTF8&psc=1
and
https://www.amazon.com/gp/product/B01D1JYXKO/ref=oh_aui_detailpage_o06_?ie=UTF8&psc=1
The clippers are still going strong and the files work nicely. I have no mold lines or excess glue on my minis and I filled in some gaps with green stuff:
https://www.amazon.com/Green-Stuff-Strip-RPR-75006/dp/B001BR8AU8/ref=sr_1_10?ie=UTF8&qid=1498688095&sr=8-10&keywords=Green+stuff
You can usually find it a bit cheaper. Hopefully, that helps!
I HIGHLY recommend getting a glue with a needle-point applicator. Some of the things you will be gluing - like hands - are very, very, very tiny.
This glue is incredible. Best model glue I've ever used.
http://www.amazon.com/gp/product/B0000WROZ2?psc=1&redirect=true&ref_=oh_aui_detailpage_o07_s00
Eh, I personally recommend not buying bundles even-though they seem like a better deal. I started by just buying paints that I would need for a particular model and continuing from there. Before I knew it I had a full range of paint from all different companies.
Buying a set of paints will only save you a little cash, but I'd bet that the big sets will include paints you will never really touch so you aren't actually saving any money buying them.
If you really want to go the paint route on Amazon then I will admit that I did in fact buy these sets when I was starting painting on a set of Zombicide minis:
https://www.amazon.com/dp/B004EKCOE2/ref=sr_ph_1?ie=UTF8&qid=1487690557&sr=sr-1&keywords=vallejo+paint
https://www.amazon.com/Vallejo-Face-Colors-Paint-8-Colors/dp/B000PHCPTM/ref=sr_1_1?ie=UTF8&qid=1487690721&sr=8-1&keywords=vallejo+paint+flesh
Perfectly fitting SEs -- you wish. The sleeves are about 2mm too short... I tried "double bagging" them by having a second SE sleeve the other way round -- but then you actually start having weird refraction light issues and cannot read the cards all that well anymore.
Anyway, at own peril: these are what I am using:
https://www.amazon.com/gp/product/B003D06SGE/ref=oh_aui_detailpage_o07_s00?ie=UTF8&psc=1
​
​
For the Locations, I am using these:
https://www.amazon.com/gp/product/B00J01XP52/ref=oh_aui_detailpage_o05_s00?ie=UTF8&psc=1
and those are perfect
​
For the FA , WPs, etc, ..
https://www.amazon.com/BCW-100-9-Pocket-Plastic-Sheets/dp/B005JCL05I/ref=sr_1_2?s=toys-and-games&ie=UTF8&qid=1543169921&sr=1-2&keywords=bcw+card+sleeves
https://www.amazon.com/gp/product/B002KDNAU2/ref=oh_aui_detailpage_o05_s00?ie=UTF8&psc=1
These work pretty much perfectly.
Yes, the entire 1.5 core sleeved with official KDM sleeves (thin/penny sleeves) fits pretty easily.
https://www.amazon.com/gp/product/B00EA9SRG6/
If you’re interested in being able to put sleeves gear cards in a binder, you might want to check these out. I sleeve mine in Docsmagic and the sleeved gear cards fit inside the pockets very well.
BCW Pro 20-Pocket Pages, Pocket Size: 2" x2", 20 Pages - Coin Collecting Supplies https://www.amazon.com/dp/B002KDNAU2/ref=cm_sw_r_cp_api_i_p5zxCb781E25J
Edit: I just now noticed you said you already ordered the other ones. My bad. Well in case you need more for the future maybe these will help
BCW Pro 20-Pocket Pages, Pocket Size: 2" x2", 20 Pages - Coin Collecting Supplies https://www.amazon.com/dp/B002KDNAU2?ref=yo_pop_ma_swf
These fit perfectly
This is what we've been using and it works just fine:
https://www.amazon.com/gp/aw/d/B002KDNAU2/ref=ox_sc_act_image_4?smid=AKVF0O4VSGCD0&psc=1
There's also a guy on patreon named Fen that has a bunch of reference files for abilities, disorders, fighting arts and the like sized the same as gear cards. You can have them printed up at that make playing cards site.
We just have our gear grids in a regular binder. I can post a picture later of what it all looks like if you want to see.
The mini's aren't too difficult to build, though I understand it can be overwhelming. There are official build guides (build.kingdomdeath.com). To get started on building you'll need 3 things:
You don't need those exact ones, those are just examples. The most difficult model was the Phoenix probably, but some, like the antelope, are only like 5 pieces.
the 2 x 2 is in fact a perfect fit.
https://www.amazon.com/BCW-20-Pocket-Pages-Pocket-Size/dp/B002KDNAU2/ref=sr_ph_1?ie=UTF8&qid=1520952822&sr=sr-1&keywords=bcw+coin+pages
Is it in a tube like toothpaste, but smaller? Viscous gel? If so, id recommend getting another type - either a brush-on that comes in a glass bottle, or one that has a small metal applicatir tube. My favorites are testors in the black bottle, and games workshop.
Testors:
https://www.amazon.com/Testors-3507AT-Liquid-Plastic-1-Ounce/dp/B00005CA7S
Would this be a good choice? I was reading up on vibrantlantern.com and they recommended the citadel clippers and GW thin glue. However, this was the closest thing I could find on amazon. Alsow what about these clippers?
https://www.amazon.com/Swan-Card-Sleeves-52x52mm-Pack/dp/B0108M0J7I/ref=sr_1_1?ie=UTF8&qid=1509684423&sr=8-1&keywords=swan+panasia
You could use these as well. Some unwarranted advice though: Since the gear cards arent shuffle or anything I decided to keep them in 2x2 BCW coin pages and put them in a binder so they are really easy to sort through
Not rounded sadly, but might be able to overshoot them. (52x52) - I think actual dimensions measure more like 53x53, possibly 53.5x53.5.
https://www.amazon.com/gp/product/B0108M0J7I/ref=oh_aui_search_detailpage?ie=UTF8&psc=1
Here's what I've gotten. They are perfect.
BCW Pro 20-Pocket Pages, Pocket Size: 2" x2", 20 Pages - Coin Collecting Supplies https://www.amazon.com/dp/B002KDNAU2/ref=cm_sw_r_cp_apa_HJR-BbATW6DKJ
These aren't the same ones I use, but I found a couple round 6 compartment bead sorters like these with more depth that hold all my tokens, one compartment per type of token. https://www.amazon.com/BENECREAT-Compartments-Organizer-Containers-Accessary/dp/B07MWTVJKS/ref=pd_aw_sbs_201_of_2?_encoding=UTF8&pd_rd_i=B07MWTVJKS&pd_rd_r=08440ad3-de9c-4299-8634-73892381977d&pd_rd_w=CQOXG&pd_rd_wg=qe5JA&pf_rd_p=3861f3e6-3054-41ac-9570-6a1994716f7e&pf_rd_r=146C1QA1K5WAS4QZJ44E&psc=1&refRID=1JRG075BH6B171KZSFZK
Yep. Sorry, it slipped my mind.
They are:
Ultra Pro Platinum Series, 12 pocket page, "protects stickers up to 2-1/4" by 2-1/2". (57mm x 63mm)."
https://www.amazon.ca/Ultra-Pro-Pocket-Stickers-Pages/dp/B000ETN7N4/
Pin the SA...
Use a small drill bit with a hand chuck and drill up into the hooves. Then drill corresponding holes in the base. Clip off sections of a paperclip, inject glue into holes, insert paperclips, attach model to base and let sit.
Suggest doing the same for the Phoenix model.
It all sounds hard, but takes literally 5 minutes. And here's a decent [hand drill set] (http://www.amazon.com/gp/product/B001RJE3X8) that would work fine.
I currently use the testors black bottle glue. It's a very thin product and is easily applied in small amounts through a very thin steel tube applicator tip. The red twin pack glue is a thick gel that is a bit more unwieldy to apply. It's been years since i've used the thick gel type and I recomend using the black bottle stuff. It's the type of glue that will melt the plastic and create a permanent bond.
Reading the packaging a little closer it looks like the black bottle now uses a plastic applicator tip. This model master version (still Testors) has the metal tip, which I like. https://www.amazon.com/dp/B0006N6ODS/ref=psdc_2236128011_t1_B00005CA7S
Games Workshop has a glue that is the same as the black bottle Testors/model master but the the GW bottle isn't as good and the applicator tube can pull out of the bottle on you if you're not careful.
Plastic is fairly soft. As long as you're not trying to cut too close to the model anything with a sharp edge will work. Just make sure the blades are thin enough to work in between pieces. I'm using a Xuron.
If we're going off stuff like that then...
This
This
This
This if you ever get the Lion Knight expansion
This
From someone who has never put together a miniature model before KDM, it wasn't that bad actually. Some models are a pain in the ass due to how small the pieces are, and fitting into your fingers.
Most of the models are pretty straightforward. You can use vibrant lantern (http://vibrantlantern.com/) to find how to put together any models that the official KDM website doesn't have.
The armor kits take a little bit more in figuring out how they are supposed to go. Armor kits can make up to 4 survivors, and you can mix and match gear so it's really up to you how to decide to build them.
Also, if you aren't painting them, the stuff below is all you'll need:
Pacer Technology (Zap) Brush on Zap a Gap Adhesives, 1/4 oz
https://www.amazon.com/gp/product/B00GB0SE60/ref=ppx_yo_dt_b_asin_title_o08_s00?ie=UTF8&psc=1
Pacer Technology (Zap) Zap-A-Gap Adhesives, 1/2 oz
https://www.amazon.com/gp/product/B00SXJJ2OU/ref=ppx_yo_dt_b_asin_title_o07_s00?ie=UTF8&psc=1
Professional 8 PCS Gundam Model Tools Kit
https://www.amazon.com/gp/product/B01GH6B3Z6/ref=ppx_yo_dt_b_asin_title_o06_s00?ie=UTF8&psc=1
Alvin Deluxe Professional Self-Healing Cutting Mat
https://www.amazon.com/gp/product/B0015AOIYI/ref=ppx_yo_dt_b_asin_title_o06_s00?ie=UTF8&psc=1
I recommend Tamiya, basically the same effect as any other plastic cement, but the bottle has a little brush in the cap which I have found to be much more convenient for application. Specifically, the brush allows you to be much more precise and does not have the possibility of excess glue running down the model.
I usually get something along the lines of...
Set of 5 New Ultra-Pro Black Deck Boxes for Magic/Pokemon/YuGiOh Cards
Going with mage $40 + 1 location addon + 1 event addon + coin binder pages for gear cards and I'm all set for core + gamblers + handful of old expansions; buying sleeves for new expansions at that bridge in 2019.
What glue did you use for her? I bought one and for some reason this glue isn't working at all for me.
What about amazon.co.uk ?
I shot an email to techrapor asking if they could tell me (I also need these). I'll let you know if I hear anything back. :D
EDIT: The answer is in the comments: http://www.amazon.com/BCW-20-Pocket-Pages-Pocket-Size/dp/B002KDNAU2
also there were a couple parts that didn't sit fully flush after our initial gluing
we used tamiya extra thin cement and after letting it sit for a little bit we simply applied a little more glue to the offending crack (one instance was the arm holding the spear) then gently pushed it where it needed to be and held it for 20 seconds or so
I think when we get Allison I'll take pictures at different steps
I'm by no means an expert but so far I've been using Tamiya Extra Thin Cement and As a starter kit for tools I've used: https://www.amazon.com/dp/B01GH6B3Z6/ref=sr_ph_1?ie=UTF8&qid=1493146419
Its only 16 bucks for the kit.
Welcome to the world of moldmaking. I've had moderate success using this method:
You'll need Instant Mold - a low temp plastic that hot water will make maleable.
And Milliput - a 2 part putty.
Put the Instant Mold in hot water, let it soften. Pull it out and press your base into it. Hold it under cold water so it 'hardens'. Peel out your base and you'll have a negative mold. Use the Putty to fill the negative mold, let it harden overnight and then pull out the hardened putty base. It'll probably need some cleanup around the edges but you're done.
Here's a big fat messy shopping list I made for someone a while ago. You might find it useful too.
http://www.amazon.com/Quickshade-Ink-Warpaints-Army-Painter/dp/B00HC8D80W
Amazon.com: Quickshade Ink Set Warpaints Army Painter
http://www.amazon.com/Pacer-Technology-Zap-Zap-Adhesives/dp/B00SXJJ2QI
Amazon.com: Pacer Technology (Zap) Pacer Technology (Zap) Zap-A-Gap Adhesives, 1 oz
http://www.amazon.com/General-Pencil-Company-Masters-Preserver/dp/B0009RRT9Y
Amazon.com : General Pencil Company The Masters Brush Cleaner & Preserver 2.5 0z. : Brush Soap
http://www.amazon.com/Army-Painter-Wargame-Starter-Paint/dp/B01BJ55UDQ
Buy Army Painter Wargame Starter Paint Set - PLUS Promo Undead figure
http://www.amazon.com/280715-American-Accents-Primer-12-Ounce/dp/B00KZ6LLZW?
Buy Rust Oleum 280715 American Accents Ultra Cover 2X Spray Paint, White Primer, 12-Ounce
http://www.amazon.com/TEKTON-6655-Needle-File-10-Piece/dp/B000NPUKYS?
TEKTON 6655 Needle File Set, 10-Piece
http://www.amazon.com/Xacto-X3311-Precision-Knife-Blades/dp/B0000DD1N4?
Buy Xacto X3311 N0. 1 Precision Knife With 5 No. 11 Blades
http://www.amazon.com/Most-Wanted-Wargamer-Set/dp/B007H4YR8S
Amazon.com: 1 X Most Wanted Wargamer Brush Set
http://www.amazon.com/Xuron-170-II-Micro-Shear-Flush-Cutter/dp/B000IBSFAI
Xuron 170-II Micro-Shear Flush Cutter: Wire Cutters
http://www.amazon.com/Milliput-Standard-2-Part-Hardening-Yellow/dp/B011BO9R5W
Amazon.com: 2 X Milliput Standard 2-Part Self Hardening Putty, Yellow/Grey
Edit: Of, and I used this guide for making my Thinner. http://www.reapermini.com/Thecraft/15 But I'm going to experiment more, because this is not perfect.
https://www.amazon.com/gp/aw/d/B0054IS6KY/ref=mp_s_a_1_1?ie=UTF8&qid=1509764150&sr=8-1&pi=AC_SX236_SY340_QL65&keywords=alumilite+mini+casting+kit&dpPl=1&dpID=51LaCFS-V5L&ref=plSrch
God that’s an ugly url, I hope that works. Or search for Alumilite mini kit. Came with enough to make the silicone mold (only enough for one shot, I made a bit of a mess with it, but it’s functional), and 8oz of resin mix. As I’m using only 15ml of resin per 4 base copies, I think the mold will get destroyed before I use up the resin. Personally picked up the kit on a whim while walking through Hobby Lobby.