(Part 3) Top products from r/KingdomDeath
We found 22 product mentions on r/KingdomDeath. We ranked the 137 resulting products by number of redditors who mentioned them. Here are the products ranked 41-60. You can also go back to the previous section.
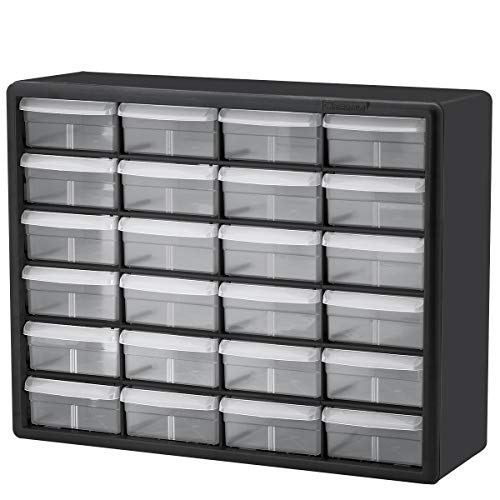
41. Akro-Mils 24 Drawer 10724, Plastic Parts Storage Hardware and Craft Cabinet, (20-Inch W x 6-Inch D x 16-Inch H), Black (2-Pack)
Sentiment score: 1
Number of reviews: 1
CABINET DIMENSIONS- 20-Inch x 6-3/8 Inch x 15-13/16 Inch, DRAWER DIMENSIONS- 6-Inch x 4-1/2-Inch x 2-3/16 Inch (large drawer)HIGH QUALITY- Rugged, high-impact polystyrene plastic frame and 24 drawersGREAT FOR– Storing and organizing classroom or office supplies, crafts, beads or sewing supplies, h...
 Show Reddit reviews
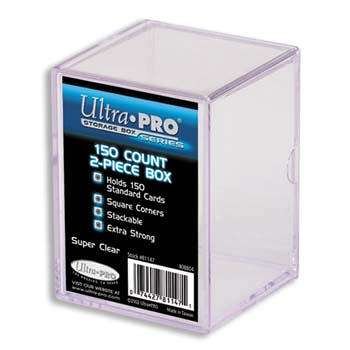
42. Ultra Pro 81147 2-Piece 150 Count Clear Card Storage Box
Sentiment score: 0
Number of reviews: 1
Holds 150 standard size trading cards (2-1/2" x 3-1/2" card dimension)Square corners to help protect card cornersExtra strong and archival safeAir tight closuresStackable
 Show Reddit reviews
43. OLFA AK-1/5B Standard Art Knife with 5 Blades
Sentiment score: 1
Number of reviews: 1
Good for industrial applications, commercial art and graphics and home craft projectsQuick-spin easy blade changeFor right- and left-handed useTool-free blade changeIncludes 5 spare OLFA KB art blades
 Show Reddit reviews
44. Perfect Barrier Card Sleeves (100 Piece), Clear, 64 x 89mm
Sentiment score: 1
Number of reviews: 1
Works with Magic the Gathering (MTG), World of Warcraft TCG, Pokémon, Weiss Schwarzmaterial type: Multiple MaterialsCountry Of Origin : JapanPackage Dimensions : 1.4 L x 7.4 W x 9.4 H in Centimeters
 Show Reddit reviews
45. General Pencil Company The Masters Brush Cleaner & Preserver 2.5 0z.
Sentiment score: 0
Number of reviews: 1
Formulated for use with oilsacrylics and watercolorsWill even remove dried on paints and paint stains
 Show Reddit reviews
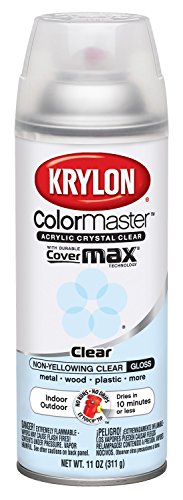
46. Krylon K05130107 ColorMaster Acrylic Crystal Clear, Gloss, Clear, 11 oz.
Sentiment score: 0
Number of reviews: 1
For use on plastic, metal, wood and morePerfect for indoor and outdoor projectsDries in 10 minutes or lessDurable Covermax technology for premium coverage and brilliant color.
 Show Reddit reviews
47. BENECREAT 10PCS 6 Compartments Plastic Round Storage Organizer Divider Display Containers Case Box for Jewelry Accessary, Bead, Gem and Other Small Crafts
Sentiment score: 1
Number of reviews: 1
【Quantity】: 10pcs plastic round storage cases which is packed in a carton, each box has 6 compartments to store different stuff【Measurement】: Overall size: about 10.3cm(4") in diameter, 1.7cm(0.66") in height; Each compartment: 4.5x3.5x1cm(1.78"x1.38"x0.39"); For details, please refer to pic...
 Show Reddit reviews
48. Tamiya America, Inc Basic File Set, TAM74046
Sentiment score: 1
Number of reviews: 1
Includes 3 Double-Cut Files: Round, half-round and Flat.Tamiya Quality and Precision16cm in lengthSuitable for working plastic and soft metals
 Show Reddit reviews
49. Winsor & Newton Series 7 Kolinsky Sable Watercolor Brush - Round #1 (5007001)
Sentiment score: 2
Number of reviews: 1
The World’s Finest Water Color Brush - for artists who appreciate exquisite quality and longevity, there is no other brush than the Winsor & Newton Series 7.Point – having a crisp point and maintaining that during use.Snap & Spring – the brush snaps back crisply into shape with the right degre...
 Show Reddit reviews
50. Loctite 487229 Threadlocker 242 All-Purpose Medium Strength Tube, Blue, 6 ml
Sentiment score: 0
Number of reviews: 1
DESIGN. Ideal for fasteners under 1/4-Inches to 3/4-inches (6 mm to 20 mm).RESULTS. Secure, one-piece assembly that will not loosen under stress.SECURE. Locks and seals while preventing parts from loosening due to vibration.EASY TO USE. Removable with hand tools for disassembly.APPLICATION. Carburet...
 Show Reddit reviews
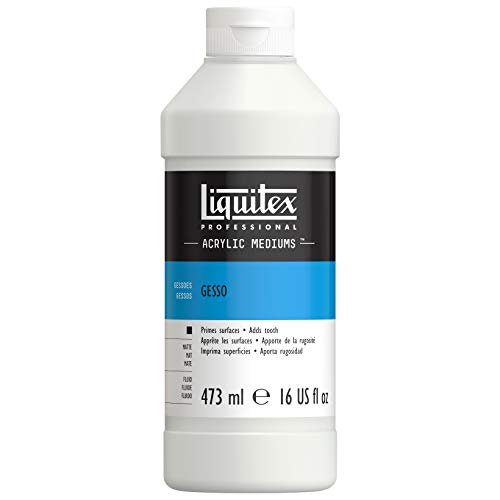
51. Liquitex G5316 Professional White Gesso Surface Prep Medium, 16-oz
Sentiment score: 1
Number of reviews: 1
Premium white acrylic gesso to prepare painting surfacesLightweight, non-toxic, dries to a water-resistant, non-yellowing surfaceIncludes 16-oz bottle of mediumIntermixable with Liquitex Professional Acrylic Paint Colors and MediumsConforms to ASTM D4236 - Safe for educational use
 Show Reddit reviews
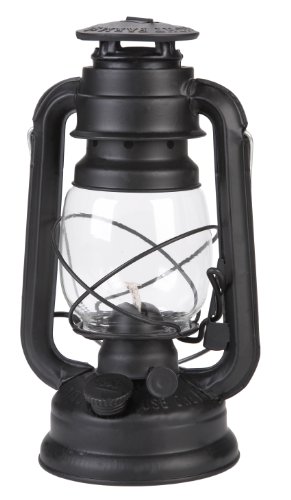
52. Lamplight 52664 Farmer's Lantern, Black, Original Version, Brown
Sentiment score: 0
Number of reviews: 1
Household necessity during power outagesBurns for up to 15 hoursHolds 5 -ounce of fuel
 Show Reddit reviews
53. Vallejo Black Model Color Paint, 17ml
Sentiment score: 0
Number of reviews: 1
Model color has been formulated with permanent pigments for fine arts; all colors are completely lightfast and opaqueThe consistency of Model color allows for an extremely smooth and uniform paint film, with no trace of brushstrokesThe water based formula of Model color has been specifically develop...
 Show Reddit reviews
54. Vallejo English Uniform Paint, 17ml
Sentiment score: 0
Number of reviews: 1
Model color has been formulated with permanent pigments for fine arts; all colors are completely lightfast and opaqueThe consistency of Model color allows for an extremely smooth and uniform paint film, with no trace of brushstrokesThe water based formula of Model color has been specifically develop...
 Show Reddit reviews
55. Vallejo Sunny Skintone Paint, 17ml
Sentiment score: 0
Number of reviews: 1
Model color has been formulated with permanent pigments for fine arts; all colors are completely lightfast and opaqueThe consistency of Model color allows for an extremely smooth and uniform paint film, with no trace of brushstrokesThe water based formula of Model color has been specifically develop...
 Show Reddit reviews
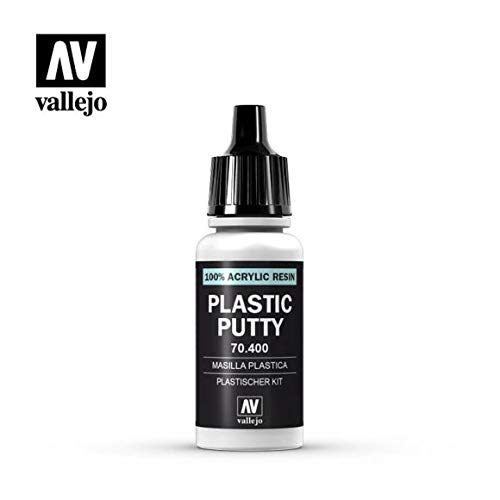
56. Vallejo Plastic Putty, 17ml
Sentiment score: 1
Number of reviews: 1
Made in SpainDries to a white, totally opaqueStone hard finishPackage dimensions: 3.125" L x 1.0" W x 1.0" H
 Show Reddit reviews
57. Wargames Basic Paint Set
Sentiment score: 1
Number of reviews: 1
8 color paint set17 ml. bottle with eyedropperThe packaging prevents the paint from evaporating and drying in the contaimerWater can bu used to dilute the paintColours can be mixed with one another
 Show Reddit reviews
58. Thinking with Type, 2nd revised and expanded edition: A Critical Guide for Designers, Writers, Editors, & Students
Sentiment score: 1
Number of reviews: 1
Princeton Architectural Press
 Show Reddit reviews
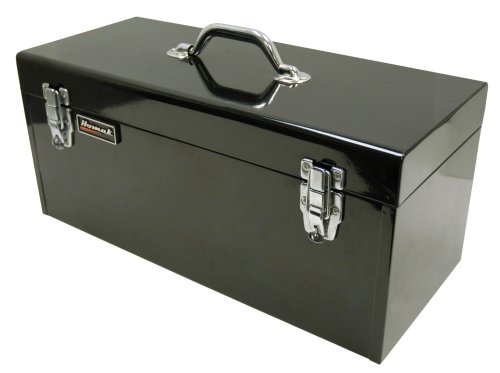
59. Homak 20-Inch Steel Flat-Top Toolbox with Removable Tray, Black, BK00120920
Sentiment score: 2
Number of reviews: 1
Durable metal construction resists damage from toolsSolid professional quality constructionDouble clasp locking systemInternal removable steel tray for hardward, tools & part organizationPad lockable designDimensions: 8.5" x 20 x 9" | Weight: 11.5 lbs
 Show Reddit reviews
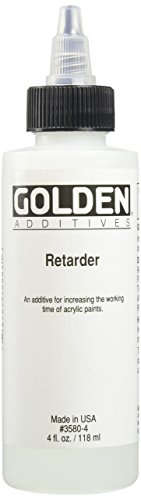
First of all anything I say here are not absolutes and do have substitutes. Each painter has their own way of doing things. This is just my take.
Prepare Your Mini for Painting
Before you do any paint first you need to sand/trim, assemble, fill gaps, and prime your miniature. When you sand/trim your mini you are removing mold lines and areas that don't mesh well with the minis surface, your trying to get everything even. You can use an exacto-knife and files for this. Once you have all the pieces so that they fit together well next you need to assemble your mini. Take the time to dry fit everything before gluing to make sure it all fits together. The type of glue you use depends on what the mini is made of and preference. For plastic, I tend to use super glue 90% of the time since plasti-weld (a chemical that melts the plastic together) doesnt seem to make the joint any stronger, though I could be using the wrong type. You can also pin the mini joints together for added strength. After your mini is assemble now we need to fill those gaps that can ruin a great paint job, I see it all the time and it makes me sad. There are many different types of putty that you can use but I go for green stuff. I mix 1:1, yellow to blue, and using a damp toothpick I wet my hands and smoosh it into gaps until it seems filled. This can be hard to tell sometimes since you cant get a sense of depth. If you want to make sure I will usually brush on some Gesso and check to see if it even. Finally we can prime our miniature. This is required or acrylic paint wont stick to the plastic. Application can be done via airbrush, rattle can, or brush. Since I haven't done much with a brush, but FYI you can use the Gesso above also for priming, and I cant assume everybody has an airbrush I will talk about the cheaper option, rattle can or spray paint. There are many available like those made for miniatures (though I don't think they have a real difference), and brands like Rustoleum and Krylon. Make sure you get a can that is for just priming and not the "prime and paint" type and is for indoor/outdoor use, sometimes the outdoor only stuff can be a bit thick. The brand doesn't matter as much as when and how you apply it. Humidity and temperature are Very important when priming a miniature, if it is to hot and dry the paint will crack and to humid you can get dripping and that terrible fuzzy look. Make sure you read and FOLLOW the directions on the can. When applying the paint do wide sweeps across the miniature with a constant spray. Keep the sprays short and the motion consistent.
Painting
Now you are at the fun part. Again, there are different mediums to paint in, oil, acrylic, pigment. Acrylic is a good place to start. The brand of paint you use is really up to you. You can go to a hobby or art store to get these paints. Don't get the paints that are to cheap the results are not good. Blick is a good store to visit because mini painting is an art that uses artistic mediums. That is what Blick is all about and you will get a wide range of brands there, you don't have to use the mini makers brands. Brushes are very important and if you get the cheapest kind you'll find that they tend to fray and leave little bits of bristles on your mini. For starters stick with the mid range synthetic ones and take care of them, theyll last awhile if you do. Make sure you wash them in your water pot (just a jar of water) often so that the paint doesn't dry on them and clean them every so often. So when you sit done with your brush and begin make sure you thin your paints or they will end up thick and goopy. You can thin with distilled water or you can use an acrylic medium. There are many special mediums but the most useful ones are matte and glaze medium and are used for different painting techniques. Always give your paint time to dry before applying more or youll mess up the prior coat and things will look rough.
Sealing
After you are done painting and have let your mini dry for a few days its now time to seal and protect it by giving it a few coats of finish. This will keep scratches away from your wonderful paint job. Application and selecting is similar to picking a primer but there are 2 options, gloss and matte. Think about what type of finish you want. Most go for matte and some use a mix but few do only a gloss finish.
Stripping
So you messed up. What now? Well you can strip the paint off and try again but you got to be careful here because this process can make the mini brittle. A common used item is Simple Green. Though it does a good job on the acrylic paint it will not remove the primer very easily. To do that I have found Super Clean to work best. But do note, only soak a mini 10 minutes at a time sink Super Clean works by sucking the moisture out of the paint, and the mini. So do a 10 minutes soak, then take a toothbrush and try to brush off the paint, then return to the solution and repeat.
It takes a lot of time. You need the right tools. Id' have an exacto knife, some clippers, some files, a good glue, and probably some gap filler. Oh, and a cutting board to work off of.
I linked some examples to give you an idea, you can feel free to find a particular product that works for you, although I do really like the Tamiya glue. There are a lot of little pieces so some people might like some tweezers as well. I use cupcake wrappers to help keep the pieces in one place as I'm assembling and keep them from getting lost. I'd recommend not working over carpet as a dropped piece might get lost forever in there.
As others have said, Vibrant Lantern has some great build guides, which are probably required for more complex models like the Phoenix.
Otherwise, don't let the amount of sprues overwhelm you. Pick a miniature to assemble and finish it before moving on to the next one. Most of them are fairly straightforward. I would really recommend you take your time in assembly, as getting the edges filed and gaps filled will pay off in the long run - nothing worse than a well painted model with gaps and mold lines showing. There are plenty of videos out there on how to do this if you aren't sure or just want some additional instruction.
Start with the White Lion and starting survivors. The Screaming Antelope and Butcher will be the next ones to tackle. All of these are fairly easy to assemble.
For brushes the main thing you're looking for is its ability to maintain a fine tip. Some people do 90% of their model with a size 3, while others use a size 1. I personally prefer a #2 with a #1 for finer detail work.
Vallejo Game Colour or Model Colour sets are a great place to start, depending on your preference. You can read more on the differences between the two here.
For washes I would recommend just starting with Citadel's Nuln Oil, and Reikland Fleshshade for all the skin tones you plan to do.
I would also highly recommend checking out Miniac on YouTube, he has a lot of great painting tutorials and he breaks it down step by step in short, easily digestible videos.
Good luck!
I haven't had to move it yet (other than just around my house) but we use
this storage cabinet and I would imagine with some foam strategically placed it would be just fine to move around with
we did happen to find an old overhead projector whose case fit around this storage cabinet perfectly which I would use if moving with all my minis
we also store things other than minis in ours like terrain (both the original cardboard and these stone ones) and tokens in this style holder
I use Paladin's standard sleeves and also perfect barrier sleeves.
The perfect barrier sleeves are amazing value to price, and they're a lot easier to get than the paladin sleeves
Edit: also in case anyone is interested I use these coin sleeves in a trade binder for easy gear and settlement item management
To add to the good info above: for KDM miniatures you are pretty much guaranteed to need to use putty/epoxy for the gaps on them if you want them to look good painted. Most of the big monsters will have some very noticeable gaps when put together, and it is fairly common on some of the armor kit survivors too (especially the unarmored kit mentioned above - serious issues with "ken doll" arm sockets).
For larger gaps, I prefer milliput superfine white. It is firm enough you can shape it (add water to help change consistency if needed).
https://www.amazon.com/Milliput-Superfine-2-Part-Hardening-Putty/dp/B002CNEWAM
For smaller hairline graps, I really like Vallejo Plastic Putty. It doesn't require pre mixing and is easier to work with if you just need to get it into a tiny gap. Usually apply it then wipe off with wet cloth.
https://www.amazon.com/gp/product/B000PHCNLC
I'm pretty certain OLFA is the manufacturer for Tamiya knives so you can probably save a few bucks by buying from them instead (see Amazon). I think the hobby knife in particular is important because you'll want something your absolutely comfortable with. They can be very dangerous.
This is the knife I use:
https://www.amazon.com/gp/product/B0006SJAXE/ref=oh_aui_search_detailpage?ie=UTF8&psc=1
I opted for plastic because I didn't like the cheap aluminum Xacto uses on their handles. I also believe the entire knife (blades and handle) is manufactured in Japan and I trust their manufacturing practices more than others. The blades I ordered over a year ago are still rust free.
It is an improvement!
If you are interested in learning more about this topic, Thinking With Type provides a useful foundation. I'm sure that, in 2016, there are other publications that have eclipsed the popularity of this one; I just haven't gone book shopping in a while.
Edit: What is the "retarder" he is using? Keeping Acrylics wet for longer sounds like a dream come true.
​
He links to it. Looks great . Here
You're welcome! I appreciate that you're open to suggestions - it's easy to get attached to a plan. Since you seemed receptive I'm going to elaborate:
I ordered KD:M and then this Vallejo flesh tone set and this Vallejo basic colors set, which got me going. Like I said, i had to supplement with a lot of citadel paints from my LGS that ended up being frustrating, so I wish I had gotten some more saturated base colors in the beginning, maybe something like this, that comes with purples and oranges.
Hey, awesome. I noticed on the post you said you needed two to fit all the expansions. I just have DBK, Slenderman, and Dragon King. Do you think I could fit core + those in one box?
Would be looking at this one: https://www.amazon.ca/Homak-20-Inch-Flat-Top-Toolbox-BK00120920/dp/B000XJSLRW/ref=sr_1_4?ie=UTF8&qid=1543007796&sr=8-4&keywords=steel+tool+box
These aren't the same ones I use, but I found a couple round 6 compartment bead sorters like these with more depth that hold all my tokens, one compartment per type of token. https://www.amazon.com/BENECREAT-Compartments-Organizer-Containers-Accessary/dp/B07MWTVJKS/ref=pd_aw_sbs_201_of_2?_encoding=UTF8&pd_rd_i=B07MWTVJKS&pd_rd_r=08440ad3-de9c-4299-8634-73892381977d&pd_rd_w=CQOXG&pd_rd_wg=qe5JA&pf_rd_p=3861f3e6-3054-41ac-9570-6a1994716f7e&pf_rd_r=146C1QA1K5WAS4QZJ44E&psc=1&refRID=1JRG075BH6B171KZSFZK
Will these do, 6ML size? https://www.amazon.ca/LOCTITE-37418-Medium-Strength-Threadlocker/dp/B000FIXQXK
The armor kits are included in the original game purchase?
https://www.amazon.com/gp/aw/d/B000MKOWRU?psc=1 fits the game well
I spray with Krylon clear, let set for 24 hours then finish with testors dull coat.
https://www.amazon.com/gp/product/B0009X8LZ4/ref=oh_aui_search_detailpage?ie=UTF8&psc=1
https://www.amazon.com/gp/product/B009FF6DN4/ref=oh_aui_search_detailpage?ie=UTF8&psc=1
https://www.amazon.com/gp/product/B0002TT3LG/ref=oh_aui_detailpage_o00_s00?ie=UTF8&psc=1
I use these cases to hold all the monsters cards and I can keep them organized and stop mixing up the cards by accident....
Here's a big fat messy shopping list I made for someone a while ago. You might find it useful too.
http://www.amazon.com/Quickshade-Ink-Warpaints-Army-Painter/dp/B00HC8D80W
Amazon.com: Quickshade Ink Set Warpaints Army Painter
http://www.amazon.com/Pacer-Technology-Zap-Zap-Adhesives/dp/B00SXJJ2QI
Amazon.com: Pacer Technology (Zap) Pacer Technology (Zap) Zap-A-Gap Adhesives, 1 oz
http://www.amazon.com/General-Pencil-Company-Masters-Preserver/dp/B0009RRT9Y
Amazon.com : General Pencil Company The Masters Brush Cleaner & Preserver 2.5 0z. : Brush Soap
http://www.amazon.com/Army-Painter-Wargame-Starter-Paint/dp/B01BJ55UDQ
Buy Army Painter Wargame Starter Paint Set - PLUS Promo Undead figure
http://www.amazon.com/280715-American-Accents-Primer-12-Ounce/dp/B00KZ6LLZW?
Buy Rust Oleum 280715 American Accents Ultra Cover 2X Spray Paint, White Primer, 12-Ounce
http://www.amazon.com/TEKTON-6655-Needle-File-10-Piece/dp/B000NPUKYS?
TEKTON 6655 Needle File Set, 10-Piece
http://www.amazon.com/Xacto-X3311-Precision-Knife-Blades/dp/B0000DD1N4?
Buy Xacto X3311 N0. 1 Precision Knife With 5 No. 11 Blades
http://www.amazon.com/Most-Wanted-Wargamer-Set/dp/B007H4YR8S
Amazon.com: 1 X Most Wanted Wargamer Brush Set
http://www.amazon.com/Xuron-170-II-Micro-Shear-Flush-Cutter/dp/B000IBSFAI
Xuron 170-II Micro-Shear Flush Cutter: Wire Cutters
http://www.amazon.com/Milliput-Standard-2-Part-Hardening-Yellow/dp/B011BO9R5W
Amazon.com: 2 X Milliput Standard 2-Part Self Hardening Putty, Yellow/Grey
Edit: Of, and I used this guide for making my Thinner. http://www.reapermini.com/Thecraft/15 But I'm going to experiment more, because this is not perfect.
Off the top of my head;
The steel was done with Vallejo Model Color Black and Shmincke Titanium white.
The dull gold on his face and shoulder is done with Vallejo Model Color Chocolate Brown, English Uniform, and Sunny Skintone.
The OSL was done with Scale 75 Anderes Red, Tiamat Orange, and Shmincke White.