(Part 3) Top products from r/PrintedMinis
We found 25 product mentions on r/PrintedMinis. We ranked the 128 resulting products by number of redditors who mentioned them. Here are the products ranked 41-60. You can also go back to the previous section.
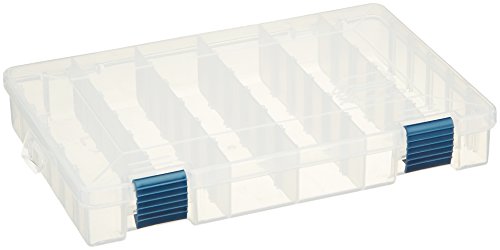
41. Flambeau Outdoors 4007 Tuff Tainer - 24 Compartments (Includes (12) Zerust dividers)
Sentiment score: 0
Number of reviews: 1
SMART DIVIDER SYSTEM: This tackle storage box offers customization options with 12 adjustable dividers that can create up to 24 different compartments. This ensures quick compartmentalization of your storage space.ZERUST ANTI-CORROSION TECHNOLOGY: Exclusive VCI formula infused into the dividers rele...
 Show Reddit reviews
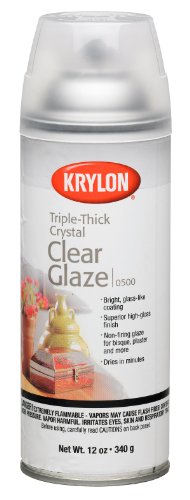
42. Krylon I00500A00 12-Ounce Triple Thick Clear Glaze Aerosol Spray,High-Gloss
Sentiment score: 0
Number of reviews: 1
Triple thick glaze's high solids formula quickly builds a bright, clear coating giving the illusion of depthOne coat equals three coats of many other clear aerosolsUsed on many types of materials wood plaster, bisque, metal, plastic and paperMany other uses in studio, home crafts and shop projectsCo...
 Show Reddit reviews
43. Chessex Dice d6 Sets: Opaque Red with Black - 12mm Six Sided Die (36) Block of Dice
Sentiment score: 1
Number of reviews: 1
Store your dice in the included clear plastic display caseColor: Red with Black PipsStyle: Opaque
 Show Reddit reviews
44. Design Ideas Lookers Box, 7.3" x 7.3" x 4.5" Soft Vinyl Storage Bin with Lid, Clear PVC Plastic with Metal Wire Frame (Large)
Sentiment score: 1
Number of reviews: 1
SOFT VINYL - Made of soft, flexible vinyl with a steel structureTRANSPARENT - Translucent sides allow you to see the contentsVERSATILE - Use for storage in the closet, office, bath, or as a gift boxDURABLE - The thick plastic vinyl can be wiped clean with a damp clothCONVENIENT - Large box with lid ...
 Show Reddit reviews
45. The Army Painter Miniature and Model Files - 3-Piece Diamond File Set of Round File, Flat File and Triangular Metal File - Needle File Set for Metal, Resin, and Plastic Miniatures
Sentiment score: 0
Number of reviews: 1
SPECIAL SET OF 3 MOST USED FILE SHAPES FOR SMOOTHING MINIATURES - The Army Painter has carefully chosen highly-used shapes for assembling an army of miniatures in this mini tool set. It comes with rounded, squared, and angular filesFINE, EVEN DIAMOND GRIT FOR SMOOTH FINISH - Remove flash and mold li...
 Show Reddit reviews
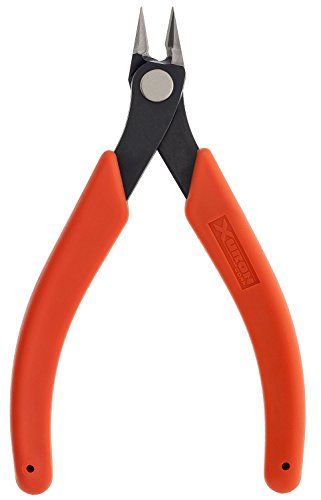
46. Cutters - Xuron Professional Sprue Cutter 2175ET
Sentiment score: 4
Number of reviews: 1
Recommended for use on soft plastic onlyFull flush cuttingProject type: plastics de-gating, plastic kit modelingMaterials: plastic sprue, plastic (de-gating)Packaged In A Retail Blister Pack
 Show Reddit reviews
47. Purple Power (4320P) Industrial Strength Cleaner and Degreaser - 1 Gallon
Sentiment score: 0
Number of reviews: 1
Concentrated formula penetrates grease, oil and dirt on contactCreates barrier between stain and surfaceIn just seconds, Purple Power wipes away even the toughest stainsEffective on a wide variety of surfaces in auto, home, marine, farm and shopBiodegradable, non-abrasive, non-flammable and phosphat...
 Show Reddit reviews
48. 1 Mil Kapton Tape (Polyimide) - 1/2" X 36 Yds
Sentiment score: 2
Number of reviews: 1
1 Mil Polyimide Tape (Kapton) RoHS compliant1 Mil Polyimide Tape is silicon adhesive protection leaves no residue.1 Mil Polyimide Tape is thin and conformable enabling masking of uneven surface1 Mil Polyimide Tape shows excellent electrical insulation.1 Mil Polyimide Tape maintains high temperature ...
 Show Reddit reviews
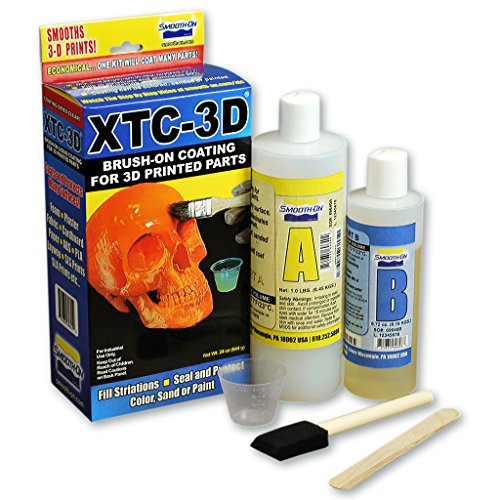
49. XTC-3D High Performance 3D Print Coating - 24oz. Unit
Sentiment score: 1
Number of reviews: 1
Epoxy Coating for 3D Printed ObjectsSmooths 3D Printed ObjectsCompatible with SLA and SLS prints.It works with PLA, ABS, Laywoo, Powder Printed Parts and other rigid media. It also can be used to coat EPS, EPDM and urethane foam as well as wood, plaster, fabric, cardboard and paper.
 Show Reddit reviews
50. NESCO FD-75A, Snackmaster Pro Food Dehydrator, Gray
Sentiment score: 0
Number of reviews: 1
Adjustable thermostat allows you to dry different foods at proper temperatures (95º-160º F)Powerful Top Mounted Fan. 600 watts of drying power. 120 VoltComes with 5 trays, but is expandable to 12 trays. (Trays are 13 1/2" in diameter)Opaque Vita-Save exterior helps block harmful light which destro...
 Show Reddit reviews
51. Testors Spray Lacquer 3oz, Clear Coat
Sentiment score: 1
Number of reviews: 1
For use on many surfacesFinely ground pigments give superb flow and coveragelead free, fast-drying, and easy to applyContains one aerosol can with 3oz (85g) of enamel paintAvailable in a variety of colors
 Show Reddit reviews
52. CON:P B20206 Mini File Set, Silver/Red/Black, 100 mm
Sentiment score: 1
Number of reviews: 1
For precision work with metalsWith 2-component handlesLength: approx. 100 mm
 Show Reddit reviews
53. Sony CR2016 3 Volt Lithium Manganese Dioxide Batteries, Genuine Sony Blister Packaging (20 Pieces)
Sentiment score: 0
Number of reviews: 1
10 year shelf life, Genuine Sony Packaging with date code on each blister, Not CounterfeitLightweight, High Voltage and High Energy DensityExcellent Discharge CharacteristicsOutstanding Temperature CharacteristicsExcellent Long-Term Reliability
 Show Reddit reviews
54. Plano Tackle 4 Pack of Size 3600 Stowaways with Adjustable Dividers, 4 Pack, Fishing Tackle Storage, Premium Tackle Storage
Sentiment score: 0
Number of reviews: 1
Quantity of four Stowaways in a bundle6 21 Adjustable compartments11 inches X 7.25 inches X 1.75 inchesProlatch locking systemClear cover allows you to see what is inside
 Show Reddit reviews
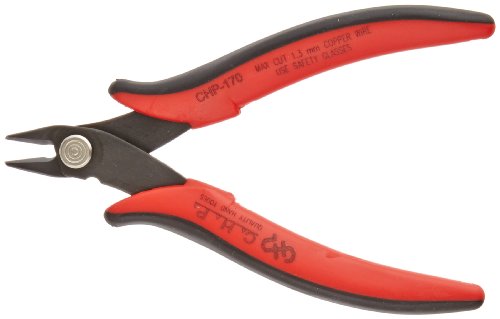
55. Micro Cutter
Sentiment score: 1
Number of reviews: 1
Flush-cut micro soft-wire cutter has 8mm long jaw with angled head for flush-cutting applications on up to 16 gauge (1.3mm) copper and soft wire21-degree2.5mm heat-treated carbon steel construction provides durability and long lifePrecision-ground holes and surfaces provide smooth movement, and spri...
 Show Reddit reviews
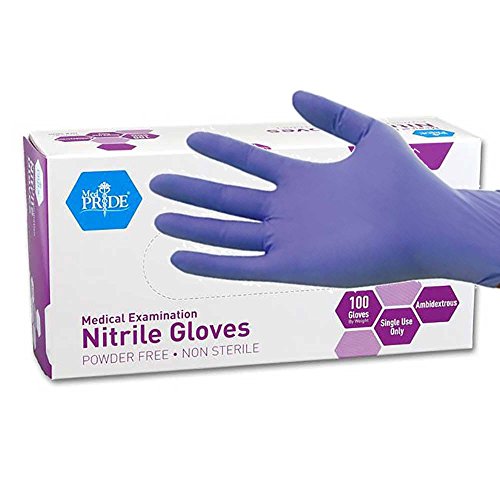
56. MedPride Powder-Free Nitrile Exam Gloves, Medium, Box/100
Sentiment score: 0
Number of reviews: 1
The ideal solution for individuals sensitive to natural rubber latex and donning powder.Comfortable fit with textured fingertips for excellent tactile sensitivity.Extraordinary strength, stretchable durability and puncture resistance with premium iris blue color.Commonly used by law enforcement prof...
 Show Reddit reviews
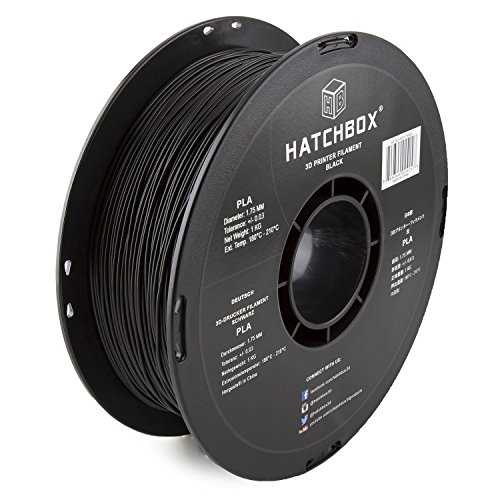
57. HATCHBOX PLA 3D Printer Filament, Dimensional Accuracy +/- 0.03 mm, 1 kg Spool, 1.75 mm, Black, Pack of 1
Sentiment score: -1
Number of reviews: 1
1 KG (approximately 2.20 lbs) Spool1.75mm Filament Diameter (Dimensional Accuracy +/- 0.03mm)PLA (Polylactic Acid) 3D Printer Filament Vacuumed Sealed With DesiccantRecommended Extrusion/Nozzle Temperature 180°C - 220°CSpool Diameter: 7.88" - Spool Width: 2.69" - Spool Hub Hole Diameter: 2.20"
 Show Reddit reviews
58. Games Workshop Citadel Shade Paint Set
Sentiment score: 2
Number of reviews: 1
Become a painting daemon with the Citadel Shades.Citadel Shade Paint Set contains 8 pots of Citadel PaintThe set also includes 1 Wash Brush.1 Nuln Oil, 1 Carroburg Crimson, 1 Drakenhof Nightshade, 1 Biel- tan Green, 1 Casandora Yellow, 1 Agrax Earthshade, 1 Reikland Fleshshade,1 Seraphim Sepia.Offic...
 Show Reddit reviews
59. 3D Solutech Real Black 3D Printer PLA Filament 1.75MM Filament, Dimensional Accuracy +/- 0.03 mm, 2.2 LBS (1.0KG) - PLA175RBLK
Sentiment score: 0
Number of reviews: 1
Dimensional accuracy: Diameter variance of no more than 30 microns for consistent feeding and better 3D prints.High compatibility: 3D Solutech PLA Filamet is compatible with nearly all 3D printers, including RepRap derivatives and those from MakerBot (such as the Replicator and Replicator 2), Ultima...
 Show Reddit reviews
A friend bought me this set for my birthday: https://www.amazon.com/Citadel-Shade-Paint-Games-Workshop/dp/B00KOD3FM8/ref=sr_1_1?ie=UTF8&qid=1537582745&sr=8-1&keywords=citadel+wash
I haven't found uses for all of the different colors yet, but I have used far more of them than I expected when I opened it. For example, I painted a zombie last night - I used my Vallejo buff to lay out a basic skin tone, then used the citadel flesh wash over it (which made it into a bronzed god!), then went over that with the green wash from that set. That turned the whole thing putrid, so I went back over the tops of the shoulders/head with the buff again to bring them back up to that original flesh tone, which worked out really well!
I'm starting to appreciate that investing in good paints is well worth it. I got some little eye-droppers so that I can pull out a tiny amount of paint onto my easel before painting (so that I don't waste a bunch of it), which has been pretty effective. I really like the bottles that the Vallejo paints come in, but I really like the colors of the Citadel washes.
Edit: https://docs.google.com/spreadsheets/d/1crvzMnt_8NJXAsABinoIhcOjE8l3h7s0L82Zlh1vkL8/htmlview?utm_source=share&utm_medium=ios_app#gid=0
Also to remove supports buy one of these and use the flat side towards the mini itself:
Micro Cutter https://www.amazon.com/dp/B00FZPDG1K?ref=ppx_pop_mob_ap_share
Asking about the "best" filament for minis is kinda like asking people about the religion they prefer - people get all excited :) My own preference is AIO Robotics which has been always consistent in quality and thickness (doing four measurements on their PLA will always average out very, very close to 1.75 mm) Remember that there is cheap filament and good filament but I've yet to find filament that is cheap AND good.
I haven't used acetone like some other posters. My one "must have" finishing tool is really good sprue cutter like this one I got from Amazon:https://www.amazon.com/gp/product/B001TMZ7QA/ref=ppx_yo_dt_b_asin_title_o03_s00?ie=UTF8&psc=1 It will allow you to snip off junk very close to the model without breaking off delicate parts like swords and spears. I then finish up with sanding and filing with jewelers' files.
​
Good luck!
I think the most obvious improvement would be to decrease the layer height because the layer lines are very visible, at what layer height did you print?
For Cleanup i use a file set like this https://www.amazon.de/B20206-Feilenset-Mini-6-teilig/dp/B00AF0KT9M/ref=sr_1_3?ie=UTF8&qid=1536922382&sr=8-3&keywords=feile
But i must say it's a solid start already, good luck with further printing and running SKT! (Im starting it too atm, it's a really cool campaign if you ask me)
things i use, that you may already have/may not need depending on your application:
I hate to just say "upgraded grub screws" - but i cant recommend enough getting some hex-headed bolts from lowes/home depot. sadly ive forgotten the exact size, (i believe them to be m6x16mm but really want someone to confirm that. you'll need 2 of them, so i picked up 4 just in case). the included grub screws in the build plate locking mechanism are just so soft, and the allen keys just go through them like mush after 5-10 good torques.
painter's tool or similar - some kind of metal/hard plastic that will be able to get the prints off the build plate. the included spatula wont last long and I generally use it to mix resins that have separated in the vat. using it to also get prints off the build plate damages the plastic and increases risk of puncturing the FEP
lots of paper towels- wiping up drips, cleaning off the bottle drips, cleaning rim of the tank, cleaning off the spatula, placing print to dry after alcohol bath.
paint brushes- both medium and small. even with ultrasonic cleaner, ive seen some people say it doesnt get every nook and cranny and need to wipe down with a soft tip brush to get all excess resin off (i dont use an ultra sonic, but rather a "clean" and "dirty" ipa tubs to try and make sure as much of it comes off before curing)
x-acto knife - sometimes the micro-shears are just too wonky/large to clip a support without damaging the print.
sandpaper- 300 or so grit, not ultra needed, but depends on what you're doing. if printing minis i cant recommend some enough in order to get a smooth bottom on the base after all the supports come off
extra paint strainers - believe it comes with some, but go pick up a 50 pack at lowes, and wont need to worry about using the last of the 5 i think they give you for free
extra, opaque tupperware/jars/containers with wide top. i use old sour cream containers. just to pour off and strain resin into (far easier than trying to get it back into the bottle). can even use some as a final "last wash" ipa bath after ultrasonic cleaner.
random extra to consider: 1 mil kapton tape to seal the LCD and prevent spills from dripping down into the unit. ( https://www.amazon.com/Mil-Kapton-Tape-Polyimide-Yds/dp/B006ZFQNT6/ref=sr_1_3?keywords=kapton+tape+1+mil&qid=1574726246&sr=8-3 ) some might call it superfluous, but id rather not have my fep puncture then come to find resin all over the motherboard
- just a side note if doing the ultrasonic, put water in the actual tub, and put ipa in a ziplock bag, and put your print in the ziplock bag and seal it, then put the ziplock bag in the water. Wont have any clean out the ultrasonic tub, reduce IPA required to operate. reduce smell. reduce IPA vapors.
I have found that a lot of items from flexifile are phenomenal when it comes to mini cleanup and repair. The touch-n-flow system is a fantastic glue for any pla models and i pretty much use it exclusively. It wont glue anything except the plastic because it isn't technically a glue. It melts and bonds the plastic on a chemical level. Any ankle breaks or arms or staffs or swords become easy fixes with a pair of reverse tweezers and that glue.
I've had good results with the standard .4 nozzle. As long as it prints clean, I've had more success putting effort into post-processing. This stuff does wonders for painting. I've printed minis on .5 and .6 nozzles with similar results in quality.
I'm gonna drop my resin links here and some short descriptions
First off, get some various sizes buckets or containers for cleaning. I find that these sanitation pails are great. You can also just get cheap Tupperware. I use these for cleaning vats, tools, and I always set the bottle in them when refilling.
https://www.amazon.com/dp/B07NC1WCJ5/ref=cm_sw_r_cp_apa_i_kxtqDbNDXDS96
You should also get a good respirator. Any hardware store should have one.
For curing I made an acrylic box and put this lamp on it.
You could use cheaper LED strips etc. https://www.amazon.com/dp/B01LT53312/ref=cm_sw_r_cp_apa_i_dBtqDb0VTGF28
Box. I use something similar with a mirror on the bottom. You could add foil or mirror film for the same effect.
https://www.amazon.com/dp/B0014QTXPW/ref=cm_sw_r_cp_apa_i_fEtqDbZ997GN6
Funnels, any hardware store has them. I bought a large oil funnel that I put the paint filter in and the tray also fits in. And just hang it above the bottle.
A ton of IPA! Hardware stores have this in 1 gallon tins.
Pro-tip this thing... But it's completely not necessary. https://www.amazon.com/dp/B075FTFD3R/ref=cm_sw_r_cp_apa_i_xLtqDbMGD060V
After I paint any mini, I varnish it with gloss varnish, and then, most importantly spray the entire thing with Testor's Dulcote. It makes everything beautifully matte.
https://www.amazon.com/Testors-Spray-Lacquer-Clear-Coat/dp/B009FF6DN4
It's only a dollar less than ordering it filled with d6s. It's a running joke in my friend group.
This stuff is basically XTC 3D in a can:
https://www.amazon.com/Krylon-I00500A00-12-Ounce-Triple-Aerosol/dp/B001144TJC
Usually what I do to dry my filament is put it in a food dehydrator set to 47C overnight. After that I store my filaments in a plastic bin that has lining on the brim of the lid. I throw a bunch of desiccants in there with the filaments and then I have a hydrometer in there to monitor the humidity. The humidity is so high where I live that leaving pla out for as little as a couple days will cause moisture issues.
I don't recommend using an oven because ovens usually swing pretty far on the temperature setting, and I've also never seen an oven that can be set as low as needed for pla. Here's a link to the food dehydrator I picked up. On mine the temperature setting is a little off but whatever temperature you set it to is rock solid. (i.e. I set the temp on the dial to 52C, it then reaches 47C and stays there all night long)
There are low profile coin battery holders around that will fit into some bases. I haven't done any work with it myself, but looked into it a bit for lighting X-Wing models. Copy of my very brief notes below w/ sample part numbers. There are also several hobby companies around that make appropriate pre-wired kits.
-------
2mm of clearance under the base
Common CR2032 coin cell battery is nominally 3.2mm tall, so that doesn't
work.
http://data.energizer.com/PDFs/cr2032.pdf
CR2016 also puts out 3.0 volts, but is only 1.47mm tall. Has less
than half the capacity though, 90 mAh versus 240 mAh.
http://data.energizer.com/PDFs/cr2016.pdf
20 pack on Amazon is $6.75
https://www.amazon.com/Sony-Lithium-Manganese-Batteries-Packaging/dp/B00C7BXISQ/ref=sr_1_3_a_it?ie=UTF8&qid=1475503982&sr=8-3&keywords=cr2016
Battery contact on base
Clip retainer
Both wired to LED
-------
this stuff
Haven't had any problems with it so far.
I use a bunch of this boxes, you get 4 for $20 so $5 each, and you can store quite a bit in them
Picture for reference
I ordered a set of these just for the occasion.
https://www.amazon.ca/gp/product/B001AE7RRO/ref=as_li_qf_asin_il_tl?ie=UTF8&tag=3dprintedtabl-20&creative=9325&linkCode=as2&creativeASIN=B001AE7RRO&linkId=0818deea100a21fd61e9bc084bf72017
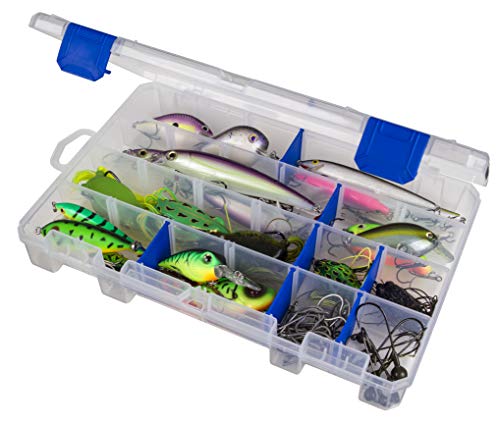
I keep the medium and small minis in tackle boxes https://www.amazon.com/gp/product/B000LF3E8O/ref=oh_aui_detailpage_o07_s00?ie=UTF8&psc=1
I messed up the paint job on my resin mini with a gob of sealer. I used Purple Power cleaner; soaked it for 24 hours and it didn’t dissolve the mini. Here’s a link: https://www.amazon.com/4320P-Industrial-Strength-Cleaner-Degreaser/dp/B002HU5N4O
I got mine through Amazon (currently $256 US).
There are some additional costs to be aware of though.
It can add up if you're not careful. So plan for an additional $200.
No I don't think so, but poor extrusion consistency could be why my print quality goes down when I go under 0.60 layer height or slow speeds down below 20mm/s. Both of these changes would theorectically decrease extrusion pressure and cause problems with poor extrusion.
Here is the PLA I use: https://www.amazon.com/gp/product/B00J0ECR5I/ref=oh_aui_detailpage_o03_s02?ie=UTF8&psc=1
One possible solution to poor extrusion is an upgrade to the extrusion gear. This is one of the upgrades I'm hoping to try in the future: https://www.amazon.com/Signswise-Extruder-Driver-Makerbot-Printer/dp/B00ZZRI0DC/ref=as_at?imprToken=aQzkLClLVwaOhO32jAnr3g&slotNum=0&SubscriptionId=AKIAJSOXNA2EGTA44JQA&tag=letsprint3d-20&linkCode=xm2&camp=2025&creative=165953&creativeASIN=B00ZZRI0DC
Another option for making extrusion more consistent and smooth is to increase temperature.