 Reddit reviews Micro Cutter
We found 150 Reddit comments about Micro Cutter. Here are the top ones, ranked by their Reddit score.
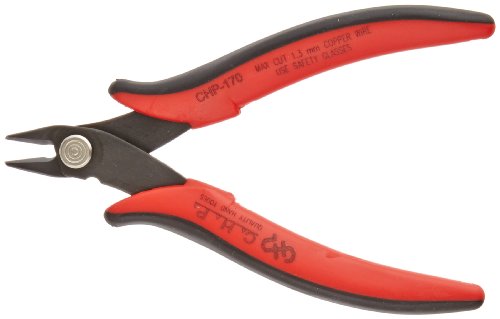
Flush-cut micro soft-wire cutter has 8mm long jaw with angled head for flush-cutting applications on up to 16 gauge (1.3mm) copper and soft wire21-degree2.5mm heat-treated carbon steel construction provides durability and long lifePrecision-ground holes and surfaces provide smooth movement, and spring returns tool to open position to reduce operator fatigueDolphin-style nonslip hand grips with curved fore-edge provide comfort and control, and Parkerized surfaces prevent glare and increase corrosion resistance
That looks like Belden 1855A cable. That connector is a Neutrik rearTWIST UHD BNC connector, which means it's part number NBNC75BDD6X with the BST-BNC-6 blue boot (it comes with black boots.) The crimp die for this connector is the Neutrik DIE-R-BNCX-PDG which fits the Neutrik HX-R-BNC, the Knipex 97 43 200, or the Rennsteig PEW12 (all the same crimper.)
The Paladin/Greenlee CrimpAll PA8000 with the PA2699 crimp die will also work.
You will also need a coax stripper, I like the Greenlee CST Pro. For this cable, you will need the orange blade cartridge.
A small side cutter is also nice to trim the center conductor and any stray braid wires. My favorite is the Hakko Micro Cutter.
These are the things I bought. You could get by without some of the wire cutting tools. The crimper is kinda necessary, and I'd definitely buy the molex hand tool for pushing the wire into the SATA connector. Much easier than using a screwdriver.
16 AWG Guage Wire
Wire Stripper (you can get by without this)
Flush Cutter (probably not necessary but nice to have)
Crimping Tool
SATA Power Connector
SATA Passthrough Cap
SATA Terminal/End-of-Line Cap
Molex Hand Tool <-- buy the real thing, mimics on Amazon aren't as good
ATX Header Pins (these are 18 AWG which are a little small for 16 AWG gauge wire)
ATX Header Housing
Yeah, some things just aren't worth it haha
&#x200B;
I would highly recommend these ones: https://www.amazon.com/Hakko-CHP-170-Micro-Cutter/dp/B00FZPDG1K
&#x200B;
If you cut anything really strong or oddly shaped you can dull them pretty easily, but otherwise they cut really clean and easily and they're super sharp. I have pick up a bunch of these, mine are almost too dull to use now :(
A few tips to help you out OP:
edit:
A few other useful items you should get either now or later, most of this you should have around the house already:
And this will solve any zip tie problem in an instant
I was thinking the same thing. Do people not know that these exist? Moreover, how much easier they make your life? There's no substitute when the need arises.
That problem is so easy to solve too.
https://www.amazon.com/dp/B00FZPDG1K
Less than five bucks, flush-cut side cutters which will trim cable ties with no sharp edges whatsover.
Sometimes, cable ties are a fine tool for the job, just have to be used appropriately.
Hey! Great questions! And good on you for asking them!
Part I
------
------
So first off, building your own coils is ABSOLUTELY the way to go, it is much cheaper, more customizable, a better vape, and just plain fun. You are going to need a few things though.
Now that you have everything you can go to town! Remember, all of this is just my personal opinion and experience, do what works for you.
------
Planning: The Kanger works best at around 1.19 ohms at 50 watts but can go as low 0.4 ohms. To get an idea of how factors like different wire gauges or multiple coils will affect your resistance try simulating it on this page.
------
Wire Work: There are plenty of videos and tutorials out there for different coils but my advice would be to start simple. Once you can build a coil that has good tight wraps and learn how to remove the hot spots from it and are generally just comfortable coiling then move on to more fancy builds. The advantage of (almost all) advanced coils is more surface area for better wicking and juice retention, there are also the offbeat ones like staged (dual) heating. I am a big fan of simple twisted wire coils, they are incredibly easy and work much better than simple single wire coils.
--------
Prepping The Wire: When you pull the wire off the spool be careful, if you don't hold tension the whole thing is prone to come unwrapped rather quickly. Work in longer lengths than you will actually need, screw ups are frequent and wire is cheap. Cut off a length of wire and you'll notice that it isn't exactly straight, or really at all, but this has an easy fix.
To straighten your wire: At one of the wire make a small 90 degree bend, insert this end into your drill with the wire centered and the bend sticking out the side, the bend allows the pincers to grab onto the wire. Grab the other end with a pair of pliers and apply light pressure (too much will cause the wire to snap). Start up your drill noting the direction it is spinning. It doesn't take more than a second or two, if the wire snaps it has spun more than enough (it tends to snap at either end but can be in the middle in which case you have to start over).
Annealing the wire: Thin wire like we use tends to be 'springy' making your coils unwind when you release tension, the thinner the wire the worse it gets. But again I have an easy fix. Holding the wire straight with tension, either with a vice grip or the drill or pliers or whatever you have, use a BIC lighter or a small flame to apply heat along the length of the wire. You want it to just start to heat up, not glow orange, if you see smoke coming off the wire move to another area because that one is done. Some people recommend dunking the wire in water when done but I just let it air cool.
[Optional] Making twisted wire: Take however many strands you wish to twist up and line up all of the ends with the 90 degree bend, cut the other end so that they are all equal lengths. Before inserting into your drill I find it helps to make a few 'starter twists' to keep the wires even and from coming undone. Remember how I said to make note of the direction your drill is spinning? Well it is time to spin in the opposite direction. Clamp your wire down in your pliers (not the drill) with the bent end sticking out a few millimeters. Grabbing the wires by the bends twist them by hand a couple times in the same direction as your drill is now spinning (opposite of the direction you used to straighten the wire). Now you can insert them into your drill. Start the drill slowly and don't go past a medium-high speed overall or the wire is more likely to snap, if it does it will 'unstraighten' on the end near the drill and become a mess to work with. If you are using a long length of wire (I would say over 8" but YMMV) it is best to release the wire halfway through and insert the opposite end into the drill (you do not need to reverse the direction of spin on the drill, it will work as is) because the end nearest the drill will twist the fastest this will provide a more even twist across the entire wire. It is totally up to you how much you want to twist the wire, if it snaps though it means you either went too fast on the drill or it has reached its limit of twisting (you can usually reinsert it and get a few more seconds of twisting out of it though).
-------
Building a coil with the linked jig: I'm only going to cover using the jig I recommended up above because if I didn't I would be here for all eternity, ask 10 people how to make a coil and you will get 12 answers. That jig is super easy to use, cheap, and makes coils better than you ever will be able to by hand.
Start by selecting the inner diameter of your coil, the jig provides nails ranging from 1mm to 3mm. Unscrew the cap from the base unit, insert your chosen nail, and screw the cap back on over it. Insert your wire from the top through the small hole on the base and grip down on the end of the wire with your thumb, you only need to pull the wire down to where the cap screws on to get plenty long leads. Taking the other end of the wire (the long portion sticking out the top) give it a small start around the nail, a quarter or half turn is all it needs. Put the piece with the corresponding size hole (the piece you the nail is originally stored in / marked with the sizes) over the top of the nail, push it down making sure the wire is between the screw and the nail. Twist the corresponding piece to wrap the wire around the nail, this requires almost no pressure if you do apply pressure you will end up with a pancake and not a coil.
Once you have however many wraps you want push down on the base piece and the corresponding piece to put pressure/sandwich the coil. Hold this for at least 30 seconds to a minute, it will help tighten the coils and keep them from unwinding. Some people pull on the wire leads with pliers to tighten them up but I do not like doing this personally because it changes the number of wraps as well as causes the leads to be made from part of the coil (as in not straight leads).
-------
Mounting your coil: Insert your coil leads onto your post and tighten them down. Be careful about over tightening or having your leads at strange angles as this can cause the coil to bend such that on one side the wraps do not touch and on the other overlap, it can also cause other weird deformities that ruin all the work up to this point. Roughly position your coils, using the nail from the coiling rig will help to keep the coil from getting bent. Make sure the coils are not touching anything as this will cause them to short. Clip your leads.
With your mod on a low to medium power setting begin to slowly pulse the device until the coils begin to glow. You want them to glow from the inside out, evenly, and at the same time. This will pretty much never happen right away. You are looking for spots that heat up unevenly. Using your ceramic tweezers squeeze and manipulate the coils, this is hard to describe but you'll understand it right away I'm sure. You can also use the coil jig nail to turn the coil and tighten the wraps (i.e. if the coil was originally inserted parallel to the deck insert the nail and twist it upwards to a 45 degree angle or even vertical, the amount varies from coil to coil but you can tell very easily by looking at it as you twist).
-------------
Permalink to Part II: https://www.reddit.com/r/RBA/comments/3xo2lv/rba_coil_question_newbie/cy6qbta
edit: Oh, and for those curious, I am currently running 3mm quad coils made from 2 strands of 32awg kanthal at 14 wraps each on the Sub Ohm Innovations RDA and the Kanger KBOX. They read in at 1.4 ohms and I fire them at 35-40 watts.
>brushes
If you use GW brushes, get the Standard, Fine Detail, and Wash brushes. These give you a good starting point for most of the stuff you'll be doing. Otherwise you'll want to find similar brushes in other ranges (Windsor & Newton make good brushes). If you go with third-party brushes I think the sizes you'll want are 1, 0, & 3/0.
>mats,
You can get any sort of sewing mat, where it's basically just a piece of rubber you lay on the table. Joann's Fabrics or any sort of sewing store should have this. Here's one I found on Amazon.
>thinners
The paint you're working with is water based, so water will work as a thinner. If you decide to airbrush things that will change what you need but for now, build a wet palette.
>cutters
Try these
>etc
You'll need some glue at the very least. You might also want some helping hands to hold things while you paint them/glue them together.
>is there a site that tells you what colours you need to paint certain colour styles?
I'm not aware of any one site as a catch-all for painting any scheme, but googling things led me to this site that goes into detail about painting Space Wolves. You could also consider this video from Games Workshop where they go through the steps of painting the model.
As for the paints themselves, I'd recommend working with the Vallejo Game Color paint range. They come pre-thinned (extremely helpful for new painters) and convert to Games Workshop colors pretty easily.
Some more hobby stuff to help you get started:
Zenithal Priming
Airbrushing
Object Source Lighting
Most people will suggest skipping GW for paint and hobby tools to save money. I suggest hitting amazon for a pair of flush cutters, set of needle files, and pack of testors model cement. Krylon camo black spray paint is a fine substitute for expensive primers. Vallejo paints are a top reccomended brand, and there is a conversion chart to convert old and new gw colors to vallejo colors.
A set of just standard tac marines is a great place to start, you'll use them for sure and theres plenty there to work on technique, hit up the warhammer youtube channel, as they have painting tutorials that are really great, watch as many as possible as each has something you can use even if they aren't painting space marine models.
http://www.amazon.com/gp/aw/d/B00FZPDG1K/ref=mp_s_a_1_1?qid=1459352340&amp;sr=8-1&amp;pi=SX200_QL40&amp;keywords=flush+cutter&amp;dpPl=1&amp;dpID=414t7uLh8KL&amp;ref=plSrch
https://www.amazon.com/gp/aw/d/B0013E68SU/ref=yo_ii_img?ie=UTF8&amp;psc=1
(Starting out you should be fine with just a zero, but if you really have moneh burnig a hole in your pocket a 1 and 00 would also come in handy eventually. Never leave your brush sitting in your water cup, don't let paint dry in your brush, and keep paint out of the metal part.)
http://www.amazon.com/gp/aw/d/B0013D53CS/ref=mp_s_a_1_2?qid=1459352997&amp;sr=8-2&amp;pi=SY200_QL40&amp;keywords=testors+model+glue&amp;dpPl=1&amp;dpID=51QQU8wrc-L&amp;ref=plSrch
https://www.amazon.com/gp/aw/d/B000NPUKYS/ref=mp_s_a_1_2?qid=1459352697&amp;sr=8-2&amp;pi=SX200_QL40&amp;keywords=needle+file+set+for+metal&amp;dpPl=1&amp;dpID=412lincr%2B5L&amp;ref=plSrch
Add an xacto and tube of superglue from your local superstore and you have all the tools needed to crank out perfectly acceptable models. I'll admit the brush is a bit overkill, but you're saving so much money on the rest of the tools, and a good brush makes the experience much more enjoyable, I suggest splurging there. Also don't bee fooled into buying a basing kit, regular old sand does just fine,
I'll just give you a list of the items I've been using (and like):
https://www.amazon.com/Hakko-T18-D08-D12-D24-D32/dp/B00C1N30DI Hakko FX-888D. The extra tips may be unnecessary, I only ever use the one chisel tip
https://www.amazon.com/gp/product/B00068IJPO Leaded solder
https://www.amazon.com/gp/product/B004SPGFT8 Brushes
https://www.amazon.com/gp/product/B00FZPDG1K Side cutters
https://www.amazon.com/gp/product/B00425FUW2 Flux
https://www.amazon.com/gp/product/B008O9VLA2 Solder Wick
https://www.amazon.com/gp/product/B0013HT2QW KimWipes
https://www.amazon.com/gp/product/B001B5JT8C Isopropyl Alcohol
https://www.amazon.com/gp/product/B005CU56KM Acetone spray (use carefully/sparingly)
https://www.amazon.com/gp/product/B004G5T9M0 Jewelers loupe
https://www.amazon.com/gp/product/B019SLLOMY Tweezers
https://www.amazon.com/gp/product/B00P8Z4RPG Hot air station (works well despite Chinesium)
Also, I noticed in Dave's videos he rarely adds flux, just the flux that's built into the multicore solder. I don't know if I'm alone on this one but with flux I always felt the bigger the glob the better the job. Just have to clean it afterwards with the solvent, tissues & brushes.
Edit: Okay that's a much bigger list than I thought, this stuff can get expensive!
Nice - you'll be glad to have that variety of tips, depending on what you are working on! If you have any spare Christmas money, I'd recommend picking up one of these self-adjusting wire strippers - it sort of matches your color scheme too! And if you do a lot of de-soldering (anything with lots of headers or through-hole IC sockets), a desoldering iron can save a ton of time compared to your solder wick and desoldering pump.
A few other things that I've found useful (mostly repairing electronic keyboards / synthesizers, although I'm hoping to get more into Arduino / Pi soon):
Hakko wire cutter
Helping hand
Hemostat / Forceps
Digital multimeter with audible continuity tester
For the sprues you need some actual sprue cutters
https://www.amazon.com/dp/B00FZPDG1K/ref=cm_sw_r_cp_apa_n2UWBbBM7Y938
Nothing much more expensive than those as you really shouldn't run into a need for hard jobs from them
Should also consider some mini files
https://www.amazon.com/dp/B078MHF415/ref=cm_sw_r_cp_apa_b4UWBb9P1BYBP
Something that really let you get at small angles, ideally you do these things before glueing but can be done after.
Doing everything with the exacto is definitely dangerous, and theres not often a need to put your hands in that much danger.
I've been cut by many zipties.
CHP-170 Micro Cutter https://www.amazon.com/dp/B00FZPDG1K/ref=cm_sw_r_cp_apa_T20TBb4J30J3A
To leave them flush. Everyone who comes after will thankyou
I own 3 of these. They are good robust basic multimeters. For learning this is plenty. The thermocouple function is one of those things that you didn't know you needed until you had it. As you progress you will probably find that you wish you had more multimeters before you wish you had better multimeters.
With the money you save, I highly recommend some test clips, some wire cutters / strippers, and perhaps some side cutters (links to the ones I recommend).
T-molding. You need to cut "V" notches to go around an outside corner like in that photo. To go around an inside corner, you need slits. No need for a special notching tool (they are very expensive), you can do everything with a cheap pair of wire clippers like this:
https://smile.amazon.com/dp/B00FZPDG1K/
Use a rubber mallet to tap it into the slot.
If cost isn't an issue, then one of the all-in-one kits should get you just about everything you need: Resistance meter, micro screwdrivers, pliers, coil wrapping tool/mandrels, scissors and some tweezers(Preferably ceramic tipped)
If you're tight on cash, there's a few routes to go. If there's a Harbor Freight nearby, you can get most of what you need there.
Resistance Meter: Also referred to as an Ohm reader (shudders). If you're ever going to get into mechs, this is a necessity. Hell, when first building, it's a nice thing to have to check your build for shorts before you slap it on your mod. You can spend as low as $5 usd, or $35-$45 dollars for a Tab unit that can actually fire the coil to work out hot spots.
Finally, cotton and wire. This has been bandied about ad nauseum about which type of wire and gauge is best, and the debate on wicking materials still comes up from time to time. So, I'll give you my two cents and leave it at that.
Wire: 26 gauge kanthal. Why? It's easy to work with, provides good flavor and doesn't need to be run at insane wattage levels for great results. If high wattage vaping is your thing, get some 24 gauge. Better still, get both! I like 26 and 28 gauge(Twisted wire YAY!), you'll find your preference as you go. I didn't care for 24 gauge as it made the vape a bit too warm for my liking.
Cotton for wicking? I swear by Labo Puffs. No "Fresh cotton" taste, easy to work with and lasts for EVAR. I'm still using the 120 pad bag I bought over a year ago, and it'll still be another six months before I need more. Here's the Amazon link for the Prime eligible pads. There are cheaper sellers, but they are in Japan and it can take a week to get to you.
What's left? Wire cutters, of course! Nail clippers work alright, but something like this works even better!
There's my suggestions and whatnot. Take or leave what you will, and welcome to the world of building!
Agreed. I had to fight that instinct to save the twist-ties in case they're needed later, but between that and snips, the only thing left to complain about is the waste-- plastic bags, cardboard labels, and all the snipped-open twist-ties.
I use these wire snips, which cost $5 at Amazon. The point is sharp enough that you can get under a right tie and confidently snip the tie without worrying that some cable will blunder into the way. And if you're making your own cable, it's great for snipping off a bad plug, getting the length of the twisted pairs even, etc., and less unwieldy than the bits of the crimping tool that do those same things.
This is everything I Use.
Hakko CHP-170 Micro Soft Wire Cutter, 1.5mm Stand-off, Flush Cut, 2.5mm Hardened Carbon Steel Construction, 21-Degree Angled Jaw, 8mm Jaw Length, 16 Gauge Maximum Cutting Capacity
Protip : The next time you send the grunts to cable up a new install, include a pair of inexpensive micro cutters. This makes removing all of the stupid twist ties go much more quickly and is far better on your fingers.
Bonus, these are also excellent for safely removing troublesome nylon zipties to be replaced with superiour velcro.
I am mostly recommending tools rather than consumables (like a truck load of filaments :P)
A digital caliper, use it every single day, must have. A $20 Chinese made should be more than sufficient for the tolerance we are printing at.
A pair of good quality side cutter. Prusa printers don’t come with them.
Hakko Micro Cutter
A Noga deburring tool. Very useful for finishing a print and trim sharp edges (brims for example). Cuts plastic like butter.
Noga Deburring Tool
A set of taps. Can’t get very strong thread in plastic, but often good enough. I would prefer a metric set.
A vise. Depends on how much space you have. I use a drill press vise and I find it ok so far.
I'm in the process of building my first FPV drone with my 11 year old son. Tools I owned or have purchased for this are:
A set of small screw drivers. I found a set in the bargain bin at NAPA Auto that had straight, philips, a few hex, a few sockets.
A decent electronics soldering station. Not the gun. I have a digital Weller that is easy to control, but the analog is just as good for these purposes.
A third hand. There are many different kinds. I got a cheap $5 one at Harbor Freight. Not great, but does the job.
Solder, de-soldering wick, flux (maybe)
Depending on where you're doing your work, might want an air-filter or fan.
A magnifying lamp is helpful but not necessary.
An assortment of board stand-offs/spacers is handy.
A good small pair of wire snips.
Wire stripper
A digital multimeter is not a bad idea.
Those are all the major tools you might need. Plus all the drone parts. batteries/charger. Radio/receiver. Camera/receiver(goggles or screen).
In short, it's a lot of stuff. The drone parts end up being the least expensive part, honestly.
Above links are just examples, not necessarily endorsements.
You mentioned you're on a budget, which I totally understand. Building is not the cheapest route, but it's been a lot of fun so far. People who've done it for a while tend to forget the cost of tools. Once you've built one, subsequent drones are relatively cheap. You can re-use batteries, the charger, most decent radios, even the receiver.
If you're not in a hurry, Bangood is a good source for cheap(er) parts. You're on your own for support, usually, but there's lots of help out there.
Ohm's Law
Current = Voltage / Resistance. Probably the single most important thing you need to understand to keep yourself safe. Steam-engine.org is a very handy site for rebuilding, and it has a simple Ohm's Law calculator. This will allow you to determine the current (amps) and power (watts) at a given resistance and voltage. When determining the current for a build on a mechanical, you always want to use 4.2v for your voltage setting since that will be the voltage of the fully charged cell. Setting your voltage as such and lowering the resistance on the Ohm's Law calcultor, you will see the current increase. You want to keep the current below the max continuous discharge rate for the battery, and just to be safe, I like to keep my amps at least 10%-20% below that max continuous rating. So you can see that with a fully charged battery at 4.2v, and a build with a resistance of 0.21Ω, you would be right at 20A.
http://en.wikipedia.org/wiki/Ohm%27s_law
http://www.steam-engine.org/ohm.asp
Batteries
If you are mainly looking to sub-ohm, don't bother with 18350 or 18490/500 batteries, and stick with 18650s. The most important part of the battery specs for safe sub-ohm vaping is going to be the max continuous discharge rating for the cell. A few months ago, I would have only suggested Sony VTC4s or VTC5s, due to their 30A continuous discharge rating, but due to price gouging and a rash of fakes due to limited availability I don't think those are going to be your best option. Next best thing at the moment is either the Samsung 25R or the LG HE2. Both are solid 2500mAh batteries with 20A continuous discharge.
http://www.illumn.com/batteries-chargers-and-powerpax-carriers/batteries/18650-samsung-inr18650-25r-2500mah-high-discharge-flat-top.html
http://www.illumn.com/batteries-chargers-and-powerpax-carriers/batteries/18650-lg-icr18650he2-2500mah-high-discharge-flat-top.html
Charger
The most important part of your gear to prevent your house from burning down, definitely don't skimp on the charger. I have an Efest LUC v4 which works wonderfully, and the Nitecore i-series chargers are also great, and you can't beat the price for the quality.
http://www.illumn.com/batteries-chargers-and-powerpax-carriers/chargers/efest-luc-v4-charger.html
http://www.illumn.com/batteries-chargers-and-powerpax-carriers/chargers/nitecore-intellicharge-i2.html
http://www.illumn.com/batteries-chargers-and-powerpax-carriers/chargers/nitecore-i4-intellicharger-2014-edition.html
Ohm Meter
Having an ohm meter is a must have when rebuilding. This is going to tell you what the resistance of your build is once you get it on your RBA. The last thing you want is to vent a battery in a mod you are using, and if you have a short in your build, venting is definitely a possibility. You can just get yourself a cheap multimeter from some place like harbor freight, but I prefer the ohm meters that have the 510 connection. Less hassle, and it gives you a nice solid base for building on your RBA.
http://101vape.com/meters/170-ohms-meter.html
Wick
There are a number of different wicking materials in use, but the most common is cotton. I started out using organic cotton balls from my local pharmacy, but now I only use japanese cotton pads. The japanese cotton has blown up, mainly because of its form factor (very easy to cut strips to size from a square pad) and excellent wicking ability.
http://www.sephora.com/pure-cotton-P300602
http://www.cvs.com/shop/baby-child/bath-skin-care/cotton-swabs/cvs-100-cotton-triple-size-organic-cotton-balls-skuid-405326
Wire
There are also some different types of wire available, but the most used (by far) would have to be Kanthal. I generally suggest picking up a couple different gauges to start. At the very least, I would say grab some 28ga and 26ga. If you are planning to try building below something like 0.4Ω, I would also grab some 24ga.
http://www.lightningvapes.com/products/kanthal-a1-resistance-wire
Wire Snips
Soemthing to cut your wire, whether it is a small pair of wire snips, or even a set of nail clippers will work for most common gauges of Kanthal.
http://www.amazon.com/Hakko-CHP-170-Stand-off-Construction-21-Degree/dp/B00FZPDG1K/ref=sr_1_1?ie=UTF8&amp;qid=1418241774&amp;sr=8-1&amp;keywords=wire+snips
Coil Jig/Mandrel
You are going to need something to wrap your coils on. A lot of people use drill bits since they have standardized sizes and that will help you determine (using something like http://www.steam-engine.org/coil.asp) how many wraps at a given inner diameter will give you the resistance you are looking for. You can also get small coil jigs that come with a set of rods of varying diameters. I prefer to use something like a jump ring mandrel. It has multiple diameters on the one tool to wrap on.
http://101vape.com/accessories-/362-rba-coil-jig.html
http://www.fasttech.com/products/0/10010836/1926001-vaping-coil-winding-jig-tool-for-rebuildable
Mechanical Mod
This and the section about RBAs is going to be very subjective. Plenty of mech mods out there function perfectly well, so when it comes to picking your mech, a lot of it will be aesthetics and form. In the end, all the mechanical mod is is a metal tube with a switch at one end and a 510 connector at the other. The two things that I tend to focus on when looking at a mech mod are how well the button functions (nothing more annoying to me than a crunchy button), and will I be able to easily adjust for battery rattle. There may be other feature that you are more concerned with, like does the unit have some sort of locking ring to prevent unintentional firing of the mod. Something to definitely consider if you are going to be carrying the mod in such a way that it could accidentally fire without your knowledge. I guess I will just link some of the mods that I prefer, like the SMPL, Pegasus, Colonial, and Vanilla. And I may as well throw a link in there for a Nemesis, since it is the go-to suggestion for first mech mod, and still a solid mod. Also, keep in mind that most if not all of these mods come in multiple color and/or metal options, including copper, brass, and stainless steel.
http://www.fasttech.com/products/0/10010820/1924800-smpl-style-18650-mechanical-mod
http://www.fasttech.com/products/0/10008266/1739802-pegasus-style-mechanical-mod
http://www.fasttech.com/products/0/10008332/1910000-penny-v2-style-18650-copper-mechanical-mod
http://www.fasttech.com/products/0/10008560/1776902-vanilla-style-mechanical-mod
http://www.fasttech.com/products/0/10009160/1448300-nemesis-style-mechanical-mod
RBA
So when it comes to rebuildable atomizers, you basically have two options. Either you will be using an RDA (rebuildable dripping atomizer) or an RTA (rebuildable tank atomizer). Your RDAs have you dripping juice directly onto your coils with relatively little juice in reserve, whereas your RTAs have a tank that is filled, and then juice is wicked from the tank to the coils. As a general rule, RTAs give you the ability to have to fill/drip less often, but tend to be more restrictive on build space and airflow. On the other hand, you will have to repeatedly drip juice onto your build as you vape with an RDA, but will have more options for different builds and be able to provide the necessary airflow for hotter builds. Again, these are just general rules, as specific models of RDAs and RTAs have different features. As far as breaking down the specifics on all the different models of RDA and RTA...yeah, there are just too many to even start. Recently, I have mainly been using a Mephisto v1 clone. I like having the ability to run either dual or single coil, I like the changeable airflow rings, I like the available airflow, the well isn't too small, and it has large post holes and screws. I am also going to throw in a link for the TOBH, since it is the obligatory "first dripper" suggetsion. Since this single item is probably going to do the most to affect your experience, I would suggest just taking some time and looking at what RTAs and RDAs are available, and then check out some reviews of them on YouTube.
http://www.fasttech.com/products/0/10009074/1802100-mephisto-style-rebuildable-dripping-atomizer
http://www.fasttech.com/products/0/10007863/1716603-tobh-atty-v2-style-rebuildable-dripping-atomzier
Might be worth getting a solder wick for when you inevitably screw up. Solder vacuum isn't a terrible idea either. I have both, I use them for different things. A third hand is also useful. I find myself using the glass more than the arms but it's all useful. If the iron you buy doesn't come with one a brass ball is great for keeping your tip clean without cooling it off like a sponge will. Micro-cutter is useful, not sure if angled or straight is better, up to you I guess. Last but not least a pair of angled tweezers. You can get those anywhere.
These are all the things I have within arm's reach when I'm doing a project. Have fun!
Micro cutter: CHP-170 Micro Cutter https://www.amazon.com/dp/B00FZPDG1K/ref=cm_sw_r_cp_apa_2189Bb5GM55MS
Xacto knife
99% isopropyl alcohol
Windex
Acetone
Scotchbrite pad
Hex wench set
Painters tape (I only use this for the purge line for PETG)
Metric ruler
Calipers
Edit: https://docs.google.com/spreadsheets/d/1crvzMnt_8NJXAsABinoIhcOjE8l3h7s0L82Zlh1vkL8/htmlview?utm_source=share&amp;utm_medium=ios_app#gid=0
Also to remove supports buy one of these and use the flat side towards the mini itself:
Micro Cutter https://www.amazon.com/dp/B00FZPDG1K?ref=ppx_pop_mob_ap_share
First of all, thanks for sharing the video. I think metal casting is really interesting, and it's great to see how different people approach it.
> It's ok to be brutal.
Alright -
I really hate the music you used.
I'm also not a big fan of videos where that show the entire process at 10x playback (or whatever speed) - to me that indicates that you're showing too much. When I see videos like this, I click through around the timeline to find the interesting parts. Show the critical parts at regular speed and cut out the extra bits. Tell me (or show me) why something is a critical step.
Increase your lighting for better video. Do you have some work lights? Get two of them as close as possible to what you're working on at different angles and try filming like that (the closer you have a light source to a subject, the more even it appears. Far away lights appear as "points"). Set the white balance on your camera to account for the color temperature of the lights. Or if you have any kind of desk lamp, try pointing it at whatever you're filming. You'll have to experiment with what looks best with what you've got.
During the wax carving section, a huge portion of the frame felt wasted. You could have gotten much tighter on the actual carving, which would have drawn me in more than looking at a 90% static shot. Again, slowing down here and showing why you make certain carving decisions would have been more interesting. For instance, why did you carve out the middle then re-fill it? I had no idea what was going on there.
I felt bad for the clippers you used to get the wax out of the can. They look like flush cut electronics clippers, which usually say something like "For Copper Only". This indicates that using them on harder metal (like a can) will damage the cutting surface. But they're your tools.
From a PPE perspective, I would strongly consider wearing leather boots while pouring molten metal. But I can be clumsy at inopportune times and I like my toes.
Lightningvapes is doing 50% all their wires so you should pick up a few.
http://www.lightningvapes.com/pages/amazon-blowout-sale-50-off-all-wire
I suggest 24ga and 26ga kanthal as well as some 26ga ss316L. In my experience, anything higher gauge (which is thinner wire) is not fun to work with and anything lower gauge is too low in resistance. You can get a 50' spool of each for less than $10.
You should also get a pair of wire snips and a few screwdrivers if you don't already have them. Good sizes to get are 2mm, 2.5mm, and 3mm.
Amazon is your friend.
http://www.amazon.com/gp/aw/d/B00JVXVKB0/ref=mp_s_a_1_2?qid=1422324544&amp;sr=8-2
100' 28g Kanthal $6 (I use 26g on my subtank, but 28 works too. This is just the first one that showed up)
http://www.amazon.com/gp/aw/d/B000TCD51A/ref=mp_s_a_1_1?qid=1422324636
More Japanese cotton than you will know what to do with $8
http://www.amazon.com/gp/aw/d/B00FZPDG1K/ref=mp_s_a_1_1?qid=1422324748
Angle cutters, not needed but it makes getting a clean cut very easy $5
http://www.amazon.com/gp/aw/d/B004800I6Y/ref=mp_s_a_1_18?qid=1422324973
Precision screw driver set, also not needed but handy for both the fact that they are in fact screw drivers and that you can use the slotted ones for wrap coils with a consistent and known inner diameter. $8 (you can get this for a lot less at Walmart, Lowes, harbor freight... Etc)
So a little over $25 shipped and you will not need kanthal or cotton for a very long time.
This is my go to list for what you need for soldering:
hakko soldering iron w/ diagonal cutters $91
hakko diagonal cutters $4.37
solder $7
solder sucker $6
solder flux $8 check digikey
solder wick $7 check digikey
wire strippers $10
helping hands $7 check harbor freight
check for lower price
One of the hakko clone stations paired with some genuine hakko tips is probably a good compromise on price/value. Maybe someone else that's from the UK could suggest something different that's also affordable there.
Buy a half dozen of these and spread them everywhere before you all hurt yourself.
https://www.amazon.com/gp/product/B00FZPDG1K/ref=oh_aui_search_detailpage?ie=UTF8&amp;psc=1
A good set of small screwdrivers, some sort of wire cutters, cotton, and a good pair of tweezers (preferably with ceramic tips)
I had to break this into another comment due to per comment character limits.
The following previously belonged to the above comment, but was moved here due to the above mentioned limts.
> Something you can do now: Build a filament drybox. Seriously, some filaments such as certain Nylons can go bad in just a few hours, depending on ambient humidity levels. All filaments are susceptible to moisture absorption, and ideally should be kept in something like a Spannerhands holder, even while printing, but at worst you should store them in a big plastic tub with silica gel beads to keep them dry.
> If I had to give one last tip, don't stock up on too much filament yet! Seriously! I thought I would be printing mostly in PLA but now that I've had a few weeks to work with it, I've learned I prefer PETG more, and now I have so much extra PLA! I'm sure I'll find something to do with it, but for my final tip I would add "And get a good variety!". Services like MakerBox (referral) let you try a bunch of different filaments on the cheap. It's not a ton of each filament (about 50g), but I love the variety of materials and colors.
Original second level comment begins:
Final Tips: Bonus Round!
There are tons of other accessories you can get ahead of time. None of these are necessary, but are small things you might end up using (or wanting to try :P), and should help get you started getting a wishlist together. Besides the ones mentioned in this comment (and the one that precedes it) already:
Edit: Upon rereading my comment I realized I have a problem.. I own every product I just listed..
^^Except ^^for ^^the ^^nozzles ^^kit ^^so ^^it's ^^not ^^that ^^big ^^of ^^a ^^problem, ^^right?... ^^Right?!
These beat the set of nail clippers I was using:
http://www.amazon.com/Hakko-CHP-170-Maximum-Cutting-Capacity/dp/B00FZPDG1K
3 years plus on these.
Hakko CHP-170 Micro Soft Wire Cutter, 1.5mm Stand-off, Flush Cut, 2.5mm Hardened Carbon Steel Construction, 21-Degree Angled Jaw, 8mm Jaw Length, 16 Gauge Maximum Cutting Capacity https://www.amazon.com/dp/B00FZPDG1K/ref=cm_sw_r_cp_api_VaWAzbS584Z83
https://www.amazon.com/dp/B00FZPDG1K/
These are my favorite, I’ve gone through like 10 of them and I highly recommend getting more then one pair. You’ll end up using them for everything
Greetings all!
My main suggestion to anyone wanting to get into vaping it is to skip the ego-starter kits, MVP2 (cheapish Vv or Vw boxes), non-rebuildable tanks (Protanks, Nautilus) and just drive right into the mechanical mod / box mod world. I say this because the vaping experience is so much better with rebuildables. I went with the all of the above, and I personally wished that someone would’ve told me to just dive right in, because all that stuff is sitting around not being used. The people that I’ve talked to are typically hesitant to do so because of the coil building, but there are so many YouTube tutorials, suggestions and information on /r/RBA and /r/electronic_cigarette that it’s much easier than it seems. Anyway, if I were to start all over again, these are the things which I’d buy.
Must Haves
These are the things which I consider essential to starting off the on the right foot. I’ve purchased a lot of things, and these are the things which I suggest to my friends. Most of the links are from Amazon, because it’s what I’ve primarily used.
Battery - Sony VTC5
http://www.eciggity.com/2-pc-sony-18650vtc5-2600mah-30a-battery/
These are pretty much the standard when it comes to “safe” batteries. They’re affordable, good amp limit and have been recommended many times. If you purchase from the link above, they also give you a plastic carrying case!
Charger - Nitecore i2 or Nitecore i4
http://www.amazon.com/Nitecore-IntelliCharger-i4-Battery-Charger/dp/B005UAI372/ref=sr_1_1?ie=UTF8&amp;qid=1404287334&amp;sr=8-1&amp;keywords=nitecore
Affordable, reliable and these won’t “overcharge” your batteries. The difference between the i2 and i4 is the amount of batteries they can charge at a single time. They also have a new fancier one out, called the Digicharger D2 and Digicharger D4. Those are nice because it has a LCD panel that displays a lot more information than the i2 and i4. I personally use an just an i2.
Mechanical Mod - Stingray
http://www.vaperoyalty.com/hcigar-stingray-mod-stainless-steel/
Now, 90% of what is suggested for an actual mechanical mod is going to be of personal taste. The Stingray is the “older brother” of the Nemesis. This is what I purchased when I first started out vaping. The unit is very easy to break apart, clean, has a locking ring, has a floating 510 connection and venting holes in case of a battery leak. Almost everyone I know has a Stingray.
Rebuildable Dripping Atomizer - Magma by Infinite
http://101vape.com/rebuildable-atomizers-tanks/309-magma-atomizer-clone-by-infinite.html
One of the best purchases I’ve made. The juice wells are very deep compared to everything else on the market (that doesn’t have a tank system). Threads are nice, easy to build on, post holes are large and the air-flow is easy to manipulate. You can run this on a single coil or a dual coil. Blows almost all the other RDAs I have out of the water. This is my main RDA.
Organic Cotton - Maxim Hygiene Products Organic Cotton Balls
http://www.amazon.com/Organic-Cotton-Balls-Triple-count/dp/B00E8T2X36/ref=sr_1_3?ie=UTF8&amp;qid=1404288337&amp;sr=8-3&amp;keywords=organic+cotton
I suggest using un-bleached, organic cotton. Some people take it one step further by washing them, I think thats taking it a bit far and I don’t do it. You can pick them up from any convenience store or supermarket (CVS, Walgreens, Target, Whole Foods), a 100 count will last you AGES.
Kanthal - AWG A1 26 Gauge
http://www.amazon.com/Kanthal-Gauge-100ft-0-40386-Resistance/dp/B00HALND7Y/ref=sr_1_1?ie=UTF8&amp;qid=1404288659&amp;sr=8-1&amp;keywords=kanthal+26
I like to use 26g kanthal wire for my dual coil builds. 26g is a bit thicker than what a lot of people suggest (28g), but for me, because it’s thicker, it’s easier to work with.
Screwdrivers - Stanley 6 Piece Screwdriver set
http://www.amazon.com/gp/product/B00009OYGV/ref=oh_details_o05_s01_i02?ie=UTF8&amp;psc=1
The screwdrivers which come with your RDAs are short, small and crappy. I like these screw drivers because they come in a variety of sizes and you do not need to mess with a drill-bit. What I really like about these, is at the end of the drill bit is a small little ledge (can’t think of a better word), where you can push your coil and scrunch it up a bit.
Ohm meter / Multimeter - Any generic ohm reader or Innova 3300
http://101vape.com/meters/170-ohms-meter.html
http://www.amazon.com/gp/product/B001O1X65A/ref=oh_details_o02_s01_i01?ie=UTF8&amp;psc=1
You can use a multimeter to do basically the same thing as an ohm reader. The multimeter has an added benefit of being able to read the volts are your battery as well. I have both, but I prefer to use a “regular” ohm reader. This video below can teach you how to use a multimeter for that purpose.
https://www.youtube.com/watch?v=wgXAmPBAO5g&amp;index=2&amp;list=LLU7AM2JUxXCrj4TSCDQDffw
Optional items
Things that I’ve purchased that you can probably substitute with something in your house. They’re nice to have, most people have these, but I decided to link these anyway, because I didn’t have some stuff (my scissors were too large).
Scissors - Generic surgical scissors
http://www.amazon.com/Amercian-Diagnostic-Corporation-3425-Stainless/dp/B000GHIUR2/ref=sr_1_5?ie=UTF8&amp;qid=1404289491&amp;sr=8-5&amp;keywords=surgical+scissors
To cut your cotton. Small, sharp and gets the job done.
Tweezers - Ceramic tweezers
http://www.fasttech.com/products/0/10007588/1655800-heat-resistant-stainless-steel-tweezers-for-e
Allows you to hold your coil together and torch them without heating up the tweezers.
Wire cutters - Hakko CHP-170
http://www.amazon.com/gp/product/B00FZPDG1K/ref=oh_details_o03_s00_i02?ie=UTF8&amp;psc=1
For cutting your kanthal off that spool!
Atomizer holder - Plano 23630-01
http://www.amazon.com/Plano-23630-01-Stowaway-Adjustable-Dividers/dp/B000E3FKVC/ref=sr_1_4?ie=UTF8&amp;qid=1404289861&amp;sr=8-4&amp;keywords=plano
You’re gonna buy a bunch of atomizers. Everyone buys a bunch. You’re not going to be able to help yourself. I use this plastic case to keep everything neat and separated.
Building deck - Tenderfoot Stands
https://www.facebook.com/tenderfoot.stands?fref=ts
You don’t need this. But it makes building RDAs easier. You can also place your juice filled RDAs on here.
Torch - Mini Jet Flame 503
http://www.amazon.com/gp/product/B007A9YSPW/ref=oh_details_o00_s00_i00?ie=UTF8&amp;psc=1
This will help you get those coils nice and tight, without having to fire off your mechanical mod.
Battery Case - Bluecell
http://www.amazon.com/gp/product/B007Q6PJO8/ref=oh_details_o03_s00_i00?ie=UTF8&amp;psc=1
If you don’t buy the batteries from the link above, you’re gonna want a battery case. Do not keep your batteries loose in your pocket or floating around your bag. They can come in contact with something metal and potentially damage the battery.
That's about all I can think of for now.
zip ties, - skip the heat shrink for the esc's around the arms. Just zip tie them.
LOTS of nylon spacers - https://www.amazon.com/gp/product/B013G1QSNW/ref=oh_aui_detailpage_o05_s00?ie=UTF8&amp;psc=1
solder braid
Hex drivers - https://www.amazon.com/PIXNOR-Hexagonal-Driver-Screwdrivers-Helicopter/dp/B00QLZGRHS/ref=sr_1_5?s=industrial&amp;ie=UTF8&amp;qid=1467916704&amp;sr=1-5&amp;keywords=hex+driver
sma pigtails - https://www.amazon.com/gp/product/B01DNMAEJS/ref=oh_aui_detailpage_o03_s00?ie=UTF8&amp;psc=1
rubbing alcohol(gets off flux)
90 degree single pin headers - https://www.amazon.com/2-54mm-40-Pin-Header-Connector-Length/dp/B00R1LQ3FC/ref=sr_1_1?ie=UTF8&amp;qid=1467916531&amp;sr=8-1&amp;keywords=90+degree+single+pin+headers
mat - https://www.amazon.com/gp/product/B00P6KPKAE/ref=oh_aui_detailpage_o03_s00?ie=UTF8&amp;psc=1
wire cutters - https://www.amazon.com/gp/product/B00FZPDG1K/ref=oh_aui_detailpage_o09_s00?ie=UTF8&amp;psc=1
For my (future) sub ohm mech modders out there. Here is a quality setup that will allow you to rebuild to your heart's delight. I recommend a minimum of 4 batteries.
optional
For flush cutters/snippers (don't need two tools really) get either:
Even the cheapest ESD tweezers are ok for holding components, get a kit that includes angled ones if you're going to do a bunch of SMD.
These are good also: https://www.amazon.com/Hakko-3-SA-Non-Magnetic-Microelectronics-Applications/dp/B00FZPEWI6
I highly recommend you take it to another store and ask them if they can build your first coils for you. Most places will do it for you for free if you buy a small container of ejuice from them. Ask if you can watch them build it, and ask questions about what type of wire, wick, diameter of the coil, etc. I've found that every good store is glad to help train new users and won't make you feel bad about starting in the hobby. Get used to how their coil acts, performs, etc. Some of my local places have 'build and brunch' days, where they invite lots of people to come in and get help, learn about stuff, share tips, etc.
You're also going to want a few spare batteries (so one can charge while you're using the other), a battery charger, wick, wire, and an ohm meter.
You can compare prices on Amazon to make sure you're not paying 2x retail.
Cheap ohm meter: http://amzn.com/B00KI0BMMC
I'm sure you can get better ones, but I have this. It matches the readings on my evic, so I'm reasonably sure it's accurate.
Wire cutters: http://amzn.com/B00FZPDG1K
Kanthal wire:
24g http://amzn.com/B00H8DQ01U
26g http://amzn.com/B00JTGYS40
28g http://amzn.com/B00FBSVQX6
Never hook up new coils to your battery without doing a resistance check first. Results can be very very bad.
Glad I'm not the only one who noticed this. I got these from Amazon for about $5
http://www.amazon.com/gp/aw/d/B00FZPDG1K/ref=redir_mdp_mobile/189-3475360-9895336
Cheap flush cutters do the trick
Flush Cutter, aka flush-cutting plier
The CHP-170 is pretty good and it's less than $5 on Amazon
http://www.amazon.com/gp/product/B00FZPDG1K/
Cuts flush and pointy enough for me.
You'll also need something to clip your leads when building your coils and some tweezers to pinch them tight and make them perform efficiently. These but regular fingernail/toenail clippers will do, and these allow you to pinch the coils while firing your mod, which you cannot do with all metal tweezers.
I just picked up on Amazon a pin vise hand drill set, some flush cutters (the ones I've been using aren't flush and it's been annoying when trimming off sprue bits), and a lighted clamp magnifying class set, total was about 25 bucks.
Step one: don't use a raft unless you absolutely have to. If you do have to, invest in a pair of these and go to town. Heat gun/butane torch will also help if used very carefully.
https://www.amazon.com/gp/product/B00FZPDG1K/
&#x200B;
As for making the top smooth, that's all about your printer calibration and settings. Without seeing what the top looks like or your settings I can't help with that one.
Among other things, I use this for small wires. Under $5 on Amazon.
You can get assorted packs of resistors from eBay or AliExpress. A quick glance shows one seller offering 35 different common values, 10 through 4.7M, 20 pieces each, 1/4W, for $3 shipped. For most applications. Your biggest headache is keeping them sorted nicely so you won't spend half a day trying to find the one you need.
Depends on the person. I have big hands and have to reach deep into a rack a few dozen times a day.
Also I might recommend a Hakko micro wire cutter. https://www.amazon.com/gp/product/B00FZPDG1K
The mk3 kit comes with all the allen keys necessary, philips and flat head screwdrivers, and needle nose pliers.
I'd suggest some cheap cutters, you'll want them during assembly for the zip ties and after for filament. Brass brushes are handy for cleaning the nozzle.
For cleaning the bed, alcohol and windex from your friendly neighborhood grocery, drug, or big box store. Or the unfriendly store, if you prefer. (Windex for prior to printing PETG; alcohol for PLA)
Eventually, you'll probably want 7mm and 17mm wrenches for changing the nozzle.
try this one ive not had any problems yet. https://www.amazon.com/gp/product/B00FZPDG1K/ref=oh_aui_detailpage_o05_s00?ie=UTF8&amp;psc=1
Lmao, same exact thing happened to me bro. Do yourself a favor and grab a pair of these, they're amazing..
https://www.amazon.com/gp/aw/d/B00FZPDG1K/ref=mp_s_a_1_3?ie=UTF8&amp;qid=1522560592&amp;sr=8-3&amp;pi=AC_SX236_SY340_QL65&amp;keywords=wire+cutter&amp;dpPl=1&amp;dpID=414t7uLh8KL&amp;ref=plSrch
Absolutely. I'd recommend the following if you are going to be sleeving existing PSU cables:
Tool | Price | Description
:--------|:--------:|--------:
MFC Molex Extractor | $10.99 | This is the most important tool you'll need, don't cheap out here. This one from MainFrame Customs is the best I've used
Side Cutters | $5 | You'll want these to cut the sleeving. It works way better than scissors
Now those are the basic tools, if that's all you want to get away with then be very careful and take your time while extracting the pins. Otherwise you'll want the following to re-crimp the broken pins.
Tool | Price | Description
:--------|:--------:|--------:
Crimping Tool | $23 | Great quality crimping tool, works for all PC pin types (atx goes in the larger slot :) )
Stripper | $41 | Great stripper, makes it very easy to get consistent strips, ideal for crimping, however you could use regular stippers
ATX female pins | $0.30 for 5 | Replacement pins
If you end up needing to get these tools, one benefit is you can cut your cables to the lengths you need which will make it very clean for cable management. Lastly, if you are going to use paracord and are not re-crimping the pins, I would recommend this Paracord threader. It'll keep the pins from tearing the paracord and make sleeving a lot easier. If you are going with PET Teleios Sleeve, you wont need it, as PET expands enough to make it easy to sleeve over the connector.
I used a pair of cutters from this amazon link.
https://www.amazon.com/gp/product/B00FZPDG1K/ref=oh_aui_detailpage_o06_s00?ie=UTF8&amp;psc=1
They work great for flush trimming stuff.
I think I saw some of those at home depot last week if you are in the US and are near one of those...
so im looking to get into 3d Printing, and unless someone has some better option, im going with the MP Select Mini.
My question is on the other things i need. Here is the list of the things im looking to buy along with the printer:
I have a set of exacto knives and a screw bit set. Is there anything else im missing?
I went with these. Haven't used them on any sprues yet, but I've cut some stuff I have and they feel great. Also, if they suck they only end up being $5.
As pointed out you should snip the LED leads. I would not suggest scissors you may break the solder and PCB. Can you get some side snips at a local store?
I couldn't do the subtanks simple because I'm clumsy and drop everything. I want one but I'm worried I'll break it immediatly. I started making coils with the help of a friend's husband because mine were not putting out enough heat. I've only changed coils once in the last month, but I regularly Rewick. I hate tasting an old flavor in my mod.
It is kind of a hobby but don't let these guys here with their crazy coils scare you. I do very simple parallel single coil(which is just two wires wrapped together in paralell) at like .2 Ohms and it hits great. I'm sure there are even better but to be honest sometimes these parallels hit hard for me.
I'd Recommend a Mech Unless you have a low Ohm regulated mod
If you get a Mech:
Coil Supplies:
nah. wire is extremely cheap (get a variety of common gauges), cotton wick is cheap too. this plus a pair of wire cutters is all you really need assuming you already have scissors/screwdrivers/etc
This is what I use for all my keeb wire cutting. Came with my Hakko soldering station.
Hakko CHP-170 Micro Soft Wire Cutter, 1.5mm Stand-off, Flush Cut, 2.5mm Hardened Carbon Steel Construction, 21-Degree Angled Jaw, 8mm Jaw Length, 16 Gauge Maximum Cutting Capacity
Assuming you can get it in Canada (not sure if Amazon ships everything everywhere) I found these to be very good Cutters to get the pieces out of the sheets, they are a very good price and seem to be pretty good quality. They are kind of a must have in my opinion. I've had mine about a month and I'm very happy with them. Sometimes they are listed as an add-on item where you have to buy something else along with it, and other times they listed as just a regular item you can buy by itself, looks like currently it's listed as an add-on item tho.
Hakko CHP-170 Micro Soft Wire Cutter, 1.5mm Stand-off, Flush Cut, 2.5mm Hardened Carbon Steel Construction, 21-Degree Angled Jaw, 8mm Jaw Length, 16 Gauge Maximum Cutting Capacity https://www.amazon.com/dp/B00FZPDG1K?ref=yo_pop_ma_swf
I think you did well for your first time. If you want pointers keep reading, feel free to ignore since you did good enough and it works.
For clipping the leads I'd try to clip them as short as you can (and clip after soldering, if that's not what you did). These make it easy to do.good trimming:
CHP-170 Micro Cutter https://www.amazon.com/dp/B00FZPDG1K/ref=cm_sw_r_cp_apa_dARRAb32DKHCP
For the solder joints, you don't need to use so much. Also a lot of them are dull instead of shiny which sometimes means the joint wasn't solid or wasn't hot enough. What temperature are you setting your iron to and what kind of solder are you using?
About the difficulty snapping in the switches, with a keyboard this small you can snap all the switches in first without using the pcb, just by holding the edges of the plate, and as long as the switch pins are straight, you can drop the plate + switches on after, that's what I did.
If other switches were popping out, they probably weren't fully snapped in. Do these switches have the big.SMD LED cutout? Mine did, and so that part of the LED housing will sometimes flex and not really snap all the way in, partly because this plate is a little on the thick side. You can snap them most of the way in, then go back with a small screwdriver and push from inside the LED cutout to force the teeth to grab the lower edge of the plate. Once the switches are fully snapped in they will not come out just from the force of snapping other switches in, if they were doing that then I'd almost guarantee that one side wasn't fully snapped in on the switches. I wouldn't worry about it now though, the switches are soldered in and that should hold them in place anyway.
Overall great job for your first soldering build!
$250 is way too much for what you listed, you can get way cheaper than that. Keep in mind you really don't NEED 100W to use an RDA. My homemade DNA30 is great for a cool vape on something with a bit more restricted airflow than the Mutation, but that will still work just fine. I would stick with your current Sigelei 30W until you know for sure you want to upgrade, because that is going to cost you the single most amount of money.
If you want the mutation x v2, grab it here for $30, its worth getting this one authentic and not a clone because its so cheap to begin with and most clones do not have the wide bore drip tip.
Japanese Cotton is what I usually use.
For the rest of your gear, Lightning Vapes has a good selection of well priced rebuilding supplies:
Ohm Meter $14.75
I recommend Ceramic Tweezers $12.95
I mostly use 28ga Kanthal (100 feet for $6.25) with my 30W box mod, with mechs I use lower gauges
I would also find a pair of flush cutters to snip wires as close to the posts as you can, and some nice small scissors to cut your cotton.
OH! Almost forgot, this is what I use to wrap my coils.
As a general rule of thumb, don't buy wire or wick from websites that sell mostly juice or hardware, it will almost always be overpriced.
If you want to get REALLY cheap and don't mind waiting, go check out Fasttech
Here is the desktop version of your link
That file? Not very well, no. You need one where the file pattern is present on the end of the file like the far-end one here. This means that you can get right in to the cap to smoothen it off!
I used a pair of wire cutters similar to these to cut the rest of the cap away to leave just the stem.
If you're LightningXI, I've just messaged you!
CHP-170 Micro Cutter https://www.amazon.com/dp/B00FZPDG1K/
These are fantastic cutters that have served me well for a long time. Highly recommended for this application and not expensive.
These are the ones I'm currently using, if you can get something similar delivered, or just buy it at a hardware store.
All you really need is for them to be beveled on one side, and not beveled on the other side. "Flush cut" is the key word you want to look for as that leaves less mess on the mini.
Flush cutters. You don't have to get the ones branded specifically for minis, they'll probably be overpriced anyway. Just hit your local hardware store and look at wire cutters and get flush edge ones. Regular wire cutters pinch the metal on both sides, leaving an uneven cut. Flush cutters are designed to pinch on one side, leaving the other side cut flat. This is important for sniping off sprues, cutting of weapons, or the bases on minis.
The metal in most Reaper minis is soft enough for flush cutters to handle. You might need to take the base off small chunks at a time. You can use larger standard wire cutters to cut off large chunks, then use the smaller flush cutter to clean up the edges around the feet. You can use a file to clean up any small bits remaining.
I have this exact cutter and it works great.
SECTION | CONTENT
:--|:--
Title | Vaping Coil Winding Jig Tool
Description | Fasttech Vaping Coil Winding Jig Tool for Rebuildable Atomizers https://www.fasttech.com/p/1926001 stainless steel / 1.5mm + 2.0mm + 2.5mm + 3.0mm + 3.5mm sections SKU 1926001
Length | 0:01:17
SECTION | CONTENT
:--|:--
Title | UD Coil Jig V3 - Demonstration
Description | UD Coil Jig V3 http://www.vapetime.co.uk This is a quick demonstration of the Coil Jig V3 by Youde Technology. For more information please visit: http://www.vapetime.co.uk/ud-coil-jig-v3/ If you have any questions please do not hesitate to call, contact us or leave a comment. We are always happy to help :)
Length | 0:04:00
SECTION | CONTENT
:--|:--
Title | Quick and Effective coil build for RDA atomizers
Description | ::EDIT:: It's a good idea to check your resistance ( ohms ) BEFORE you attempt to glow and fiddle with your coils. The resistance will change as your coils get more even. So check before, then check again after. Thanks. Hey everyone! If i'm being 100% honest. I mostly shot this video for my brother who recently got into the world of rebuilding. He was really struggling with it. Rebuilding has become such second nature to me that I often forget how it feels to be building for the first time and that sense of frustration that sets in quickly. So hopefully some other people will find this video helpful. Rebuilding honestly just takes practice and patience. ANYONE can do a solid simple build that will produce both great flavor and large clouds ( if you want ) The build in this video came out to 0.3ohms, which will work great on a mech mod, or on a higher wattage regulated device like the Sigelei 150w or iStick 50w I used 24g Kanthal, 6 wraps around a 2.5mm screwdriver. Below I have links to most everything I used in this video. Including some "beginner friendly" RDA atomizers. Precision screw drivers http://www.amazon.com/Stanley-66-052-6-Piece-Precision-Screwdriver/dp/B00009OYGV/ref=sr_1_1?ie=UTF8&amp;qid=1435336275&amp;sr=8-1&amp;keywords=precision+screwdriver+set&amp;pebp=1435336344707&amp;perid=1M11EBNKQ3Z63A7B0VQ8 Wire Clippers http://www.amazon.com/Hakko-CHP-170-Stand-off-Construction-21-Degree/dp/B00FZPDG1K/ref=sr_1_1?ie=UTF8&amp;qid=1435336368&amp;sr=8-1&amp;keywords=Wire+Clippers 24g Kanthal http://www.amazon.com/Genuine-Lightning-Vapes-Kanthal-Resistance/dp/B00JWYIHLY/ref=sr_1_1?ie=UTF8&amp;qid=1435336391&amp;sr=8-1&amp;keywords=Kanthal&amp;pebp=1435336399204&amp;perid=0Q2SHF5N87Q64YJT5F9E Organic Japanese Cotton http://www.amazon.com/Japanese-Organic-Cotton-Organic-unbleached-Largest/dp/B00P219C5Q Unfortunately the VapeKit has been discontinued. They are doing a V2 kit, but in the meantime check this one out http://www.coil-master.net/product/diy-kit Some good RDA's for new builders IMO Mutation X V4 http://www.vapordna.com/Project-Sub-Ohm-Designed-Mutation-X-V4-RDA-p/psmxv4.htm The Mako http://www.beyondvape.com/store/import-cat-c-1_2/beyond-vape-mako-rda-p-1927.html The IMP http://www.empiremods.com/product_p/youdimp.htm Thanks so much for watching everyone! hope this is helpful. Feel free to follow me on Instagram http://instagram.com/grimmgreen/ Twitter https://twitter.com/GrimmGreen Facebook https://www.facebook.com/GrimmGreen Also please remember that unless you make it so I can reply to you. I will be un-able to reply to your comments.
Length | 0:22:32
****
^(I am a bot, this is an auto-generated reply | )^Info ^| ^Feedback ^| ^(Reply STOP to opt out permanently)
These are the ones I use. Very good for the price($4.97)
Ohm reader:
http://www.eciggity.com/eleaf-digital-ohmmeter-voltmeter/
Ceramic tweezer: it makes getting hotspot easier with a torch
http://101vape.com/accessories-/415-ceramic-tip-tweezers.html
Cotton pads: Pricy up front but I love it and KGD is nowhere to be found
http://www.amazon.com/Shiseido-0446125933235-Facial-Cotton/dp/B00020E1P8/ref=sr_1_1?ie=UTF8&amp;qid=1413476869&amp;sr=8-1&amp;keywords=shiseido+cotton
Wire cutter: I prefer this over using nail clippers
http://www.amazon.com/Hakko-CHP-170-Maximum-Cutting-Capacity/dp/B00FZPDG1K/ref=sr_1_1?ie=UTF8&amp;qid=1413476778&amp;sr=8-1&amp;keywords=wire+cutter
24/26/28 Guage A1 Kenthal: This should last you for a while
http://www.amazon.com/Genuine-Lightning-Vapes-Kanthal-Resistance/dp/B00JTGYS40/ref=sr_1_1?ie=UTF8&amp;qid=1413476842&amp;sr=8-1&amp;keywords=kanthal+26
not really. I just squeeze everything in an ego carrying case http://i.imgur.com/6caLRZT.jpg
It all barely fits but this is what I have in there:
I find making the cables to be the nicest looking.
I find the tool kit, cable cutter, knife and combs to be necessary. However you could use scissors instead of the knife and cutter, go without the combs, and use paper clips and small screwdrivers instead of the tool kit.
The paracord has a million options and is very cheap. Buy too much.
If you're really careful, you don't need heatshrink. However if you need it, it's really cheap.
I don't have much to add just going to go in to a bit more detail. I usually try to keep at least 2 or more of each screw or nut my drones use, that includes the motors, camera mount, ANY screw.
Loctite/thread locker will help but some times repeated hard crashes loosen screws and you may not realize it. With that said you don't want to use anything above blue Loctite such as red or green, you want to be able to get the screws off!
I also bought a ton of micro JST connectors and a crimper to repair balance lead connectors. This wouldn't be needed if you are diligent about keeping your battery wires away from your props, I was not, but some times it is unavoidable.
And the random things I keep around are; velcro, VHB tape, shrink tubing of various sizes(you can get assortments from Amazon), spare VTX pig tails, various sizes of silicone wire (26awg for ESC signal wire, 18ga wire for power and ground to ESCs, 14awg for power leads), flush cutters, different tipped tweezers, spare antenna cable for the receiver, servo leads, circlip pliers.
All that comes to mind at the moment but I am sure I am missing stuff. Here are some links!
Flush Cutters
26awg Silicone Wire
14awg Silicone Wire
VHB Tape
Micro JST Crimper
Micro JST Connectors
Circlip Pliers
Servo Connectors-not silicone
Tweezers
Aside: spend $5 and get a pair of flush clippers:
https://www.amazon.com/Hakko-CHP-170-Stand-off-Construction-21-Degree/dp/B00FZPDG1K
Ceramic tweezers and wire cutters, I like these and these kind I got a three pack of different kinds but it's no longer available. For cotton this will last forever. if you don't already have screwdrivers and/or bits to wrap your coils something like this works great. For roundwire something like this will last till the end of time.
Ah yeah those will cut but you need something that will cut shorter. I found these on Amazon they work great!
I prefer temperature controlled stations, that one just has control of the wattage and no monitoring of the temperature.
Get some good side cutters for trimming component leads.
Like these.
Also, "helping hands" in general are mostly useless, I prefer a vice for PCB work.
As far as solder pump vs wick, get both.
Clippers
Iron
Tip for iron
Scissors are no good. I got these clippers from Amazon. They are actually wire clippers, but the $5 is well spent.
All the models in the Misaki box are Ten Thunders, except Misaki and Shang (the totem) who are dual faction. However, Misaki has a special rule that allows her to hire four "Last Blossom" models into her crew regardless of declared faction, so if you declare her as Outcasts you can still hire the whole crew box.
Each boxed set comes with all the bases you need, so don't worry on that front.
For competitive play with the Guild Masters, you'd probably want to have both boxes as the Judge and Francisco are excellent henchmen, and Death Marshals are good minions, and Nino is a good Enforcer.
Ultimately when you get fully competitive (think: Magic the Gathering) you end up having every model in the faction.
[I love these wire cutters] (http://www.amazon.com/Hakko-CHP-170-Stand-off-Construction-21-Degree/dp/B00FZPDG1K?ie=UTF8&amp;keywords=wire%20cutters&amp;qid=1462906097&amp;ref_=sr_1_3&amp;s=power-hand-tools&amp;sr=1-3)
[These are nice for coil building and getting tight fitting tanks apart] (http://www.amazon.com/dp/B01D71MIYO?psc=1)
What you need:
X-acto Knife: https://www.amazon.com/X-ACTO-2-Knife-Safety-Cap/dp/B000V1QV7O/ref=asc_df_B000V1QV7O/?tag=hyprod-20&linkCode=df0&hvadid=167119535166&hvpos=1o1&hvnetw=g&hvrand=3576300261824586112&hvpone=&hvptwo=&hvqmt=&hvdev=c&hvdvcmdl=&hvlocint=&hvlocphy=9018839&hvtargid=aud-799728744414:pla-308484349331&psc=1
Chang of knife blades #11. You don't ever want to cut with a dull blade: https://www.uline.com/Product/Detail/H-998B/Utility-Knives-and-Cutters/11-Replacement-Blades-for-H-998-X-Acto-Knife-Package-of-15?pricode=WA9175&gadtype=pla&id=H-998B&gclid=CjwKCAjw7uPqBRBlEiwAYDsr18MFtut5s8DKoa1EPpCHKfGuwUmYP0EN4khc-4M-UvalEfAyX71KMBoC-k4QAvD_BwE&gclsrc=aw.ds
A cutting mat: https://www.hobbylobby.com/Fabric-Sewing/Sewing-Quilting-Notions/Cutting-Tools-Mats/Double-Sided-Self-Healing-Cutting-Mat---9%22-x-12%22/p/80665711
Glue. This glue, don't settle for anything less: https://brokenpaintbrush.com/plastic-glue/
Hobby Clippers to remove pieces from the sprue: https://www.amazon.com/Hakko-CHP-170-Micro-Cutter/dp/B00FZPDG1K/ref=asc_df_B00FZPDG1K/?tag=hyprod-20&linkCode=df0&hvadid=198070022856&hvpos=1o2&hvnetw=g&hvrand=13952833326321162249&hvpone=&hvptwo=&hvqmt=&hvdev=c&hvdvcmdl=&hvlocint=&hvlocphy=9053103&hvtargid=aud-799728744414:pla-382997837730&psc=1
You and I have a significantly different view on cheap. These will cut zip ties like nobody's business for much much cheaper.
https://www.amazon.com/dp/B00FZPDG1K/ref=cm_sw_r_other_apa_i_pfAxDbBV1Y9EN
These
Micro Cutter https://www.amazon.com/dp/B00FZPDG1K/ref=cm_sw_r_cp_api_i_Od3yDb93BHJZB
Not bad for the first time. Did you trim the leads before you inserted them? I highly recommend you get these wire cutters. These cut through wire like butter and thin enough to get to tight spaces.
You should be using flush cut pliers to cut tywraps. Dikes will leave the dangerous end. Example
Look for a flat side cutter/nipper.
Example: https://www.amazon.com/Tamiya-Sharp-Pointed-Cutter-NO-123/dp/B010PG73J4
You can spend anywhere from $5 to $50 for one. $5 ones are fine if you're sanding/priming/painting the kit and can hide the stress marks. You'll want to look at the more expensive ones as they are sharper and can do less physical/visual damage to the surrounding plastic if you're doing straight builds.
I use these: https://www.amazon.com/Hakko-CHP-170-Stand-off-Construction-21-Degree/dp/B00FZPDG1K
Or, if you have money to blow, these are the gold standard: https://www.amazon.com/God-Hand-SPN-120-Ultimate-Nipper/dp/B00T5IH8PI
I'll chime in... had my kit for about 2 weeks now and will share my experience:
Tools
If you don't have some of these, I HIGHLY recommend them.
Assembly isn't too hard, and the directions are pretty good. My main complaint with the directions is that sometimes they don't explain what's important and not important all the time. I spent a lot of time building, taking apart, and rebuilding the base y-axis frame because I thought I did something wrong (it wobbled) to find out that you fix that wobble as one of the last steps.
The 100mm distance that you're required to thread double nuts early in the assembly is absolutely critical by the end of the build for many different reasons. It would be nice if prusa included some kind of printed spacer to make that step foolproof.
Again, assembly is straightforward. I took a span of 3 days to finish mine while dedicating a few hours each night to do it.
Upgrades
A couple of things can be improved on the printer. The printer isn't terribly noisy, but you can make it damn near silent with a few upgrades.
Just buy these. Thank me later.
In fact, buy two or three.
I recently bought these wire cutters from Amazon. They are excellent in tight spaces. And cheap, too.
http://amzn.com/B00FZPDG1K
http://amzn.com/B00KAEWG76
I use these for thick pieces of runners
to avoid dust I would just use a pair of side cutters and snip the tabs.
like these: http://astore.amazon.com/bsmods-20/detail/B00FZPDG1K
Glad it was helpful!
The RDA looks good, not sure the cost of a Plume Veil clone from eciggity, but you might wanna check - it'll come much faster and if you ever need to replace something, the chance of finding a part that fits is more likely, but again for $10, you probably wouldn't pay to fix that.
I'm not super familiar with mech mods, I've got two, but almost always use my Sigelei now, but just make sure you are familiar with battery safety, ohms law, battery limits, etc.
Other items you'll need (let me know if you need links for these items, you can get everything listed below of Amazon):
I hope this all helps, good luck and be safe, ALWAYS, ALWAYS use your ohm meter in conjunction with www.steam-engine.org
Here was my last RDA build that I took pictures of, if it helps at all
Thanks! I've been using this https://www.amazon.com/gp/product/B00FZPDG1K/ref=oh_aui_search_detailpage?ie=UTF8&amp;psc=1 but being very careful and as you can see, it's not that precise.
I purchased these cutters and they are nice for just 10$.
Edit: check your local hardware store if I had done that i could have gotten my x-acto handle and blade for half the price.
I was using nail clippers for a long time, and I noticed they got dull pretty quickly. I picked up these, and they work like a charm. Cut like butter, and cut nice, and close to the post.
snips
These are the only cutters I use right now. Using the tips and taking off the gates in a series of thin shavings works quite well. I file and sand everything after trimming the gates, too.
It turned out better than I was expecting just using a small flush face cutter, this one specifically. CHP-170 Micro Cutter https://www.amazon.com/dp/B00FZPDG1K/ref=cm_sw_r_cp_apa_i_pSZ8AbGRVD76F
Right before I graduated from college I was getting into soldering and decided once I got my diplomas I would treat myself to some nice HAKKO equipment using the 30% discount while I was still considered a student. The stuff below is what I purchased. Note that the 30% discount is only applied to the soldering station nothing else. Anyway, if you can splurge, I highly recommend the FX-951-66. It is truly fucking AWESOME. If you are on a tight budget and not sure if soldering as a hobby will stick, get the cheapest HAKKO they sell and it will still be a good unit. I am a huge fan of hakko so clearly I am biased but they are a well-known reputable brand
Hakko Soldering Station, FX-951-66
Hakko T15-JS02 Conical Bent Tip R0.2 / 30deg x 1.6 x 7.9mm for FX-951
Hakko CHP 3-SA Stainless Steel Non-Magnetic Precision Tweezers with Very Fine Point Tips for Microelectronics Applications, 4-3/4" Length
Hakko CHP-170 Micro Soft Wire Cutter, 1.5mm Stand-off, Flush Cut, 2.5mm Hardened Carbon Steel Construction, 21-Degree Angled Jaw, 8mm Jaw Length, 16 Gauge Maximum Cutting Capacity
I use these wire cutters, these pliers, and this roll-up pouch from Amazon, and I picked up a couple of pair of hemostats for a couple of bucks at a gun show, some dental picks from Harbor Freight, and some Ceramic tipped tweezers from fasttech. That's about all the tools I carry. The pliers are a little on the overkill side, but they work great for grabbing onto thin gauge wire for twisting.
TL;DR - I'd stay away from pre-packaged kits. They are convenient, but chances are the quality of all of the tools included may not be equal. But, if you don't want the hassle of shopping around and personally selecting each tool, just throw some money at a kit, and you'll be ready to build in one stop.
lol i hated the orchid for a minute, but it was mostly because i didnt have the right wire nippers to get my builds the way i wanted them in there. new pair for $5 off amazon and that problems solved. if you dont have a pair of these i highly reccomend them
http://www.amazon.com/Hakko-CHP-170-Stand-off-Construction-21-Degree/dp/B00FZPDG1K/ref=sr_1_2?ie=UTF8&amp;qid=1426547129&amp;sr=8-2&amp;keywords=flush+cut+wire+cutter
Non-mobile: http://www.amazon.com/dp/B00FZPDG1K/ref=redir_mdp_mobile/189-3475360-9895336
^That's ^why ^I'm ^here, ^I ^don't ^judge ^you. ^PM ^/u/xl0 ^if ^I'm ^causing ^any ^trouble. ^WUT?
You can satisfy all your sticky tape and battery pad needs for life if you get a 5M roll of monkey grip tape, which is on sale atm over at banggood.
Considering how many chinese screws I've already stripped by applying what I feel is reasonable torque, I suggest you get some spare screws.
Most frequently you're going to use M3 screws, between sizes M3x5 and M3x16, so maybe get a couple of those. If you're planning to fly 3'' and smaller, the same margins apply for M2 screws. Throw in some M5 nyloc nuts to secure your props.
Don't overdo it on the soldering tools unless you can afford to spend a lot. The iron is less important than many on here might make you think, . As long as you know what you're doing and using the right tip for the task at hand, you'll be good with a cheap one. So I suggest you watch some videos on youtube and practice.
u/Errat1k already mentioned all the hex drivers you will need.
You'll want to have a pair of wire clippers like these and treat them well. Don't cut anything except wires and zip ties, you'll be good for a long time.
Heatshrink is your friend as well, get some.
They sell in packs with multiples of 4, but for the price, you might as well just buy enough for a few cases at once.
I use pliers to install them (make sure you install them on the correct side) for pulling the fan-end through the fan. One thing that helps a lot is using something like a wire cutter, or maybe nail clippers, to snip a bit of material off of that end. The case-side always just pops right into place no problem. I only ever have issues with the fan-side.
The ones I linked have a slightly different design than the rivets I own, so you may not need to remove material.
For sure my man! Here you go , works wonders for me and the cuts are super clean!
I'd do a different spool setup. I use the TUSH The only needed hardware for that one is 4 skate bearings. If you need bearings I'll send you 4 for $5 or 8 for $6. Shipping included to US.
The other tools I recommend:
Buy a half dozen of these. They're good flush cutters, cheap <$5.
> I am looking for tools that I will need for general printing and maintenance
Set of tweezers to remove stringy plastic oozing from extruder, soft wire cutter makes snipping end of filament a breeze, assorted m3-m6 hex nuts and bolts will come in handy. Maybe some combination wrenches
And if you want to run octoprint, a raspberri pi, camera, & power supply.
I'm looking at these for snips actually.
My first choice at the moment is the derringer clone with the velocity posts (like you said). I just like the shorter look of the derringer and I keep hearing about how that's best for flavor. Is this what you're referring to in regards to "v2 clone" though?
Don't buy that toolset, its very... I'd say low quality but its between low quality and medium quality.
Buy this instead.
You will be much better off. They are good tools and will last you ages. Also the blades for the knife should be replaced after one or two builds. But they are cheap and high quality. BE CAREFUL many, many cuts.... Also, You might want to start with a High Grade kit. You will learn a lot after building two or three of them.
$16 in Canada :| https://www.amazon.ca/Hakko-CHP-170-Stand-off-Construction-21-Degree/dp/B00FZPDG1K
I picked up a pair of these from amazon. Though you could probably do better/cheaper by just searching "flush cutter"
[Flush Cutters] (http://www.amazon.com/Hakko-CHP-170-Stand-off-Construction-21-Degree/dp/B00FZPDG1K/ref=sr_1_1?s=hi&amp;ie=UTF8&amp;qid=1421781333&amp;sr=1-1&amp;keywords=flush+cutters}) for removing support material
&nbsp;
Digital Calipers
&nbsp;
Blue Painters Tape
&nbsp;
Crazy Filimants (Glow in the Dark or Ninjaflex are good choices)
Something like these?
Edit: Actually just found a pair of diagonal cutters and it's exactly what I need!
Just my kitchen table. Helping hands is a must. Also, you want to invest in some of these and these.
True. I meant the whole fraud but as a general statement, not directed towards you, or what you have mentioned.
A lot of these companies aren't bad to deal with if you're honest. And have good luck.
Didn't actually know they were glass reinforced, which makes total sense that they are. My limit to experience with drones is some little cheapies. I'd really like to get into it, just seems expensive (yet I've spent around $200 in Wera screwdrivers this year).
EDIT: Also, I highly recommend these little buggers for soft, fine wire. They will instantaneously deform on use of anything heavy, but it's an inexpensive mistake. Good, consistent build quality (on the whole 3 I've seen), good feel in the hand. https://www.amazon.com/dp/B00FZPDG1K
For stuff like that, I just use the little flush cutters that I have (I have ones I got from Walmart, but the design is the same) and snip off the little messy bits.
It may just chip off, I’d try it. After you get the magnet out you can use something more tenacious like acetone to get it off the magnet, and use the exacto to scrape it off the plastic. If you have some try a pair of electronic flush diagonal cutters.
https://www.amazon.com/Hakko-CHP-170-Micro-Cutter/dp/B00FZPDG1K/
If the plastic melted then chip away slowly with little nips so you don’t ruin the cube.
I have one similar to this. It works pretty well.
Do you have flush cutters? Like this? https://www.amazon.com/Hakko-CHP-170-Micro-Cutter/dp/B00FZPDG1K/ref=asc_df_B00FZPDG1K/?tag=hyprod-20&amp;linkCode=df0&amp;hvadid=198070022856&amp;hvpos=1o1&amp;hvnetw=g&amp;hvrand=430673449294190113&amp;hvpone=&amp;hvptwo=&amp;hvqmt=&amp;hvdev=m&amp;hvdvcmdl=&amp;hvlocint=&amp;hvlocphy=9008336&amp;hvtargid=pla-382997837730&amp;psc=1
How good?
Here is one that will last you pretty much for whatever no matter what you do with it, its the soldering iron I have used for the past several years and has been great on a number of projects: https://www.amazon.com/Hakko-FX888D-23BY-Digital-Soldering-Station/dp/B00ANZRT4M/
Here is one that will do just fine but isn't great or anything:
https://www.amazon.com/Weller-WLC100-40-Watt-Soldering-Station/dp/B000AS28UC
The most important feature for a good soldering station is variable temperature.
The only other things you will need is solder:
https://www.amazon.com/WYCTIN-Solder-Electrical-Soldering-0-11lbs/dp/B071G1J3W6, a solder wick: https://www.amazon.com/MIYAKO-Desoldering-Wire-Handy-Dispenser/dp/B010VMHR5M, and possibly wire cutters if you don't have them: https://www.amazon.com/Hakko-CHP-170-Micro-Cutter/dp/B00FZPDG1K
Some personal advice is get the best one you can afford if you thing you will use it a lot, the difference between a okay one and a great one is huge. I hated soldering till I got a good iron.
Even in the slowest setting my dremel would be too fast, and even the small sanding wheel would be WAY too big to sand that print.
When sanding a 3D print you want to use wet/dry sand paper, the black sandpaper. Getting it wet and moving slowly will reduce building up heat which could warp the print.
Before sanding you may want to trim supports with a flesh cutter a tool like this:
https://www.amazon.com/dp/B00FZPDG1K/ref=cm_sw_r_em_apa_i_aKt5CbB6PMGJX
An X-acto knife would also be useful.
As mentioned, flush cut snips is a common name for them. I have a pair identical to these, even at $5 they're leagues ahead the blue handled version that come free with so many printers.
https://smile.amazon.com/Hakko-CHP-170-Micro-Cutter/dp/B00FZPDG1K/ref=sr_1_3?crid=1JK6FBN2VHTH9&keywords=flush+cut+snips&qid=1558783149&s=gateway&sprefix=flush+cut++sn%2Caps%2C227&sr=8-3
Build Your Own Clone
I doubt you'd keep track of any more websites I could mention above once you find a few kits there. As far as equipment goes, get:
A decent soldering iron ... Alternative (please also get this with the alternative)
Solder
Micro Cutters to trim leads
Hopefully you have a small flat-head screwdriver to set knobs and a small flat pair of pliers to attach hardware to the enclosures.
I doubt you'd need to but if you ever need to get any components that aren't supplied with a kit, go to Tayda Electronics for nearly any part (they tend to be cheapest for hobbyists, you can find anything from passive components like resistors and capacitors, to knobs/switches/audio and power jacks, etc.).
http://www.steam-engine.org/ (or there are plenty of apps for smart phones)
I recommend against B & M builds unless you truly trust your B & M. I've heard way too many horror stories hear about unscrupulous B & M's and their building practices. If you have a friend that build have them walk you through it and teach you the ropes, watch YouTube, post questions here, but be sure you know 100% what you are doing before you actually fire or vape off your own coil. Be safe, build safe, vape safe.
Snip them with wire cutters (I use something similar to this Amazon) or nail clippers. With a three post setup and doing dual coils I snip the negative posts but then use my needle nose pliers to bend the positive tails back and forth until they snap off. B/c I like this method I generally make the positive tails longer to make this easier.
If you're removing swtiches tops that aren't mounted yet, use these: https://www.amazon.com/Hakko-CHP-170-Stand-off-Construction-21-Degree/dp/B00FZPDG1K/ref=sr_1_3?ie=UTF8&amp;qid=1486740568&amp;sr=8-3&amp;keywords=side%2Bcutters&amp;th=1
You can find it at your local hobby store or hardware store
A pair of flush-cut nippers was a game-changer for me. I find they're extremely helpful for removing the parts from the sprues. Something like these should work fine while you're starting out.
I have this problem some times. I use a pair of wire snips to cut the excess so it doesn’t pull the filament and make it uneven. The snips are also the best way to cut zip ties I have ever found. Also good for cutting supports off flat:
CHP-170 Micro Cutter https://www.amazon.com/dp/B00FZPDG1K/ref=cm_sw_r_cp_api_1DXLBb3P7GDED
Saw your other posts. Have you picked up a pair of these yet? One of the top 5 tools imo for electronics (and salvaging cells)
Micro Cutter https://www.amazon.com/dp/B00FZPDG1K/ref=cm_sw_r_cp_apa_i_3-OBDbF06NFF2
Get a pair of PCB flush cutters like this: https://www.amazon.com/Hakko-CHP-170-Micro-Cutter/dp/B00FZPDG1K/ref=sr_1_11?keywords=pcb+flush+cutter&qid=1569304958&s=gateway&sr=8-11
they're usually for snipping away excess resistor legs and solder, but they lay nice and flat, so they can edge their way under that raft for you to snip away. I use mine more for cleaning prints than circuit boards.
My username came from back when I was REALLY into anime. I mean, I'm still into it, just not as much as I was.
My username came from a combo of ICHigo Kurosaki and the title of my favorite series, bleACH. Eventually, Icheach looked really stupid to me, so I dropped an H and became Icheah. Just don't ask me how to pronounce it, because I have no idea to this day.
Also: My Item
Thanks a lot for the contest!
1-It should, but you'll have to use the extension tube.
2-I'd suggest getting a good clone first. That way if you don't like it, you're not out $100+ dollars. I'll throw another vote in for the EHPro Kayfun Lite Plus V2 being about the best clone out there right now. Eciggity is a reliable vendor and they've got them for $35. They also have a "dual airflow hole" version for five bucks more. Either way, they're great quality and it's still less than half of what you'd pay for an authentic. If you end up really liking them, you can always splurge on an authentic in the future (and trust me, more Kayfuns is more better!)
3-It depends, but probably. A lot of the replaceable coil head tanks tend to use NiChrome resistance wire, which wears out faster than Kanthal. But regardless, you'll end up saving quite a bit of money over replacement Kanger or Aspire heads: a 100' spool of Kanthal is only around $6 directly from TEMco, and a bag of organic cotton balls is about $3 at most drugstores and WalMart. For the price of two boxes of replacement coil heads, you'll have enough wire to make literally hundreds of coils and one bag of organic cotton balls will last you months. It's a huge savings.
4-Same as most everyone else has mentioned: ohm reader (or digital multimeter) and drill bits (especially 1/16", 5/64" and 3/32") for sure. Wire "dikes" (aka nippers, aka snips, aka all sorts of different names) are handy, but a pair of nail clippers works just fine too. If you really want to get wire cutters, this Hakko CHP cutter is excellent and under $5 (or pick up something similarly small.) A "build stand" is really handy, and you can either buy one or make your own by epoxying a spare 510 connector into a piece of wood with a hole drilled in it. Not totally necessary, but it'll make rebuilding a lot less fidgety. I made mine by taking the base of an old EVOD tank (the internal "coil head" threads are actually 510), drilling a hole in a nice piece of flamed walnut I've had forever and epoxied it in with JB Weld.
Oh yeah, and a pair of small-tipped tweezers! Total lifesavers! A pair of needlenose pliers will work too, but I use my tweezers every single time I build a new coil and they're easy to get into small spaces. Totally worth the $4 at your local grocery store or Walgreens or wherever.
Allen wrench set (Bondhus), zip ties, a 7/16 & 3/8 open-end wrench, and a pair of snips (Hakko) would be far more versatile and optimized to fixes you can actually make on the robot.
It's all about the karma. Karma?
Get yourself a pair of these.
I have a pair of [flush cutters](https://www.amazon.com/Hakko-CHP-170-Micro-Cutter/dp/B00FZPDG1K/ref=sr_1_3?keywords=flush+cutters&qid=1565472867&s=gateway&sr=8-3) designed for electronics work that pulls double duty for ingrown toenails. Works fantastic.
The side cutters are cheap ones from amazon
Micro Cutter https://www.amazon.com/dp/B00FZPDG1K/ref=cm_sw_r_cp_api_i_P4PzDbEY3W097
The two black tweezers, square file and sanding sponge came in a crappy tool set I found on amazon.
Something like this set: Keadic 43Pcs Gundam Modeler Basic Tools Craft Set for Professional Model Assemble Building (Kit 4) https://www.amazon.com/dp/B07NMH65RV/ref=cm_sw_r_cp_api_i_i8PzDbJNHPJ2M
None of the tools are great but they will do until I can afford better stuff. There’s a lot of stuff you will want if you are going to paint your models and most of it is cheap but adds up. Thiners, primers, paints, brushes, clear coats etc.
This is my station now
https://i.imgur.com/5HPJfTq.jpg
Correct me if I'm wrong, but I noticed a glaring omission from your coffers.
Lineman's pliers, I'd recommend these Channellock's, or if you have a few dollars more their Code Blue line. They also have models with fishtape pullers if you need them.
Other things you could probably use are a good pair of wire nips. You won't find a better value than these Hakkos, A non-marring hammer/deadblow hammer is quite handy to have around. A pair of needlenose pliers. A variety of precision screwdrivers or an encompassing bit set, I like this Tekton Everybit set (confession, mine was a gift from Tekton rather recently but it is still an honest opinion)..
And where are your safety glasses, hmm?
BTW That is a nice selection of tools, this isn't really criticism, just trying to think of things you might find useful that you don't already have...
Also, do buy a tool like this as well. It's a lifesaver, and you'll love it for zip ties.
The DOG3 doesn't come with any coils, as far as I can remember. It does come with extra screws/o-rings.
If you're planning on building your own coils, I highly suggest looking up some videos on youtube. I learned from watching Grimm Green's videos about 3-4 years ago on how to do dual coils and have been happy with them to this day. It's nothing fancy but it gets the job done.
You can get your supplies at https://www.lightningvapes.com/
Don't buy spools of wire that's more than 10 dollars anywhere else... You're getting ripped off.
I would recommend you try using 316l stainless steel wire. Especially since you're thinking of getting an rx200, which is a temp control mod. Stainless steel can do temp control (tc) or wattage mode so you can play with those two modes and see what you like. I started with wattage mode since tc wasn't around yet but have since been doing tc and haven't looked back.
Also, go to this site http://www.steam-engine.org/coil.asp
It's a calculator to see how many loops you'll want in a coil to get your desired level.
You got the wire and the calculator, now you'll need some wicking material. I personally use japanese cotton. I use https://www.amazon.com/ORGANIC-Cotton-Makeup-Puff-Medium/dp/B000TCD51A/ref=sr_1_8_a_it?ie=UTF8&amp;qid=1484118018&amp;sr=8-8&amp;keywords=japanese+cotton
This one pack will last you for more than a year once you get a hang of things. Don't get ripped off and buy them in smaller packs. I've seen b&m stores selling repackaged cotton for 2-5 dollars.
You might need a wire cutter if you don't already have one handy. I've been using this for 3 years now and it still works like new. https://www.amazon.com/Hakko-CHP-170-Stand-off-Construction-21-Degree/dp/B00FZPDG1K/ref=sr_1_3?ie=UTF8&amp;qid=1484118170&amp;sr=8-3&amp;keywords=wire%2Bcutter&amp;th=1
You can also search for mini screw driver sets to wrap your wire around to make your coils. I bought mine at walmart for 5 dollars.
You'll also need tweezers. I've been using ceramic tweezers from lightening vapes, which I linked above. Aside from that, you should be ready to rock. Oh, and get an ohm reader. That might come in handy to check your work.
If you have any other questions, just PM me. I know how scary it is to play with wires/electricity and crap if you're not comfortable with them.
I've been using these for the past 4-5 kits; they are cheap and work very well. These are nowhere near godhands or anything, I'm still shaving down the nubs with my hobby knife.
Those cable ties D: just waiting to cut someone up. You should invest in a pair of flush cutters and trim those properly.
(On mobile so sorry for poor link formatting: http://www.amazon.com/gp/aw/d/B00FZPDG1K/ref=mp_s_a_1_1?qid=1407866976&amp;sr=8-1&amp;pi=SX200_QL40 )
Youtube can be very helpful. While not absolutely required, a coil jig and flush cutters are great to have. For wire, get SS 316L.
Get something like these: https://www.amazon.com/dp/B00FZPDG1K/ref=mp_s_a_1_3?keywords=Copper+wire+cutter&amp;qid=1558021268&amp;s=gateway&amp;sr=8-3
Higher quality which will last you longer but same concept.