(Part 3) Top products from r/ender5
We found 26 product mentions on r/ender5. We ranked the 59 resulting products by number of redditors who mentioned them. Here are the products ranked 41-60. You can also go back to the previous section.
41. Stebcece 3 Colors 3 in 1 Pop-up Flash Diffuser Kit For Canon Nikon Olympus Adjustable
Sentiment score: 0
Number of reviews: 1
100% brand new and high qualitySuitable for most cameraSize: 8.5*4.2cm/3.35*1.65"Quantity: 1 SetAnd due to the difference between different monitors, the picture may not reflect the actual color of the item
 Show Reddit reviews
42. 3D Printer Heat Bed Power Module SIMPZIA General Add-on Hot Bed Mosfet MOS Tube High Current Load Module for 3D Printer Hot Bed/Hot End(2 Pack)
Sentiment score: 1
Number of reviews: 1
MOSFET APPLICATION:This high power module is a general add-on heated bed power expansion module for 3D printer.After Sales Quality Guarantee:All of our mosfets past quality inspection before shipment, Anyone receives a defective one please contact us, we guarantee to ship the new replacement.A GOOD ...
 Show Reddit reviews
43. BIQU TL-Smoother Kit Addon Module for Pattern Elimination Motor Filter Clipping Filter 3D Printer Motor Drivers Controller (3)
Sentiment score: 0
Number of reviews: 1
The TL-Smoother is an addon module for 3D printer stepper motor driversThe board provides flyback diodes (freewheeling diodes) for the motor outputs, so that they are also protected against induction voltages in the unpowered state of the driverYou will got smoother movement especially on the delta-...
 Show Reddit reviews
44. HICTOP Upgraded Replacement Aluminum MK8 Extruder Drive Feed for Creality 3D Printer Ender 3/3Pro CR-10, CR-10S, CR-10 S4, and CR-10 S5
Sentiment score: 0
Number of reviews: 1
[UPGRADING]: Original Aluminum Drive Feed for Creality Ender 3/3Pro CR-10, CR-10 S4, CR-10 S5, it is stable and durable.[REPLACEMENT]: MK8 extruder drive feed kit, can replace acrylic parts of Creality Ender 3/3Pro CR-10, CR-10 S4, CR-10 S5.[Easy TO USE]:for 1.75mm filament of 3D printer MK8 bowden ...
 Show Reddit reviews
45. CHPOWER CR-10 Extruder Upgraded Replacement, Aluminum MK8 Drive Feed 3D Printer Extruders for Creality Ender 3, CR-10, CR-10S, CR-10 S4, CR-10 S5
Sentiment score: 1
Number of reviews: 1
UPGRADE: Right hand extruder kit - Perfect replacement for Creality 3D Printers ENDER3, ENDER5, CR-10 Series, CR-10 S4, CR-10 S5, CR-10 Mini, CR-10S, CR-10 Plus. Upgrade your Creality 3D Printer Extruder with our New "Metal Anodised Aluminum" Upgrade Kit.STABLE and DURABLE: Full metal aluminum alloy...
 Show Reddit reviews
46. Capricorn Bowden PTFE Tubing XS Series 1 Meter for 1.75mm Filament (Genuine Capricorn Premium Tubing)
Sentiment score: 0
Number of reviews: 1
Brand: CapricornLength: 1 MeterID: 1.95mm ± 0.05mmOD: 4.0mm
 Show Reddit reviews
47. Official Creality Ender 5 Pro 3D Printer with Silent Mother Board Upgraded Metal Feeder Extruder and Capricorn Bowden PTFE Tubing 220x220x300mm Build Volume
Sentiment score: 2
Number of reviews: 1
Upgrade Metal Extruder Kit: Ender 5 Pro adopts Creality metal extruder which has better stronger pressure to pushing filament into printer nozzle, improving the printer's performance.Upgraded Silent Mainboard V1.1.5: Ender 5 Pro 3d printer coms with upgraded V1.15 silent Mainboard with TMC2208 drive...
 Show Reddit reviews
48. Creality 3D Printer Part Limit Switch with Separate Package CNC for RAMPS 1.4 RepRap 3D Printer CR-10 10S,S4,S5,Ender 3/Ender 3 Pro (Pack of 3)
Sentiment score: 0
Number of reviews: 1
Compatible with all Creality 3D PrinterNumber of Pins: 33D Printer Accessories Limit Switch 3Pin N/O N/C control easy to use Micro Switch100% Creality OriginalPackage Included: 3 PCS * Limit Switch
 Show Reddit reviews
49. SIQUK 2 Pcs PTFE Teflon Tube (2M) 4 Pcs PC4-M6 Quick Fitting 4 Pcs PC4-M10 Straight Pneumatic Fitting Push to Connect for 3D Printer 1.75mm Filament
Sentiment score: 0
Number of reviews: 1
 Show Reddit reviews
50. CCTREE 3D Printer POM Wheel Plastic Pulley Linear Bearing for Creality CR-7,CR-8,CR-10,CR10S,CR-10 V2,Ender 3/Pro,Ender 5/Pro/Plus 3D Printer(Pack of 6)
Sentiment score: 0
Number of reviews: 1
Material: POMOuter Diameter: 24mm, Inner diameter: 5mm, Height: 11mmNet Weight: 14g/pcsApplication: Used for 3D Printers
 Show Reddit reviews
51. [Gulfcoast Robotics] 3D Printer Borosilicate Glass for The Creality Ender-3-4mm Thick.
Sentiment score: 0
Number of reviews: 1
100% Genuine Borosilicate Glass is thick, durable and resistant to thermal shockRounded corners and beveled edges are safe and easy to handleFits the Creality Ender 3, Ender 3 Pro, Ender 5 and Geeetech A10 Heated BedsPerfectly flat, heat resistant plate does not warp and maintains shape over timeRec...
![[Gulfcoast Robotics] 3D Printer Borosilicate Glass for The Creality Ender-3-4mm Thick.](https://m.media-amazon.com/images/I/51T0-r9uaWL.jpg) Show Reddit reviews
Show Reddit reviews52. Upgraded NEMA 17 Stepper Steel and Rubber Vibration Dampers with M3 Screw -CNC for 3D Printer Creality CR-10, CR-10S Machine CNC 3D Printers (Pack of 3)
Sentiment score: 1
Number of reviews: 1
The dampers reduce stepper motor noise and vibration. Excellent anti-vibration dampers for quiet stepper motors1 Damper used per Stepper or Electric motor3D Printers see a 5-10dB reduction in noise when used on X and Y Axis steppers with the vibration damper for NEMA 17Works on both Cartesian and De...
 Show Reddit reviews
53. Official Creality 3D Ender 3 Ender 3 Pro Ender 5 Tempered Glass Upgraded Build Plate Printing Surface for Heated Bed 235x235mm
Sentiment score: 0
Number of reviews: 1
Experience Pro-hesion- Our state of the art carbon and silicone build surface provides the best adhesion in the market. Once the hotbed cools back to room temperature, the carbon-silicone base will release the model which can be easily removed by hand.This new glass plate can be placed on top of any...
 Show Reddit reviews
54. ANTCLABS BLTouch : Auto Bed Leveling Sensor/to be a Premium 3D Printer (with 2M Extension Cable Set)
Sentiment score: 1
Number of reviews: 1
[Note] Firmware Update: This item requires a firmware update. Please check the manufacturer's instruction page: antclabs.com/manual.BLTouch is an auto leveling sensor for 3D Printers based on open-source.Simple, Smart, High-precision.It could work with any kinds of bed materials, such as glasses, wo...
 Show Reddit reviews
55. 3D Printer Glass Bed Upgraded, Borosilicate Glass Plate for Creality Ender 3 Pro Ender 5 Pro 235x235x3mm Build Surface Replacement with 4 Glass Clips
Sentiment score: 1
Number of reviews: 1
【Borosilicate Glass】High binding power when heating. Easy to separate the plastic parts when cooling.【Size】235mm x 235mm x 3mm. Perfectly fit Creality Ender 3 Ender 3X Ender 3 Pro Ender 5 Ender 5 Pro CR-20 CR-20 Pro.【Safety】Flat Polished Edge, safe to use.【Upgrade】Upgrade your alumin...
 Show Reddit reviews
56. MOONS' NEMA17 Stepper Motor 3D Printer 0.5Nm(71oz-in) 1.5A 2Phase 1.8 Degree Bipolar Stepping Motor 39.8mm(1.57in.) Prusa Extruder Step Motor Smooth Silent(Model MS17HD2P4150)
Sentiment score: 1
Number of reviews: 1
High Torque: MOONS’ high torque stepper motors provide 15% to 25% more torque across the entire speed than conventional motors.Long Life Time: In typical Industrial application, Mean Time Between Failures of MOONS' motor was up to 406,500 hours and Failure Rate was 3.44 hours /1000,000 hours, ...
 Show Reddit reviews
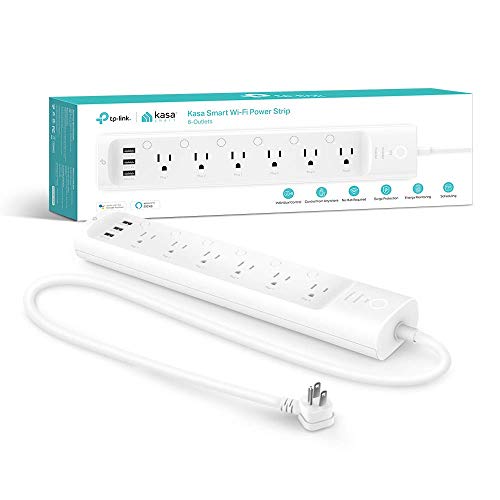
57. Kasa Smart Plug Power Strip, Surge Protector w/ 6 Smart Outlets and 3 USB Ports, Works with Alexa Echo & Google Home , No Hub Required (HS300)
Sentiment score: 2
Number of reviews: 1
6 smart outlets: Independently control 6 smart outlets, and charge 3 devices with built in USB ports; Ideal for controlling electronics in your home, home office, or small businessSurge protection: ETL certified surge protection shields sensitive electronics and appliances from sudden power surges t...
 Show Reddit reviews
58. SUNON KDE2406PHS3 DC Brushless Tubeaxial Fan, 12" Leads Connection, 15 CFM, 24 VDC, Sleeve Bearing, 50mA, 1.2 Watt, 60 mm L x 60 mm W x 15 mm H
Sentiment score: 0
Number of reviews: 1
Sleeve bearing15 cfm air flow31 dba noiseVoltage (vdc) 24
 Show Reddit reviews
59. 235mm x 235mm x 4mm Borosilicate Glass Build Plate/Bed for Creality Ender 3/Pro 3/3X, Ender 5, CR20/Pro 3D Printer (235x235x4mm Square)
Sentiment score: 1
Number of reviews: 1
Made of borosilicate glass.Low coefficient of thermal expansion, does warp during long term use.Polished edges to improve handling safety.Dimensions: 235x235mm, 4mm thick.Fits Creality Ender3 Ender 3/Pro 3/3X, Ender 5, CR20/Pro 3D Printers.
 Show Reddit reviews
Thanks for making a new thread. You mentioned pre-assembled and quality/reliability over cost, but do you have a general price in mind?
Extruder
The most popular option is to just go with one of the cheap aluminum extruders. These are a considerable improvement over the stock plastic version. There isn't really much assembly involved, you will need to bolt on the extruder plate/lever and put the spring in, but it's about the most simple upgrade there is.
On the more premium end, depending on which version you buy, a genuine Bondtech comes pre-assembled. It's about $70 more expensive and the benefits are negligible, but that's an alternative.
Hotend
The two main choices for Creality machines are the V6 or Micro Swiss (or a clone), both of which do have some assembly involved.
E3D sells their V6 as a bunch of parts that you assemble yourself, but Filastruder offers it as a pre-assembled version. I believe most V6 clones come loosely pre-assembled as well. Keep in mind however that V6 isn't a direct install, you will need some kind of printed bracket / fan duct like the PetsFang to mount it.
The Micro Swiss on the other hand is a drop-in installation on Creality machines. You do have minimal assembly putting a few parts together, but it bolts up to the stock machine without any changes. I wrote a guide that covers how to do it for the Ender-3, but the Ender-5 uses the same hotend carriage design, meaning the steps are the same.
---
I would personally go with the cheap aluminum extruder and a Micro Swiss hotend. This would be a cost efficient, yet effective set of upgrades for the machine. There is minimal assembly involved, but there isn't much on the market that is 100% ready to go.
When it was time for my 2nd printer (my first is an old Printrbot Simple Metal) I was planning to get an Ender 3 pro. Then I found out about the 5, watched a bunch of videos and read a bunch of reviews, and decided to go with the 5.
I don't know that it's that much better than a 3 since I cannot compare them, but based on all the reviews, it is more rigid and a bit better built than the 3. I have zero complaints with the build quality of the machine.
My thought was, if I get the 3 pro I'll probably regret not getting the 5. If I get the 5 I won't regret not getting the 3.
If you can can spare the extra $100 (or maybe less now) then get the 5 and be happy.
Mine has been pretty much perfect out of the box. There is only one thing that I could not live with, and that is the plastic extruder. I upgraded to the aluminum one.
I also added TL smoohters, Capricorn bowden tube, and a glass bed. I would not necessarily recommend the upgrades right away unless you are not happy with the performance of the stock machine. Over time you'll gather enough knowledge to decide if you will benefit from upgrades.
I ordered this one from Amazon: https://smile.amazon.com/gp/product/B07KQ2MTGM
Definitely sounds like a clogged nozzle. Clear that out and you should be good to go. You probably don’t need to replace your motor, but if you want to, look for something with higher torque. The Creality motor you linked to has a force of .4nm, while the other motor has a force of .46nm. Moons makes steppers with even higher torque if you’re interested in that. One point to note, when I’ve updated my stepper motors in the past, they haven’t always been precisely plug and play. I had to change the order of some wires in the harness to get it to operate correctly (it would run backwards, haha). You may also have to adjust your vrefs if your new stepper motor requires more current.
EZABL: https://www.th3dstudio.com
Glass Build Plate: https://www.amazon.com/dp/B07GV98LH1
Note: Any decent borosilicate glass plate will do; you just want to make sure it’s the right size. As for the EZABL, getting that up and running for your Ender 5 will probably involve using a jump host (arduino) to load a boot loader in order to update the firmware, etc. honestly I didn’t find the process particularly user-friendly, but if you’re comfortable setting jumper pins, wiring ports, modifying code, etc., you should be OK. The company has very detailed instructions and there are secondary resources (incl. videos) online.
I ended up ordering a generic borosilicate glass bed and applied some GizmoDorks PEI to the top of it. Works excellent and I don't need to use any painters tape or glue stick with it. It was a great upgrade from stock and much easier to level. Haven't decided yet if I want to dump my dial indicator leveling for a BLTouch or equivalent. I might end up doing that though.
The on/off plug just kills the power, its not initiating a system shut down or anything. I use a Octopi with a webcam to print and monitor and I have it and the printer in a smart plug. Works great for me and has saved me some pain in the past. Plus I don't like leaving it on unattended for long periods. I would definitely get an OctoPi going if you're doing things remotely though. Its got a ton of features, but makes remote control easy.
Edit: I use this https://smile.amazon.com/Kasa-Smart-Power-Strip-TP-Link/dp/B07G95FFN3?sa-no-redirect=1 to control 2 printers, two raspberry Pi, and some lamps. I was out of town for a week and I just had my wife remove the prints each morning, but I was able to work on it and turn on the lamp when I knew it wasnt going to bother her to check on prints (versus leaving it on always)
The TH3D board is 32 bit and has more room for firmware. So its "future proof" but I just got done installing exactly what you want to do, and the Creality 1.1.5 board with BLTouch worked just fine. Just make sure you get 2m of extension and not 1m.
​
https://www.amazon.com/dp/B07FR2LLZP/ref=twister_B07BH4PF2Y?_encoding=UTF8&psc=1
​
Print a BL touch Bracket first. I forget if I used the 3mm lower one or the regular one. I think I did the 3mm lower one.
https://www.thingiverse.com/thing:3388571
I also got these, should I install them?
https://www.amazon.com/gp/product/B07DNT72SF/ref=ppx_yo_dt_b_asin_title_o06_s00?ie=UTF8&psc=1
And what about springs/more bed travel. Any improvements I can make there?
I am going to print out the bed support now.
Might help clarify, I'm talking about adding something similar to these in line from the PSU to the power connector for the heat bed on the main board:
https://smile.amazon.com/Printer-Module-SIMPZIA-General-Current/dp/B06XY5HBFXEDIT: I realized by watching the TH3D video I edited into the original post, that the above MOSFET is for a 12v PSU, you should research if a 12v MOSFET is needed instead. TH3D mentioned in the video that they do carry them.
Yup. Nothing really changed other then +5 degrees on the hot end. I do have small mods like these
Aluminum Extruder
tube & fittings
You're going to be looking for something like this.
https://www.amazon.com/dp/B07BF8KXW3/ref=cm_sw_r_cp_apa_i_Mhv4CbV5G6G18
Yep. Just the standard Creality bed.
Official Creality 3D Ender 3 Ender 3 Pro Ender 5 Tempered Glass Upgraded Build Plate Printing Surface for Heated Bed 235x235mm https://www.amazon.com/dp/B07F16WPR5/ref=cm_sw_r_cp_apa_i_35VBDbA6SHFZB
https://www.thingiverse.com/thing:3122247
I was browsing Pi Camera mounts, and found this one. I happened to have one of those lamps already, so it was convenient. I have it mounted to the top front rail.
I put a camera pop up flash diffuser over the light, so that the lighting is less harsh. Without it, it was hard to see the print very well when the lamp was on. Mine is similar to this, and it fit okay on the lamp https://www.amazon.com/Stebcece-Colors-Diffuser-Olympus-Adjustable/dp/B06XCMP85B/
Only downside is that the camera is mounted to the frame, so the angles you can choose from and actually see stuff without being blocked by the rails or hot end are limited.
Meanwell power supply:
https://www.amazon.com/gp/product/B013ETVO12
Ferrules and crimper:
https://www.amazon.com/gp/product/B07LCF39W9
Stepper smoothers (3-pack):
https://www.amazon.com/gp/product/B0727QT316
Capricorn PTFE tubing:
https://www.amazon.com/gp/product/B079P92HN9
Performance 3-D MK8 Apollo 0.4mm extruder nozzle:
https://www.p3-d.com/collections/duraplat-3d-extruder-nozzles
Glass bed (appears to be produced by creality), ebay seller usbkits :
https://www.ebay.com/itm/Creality-3D-Ender3-Ultrabase-Heat-Bed-Glass-Plate-235x235mm-for-3D-Printer-X6W6/143049426638
Aluminum drive feed, ebay seller creality-3d-direct :
https://www.ebay.com/itm/Upgrade-Aluminum-Extruder-Drive-Feed-Frame-For-Creality-Ender-3-3D-Printer/223095519332
***the tube fitting in this kit did not work well, so I used the fitting from the stock creality assembly and it worked fine.
​
THD Firmware:
https://www.th3dstudio.com/knowledgebase/th3d-unified-firmware-package/
Which country are you in? I see 6 packs of the wheels.
CCTREE 3D Printer POM V Slot Wheel Plastic Pulley Linear Bearing for Creality CR-7,CR-8,CR-10,CR10S,Ender(Pack of 6) https://www.amazon.com/dp/B07DC99DPV/ref=cm_sw_r_cp_api_i_detDDbSH2HTZG
Just saw your inquiry about the bed: I'm using this one [Gulfcoast Robotics] 3D Printer... https://www.amazon.com/dp/B07DFTKCV9?ref=ppx_pop_mob_ap_share
I found this one after doing a search for an hour tonight on different websites: https://www.amazon.com/gp/product/B0761PGLZ4/ref=ox_sc_act_title_3?smid=A2UHE58S2974CT&psc=1