 Reddit reviews Alumilite Amazing Casting Resin, 16-Ounce
We found 13 Reddit comments about Alumilite Amazing Casting Resin, 16-Ounce. Here are the top ones, ranked by their Reddit score.
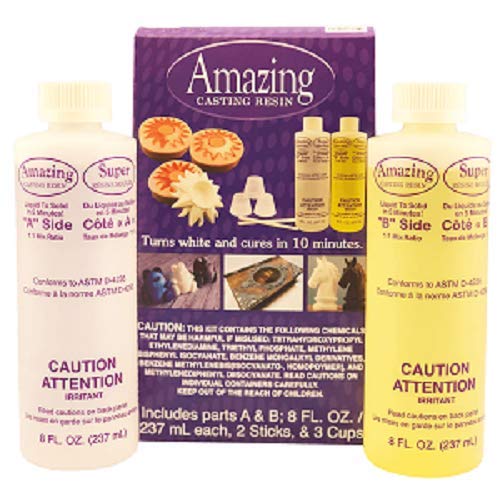
It is durableLess than 10 minutes later remove a beautiful cast replica of your originalYour cured Amazing Casting Resin piece can be painted stained dyed tapped drilled and machinedNote: THE RESIN TURNS WHITE WHEN IT DRIES
The problem with using paints or glues is that they require exposure to air to cure, so it will never set under the top layer of skin.
I recommend to go with resin. This mixes 1:1 ratio and dries to a white solid, semi-translucent at the thin areas, plus any bubbles will make it look legitimate. It’s exactly what came to my mind when you mentioned milk:
Alumilite Amazing Casting Resin, 16-Ounce https://www.amazon.com/dp/B0058V9KMK/ref=cm_sw_r_cp_apip_3CBhw6kz94uzW
Alternately (and inexpensively), you can use Plaster or Hydrocal. It will cost under $10 in that case.
Plaster: http://www.walmart.com/ip/DAP-Plaster-Of-Paris-Dry-Mix-4-Lb-Box/190101660
Hydrocal (as perfect cast, get this at Joann and use a coupon): Perfect Cast 2lb Cast & Paint Casting Material https://www.amazon.com/dp/B0006O87CS/ref=cm_sw_r_cp_api_i_xB9wDbPRN1SXD
I just bought a resin kit on amazon. Messed around with pigments to get the right color. Weirdly food coloring does even better job at getting the “stone” look than the pigments do.
Alumilite Amazing Casting Resin, 16-Ounce https://www.amazon.com/dp/B0058V9KMK/ref=cm_sw_r_cp_api_i_ndR5Cb151WWPX
You could probably cast something in plastic, though looking at the pic you might be better off just learning to adjust to the length. In any case, heres what you'd need
So take the clay and make yourself a new fingertip, with a pocket for your finger stub to go in (mold it around your finger). Take it off and coat the outside with the latex, thin coats letting each dry until its like maybe 1/8 to 1/4" thick. keep the pocket clear so you have somewhere to pour the resin. once it dries peel it off the clay and you'll have a mold.
mix the resin and pour it in, swirling it around, in small amounts. the point here is to build up thin layers until its sturdy. it should cure pretty quickly in small quantities. once you've got enough, peel the latex off and you have a new fingertip. if the latex is too floppy to hold its shape you can use like plaster of paris or something to make a cast around it for stability
the end result is going to be hard plastic like a hockey mask. you can sand it smooth and make adjustments once its done. google "slush casting" for better instructions on it.
its probably going to take some trial and error to get right, but for something that small you'll have plenty of extra supplies. you'll probably want to put something on the fingertip like a piece of felt so it has some grip, and figure out a way to attach it too.
good luck dude.
This casting resin is quite useful, seeing as you cannot cast copies without it!
I have had nothing but excellent experiences using Alumilite Amazing Casting resin. It starts out clear and turns opaque white when it cures. The cure time is nice and fast (15 minutes, about) but not so quick that I can't do sweet gradient pours in small molds. It's also possible to make hollow casts (slush casting) by rotating the (2-or-more-part) mold by hand as it cures.
Indeed. There is a recess of 1.6mm for an inlay and resin https://www.amazon.com/Alumilite-Amazing-Casting-Resin-16-Ounce/dp/B0058V9KMK
Actually bought some from a local Hobby Lobby.
http://www.amazon.com/Alumilite-922593-Amazing-Casting-Resin/dp/B0058V9KMK/ref=sr_1_1?ie=UTF8&qid=1374250502&sr=8-1&keywords=cast+resin
You can buy some cheap mold stuff and cheap resin stuff on amazon to mess around with. I think you're doing small enough scale stuff that for your purposes it will be fine.
I used it to make knock offs of the Dr Wu pistol that they released for MP Prowl. The mold is fine, there's a bubble or 2 in the actual piece like half the time I make one.
This is what I use to cast the stuff'
This is what I used to make the mold
>Pressure pot
i have this mold, be aware that if you want to make full skulls it leaks through the gaps in between the 4 skulls so you always have to make them in batches of 4 and there'll be a fair amount of sanding and polishing; also https://www.amazon.co.uk/gp/product/B0058V9KMK/ref=ox_sc_saved_title_2?smid=A3P5ROKL5A1OLE&psc=1 resin works best as it sets ultra fast so there's no dipping where the hole is but it's solid white.
With candle wax it also leaves a hole at the back of the skull.
Craft stores... or, of course amazon! haha
http://www.amazon.com/Alumilite-922593-Amazing-Casting-Resin/dp/B0058V9KMK/ref=wl_it_dp_o_pC_nS_nC?ie=UTF8&colid=2HE2CVFCHHLDS&coliid=I25EQ234VN5UJ7
http://www.amazon.com/Alumilite-Amazing-Clear-Cast/dp/B008542CNQ/ref=wl_it_dp_o_pC_S_nC?ie=UTF8&colid=2HE2CVFCHHLDS&coliid=I1MQFBZ3T0VWNV
http://www.amazon.com/Environmental-Technology-8-Ounce-Casting-Craft/dp/B000XAR0DM/ref=pd_sim_sbs_ac_1
The damp sand is because the pros do this with a crazy vacuum chamber. We're poor so we can't afford that method.
This is the next best thing, so I'm told. It just keeps everything packed in.
I have not actually done any of this yet! It's a plan in the works lol
You have to make a mold.
Step 1. Make the "prototype" Get a base and glue 10 scarabs in top of each other. to create 1 of these. Note: that since you are making a mold you want to create a pryamid-ish shape so your resin can be removed from the mold. Spray this model lightly with mold release.
Step 2. Make the mold. I pushed the mold putty into the bottom of a plastic cup until it was about 2 inches deep and flat. Take the model made in 'step 1' and turn upside down and push the model into the mold until the model is fully inside the putty and the base is flush with top of the putty. Let this dry for 30 minutes until the putty is firm. You now have your mold!!! Remove your original model from the mold. This mold will likely last for 20+ runs of resin.
Step 3. Spray your mold with a small amount of mold release. Using your 2 part Resin kit, mix a small amount and pour it into the mold and let sit for ~30 minutes. Once dry you should be able to bend your mold to release the resin model from the mold. You are now done!
You only need to repeat step 3 for each additional scarab base you make. If you want different variations/poses of the scarabs feel free to repeat steps 1 and 2 to create different looks.
Below is an example of the 3 parts you need to buy to do this. This should be able to make over over 40 scarab bases.
Example Resin:
https://www.amazon.com/Alumilite-Amazing-Casting-Resin-16-Ounce/dp/B0058V9KMK/ref=sr_1_3?s=arts-crafts&ie=UTF8&qid=1503334670&sr=1-3&refinements=p_n_feature_keywords_browse-bin%3A4689627011
Mold Release: https://www.amazon.com/Environmental-Technology-33900-Release-Conditioner/dp/B000XAWQJU/ref=pd_bxgy_201_img_2?_encoding=UTF8&pd_rd_i=B000XAWQJU&pd_rd_r=GWRHGKFFGEDDNY0W6JD7&pd_rd_w=1IJDT&pd_rd_wg=cvQcD&psc=1&refRID=GWRHGKFFGEDDNY0W6JD7
Mold Putty: https://www.amazon.com/Smooth-Silicone-Making-OOMOO-30/dp/B004BNF3TK/ref=pd_bxgy_201_img_3?_encoding=UTF8&pd_rd_i=B004BNF3TK&pd_rd_r=GWRHGKFFGEDDNY0W6JD7&pd_rd_w=1IJDT&pd_rd_wg=cvQcD&psc=1&refRID=GWRHGKFFGEDDNY0W6JD7
If you're using green stuff as a mold and as a medium, I'd recommend a silicone mold and 2-part epoxy kit. Been thinking about this too for all the tankbusta bombs I'll need! Links to amazon below.
​
In truth, the little bolts will likely never turn out very well, as that's a common place for air bubbles. But the kits below work for all sorts of stuff, and quite a bit better than green stuff. The epoxy also cures in like 10 minutes.
​
https://www.amazon.com/Crafters-Companion-A20501-Products-Alumilite/dp/B004BNA6VA/ref=sr_1_5?ie=UTF8&qid=1541695415&sr=8-5&keywords=silicone+mold+kit
+
https://www.amazon.com/Alumilite-Amazing-Casting-Resin-16-Ounce/dp/B0058V9KMK/ref=pd_bxgy_img_2?_encoding=UTF8&pd_rd_i=B0058V9KMK&pd_rd_r=7780f995-e375-11e8-9223-f3513df83f20&pd_rd_w=7I6mG&pd_rd_wg=r2j52&pf_rd_i=desktop-dp-sims&pf_rd_m=ATVPDKIKX0DER&pf_rd_p=6725dbd6-9917-451d-beba-16af7874e407&pf_rd_r=9CA77A95851BCQNXC5X6&pf_rd_s=desktop-dp-sims&pf_rd_t=40701&psc=1&refRID=9CA77A95851BCQNXC5X6
I've made castings with [this stuff] (http://www.amazon.com/Alumilite-Amazing-Casting-Resin-16-Ounce/dp/B0058V9KMK/ref=sr_1_2?ie=UTF8&qid=1415497741&sr=8-2&keywords=casting+resin) before and it works very well. Easy to use and cures quickly.
You'd need to measure to be sure there's enough for your cavity but I think it would work.
Polyurethane would take forever to dry and it would be as hard as wax at best in that kind of thickness.