(Part 2) Best aluminum metal raw materials according to redditors
We found 122 Reddit comments discussing the best aluminum metal raw materials. We ranked the 51 resulting products by number of redditors who mentioned them. Here are the products ranked 21-40. You can also go back to the previous section.


Maybe something like this
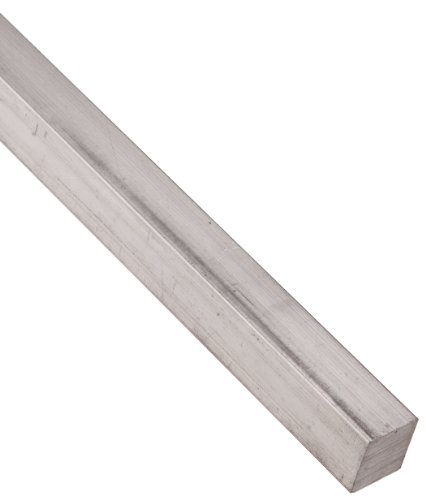
It's a 1-inch diameter aluminum rod submerged in tap water. I'm testing it as part of a immersion cooling system for homebrew (beer making). It has been submerged for 31 days. I intend to use it as part of a peltier system that will control the temperature of fermentation.
Here's a link to the rod
1" Diameter, 6061 Aluminum Round Rod, 12" Length, T6511, Extruded,1.0 inch Dia https://www.amazon.com/dp/B01HUA9LFM/ref=cm_sw_r_em_apap_vVbLFMck9eftG
My question is regarding the "fuzz" in the photo. I suspect it is either:
I chose aluminum because it is generally regarded as safe for food and has much better thermal conductivity than stainless steel.
Any ideas?
Okay, here is the 12ton diy list:
Fasteners;
(4pc)1/4”-20x1-1/2 flat head Phillips- screws for bottom heated plate
(4pc)1/4”-20x1-3/4 flat head Phillips- screws for top heated plate
(4pc)1/4”-20x1” hex head
(4pc)1/4”-20 nut
(4pc)1/4” washer-(feet fasteners)
(4pc) two packs to make 4 springs total
https://www.homedepot.com/p/Everbilt-11-16-in-x-1-1-4-in-and-7-8-in-x-4-in-Zinc-Plated-Compression-Spring-4-Pack-16084/202045472
1/4”x4” oak hobby board (insulation plate) 2 pc cut 5-1/2” x3-1/2” drilled to match the hole patterns of the heated plate so there is a 1/4” overhang around.
(4pc) 3/8”-16x 6” stainless hex head bolt. https://www.homedepot.com/p/Hillman-3-8-in-16-in-x-6-in-External-Hex-Hex-Head-Cap-Screw-4-Pack-45035/204775455 (it’s a better deal to buy the 4 pack I paid individual price and you need 4 total for the carriage guide bolts)
(4pc) 1 pack for the feet cut down to use for stability and to keep from ruining tables. https://www.homedepot.com/p/Everbilt-1-in-Black-Rubber-Leg-Tips-4-per-Pack-49128/203661031?MERCH=REC-_-mobileweb_search_rr-_-NA-_-203661031-_-N (I stuck it on a 1”dowel to hold it and cut with a utility knife)
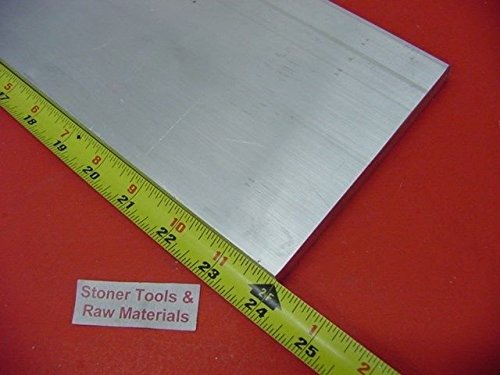
This plate will work for the frame it’s only 12.38” but it will work. You’ll need to make some adjustments, but keep the hole center spacing the same. (Take of 5/16” equally from both sides) that way your press isn’t lopsided.
Quantity 2pc
https://www.amazon.com/ALUMINUM-12-38-T6511-1-000-Solid/dp/B01F80W5HW/ref=mp_s_a_1_3?keywords=1”+x+5”+aluminum+stock&qid=1566403343&s=gateway&sr=8-3
Threaded rod 2pc cut in half to make 4 18” rods
https://www.homedepot.com/p/5-8-in-11-x-36-in-Coarse-Silver-Metallic-Steel-Threaded-Rod-802267/204274014
5/8 nut 16pc
https://www.homedepot.com/p/Everbilt-5-8-in-Zinc-Plated-Coarse-Threaded-Hex-Nut-801786/204647894
5/8 washer 12pc
https://www.homedepot.com/p/Everbilt-5-8-in-Galvanized-Flat-Washer-804136/204633120
1-1/4 angle 1pc cut in half to 18”
https://www.homedepot.com/p/Everbilt-1-1-4-in-x-36-in-Plain-Steel-Angle-with-1-8-in-Thick-801507/204225753
Got tired of my heels sliding into my pedal arms so I added a heel "stop" to my pedal deck. It consists of this and these. I'll edit this later with a shot so you can see how it goes together on my rig.
I also added these hooks for my HMD and headphones.
LEDdrop Aluminum Channel System with White Diffuser Covers, End Caps, and Variety Pack of Mounting Clips, for LED Flex/Hard Strip Light Installations, Pack of 5x 1m Segments, U-Shaped, U-12 https://www.amazon.com/dp/B013U9SXOW/ref=cm_sw_r_cp_apa_Vz-GybB8V696Q
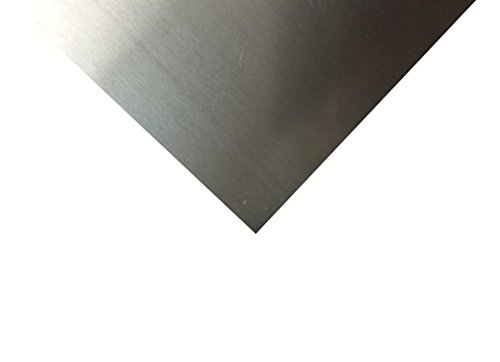
6 inches by 4 inches?
Or do you mean 6 feet by 4 feet?
Edit
If 6" x 4" is all you need : http://www.amazon.com/Aluminum-Sheet-Plate-125-5052/dp/B00H6SOAVY
Sooo, I've bought the dongle but have yet to set it up. I have a few questions about what I'm doing though, since I'm not really sure what I'm doing.
I'm following this
tutorial, and planning on building an antenna (info here and here)
so my qustions are:
2b) If 1/4" rods are a problem, will these be OK? I am assuming so, but just want to be 100% sure there isn't anything I'm missing or didn't know
Thanks! I'm excited to get started!
I'm no pro, but here's my suggstion.
Marking and measuring are important. Get a knife of some sort. This marking knife is cheap and well regarded. Get a combination square (lot available at all sorts of price points). For a longer straight edge, you can use extruded aluminum or angle aluminum which is cheap, lightweight, and straight enough. Then learn to create a knife edge and a handsaw (either western push style, or japanese pull style) and you can cut wood accurately to size.
You're planes will then get you to flatten and surface your boards (you can use the aluminum as winding sticks). Lots of resources available for rehabbing planes. Then the next step is joints. For this, chisels and a comfortable mallet are great (and a rabbet plane if you can find/afford one). To make life easier, a coping saw and a drill (electric or brace and bit) can clear out waste for you. It makes life easier. But the key here is keeping your planes and chisels sharp. I don't know of a budget way to do this. I've got a few Ezelap diamond stones (coarse, fine and extra fine) that I use, but there are other methods as well (sandpaper on glass, waterstones, oil stones, tormeks). But sharpening is critical to handtool woodworking happiness. You might want a sharpening guide as well. The cheap ones work great (I'm not sure why these are so expensive. I think I paid $8 for mine). Then build one of these and you're all set for sharpening. Finally, you need stuff to stick together, so glue and glue applicators are worth looking into. I also use my cabinet scrapers quite a bit, but that's just me. They're cheap so I think everyone should have one.
After that, you can spend all sorts of money on other stuff as you progress. But most anything square can be built with this setup.
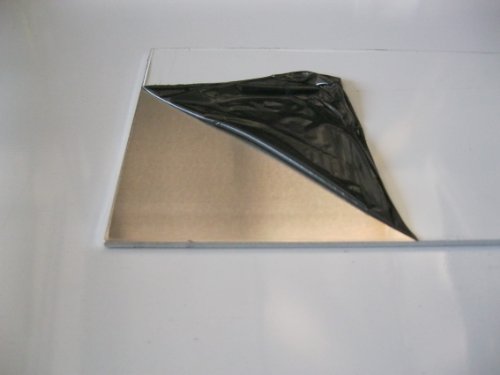
I developed chips in my glass build plate and put a PEI sheet on top of it. So far, loving it more than purple glue stick on glass. It takes a lot less bed heat for that sweet spot of good adhesion and fairly trouble free release. PEI sheet does take a very careful release process on large base builds to not damage the sheet. Tall builds often can be tapped off with the scraper handle.
Using PEI sheet over the glass plate made me realize a thin sheet of metal would be better. Aluminum didn't turn out to be a good surface to directly 3D print on, but an aluminum sheet covered with a PEI sheet should work great, since the aluminum would still be a good heat transfer. The combination of the PEI sheet over the aluminum plate removes all the critical specifics of them, by themselves. Easy removal, cheap, no gluestick needed, nice clean bottom quality (not mirror though). The combination of plate and PEI sheet is a dirt cheap build base.
https://www.amazon.com/RMP-Inch-6061-T451-Aluminum-Sheet/dp/B0147KXYNS/ref=sr_1_73?ie=UTF8&qid=1541445527&sr=8-73&keywords=aluminum+plate+0.25+12x12
https://www.amazon.com/Gizmo-Dorks-Sheet-Printer-Surface/dp/B074XG1NDM/ref=sr_1_2?ie=UTF8&qid=1541445575&sr=8-2&keywords=12x12+pei+sheet
This is my set up. Really, really easy. I dont have a garage full of tools and i still thought it was easy.
Disassemble this https://www.amazon.com/gp/aw/d/B01M14RI79/ref=zg_bs_11058261_7?ie=UTF8&psc=1&refRID=F6E9C1ERF8C0HBFJSA98 (having some of those really small screwdrivers like you'd use to work on eye glasses makes this part cake)
https://www.amazon.com/gp/aw/d/B00ZS6JU02/ref=mp_s_a_1_7?ie=UTF8&qid=1510258631&sr=8-7&pi=AC_SX236_SY340_QL65&keywords=aluminum++1%2F2+inch&dpPl=1&dpID=31FkfqMeaYL&ref=plSrch use a dremel to cut this into plates to sit on both sides of each of your hair straightener heat plates. Having the aluminum against the back of the hair straightener plate will keep you from smashing those wire leads and allow you to put more pressure.
I tried a few diff arbor presses and vises, for my small nug presses (i press a nug at a time, its just for me and rosin lasts me a really long time in my wax pen) .... the 5 inch model of this one gives me plenty of pressure and doesnt break the bank. https://www.amazon.com/gp/aw/d/B003JSY8S0/ref=mp_s_a_1_7?ie=UTF8&qid=1510258796&sr=8-7&pi=AC_SX236_SY340_FMwebp_QL65&keywords=yost%2B5%2Binch%2Bvise&dpPl=1&dpID=41QF1yC8WyL&ref=plSrch&th=1&psc=1
And thats it. At first i used jb weld to hold my plates to each other but found that metal wire (with slots cut into everything to make the wire stay in place and the plates to meet flush) was far easier. Only tool i really used was a dremel and of course my laser thermometer to constantly check accuracy of the temps. I get great results with this setup and it was super cheap. I can post pics of mine if you want. Got it zip tied to the inside of a milk crate to make it portable and stand upright on its own. It looks pretty rough but works great.
Edit. ... personal opinion here ..... but beware of builds using arbor presses, yeah they work, but for my money its easier to twist that 5 inch vise tight really hard then wait and watch the timer...... vs having to stand there with all my weight leaning on an arbor press handle for 60 seconds at a time to keep pressure on. That yost 5 inch vise gives me better returns than i got from an arbor press and it's less work.
Hope i dont get laughed too hard but here is my Frankenstein https://m.imgur.com/a/bOZ1P (note the notches made with the dremel to keep the wire from sliding around the vise when you tighten it.) Works like a champ and cheaply replaced parts.
I'm no u/thebearjew333, just some passerby. Hey, you could maybe cut up some thin tin or aluminum sheet and J B Weld putty together the petals.
Just built one with 2" plates and was very happy I didn't go bigger or smaller. I got these from Amazon.
TEMCo 2 x 2 Inch 3"x5" 6061 Aluminum Tooling Flat Sheet Plate Bar Mill Stock https://www.amazon.com/dp/B00ZS687XI/ref=cm_sw_r_cp_apa_ymc-Bb1JY0BZ8
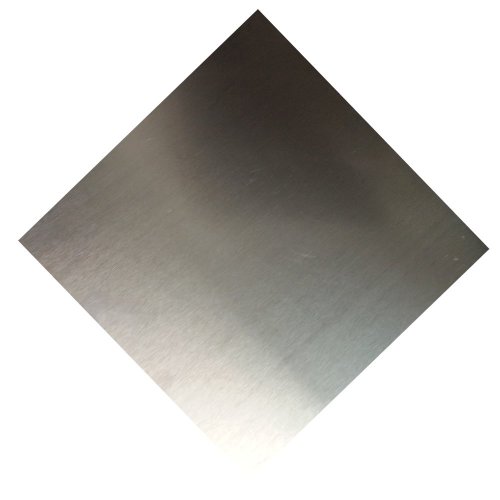
https://www.amazon.com/RMP-063-5052-Aluminum-Sheet/dp/B00HRHB24W/ref=sr_1_4?ie=UTF8&qid=1510325729&sr=8-4&keywords=.063+aluminum
.063" is 1/16 inch, so searching for that in aluminum/steel is probably going to be your best bet
Haha yeah aluminum is much better to work with compared to steel. Here's the link to the aluminum sheet I bought if you're interested: https://www.amazon.com/dp/B01CITA9WO?ref=ppx_pop_mob_ap_share
How many watts are those coils? I don’t think they are going to be very effective.
Cartridge heaters are great because it’s east to drill a hole and they are designed to fit snugly.
I’m not sure about the best way to attach a coil to a plate.
You are going to run into issues machining a slot/recess for the coil and then also have issues getting a good thermal transfer from the coil to the plate.
StonerMetals 3x6” plates on amazon, these are reasonable sized metal plates for a pretty good price. They are just pieces of metal and will need modification.
You will need to drill that out and add cartridge heaters, temp probe and then get a pid controller. Pair that up with a 6 or 12ton harbor freight press and you should have a press for around $300-400.
green genes diy rosin press tutorial on youtube is a great guide to set up a press.
the tutorial also has more detailed links for putting the whole setup together.
https://www.amazon.com/ALUMINUM-Solid-T6511-1-250-Plate/dp/B01F80W79S/ref=sr_1_1/164-2145104-7108442?ie=UTF8&qid=1490495202&sr=8-1&keywords=stoner+metals
Something like this would be your raw material: https://smile.amazon.com/ALUMINUM-T6511-Solid-Plate-Stock/dp/B01F80W7GQ/
Note: that's enough for 2 sets of these.
3/8" X 6" ALUMINUM 6061 FLAT BAR 24" long .375" SOLID T6511 PLATE Mill Stock https://www.amazon.com/dp/B01F80WFY0/ref=cm_sw_r_cp_apa_i_34P5CbHD3A184
Or try metals 4u
I will second drillman1 on ebay.
I don't have any local suppliers that sell off cuts so I have to resort to online purchase. I've bought a good bit of aluminum off cuts from Metal Remnants Inc on Ebay and have been very happy.
If you have Amazon Prime they actually have what I feel are decent prices on aluminum flat bar and other raw materials.
Page 2
​
>\> That's MY time and contribution towards YOUR effort. And rather than appreciate it, you cant fathom that something might be better or different even.. You designed the aluminum rails to primarily be cheap and easy to make at home, these were made for optimal function and quality
>
>Is that right? Then why haven't you released the CAD? Is it because you know everyone will see that you didn't design the rails, and instead just made edits to the FMDA rails? The aluminum rails are designed as the way to do it. Your edits don't change function nor quality - especially not 1018 rails.
https://imgur.com/a/Yx7FSXe so you can SEE the difference. If you look, only the length of the base, the width of the lips, and the internal clearance width are the same. I've literally released every single thing I've personally designed other than the 1 design I gave to someone to make for the group and he invested a ton of money into producing for everyone. I'm not releasing it yet because it would be a dick move to release the CAD of the part hes selling. I did say you're welcome to it once Wojtek is done with this. I've also very explicitly described the differences to DIYers who were making it themselves. I've literally given everything except the cad. Even now with an intersection cut comparison for you.
>\> These have the same purpose but different design, different function.
>
>Jesus dude, you can't keep your feet out of your mouth. The design isn't functionally different and you know it - that's why you refuse to release CAD. Same purpose, same designs space, same exact function.
See above
>\> They dont share any of the same dimensions
>
>Then why, pray tell, do the rail pockets on the "BobTheBuilder" frames bear the same exact dimensions as the FMDA frames? If your rails are different dimensions, so too should be the pockets for them. Release your CAD and stop hiding behind it.
The pockets are all the same so the rails can be used in any version people want. The rails are meant to go in that pocket.
>\> have many improved design features
>
>An undercut and chamfer is like adding cutouts to an AR upper and pretending it makes it better. You can't name a single way in which those "features" make the rail any better.
See above
>\> We put months of effort designing and prototyping these the way they are because it wasnt worth trying to fix your design
>
>You and I both know that's a blatant lie.
You and I BOTH know exactly how long I spent on these because Blaster and I were discussing designs when they were first released and I was providing feedback on the issues I was having. I spent about a month with the redesign and then another month programming and producing them. Messages go from the end of March to the beginning of June right before the reddit Sub went down. You never had an issue then, or any objections, nothing. We actually got along really well up until SpookyRails came out.
Here's a fun tidbit, I was working on the rails with Blaster back in March! You wanna know something even crazier? I sent him the fucking detailed drawings with all dimensions on the modified rails back in April! So you've had them this whole time!
https://imgur.com/AQADtiK
​
>\> Your 'freesource' design in aluminum didnt work for us and we didnt like the quality either so we did it our way with stronger material, better quality, tighter tolerances, and a better design
>
>Lets dig into this one. The open source design works perfectly for everyone who has made them - I, on a manual mill, China, on a CNC machine, Defense Distributed on their various CNC machines, flood on his Tormach, as well as I and a few others who made them using hand tools. So if they didn't work for you, it only reflects the fact you shouldn't be trusted to make anything, ever.
Its only my job to make extremely high tolerance parts for multi billion $$ companies, labs, gov, mil, research. I think I know what I'm doing. I made the original design at the very beginning as it was released with guidance and discussion with blaster on the tolerances and they were way off. Dont know if you've improved upon it since then but as it was released in the beginning didnt work. And the 80ish kits I sent out after my redesign all worked flawlessly.
​
>Way stronger material? 1018 Mild is softer than 7075. It's inferior to aluminum in the most important metric for a rail. So try again kiddo, but facts and data aren't on your side.
Who you callin kiddo, sport? I said steel is stronger than aluminum, you added the "Way". And in almost all cases this is true. Only some of the strongest temper of 7075 is even comparable to 1018. Are you using 7075? That's new information. What temper? There is no mention of this on SpookyRails. In fact YOUR readme states "Something like a 3/4" X 1" ALUMINUM 6061 FLAT BAR 12" long .750 Solid Mill Stock from Amazon would works well.", hell the link you posted to doesn't even list the temper of the 6061, hopefully you're not getting T4 or T0.
So yes, 1018 is "Way" stronger than 6061-T6 (assuming you meant the stronger T6, not what you might be getting from that amazon link).
https://www.makeitfrom.com/compare/6061-T6-Aluminum/SAE-AISI-1018-G10180-Carbon-Steel
Youre right that 7075-T6 is a better choice. Pretty comparable to 1018 except for fatigue. But probably fine if your 6061-T? has been holding up. Make sure they don't give you 7075-T0 instead, that's actually weaker than 6061-T6. Ask for certs, but you know how that Chinese aluminum can get mislabeled though.
To Be Continued
Page 2