(Part 2) Best automotive electrical accessories according to redditors
We found 102 Reddit comments discussing the best automotive electrical accessories. We ranked the 74 resulting products by number of redditors who mentioned them. Here are the products ranked 21-40. You can also go back to the previous section.


Here are some links for anyone who likes what you see here.
Potato Express
Phantom Saucer
Wipe New
Easy Eggwich
Fast Brite
Hover Ball
Micro Touch Max
Side Socket
Mighty Charger
Swivel Sweeper Max
Ball Pets - Kitty
You might be able to find some rubber grommets to shove in the lid to stay and you just shove the tube through the hole in the middle of the grommet. That would create a seal.
Edit: Something like this: https://www.amazon.com/dp/B01BGZ9WVU/ref=cm_sw_r_cp_api_i_FwR5Cb0767VAG
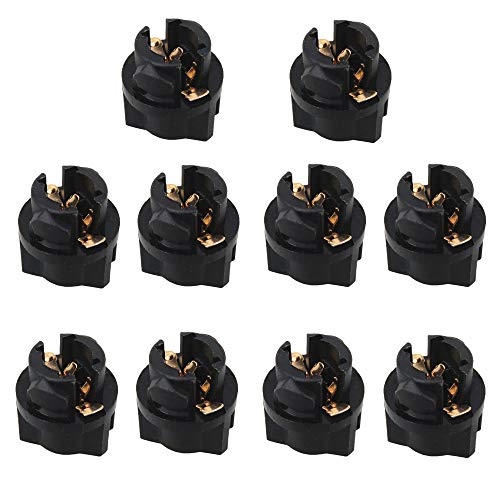
"stud socket connector"
Part numbers I have found: 5656C, AC Delco# PT404, GM# 12112171
here's a couple of sources:
http://www.repairconnector.com/products/GM-Ford-Chrysler-Universal-Stud-Socket-Pigtail-.html
https://www.summitracing.com/parts/pco-5656pt/overview/
https://www.amazon.com/Pico-5656PT-Universal-Pigtail-12112171/dp/B0002JN06U
(25 pack) https://www.amazon.com/Pico-Universal-Pigtail-12112171-Package/dp/B01DCJGY5U
It sounds like the jack is worn out. You can replace it with this procedure with part 39114-SCV-A01ZA. You can Google that and find a few sources, but here are a few I found:
Amazon
Honda Parts Now
Honda Parts Cheap
That said, if you were already planning on upgrading your head unit soon, I did just go ahead and do that
> Splice them into your trailer wiring
That's what I did. I went up about 4" from the 7-pin plug, cut the necessary wires, used uninsulated butt connectors with a closed-barrel crimper and adhesive-lined heat shrink to splice in a 6-pin Deutsch DT connector pigtail, then built my own wiring harness that plugs into the Deutsch connector and ran it up to the headache rack.
Went with the 6-pin Deutsch connector since I only needed 5 of the 7 wires (LT, RT, Tail, Backup, and Ground) and 5-pin Deutsch connectors aren't available. Deutsch DT connectors are frequently used in the automotive aftermarket (probably more so than Delphi Weatherpack connectors). I know Rigid Industries uses them for their LED lights, and Smith Race Wire uses them for parts of their custom wiring harnesses.
Also, since you can only close-barrel crimp one end of the uninsulated butt connectors, I chose to close-barrel crimp the side that had only one wire (since closed-barrel crimping is more secure, and the one wire was looser in the connector) and used Channel Lock 909 Pliers to crimp the end with two wires.
Once you made your harness, make sure you slip it into some split wiring loom. Using a loom insertion tool makes quick work of that. Wrap the wiring loom with non-adhesive dry vinyl tape for a factory-finished look and to avoid a gooey, sticky mess in case you need to unwrap the wiring harness in the future.
Finally, a good wire stripper will save your hands a lot of fatigue compared to using a standard wire stripper that you have to always pull the wire through.
If this is the low-beam, you need this part.
If this is the high-beam, you need this part.
After that, you just need some wire strippers and these connectors to hook the new socket. No crimpers required with these types of connectors.
The text on the bulb says 55W which should be stock. Here's a right angle connector with a ceramic element that should resist heat a little better. Have a competent electrician type splice it in properly, treat it with dielectric grease, and you should be good to go, after checking for electrical shorts, improper fuses, etc.
i'm pretty sure this uses the lightning plug for charging and aux for audio - so you might not be able to control playback via mmi/steering wheel controls.
this is a genuine one, but yeah, a bit pricey
https://www.amazon.com/gp/aw/d/B01DB44V42?psc=1&ref=ppx_pop_mob_b_asin_title
I want to weigh in on the Deebot N79S. This robot is garbage and I hate it and I'm pissed off I have no way to review it to warn other people about how garbage it is. Amazon disabled reviews on the page for this product likely because too many people were giving bad reviews.
I have the same problems OP has, where it's constantly getting stuck underneath/ontop of things and it drains its battery. For me a big problem is that it gets stuck underneath my kitchen counters. The rounded design of the bumper plate on the front of the robot allow it to wedge its way underneath things without triggering the bump. I've resorted to duct taping a piece of cardboard to the front of the robot to prevent it from going underneath the counter while still being able to get underneath the couch and other low areas. It also likes to get stuck on very low carpets. These are not plush carpets, just a few mm high. Sometimes they go over the carpet, sometimes they get stuck trying to get on it, sometimes it pushes the edge of the carpet over and flips part of the carpet upside down.
The robot is completely inconsistent with what indicators it uses for what it can and cannot get over. Sometimes it can get over a cable sometime sit cant. From small couch side lamp cables it can sometimes get over and sometimes it detects and turns around to a large 5/8ths" cable tube it will obstinately try to climb over and get stuck on.
And probably the worst part is that it seems so obvious that they could make this at least the tiniest bit less frustrating by sending notifications via the app when there's a problem, but it doesnt. You can check the app and see the error manually. Clearly the app has all underlying technologies but doesnt put them together in a meaningful way. The robot will instead beep for what is never long enough to find where it's stuck under but stay powered on and draining the battery so that when you do eventually find it you have to charge it for a few hours before sending it back out.
This robot is absolutely horrid. 0/10 do not buy. I wish I had given up on it sooner before I ran out of time to return it.
Edit: I just remembered about the most recent problem I've been having with my Deebot, it's started pushing its basestation around so that at the end of its vacuum cycle it cant even properly find its way back home to recharge. I have to manually pick up and place the base station back against the wall and the Deebot back on it to recharge.
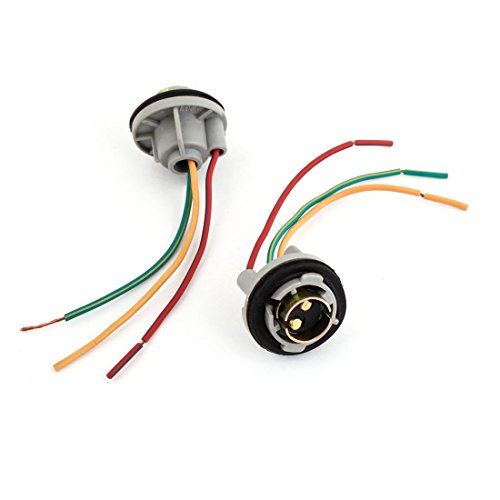
>5K0941109C
https://www.ebay.com/itm/VW-VOLKSWAGEN-OEM-15-16-Tiguan-Headlight-Head-Light-Lamp-Mount-Ring-5K0941109C/323614019607?epid=1652079174&hash=item4b58e61017:g:8ogAAOSwgv5ZQ3a-&frcectupt=true
​
https://www.amazon.com/Volkswagen-Genuine-SOCKET-5K0941109C-OEM/dp/B01M0IIA1P/ref=sr_1_1?keywords=5K0941109C&qid=1559220156&s=gateway&sr=8-1
​
etc.
I bought this one but apparently it requires a connector I can't seem to find. It has a completely different port than the original.
I did find a similar looking one but according to Amazon it wont fit.
Any help would be awesome.
Can you tell me if THIS is the kind of thing you're talking about? Can put one of these in the light socket & solder the LED strip wires to it?
Sorry, but I need this explained to me like I'm five, it's surprisingly hard to find a clear how-to for dummies on this.
They're quite a a simple loom, I made a new one for my Z1, just bear in mind that all the bullet connectors are slightly smaller than the standard ones you can buy off the shelf in most parts suppliers
https://www.amazon.com/Motorcycle-Bullet-Connectors-Covers-Terminals/dp/B01EREJYMY
Just get a kit with a relay for switching on and off off-road lights. There are a ton them on Amazon for cheap and you won't have any worries about current, arcing etc. - https://www.amazon.com/EPAuto-Light-Wiring-Harness-Switch/dp/B01DJOUEIQ
Hard to tell from the picture but that one looks like 4 pin. Make sure you get a 5 pin. If they don't have any at the auto parts store, I'd recommend this exact one, simply because it comes with the relay and a plug in for the relay with pigtails on it, and it's waterproof :)
Pico 5593PT 12 Volt 40 Amp 5 Terminal General Purpose Automotive Change-Over Relay and Connector Pigtail Set https://www.amazon.com/dp/B007UTFJHS/ref=cm_sw_r_cp_api_0tGlzbY6SBP4C
Something like this
How do your sockets look? I've had to replace the actual tail light assembly before as well when the sockets got all corroded and rusted out. I could clean them and make them work for a few runs, but they would just crap out again after a bit.
If you don't want to mess with the whole light assembly, you can always swap out just the socket
change your third and fourth gear pressure sensors
https://www.amazon.com/Genuine-Honda-28610-RKE-004-Pressure-Sender/dp/B005AB0NGK/ref=sr_1_7?ie=UTF8&qid=1540213312&sr=8-7&keywords=acura+tl+pressure+switches&dpID=41%252BoG0Smn9L&preST=_SX300_QL70_&dpSrc=srch
https://www.amazon.com/gp/product/B00IMLAHHU/ref=oh_aui_detailpage_o09_s00?ie=UTF8&psc=1
thinking back these are what I bought for my type s which may have a different transmission so do some research if your car has the 3.2
Do you think these connectors would work?
http://www.amazon.com/Deutsch-Series-Connector-Barrel-Terminals/dp/B00D3RS64E/ref=sr_1_3?s=automotive&ie=UTF8&qid=1376787011&sr=1-3&keywords=Deutsch+connector+2+pin
They seem cheap enough, and if they work that would be ideal.
Also, would this flasher relay work?
http://www.ebay.com/itm/SUZUKI-BANDIT-1200-LED-FLASHER-RELAY-7-PIN-NEW-/120786114228#vi-content