Best beer brewing bottles & bottling products according to redditors
We found 346 Reddit comments discussing the best beer brewing bottles & bottling products. We ranked the 107 resulting products by number of redditors who mentioned them. Here are the top 20.


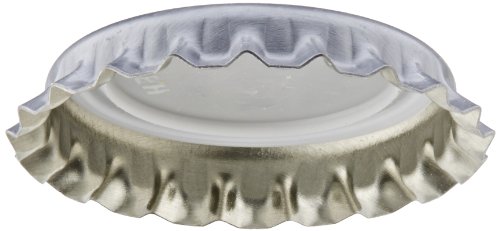


That is a bottle capper. It is used in homebrewing.
The working man's strap lock.
Don't buy a kit! They sell you all kinds of shit you won't use when there are better options for similar money.
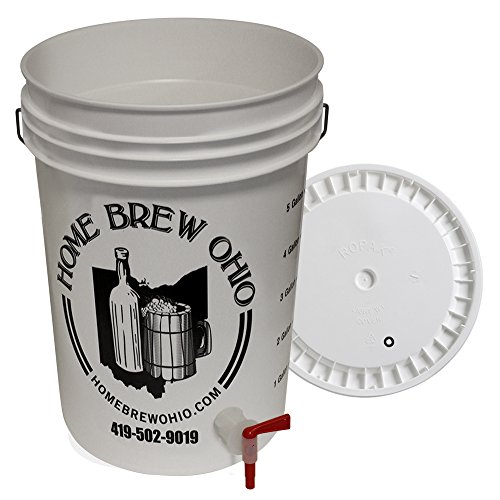
Get a brewing bucket as if you don't have a bottler then this will make your life so much better.
Get 2 carboys (glass is best but better bottles will work too). Check Craigslist for these...you can get some awesome deals.
Get 1 Refractomoeter instead of a hydrometer because they use WAY less of your must to calculate and they aren't mega fragile like hydrometers are.
You will want an auto siphon
You will want a carboy brush that fits on a cordless drill because cleaning a carboy without one fucking sucks (and for 18 bucks this is a no brainer).
You will need sanitizer. I personally like Iodophor because it's super cheap, it doesn't really foam up and it lasts forever. I bought one of THESE bottles like 2 years ago and it is about half full even though I brew between 50-100 gallons a year.
I always advocate people start with beer bottles rather than wine bottles. The reason for this has less to do with the bottles and more to do with equipment. The Ferrari Bottle Capper is 14 dollars while a good floor corker for wine bottles will set you back 60 bucks. In addition, it's cheaper to bottle in 20 ounce beer bottles with caps rather than in wine bottles with good corks. Use of a double lever corker for wine bottles should be considered a war crime...seriously...unless you're a masochist who loves dumping wine everywhere and having to clean it afterwards...then just avoid them...they are absolutely awful.
If you go the wine bottle route then NEVER use agglomerated or colmated corks (the ones made from tiny pieces of cork glued together) as they fall apart and will leave chunks in your bottles. In addition they don't age well, so you are much more likely to lose your brew to spoilage. I like synthetic Nomacorc but you can also buy very good quality solid natural corks as well.
Good oxygen absorbing bottle caps on the other hand are mega cheap. Again...this isn't about one being better than the other, so you can use either one.
For wine bottles, I REALLY like the ones with screw tops because they make it nice and easy to cap your bottles once opened. But for all of your bottles buy these locally...shipping will double or triple the cost of these vs buying locally. I get them for 15 bucks a case a few miles from my house...they're almost 30 a case on Amazon or close to that from Midwest or from Ohio (shipping is like 11-15 dollars a case.)
For beer bottles...I prefer clear, but they'll be tough to find locally so I often end up with brown ones. Again...buy these locally not online due to shipping costs. Your local brewing supply stores buy these pallets at a time so even Amazon can't compete with the lack of shipping costs.
You would like to know about a bottle wand.
It has a spring loaded stop. You press it against the bottom of the bottle - the bottle fills all the way to the rim - stop pressing and remove the bottle wand - perfect fill level every time - when you stop pressing on the wand, it stops releasing mead/beer/wine/etc.
Firstly, once oxygen has entered the bottle, the countdown is on until it goes stale. You can try to reduce the time exposed to oxygen, but short of recarbonating the bottle with more sugar and yeast, you're never getting the oxygen out.
Secondly, you're battling against losing CO2. The best bet to keep CO2 in solution is to keep the beer cold. Beer loses CO2 as it warms up. So pour your first glass, and then get the bottle back in the fridge ASAP.
Thirdly, and I have no science to back this up, I like to use a rubber cap to seal my bottle in the fridge. I figure this will physically block some of the CO2 from escaping, and reduce the oxygen getting in, but I honestly don't know if it works or it's just placebo. I've left half full bombers sit in my fridge for 3-4 days with a rubber cap with some solid success though.
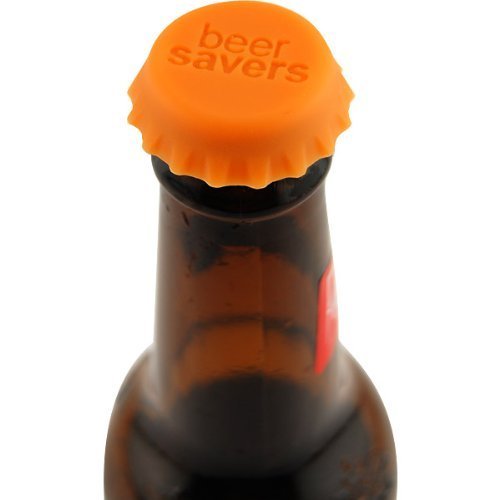
Beer Saver Cap I'm talking about : https://www.amazon.ca/Beer-Savers-Silicone-Rubber-Bottle/dp/B003Z5GW0O
https://www.amazon.com/Mr-Beer-Homebrewing-Bottling-0-5-Liter/dp/B0085F3PTU/ref=sr_1_1?ie=UTF8&qid=1519763137&sr=8-1&keywords=mr.+beer+bottles
These are fine, you just fill them up, and screw on the cap.
Holy crap, i didnt even think of those as a washer. Ive got like 200 of them. And theyre super cheap online. Woooooo, sorbo alternative!
Grolsch Bottle Replacement Washers (Pack of 100) https://www.amazon.com/dp/B004NXUJ06/ref=cm_sw_r_cp_apa_RO5lzb59739Q4
Get one of those 2-3 gallon jar/beverage dispensers with a spigot (make sure spigot is not metal, many look metal but aren't). It makes bottling so much easier. Also, a funnel. And some type of bottle with lid like this
The David Grolsch signature starp locks are the best:
https://www.amazon.com/Naruekrit-OT-EVP0-QWCJ-Grolsch-Gaskets-Count/dp/B0064OE7SC/ref=sr_1_3?ie=UTF8&qid=1505248012&sr=8-3&keywords=grolsch+gaskets
otherwise known as amber bottles I can buy at my local Sprouts, Natural Food Grocers, or any other place that sells patchouli.
Also available on Amazon if you don't feel like venturing out. https://www.amazon.com/32-Ounce-Kombucha-Growler-Polycone-Phenolic/dp/B0749ZWF1C?ref=ast_p_pc_rc
Looks like the top two photos are in the open position, and the bottom is closed. Pushing down towards it closes the clip, pry the lever open to release tension. Describing this is hard.
Think about a bottle with this kind of top. Similar concept! https://www.amazon.com/dp/B078JYNSCR/ref=cm_sw_r_cp_api_i_ev8jDbJ87MJPR
Beer Savers! I use them, they work. http://www.amazon.com/gp/aw/d/B003Z5GW0O?pc_redir=1413281083&robot_redir=1#
Fermtech Mini Auto-Siphon https://www.amazon.com/dp/B0064ODL1G/ref=cm_sw_r_cp_api_O18IBbH9HNE3C
I bought a bunch of 16oz. glass swing-top bottles from a retail place called Chef's Emporium. I put pourer tops on them when in use and seal them with the swing top when it's time to put them in the fridge.
They're all over Amazon. Like this: Swing Top Grolsch Glass Bottles 16oz - CLEAR - For Brewing Kombucha Kefir Beer (6 Set) Bonus Gaskets https://www.amazon.com/dp/B01LB1862A/ref=cm_sw_r_cp_api_pG0Rzb1GQ3PJY
OR (8 US cents each) http://www.amazon.com/Brewcraft-Grolsch-Bottle-Replacement-Washers/dp/B004NXUJ06
Not sure if you have found these yet. They are about $1.60 a piece... The best way to overcome the fewer bottles is to brew more beer =)
http://www.amazon.com/CASE-OF-12-Bottles-AMBER/dp/B005CIFIDO/ref=pd_sim_indust_1
If you're interested in cider, here's an easy method that doesn't use the kit.
Sweet ciders add another couple steps, but I can go into that too if you'd like. Once you depreciate the cost of the gear over several batches, it's quite cheap compared to commercial cider.
Jezuz christ you are freaking me out. Get one of these!!!
I've had a 3 gallon, albeit only partially filled, glass carboy slip an inch and hit the cement floor. I almost cried.....
And then this!!!
These are the bottles I use for second fermentation.
This is the heating pad I use. It's pricey but you have complete control over the exact temperature you want and if it's a hobby you plan on continuing, it's well worth it.
6.5gal plastic fermentor - $17.88 (Don't bother with glass fermentors!)
6.5gal Bottling Bucket - $18.81
Hydrometer - $12.99
3 3-piece airlocks - $5.00 - trust me, they'll break.
stopper not needed with plastic fermentor
Bottle filler - $5.09
10 ft 3/8th inch tubing - $10.99
Auto siphon - $8.76
don't need a bottle brush with plastic fermentor
144 bottle caps - $5.78
Use any pure sugar for priming - just calculate it right. I use cane sugar without issue.
Wing bottle capper - $15.48
Dial thermometer not really needed if you're slapping on an adhesive one, but definitely get this for a hot liquor tun if you're doing that.
Wine thief - $11.20
I never used a funnel or fermentor brush - you can use anything to clean but I suggest Oxyclean rinses
32oz Star San - $20.70
Adhesive Thermometer - $4.84
Total Cost: $137.52. Not ridiculous savings BUT you get 32oz of star san instead of 4oz of io-star which will last you years and sanitizer is expensive. You get a plastic fermentor instead of glass which is so much easier to clean and keep light out. Glass carboys are good for aging and aging is good for wine or special beers. Focus on simple ales that don't require it first.
The real savings come when you do all grain and make your own equipment. You can save $137 alone if you buy a big stainless steel pot and slap on a dial thermometer with a ball valve.
That's the kit I started with in September. The beer turned out great, even though I forgot to aerate it before pitching the yeast. I think it was around 4% ABV. The kit has everything you need to get started and you can upgrade from there. The bottle filler sucked, so I would recommend a spring tip one like this. Since then, I have upgraded to a bigger kettle and purchased a glass carboy.
Side note: Northern Brewer was recently acquired by InBev, and /r/homebrewing is not happy about it. I've started ordering from www.love2brew.com instead.
A bench capper is a nice upgrade and Amazon has few in the $38 range. Anything cheaper is probably going to be similar to the handheld red ones that are standard with most kits.
I'm not advocating such silliness, but here's an example: http://amzn.com/B003Z5GW0O
Mead is super easy and rather cheap compared to other types of brewing. If you have a local homebrewing store they can help you get started and will have everything you need, most major cities have one and I find that the people are almost always very helpful.
The first thing is to decide volume, then if you want to boil or not, and then recipe (which includes batch strength). I prefer to boil my mead to help dissolve the honey and make sure its good and sanitized, but thats not entirely necessary
So Optional Equipment (if you boil)
1 Big Boil Pot - This needs to be big enough to do however much you want as a batch. If you get a 5 gallon pot, this is good enough for 2-3 gallon mead as well as if you got into Extract Beer Brewing. If you buy a 10 gallon boil pot (usually $120 or so) its big enough for 5 gallon All grain beer batches, as well as 5-8 gallon mead batches
2 Burner - If you are doing smaller batches your stove can handle it, if you move up to big batches or beer batches it helps to have a propane burner and propane tank.
Non optional Equipment:
1 Fermentation/Secondary Vessel - There are two options here. The cheaper route is the 8 gallon buckets with a lid and an airlock. A rubber mallet also really helps to get it on the first time (trust me here). They are about $20. The second option which I'd recommend is one of the Speidel fermenters, they are a bit more expensive at $50-$60 but have a nice spigot for siphoning and are super nice. You also need an aging vessel as you need to let it sit for 5-6 months before bottling. For this I recommend a PET carboy or a smaller Speidel Fermenter
If you are doing 5gallon, get the 8g Speidel or equivilant sized bucket. Get a plastic carboy or the smaller speidel fermenter for aging
The downside to not doing the Speidel fermenters is then you need a bottling bucket and a siphon pump to get the mead out of the bucket, I like the speidel fermenters because I can just transfer to it and use it to bottle with.
Bottle Filler and 3' rough of Hose - This is for bottling
Bottles - I prefer the nice flip top ones but they are usually around $30 for only 12 of them. The other option is to buy some bottle caps, and clean
Iodophor / Star San - Cleaner, just google them. You need this to clean all your equipment as well as your fermenters
There are some minor other things, such as a Big spoon for stirring, having a thermometer is a good idea... maybe other things but I think I covered most of it
Recipe: (The recipe itself)
Normal recipes are around 3 pounds of honey per gallon of water, so you need to get 15lbs of honey if you do 5 gallons. More honey will up the alcohol, less honey will lower it
A vial or two of yeast. I like to pitch two of them just to make sure it starts. I use Sweet Mead Yeast
Yeast Nutrient - Mead doesnt have some of the nutrients beer does, so a bit of this added per the instructions gets the yeast going
Optional - Flavoring. I tried out strawberry this time, totally optional but just google it and you can find it. Usually it comes in a tiny bottle
Instructions
First you dissolve honey into water. If you are doing a 5 gallon batch, use 5.5 gallons of water. If you are going to boil, nows a good time. During this process, Add the yeast nutrient. Put the mixture into your fermenter vessel. Cool it down to room temperature (important)
Its fairly important to ferment at 68-70 degrees for at least the first week or two (yeast stuff), so if you don't have central heating/cooling that could be an issue you have to tackle from another angle. At this point, pitch the yeast and seal it up and let them do their job
Wait about a month for it to ferment (the airlock will go bloop bloop a lot). Sanitize the hose and secondary/aging vessel, this vessel should be close to your actual volume so there isn't head room. Then transfer to the secondary, pop the airlock on it and let it age for usually 3-6 months, depending on your patience. At that point, transfer it back to a different vessel (to get it off the trub) and during this process add any flavoring (if any). Finally, siphon into bottles using that little spring bottle filler attached to the hose, and cap it
That was a bit long winded but I was trying to be thorough. if you have any questions feel free to PM me!
This one will work
https://smile.amazon.com/Fermtech-Mini-Auto-Siphon-3-8-inch/dp/B0064ODL1G/ref=sr_1_3?ie=UTF8&qid=1494300266&sr=8-3&keywords=auto+siphon
Okay, here's what you do.
Get a six-gallon, food-safe plastic bucket, with a lid with a small (like, quarter-inch) circular hole in it. You'll also need an s-shape airlock to put in the little hole. Get five gallons of apple juice from the grocery store, and a packet of wine yeast.
Clean the bucket with a 1% bleach solution (...the other 99% water) and rinse thoroughly. Add apple juice and yeast to the bucket, seal with the lid and airlock. Wait three to four weeks.
During this time, also get 48 empty beer bottles (you can use your own empties if you drink enough), and enough beer bottle caps. You'll also want a capper -- there are cheaper and harder-to-use options.
After the three to four weeks of fermentation, open the bucket and add about half a cup of sugar (corn sugar works best), and stir it in. Fill the bottles using either the spout on the bucket or a siphon hose, leaving a half- to three-quarters-inch of air at the top of each bottle.
Let the bottles sit a couple weeks to condition (carbonate), then refrigerate and enjoy. The dryness of the resulting cider will be based on which yeast you chose, so if you want a sweet cider use a white wine yeast, and if you want ultra-dry cider, use champagne yeast.
When I brew in bulk, I do like the beer homebrew folk do and use an auto-siphon with a bottle filler attachment. The siphon goes into the bucket, held just above the bottom to avoid the dead yeast, and stays far enough below the surface to (mostly) avoid the yeast strands, everything staying still and not mixed around. When a strand does sneak through, it gets caught in the bottle filler tip and can be easily wiggled out if problematic. It makes filling bottles extremely clean and simple. But unless you're brewing 3+ gallons in a single container, it's probably not worth the effort and I end up just using strainer + funnel.
I've made some slight modifications to this, mostly to make it easier to follow. I've also included steps that should be quite obvious to someone who's done any homebrewing before, but I wish someone had told me when I first started.
I'd link to the original, for the sake of attribution, but the user who posted this deleted their account not long after I wrote everything down.
This will produce a sweet fruit-mead (or melomel). WARNING this will be far more alcoholic than it tastes, and should not be consumed if you've recently taken antibiotics, or suffered gastric distress, as the yeast culture will still be alive, and will happily colonize your intestines if your gut microbiome is too fucked up.
Equipment: Most of this stuff will be a good deal cheaper at your local homebrew store, but I've included amazon links (also to the yeast).
At least 2 (3 is better, for reasons we'll get to) 1-gallon jugs (I don't recommend scaling this up), glass preferred. Add an extra jug for each additional batch. This one includes a drilled stopper and airlock
Drilled stoppers (or carboy bungs) and airlocks, non-drilled rubber stoppers.
An autosiphon and food-safe tubing.
Food-safe sanitizing solution (I recommend StarSan).
An electric kettle with temperature selector is useful, but not needed.
If you want to bottle it rather than just keeping a jug in your fridge:
Empty beer or wine bottles (just save your empties), capping or corking equipment, caps or corks, and a bottling wand.
Ingredients:
2.5 lbs (1130g) honey, clover recommended.
A cup (approximately 250ml) or so of fruit (I recommend blackberries, and I strongly recommend against cherries, other recipes have worked for me, but this yields a very medical flavor with cherries).
1 packet Lalvin EC-1118 yeast (a champagne yeast notable for its hardiness, its ability to out-compete other microorganisms, and its high alcohol tolerance).
Optional: potassium sorbate (to reduce yeast activity when our ferment is done), pectic enzyme (aka pectinase - for aesthetic purposes). Both are also available in bulk.
Process:
Day 1:
Mix sanitizing solution with clean water at specified proportions in one of your jugs, filling the jug most of the way. Stopper it, shake it. Remove stopper, set it down wet-side-up (to keep it sterile), pour the fluid to another jug. There will be foam left behind, this is fine, don't bother to rinse it or anything. At low concentrations this stuff is totally fine to drink, and won't ruin your fermentation or flavor.
Add honey to jug, all of it.
If you have a kettle, and your jug is glass, heat water to around 160F (71 Celsius), pour a volume into your jug roughly equal to the amount of honey present. Fix sterile stopper to jug. Shake until honey and water are thoroughly combined. The heat will make it FAR easier to dissolve the honey. Set aside for an hour or so while it cools. Add clean water 'til mostly full, leaving some room for fruit and headspace.
If you're missing a kettle, or using a plastic jug, this is gonna be a little harder. Fill most of the way with clean water (I recommend using a filter) leaving some room for fruit and headspace. Fix sterile stopper, shake 'til honey and water are thoroughly combined. This will take a while, and you will need to shake VERY vigorously.
At this point, you should have a jug mostly-full of combined honey and water. To this, add fruit (inspecting thoroughly for mold, don't want to add that). Then dump in a single packet of the Lalvin EC-1118 yeast, don't bother rehydrating it first or anything, it'll be fine going straight in. Add pectic enzyme if you have it (this does nothing to the flavor, it just makes the end product less cloudy). Stopper it up, shake it again. This jug now contains your "must" (pre-ferment mead).
Pour some sterilizing fluid in a bowl, put a carboy bung/drilled stopper in the bowl, with an airlock. Ensure full immersion. Let sit for a minute. Replace stopper with your bung/drilled stopper, affix airlock. Fill airlock with clean water, sanitizing fluid, or vodka. Rinse the stopper, fix it to your jug of sanitizing fluid.
Place must-jug in a dark place, I recommend a cabinet or closet.
Days 2-7:
Retrieve jug, give it a little jostle. Nothing so vigorous as to get your mead into the airlock, but enough to upset it. This is to release CO2 buildup, and to keep any part of the fruit from drying out. The foaming from the CO2 release may be very vigorous. Do this over a towel for your first batch. If the foam gets into your airlock, clean your airlock and reaffix it. Perform this jostling procedure at least once per day, more is better.
Day 8:
Final jostling, I recommend doing this in the morning.
Day 9:
let it sit, we want the sediment to settle.
Day 10: Time to get it off the sediment
Shake sterilizing fluid jug. Affix tubing to siphon. Put the siphon in the sterilizing fluid, shake the jug a little just to get the whole siphon wet. Siphon fluid into either a third container or a large bowl. This is all to sterilize both the inside and outside of your siphoning system.
Remove siphon from jug. Give it a couple pumps to empty it of any remaining fluid. Place siphon in your mead jug, leaving the end of the tubing in sterilizing fluid while you do this.
Take the jug that you just siphoned the sterilizing fluid from. Dump what fluid remains in it. Place the end of the tubing in this jug, then siphon the mead into it. Make no attempt to get the last bit of mead into your fresh container, it's mostly dead yeast and decomposing fruit.
Add potassium sorbate if you have it, stopper the jug, place it in your fridge.
Clean the jug you started in. Clean your siphon and tubing.
Day 11:
Let it sit
Day 12 or later: time to transfer again, or bottle it.
If you no longer have a jug full of sterilizing fluid, make one.
Repeat the earlier steps to sterilize the siphoning system, with a bottling wand attached to the end of the tubing if you want to bottle.
Sterilize your bottles or a clean jug, either with fluid or heat.
Siphon mead either into your bottles or jug. Stopper/cap/cork when done.
Put your jug/bottles in the fridge.
The yeast culture is still alive, and will continue to ferment. The fridge, and optional potassium sorbate, will merely slow this down. I recommend drinking any bottles within two months, to avoid a risk of bursting bottles. The mead should already be tasty at this point, but usually tastes much better after a couple more weeks.
EDIT: Fixed the formatting up a bit.
Ha. :)
I was thinking more about one of these: http://www.amazon.com/Spring-Loaded-Beer-Bottle-Filler/dp/B000E66A4U.
It seals when you no longer press down, keeping beer in the line.
To add to what /u/Sintered_Monkey has said, a kit to start can be a pretty good idea, though honestly, you could skip extract altogether^1. I got into the hobby with a 1 gallon all-grain kit from Brooklyn Brew Shop. They're $40 and include everything you need to get started brewing, so long as you have a couple of 8 quart or larger pots and a strainer (you can get by with 2 pots, but 3 can make it a bit easier; alternatively, brew-in-a-bag, or BIAB, could allow you to do this with just a single pot and is honestly easier). You'd also need one of these to cap your bottles. I'd recommend this route because it allows you to jump into the hobby pretty thoroughly; even a basic BIAB all-grain setup is doing all of the fundamental steps of beer-making that the pros use, and any gear upgrades beyond that (and you will end up having gear upgrades, because there are lots of fun toys in this hobby) are just to further refine your process. If you end up not liking it, you're out not even a hundred bucks. If you do enjoy it or just want more info, come join us at /r/homebrewing!
^1 (One of the first steps in brewing is extracting sugars from grains; this resulting liquid is called wort. With all-grain brewing, you do this extraction step yourself; with extract, you're basically buying concentrated wort—more expensive on an ingredient basis, you have less control over the final product, but your equipment costs are less.)
I think the reason champagne uses different corks than wine is due to the carbonation. The champagne type are more secure I imagine due to higher pressure inside. The issue with mason jar lids is that in canning, the contents are at a negative pressure and actually pulls the seals tighter. If you put carbonation in the jar then you have positive pressure pushing the seal apart and therefore the CO2 tends to escape. I would try small plastic bottles or someone here was going to try beer bottles with caps. You can get caps and a crimper and reuse old bottles. Not sure how it will work, the jury is out ;-)
$17 with prime shipping: http://www.amazon.com/Ferrari-Red-Baron-Bottle-Capper/dp/B001D6KGTK/
I used one of these back when I made my own soda. Capping them goes remarkably quickly. (Not great if you need any sort of pressure release, of course.)
Carboy. It’s the same shape as a bucket and doesn’t have a handle. It’s a glass container that’s super heavy when filled with wort/beer. Usually slippery after you brew which makes it even more useful to be able to carry it like this. There’s a LOT of stories on the homebrew sub where people have broken their foot, sliced their tendons, sliced their nerves, etc not to mention had tons of broken glass and like 5 gallons of beer spill onto their floor.
https://www.amazon.ca/Grolsch-Bottle-Replacement-Washers-Pack/dp/B004NXUJ06?SubscriptionId=AKIAILSHYYTFIVPWUY6Q&tag=duc12-20&linkCode=xm2&camp=2025&creative=165953&creativeASIN=B004NXUJ06
Way cheaper. Although, you probably don’t need 100 of them. 🤷♂️
http://www.amazon.com/gp/aw/d/B004NXUJ06/ref=mp_s_a_1_1?qid=1397145827&sr=8-1&pi=SY200_QL40
Yes, but also it's pretty easy to fold the strap into the case too cos the grolsh rings are flat
I've done it for the last 2 years. Really good. The link above is way more than you'll need, I'm still on my first pair!
Cool add-ons to the Brooklyn Brew Shop 1G kits (which I liked):
http://www.amazon.com/Beer-Wort-Wine-Refractometer-Scale/dp/B006GG0TDK/ref=sr_1_3?ie=UTF8&qid=1398314617&sr=8-3&keywords=refractometer+dual+scale
http://www.amazon.com/Fermtech-MINI-Mini-Auto-Siphon/dp/B0064ODL1G/ref=sr_1_1?ie=UTF8&qid=1398314371&sr=8-1&keywords=mini+auto+siphon
http://www.amazon.com/Brewcraft-Fermtech-Plastic-Bottle-Filler/dp/B0064OEE9O/ref=sr_1_2?ie=UTF8&qid=1398314427&sr=8-2&keywords=bottling+wand
Starsan you don't have to rinse off, and it really helps you to be confident in your sanitizing abilities.
http://www.amazon.com/Five-Star-FS_SS_16-San--16oz/dp/B00FA86OZ2/ref=sr_1_3?ie=UTF8&qid=1398314939&sr=8-3&keywords=star+san
http://www.amazon.com/Bottle-Capper-Red-Baron-Homebrew/dp/B000Q6ARMY/ref=sr_1_1?ie=UTF8&qid=1398315533&sr=8-1&keywords=bottle+capper
http://www.homebrewtalk.com/f39/fermentation-temperature-control-440670/
Anyway, enough. Don't overthink it. Those kits are so freaking easy to do, my first batch turned out pretty drinkable despite some temperature screw ups during mashing.
You can watch homebrewfinds.com for deals on any items I listed, and you can even better, get them from your local home brew shop.
Note, if you think you want to do bigger batches later, the mini auto-siphon and any tiny kettles are going to be a waste of money... the refractometer, starsan, capper, etc. will still be quite useful.
If it's a 1 gallon batch get the mini siphon:
https://www.amazon.com/Fermtech-Mini-Auto-Siphon-3-8-inch/dp/B0064ODL1G/ref=sr_1_2?ie=UTF8&qid=1498080342&sr=8-2&keywords=brew+siphon
if its 3-6 gallons get the big one:
https://www.amazon.com/Regular-Auto-Siphon-feet-Tubing/dp/B00AYHS7ZY/ref=sr_1_1?ie=UTF8&qid=1498080342&sr=8-1&keywords=brew+siphon
They all work fine.
I can't say anything as to the strength of the swing tops. But they certainly look good and are perfect for bottling. However, you'll have to make/drink a lot of mocktails before you have enough bottles. I bought these on Amazon and they work great: https://www.amazon.com/gp/product/B0064ODUDK
Quicker way to the bottles. Unless you were going to buy a bunch of those mocktail things anyway. :-)
Or you could get them for a fraction of the price if you buy them from somebody not selling them to guitarists. (Seriously, do you think those brewers pay $1+ per gasket?)
Grolsch Gaskets- 100 Count https://www.amazon.com/dp/B0064OE7SC/ref=cm_sw_r_cp_apa_OmQFzb02ZS9SD
Don't skim on a hydrometer. RDWHAHB!
I use these. Sanitize your bottles, print some fancy labels on your home printer, slip on the sleeve, slip label between sleeve and bottle, and hit it with a blow dryer set to high. They're great for if you brew the same stuff a lot, and the labels won't peel off due to condensation or cooler water.
Hello world.
When I don't know what to get someone, I usually go over to mysubscriptionaddiction.com and find a nice monthly subscription box they'd like. There are monthly beer clubs, to fancy foods, and the infamous dollar shave club.
As for something on amazon, me and my boyfriend loved the Mr. Beer Kit. Me and my gal friend each got our boyfriends one of these for Christmas, and we all took a day out to brew beer together. The best part is making custom, inside joke labels with these clear label wraps and then sharing them with friends. Health/Mana Potion and Molotov Cocktail labels are always good for game night.
If beer isn't your thing, there's a wine version and a [cider version](http://amzn.com/B00I5R7MR4
). And if you're living sober, then I'm an ass and enjoy your anniversary! Congratulations. :)
It was one like this, with a plastic buckle. The stitching was fine, but give the plastic buckle enough pressure, at it unbuckles itself. After that one incident, it immediately went in the trash as I realized how bad of an idea it was.
As long as they're quality, the netting ones look safe. Definitely don't try to use the carboy handles when it's full. That's not what they were meant for, and I've experienced it slipping off, no matter how tight I made it.
Still, nothing can go wrong in a keg in a bathtub (right?), so that's my preferred fermenter now.
Yeah, I don't know what that guy is on about or if its just you being a bit nervous/paranoid. Glass carboys are quite common and used a lot. As /u/zoomzilla says, a handle or carrier (which they linked) is quite recommended. They can be a bit of a pain to clean since you end up needing a carboy brush to get at the sides through the small neck. The benefit of glass is that it doesn't have a problem with scratching and infection that plastic has. A quite common plastic/PET carboy is a speidel which has a locking large lid to allow for cleaning by hand without needing a specialized brush. The risks there is scratching and unintended infection and whether or not the lid will stay clamped down during fermentation. I don't think I've heard about that with speidels, but have head of it from various other wide-mouthed fermentors/buckets.
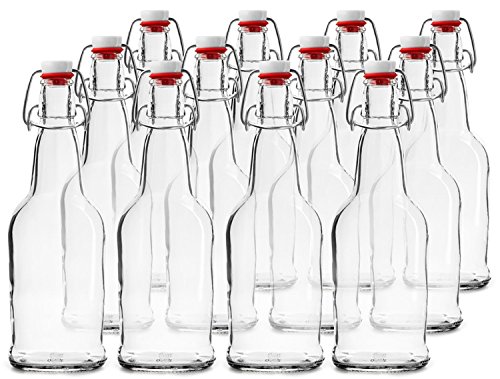
Have a look at 1 gallon extract kits Buy a 1 gallon jug of wine (about $8) then dump out the wine or drink it and use that as your fermenter. You have a pot,spoon and save up some bottles or buy https://www.amazon.com/Chefs-Star-CASE-Bottles-CLEAR/dp/B011SGS8U8/ref=pd_lpo_vtph_328_bs_t_2?_encoding=UTF8&psc=1&refRID=THND89S8R7NBS9W8Y5SV.
I recently switched from using recycled GT bottles to swing tops. It made a world of difference! Honestly, the carbonation increased by 50%.
These are the ones I bought off of Amazon...Swing Top Bottles
I got mine at my local brewery supply store! These seem similar.
Amazon link
https://www.amazon.com/Gallon-Bottling-Bucket-Spigot-Beer/dp/B000E62H8I
Your recipe sounds like it'll turn out well if all goes according to plan! You may want to add some sweetness back if it ferments dry, but you've got several weeks to figure that out and read the Wiki to get all caught up on the method and terminology to things like back sweetening and nutrient addition schedules. I admire that you're being industrious with your fermentation equipment, I wasn't brave enough to start fermenting with whatever I had on hand with my first batch.
If you think you'll stick with it, here's the equipment I used for my first batch. I highly recommend looking into it if you think you'll do another batch! (I apologize if you aren't in the US, Amazon is my go-to)
All-in-all, this is just about my current setup excluding yeast, yeast nutrients, and extra carboys and airlocks. The list above comes out to about $127.45 USD before tax, which really isn't too bad considering one gallon should yield just shy of 5 standard wine bottles! Most commercial meads I've seen ranges from $15-$25 with some exceptions (There's a winery near me called Oliver Winery that makes a mead called Camelot Mead that sells for about $8 per bottle. Very good for such a cheap mead, you can probably find it at Total Wine & More if you have one nearby).
​
Sorry for such a long comment! Best of luck in your mead-making adventure!
Edit: If you have a local homebrew store, I would opt for that rather than Amazon. Prices may not be as cheap but you won't have to wait for shipping, you'll be able to support a local business, and employees at homebrew stores are usually really helpful and they can recommend recipes and give you pointers. Nothing beats face-to-face interaction!
Sorry I tend to do my brewing calculations in imperial (Murican) but.. what I shoot for is a ratio of roughly (usually just a tad under) 1 oz/1 gallon when using dextrose.
For a 5 gallon batch I usually use 4-5 oz in most beers/ciders of medium-higher carbonation. Perhaps shoot for the lower side of that spectrum if you think you may have any residual sugars. If a cider is a bit undercarbed in the end it's not so big of an issue in my opinion.
So to convert converting to metric that would put you at about 13g/liter of what I use maximum if I'm not mistaken. 10-12 g/l should be more than plenty.
> Are there any major differences between top to top siphoning between fermenters, and tap to bottle? (Presuming 10 minutes to let the priming solution diffuse.) We would minimise splash and thus oxygenation in both cases.
Sorry not sure what you're referring to with your process. Maybe you could explain a little better what you're looking to do.
Here are the general beginner steps most people use for bottle carbonating:
I usually heat it until just before a boil or cut it right as I see a boil. As it cools I start getting everything setup.
Usually the dextrose mix cools relatively quickly especially as the cold bucket acts as a heat sink. It's best to not rack the cider right onto the boiling hot mixture.
A good tip is keeping the tubing just below the surface of the cider in the bottling bucket as it fills so I'm not splashing and introducing larger amounts of oxygen.
Sorry for the wall of text haha. That's a quick little rundown, hopefully it helps! If you have any questions feel free to ask!
I ordered one of these: http://www.amazon.com/Spring-Loaded-Beer-Bottle-Filler/dp/B000E66A4U after my first batch.
Also started with the NB kit.
This wand is great. Sometimes I get a very slow drip from it but unless you're gonna wait several minutes between bottles it isn't an issue. Even if you let it drip for five minutes you'd lose less than half a bottle.
$5 on prime, if that's your thing https://www.amazon.com/Spring-Loaded-Beer-Bottle-Filler/dp/B000E66A4U
I use this. Works great.
https://www.amazon.com/Spring-Loaded-Beer-Bottle-Filler/dp/B000E66A4U/ref=sr_1_1?ie=UTF8&qid=1539095622&sr=8-1&keywords=bottling+wand
It is fairly easy to get large equipment like vessels and burners locally in India but it's the little stuff that makes your brew day/bottling day easier like the bottle fillers and auto siphons which are kind of difficult/expensive to get hold off. Depending on which city you are in hops, malts and yeast can be easy to source especially if you have any brewpubs around. The selection of hops is again very limited so like like /u/chino_brews suggested you could get bulk hops from YCH. Dry brewing yeast is available (Fermentis, Lallemand) but it is mostly sold in 500g bricks so I would recommend picking up some 11g packets as well. You should definitely pick up a large 16/32 oz bottle of StarSan and a tub of PBW or something similar for cleaning and sanitizing. I would also pick up a hand held bottle capper, a racking cane, a couple of airlocks and a spigot for bottling. Almost everything else can be improvised or jugaad if you're a little handy :)
Hopefully you're filling with a wand. If not, you should be filling with a wand. When you do, fill to the apparent top of the bottle. The headspace you create when you remove the wand will be a) the correct amount, and b) the same for all your bottles.
You want one of these https://www.amazon.com/gp/aw/d/B072C2YYHR/ref=mp_s_a_1_2?ie=UTF8&qid=1509601569&sr=8-2-spons&pi=AC_SX236_SY340_FMwebp_QL65&keywords=Bucket+spigot+beer&psc=1
And these https://www.amazon.com/gp/aw/d/B000E66A4U/ref=mp_s_a_1_3?ie=UTF8&qid=1509601632&sr=8-3&pi=AC_SX236_SY340_FMwebp_QL65&keywords=Bottle+filler+beer&dpPl=1&dpID=11RVezcyCFL&ref=plSrch
The filler goes on the spigot, you slide the bottle onto it until the bottom pushes up the black bit of plastic and it fills the bottle.
Open your dishwasher (assuming you have one) and put the bucket on the counter above and you have the perfect drop catcher.
This cut my fill time and mess down a huge amount.
Don't know if this qualifies as a 'hack', but it made my life a hell of a lot easier, so here we are:
I can't say this emphatically enough: Get a bench capper
I'm serious, If you bottle your beer, don't be messing around with that twin lever bullshit, slipping and breaking bottle necks.
Just buy a bench capper (aka single lever capper). They are costlier, but I swear, it is still the best brewing investment I have ever made.
yep. hated it.
Buy a bench capper. you wont be disappointed that you did. You can probably find it for cheaper if you shop around. I got mine for free in a package deal on craigslist.
Bottle size: 12 or 16 oz
I use a keg instead of a bottling bucket. Siphon beer into keg, prime with sugar, fill bottles. At 5 psi the kegs works better than a gravity bucket.
Fill 6 or so, then cap. Bottling is much better with a friend. One person to fill, the other to cap. Standard caps only.
No gloves.
Pro-tip: get a decent bench capper. Woah - when I bought one the price was only $30. This really is the king of cappers.
I got this one a few months ago and have been more than happy with it. Think I got it for around 40 bucks.
Ah, then they probably AREN'T oxygen resistant caps. You'll want something along the lines of https://www.amazon.com/Beer-Bottle-Caps-Absorbing-Homebrew/dp/B000Q64T8M
And let us know if it's an anomaly!
Oh yes, and it is quite simple to get the stuff together without buying a kit. Do you have a local home brew store?
This subreddit's wiki which includes a beginner section: https://www.reddit.com/r/Homebrewing/wiki/index
There are several videos on youtube that have good instructions.
Here is a basic list of gear to brew beer in a bag. You can get all of this stuff on amazon if you don't have it already. This is not the best list, but it works.
http://homebrewmanual.com/home-brewing-equipment/
Some of the stuff you won't likely have at home:
Beer recipes: http://beerrecipes.org/
To get grains from amazon, type in the grain type and it will provide you options. If you don't have the ability to mill it yourself, you can order it crushed. Its not ideal, but if you don't have a homebrew store near you and don't have your own mill....it will work. You will have to measure out the correct amounts for each grain that you add on your own from the bulk that you ordered. If you want to brew with extracts, you can also order those on amazon as well.
You can order hops on amazon the same way as grains or extracts.
A bottle capper.
Swing top bottles
I'm guessing you had the Red Barron. There's others out there, but the market is mostly RB or bench. There are smaller bench cappers out there that might work, but I've also fully invested in swing top bottles because I was so angry my wing capper broke.
Wow, I must be lucky. I have one of these, and used it to bottle two 5 gallon batches to far in recycled bottles (mostly Guinness, Magic Hat, Sam Adams, Samuel Smith), and haven't broken a bottle, and haven't had a leaky cap. It isn't the fastest thing, but it does the job.
edit:
Here is the Amazon product page with reviews.
http://www.amazon.com/Ferrari-Red-Baron-Bottle-Capper/dp/B001D6KGTK?ie=UTF8&psc=1&redirect=true&ref_=oh_aui_search_detailpage
Does anyone know if the standard red bottle capper like this one can be used or modified to work on 29mm champagne bottles with crown seals?
It is a huge pain and if you have a bottle capper like that one get a second one, they can break. I went with the 16 OZ. EZ cap beer bottles.
You might want to then go more long-term and get him some bottling tools. Depending on how he wants to bottle, or what kind of mead he's making, a wine corker, a case of empties, and handful of corks might be something nice for down the road. Especially if he has something already aging in a carboy.
If it's supposed to be sparkling then you might want to stick with the relative ease of a bottle capper and some campaign bottles. TIL that in North America at least most sparkling wine bottles actually take regular ol' beer caps - which is incredible to learn. Martinelli's apple cider is the only place I've ever seen it done, but I guess it's common. If he doesn't have a regular bottle capper, or has something that isn't as easy on the bottle as one of these then maybe a capper and caps would be good.
Hope this helps!
Thanks for the input. Is this the one you have?
Before you pull the trigger on that, there's a groupon for a homebrew set:
http://www.groupon.com/deals/gx-midwest-hydroponic-atlanta
It's the basic kit plus brewing ingredients, PLUS a $25 coupon. The kit you linked also includes:
-Carboy, if you really want to get it. Honestly, for a first batch, you can get by without one and just do a single stage fermentation, but it's recommended to get a secondary. My first batch was an extract that spent ~2 weeks in a primary then straight to bottles. Came out great. There's a good deal at Amazon right now on a 6 gallon glass carboy. Also add a bung and Airlock
-Bottles. Drink some beer, keep some bottles. If you want to buy them, get 48 for a 5 gallon batch (about $25) or go cheap and get some plastic PET bottles. Also a good option. See: every argument of plastic vs. glass for a comparison.
-Large stock pot. For a first extract, you won't need more than a 2 gallon boil, so you can get by with as small as 12 qts. A cheap 12 qt pot can get you started.
Usable desktop link for the same product.
(this should be a bot)
My brother is getting married in October (which is good news by itself) and because he and his fiancée want more than the 6 people City Hall allows to attend, I GET TO MARRY THEM! I have been ordained through Universal Life Church (the real one, not the fake one) since March 2006 and I finally get to marry someone! I put in my minister profile that I'll only do same-sex weddings, but I made an exception because, well, it's my brother.
Hooray!
(if you're taking suggestions, I'd go for the beer savers, but I'm fine with a surprise!)
Thanks for the contest!
You can also buy the washers by themselves...
http://www.amazon.com/Grolsch-Bottle-Replacement-Washers-Pack/dp/B004NXUJ06/ref=sr_1_2?ie=UTF8&qid=1462308922&sr=8-2&keywords=grolsch
Those beer washers work very good, amazon prime for $5 gets you 100 of them.
Edit: it's $8 for 100
[ LINk ] ( https://www.amazon.com/dp/B004NXUJ06/ref=cm_sw_r_cp_api_F0bmzbEQQ71QS )
$14 and free shipping for 100 gaskets on Amazon. http://www.amazon.com/Brewcraft-Grolsch-Bottle-Replacement-Washers/dp/B004NXUJ06
http://www.amazon.com/gp/aw/d/B004NXUJ06?pc_redir=1398414039&robot_redir=1
Pack of 100
You can just buy the washers, Amazon has them for $10 here
I recommend bottles that are rounded. I've had a couple bottles explode in the past, but they were the type pictured, the ones with corners. I think those create weak points, perhaps? My kombucha is extrememly bubbly, but it never breaks the rounded bottles!
http://www.amazon.com/CASE-12-Beer-Bottles-AMBER/dp/B005CIFIDO?ie=UTF8&psc=1&redirect=true&ref_=oh_aui_search_detailpage
Most of the online retailers carry them. For example. Northern Brewer has them for $29.99/dozen (amber, 16 oz.) Amazon has them too.
Is there some other facet of this search that I'm not getting?
Amazon has grolsch type bottles for homebrewing.
This is an example. If you search "homebrewing bottles" you should find several different types.
http://www.amazon.com/CASE-12-Beer-Bottles-AMBER/dp/B005CIFIDO/ref=sr_1_7?ie=UTF8&qid=1449637437&sr=8-7&keywords=homebrewing+bottles
If there is a homebrewing supply store near you they probably have them as well.
I have a set of fastracks and a set of [these bottles] (http://www.amazon.com/CASE-OF-12-Bottles-AMBER/dp/B005CIFIDO) and they work resonably well together. Every now and then one of the caps gets in the way, otherwise they fit well and are 10 times easier for storage than a bottle tree.
I use amber bottles, like this one.
Amber beer bottles, like this one, or amber wine bottles, like this one, also work great and might look a little nicer but are harder to label.
You can probably find these bottles cheaper on non-amazon websites too, just do a google search for "amber bottles" and look around. They come in different shapes and sizes too.
Fermtech Mini Auto-Siphon https://www.amazon.com/dp/B0064ODL1G/ref=cm_sw_r_cp_apa_i_pmjzDbV80QZA9
This will fit a 1 gallon growler jug. Haven't seen anything smaller. That looks to be bigger than a gallon so check measurements to make sure it can reach bottom.
Relax, don't worry, you made alcohol! isn't it neat?
get yourself something like this, it will help a ton. (your local homebrew supply store is probably cheaper)
1st question: 2 weeks is fine. If you want to wait another week or two that's fine too.
2nd question: see the auto-siphon above. use it to siphon all of the liquid above the yeast cake that's settled on the bottom.
3rd question: For our purposes, I like to think of gravity as a measure of sugar content. Since yeast eat sugars and poop CO^2 + alchohol, the gravity will drop during fermentation. This allows us to measure our alcohol content.
Has anyone ever used one of the cheap red cappers? I'm on a budget, so I went with this. I'm planning on reusing Samuel Adams bottles from a variety pack I bought. I've got a Brooklyn Brewshop kit (afternoon wheat), a mini siphon {here}, and strainer, but no bottling bucket (I was told I can use a pot and siphon for just a gallon). Also got caps. Anything else I really need to get? I'm looking to start the process next week.
I'm assuming this is from Brooklyn Brew Shop (I started the same way, have the same carboy :P ). That's pretty normal, it will settle!
What I did for my second kit from them was a cold crash. Stuck it in my fridge for 5 days and then bottled. I was warned this may kill the yeast/make bottle conditioning impossible but it turned out just fine. I can't say it will always work, but for me it did.
My first batch was super carbonated (possibly just too much sugar. Be careful! Small batches mean small miscalculations can make huge differences).
Also, be very careful when siphoning, the yeast can kick up very easily, especially if you don't cold crash. You will want some yeast for bottle conditioning, but the suspended yeast should be enough. If you can, buy a mini auto siphon. Makes siphoning way easier. I won't go back to just a racking cane. Also a clip if you can, or just a steady hand :)
I have a Balcones barrel as well, bought from the same place. I ended up having to buy a siphon with a smaller diameter that barely fit in the top opening. This one worked: https://www.amazon.com/gp/product/B0064ODL1G/ref=oh_aui_search_detailpage?ie=UTF8&psc=1
I use clear flip top bottles like these. Add a speed pourer for precision, and you're good to go. Of course the later is optional.
http://www.amazon.com/CASE-OF-12-Bottles-CLEAR/dp/B0064ODUDK/ref=sr_1_2?ie=UTF8&qid=1412296599&sr=8-2&keywords=flip+top+bottles
or for larger batches
http://www.amazon.com/Bormioli-Rocco-Giara-Bottle-Stopper/dp/B003QZPY6Q/ref=sr_1_3?ie=UTF8&qid=1412296599&sr=8-3&keywords=flip+top+bottles
Those are EZ Cap brand 16oz flip-top bottles. You can find them here:
http://amazon.com/dp/B0064ODUDK/
But I recommend getting them at your local brewing supply store. They were only $25 bucks for a case of 12 at my local shop.
Get some EZ-Cap bottles from your local homebrew supply or Amazon and print your own labels.
From what I hear, the rubber gaskets degrade over time. You should be able to find replacement gaskets, i'm not sure if these will fit those particular bottles but you could pull them off and measure:
https://smile.amazon.com/Naruekrit-OT-EVP0-QWCJ-Grolsch-Gaskets-Count/dp/B0064OE7SC?sa-no-redirect=1
These look pretty similar as well...
https://www.amazon.com/Naruekrit-OT-EVP0-QWCJ-Grolsch-Gaskets-Count/dp/B0064OE7SC/
You can probably by them one at a time at the beer store.
There are generally two different crown cap sizes - 26mm (American) and 29mm (European). There are plenty of American cideries using 29mm bottles - I always throw those away and keep only the 26mm ones to avoid having that problem (most of the cideries near me are using the same Saint Gobain/Verallia 750mL bottles (example in brown: https://buyourbottles.com/amber-glass-bottles/glass-750ml-celebration ).
Also, this is my favorite crown capper - https://www.amazon.com/Universal-Capper-OJ-NDV7-41ZH-Rigamonti/dp/B007CZI6BG/ref=sr_1_1?ie=UTF8&qid=1482204885&sr=8-1&keywords=italian+crown+capper
It works well on the 750 bottles and leaves a pleasant circular indent in the top.
Since you're ER averse as well, I thought you might be interested in these, they're at a great price point right now at only 14.99 & prime eligible: http://www.amazon.com/Mr-Beer-Deluxe-Brewing-Bottling/dp/B0085F3PTU/ref=sr_1_9?ie=UTF8&qid=1415197409&sr=8-9&keywords=mr+beer
Only been brewing a year now but I've seen may glass carboys break and always see it had Carboy Handle so I sold my glass carboys and use a speidel fermenter or a Stainless Steel Steam Table Pan for open fermenting.
This is what I've been using. Weird, though, because it sounds like what you recommended.
These have worked well for me: https://www.amazon.com/dp/B011SGS8U8/ref=cm_sw_r_cp_apa_ZGtEAbFW4725R
I also found something similar at IKEA that would work just as well
Amazon! They came with the bottles.
https://www.amazon.com/dp/B01LB1862A?ref=ppx_pop_mob_ap_share
Swing Top Glass Bottles - Flip Top Brewing Bottles For Kombucha, Kefir, Beer - Clear Color - 16oz Size - Set of 6 - Leak Proof Easy Caps, Bonus Gaskets, Chalkboard Labels and Pen - Fast Clean Design https://www.amazon.com/dp/B01LB1862A/ref=cm_sw_r_cp_apa_i_P6dxDb9CYMEXP
So I’m a newbie (and had some explosion issues) but here goes with what I did!
1.) I did 2F for 5 days at room temperature. Longer than the 2 days people sometimes recommend, because I had tried one bottle after 3 days and it was too sweet. (I also bottled 1F at sweeter than I would drink because I wanted to ensure carbonation.)
2.) I used chunks of strawberry, minced ginger, and lime juice. (Also made one with pineapple purée but that exploded!) ((Also made raspberry-lime not featured with mashed raspberry and that worked the best out of the three flavors.))
3.) About 1/4 cup fruit per 16 oz kombucha bottle. (For the featured Strawberry-Lime-Ginger: 1/4 cup finely chopped strawberry, 1 tsp minced ginger, 2 tsp lime juice.)
4.) These https://www.amazon.com/Swing-Top-Glass-Bottles-Chalkboard/dp/B01LB1862A?ref_=fsclp_pl_dp_1
Going forward thing I’m going to try different are:
-Juice over plant matter like someone suggested (except raspberry which worked great!)
-And I’m going to try to use herbs and perhaps chia seeds in one batch!
Happy Brewing!
Amazon!
Swing Top Glass Bottles - Flip Top Brewing Bottles For Kombucha, Kefir, Beer - Clear Color - 16oz Size - Set of 6 - Leak Proof Easy Caps, Bonus Gaskets, Chalkboard Labels and Pen - Fast Clean Design https://www.amazon.com/dp/B01LB1862A/ref=cm_sw_r_cp_api_i_4J.MDbCKXHADR
the instructions for the unicolor develop kit requires 1000ml and the amber bottles i purchased limit at 950ml, should i be fine or purchase bigger bottles?
I like to use Amber bottles. I just think they look super cool. But they also keep UV light away from the chemicals.
32-Ounce Amber Kombucha Growler Bottles (4-Pack); 1 Quart Boston Round Glass Bottles w/ 6 Polycone Phenolic Lids for Home Brewing https://www.amazon.com/dp/B0749ZWF1C/ref=cm_sw_r_cp_apa_i_gXFTDbK31SN6T
I bought these off Amazon and have had no issues whatsoever with them: https://www.amazon.com/gp/product/B078JYNSCR/ref=ppx_yo_dt_b_asin_title_o03__o00_s00?ie=UTF8&psc=1
> Proteins are what you're feeling in a 'full' beer, and taking care to ensure they stay in the beer will get you the body/mouthfeel/head retention you're looking for
What would you recommend to do in order to achieve this?
I haven't taken the pH of my water, I've just been using it from the tap. My neighbor brews some of the same exact recipes I did (same LHBS) using his faucet water as well. He does partial mash, but I don't believe he's treating his water/adjusting his pH.
My cleaning process has been pretty light, as far as I can tell. I bought everything new, but I did a PBW clean of my kettle and fermeters before I used any of them. I fill the fermeter with StarSan on brew day and dump that into the bottling bucket just before I transfer from the kettle. I have never used dish soap or anything aside from PBW and StarSan (and then a rinse with water after cleaning) on my equipment.
Do you have one of these?
I'd like to do 5 gallon batches. I don't think the quantity from the Mr Beer keg is worth it.
How's this look? Total is around $80.
Fermentation bucket
Bung/airlock
Stock pot
Autosiphon
Star San or Idophor (What's the difference?)
Is there any advantage to having a carboy as well? How long would I leave the beer in the fermentation bucket?
So if I wanted to do sours, I'd basically have to get 2 of everything?
Edit - actually, wouldn't this kit be about the same, but with an extra bucket but no stock pot?
Edit 2 - another pot, 36qt is good price, leaving this here so I can find it again.
Use the auto siphon that came from the homebrewing kit - it's absolutely worth it. Bonus points if you have a bottle filler attached to the other end of the hose.
That's actually not bad but as mentioned below, a decent pot will go a long way. I bought a 30quart turkey fryer and put in a ball valve and that's been one of the best upgrades I've made. I have a fermentor now, but I got some free 6+ gallon food grade icing buckets from my grocery's bakery. Spigots, air locks, and bottling wands are $6 on Amazon. Tubing can be found pretty cheap online or at LHBS/hardware store.
Kettle - $25
Ball Valve - $22
Bazooka Screen - $9
Buckets - Free
Spigot - $6
Airlocks - $7
BIAB Bag - $5
Bottling Wand - $5
Capper with Caps - $18
Various Tubing - $15
This doesn't include your first beer kit, but you can pull off an all grain BIAB as long as you've got fire. My second favorite piece I own is my mash tun which is just a 10 gallon cooler with a bazooka screen and ball valve. I don't bottle anymore, but I feel like if I were to do it again that's all I would need to start. Oh, and a thermometer and some StarSan.
Yes, ideally you would attach a syphon tube to a bottling wand like this and use that to fill your bottles.
I recently got one of these, no foam from pouring into bottles
Spring Loaded Beer Bottle Filler https://www.amazon.com/dp/B000E66A4U/ref=cm_sw_r_cp_apip_DNWb6NyYyNjOT
http://www.amazon.com/Learn-To-Brew-Auto-Siphon-3/dp/B000E60JF6/ref=sr_1_1?ie=UTF8&qid=1377796614&sr=8-1&keywords=autosiphon
http://www.amazon.com/Spring-Loaded-Beer-Bottle-Filler/dp/B000E66A4U/ref=sr_1_6?ie=UTF8&qid=1377796614&sr=8-6&keywords=autosiphon
For less than $20 you won't have to deal with this in the future.
http://www.amazon.co.uk/Brew-Your-British-Real-Camra/dp/1852492589 is excellent - gives clear simple advice, as well as having a good selection of British ales, milds, porters and stouts - if that's your thing.
http://www.amazon.co.uk/Sacred-Herbal-Healing-Beers-Fermentation/dp/0937381667/ref=sr_1_1?s=books&ie=UTF8&qid=1368899642&sr=1-1&keywords=sacred+herbal+beers is also a really interesting book - an anthropological of the history and mythology of brewing, complete with recipes! A lot of the recipes are a bit simple, or sugar-based, but it (like Radical Brewing) is a really good source of inspiration and historical knowledge.
Advice? Get a bottling wand and a vinator and bottle draining rack and shave tons of time off your bottling day.
I would strongly caution against a 35 quart pot. The Bayou Classic 44 quart (11 gallon) pot is only a little more, and it's of dimensions more ameniable to brewing (tall, rather than squat). If you plan to migrate to BiaB, the version with the basket is quite useful; you'll be able to fire your heat source without worrying about scorching the bag.
For ingredients, I would recommend looking around for a LHBS (local homebrew shop). You'll likely not save much money ordering those online, due to their weight/cost ratio, and a LHBS is often the centre of your local community of homebrewers.
With regard to literature, my bible is John Palmer's How To Brew. You can also read the first edition online, but much has been learnt since that was published and the latest edition has current best practices.
That equipment kit is decent, but there are a lot of things in it you'll probably wish you hadn't bought.
You will want:
I mean, I'd waste 37 bucks on this one just to see how it goes...but that's just me.
I got one of these a few months ago http://www.amazon.com/Super-Agata-Bench-Bottle-Capper/dp/B000Q638P2/ref=sr_1_5?ie=UTF8&qid=1415486973&sr=8-5&keywords=bottle+capper and it makes the bottling process SO much easier. Its worth every dollar.
Even with that, though, I'm seriously tired of bottling. I'm seriously considering switching to kegs.
Amazon has it, and it'll be delivered by tomorrow: http://www.amazon.com/Beer-Bottle-Caps-Absorbing-Homebrew/dp/B000Q64T8M/ref=sr_1_1?ie=UTF8&qid=1410318689&sr=8-1&keywords=homebrew+bottle+caps
With standard bottle caps they say the brew remains true for about 6 mo. after bottling. They have oxygen absorbing bottle caps that are supposed to keep beer for over a year. I've also read that you can wax the top of your bottles to prevent oxygen from seeping in. I'm thinking about doing this for my most recent bourbon vanilla porter brew.
NOTE: I've never tried aging beer for more than 3 or so months so I cannot attest to either wax or oxygen absorbing caps methods.
No, just regular metal ones like the ones below.
I am wondering if my capper failed on me. It seemed like it sealed everything fine but it also seems like that's the only possible explanation.
https://smile.amazon.com/Silver-Oxygen-Barrier-Crown-Count/dp/B000Q64T8M/ref=mp_s_a_1_4?keywords=bottle+caps+for+homebrew&qid=1572026207&sprefix=bottle+caps+&sr=8-4
If you did this a lot maybe one of these would be better:
https://www.amazon.com/Ferrari-1170-Baron-Bottle-Capper/dp/B001D6KGTK
Just crimp the cap on.
Anchor Hocking Heritage Hill Glass Beverage Dispenser with Spigot, 2 Gallon https://www.amazon.com/dp/B00BWC0E42/ref=cm_sw_r_cp_api_f4uhAbF8X8STT
1 X Organic Kombucha Scoby - Live Culture by Scoby Kombucha https://www.amazon.com/dp/B009ZW8RP4/ref=cm_sw_r_cp_api_.5uhAb83TMN5D
Unbleached Cheesecloth 9 Sq ft 100% Cotton Reusable-Great Filter or Strainer for Cheese/Kombucha scoby/Glass jar/Wine making https://www.amazon.com/dp/B01M612PJU/ref=cm_sw_r_cp_api_j7uhAbFHCHX7S
Adhesive Temperature Strip https://www.amazon.com/dp/B0079JZLP4/ref=cm_sw_r_cp_api_i9uhAbJBGF75D
Red Baron Bottle Capper https://www.amazon.com/dp/B001D6KGTK/ref=cm_sw_r_cp_api_xbvhAbFY4CJN3
Beer Bottle Crown Caps - Oxygen Absorbing for Homebrew (Gold) https://www.amazon.com/dp/B00ZSEH8VW/ref=cm_sw_r_cp_api_YcvhAbCE0836F
Bottles Free: Just start saving old beer bottles (not the twist on style bottle) submerge them in hot water for 5 min, labels peel right off.
Sanitizer: White Vinegar, I prefer Star san.
Prince of Peace Tea, Black, 100 Count https://www.amazon.com/dp/B00AP70BKC/ref=cm_sw_r_cp_api_divhAbY9D73AP
With these products, you will be good to go and your volume is 2 gallons, so by the time your upgrading after your first batch. For me a 1 gallon container never cut it. With the capper you don’t have to worry about giving your friends a bottle of your Kombucha and never seeing your $4 swing cap bottle again. Just save old beer bottles or ask your friends for them.
To answer your question, the temps you listed are to low. For all brewing temperatures are very important. You want to keep your fermentation in the 70s. Here’s how you fix the problem without keeping your home heater on 24/7.
Round Kombucha Heater Kit for Continuous Brew Crocks & Dispensers. 10" Brewing & Fermentation Heat Mat, Works with any Ceramic, Glass, Stone or Porcelain Containers (10"-120VAC 7-Watts) https://www.amazon.com/dp/B072S6XBQJ/ref=cm_sw_r_cp_api_1tvhAb04PYXBK
Enjoy... In the long run you will spend less by starting off with the right equipment.
It's actually for putting bottle caps on, not removing them.
I've never heard of a wooden capper can you link me a picture? The cheapeast option is something like this but bench capper works way better imo.
You need something like this:
https://www.amazon.com/Ferrari-1170-Baron-Bottle-Capper/dp/B001D6KGTK
And a bag of caps. They are single use.
What I do is bottle at least one bottle of Kombucha in a plastic 20 oz soda bottle, and the rest in glass. Once the soda bottle is very firm to the squeeze, I put them all in the fridge.
If you have a homebrew shop near you, you can buy a bottle capper for like $20 and recap, or tighten the caps. Hell, you could probably just bring your bottles there and they'll let you recap it for free. Or if you know someone who homebrews, or if there's a brewery near you that caps their beer, etc.
The most common caper is called the "Red Baron Bottle Capper." Here's what it looks like:
https://www.amazon.com/Ferrari-1170-Baron-Bottle-Capper/dp/B001D6KGTK
I use this -- a bench capper would be nice if I lived in a big enough place that I were willing to semi-permanently dedicate table space to it, but that particular item works just fine for me for now.
I've been using the standard red bottle capper, but the thing is really kind of junk (I have two actually). It's always slipping, sometimes takes a few tries to get it right, technique needs to be spot on etc.
I am using (what appears to be )https://www.amazon.com/gp/product/B00TFVXUC0//ref=as_li_ss_tl?creativeASIN=B00TFVXUC0&imprToken=tPx24TDfjZE4TvrGDKk5Rg&slotNum=4&ie=UTF8&linkCode=w61&tag=villaegbakery-20&linkId=9e883a23a0cbb04c0ca1726a5999b954 Looks like the exact same one here https://www.amazon.com/gp/product/B001D6KGTK//ref=as_li_ss_tl?creativeASIN=B001D6KGTK&imprToken=tPx24TDfjZE4TvrGDKk5Rg&slotNum=1&ie=UTF8&linkCode=w61&tag=villaegbakery-20&linkId=137e7f2db4bc77fc4b1a6d281597aa42
Any recommendations for a better capper that doesn't suck?
Problem solved, $30 shipped
Do you think I'm better off spending $20 more for 2 6-Gallon carboys? Such as the ones on today's homebrew find?
I just made a post about this.
If cost is the only reason for the switch to better bottles check out this $24 glass carboy:
http://www.amazon.com/Paklab-Glass-Carboy-Liter-1-9-Pound/dp/B002VFXW5W/ref=sr_1_cc_1?t=slickdeals&tag=slickdeals&ie=UTF8&qid=1291137175&sr=1-1-catcorr
I ordered mine yesterday....I also assumed they were Italian, since I couldn't find where they were made. I also checked out the reviews before I made the purchase. They seemed pretty favorable for the most part.
http://www.amazon.com/Paklab-Glass-Carboy-Liter-1-9-Pound/product-reviews/B002VFXW5W/ref=dp_top_cm_cr_acr_pop_hist_all?ie=UTF8&showViewpoints=1
These.
https://www.amazon.ca/Beer-Savers-Silicone-Rubber-Bottle/dp/B003Z5GW0O
Don't have these exact ones cause I got some for free at an event but they actually seal really well and hold a fair bit of pressure! Beer always tastes fine the next day when bottle was half empty or less.
https://www.amazon.com/Grolsch-Bottle-Replacement-Washers-Pack/dp/B004NXUJ06/ref=pd_sbs_79_1?_encoding=UTF8&pd_rd_i=B004NXUJ06&pd_rd_r=AY1NG5P021DCM7448X9N&pd_rd_w=S18uq&pd_rd_wg=DFktd&psc=1&refRID=AY1NG5P021DCM7448X9N
Cheapest straplocks
Brian May even uses them: http://i.imgur.com/r42kJne.jpg and you can get them on Amazon: https://www.amazon.com/Grolsch-Bottle-Replacement-Washers-Pack/dp/B004NXUJ06.
So, an alternative to kegging if you aren't ready for the expense is the buy those flip top brown bottles like these.
I have those, as well as a keg (which I only use for special occasions/parties right now as I don't have a kegerator) - the flip top bottles remove a lot of the hassle involved in bottling as you don't need to cap them. They are also larger than standard 12 oz bottles, so it takes less time.
Mason jars are made to withstand vacuum, not internal pressure. so you're more likely to have an explosion with those than a bottle made to have internal pressure. The Grolsh style beer bottles work great. I also like using 1/2 gallon growlers (get the ploy caps).
If you intend to have a sparkling product, you can try flip-top bottles. I have a bunch that originally held beer that I've successfully used for bottling carbonated things.
As others have said, champagne yeast doesn't guarantee a sparkling end product.
This?
Mini auto siphon. Great for decanting yeast starters without kicking much yeast up into suspension.
So I’m not sure where I pulled this recipe from, it was probably inspired from another webpage but with my own twist and I’m still changing it as I go. So I originally tried 150g peeled ginger in a ninja single serve blender, filled to max line with water which was ~310ml and blended to hell. Then I put in pot, heated to ~65°C (150°F) and added 53g turbinado sugar (~4Tbsp) and 43g (~3 Tbsp) table sugar. I stirred for a few minutes to dissolve, covered and let sit about 30 min. Then I strained out the ginger muck, topped up with cold water to the 1L mark and chilled in fridge to room temp. Once it’s about room temp I put in the GBP grains to prevent any thermal shock. I also only use bottled (preferably Poland spring) water. Now the most recent batch was roughly quadruple of that but not topped up to 4L, instead closer to 3.5L making it a bit more concentrated. I let mine ferment fully dry and then force carbonate in a tiny 1.75 gal keg. If you wanna do swing tops I have one conditioning now with 3g of sugar added to the ~400ml that was in the bottle (I got them on amazon I think they’re 16oz bottles and this one was slightly under filled) I actually used 6ml from my cocktail simple syrup (1:1) and just put it in the bottle the other day.
Edit: sorry I wrote my recipes in real units and have to convert because... well Murica
Second edit: don’t forget to feed the grains! Even if you’re not gonna make another batch to drink, make a small 1L batch and give it a few hours on a vented container (I like using mason jars with these https://www.amazon.com/dp/B01H7G1NF0?ref=ppx_pop_mob_ap_share )
before putting in the fridge! Once in fridge their metabolic rate will come to a crawl and they’ll be in a solution of food and won’t starve (not for a good long while at least)
Third edit! Lol: the 5”? OXO strainer is ideal for harvesting grains and I also use one of these https://www.amazon.com/dp/B0064ODL1G?ref=ppx_pop_mob_ap_share to remove the bulk of the gingerbeer into another container before harvesting the grains out. It leaves all the muck leftover at the bottom and out of finished product. Also, most recent batch was neglected while heating and hit a boil so I’ll let you know how that changed it. I made one batch with fresh squeezed blackberry juice pressed and filtered as not to contaminate the grains and while it was wonderful it was a PITA. I plan to repeat but with some sacrificial amount of grains so I can just add mashed blackberry and let the culture extract the bulk of flavor then toss those grains with the vegetative waste at the bottom
There's the Mini Auto Siphon, made purposely for 1-2 gallon jugs.
In my experience the quality of your cold brew is also highly dependent on your filtering system. I use the Hario mizudashi because it has a very fine filter and produces extremely clean cold brew. I prefer the cold brew from the Mizudashi even with lower quality beans to simply submerging coffee in water and filtering it later. I use a 10:1 ratio in the Mizudashi and I like drinking it at that strength. 4:1 is meant to be diluted by half, so keep that in mind.
If you're making cold brew by simply submerging it in water and filtering it later, I'd recommend putting the coffee in something like this and seeing if you like it better. However it's still possible to make good cold brew without doing this, just make sure you leave all the sludge at the bottom and filter out the good stuff. A siphon like this which is commonly used for home brewing beer could be the perfect tool.
EDIT: as far as beans go, try making cold brew with the cheapest possible option if you have a low budget. Some grocery store coffee will work just fine as long as it's made well. Cold brew is perhaps the most forgiving method of coffee brewing.
Chill it in your... dorm fridge or an ice bath. That will encourage yeast and other trub to drop out. Then you can use a racking cane and tubing or something like this to transfer it to bottles. If those are no goes, you can do a careful "still pour" - slowly pour it trying to leave trub behind. PET soda bottles will do the trick for bottles.
Local brew shop. They're ez-cap bottles: https://www.amazon.com/CASE-12-Beer-Bottles-CLEAR/dp/B0064ODUDK
The price seems pretty good. On Amazon, you can get a case of 12 for $24, so this guy is offering them for half of that.
If you do decide to go through with it, it's probably a good idea to replace the gaskets on every bottle. There's no way to know what condition they'll be in, or when they were last replaced. They're pretty cheap too. Here's what I found on Amazon.
I had one of those "black beauty" cappers, and I never broke a bottle. However, it only lasted about 300 caps before it seemed to have gotten too loose to properly cap.
I got a metal version, link below. It's lasted a long time, and has nylon where it grabs the bottle neck, rather than metal like on the black beauty.
http://www.amazon.com/Rigamonti-FMT_BC_M-Rigamonti-Universal-Capper/dp/B007CZI6BG
Plastic or metal? Usually it's a good idea to have a spare handy, anyway, whether it's yours or just another local brewers. Nothing worse than getting halfway through and realizing you cant bottle. If you want a big jump in quality, get a bench capper. That way you can even do wine bottles if you want. Otherwise, I would recommend an all metal handheld like this
Another one today. Looking at getting some new bottles. Saw these for a good price on Amazon, plastic bottles with screw caps. Would these work presuming you're doing some bottle fermenting? Or will they not seal well enough?
https://www.amazon.ca/Mr-Beer-Homebrewing-Bottling-0-5-Liter/dp/B0085F3PTU/ref=sr_1_1?ie=UTF8&qid=1500919383&sr=8-1&keywords=beer+bottles
I was wondering if printing on nice paper and using these was an option. But I'm not exactly sure what they are. I'm imagining them to be some sort of thin laminate type. But I really don't know
It's a gift, what can I say... I used these (Home Brew Beer Label for 12 oz Bottles https://www.amazon.com/dp/B008703U5W/ref=cm_sw_r_awd_pF2mub1C15JD4) to secure the label to the bottle which is just printer paper. It's honestly not worth the effort though. In the future I plan on just sticking to glue sticks.
I bought these and they've worked out well so far. I've only used the for 3 batches. No explosions and my strawberry second ferment was on the verge of being too carbonated.
https://www.amazon.com/Chefs-Star-CASE-Bottles-CLEAR/dp/B011SGS8U8/ref=pd_sim_sbs_79_1?ie=UTF8&dpID=51vunCRbh9L&dpSrc=sims&preST=_AC_UL160_SR160%2C160_&refRID=ZYCKXHCPJPRABD169RBJ
Thanks for the advice, I'll definitely try soda bottles. I've also seen easy cap bottles: https://www.amazon.com/Chefs-Star-CASE-Bottles-CLEAR/dp/B011SGS8U8/ref=sr_1_1_sspa?ie=UTF8&qid=1523023099&sr=8-1-spons&keywords=easy+cap+beer+bottles&psc=1
I'd like to try these in the future, if these work how I think they're supposed to, it would save me the cost/hassle/space of keeping caps and a capper. Do you know of any downsides to this kind of bottle?
Thanks for your detailed reply! By the way, what do you consider a "carbonation safe bottle"? My first inclination was to use the flip-top style that I use for beer like these. Would these be appropriate for carbonating and storing for a month or two?
For the 2F I am using the glass swing top bottles that I've purchased from amazon.
https://www.amazon.com/Chefs-Star-CASE-Bottles-CLEAR/dp/B011SGS8U8/ref=sr_1_6?ie=UTF8&qid=1487950546&sr=8-6&keywords=glass+swing+top+bottles
Thanks everybody, sounds easier than I thought. Can you please look at these products and let me know if I'm missing anything
Glass jar
https://www.amazon.com/1-gallon-USDA-Fermentation-Glass-Jar/dp/B006ZRBGSC/ref=sr_1_3_m?s=home-garden&ie=UTF8&qid=1481986875&sr=1-3&keywords=gallon+glass+jar
Scoby
https://www.amazon.com/Poseymom-Kombucha-Scoby-Cup-Starter/dp/B00J3U9RMK/ref=sr_1_4_a_it?ie=UTF8&qid=1481988107&sr=8-4&keywords=kombucha+scoby
Some bottles for transport https://www.amazon.com/Chefs-Star-CASE-Bottles-CLEAR/dp/B011SGS8U8/ref=pd_sim_79_5?_encoding=UTF8&psc=1&refRID=8GX2CTXPKCQN47F3H629
Is it really this easy, I've brewed beer before and the materials and process were significantly more difficult. Anything I'm missing?
Recipes on the internet! It's basically whiskey and heavy cream. It's not terribly hard to make aside from making sure the cream doesn't curdle and isn't time consuming at all. Just Google "bailey's recipe" and you'll get a ton of versions, all pretty similar. No suggestions on which one as I haven't made it in years, but I just picked one at random from Google. Just don't listen to the ones that say you need eggs, it's unnecessary (and gross) IMO.
Too little too late, but you can make huge batches, get [inexpensive but nice looking glass bottles](Chef's Star CASE OF 6 - 16 oz. EASY CAP Beer Bottles - CLEAR https://www.amazon.com/dp/B011SGS8U8/ref=cm_sw_r_cp_api_KrVyybC36C3R0) off Amazon, and gift them for a cheap and easy but crowd pleasing present.
These are the bottles - found them on Amazon
I bought a kit initially just to get past any worry that I would miss something....it got me started anyways. If I would do it over I would just buy a gallon glass jar (wide mouth), some black tea, a starter scoby with liquid, some sugar, a flexy funnel (for bottling), and some flip top bottles. The kit added about 15 extra bucks to the cost if I had bought everything by itself. I also bought a few large glass pyrex jars for scoby hotels and/or to hold the scoby if I don't re-make a fresh batch that day. I also bought fresh cutting boards, saucepan and wooden spoons so I can keep that separate and really clean away from any other cooking I do.
Kit: https://www.amazon.com/gp/product/B00LW7OR4A/ref=oh_aui_detailpage_o05_s02?ie=UTF8&psc=1
Bottles: https://www.amazon.com/gp/product/B011SGS8U8/ref=oh_aui_detailpage_o00_s00?ie=UTF8&psc=1
For the cover I have been using a coffee filter with a rubber band and it's been working super.
I've had no issue with mold or worrisome stuff happening to my kombucha. Each time it works perfectly and forms a nice healthy pellicle/scoby for the next batch. I think a few things you can do to make sure it doesn't 'go bad' is to remember to get all liquids to room temperature before dumping it in, don't use metal on it, wash your hands well before touching, don't use antibacterial cleaning products near it, and clean utensils with white vinegar before using. That being said, it appears to be sort of hard to kill it so it's a pretty beginner-friendly hobby.
Listen to this guy OP, he's the only one that actually answered your question. Those canning jars can't take too much pressure and are not usually perfectly cylindrical, this puts even more pressure on the corners.
They would probably work if you did a short 2F but then you'd have the same problem as you did with the growler, not enough carbonation, plus the added risk of a glassy, liquidy mess.
I'd just order a pack or dedicated swingtop bottles from amazon. If you wanted you buy a couple of 4-packs or Grolsh lager for the same price, and get the added bonus of 2 exta bottles and all of that delicious beery goodness.
https://www.amazon.com/Swing-Top-Glass-Bottles-Chalkboard/dp/B01LB1862A/ref=mp_s_a_1_3?keywords=kombucha+bottles&qid=1567886502&s=gateway&sr=8-3
Swing Top Glass Bottles - Flip Top Brewing Bottles For Kombucha, Kefir, Beer - Clear Color - 16oz Size - Set of 6 - Leak Proof Easy Caps, Bonus Gaskets, Chalkboard Labels and Pen - Fast Clean Design https://www.amazon.com/dp/B01LB1862A/ref=cm_sw_r_cp_api_i_d6N7Cb4D5PVHC
Isn't this a brewing bottle though? The bottle cap is supposed to go off before the bottle explodes. You can check this as example.
Had similar problems early on. Went from 7 day 1F to 10 day solved that for me. I also keep my house in the high 70's-low 80's which i know some people find unbearable (comfortable temp for me).
Also I don't add sugar to 2F, but usually just let them sit for 4 days before refrigerating (though i might go back to 3 since my latest batches have had too much carbonation).
Finally, i started to use these bottles instead and they're honestly amazing. Best seal of the 3 brands I've bought and I'll be sticking with them.
$22 for 4 of these! Here is the link :)
32-Ounce Amber Kombucha Growler... https://www.amazon.com/dp/B0749ZWF1C?ref=ppx_pop_mob_ap_share
I used Amazon Prime
I can't find the specific ones I bought, but anything like these should work:
https://www.amazon.com/gp/product/B0749ZWF1C/ref=ppx_yo_dt_b_asin_title_o01_s00?ie=UTF8
You might be able to find them for cheaper on Ebay/Craigslist or random stores in-person if you have any nearby.
Get some swing-top bottles if you want to be classy.
These are the ones I bought and they’re perfect - Bellemain Swing Top Grolsch Glass Bottles 16oz - CLEAR - For Brewing Kombucha Kefir Beer (6 Set) https://www.amazon.com/dp/B078JYNSCR/ref=cm_sw_r_cp_api_i_N9Q1CbK58REDZ
thats not a regular bottles though it has the swing top. Those are supposed to give out pressure if it builds up too much. I have had this happen to me before with just 1-2 days of fermenting and it made a mess int he kitchen but didn't blow up the bottle. Your freaking me out now though....
These are the bottles I have https://www.amazon.com/gp/product/B078JYNSCR/ref=ppx_yo_dt_b_asin_title_o02_s00?ie=UTF8&psc=1
From amazon! https://www.amazon.com/gp/aw/d/B078JYNSCR?psc=1&ref=yo_pop_mb_pd_t2
I buy replacement tops though because the ones they come with don’t provide a great seal. I got these: https://www.amazon.com/gp/aw/d/B01M31XE0W?psc=1&ref=yo_pop_mb_pd_t2
Don't do your 2F in plastic bottles! The plastic will leech into your brew, leaving a nasty after-taste. Instead, try reusing kombucha bottles you buy in-store, they're rated to hold carbonation and won't leech anything into your brew.
I'd recommend buying some swing-top bottles if you're planning on brewing into the future - they make a big difference!