Best cutting burs according to redditors
We found 51 Reddit comments discussing the best cutting burs. We ranked the 19 resulting products by number of redditors who mentioned them. Here are the top 20.
We found 51 Reddit comments discussing the best cutting burs. We ranked the 19 resulting products by number of redditors who mentioned them. Here are the top 20.
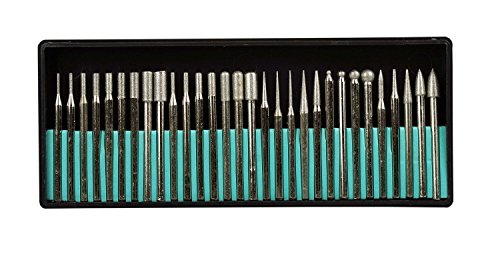
![ZJchao 10 pieces Tungsten Carbide Rotary Burr SET 1/8" shank [Misc.]](https://m.media-amazon.com/images/I/41bp02MiFXL.jpg)


A little how-to:
My suggestion would be a Dremmel with 400 grit diamond burrs. You can also get some more aggressive grits for faster material removal.
btw: Cute carving
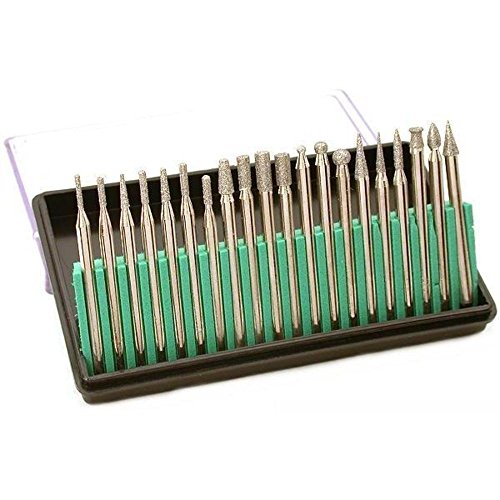
I start my hole with a Dremel and the round (ball) bit of a diamond Burr set found here: http://www.amazon.com/gp/product/B000MOI9G6/ref=oh_details_o07_s00_i00?ie=UTF8&psc=1
Once that's through I finish up with a cone shaped 1/2" Diamond Burr set made for a real drill: http://www.amazon.com/SE-82323DB-6-Piece-80-Grit-Diamond/dp/B0019N7YL0/ref=sr_1_3?ie=UTF8&qid=1394225745&sr=8-3&keywords=diamond+burr
I haven't used the second ones, cause I bought mine off ebay but I used the exact dremel bits on the first link
Absolutely! Just make sure you have either ceramic, diamond, or carbide bits otherwise you're gonna destroy all the bit heads. If you don't have them I may suggest either of these...
http://www.amazon.com/gp/aw/d/B000P49BX8/ref=aw_1st_sims_1?pi=SL500_SS115
http://www.amazon.com/gp/aw/d/B0012DLA3U/ref=aw_1st_sims_2?pi=SL500_SS115
...they ain't the worlds best bits but the price is just right and they've lasted me at least 3 projects, and will probably make it another 3 for sure. And they're cheap to replace!
Dremel is a name brand for hand held rotary tools. I have and have had several so I will give you my .02
Vacuum powered - You connect it to a shop vac or other vacuum and the suction powers it, while this may sound good on the surface I can't see this having anykind of power from this I suggest avoiding it.
Cordless - Battery powered, I have had several. You get less torque than with a corded version, and they run down. I do have their new micro version and I like it so far, but cordless will always be a balance between power and battery life.
Corded - Best bet IMHO, get more features for less money than with the cordless and do not have to worry about waiting for one to charge.
Suggested Features -
Bits - This will depend on what you want to use it for. I use my Dremels for everything from mixing epoxy to cutting and sanding everything (metal, wood, foam, fiberglass, etc). You can get more for your money if you buy a family of bits in a kit (example) but a few bits I have found most useful are:
NOTE Like most power tools, a rotary tool takes a bit of practice, they can get away from you and eat up material (including your jeans and leg) if you are not careful. I have found that 90 percent of the time a light touch.. pull back.. and light touch.. pull back is the best method.
edit: spelling and format
Dremel has some attachments that would work (like these). If you don't have a dremel, you can run them in you drill.
I would also recommend picking up a set of these:
https://www.amazon.com/gp/product/B00Y01TJ6G/ref=oh_aui_detailpage_o02_s01?ie=UTF8&psc=1
They are invaluable for shell work.
You'll need a pencil grinder (or a Dremel, if you don't have an air compressor), and a small teardrop 1/8"-shank carbide burr (something like THIS... 5th or 6th from the left). You'll also need a steady hand, because you'll be grinding that bit out. If you're careful enough in removing the broken bit, you should be able to drill the hole a little larger, and use the next-size-up extractor. I don't know if you used an form of Loc-tite on the bolts, but you may have to use a bit of heat as well.
Source: Aircraft mechanic for 10 years, and have removed many bolts/screws in this fashion.
Cut the crack down with a round file, sandpaper on a 1/4" dowel, dremel..burr might work best or a bench grinder. If it's the alum block and not the stick, just use the other side.
Some trees and a sleepy sun!
Thanks for the contest! This is a drill set for cutting into stone and glass to make my own beads!
I have to say that the best thing to do is use something like a dremel diamond sanding wheel or drum to knock off the hard corners and then use sand paper to refine those edges and clean them up. The last thing you might want to do is use some diamond coated needle files to get into those tight places and use a stick or rod with some more sand paper wrapped around it to clean up.
https://www.youtube.com/watch?v=AWEOn43N0DM
https://www.youtube.com/watch?v=XUHXHQ4mfwA
These are the files that I picked up. These are similar to disks used in the first video but I want to pick up these drum files instead.
My girlfriend got me a set of cheap chinese tungsten carbide carving burs off of amazon. I find myself using them and a few of the sanding drums very often.
I can't find the exact set anymore, but they're very similar to these:
http://www.amazon.com/gp/product/B0097QA7OW/ref=s9_wsim_gw_p469_d63_i2?pf_rd_m=ATVPDKIKX0DER&pf_rd_s=desktop-1&pf_rd_r=1KHDGF05W4NZ4NY2PTV9&pf_rd_t=36701&pf_rd_p=1970559082&pf_rd_i=desktop
I'd just stipple it. I can tell you what to buy and how to do it including the borders. You'll need the following:
https://www.amazon.com/Dremel-107-Engraving-Cutter-Shank/dp/B00008Z9ZV/ or https://www.amazon.com/Dremel-106-Engraving-Cutter-8-Inch/dp/B00008Z9ZU
https://www.amazon.com/Dremel-120-volt-Variable-Attachment-Accessories/dp/B075174NCV/ (you may have your own dremel, but definitely get a flex shaft for it)
https://www.amazon.com/HTS-401B3-Multi-Grit-Diamond-Medium/dp/B00U0E0KRE
https://www.amazon.com/AUSTOR-Grinding-Polishing-Accessories-Attachment/dp/B078Y5XGM8 (careful with these, light touch and keep it moving)
https://www.amazon.com/Flitz-Multi-Purpose-Fiberglass-Aluminum-Sterling/dp/B000MUSOW4
First use your engraving cutter to cut the borders that you've drawn on with a water-removable Stabilo marking pencil. Try to cut as smoothly as possible, with a steady hand. Don't try to cut it all at once, be patient (be patient for all of this, it took me a whole week doing a little at a time to complete the whole process, and turning my dremel off periodically because I have an older model flex shaft that gets hot after some use - solved this by wrapping the grip with bicycle inner tube)
The smoother you cut it the easier the rest will be. Some people just use the engraving cutter for borders, but I followed someone's guide and then used the diamond burs to smooth it out and polish it. Go from the lowest grit to the highest. You can either use the ball bits that are the same size as your cutter, or use the rounded cylinder bits. You can angle the cylinder bits in certain ways to get around curved surfaces, you'll kind of have to experiment with that. Once you get to the highest grit, I found that the only way to get it near-glass smooth was to apply a lot of pressure. It doesn't remove much material and you kind of want it to heat up the plastic to get it smooth. Then, still not satisfied with this, I got those felt wheels and cut the very tip off the smallest one, and used a bit of flitz paste, and then went over all the borders. That got it close enough for me. You can get more advice from the Weapons Stippling group on Facebook.
After you do the borders, I use the round tip on the walnut hollow wood burner on a medium heat setting. You don't want it too hot, not with the P80 plastic anyway. My technique was to press in, not too much but just enough, and drag downwards. A random totally pattern is best, I did a somewhat orderly snake pattern and then went over it again and smeared it out to give it a more organic texture. Then I went over it one more time, lightly and fastly rubbing all along the surface to blend the ridges that were created into the rest of the texture. You can do this several times to get it just right. The result is a texture that is grippy, yet not rough. That's how I like it, but you can experiment. The key is not to heat it up too much and don't stick any of the tips in too deep, and don't try to do it perfectly ordered unless you've gotten good at that with practice and are using an appropriate tip. You can make your own tips out of #8-32 brass screws or buy blanks from OT Defense, or some other place.
A diamond tipped bit like these ??
For the bowl, the bit was a single-cut burr. Like this: https://www.amazon.com/dp/B00ECMQUGK/ref=cm_sw_r_em_apa_i_3DFRDbPJCREKT
For the handle, a coarse bit, like this: https://www.amazon.com/dp/B0037MFFQ2/ref=cm_sw_r_em_apa_i_zHFRDbEF4ADCX
Both used on an old in-line, Dremel-style rotary tool. It's a bit more robust than a Dremel, but same idea.
Edit: Ah this is pretty much the tool:
https://www.amazon.com/dp/B01C3WPX6I/ref=cm_sw_r_em_apa_i_ELFRDbCV6QAX4
clean bbs with a chisel and use a dremel with 1/8" shank burr bit to knock the ugly off the rest https://www.amazon.com/YXGOOD-Pieces-Tungsten-Carbide-Double/dp/B01MXURLTG/ref=sr_1_4?ie=UTF8&qid=1505753798&sr=8-4&keywords=1%2F8%22+shank+burr
Both camber bolts and slotted holes have a risk of slippage. It's definitely important to tighten them down well. When tight they shouldn't slip, though it is always a risk. It isn't excessively risky though. I actually put a WRX through some serious paces with wobbly bolts in the lower front holes. You could feel when they should shift camber and the front end washed out, but that is pretty controllable.
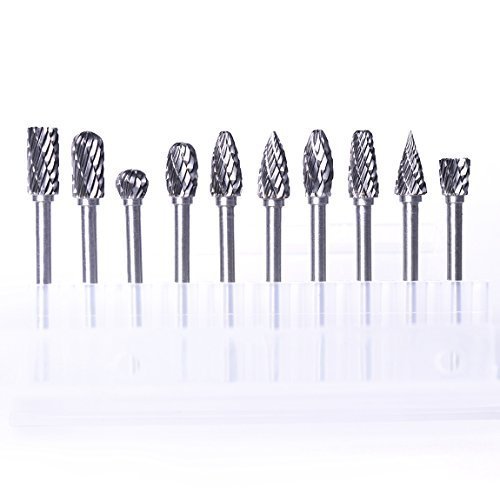
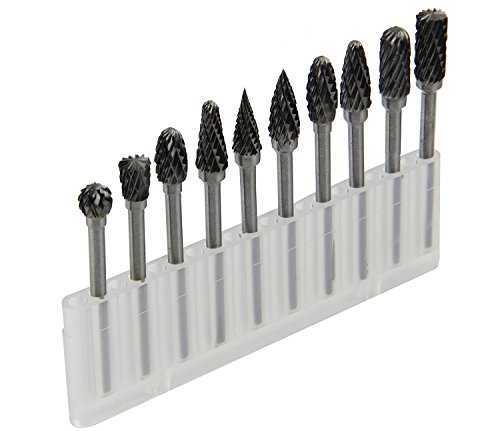
I would recommend a carbide bit if you can. It will be more precise and easier than a drill bit. Something like This, though you should be able to find it cheaper.
SE DT220R 180 Grit Diamond Burr Set, 20-Piece https://www.amazon.com/dp/B000MOI9G6/ref=cm_sw_r_cp_apa_3N6MAb31N6WZ0
Use the egg-shaped bit. Hold the bottle under a small stream of cold water in your sink so that it is rolling over the spot your going to drill. Use a dremel on highest speed. Go slow and occasionally lift the bit off the glass while you're drilling. Once the bit is through the glass, use the sides of the spinning bit to sand away the glass and open the hole to to desired size. Bob's your uncle and you got a pipe. I'm currently in a pipe/bong making phase and this is my method.
I'm particularly proud of this one... Recycled Coca-Cola bottle 2-chamber glass bong https://imgur.com/gallery/ZHAt8
For my longer jobs like drilling and grinding the air holes on kayfun lite clones I actually hold it under dripping water in the sink. For smaller quick jobs I've used old e liquid, since it can be a pain in ass to wash out machine oil and I have a bad full of e liquid that I don't use. If you use the automotive sand paper you can just wet it with water, the paper I got is made for wet sanding. I think I got it from Walmart it was years ago when I was panting truck parts so it may have come from an auto parts store.
This is the last diamond bits I bought
Just take it slow on the glass and smooth the sharp and I think you'll be happy with the difference it makes. Oh and if you try to mod any metal parts don't force the bits down into tight holes like small air holes because they can overheat and break of in the hole and it sucks trying to get them back out. I learned how important patience is real quick doing that, and keeping your work cool and lubed.
Well I love Rick and Morty as well, and I think your giftee would like a replica of Ricks portal gun $12https://www.amazon.com/Funko-Toy-Rick-Morty-Portal/dp/B071GVGFQF/ref=sr_1_1?ie=UTF8&qid=1543448056&sr=8-1&keywords=rick+and+morty+portal+gun
And as I am also a harry potter fan that owns one of these, I think your giftee would like a Replica of the Marauders Map $27 https://www.amazon.com/The-Noble-Collection-NN7888-Marauders/dp/B0026PW67W/ref=sr_1_1_sspa?ie=UTF8&qid=1543448110&sr=8-1-spons&keywords=harry+potter&psc=1
​
I'm a woodworker, and If I win I would love this set of wood carving burrs Wood Carving Burrs
Coincidently I also make Harry Potter inspired wands from time to time, Here's my most recent wand
The shape is similar but I think those bits might be a lot smaller. These have a 1/8" shaft
I found this one also https://www.amazon.com/dp/B0037MI4TM/ref=psdc_256263011_t3_B01EBCTZDK
https://www.amazon.com/gp/product/B000RH36WU/ref=oh_aui_search_detailpage?ie=UTF8&psc=1
.
https://www.amazon.com/Astro-2181-Double-Carbide-Rotary/dp/B00061SFKK
Rookie mistake to buy a $20 drill bit, when you can get 20 for $4
I've had a lot of people ask for a build video but if you check out my 15 second typing video in this thread you'll see my video production is really lacking. Given the whole process is 2-3 hours, that's also a pretty long video.
But to answer your direct question, I definitely sculpt the key into its external shape first. I tried the other way around when I first started and quickly gave up.
It might seem like it would be easy to cut too far but this didn't happen once when I switched to walnut.
What worked really well was doing most of the hollowing using the sphere bit in the link below. This handles 75% of the hollowing out and it does so in a very predictable spherical shape.
Problem is, the interior of a Cherry MX keycap isn't spherical. So I then used a reverse code bit square out the interior, this left the walls of the keycap about 1-1.5mm in thickness, which leaves enough room for the switch.
Sphere:
https://www.amazon.com/dp/B0037MI5RI/ref=twister_B07CRQ7LLL?_encoding=UTF8&psc=1
Reverse cone (far right in the picture):
https://www.amazon.com/DRILLPRO-Double-Carbide-Rotary-SizeTungsten/dp/B06W9JFW66/ref=sr_1_1?ie=UTF8&qid=1536972165&sr=8-1&keywords=reverse+cone+rotary+bit
Here's a link to a set on Amazon for $6.50. Thanks for the heads up OP.
Edit: or this one. Which to get?
If you have a dremel or electric drill just get these: http://www.amazon.com/Pro-Quality-20-Piece-Diamond-Point-Rotary-Tool/dp/B000MOI9G6/ref=sr_1_1?ie=UTF8&qid=1331352860&sr=8-1
I was using a variety of tips (bought from amazon
And yes I was using sulfur lime for treating peach curl
I think it's definitely worthwhile to drop a few bucks on glass drill bits. There about $15 in a hardware store or you can look online. I got this set and immediately made a nice steamroller. Be aware that they're too small for most downstems.
i have a set thats a bit larger than this
main thing you have to look out for is if the bits you want will fit the chuck of the drill you are using
I have 2 and I prefer my Dremel brand one because it has 5 speed settings whereas my B&D only has 3.
My Dremel is a 3000 but there are lots of options in the Dremel world. I would say to avoid wireless/battery operated ones if you plan to ever use it for metal cutting because battery operated ones tend to lack the speed and power of a corded model.
Also consider investing in a rotary file bit or 3 (https://www.amazon.com/dp/B00Y01TJ6G/ref=cm_sw_r_cp_apa_QyHszb8B7NJ72) - the circular cutting bits are a pain to angle sometimes and are useless for rounding corners, etc. A rotary file bit is great for when you want to shave away a surface instead of cut INTO a surface. Kinda hard to explain in text. You'll see what I mean if you ever try them in person.
You are absolutely going to need diamond tipped bits. This is not at all easy to do. This IS going to result in a ton of broken attempts. Please make sure you wear really good eye protection AND a respirator. I have not made any designs on/in glass with a dremel but I have had to drill several half inch holes in the side of bottles before. If you go to fast it will break. If you let the dremel bounce or get out of control it will probably break the glass. If you look at it wrong it will break the glass...seriously though, it is something that is going to take some practice and a steady patient hand. I wish you the best of luck!
Bits
I've not tried it myself, but using a hand tool would seem to be the safer bet.
I believe i have also read someone say they used the Diamond Bur set that you can get on amazon. Google'd: This one maybe?
Thanks everyone for the advice everyone, I probably would have bought them had I found them yesterday, but I decided to go the DIY route. Since picking must be a very budget conscious hobby for me, I went ahead and took the plunge and bought the important tools. I figured making my own pins would be difficult and require a lot of crazy equipment, but I looked into it and realized it was a lot easier than expected. So just for anyone who's curious, here's what I got:
 
So in total $112 for all the components needed to make as many locks as I can imagine, many of which can be used for other projects.
 
To add supplies for a few other DIY projects I also added:
 
So another $21 brings it to $133 plus $2 per 2-3 tools that you need. Add in this $6 case and a few $4-$6 practice locks around aliexpress (1st, 2nd, 3rd, 4th 5th, 6th, 7th), and you've got a great starter kit that sets you up to DIY anything you might need in the future. I also took advantage of Peterson's mega christmas sale (plus the 10% discount code they gave us) and got a ~$25 order of $1-$3 picks to start me off
I did that last, after turning the whole thing on a lathe. I removed the bulk of the scoop with a 5/8" forstner bit on a drill press, and then carefully removed the rest with a 3/4" diameter ball nose burr, like this. If you check out the 5th picture in this post I made a few weeks ago you can see it attached to a hand drill, which I would recommend over the drill press where it can take off more material than you're planning.
that one seems a bit big, possibly smaller ones are cheaper?
hole saw set - says diamond tipped
http://www.amazon.com/SE-Diamond-Hole-Saw-Set/dp/B000SJ2TL6/ref=sr_1_6?s=hi&ie=UTF8&qid=1334198775&sr=1-6
hole saw - 1 bit 3/4 inch
http://www.amazon.com/DEWALT-DW5582-4-Inch-Diamond-Drill/dp/B000VRBENO/ref=sr_1_1?s=hi&ie=UTF8&qid=1334198775&sr=1-1
dremel kit - must have a dremel for sufficiENT speeds
http://www.amazon.com/Pro-Quality-20-Piece-Diamond-Point-Rotary-Tool/dp/B000MOI9G6/ref=sr_1_4?s=hi&ie=UTF8&qid=1334198775&sr=1-4
ALWAYS MEASURE TWICE and CUT ONCE
I used a half inch spade bit and it kinda cracked my first one
http://i.imgur.com/T9w9t.jpg
Has slide to bottom and then removable bowl
stuff at neck is hot glue for a air tight seal, glass was to thick for gromit that came with the slide
bottle cutter - for other fun things
http://www.amazon.com/Generation-Green-g2-Bottle-Cutter/dp/B004ZRV3AU/ref=pd_bxgy_hi_text_b
Well this + this(1.75L) should work ok. At least its what i plan on using shortly.
Thank you so much for this info, c0nduit. I really appreciate it. I aim to do carving in the round. I'll see if I can get away with a generic big hook instead of the stand. Would a hook > spring > motor help keep the motor's sound down / keep it from rattling or vibrating the wall/cabinet the hook is connected to? Or is that a non-issue? My bench doesn't support any of the elevated stands they sell.
Thanks for letting me know the big burrs that come with the kit are functional and I had no idea fire is the best medicine for a clogged burr. Thank you also for a look into your workflow. I will pick up the detail diamond files. I anticipate them being very helpful. I'll also get the diamond "detail" burrs cause they're also cheap and it sounds like small diamond burrs will work well enough in moderation. Hopefully those and a basic detail knife set for edges will get me through the first few projects and aim me towards a stronger detail game-- hopefully without acquiring another power tool :]
Am I right to think the small diamond, almost engraving burrs might be OK for very limited detail work? Or would they get clogged immediately and be a huge pain to repeatedly clear out?
Thanks again for 1 -validating my research and 2 - your thorough answers. This is a really big help.
And here you go:
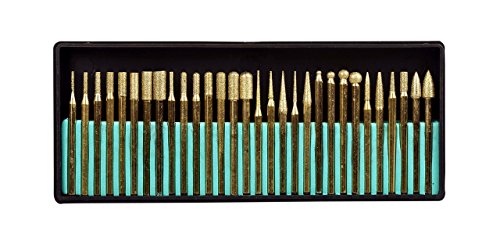
SE 82331TF 30-Piece Set of Titanium-Coated Diamond Burrs, Grits 120-150 https://www.amazon.com/dp/B000P49BX8/ref=cm_sw_r_other_awd_w8I7wbTKQKNKS
I've been pretty happy with those so far. I think I might try my hand at engraving sometime soon.
Sorry, went to bed. As long as you are slow and deliberate, I wouldn't think you would have a problem with cracking. There are some issues with the glass flaking off where you cut it, but that can be fixed with sanding.
https://www.amazon.com/Pro-Quality-20-Piece-Diamond-Rotary-Tool/dp/B000MOI9G6/ref=sr_1_1?ie=UTF8&qid=1499440765&sr=8-1&keywords=diamond+tipped+dremel+bits
I used these bits to finish the edges after cutting. The "globe" bit, 7th from the right, is what I used to drill a drainage hole in the glass.
edit: also, for sanding the edges, get Emery Cloth, it's in the sandpaper isle at home depot. It's sandpaper that is bound with cloth, so you aren't going to cut through on a sharp edge when you are sanding it down.
I bought a cheap chinese set of carbide burrs from Amazon. $11
I used the cylindrical one with the round head to grind out two bolts that held the sway bar clamps on one of my W163 MLs. The bolt goes through the control arm and the two clamp halves and is a colossal pain. The head breaks off of the bolt almost every time.
Very time consuming and it takes a lot of pressure on the drill to make it cut but it worked great. I used a 2x4 as a level and was probably putting close to 100lb of pressure on the drill. Took forever but it worked.
More like the slender ones in this:
https://www.amazon.com/dp/B001BK8TYW/
https://www.amazon.com/SE-82331TF-30-Piece-Titanium-Coated-Diamond/dp/B003K2E7CM/ref=sr_1_3?ie=UTF8&qid=1537360803&sr=8-3&keywords=HOMEIDOL&th=1
For finishing
https://www.amazon.com/dp/B076D4Z8LX/ref=sspa_dk_detail_0?psc=1&pd_rd_i=B076D4Z8LX&pf_rd_m=ATVPDKIKX0DER&pf_rd_p=f52e26da-1287-4616-824b-efc564ff75a4&pf_rd_r=3RCNSN0TMJKMBZZES4V2&pd_rd_wg=ypDkP&pf_rd_s=desktop-dp-sims&pf_rd_t=40701&pd_rd_w=2IRyq&pf_rd_i=desktop-dp-sims&pd_rd_r=a34681d1-bc07-11e8-b7c1-abe19be0e9b5
Burrs
[this is what i used because i have a dremel] (http://www.amazon.com/SE-82331TF-pieces-8-Inch-Diamond/dp/B000P49BX8/ref=sr_1_1?ie=UTF8&qid=1370366072&sr=8-1&keywords=diamond+dremel+bit) (if you dont have one, id suggest getting one they are great for anything)