(Part 2) Best hobby tool painting tools according to redditors
We found 195 Reddit comments discussing the best hobby tool painting tools. We ranked the 50 resulting products by number of redditors who mentioned them. Here are the products ranked 21-40. You can also go back to the previous section.


A Gundam paint marker.
First comment:
Please upvote this by default so it stays towards the top. I'm still learning how2reddit
So I am NOT an artistic person so this is especially anxious for me. But, I needed something to keep my hands busy that wasn't masturbating, so here we are.
I have probably over studied techniques and materials, and I want this post to be a "documentary" if you will. Where someone who has no business painting is going to be doing just that.
So, I'll be documenting my pitfalls and approaches to everything here. With all of you lovely people, it'll also hopefully be a central location for someone like me or just wants to get into 40k can refer to.
Disclaimer: I'll be at work until 5pm EST. But my job is pretty cushy so I'll be adding planning details throughout the day
Tools and Such
Well, I probably overspent here. Only because I'm lazy and didn't want to make the drive to harbor freights. But then again, paying the premium to help support my local game shop is going to give me some karma in the long run. Here's the list of things that I ended up picking up:
Theory is Great and All (11.13.19)
So here are my updates from actually painting.
Life Sucks and I haven't gotten much done (11/15/19)
So I was only able to apply a second coat of to what I've already done. But honestly, not too shabby! Apparently I didn't water down the paint too much.
https://imgur.com/gallery/lA9LV1N
Also, I recently switched to a different cell phone carrier, and got a $200 prepaid card.... So I'm getting these.
https://www.amazon.com/gp/product/B004INERK4/ref=ox_sc_act_title_1?smid=A3TMLEXVMVIW94&psc=1
https://www.amazon.com/gp/product/B002JLVM5U/ref=ox_sc_act_title_3?smid=A1Y3PCPH3CY53X&psc=1
There's a blog that I found (will have to find it again later) that recommended these.
https://www.amazon.com/dp/B07GWFCRHZ/ref=cm_sw_r_cp_api_i_1KDXDb0Y3VZ0Q
You’re welcomed.
Are the gundam marker airbrush any good for beginners ?
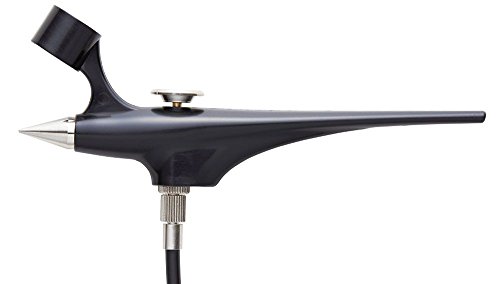
I have one of these and love it. It's Mr Hobby (Gunze) from Japan and all signs are it's made by Iwata. Fit and finish is just as good if not better. There is another non-"Platinum" 0.2mm that doesn't have the MAC valve that's a little cheaper but this is the one I have.
The Gundam Black and Grey markers are ususally the choice tools:
http://www.amazon.com/gp/product/B0027ORJ10/ref=as_li_ss_tl?ie=UTF8&camp=1789&creative=390957&creativeASIN=B0027ORJ10&linkCode=as2&redirect=true&tag=goosgunblo-20
http://www.amazon.com/gp/product/B001VJUWX4/ref=as_li_ss_tl?ie=UTF8&camp=1789&creative=390957&creativeASIN=B001VJUWX4&linkCode=as2&tag=goosgunblo-20
but
A set of Sakura Micron markers does the job just as well, for much less $$$!
http://www.amazon.com/gp/product/B0008G8G8Y/ref=as_li_ss_tl?ie=UTF8&camp=1789&creative=390957&creativeASIN=B0008G8G8Y&linkCode=as2&tag=goosgunblo-20
If you're looking to color larger areas, I highly suggest getting some bottles of tamiya paint and a hand brush instead. I have found that the paint markers tend to be streaky.
Tamiya makes different sized q-tips which are stiff so they are absorbent but won't reach into all areas like a normal q-tip. I use them regularly to clean up panel accent on features which don't have a defined or deep groove to protect the desired wash.
An example: Tamiya Craft Cotton Swab, Triangle Xsmall 50 p TAM87105 https://www.amazon.com/dp/B0026IBC38/ref=cm_sw_r_cp_apa_cnEEAbQ2FTAWS
The product you want will depend on how large the item you're painting is, and if you want a glossy or matte finish. I paint minis and plan on printing and painting minis, as well. I use Reaper's brush-on matte sealer (/dp/B00P8DYS5C), but that comes in 0.5 oz containers and is not feasible for larger products. Your local hardware or craft shop should have a sealer to meet your needs. Just keep in mind, if it's a gloss sealer (or you put too much matte sealer on) it will make your product shine.
Here are my steps. Happy to answer any further questions. I will say be minimal with the rocks and grasses. A little variation is what you want, but ultimately I was going for a definite sand look.
If the paint dries on your brush then you're painting too slowly ;)
 
You can use a Brush Restorer to clean your brushes. It even helps them maintain a fine point.
Yes it will, mostly.
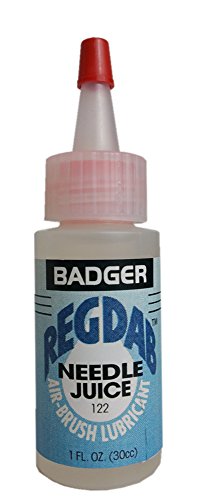
Other things that help: Get lubricant for the needle (for example here: https://www.amazon.com/BADGER-122-Regdab-Airbrush-Lubricant/dp/B000BRMYTC) and use Vallejo air colors.
> That is part of the reason I'm really looking to go the super-detail route.
Super-detailing might not really lead to "no real analysis." There's details to be worked out such as modified construction order, and what the $&% was the color of THAT part in real life?
But if you think "the more the merrier," I might suggest looking for Aires detail set 4225. Personally, I think the kit is well done enough that my fleet of eleven* of the Tamiya Corsairs only have the Ultracast resin seats
I can't tell you airbrushes really as I've had my setup for over 20 years now. Mine's an Iwata, but even their baseline compressor would eat up a significant portion of your budget there. My local hobby shop sells a variety of brands and the Grex ones seem to be the most popular.
> Expensive airbrushes still use these same types of screw in nozzles. The Iwata Micron is a good example.
Yes, the actual tip is still screwed on, but the nozzle sits on a removable piece, which can be more easily cleaned. In Neo and Master, the nozzle tip is directly screwed onto the body of the airbrush.
What I meant is that this whole piece can be removed for cleaning.
https://www.amazon.com/Iwata-Eclipse-Sbs-Nozzle-0-35Mm/dp/B000BQPNUU
I have the same one and I love it. Invest in a bottle of REGDAB(Needle Juice) The bottle will last you a lifetime and its really worth it. Just dip your needle in and wipe it off lightly before everyother session and you wont have as many problems with clogs and paint getting stuck on the tip.
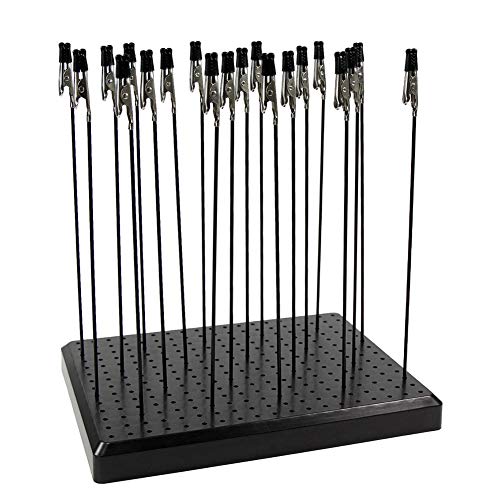
Ditto on Airbrush and booth, but even more alligator clips, foam blocks to insert said clips into, more variety in paint colors, or a proper mask are all good choices, in my humble opinion. To go an extra mile, a sprue holder might make his life easier: goo.gl/mPqwf5.
or an Airbrush holder: https://www.amazon.com/Iwata-Medea-AH-400-Universal-Airbrush/dp/B01DYN6GJ8/ref=sr_1_1?ie=UTF8&qid=1492656575&sr=8-1&keywords=Airbrush+Holder
https://www.amazon.com/Tamiya-Cotton-Triangle-Xsmall-TAM87105/dp/B0026IBC38
These work really well for that, be careful in the panel lines. I have found that the paint tends to be thinner in those area so the acetone will eat through the paint really quickly. I know you're across the pond but I'm pretty sure you can find these in your area.
Cheater!
I kid. Airbrushing is gonna make a huge difference on your kits. I have no experience with them, but I can imagine it being a lot like spray painting, only cheaper and better. I had an awesome time using Tamiya sprays on my MG Sinanju, but the price per can was ridiculous. Also, I see a lot of juicy panel lines on your kits. Try getting one of these for the white pieces and one of these for the other coloured pieces. They're cheap, easy to use, and will make your models looks so much better.
And yeah, gunpla is a pretty expensive hobby to get into, but I've always thought that one MG every three months is a good way to treat myself. It also encourages me to take my time building it so I don't do a piss poor rush job on them.
Something like this?
https://www.amazon.com/Pinkiou-Double-Airbrush-Needles-Temporary/dp/B01G5B5GM4/ref=sr_1_1_sspa?keywords=airbrush&qid=1567021606&s=power-hand-tools&sr=1-1-spons&psc=1&spLa=ZW5jcnlwdGVkUXVhbGlmaWVyPUEyRTdLWVM4UzkyN0VGJmVuY3J5cHRlZElkPUEwMDQyMTk2UDk2OFpDS1NKRUdLJmVuY3J5cHRlZEFkSWQ9QTA2NzQzODAzQVBZV1M5NkdIMlVCJndpZGdldE5hbWU9c3BfYXRmJmFjdGlvbj1jbGlja1JlZGlyZWN0JmRvTm90TG9nQ2xpY2s9dHJ1ZQ==
A wet palette would be good for starters. If she's ready for nicer brushes and understands how to care for them, a couple Windsor Newton Series 7 brushes could be a good idea. A new lamp might be good, lighting can make a huge difference. Look for a full spectrum lamp on an adjustable arm if you go this route, or consider an LED arch. A subscription to one of the better painter Patreons or a subscription box like Asset Drop might be worth looking at too. I'm honestly not very familiar with the different painter Patreons, so can't really recommend a specific one.
The eclipse uses one of these nozzels https://www.amazon.co.uk/Iwata-Eclipse-Sbs-Nozzle-0-35mm/dp/B000BQPNUU
I also have the same one and broke the thread when I first got it due to overtightening as well. Unfortunately from what I've found here in Aus the replacements are not particularly cheap. I haven't broken one since the first one though.
I have found though that it's easy to prevent breaking again as I haven't needed to unscrew it at all and just leave it together, I think Iwata even has a cleaning guide somewhere which leaves it together. To clean I just use a small interdental brush designed for your teeth, can be picked up from supermarket or chemist/pharmacy. Just dip in a bit of airbrush cleaner and give it a nice scrub inside to keep clean. Because they're made for teeth they much softer than the airbrush ones and no bits of metal/wire to scratch the inside of the nozzle.
I haven't come across something like that yet. But I have the Mr hobby procon boy that has a adjuster on the back end of the airbrush to limit how far you can pull the trigger. It essentially limits how much paint comes out which is perfect for shading.
GSI Creos Mr. Procon Boy FWA Platinum Airbrush, 0.2mm https://www.amazon.com/dp/B0031M5RE8/ref=cm_sw_r_cp_apa_Hkmiyb1VMF6P3
http://www.amazon.com/GSI-Creos-Nipper-Side-Cutter/dp/B00IFW9XB2
these?
I often use this guy on small parts. However, I have been converted to this method of gluing using both Mr. Cement Deluxe and Mr. Cement S.
From GundamBuilder.com:
> I really think that one should buy both of these products, as they are also complementary to each other; use the Deluxe type is for the initial setting of plastic parts and use the S type for extra added melding support.
It really does give a superb bond! Remember to use www.camelcamelcamel.com if you can wait around for prices to drop. I was lucky enough to pickup both for under a dollar each a while back.
Whatever you do, abolutly stay away from this garbage. If you happen to have some laying around, however, this guy has some sound advice for how to use it.
This is my test horse for my new airbrush. I just ordered a Iwata-Medea Hi Line CH (http://www.amazon.com/gp/product/B001CRV14Y). Pretty excited!
http://hlj.com/product/GNZGM17/Sup
http://hlj.com/product/GNZGM16/Sup
Metallic red and blue. Labeled "meta" for some reason.
Same ones on Amazon, but rather expensive.
https://www.amazon.com/Gundam-Metallic-Acrylic-Paint-Marker/dp/B0018QZXLG
https://www.amazon.com/gp/aw/d/B0018QZVIG/ref=pd_aw_fbt_21_img_2?ie=UTF8&refRID=ZPYWZTK2HV1ZFTMMDVSJ
https://www.amazon.com/dp/B016ONQOEW