(Part 2) Best industrial sealants according to redditors
We found 45 Reddit comments discussing the best industrial sealants. We ranked the 32 resulting products by number of redditors who mentioned them. Here are the products ranked 21-40. You can also go back to the previous section.


To seal the outer, non-moving seams, use a window caulking like:
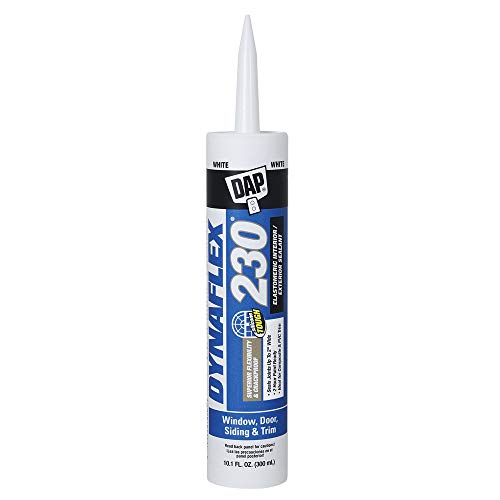
Dap 18275 DYNAFLEX 230 Premium Elastomeric Interior and Exterior Sealant, 10.1 oz, White https://www.amazon.com/dp/B0000CBJI6/ref=cm_sw_r_sms_apa_i_KqiWDb6F2FA9M
To seasonally seal the seams along the track, use something like:
Dap 18354 Seal 'N Peel Removable Caulk, 10.1-Ounce https://www.amazon.com/dp/B001QFZS6E/ref=cm_sw_r_sms_apa_i_JniWDbG8RNJ5K
Just read the directions and clean surfaces well before applying to ensure you don't waste time and have to re-do it shortly.
Wrap his present in duct tape, then put a nice base of spray foam in the bottom of a box. Put in present, then spray foam the rest. Close it up and duct tape it again.
I recommend a latex spray foam for easy cleanup because you will get it on your hands.
http://www.amazon.com/18826-Latex-Sealant-12-Ounce-Aerosol/dp/B0006B685O
The way I would do that is bail out the tank, remove the ballcock, inspect the hole in the porcelain, inspect the gasket on the ballcock, apply dope to the ballcock gaskets , install the ballcock in the tank, dope the threads on the outside end of the ballcock being careful to not get dope inside of the ballcock, attached the supply tube to a firm hand tight.
Turn the water on and test
https://smile.amazon.com/Oatey-15804-Hercules-Megaloc-Multi-Purpose/dp/B000BQ8DUW/ref=sr_1_4?crid=SWRFTX4OKEDO&keywords=megalock+thread+sealant&qid=1573895934&sprefix=megalock%2Caps%2C132&sr=8-4
I’ve never rebuilt one of those specifically before but I’ve rebuilt hundreds of motorcycle engines and other complicated items. The most important thing is not to be in a rush. As a general rule things should come apart pretty easily. If your reaching for the 3 foot pry bar you probably missed something. Stop, take a look around, there might be a bolt hidden that you missed or something like that. Forcing stuff can easily lead to breaking other stuff that was perfectly fine.
Also stay organized/take pictures. Once the case is open don’t just start ripping gears off the shafts. (Don’t be in a rush) take a few pictures that will help you get things back in the right order a week from now when the parts get delivered. It’s best if you have a place where you can lay out the parts in order as you disassemble. Tagging parts is helpful too.
Clean everything. Take the time to thoroughly clean anything you might be reusing. That gives you a chance to visually inspect all the pieces. You may find the beginning of another problem and be able to correct it before it really causes trouble.
Use quality parts. You don’t want to go through all of this a second time because you were trying to save a few dollars and some cheap Chinese bearing came apart three months down the road. You’re already saving a ton of money not paying someone else to do this. Use some of that savings to make sure it’s 200k miles before you need to think about doing it again.
Also I highly recommend using loctite 518 to seal everything up. As long as you get all the sealing surfaces nice and clean that stuff is superior to most anything else I’ve tried. Use your finger to spread a nice even film on the sealing surface. You don’t want a ton squeezing out the sides when you torque it down.
Hope this is helpful and good luck with your project!
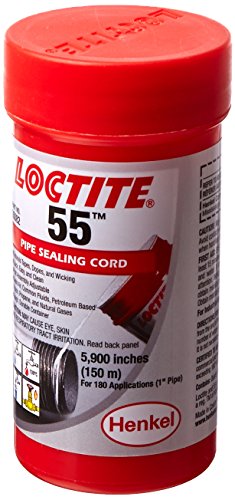
I can't image silicon working very well. T-tape & dope work just fine. There are things like Locktite 55 and X-pando if you're having problems.
If you need it to hold up through a war and be cheap, Vinyl is the way to go. Some of it looks pretty good and it will outlive your grandchildren. My father has multiple large dogs and needed something that could endure their running and playing. It definitely does.
If you need it to hold up through a war and can spend more, this is the most amazing thing I've ever had on my floor. Multiple people, including real estate agents, can't believe it's not wood. Tile costs more to install, and there's grout to worry about and seal but ... just wow. The trick to making tile look like wood is buy a tile that comes in very long pieces, like wood would. (See what I did there?) and use a grout that closely matches the selected tile.
When I did have laminate I used ClicSeal in the kitchen. I can tell you with no reservations that it held up to every spill that got onto it, no questions. I imagine you could use ClicSeal with any laminate flooring to keep moisture from getting into the joints and causing swelling. I only wish I'd used it throughout. I don't recall how much is added to the install or what it cost.
As for brands, I'd just shop primarily by appearance. How much like real wood do you want it to look? Is a hand-scraped texture important to you? It was to me. I'd also look for a thicker board and don't skimp on the underlayment. You don't want it to sound hollow when you walk on it.
In this situation my preferred sealant is Solar Seal likely in clear. Please feel free to read up on it. A word of caution. Very sticky and mineral spirits may help with cleanup. I recommend using disposable gloves to finger the caulk line. Solar seal stays pliable for a very long time and I have trusted it for years. It's a step above average caulk.
Thanks for the input. I’m between that and the 3M marine grade silicone. Silicone was previously used, so I was thinking I’d b stick with it for this application. Thoughts? There’s also 4000 which is specifically for sealing screw holes.
3M Marine Grade Silicone
3M 4000
What sort of projects are you working on? My buddy used to design Bayliner boats for Brunswick, and built a number of small boats, but has since moved on to aerospace.
Ended up overnighting a tube of this: https://smile.amazon.com/gp/product/B0002YQBU2/ref=oh_aui_detailpage_o00_s00?ie=UTF8&psc=1
It's not white but clear will work since you can't see the roof anyway. It's going on a fiberglass conversion top.
http://www.amazon.com/Super-Glue-80583-Copper-Epoxy/dp/B000BVS0IW
it's this shit. makes anyone a pro at something they shouldn't be touching.
I am taking a few pics of the process, so can do that when I'm done. In words, I essentially put a 2x4 on two sides and the top of the fridge and screwed them together (it kinda looks like the bottom of an 'H'), then put one of those assemblies toward the front and one toward the back of the fridge connected with spacers at the top and bottom. Then attached a frame around the front (just like a picture frame, but with 2x4's). That essentially made a box for the fridge made out of 2x4's, and on the front, I sealed all the cracks and screwed the gasket that was attached to the fridge door to the frame. That is meant to make a fairly tight seal against the fridge. I'll hold the fridge tight against it by screwing two 1x2's to the back just to hold it in place. So the fridge hasn't been breached at all, and I can fairly easily remove it if needed.
For the chamber, my plan is make a frame that matches the frame on the fridge for that end. The bottom will be quarter inch plywood screwed to 2x4 crossbeams filled with insulation (think like the walls of a house, except the insulation will be better quality stuff). I'll put plywood on top of that for the fermenters to sit on. I'll make all the sidewalls and top similarlly and sealing everything up with caulk and Great Stuff. I'll leave an opening for the door on the front wall.
The two frames (the one on fridge assembly, and the one on the chamber assembly) will screw together with gasket tape sealing it. I also have foil insulation tape to use on the inside throughout to make it as air tight as possible.
The door will be a little tricky since the walls are going to be ~2-4" thick (depending on how I turn the 2x4's). You can't just make it similarly and it be able to swing out on regular hinges, because it'll bind at the edge opposite the hinge (let's call it the swing-out side). I'm thinking about turning/cutting the 2x4's that touch the swing-out side of the door at a 45, then just letting them mate with gasket tape and a slide lock. Similarly, the other 3 sides of the door need to be able to make contact with a firm side of the chamber and seal with pressure + gasket tape.
So that's my plan. I haven't had time to work on it much lately, but I'm pleased with how the frame for the fridge turned out, and how well it works with the gasket I pulled off the fridge door. The fridge probably doesn't even need to be held in place, but I just want to make sure if I shift it around, that does come loose and start spewing cool air out into my garage.
Oh, also, I'm going to build a work bench on top of all this. It'll slide up next to the workbench I already have and be the same height.
I'll post pics when I finish :)
This is what you want to use.
https://www.amazon.com/Copperfield-W573-0007-Mill-pak-Temperature-Sealant/dp/B001D1J8TO
Wood stove pipe in general will have minor gaps at the stove or thimble and will not effect performance. Natural draft will draw smoke up without any leakage. Just make sure the crimped end of the pipe is running downward and not up.