Best plant germination trays according to redditors
We found 77 Reddit comments discussing the best plant germination trays. We ranked the 44 resulting products by number of redditors who mentioned them. Here are the top 20.
We found 77 Reddit comments discussing the best plant germination trays. We ranked the 44 resulting products by number of redditors who mentioned them. Here are the top 20.


Oh man. Miniature Doug firs are really rare in the trade -- that's a pretty good one. These normally have to be grafted in order to propagate them , but if you're game to try cuttings, here's how I'd do it.
relativelyvery high concentration like Hormodin #3 dip the cut end into a tiny bit of the hormone, just enough to turn a couple of millimeters of stem white.If you are successful; you get to name the cultivar. I'd recommend you base it off your handle: Riggs Dwarf!
[Edit: here is a ridiculously technical paper on propagating Douglas Fir from cuttings PDF and
Changed the rooting hormone]
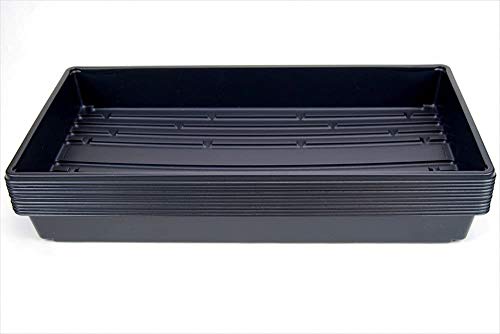
I do something similar except in one of those black long grow trays (the ones that look like this: https://www.amazon.com/Plant-Growing-Trays-Drain-Holes/dp/B0058PTK6M) It's where I keep all my smaller potted succs. This way I don't need to haul them back and forth; they all get some succ food and watering at the same time. They seem to love it!
Since it's not super nice looking maybe I can think about getting a prettier tray with high-ish sides in the near future...
part 2/2
One of the things you have to do is decide where you want to draw the line for your own personal definition of the word "raw". A commonly-accepted definition of following a raw diet is that at least 75% of your food is either raw or is cooked at temperatures below 104F to 118F. Some people go 100% with no heating at all. This is really important to figure out because you have to decide how stringent you want to be. For example, "raw almonds" aren't actual raw, because current laws require pasteurization of all almonds in the United States - so no almonds, no almond butter, no almond milk, etc. if you are truly 100% raw. Two additional things to consider are dehydration & pasteurization:
Fourth, I'd recommend picking up the Thrive Diet book by triathlete Brendan Brazier. This book contains many raw vegan recipes. These are high-energy recipes as well, as the book is oriented towards athletic performance.
Fifth, you may want to look into growing & fermenting your own foods. A few starter ideas:
Sixth, it's worth building up an inventory of great ingredients & recipes. A few starter ideas:
>I just threw out a bag of chips and decided it would be my last time ever buying anything like that. I don't want to buy anything processed again (after I eat up these remaining veggie dogs).
Food & health isn't so much of a destination, as a journey - learning what works best for your body, finding new ingredients, recipes, and tools, etc. Defining what path you want to take is important because that's what guides your day to day eating decisions, and also results in how good you feel, energy-wise. People generally go vegan for two reasons:
What often happens, in reality, is that people buy highly-processed fake meats (burgers, dogs, etc.), snack foods (potato chips, etc.), and junk food (dairy-free ice cream, candy, etc.) & then wonder why they don't feel good. Only you know how your body feels, so you have to figure out what works for you, which means trying new things, defining what your diet entails, learning about macros, and so on.
I've tried a variety of dietary approaches over the years (keto, paleo, low-carb, vegetarian, vegan, raw vegan, fruitarian, etc.), all with pretty good results. One of the biggest things I've discovered is that having a meal-prep system in place is critical to success, unless you have a lot of energy, free time, and a strong love of preparing food. I like to work in the kitchen...when I'm in the mood. The rest of the time, I need to feed my body my macros so that I feel good, look good, and am healthy, and really, I just need to fill the void when I get hungry & want something tasty.
So hopefully this gets you started in the right direction...there's an infinite amount of resources out there on the Internet, from raw vegan cheesecakes to walnut taco "meat". It also helps tremendously to eat according to your macros, and to figure out your eating schedule, which enables you to figure out a meal plan every week, instead of just winging it on a daily basis & struggling with being consistent & having consistent energy as a result.
If you put a word in [brackets] (and then link in parentheses) you get some thing that looks like this: trim bin.
never used one, but i've heard good things about the trim bin
You need a couple of these.
I dug really deep on Amazon
Only complaint is a few of my stack of unused black trays warped under high 90s direct sun but I should have covered it all up. Lost some props that week too.
https://www.amazon.ca/gp/product/B00L4NJSBE/ref=ppx_yo_dt_b_asin_title_o03_s00?ie=UTF8&psc=1 You buy this and capture all of that. Pays for itself immediately
Thanks!
I only made shake once, but I'm proud of the method, and product.
I bought a trim bin, filled it with trim, then placed the bin on a speaker playing some loud bass. Collected the shake, and repeated until there was nothing left to shake.
I call it the lazy shake method :-)
Will do it again in a few weeks.
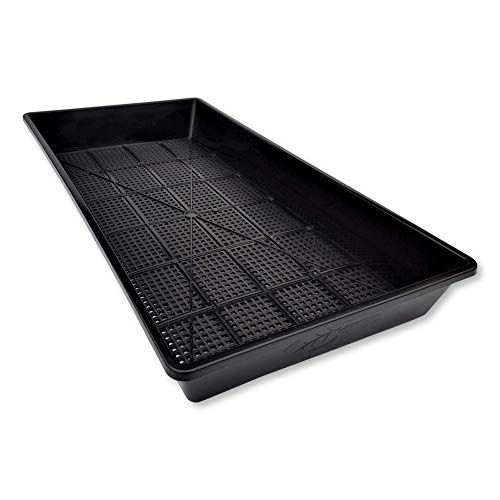
Yea its like at that point just add another plant in and presto! There's almost always a way to still get what you want out of a grow :D. Happy trimming! Also THESE THINGS are BADASSSSSS!!! (There are cheaper/ different versions this is just my fave.)
https://www.amazon.com/Strength-Microgreens-Seedling-Planting-Propagation/dp/B07CHYSJ5F/ref=sr_1_8?ie=UTF8&qid=1542593081&sr=8-8&keywords=microgreen+trays+extra+strength
looks ok
​
buy a trim bin LINK
The quality is really good on them. Sturdy as heck! The 1020 trays I got a while back from a local hydroponics store and they are no where near the same quality.
https://www.amazon.com/1010-Seed-Tray-Microgreens-Wheatgrass/dp/B074LSRL31/ref=mp_s_a_1_1?keywords=1010%2Btray%2Bbootstrap&qid=1563076109&s=gateway&sprefix=1010%2Btr&sr=8-1&th=1&psc=1
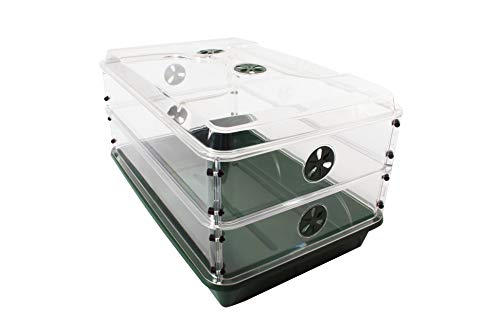
These are nicer than the "cheap" dome / tray sets. They are always out of stock but, the biggest one is great to have. Garland XL High Dome Plant Propagator https://www.amazon.com/dp/B019FW5Q20/ref=cm_sw_r_cp_apa_jDTIAbJ2GD0SN
Keeping things clean is 90% about careful process; no matter what you use, if you go fast, you'll probably make a mess. For personal consumption, I'd recommend small trays (like these from Bootstrap Farmer that will last you forever--you can get the flimsy ones for cheaper, but they don't last). Don't overthink the soil buildup--it would take a long time for those 5x5 trays to overwhelm your raised beds I'm sure. I just save my soil residue in a few Sterilite bins and add them every few months to the raised beds (I have 6 4x4 SFG-style raised beds).
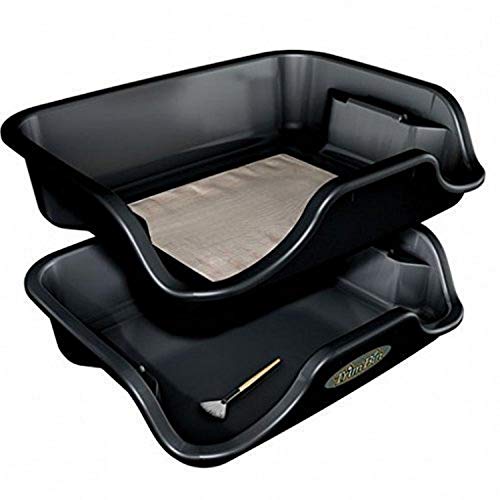
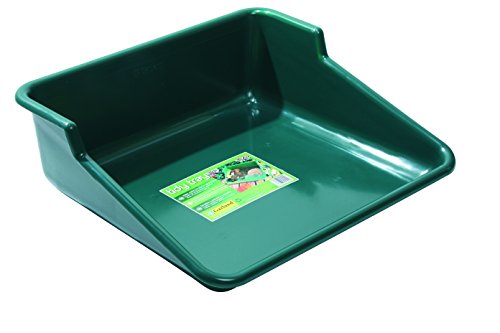
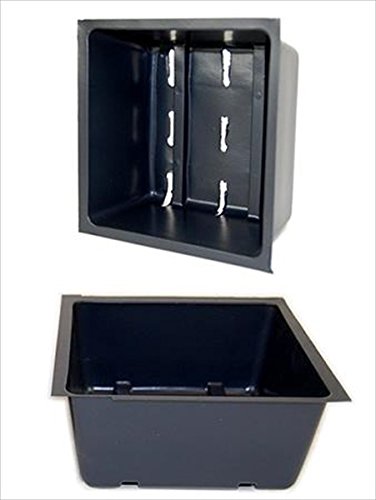
I found it through amazon, while looking for a litterbox with low sides. All I could find were dog boxes (meant for puppy pee pads), when I came upon these. I bought the more expensive one ($29, the other is $18), sine it is nice and big for two bunnies. I spent at least that on three for four litter boxes over the past year trying to find one they liked that they wouldn't destroy. This one is super heavy plastic.
http://www.amazon.com/Argee-RG155-Table-Top-Gardener-Portable/dp/B0013LI4GM/ref=sr_1_4?ie=UTF8&qid=1422693249&sr=8-4&keywords=garden+tray
http://www.amazon.com/Tierra-Garden-GP48-Piece-Potting/dp/B001IPYM9Q/ref=pd_sbs_lg_14?ie=UTF8&refRID=1808VASKZCYYCSXV97A1
Found it! I need one of those.
TrimBin Harvest More Trim Bin, Black https://www.amazon.ca/dp/B00L4NJSBE/ref=cm_sw_r_cp_apa_i_J94TCbNXBPY8D
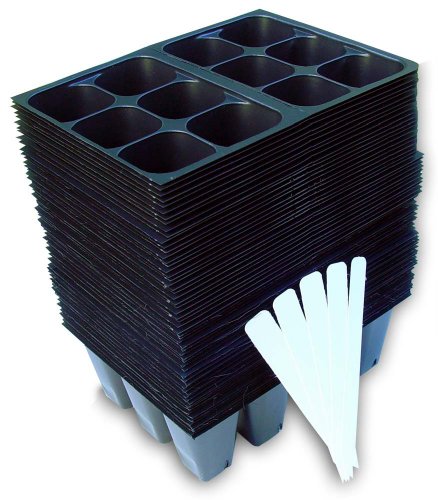
You can do communal pots no problem as /u/bunannna said, make sure they have space. A least enough grow to the size where you intend to repot them. I like things organized so I got some seedling trays. (Buy these locally if you can, they are WAY cheaper when you don't want 720 of them. I got my 72 slot tray for $1.80)
$120 shipping included: https://www.amazon.com/Botanicare-Tray-4-by-4-Feet/dp/B007XR64J4
3'x3' is $83.
You can build your own tables a lot cheaper.
I'm not OP, but I use (a different brand of) this and have had 100% germination.
go for it, but you could order these to our doorstep and save yourself the trouble.
I use https://www.amazon.ca/gp/product/B071D55QFS/ref=ppx_yo_dt_b_search_asin_title?ie=UTF8&th=1
I find the curve helps, but that's just preference.
and because I like to buy every toy possible this also very convenient for harvesting:
https://www.amazon.ca/gp/product/B00L4NJSBE/ref=ppx_yo_dt_b_search_asin_title?ie=UTF8&psc=1
Two hours per plant? (always longer than you think!). Get some buddies over, roll a few joints and get trimming ;)
https://www.amazon.com/TrimBin-Harvest-More-Trim-Black/dp/B00L4NJSBE/ref=asc_df_B00L4NJSBE/?tag=hyprod-20&linkCode=df0&hvadid=193150648923&hvpos=1o1&hvnetw=g&hvrand=7262421580731275073&hvpone=&hvptwo=&hvqmt=&hvdev=m&hvdvcmdl=&hvlocint=&hvlocphy=9003417&hvtargid=pla-309887297935&psc=1
Wait - I googled it for you: http://www.amazon.com/Tierra-Garden-GP48-Piece-Potting/dp/B001IPYM9Q
They're super easy to grow. Put a seed in each of these and put them all in one of these filled 1" full of water
And keep in a warm and sunny place. Them transfer to pots and put in a sunny window :)
You can buy the seeds online too :D
I've been growing microgreens for 2 months - just broccoli and kale so far. They are the easiest to get you started as they can survive the widest temperature range, humidity range, grow well in substrates (non-soil mediums like coco coir and hemp), and tend avoid mold problems - I've never had any issues myself.
Here's some pics of my results + setup:
https://imgur.com/a/nQZrev2
I use a couple of 75w blue+white LED grow light panels - one for each tray of microgreens. Blue is important for vegetative growth which is what microgreens are all about.
75w blue-white grow light panels
Flowering plants requires more of the red light spectrum. Microgreens don't need that red light but when I started I had a couple of 90% red + 10% blue LED grow light panels and the microgreens did okay under those and where still edible.
Lots of people love white T5 florescent lights (which of course contain the blue light microgreens need) but from what I've read they generate a lot of heat and you need to circulate air around them more - this is often achieve with little box fans. Though, in cold climate that heat can be beneficial. Personally, I think if your growing in a typically well-heated area of your home you can just go with LEDs.
In the pics I linked to you'll see 7" humidity domes over my trays. I don't use them anymore and find they provided no benefit. If anything the extra humidity was hurting the microgreens. It could've been insufficient oxygen to despite the top vents. They just didn't grow as strong. You might need them in a very dry climate though.
7" humidity domes
The trays I use are called "1020 trays" because they're 10x20 inches. They're from Bootstrap Farmer on Amazon. I recommend this brand over others due to their durability.
1020 trays
I use 10x20" hemp mats as a growing substrate and love them. I'm considering switching to coco coir some day due to how cheap it is but I'm still doing research on that.
hemp substrate
The seeds I use are from Mountain Valley Seed Co. The germinate very well and I've had zero problems.
kale seeds
broccoli seeds
I just zip tied the grow lights to a tiny wirerack I had around. I'm going to expand to a 48"w x 24"d x 72" high wire rack soon so I can use 1 shelf for 4 10x20" trays and use the other shelves for storage or whatever. If you get a large wirerack like that I recommend something in Alera's industrial line. A little pricey but they're sturdy beyond measure.
I'm still very much a n00b at all this and this is all just based on my 2 months of experience.
/r/microgreens is a great resource.
I highly recommend checking out some of John Kohler's videos where he interviews microgreen growers. This one he did with the owner of City Hydro got me interested in microgreens:
How to Grow Microgreens in Your Home & Make $100,000+ a Year
City Hydro has come great videos on their YouTube page as well:
https://www.youtube.com/channel/UCe0J-lbIU2Pta8mR6euWg-g/videos
Their setup takes up more space that I have in my modest apartment but it's still inspiring.
Here are the microgreen version of that tray: https://www.amazon.ca/dp/B06XZFLY9P/ with free shipping in Canada.
Stand:
https://www.amazon.com/gp/product/B07FJQ1F6M/ref=ppx_yo_dt_b_asin_title_o01_s00?ie=UTF8&psc=1
​
Germination Tray:
https://www.amazon.com/gp/product/B07GRRDXSV/ref=ppx_yo_dt_b_asin_title_o08_s00?ie=UTF8&psc=1
​
Light:
https://www.amazon.com/gp/product/B07TS82HWB/ref=ppx_yo_dt_b_asin_title_o03_s00?ie=UTF8&psc=1
For my two buns, I got a large gardening tray from amazon. It's about 20x25, in 6 inches deep in the back, but only an inch deep in the front. They can walk easily (they are lazy and will pee next to boxes that are high). It was maybe $22. Best litter box I've ever had
Edit:
Tierra Garden GP48 Tidy Tray One Piece Potting Tray https://www.amazon.com/dp/B001IPYM9Q/ref=cm_sw_r_other_awd_hjr7wbKZMWRBE
It looks like this one
Found them at the local garden center, just the trays that come with the greenhouse style seed starting kits.
http://www.amazon.com/Plant-Growing-Trays-Drain-Holes/dp/B0058PTK6M/ref=sr_1_10?ie=UTF8&qid=1458235881&sr=8-10&keywords=seed+starting
I bought it at a garden store for 10 bucks. But this is practically the same: https://www.amazon.com/d/Plant-Germination-Trays/Garland-High-Dome-Plant-Propagator/B019FW5Q20/ref=sr_1_fkmr0_4?ie=UTF8&qid=1549409316&sr=8-4-fkmr0&keywords=hydro+propagator
Chop the entire plante down, and hang them upside down in your tent or some type of enclosed area where you can maintain a consistent temp and humidity.
Try to keep the temp around 60 degrees F and humidity around 60% if you can. If your humidity is going to be 60% or higher then pull off all the leaves before hanging, otherwise just pull off the large ones (or none at all if your humidity is going to be lower than like 50%). When the branches start to snap rather than bend, start trimming it up. The goal is to let it dry out slowly - around 1.5 -2.5 weeks from chop to fully dry is a good time frame to shoot for.
Use a tray like this one when trimming to collect all the good stuff that falls off during the trim job.
After trimming, put it in mason jars filled around 70% full.
Canadian here, what do you think of these? They seem very similar, just cant get my hands on those trays without spending a fortune
https://www.amazon.ca/gp/product/B071CZQS6T/ref=ox_sc_act_title_1?smid=A1HGNN1IFZEK5C&psc=1
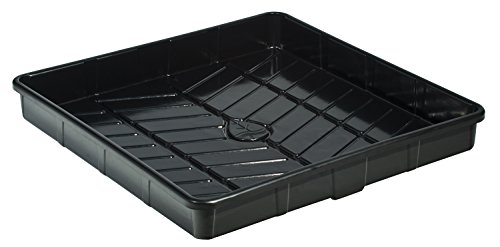
This is a 4x4 Flood Table built for a 5x5 tent. Just need to find good medium and I'll be popping seeds :) Glad to be back at it!
Current Plan:
> ##Ebb & Flow:
> Finished Table
> Tray: 4x4 Botanicare Tray
> Fittings
> Pump: Active Aqua Submersible Water Pump, 400 GPH
> Drain Hose: 1/2" Inside Diameter)
)
> Pump Hose: 3/4" Inside Diameter
> Rubber Grommets: 1/2 inch
> Stand: 5x5 Wood Frame (Building this weekend)
> Reservoir: 55 Gal.
> Air Pump: 95 GPH
> Air Diffuser: 4x Air Stones
> ##Medium:
> Germination: Starter Plugs
> 6 inch Net Pot
> Hydroton (but willing to be convinced otherwise!!!)
> 4 x 4 Coco Mat
> ##Environment:
> Tent: 5 x 5
> Light 1: 1100W DE HPS bulb w iPower Ballast & Extend-A-Wing reflector
> Light 2: 600W of QBs
> AC inside, Venting Outside with 450CFM fan
> ##Nutrients:
>
> Flora Trio
> KoolBloom
> Diamond Nectar
> Armor Si
> Floralicious Plus
> Humboldt Snowstorm
> Mammoth P
> * Hydrogaurd
> Strain: Sweet Amnesia (from seed)
ANY AND ALL ADVICE IS APPRECIATED!!!
Amazon
5" by 5" by 2" Deep Garden Trays w/Drain Holes - 20 Pack - Greenhouse/Gardening Plant Grow Flats https://www.amazon.com/dp/B00WEW0HZU/ref=cm_sw_r_cp_apa_i_46ITCbEE1XWJR
I totally failed with paper towel ziplocs this year...of 6 bags I managed to cook 99% of the seeds in them because I left them directly on the heat mat in a pile, like a dumbass. Actually had solid results with one of these pro-hex trays.
https://i.imgur.com/HasUUr4.jpg My setup with tomatoes and peppers
Here is the link !
So I have everything germinating in a 72 cell tray. Would a move up to a 32 cell tray give them two weeks do you think?
http://www.amazon.com/Hydrofarm-JSEF55-Smart-Float-Plugs/dp/B003ST9WQI/ref=sr_1_1?s=lawn-garden&ie=UTF8&qid=1457725355&sr=1-1&keywords=seed+tray+float
One of my garden stores had this with a set up and stuff growing. It was like 50% when i saw it and bought it 3years ago maybe. Could make your own for cheap, but whatever works
If you can put a little money into this, you'd get better veg out of a 4' T5 fixture, and it'll put out more heat. Keep the tent pretty much closed up, with a vent on the bottom barely open and a 6" duct fan hooked to a Programmable Thermostat venting out the top. While it's cold, you can set the fan only to kick on at 80 degrees or something, so you aren't venting out warm air constantly. You do need some airflow, and the thermostat makes it a "set and forget" kind of thing. So you aren't baking plants on an unusually hot day, or taking away their heat on cold nights.
Other ideas:
edit: Last thing. Not an outdoor grower, but in 8 weeks you'll have 4' tall plants that aren't "hardened" to sunlight. That'll be a process. As will supporting the plants. These will likely need trellising straight away.
Right here: https://www.amazon.com/Plant-Start-72cell-Dome-Tray/dp/B004NSD3CC
I use growing trays similar to these that I bought ages ago to start seedlings in back when I had a vegetable garden. Make sure to get ones without drain holes.
These are the best prices I've found.
http://www.amazon.com/dp/B0058PTK6M/ref=wl_it_dp_o_pC_nS_ttl?_encoding=UTF8&colid=1BVC8W6XNJ4ZW&coliid=I1CFOFX4XKESLR
http://www.amazon.com/dp/B00BRQ3QWK/ref=wl_it_dp_o_pd_nS_ttl?_encoding=UTF8&colid=1BVC8W6XNJ4ZW&coliid=IW6IL6YJDY7FF