Best sculpture release agents according to redditors
We found 7 Reddit comments discussing the best sculpture release agents. We ranked the 2 resulting products by number of redditors who mentioned them. Here are the top 20.
We found 7 Reddit comments discussing the best sculpture release agents. We ranked the 2 resulting products by number of redditors who mentioned them. Here are the top 20.

Hello all, thanks for looking!
These are the first batch of Dugout One Hitters that my dad and I are making in our garage. We used Amazing Cast Clear epoxy resin. The blue one is dyed with a liquid coloring and the green one is a powder with some metallic flake. We wet sanded them up to 3000 and then used 3M buffing compound for the final finish.
Here are some more pictures.
Resin Used
Liquid Coloring
Powder Coloring
Buffing Compound
We made custom molds out of HDPE and used Smooth On releasing agent.
Any feedback or questions would be appreciated! Check out more on my Instagram
Ok, I know what I'm talking about so please heed my advice. I want to see this work for you, so I'll take some time to really give you my best advice, though if something comes up, hmu and I'll help you work through it. I can't see everything coming either. I've worked with thermosetting polymers for a decade, for models, prototypes, and special effects work. If I don't word good here, lmk and I'll draw a diagram. Here are some tips, and then my step-by-step:
My Process:
When you have completed the wood construction, sand the outside smooth and brush on a couple heavy coats of Johnson's Paste Wax. You will also need a wood box to work as a retaining wall, I recommend good-quality (birch veneer) plywood, 1/2". Brush this with a couple heavy coats of Paste Wax as well, let the wax dry between layers, but when you assemble the box around the finished wood, give both a heavy coat of wax to act as a gasket. Don't go so heavy near the edges, don't get wax onto the surfaces you intend the resin to bond to. In this process, resin can sneak down the edges of the retaining box a few inches, as long as it hits the gasket layer and doesn't run out the bottom. This thing will need post-processing, you are not getting a shiny final product out of the mold.
Butt and pass the outside corners of the walls like a crate, with corner blocks on the outside that you can screw the walls into to keep from marring your finished product. This entire waxy, woody construction must be made with very fine craftsmanship.
I would design the walls to sit flat on a sturdy floor, and the finished wood inside to also sit flat on the floor (whatever contact points it has) when it's all put together. You don't want the weight of the resin to cause any physical changes in this arrangement whatsoever. The gasket layer must be a wet smoosh scenario, that doesn't squelch out onto the work surface (stay away by an inch or two), and isn't disturbed ever again once assembled. I would use some heavy finish nails, right through the walls and into the finished wood work. This will pin them from sliding for the next step, and you can easily make those holes disappear later.
That being said, once it's together, I would tip it up on one end, and use some 100% silicone caulk along the inside corner of the bottom all the way around, as insurance. Get the "30 minutes rain or water ready" kind. Also, put everything together on a big sheet of heavy plastic drop cloth.
Mix up a small batch of your casting resin, and brush it onto the surface of the wood to seal it, drill it in really well with a chip brush, however don't go nuts against the waxed retaining wall, just get it up to there and stop. Don't grind into the wax layer and get wax mixed onto the brush, etc. I would not colorize this resin, that way if it wicks into the layers anywhere near the sides, it cannot be seen there.
Poke a work lamp down in the box and let it heat that all up and help kick that thin coat of resin. Casting resin, especially slow setting, is formulated to generate relatively low heat by volume, since it's usually in a big volume. This is why you don't use laminating resin, it's formulated to make a lot of heat to cure in thin layers. If you cast with laminating resin, you'll start a chemical fire. So, thin layers of slow casting resin will be extra slowww. Consider adding a bit more catalyst, depending on manufacturer's recommendations. You can also get a small amount of laminating resin from the same family (epoxy or urethane) as your casting resin, and use it to seal the wood here.
When that resin has "gelled" (i.e. pot life over, not runny anymore) you may mix the entire volume for the project and pour it in.
Once it's full, you can run a palm sander or similar vibrating tool all around the outside of the box, to send any bubbles rising to the top. This is where slow resin that stays runny for an hour, will help you. Do this for a minute or two.
When you're done with that, the top should be foamy. This is when I like to spray Mann 200 lightly over the top. This will break the surface tension and all bubbles will pop instantly. It's ok to get a film of the Mann 200 on the whole top, any loose bubbles that may rise later will pop when they hit it. This works like a charm with all Urethane casting resin, which I recommend. I'm inclined to believe it will work for Epoxy, however not positive. Epoxy is a lot harder when cured, more difficult to post-process, but harder to damage. If you choose epoxy, you can use a propane torch to pop bubbles easily. I am not sure if Mann 200 (once liquid) is flammable, so don't necessarily do both together without testing first. You will be sanding the whole top anyway, but popping the lion's share of the bubbles is good practice as they do make craters that cause you to have to push the finished surface down a few thousandths of an inch for the original pour height.
Let it cure undisturbed for the appropriate amount of time.
Pop off the walls, and use a DA sander to completely process all surfaces from 150 up to like 400, I would keep going on the resin surfaces up to 1200 at least. This is where you will notice the difference in hardness between urethane and epoxy, depending on what you chose. The former is a dream to sand, the latter is going to take a while longer. Use a sander with a big footprint and be even, promote a planar surface, don't make it undulate by working too hard on any specific area, if you can help it.
At this point, you can either spray clear polyurethane onto everything (this will make the sanded resin go back to glass-clear, and seal the wood) or you can polish the resin with plastic polishing compound. You would have to be careful not to grind polish into the wood parts, however.
Good luck! Hit me up for specifics if necessary.
Final tip:
http://www.amazon.com/Liquid-Urethane-Rigid-Foam-Density/dp/B00LNNWT7K
http://www.amazon.com/Mann-Release-Technologies-Ease-200/dp/B002YEBO1O
It's a process. if you've never done any mold making or casting before, I recommend finding something small that's flat on one side and detailed on the other, like a pendant or tiny wall hanging. Then, go to your local craft store or online and pick up a silicone mold making kit. You can get something like thiswhich is inexpensive. You'll want a mold release too, which you'll use on any surface the resin will come in contact with.
The resin is next. There's all kinds depending on what you want. Clear like glass, glow in the dark, opaque, etc. You can even mix stuff like dyes and glitters into it if you want a different effect.
Then, of course , there are the boring things like gloves, plastic cups for mixing, sticks for stirring, etc. Those shouldn't cost too much. In total, it would probably cost around $100-150 USD to get started. Just the products I linked you would be good for a dozen or more small objects so it's worth the price.
Mess around making a bunch of little molds and casting resin stuff to get a good feel for the process. There are a lot of tutorials on YouTube to help you along. Depending on your end goal, there are a ton of different techniques to attain the results your after. More than I can go into here.
If you're interested in sculpting your own stuff, that's a whole 'nother beast entirely and there are multiple way to go about it. Either way, if you have any questions about products or what to do, you're free to message me anytime. I'm always happy to bring more people into the fold.
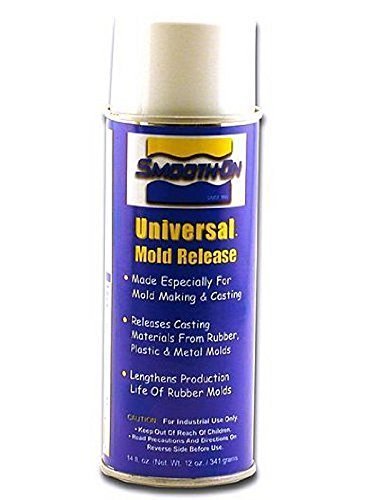
Sure!! It’s this one Smooth-On Universal Mold Release 14 fl. oz. https://www.amazon.com/dp/B004BNHLOK/ref=cm_sw_r_cp_api_i_aKTDDbBNZM1N7 that’s a bummer about your molds!! I hear silicone works too
So I'll give my two cents on dental plaster ---it's brittle (not terribly so, but, it can chip and/or shatter if dropped) -- that said, it's perfect for use with terrain, especially stone / rocks.
​
Pros:
Easy to mix
Easy to use
​
Cons:
More fragile
Heavy compared to resin.
​
​
Personally, I prefer resin, but it takes a little more practice to get decent at pouring it---but it's pretty exact, follow the measurements, and pour!
​
Also, use a mold release product
​
https://www.amazon.com/Smooth-Universal-Mold-Release-fl/dp/B004BNHLOK/ref=sr_1_3?keywords=mold+release&qid=1556573115&s=gateway&sr=8-3
​
And before spraying that, I often will also use talcum powder (baby powder) and a brush to brush it out---this helps the flow of resin into those hard-to-reach places.