(Part 3) Best automotive gauges & accessories according to redditors
We found 312 Reddit comments discussing the best automotive gauges & accessories. We ranked the 155 resulting products by number of redditors who mentioned them. Here are the products ranked 41-60. You can also go back to the previous section.


Or for those of you who don't want the DIY
You can get cheap gauges at pretty much any parts store or online retailer. Here's a Sunpro tach and a coolant temp gauge, which you could also use for oil temp. An oil pressure gauge would probably be the most critical.
I have a lot of time into the cad file, and I will be selling the design as a finished product, so I wont open source the file.
But gauge info:
AEM 30-0306 X-Series Boost Pressure Gauge https://www.amazon.com/dp/B01BI2PNGO/ref=cm_sw_r_cp_api_GNCPAbZY70SX7
Revel VLS 1TR1AA006R Intercooler Dual Temperature Gauge 52mm, 50°F to 300°F Intercooler In-Out Digital OLED Display w/ Temperature Sensors & Mounting Kit https://www.amazon.com/dp/B0744QMBF8/ref=cm_sw_r_cp_api_mOCPAbYQ2FCGS
Leveling is pretty rough when you first start out, so don't feel too bad about it. One thing I can suggest is to use a feeler gage instead of paper. I use the 0.1 mm one on this one. You can more accurately measure the height that way, but you'll likely want to clean the bed with alcohol before printing, because the feeler gage set has a coating of oil on it.
As others have said, you'll need to raise your z limit switch to use the glass bed. You want to roughly adjust the height before you set the z switch height. Tighten your bed level points until the springs are fully compressed, then loosen them about 3 turns or so. Manually move the nozzle to the center of the bed and down far enough to touch. Then loosen the z limit screws and raise switch to touch the x gantry. Tighten it there and then start the level process.
The only thing that I can think of for the prints stopping is maybe the extruder isn't assembled correctly. Try wiggling the arm up and down. If it has play, you need to tighten the pivot screw more. While you are messing with that, make sure the other screws are tight, and see if you can turn the pull when there's no pressure on it. It should be able to turn freely, and it shouldn't wiggle up and down either.
Actually, now that I think about it, is it because of the SD card slot? I imagine if you pulled the SD card during a print it would do exactly what you described.
As far as the SD card, you'll either have to replace the whole board, or use octoprint. I can highly recommend octoprint, though. It let's you print from your pc, without using the SD card. Once you have it set up, you can print directly from cura, with an add on in the cura marketplace. (well, on cura 3.x. I'm not sure on cura 4.0 yet, as I haven't messed with it too much.)
Cura is actually pretty good, it'll do pretty much anything you need it to.
Re: auto bed leveling, it's helpful, but it was a pain to set up for me, and you'll either need to order the Creality kit or print a mount for it.
I haven't had any problems with Hatchbox pla. It's one of the better ones I've used.
This hobby is pretty great once you get started, but the learning curve is pretty steep. Don't feel embarrassed about asking for help! I've only been printing for a few months now, and the community is pretty great!
I added a voltmeter. It's easy to glance at it from time to time just to make sure all is well with your charging system. One of these with USB outlets is very handy. https://www.amazon.com/Charger-Digital-Voltmeter-Motorcycle-Accessories/dp/B07FVH1XMF
https://www.amazon.com/dp/B07PZ7PSG4/ref=psdc_15729781_t2_B01NBXJ4T2
Not sure if these are actual ones I ordered because it’s been a couple of years now and I couldn’t find it in my order history. As far as scraping off the old paint, I just used the corner of a razor blade to chip it off.
https://www.amazon.com/dp/B07MPB6RY9/ref=cm_sw_r_cp_api_i_Da-3CbVR4ETA5
Parts list:
Motor and drive train combo: 2 x 550 30000RPM Gearbox with 12V Motor,Electric Motor with Gear Box for Kids Electric Cars and Motorcycles High Speed RS550 Drive Engine Match Children's Ride on Cars https://www.amazon.com/dp/B076Q3XTWB/ref=cm_sw_r_cp_api_i_PiZADbZK937A2
Transmission to wheel adapter: Transmission Gear External Gear Accessories Connect Gearbox Motor and Wheels for Kids Powered Ride-Ons, 550 Gearbox Accessories Kids Ride On Car Replacement Parts E https://www.amazon.com/dp/B076HW2W98/ref=cm_sw_r_cp_api_i_TlZADbWF68M45
Variable speed controller: RioRand 7-80V PWM DC Motor Speed Controller Switch 30A https://www.amazon.com/dp/B071NQ5G71/ref=cm_sw_r_cp_api_i_LjZADbQSB11QY
Connectors: Amass 10 Pair XT60H Bullet Connector Plug Upgrated of XT60 Sheath Female & Male Gold Plated for RC Parts ... https://www.amazon.com/dp/B074PN6N4K/ref=cm_sw_r_cp_api_i_nkZADbG4NVM0E
Spade connectors: Supco T1112 Quick Disconnect, High Temperature, 12-10 Gauge, 1/4" Female Tab (Pack of 15) https://www.amazon.com/dp/B0071NC78C/ref=cm_sw_r_cp_api_i_olZADbX56T2WB
Battery terminal: https://www.ereplacementparts.com/contact-plate-holder-p-154719.html?osCsid=ijjl2im5cg4p7n3dm3k1cbpjv6
Voltage meter: MICTUNING MIC-VM DC 12V LED... https://www.amazon.com/dp/B078LVLHNF?ref=ppx_pop_mob_ap_share
Note: no affiliate links. All straight links!!!
This all started off with my wife saying that Lightning was a little too slow! I said no problem I got this.
So my first step was to investigate what was the best way to go about this. After a while of researching the best way, I realized that they are more or less oversized versions of my rc cars that I race. With that in mind I was able to do everything.
I started the conversion using just one of the motors. This was so I could make sure I was mentally doing it all right. While the transmission was close to the stock one, it was not a exact fit. I ended up having to trim away some extra plastic and make the opening larger.
Now that the motor and trans is in for the right side I had to start looking at the wiring. The wiring that is in there stock was 18 gauge and while technically will handle the 18v I wanted to be sure we did not melt any wires. I swapped it out one by one using the same 12 gauge wire I use in my RC cars.
The first wires I did was the battery connector. I found the connectors online and used a epoxy putty to make the socket. This ensures the connection is good to the battery.
I then proceeded to replace wires in the harness one by one till they were all replaced. Once it was all setup stock it was time to add in the speed controller. This allows me to turn the speed down (by adjusting the voltage.) I put it online between the battery and the rest of the wire harness. I did it here because it was not able to handle flipping the polarity for reverse. (Popped a fuse finding that out lol. )
Once this was wired up I was able to add in the “fuel gauge”. I put it in what is the “gas cap” on the car. This is a simple dc voltage meter. Nothing fancy here.
Once all that was wired. I needed to make a “Y” splitter for the motors. I know this puts them in parallel all the time and down the road I might change that but for now just forward and reverse was good enough.
Since this car was a single drive motor previously I had to completely make a new hole for this second motor. This was a bit simpler then making room for the first motor.
One thing to note on wiring the second motor. You will want to do it in reverse of the first one as it is spinning the opposite direction of the first motor.
After this was done they only thing I did was relocate the dial for the speed controller from on the speed controller to on the back of the car under the rear fender. This was so I can adjust it without having to remove the seat to adjust it. One thing I may still add is a master power switch. I know this car has one but due to positioning I had to put the battery meter before that switch.
One thing that is still a work in progress is I bought a mltoys brake reduction system. The problem is I was not sure which wire it should go to. This is not the typical plunger switch gas peddle. It is a 6 poll rocker switch. Once they get back to me with that I will get it installed so it is not as jerky on starts and stops.
Just thought you might be interested. I just ordered one of these 6 in 1 gauge clusters to replace all the dead gauges in my old boat and clean up/remove a whole lot of wiring at the same time.
https://www.amazon.com/ELING-Multi-Functional-Speedometer-Tachometer-Voltmeter/dp/B0785NF5XH/ref=pd_lpo_sbs_263_t_1?_encoding=UTF8&psc=1&refRID=EJP8J7NJA8YCYVNQXDM7
amazon has a mtx-l for $151
https://www.amazon.com/Innovate-Motorsports-3918-MTX-L-Plus/dp/B071RSKR4Z/ref=sr_1_1
Kwiksen 234-9064 234-4733 Heated... https://www.amazon.com/dp/B01I28UF1U?ref=ppx_pop_mob_ap_share
Catalytic Converter for 2003-2011... https://www.amazon.com/dp/B07QVWR1GB?ref=ppx_pop_mob_ap_share
I got these and no CEL return, just passed emissions in OR!!
I highly recommend you get the OEM exhaust “donut” gasket over aftermarket. I spent about 3 hours trying to get an aftermarket one on, OEM slipped on like butter...
I highly recommend an electronic torque wrench.
The mechanical ones are very inaccurate at the bottom end of range. Head bolts are often at the bottom or below what they can even be set to.
I use this one and it works amazingly well. It can accurately go down to 3ftlb. You can set the desired torque and it has a beep alarm as you approach, reach, and go over the threshold. https://www.amazon.com/gp/product/B004VYUKTC/ref=ppx_yo_dt_b_search_asin_title?ie=UTF8&psc=1
I also recommend flying with a very basic set of tools. I fly with some hex keys and wrench that fits all the sizes on my paramator. https://www.amazon.com/gp/product/B01F512F74/ref=ppx_yo_dt_b_search_asin_title?ie=UTF8&psc=1
Siphon is nice to get fuel out of paramotor. This one works amazingly for me. https://www.amazon.com/gp/product/B07CKW15ZS/ref=ppx_yo_dt_b_search_asin_title?ie=UTF8&psc=1
Radio chest harness. https://www.amazon.com/gp/product/B007HJKSG8/ref=ppx_yo_dt_b_search_asin_title?ie=UTF8&psc=1 I added a draw cord to attach my phone to. Phone then tucks into the velcro pocket and is secured by one of these: https://www.amazon.com/gp/product/B01H4E9Z6O/ref=ppx_yo_dt_b_search_asin_title?ie=UTF8&psc=1 It's powerful enough to draw in a medium weight phone.
Hook knife: https://superflyinc.com/products/jack-the-ripper-hook-knife
Power floats: https://glidersports.com/shop/powerfloat-2bsure/
Waste flotation: https://www.amazon.com/gp/product/B013RLI9XS/ref=oh_aui_detailpage_o04_s00?ie=UTF8&psc=1
Cut prop tape strips out of this: https://www.amazon.com/Scotchgard-Clear-Paint-Protection-60-inches/dp/B004VG8DS0/ref=sr_1_9?s=automotive&ie=UTF8&qid=1534535837&sr=1-9&keywords=3m+scotchgard
RTV silicon to put on exhaust springs to reduce vibration fatigue: https://www.amazon.com/Rutland-500%C2%B0RTV-High-Silicone-Black/dp/B000H5Y6CQ/ref=sr_1_5?s=home-garden&ie=UTF8&qid=1534352404&sr=1-5&keywords=heat+resistant+silicon+rtv
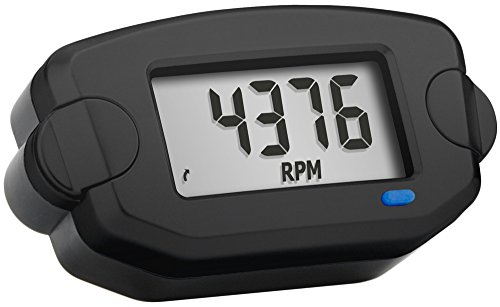
Motor tachometer: https://www.amazon.com/gp/product/B01GTP6ORC/ref=oh_aui_detailpage_o03_s00?ie=UTF8&psc=1
Radio: I recommend the FT60 or FT65. The 60 model is tried and true and can also be modded to RX aviation band. FT65 has newer display and is cheaper having been made in China.
Awesome, I've got the 454 as well. Plenty of power and getting like 7 miles a gallon. If you don't have a tach, I recommend getting one. I bought this one from Amazon and it was an easy three wire installation:
http://www.amazon.com/Sunpro-CP7901-Super-Tachometer-II/dp/B00029JXNE/ref=sr_1_1?ie=UTF8&qid=1415819111&sr=8-1&keywords=sunpro+tach
Price History
CamelCamelCamel - [Info] │ Keepa - [Info]
_
Price Chess > Price Checkers
^(Info) ^| ^(Developer) ^| ^(Inquiries) ^| ^(Support Me!) ^| **[^(Report Bug)](/message/compose?to=The_White_Light&subject=Bug+Report&message=%2Fr%2Famazondealsus%2Fcomments%2Fdvvm85%2Fbattery_indicator_31102019couponcodeklaekp2h42%2Ff7ezp0z%2F%0D%0A%0D%0A%0D%0A%0D%0APlease+explain+here+what+you+expected+to+happen%2Fwhat+went+wrong.)**
You could get something like this to just split the outputs, but if you actually want to mod your car I think you are actually looking for something like this or this...
Not terribly sure what your dash looks like, or which button panels are available to tap into, but that's probably where I'd start... >_>
The wife has something like this in her car, but I kinda hate it 'cause it takes up one of the cupholder slots... >_>
Here you go.
(1) https://www.kfm-motorraeder.de/cms/en/genuine-spare-parts/ducati-spare-parts?itemid=40610336A
​
(2) http://www.rubbersideup.com/ducati-monster-1000-s-ie-lock-set-gauge-speedometer-ecu-red-key-406-1-026-1c
(3) https://www.amazon.com/VOUCHER-Ducati-Monster-Instrument-Cluster/dp/B01HDGRIMG
I got mine off ebay but appears to be this same one...
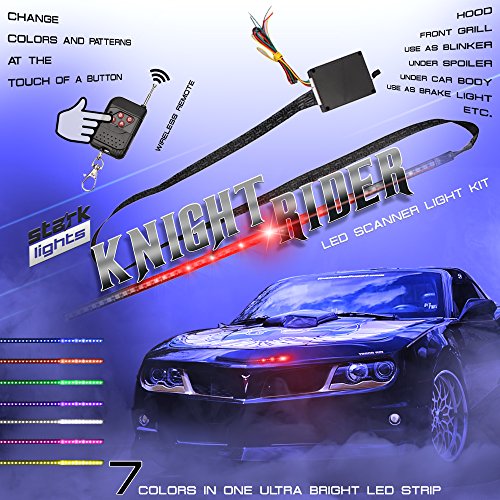
https://www.amazon.com/Knight-Rider-Scanner-Strobe-Universal/dp/B07934TD4G/ref=pd_lutyp_crty_cxhsh_4_1/147-8166200-6589668?_encoding=UTF8&pd_rd_i=B07934TD4G&pd_rd_r=01752d53-337c-4f23-83c6-0f7d75956fd0&pd_rd_w=cSn9b&pd_rd_wg=jecVE&pf_rd_p=84d6174c-2d03-4ac5-8f19-c869e855160f&pf_rd_r=CH33C77YXP7TN258JQH1&psc=1&refRID=CH33C77YXP7TN258JQH1
​
It has several reviews that are consistent with my poor experience, but some people reported re-sealing the whole thing in silicone as it says it is waterproof but doesn't really appear to be.
I have an Outback Flexnet DC in my main system and a Victron BMV 700 on a second smaller system. I would suggest you buy a Victron BMV 712 Smart (1) which comes as an all inclusive package with all that you need to install it. This one also has Bluetooth which makes it super cool with charts on your phone. If you are on a tight budget you can go for their simpler non bluetooth ones. Mine cost around 100 GBP a few years ago. There is also a 15-ish GBP option in Amazon but I don’t know how well it works (2).
The Victron comes with a shunt which you connect to the battery bank negative pole and you connect the inverter and the controller to the other terminal of the shunt. You want to make sure that nothing else is connected to the negative pole of the battery so that all energy crosses the shunt. Then the monitor itself is connected to the shunt (it comes with full instructions). You want to make sure you do this after fully charging your batteries.
A monitor gives the correct state of charge of your bank which is miles better than guessing from the battery bank voltage.
It could be an "air core" meter movement, newer gauges are little stepper motors
Edit: That looks very much like an air core movement.
If you're going to the dealership, you're probably overpaying by a factor of 2x.
Knowledge trickles down; on a 20-year-old car they probably want to charge you OEM prices (probably around $150) for the sensor and then do the associated equipment package (which would require replacing all AF and O2 sensors) rather than just the faulted one.
It's a $40 part, probably made by NGK or Denso.
(checks Amazon...)
Genuine Toyota Part for $115
$60 aftermarket
If I shopped around I could probably find something for $40. But $60 is close, no?
Take it to an indy; that $400 repair should be a $150 repair, tops.