(Part 2) Best colandes & food strainers according to redditors
We found 667 Reddit comments discussing the best colandes & food strainers. We ranked the 235 resulting products by number of redditors who mentioned them. Here are the products ranked 21-40. You can also go back to the previous section.


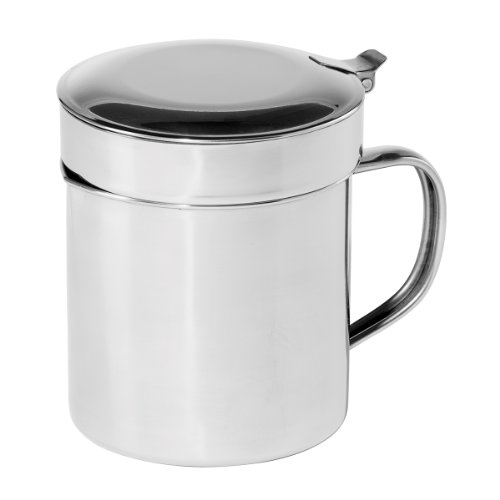


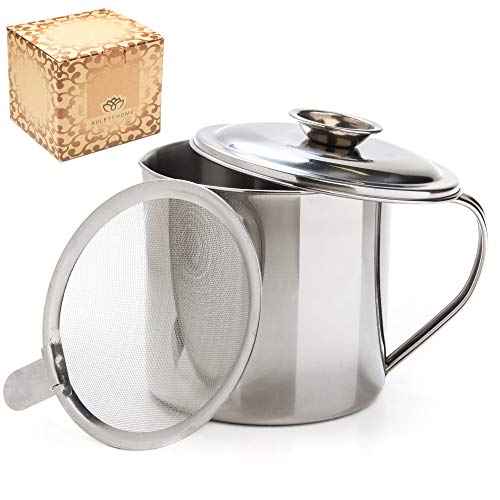


I don't think it's for making coffee. I don't think it's missing any parts, either. It's for collecting grease from cooking. We had one of these on the stove when I was a kid. You can buy these from Amazon: https://www.amazon.com/Cook-Home-2-Quart-Stainless-Storage/dp/B00318C5P6/ref=pd_lpo_vtph_79_bs_tr_img_2?_encoding=UTF8&psc=1&refRID=120F28YQS3GV4EWJYND7
Take a look at the difference in the strainer piece at the top. It's not a basket for coffee grounds. It's to catch small bits left over from cooking bacon. Then, you reuse the grease in cooking other things.
Notice three differences in this and a coffee percolator:
Simple strainer vs. basket
Missing rod in the middle
No spout for pouring out the coffee.
Edit:
Imusa brand - looks very similar to this: https://www.amazon.com/Imusa-COMINHKPR56104-IMU-35520-Grease-Dispenser/dp/B00DEOQPHQ/ref=pd_bxgy_79_img_2?_encoding=UTF8&pd_rd_i=B00DEOQPHQ&pd_rd_r=H4VZZR4CZGAMDXSY4332&pd_rd_w=DBkZb&pd_rd_wg=ePfyB&psc=1&refRID=H4VZZR4CZGAMDXSY4332
Yes, money well spent.
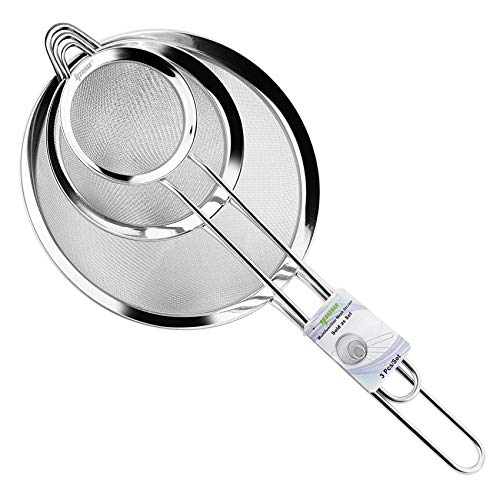
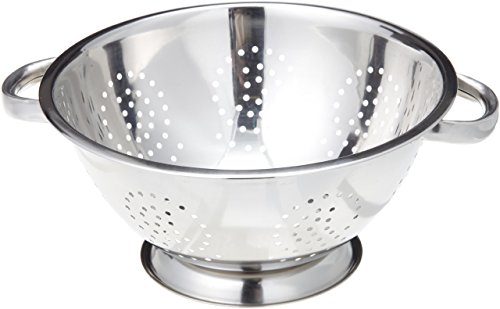
That is not a colander.
This is a colander - large holes, used for pasta or veggies.
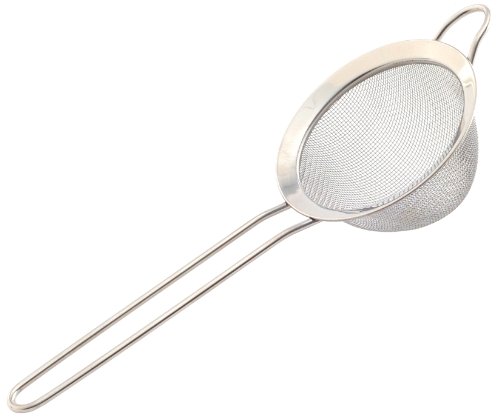
This is a sieve - small wire mesh, used for sifting flour and the like.
This is a strainer - wide wired mesh, used for anything too small for a colander, but not requiring the finesse of a sieve (like spaghetti)
Yeah, so I did the first fermentation as normal (scoby, tea, sugar). After that was done (7 days for this one), I took out the pellicle and starter liquid for the next batch (which I started in another vessel). Using the same vessel I had just brewed in, I added the pumpkin and spices. I covered it with a cloth just the same way you do for a first fermentation. I let it ferment with the flavorings for 3 more days. Then I used a super fine filter (a greek yogurt strainer bag actually, like this: https://www.amazon.com/Kleynhuis-Yogurt-Strainer-Ultra-Fine-Micron/dp/B07868DR5D) to strain everything into a separate container. Then I funneled it into the bottles. I just did that last part today, so I'm not sure how the carbonation will turn out, but I was seeing lots of carbonation bubbles in the brew before I strained it, and I do see some tiny ones already after a couple hours, so I'm guessing those will continue to build over the next few days. I plan to let them sit at room temperature for about three days or so. This is all new to me, too! I think I'm a little less concerned about the carbonation and more about it getting too sour, as this is essentially adding three extra days to what I normally would have done (going straight from F1 to bottling F2 with flavorings). We'll see!
Like this?
I used one of these when I made my own hot sauce a few times, works great :)
Save it. I keep this in the refrigerator. The mesh filters the crud out.
I seldom use cooking oils for most things. Just a spoon of bacon grease. It's not good for searing, (not a high enough smoke point) and butter works better for eggs, but most everything else gets started with bacon grease. And it's actually not bad for eggs, I just like butter better.
Jelly Strainer
Get one of these and just hang it from a hook. It'll dry on its own and its not really getting dirty so no need to wash it that often.
If you can't find one downtown, there's always amazon
https://www.amazon.ca/Oggi-Stainless-Removable-Strainer-1-Quart/dp/B00JZO3A1I/ref=sr_1_fkmr2_1?s=kitchen&ie=UTF8&qid=1482992249&sr=1-1-fkmr2&keywords=bacon+grease+strainer
I call mine a side strainer. Mostly use it for draining fat from ground beef and then continuing on into sloppy joes, tacos, hamburger dishes, etc.
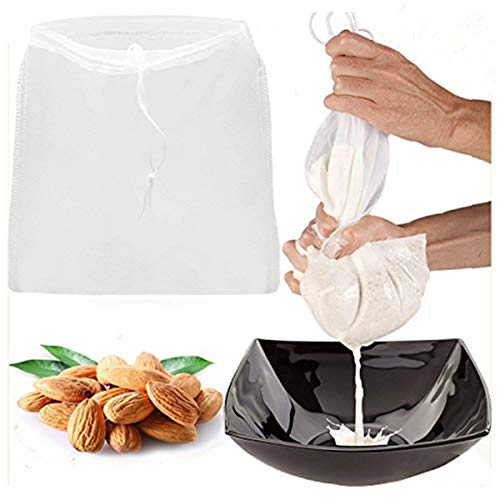
https://www.amazon.com/Commercial-Quality-Reusable-Strainer-Cheesecloth/dp/B0163J8NH8/ref=sr_1_5?s=home-garden&ie=UTF8&qid=1536019762&sr=1-5&keywords=milk+sack&dpID=61%252BNdBIjF5L&preST=_SY300_QL70_&dpSrc=srch
I didn't buy one for the same reason. I ended up finding this, though, and it's a perfect alternative for me: https://www.amazon.com/Kleynhuis-Yogurt-Strainer-Ultra-Fine-Micron/dp/B07868DR5D?ref_=ast_sto_dp
Looks like it might be an old strainer for the edge of a frying pan. You'd put the convex side inside the rim of the pan, against the edge, and tip the pan. It would keep stuff from falling out.
Like this one: https://www.amazon.com/dp/B000PSUUDY
I actually do need new sunglasses because I am working out outside all the time, and my current ones are starting to get way too scratched up.
I'm nominating /u/mewfasa because I know she needs a new colander.
edit: I forgot the raffle phrase... my bad... I don't need double talk, I need
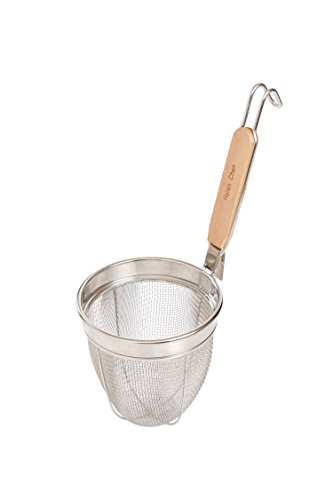
There are strainers specifically designed for noodles. Just place the noodles in the basket, submerge in boiling water and use chopsticks to stir the noodles. You can hang it on the side of the pot until its ready. This is ideal for single servings and quicker cooking noodles.
I am still refining my procedure but I have found this $8 jelly strainer very useful. Also 50 cents worth of tubing from the hardware store.
I mix ground coffee and water, leave it overnight in the fridge, then siphon the coffee concentrate from below the top layer of grounds and above the bottom layer of silt, through the jelly strainer.
I like to use an almond butter bag to make the straining easier. Basically a large teabag filled with coffee in a large container of water.
We keep a container similar to this next to our stove.
http://www.amazon.com/gp/aw/d/B00318C5P6/ref=mp_s_a_1_6?qid=1417746304&sr=8-6&pi=AC_SX110_SY165_QL70
I pour my bacon grease and bacon grease only, in this container and once it's about half full, I pour the strained grease into a wide-mouth jar and refrigerate. This is how my grandmother and mom did it. I've never had my grease go rancid.
Fine Mesh Sieve Strainer Stainless Steel Cocktail Strainer Food Strainers Tea Strainer 3 inch by Homestia https://www.amazon.com/dp/B01F8OTGG6/ref=cm_sw_r_other_apa_i_wOcqDb66F7WK4
Yeah, really you don't really need to smack them together that hard, the main thing that creates the seal is the vacuum created by ice chilling the internal environment. So really a light pat, followed by making sure to hold the tins together for the first couple of shakes is fine, after that one-handing even is fine. Slamming them together, is pretty much just going to make it even more difficult to separate, and maybe damage the shape of the tins a little.
The main exception is probably going to be doing a dry shake, where the ingredients aren't chilled enough to create that vacuum, plus you're creating foam which seems to increase pressure. Still not sure a hard smack is all that useful, or at least it hasn't been for me.
To separate after a cold shake, I usually just lightly squeeze the top of the larger tin to deform it a little bit, and pull the small tin while trying to rotate it (er, changing the angle?). I never got the smack separation thing to work, and one time lost my grip and dropped my tins on the floor, which was a successful way to separate them, unfortunately...
I also like to double-strain all my shaken drinks because little ice flecks will slip through the hawthorne and I find that disrupts the texture of most drinks. So if you have the funds, maybe pick up a small cheap fine mesh strainer too.
If you have a blender you can make your own rice milk and almond milk pretty cheap. These recipes have simple ingredients.
The only thing you would need would be cheese cloth or a nut milk bag to strain the milk.
Tools:
I ordered Life Extension Bifido Gi Balance capsules on AmazonThis is what I use https://www.amazon.com/gp/product/B008968GLW/ref=oh_aui_search_detailpage?ie=UTF8&psc=1
Whole milk - it seems that people recommend using regular whole milk (non organic or raw etc.) because it yields the best result in making the yogurt. If you want less whey/waste, use Fairlife brand milk Whole. It is ultra-pasteurized but expensive.
I probably have to buy a whisk for stirring, a cheesecloth for straining, a food thermometer for checking temperature, maybe containers to keep the yogurt in, and large-cube ice tray for freezing the starter.I'd recommend a strainer such as this: https://www.amazon.com/gp/product/B01MRDZXXK/ref=oh_aui_search_detailpage?ie=UTF8&psc=1And these bags, big enough for a gallon, instead of cheesecloth: https://www.amazon.com/gp/product/B071CWTLY5/ref=oh_aui_search_detailpage?ie=UTF8&psc=1
Starter: from what I understand, you have to make the "Starter" first, which is basically a small, concentrated batch of yogurt, made from the contents of the probiotic capsules and prepared milk.Starter can take up to 24 hours. I use a programmable food dehydrator to set the starter on to keep it consistently warm. https://www.amazon.com/gp/product/B012CG8N26/ref=oh_aui_search_detailpage?ie=UTF8&psc=1
Sterilize the cooking container, in my case the Instant Pot cooking pot ("how to" in This Old Gal's recipe).I have never sterilized the container, my dishwasher sanitizes which seems to be enough.
Making the Yogurt: From what I understand, to make the yogurt, you perform almost the same process as you did to make the Starter.
Defrost the Starter: defrost the Starter cube you will be using to where it is no longer frozen. No need to defrost, once the milk is heated and cooled to 105-110 degrees throw the cubes in. They will melt.
You prepare the milk the same way - you can use a gallon now. Sterilize the container (skip)pour in milk, get it up to 180F while whisking, cool in cold water in sink while whisking, take a cup of the prepared milk (cooled to 105-110) and mix it with your starter in that cup to temper it before using it to inoculate the pot, Place the contents of the cup with the starter into the pot, put pot back on heat source and incubate it for 15 hours, chill in fridge for 7 hours, strain for 3-4 hours, and place in a container for storage in your refrigerator (Timing is not relevant, I rely on the appearance of yogurt. I prefer to chill overnight before straining. I also use the aforementioned bag and strainer instead of cheesecloth.)
Dosing and Questions:
u/resistingdopamine mentioned taking 1 BB536 probiotic capsule+1 cup of the yogurt, twice a day, morning and night. Not sure if everyone who had success followed with dose. u/MaddinOrLynch, u/Trindolex are some people who have had success stories that I've seen here.
I've read advice to avoid probiotics and fermented foods while doing this, to make sure that they don't out-compete the BB536. I'm not sure if you can start eating them again (I personally love sauerkraut)?
So from what I understand, the first batch takes a couple of days to make as you have to make the first Starter, and then use that to make the first batch - so two batches back-to-back? Yes
Should I keep the milk at 180F for a few minutes, or transfer it to cold water immediately? How does one keep it at 180F without the temp. rising further? Cool immediately. I have found that my IP is really good about beeping at the perfect 180 but use a thermometer too.
I know most IBS sufferers seem to have negative effects from dairy products, including yogurt - is it different with this yogurt? The bacteria eat the lactose which is the bad guy.
Should a person be whisking during incubation (when it's standing at 105F for 15 hours)? NO NO NO
I've heard the longer the incubation period, the more potent the yogurt becomes and less lactose it has - is there a point of incubating for over 15 hours? Once it sets up, it's done.** No more incubation needed**.
I have read that you shouldn't keep the Starter for more than 3 weeks. Should you just freeze parts of the new batches for Starter after? No, use starter as the primary basis for new batches. If you just use yogurt, the bacteria get weak. Should you add another capsule at any point when making new batches? I use a bit of the last batch of yogurt and a couple cubes of frozen starter in each new batch. I have never had a bad batch and it gets much quicker to make once you do it a few times, practice makes perfect.
My Big Fat Nut Sack ... they're big enough for what you're looking to use them for, and they're reusable. I swear by them
A mini strainer like this https://www.amazon.com/gp/aw/d/B000LNTRRS/ref=psdcmw_13840231_t1_B001713L84 would be the easiest solution
https://www.amazon.com/gp/aw/d/B00KX9YI9W/ref=mp_s_a_1_2?ie=UTF8&qid=1496806897&sr=8-2-spons&pi=AC_SX236_SY340_FMwebp_QL65&keywords=nut+milk+bag&psc=1
I put my grounds in one of these and then stick it in the water. Then just pull the bag out and you're good to go. It does let some fines through, but it's worth it in my opinion. The bag is difficult to get completely clean though. I can get like 95% of the grounds out in 5 seconds and then the last 5% I have to mess around with in the sink. I usually just give up and "recycle" the last little bit that gets stuck in the crevaces.
I'm going to suggest /u/sowkr gets this book. She works with kids who have borderline personality disorder and this book would be really helpful for her.
I don't need double talk, I need this colander because mine's rusting and you probably shouldn't use a rusty colander.
In the future, I recommend going this route:
https://www.amazon.com/gp/aw/d/B0163J8NH8/ref=mp_s_a_1_1/147-0902726-9793908?ie=UTF8&qid=1522765392&sr=8-1&pi=AC_SX236_SY340_QL65&keywords=my+big+nut+sack&dpPl=1&dpID=61%2BNdBIjF5L&ref=plSrch
I have been using [this] (https://www.amazon.com/gp/aw/d/B00KX9YI9W/ref=yo_ii_img?ie=UTF8) and I've been getting great cold brew with it.
Wow, very cool! Do you roll the boba by hand? I've heard it's really time-consuming.
Oh, I see. That makes sense. I guess you're obligated then to use loose-leaf tea, local milk, and local honey. Even so, you should be able to sell it at enough markup to net a profit. How much does each serving cost to make? $1?
Look into Boba Guys (SF). They use loose-leaf tea and local milk (almond is an option too) and sell at a higher price ($4.50 v $3.50). They market it as a premium version for boba enthusiasts and health-conscious consumers. Their site has pages explaining how they got started and why their prices are higher.
Personally, I prefer classic, stronger milk tea, but Boba Guys seems to be doing well in the city.
If you have 4 8-gal pots, then you can brew 8 gal and then pour it into another pot through a strainer like this or this. Or you can use 4 clothespins to attach cheesecloth over the second pot. I've tried fine-straining my milk tea to get rid of leaf dust (not that you'll have much) and it didn't do much, so I wouldn't bother.
Also, you could reinforce the healthy/hippie theme by using raw sugar. US brown sugar is just white sugar with molasses added back in. Demerara/turbinado have some molasses left in during processing. Muscovado has more. Black sugar (from Taiwan, Okinawa, or Korea) is considered a health food.
honestly, just any fine mesh strainer for kitchen use. Maybe these?https://www.amazon.com/Stainless-Strainer-Colander-Kitchen-Vegetable/dp/B00H2D47YS/ref=sr_1_3?s=kitchen&ie=UTF8&qid=1504828520&sr=1-3&keywords=fine+mesh+strainer
useful for first stage filtering of ice tea and cold brew too, as well as many culinary uses...
I make yogurt twice a week and love this bag
Kleynhuis Greek Yogurt Strainer Pouch, Ultra-Fine 100 Micron Nylon (16"X9") https://www.amazon.com/dp/B07868DR5D/ref=cm_sw_r_cp_api_i_0A80Db0K36NHP
How long does it take to filter? a minute maybe. 30s to pour through a sieve like one of these, but a little finer of mesh/screen. And then another 30s to pour it through a v60 with a v60 (rinsed with plain water first) paper filter or my coffee sock filter.
we actually have a small stainless steel container with a built in strainer for bacon grease like this one
I bake a pack in a cooling rack and sheet pan. Cook until its almost done and pull it. I drain the grease, using a strainer and this http://www.amazon.com/Cook-Home-2-Quart-Stainless-Storage/dp/B00318C5P6/ref=sr_1_7?ie=UTF8&qid=1342368256&sr=8-7&keywords=grease+holder which i keep in my fridge. So i can use the grease as cooking oil.
Be sure to strain out any food particles. Most commercial containers, like this one, come with a strainer on top.
Do you love pretty brass? If so, get the Frankford Arsenal wet tumbler, separator, and magnet.
Make sure it's this separator: https://www.amazon.com/Frankford-Arsenal-Platinum-Media-Separator/dp/B01B6S8JUC
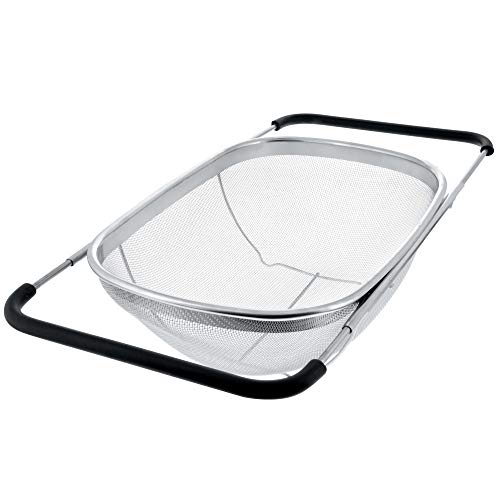
Comment about straining pasta/ vegetables - pretty much anything in a pot of boiling water: Get one of these and don't bother with a colander. Just rinse if off and you're done, and don't have something else to clean up.
Someone on this sub recommended me this.
https://www.amazon.com/dp/B01F8OTGG6/ref=cm_sw_r_cp_apa_i_4u-HDb8HT29BP
I strain it first to get the large chunks out through a metal strainer, then I strain it through coffee filters in my chemex. I do use a few filters. I use normal coffee filters though, as chemex filters are expensive.
I moved from cheese cloth to a metal strainer a long time ago, due to making marijuana butter. The cheese cloth was just too hard to handle and it did a shit job straining.
the metal strainer I use is something like this
https://www.amazon.com/dp/B00H2D47YS/ref=cm_sw_r_tw_dp_U_x_10JIDbC2JDMMJ
Although I got it at target in 2008.
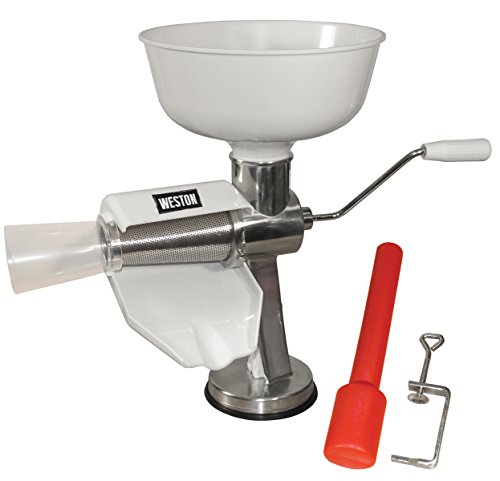
https://www.amazon.com/Weston-Strainer-Tomato-Vegetables-07-0801/dp/B0000BYDR1
The auger is still plastic, but it has a metal part where the crank connects. Unlike the electric version, that was just plastic.
It's an old-fashioned technique but I have something like this and keep it in the refrigerator.
Works well.
Do you mean what you use to make nut milks?
Most people use something like this.
Here's my tea recipe:
-In a sauce pot, bring 14oz of water to a boil, turn off heat
-Steep green (or your choice of) tea for 5-7 mins, throw out tea bag
-Turn heat back to medium and add dry ground up mushrooms
-Bring to a boil, reduce heat to a simmer making sure the material is moving around
-Boil for 12-15 minutes, occasionally scraping down the sides
-It's going to reduce a bit, so make sure you watch the pot and don't let it boil dry
-Strain through a fine mesh tea strainer or nut milk bag, discard mushroom material
-Add a few ice cubes to cool down
-Say a prayer, turn around 3 times clockwise while tapping your head and rubbing your belly, then down it (or just sit down and sip it while listening to some chill tunes)
Occasionally on high doses (7.5g+), I'll get some stomach pains. This is probably due to the fine powder I grind my mushrooms into, so a decent amount can get through the mesh. A bit of cannabis clears that right up. A 75 micron nut milk bag should be fine enough to catch most of it. Haven't tried it with finer mesh because this method works well for me.
​
Stuffs:
Yogi - Green Tea Kombucha
My Big Fat Nut (milk) Sacks
Fine Mesh Tea Strainer
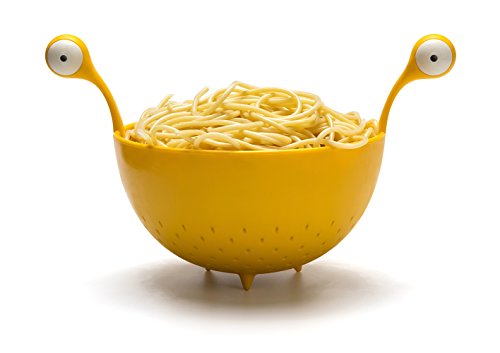
You can commit these heresies or you can wear official churchly merchandise:
https://www.amazon.com/Spaghetti-Monster-Colander-Strainer-OTOTO/dp/B076676PS9
I use this large colander with adjustable handles, but if I have hops to Whirlpool then I'll add those into a little muslin baggie.
So... I was at a Ramen Restaurant the other day and was hit with some inspiration. They use things like this, to boil noodles in and take them out easily. Does anyone use this method for hops? Seems like a cheap effective way to remove hops before transfer etc.
I use this Jelly Strainer and I get very minimal loss
Yeah dude, I totally get it - this shit adds up. The Hawthorne is part of the kit already and you don’t really need the muddler unless you wanna make certain very specific drinks. If you do decide to get one, though, just get one that doesn’t have teeth on it. Look for a flat muddling surface. This is the other type of strainer you want, and you definitely want both kinds because they’re often used together.
I haven’t used this one myself so I don’t have personal experience but I’ve heard good things. Barfly’s kit doesn’t include a mixing glass but mixing glasses aren’t truly necessary. We use them sometimes at work because they look nice, but Dave Arnold (if you’re not familiar with him - he’s a very well respected bartender/writer) says he prefers just stirring in a tin anyway and that’s what I do at home. Plus with the Barfly kit you don’t have have CK’s crazy shipping fee. They carry great products so I usually just suck it up, but fuck that $10 shipping.
If you’re gonna have a little room left in the budget with the Barfly kit, and if (I think you said) she’s brand new to the game, it may not hurt to grab a book too for a little guidance. This one is excellent for starters.
Hi thanks for the link! It's cool to see so many different ways of cooking/boiling an egg. The American test kitchen method is almost opposite! Also looks delish no doubt.
For me personally I didn't want a over easy runny yolk and strived for a Japanese ramen shop style egg. The first eggs that comes to mind is Ichiran in Tokyo, or Daikokuya in little Tokyo LA.
I used a bigger pot and placed the mesh strainer like this one to avoid direct heat from the bottom of the pot. It was also much easier to take the eggs in and out of the pot/ placing it in an ice bath at the same time using the strainer.
The eggs are runny like ATK's eggs if you eat it right away but turns into a different texture after being refrigerated for 24 hrs. it's thicker and creamier.. kind of like the center of a Cadbury egg! But with real egg yolks if that makes sense... 😋
^^ exactly
I use
https://www.amazon.com/Oggi-Stainless-Removable-Strainer-1-Quart/dp/B00JZO3A1I
to keep all that lovely grease. great for adding flavor and fat to anything else you make
My mother in law bought us this:
http://www.amazon.com/Strainer-Sauce-Maker-Fruits-Vegetables/dp/B0000BYDR1
It works well enough, and once I get some cheesecloth I can probably start making cider or juice.
> I would strain the 'booch through some butter muslin or cheese cloth when pouring into a glass to get most of it. A coffee filter would work in a pinch but might taste paper-y.
A tea strainer works great for this and is I think simpler, can usually just be rinsed out after, though I also don't really care for putting solids in.
> That's how I started and then eventually upgraded to the Oxo Food Mill.
Yes yes, I have one of those, and one of these as well..
Both these devices function to get the seeds and skin separated from the tomatoes. I am trying to separate most of the liquid, but leave behind enough pulp so it is still a sauce.
I got one of these and a magnet.
https://www.amazon.com/Frankford-Arsenal-Platinum-Media-Separator/dp/B01B6S8JUC/ref=sr_1_1?ie=UTF8&qid=1483812316&sr=8-1&keywords=frankford+arsenal+media+separator
You can usually find them a little cheaper from time to time. It works pretty well and one of the sides has a screen in it so you can rinse the media. Worth the $$ in my opinion.
I also like straining as much liquid as possible out of it. A [tuna strainer](https://www.amazon.com/gp/aw/d/B00EZQQZGI
/ref=mp_s_a_1_1?ie=UTF8&qid=1486438432&sr=8-1&pi=AC_SX236_SY340_FMwebp_QL65&keywords=tuna+strainer&dpPl=1&dpID=51PmVNk27LL&ref=plSrch) is great for this
I use this in a large glass jug. Works perfectly.
A tuna can drainer is the best :)
Prepworks by Progressive Can Colander , GT-3973 Can Strainer, Vegetable and Fruit Can Strainer, No-Mess Tuna Can Strainer , Best for Canned Tuna https://www.amazon.com/dp/B00EZQQZGI/ref=cm_sw_r_cp_api_i_TLIODb1NTM4CZ
Why don't you get the media separator? It saves you tons of time picking out the brass from the SS media.
https://www.amazon.com/Frankford-Arsenal-Platinum-Media-Separator/dp/B01B6S8JUC/ref=sr_1_2?ie=UTF8&qid=1486052075&sr=8-2&keywords=frankford+arsenal+media+separator
Using this is much safer and better for storing bacon grease. Hot grease can break glass.
Funny kitchen strainer since u have other cooking/baking items.
Mermaid bath bomb because everyone needs good relaxation!
I kind of like the Stainless Steel one better (5 stars too), and it's cheaper too:
GreaseKeeper
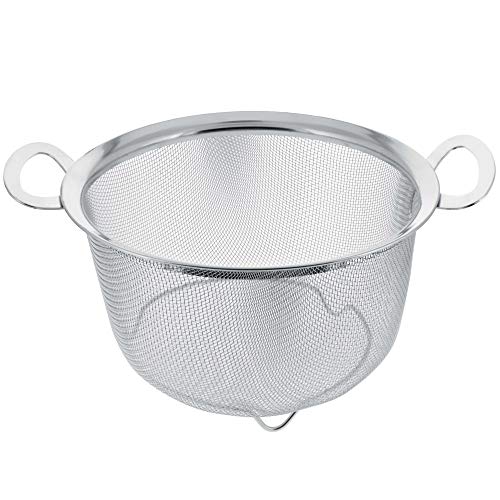
My wife got me a noodle basket for Christmas one year. They’re pretty inexpensive and they work great!
https://www.amazon.com/Helens-Asian-Kitchen-Stainless-Dumpling/dp/B01DF4L2DG/ref=asc_df_B01DF4L2DG/?tag=hyprod-20&linkCode=df0&hvadid=194812759407&hvpos=1o2&hvnetw=g&hvrand=16209950707552490855&hvpone=&hvptwo=&hvqmt=&hvdev=m&hvdvcmdl=&hvlocint=&hvlocphy=9017242&hvtargid=pla-313840840969&psc=1
Look into RV/Van kitchen lists. There will be some good ideas there from people that don't have the space for lots of clutter to begin with. Here's a couple of ideas I've taken.
Biggest thing though is simplify your meals. One pot/pan meals. Pay someone else for food that requires specialized tools, unless you actually get value out making it yourself.
I like smooth edges & I like tuna. I bought one of these, and found that it's better at draining tuna than the can lid-compression method anyway.
I use this $8 Norpro Jelly Bag Strainer with Stand and it works great. The bags are reusable and replacements are about $2 each. They work great for making almond milk. You don't really need the stand. You can tie the draw strings on the bag around the kitchen sink or on a dowel resting on top of a large pot.
Hmm, could you possibly use a gigantic fine mesh strainer type thing to insert into the tub? Maybe do half of the plants at a time, or water in shifts?
I was envisioning something like this, but much larger.
Maybe even a DIY purchase of fine mesh material that you could roll up to store away, then bring out to cover the bottom of the tub when you water? Not sure of the fully thought out practicality here, but it’s the first thing that came to mind.
> Frankford Arsenal Media Separator
https://www.amazon.com/Frankford-Arsenal-Platinum-Media-Separator/dp/B01B6S8JUC
How about a reusable teabag or even disposable tea bags? If you happen to live by a Daiso or other kind of dollar store, they sell disposable teabags for about $1.50 for a 100 pack. I think that there are also collapsable tea filters, if you don't mind a non-metal filter.
Otherwise, those are pretty small in terms of infusers (~2.5x4in) that would actually work well with tea. My last suggestion would be using a strainer like this although it's not too different from the second infuser I linked earlier (aside from maybe you could use this to scoop out the leaves). If space is the priority though, I think your teaball is already effective for your needs.
I've seen a redditor use a flour sifters like these to sort grinds. http://www.amazon.com/Stainless-Strainer-Colander-Kitchen-Vegetable/dp/B00H2D47YS
That isn't a standard kitchen strainer. found one
NAH, if she’s cooking, she gets to make the decisions.
Alternatively, cook both pastas at the same time using the same pot. Boom, problem solved.