(Part 2) Best epoxy adhesives according to redditors
We found 319 Reddit comments discussing the best epoxy adhesives. We ranked the 81 resulting products by number of redditors who mentioned them. Here are the products ranked 21-40. You can also go back to the previous section.


https://www.amazon.com/gp/aw/d/B079CR71SL?psc=1&ref=ppx_pop_mob_b_pd_title
I used 4 gallons of this stuff. Total $260
epoxy: https://www.amazon.com/Crystal-Clear-Table-Coating-Tabletop/dp/B07DP6KBSB/ref=sr_1_3?ie=UTF8&qid=1542822740&sr=8-3&keywords=epoxy
Dye: https://www.amazon.com/VARIETY-variety-pigment-Diamond-Pigments/dp/B01HNE78KK/ref=sr_1_3?ie=UTF8&qid=1542822751&sr=8-3&keywords=epoxy+pigment
Don't actually do that. Terrible idea. Electrical tape is a quick rigging measure. In a few years, it'll get weird and sticky as the adhesive slowly leaks out or something. The proper way to do it would be with potting compound.
http://www.amazon.com/3M-Scotch-Weld-Epoxy-Potting-Compound/dp/B000X5G6O6/ref=sr_1_1?ie=UTF8&qid=1453615446&sr=8-1&keywords=potting+compound
Get one of these to put over your USB ports.
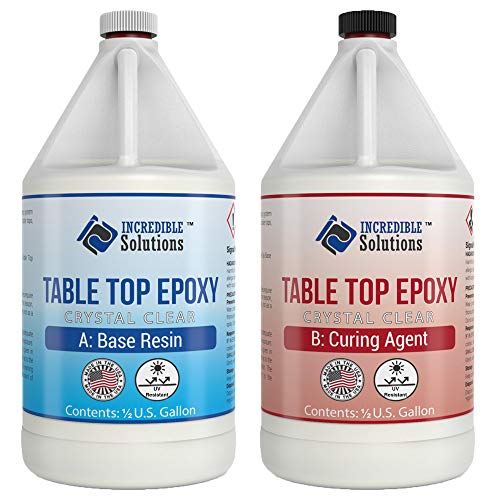
I needed a lid to hold the airlock on my ferments. I have a tried a few options over the years and they are either very expensive or don’t work well. The previous best option was the ReCap lids for wide mouth ball jars whose opening is the perfect size to hold an airlock stopper. However, those are $8.99 a piece and in any particular year I need 20+ lids. So I did some research to see how I could make something food safe and once I discovered a product for that I designed this in OpenSCAD and printed about 20 of them. Then I coated them with the food safe (direct contact) epoxy resin.
The epoxy resin is kind of pricey but factoring in filament costs, the silicone gaskets, and the epoxy resin I only needed 7 of them to break even (compared to the ReCap lids). Anything above 7 was pure savings. Also, I had no idea how much resin it would take so I bought a fairly large bottle. Come to find out a little bit of it goes a long way and I could have gotten away with a smaller bottle. I used ~5 oz to coat 20 lids.
Since I was coating them with the resin the kind of filament didn’t matter but I used PETG so they would survive the dishwasher (the resin is also dishwasher safe when fully cured). PLA is a little iffy at dishwasher temps.
I pulled three 5 gallon buckets of Jalapenos off my plants this weekend so I actually need to print more lids! In past years I have always been limited by the number of lids, this year the limiting factor is going to be the number of airlocks.
Products used:
Depends on your 'philosophy' in knife making. Personally I feel that the epoxy shouldn't be used to keep everything together, it is more just an added thing to keep things in place. If you are relying on glue alone (or mostly) to hold your knife together you are in a pretty rough place with that knife. You should make sure your fit of the tang into the handle is solid (not lots of wiggle room) this will go a long way. Next a single pin through the handle and the tang gets you to 90-95%. Adding the epoxy just makes up for any slack and keeps things in place. Personally I just use the JB Weld brand rated for bonding metal. I see a lot of people using this epoxy -> https://www.amazon.com/System-Epoxy-Resin-Hardener-Metering/dp/B07JHC28CV?keywords=west+system&qid=1540668531&s=Industrial+%26+Scientific&sr=1-14&ref=sr_1_14 but I don't make enough knives for it to be economically practical.
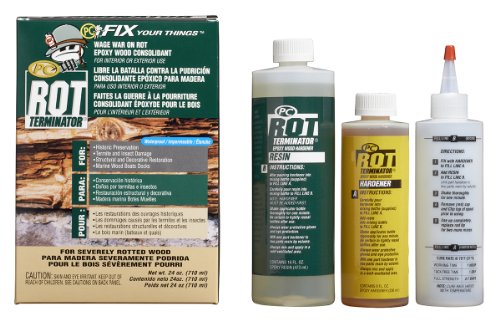
Not *exactly* what you're looking for, but I've had a similar situation with dry rot. There are wood reinforcing products that penetrate the wood (it acts like a wick) and restore integrity. Here's a starting point for your research: https://www.amazon.com/gp/product/B008DYN1B0 Here's something similar: https://www.amazon.com/System-Three-Resins-646697001380-Window/dp/B0015YLMUW
Do you think something like this would work: https://www.amazon.com/dp/B01J166GM4/ref=cm_sw_r_cp_apa_LAqazbPS0VDKD
I've heard of people using resin like this for finishing 3D printed objects that are intended for food contact as 3D printing is inherently not food safe either
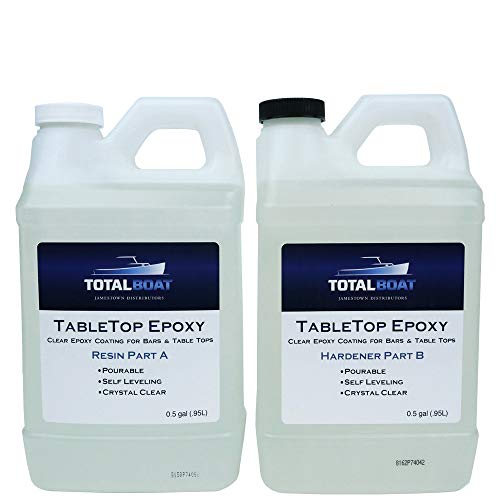
I got this stuff off Amazon. This tabe, with the ~4"x20" trough took juuust under a gallon to fill. This stuff is good, git hotter than others I've used, but it cured super fast
https://www.amazon.com/TotalBoat-Gallon-Crystal-Coating-Countertops/dp/B00S9QJIY6/ref=sr_1_9?ie=UTF8&qid=1540298386&sr=8-9&keywords=table+top+resin
Sorry to hijack, This is what I use and it’s been great.
https://www.amazon.com/MG-Chemicals-Black-Encapsulating-Compound/dp/B077SCBR8Q
Amazon! I got table top resin. It's supposed to be food safe after it cures, I guess.
https://www.amazon.com/gp/product/B079CR71SL/ref=ppx_yo_dt_b_asin_title_o01_s01?ie=UTF8&psc=1
I pulled a vacuum on it before pour and was sorry I did. I find that a lot of the bar top resins have much better air release. I’m going to try this one out. This weekend.
https://www.amazon.com/dp/B07Q474BV1/ref=cm_sw_r_cp_api_i_hoGLDbKZY6BNT
Tabletop epoxy would be one way to go.
If it were my house I would just fix it and replace later if I ever remodeled that bathroom. Since you are a renter its a bit different though as the land lord might not be happy with your diy fix.
If you do go DIY then look at products meant for boats. Some epoxy resin thickened with reinforcing fibers and topped with gel coat repair that is the same color would produce a fix that would be hard to detect if you are somewhat careful. It would most definitely cost you less than $100
Edit:
If you really want to go cheap and don't care too much about it being a perfect fix, get some of this https://www.amazon.com/J-B-Weld-50172-MarineWeld-Adhesive/dp/B00R2CDVIW/ref=sr_1_2?ie=UTF8&qid=1535817967&sr=8-2&keywords=white+marine+epoxy
and pack it into the crack with a popsicle stick and smooth out the surface
As /u/tehbilly said, epoxy is probably your best bet for the most long term and secure adhesion.
Just be sure to look for plastic epoxy or non-metallic epoxy. Its not a big issue, but some have metal particles for extra strength, like some of the jbweld stuff, and that should be avoided just in case.
I use several kinds, but the last one I liked was Elmer's Superfast Epoxy as it dried quick and clear, and had low odor.
You could also use hot glue or the like, but they will meet with less desirable results and you will probably find yourself in this same situation again.
I used this product. Looks like a million dollars, and is heat resistant, as well:
https://www.amazon.com/Countertop-Epoxy-Resistant-Resin-Gallon/dp/B00BISWFL0
The board in your picture is typical of what is contained in the typical plug-in USB chargers. The key is the circuitry must be in a solid, well-insulated enclosure. In the case of the project you're building, keeping the power supply after the vacuum cleaner switch solves the problem of leaving it plugged in and unattended.
If you're really worried, take the guts out of a brand-name USB charger. Alternatively, you could encase the circuitry in electronic potting compound with only insulated wires coming out.
Try this: https://www.amazon.com/J-B-Weld-50176-KwikWeld-Reinforced/dp/B009EU5ZMA
500F and food safe.
I use potting epoxy.
MG Chemicals Translucent Epoxy Encapsulating and Potting Compound, 12 oz Kit https://www.amazon.com/dp/B005T8S0PA/ref=cm_sw_r_cp_apa_n1dPzbDXPFWET
You can build a small form or mold and put the electronic component in it. Pour the epoxy over it and let it cure. It'll be encapsulated in epoxy and unable to get wet. I use it on castle mamba Max pros. Have done 3 for me and one for my friend with no failures yet. Balloons and grease etc will fail over time because the water can wick down the wires inside the jacket of the wire. I spend lots of time and ruined many escs before learning about epoxy. It's way better. Potting epoxy won't shrink or expand which can break your electronics.
The other method I've not tried is conformal coating. It's a thin layer of waterproofing. It supposedly works well too but I've not tried it.
For servos or BECs I use the same epoxy but when it sets up and get thick like syrup, paint it onto the circuit board several times as it drips
For a receiver I had one fail after using potting epoxy so I use liquid electrical tape. I get it from Lowe's. Same deal paint it on let it dry. Had no failures with that.
I always confidently sink any of my trucks and they work every time. Let me know if I can help. Best of luck!
It seems like you'd need a pretty low viscosity product that could be poured down into the voids. I think most of the rotten wood repair products I've seen are much thicker, more putty-like in consistency.
Although a lower viscosity product might just seep and run through the cracks and out the sides unless you contained it somehow . . . maybe a couple of tightly wrapped layers of that stretch-wrap used by movers/packers?
This seems like it might do the trick?
https://www.amazon.com/PC-Products-Terminator-Two-Part-Consolidant/dp/B008DYN1B0/ref=pd_sim_328_4?ie=UTF8&dpID=51tU9ZITdlL&dpSrc=sims&preST=_AC_UL160_SR160%2C160_&refRID=REYBDD3CVFB3X4ER9ZRF
I would recommend a 2 part epoxy.
JB Weld makes a steel reinforced epoxy that is very tough. It dries in 6 min in warm weather, and is totally hard in 45 min. Any other brand of similar epoxy would also work fine.
https://www.amazon.com/J-B-Weld-50176-KwikWeld-Reinforced/dp/B009EU5ZMA/ref=sr_1_9?s=automotive&ie=UTF8&qid=1487210197&sr=1-9&keywords=jb+weld+epoxy
JB also makes epoxy putty sticks, these are really easy to use, and work great.
https://www.amazon.com/s/ref=nb_sb_noss?url=search-alias%3Dtools&field-keywords=jb+stick
Sand the two parts you want to glue with some 80-100 grit sandpaper, it'll make the bond much stronger than if it was smooth.
I used some store brand two part epoxy, with a 5 minute cure time. Doesn't give much time for assembly, so you have to mix small bits at a time, but when it cures, its solid.
Something like this will work just fine: https://www.amazon.com/gp/product/B000BQWY8Y/ref=oh_aui_detailpage_o00_s00?ie=UTF8&psc=1
This stuff. It dries like cement and would be pretty much impossible to remove.
Or maybe this.
http://www.amazon.com/AeroMarine-Clear-Epoxy-Resin-Counter/sim/B0047R0J44/2
all kinds of different resins for different applications
Attach all the cards to the surface using a small amount of glue - probably something that doesn't dry too quickly, so you can adjust them as you go.
When you have the arrangement you're looking for, seal the top with something like this. It will coat everything in a layer of polymer that will protect the cards and the table, as well as make a nice, smooth playing (or eating) surface that is easy to clean.
Thanks!
I use this fairly generic 2-part epoxy which just about every hobby and craft store has. The whole blaster is glued with it and cyanoacrylate.
There was just enough room in front of the trigger mechanism for a few hex nuts.
I’ve heard some people mix BBs or lead shot with epoxy which will fit into more books and crannies. I may try that next time.
Also, Hatchbox wood PLA works great wood stain.
If you will go to some of your local cabinet shops they will let you buy their scraps. We sell ours to all kinds of wood workers. On average my shop fills up a 40 yard roll off dumpster full of plywood and hardward scraps every 2 weeks.
If your going to build a butcher block top there are 2 ways to build it. Use hardwood on it's edge or "side" for a face grain top. This is the easier way to go and does not stand up over time. It doesn't matter if you use hard maple or hickory, a sharp knife will still leave cut marks and take strip out of the wood with very little use. If this doesn't matter to you just sand it out and be happy.
The second way, much more difficult and time consuming, but you can use smaller scraps is to set your lumber on end as end grain. The advantage here is it will basically last a life time.
A good butcher block top is not a beginner project. I would suggest you get to know your local custom cabinet shop and have them use their large belt sander to flatten your piece.
If this is going to be a functional piece you should put a juice groove in the top and extend the top over 1 edge at least 6 inches. Drill a shaped hole that's beveled top and bottom and put a pull out trashcan drawer underneath. Then you can pull out the trashcan and simply rake the scraps right in.
You can use any stain you like for a butcher block, but if it is going to be funchtional we typically do not stain. Not for food safety, but because at the cutting board will wear over time and the stain will make the wear marks stand out like a sore thumb.
Finishes - For a nonfunctional top we use a 2 part epoxy like https://www.amazon.com/Crystal-Clear-Table-Coating-Tabletop/dp/B07DP6KBSB/ref=sr_1_10?ie=UTF8&qid=1536890973&sr=8-10&keywords=2+part+epoxy
For functional food safe finish we use either boiled linseed oil or tung oil
Final thoughts, Don't use any nails or screws or you will regret it later on.
​
Good luck. This is going to be a difficult and challenging project.
Your friendly neighborhood cabinet shop owner
I'm not sure what you're using, but a quick google search turns up clear Epoxy for less than $100 a gallon on Amazon.
Besides that, have you tried to negotiate a bulk price with the retail operations. If you're buying 100 gallon at a time, they can probably cut you a great deal.
If that fails, call some flooring companies and see if they have any leads for you. They are the only guys I can think of who would need Epoxy in those quantities.
Since it's a really clean break with no missing parts, here wold be my advice:
Get some marine grade epoxy and carefully glue it back together.
Done it on many of my own pieces or friends' pieces - bowls, bubblers, bongs - with no issues. Hell, it's how I fused together my two broken bongs into one massive functional one, and fixed a tree perc in the process. Considering that it's a bubbler and that the break isn't anywhere near where the bowl wold get hot, you're fine using an adhesive. 2-part epoxies are really strong once they cure and the marine-grade one, specifically, states that it can be used on glass and, well, in water scenarios.
Tips would be:
After all that, your piece should be totally fine, albeit with a grey epoxy band on it.
Heck yea this is fixable
This two part urethane is one of the coolest things on the planet.
This pair of boots I repaired a hole in the toe. The toe cap is made of this urethane. I used about 3 packs for both toes and sealing all that stitching you see
edit: Get your structural integrity back with stitching, seal it with the urethane
I honestly used aquarium safe epoxy because I had some left over.
I've used
https://www.amazon.ca/Pond-Armor-SKU-CLEAR-QT-R-Non-Toxic-1-5-Quart/dp/B00D317Q46/ref=sr_1_1?s=hi&ie=UTF8&qid=1502734651&sr=1-1&keywords=pond+epoxy
I'd recommend
https://www.amazon.ca/CLEAR-GRADE-Epoxy-Resin-System/dp/B01J166GM4/ref=sr_1_4?ie=UTF8&qid=1502734602&sr=8-4&keywords=food+grade+epoxy
Edit: you cant bake with it, but it'll be dishwasher safe.
Since everyone else is weighing in: where are the weapons failing? If you tell us what you have to fix over and over we might be able to offer some advice on that in specific.
My generic club advice: