Best hose fittings according to redditors
We found 83 Reddit comments discussing the best hose fittings. We ranked the 55 resulting products by number of redditors who mentioned them. Here are the top 20.
We found 83 Reddit comments discussing the best hose fittings. We ranked the 55 resulting products by number of redditors who mentioned them. Here are the top 20.


As noidios said the kegs are going to cost more unless you get a good deal from someone. My local store has the pin locks for $65 each.
Co2 tank sounds about right. You may need to have it filled though depending on how the store sells them. I would consider a bigger tank or a spare as you don't want to run out of Co2. 1 5lb can dispense roughly 6-8 kegs and that is if you don't have a leak. Some kegs can leek. Seeing as how they are all connected and will equalize in pressure one leak going unnoticed for a night can cost you the tank and the pressure in all your attached kegs.
Manifolds is dead on on price.
50ft of 5/16 at $50. maybe shop around on that one. If you know your PSI you can check out This I wouldn't think you would exceed 50 PSI under normal conditions.
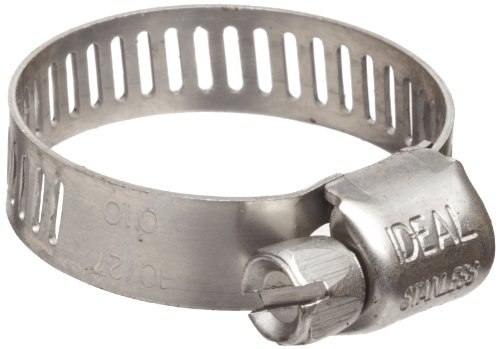
Hose Clamps since you are going to be going off of the OD it should work as the OD of the smalles tube is 5/16. Figure you will need 4 for each keg (2 on each end of the line) plus 2 for the line going from the manifold to the tank should be about 34 (assuming 8 kegs.) so 4 orders comes to $$20
3/16 for beer line. I would look at this 100ft A bit more cost effective. Others can chime in on them if I linked a bad product.
Keg Lube save a couple bucks for 4 oz vs the normal 1 oz. Easier to dispense and keep clean imo.
Places where I would spend a little more:
Shanks are up to you but I would go the extra stop for stainless if you can just so you don't have to worry about chrome flaking off a few years from now.
Handles - for the price I take it you are looking at the cheap ones from northern brewer? Can't speak for them for myself but I think they will work. worst comes to worse you replace them a year later.
Edit: Also the kit you listed 1 4 way manifold (say $50 for rounding), 4 bev locks, 4 gas locks (6.50 ea so $52) the faucests look like the cheap chrome ones from amazon $31 ea ($124), 3 feet of gas line with 2 clamps and a faucet wrench aren't worth much.
$250 for the kit they are selling for $382 unless I missed something.+dual reg at say $98 but$50 for the regulator. so about $280 in parts that they are charging you $382 for. unless I missed something elseThe biggest contributor to the amount of foam is the flow rate out of the tap. To reduce the foam, reduce the flow rate. You're using 11 PSI with a 5 ft line, which sounds like it would pour really fast.
Option 1: Lower pressure for serving
Bleed pressure from keg and set regulator to 2-5 PSI when serving. Re-pressurize when not serving so the beer doesn't go flat.
Pros: No extra equipment required.
Cons: Incredibly wasteful in terms of CO2. Using this method, I blasted through roughly a third of a 5# tank dispensing just one keg.
Option 2: Adjust beer line length
Make the line length longer according to the style of beer, to compensate for high pressure in the keg. This has to do with fluid dynamics. There is info available on this if you search; I remember seeing posts on this a few weeks ago.
Pros: simple, effective, and inexpensive
Cons: Requires a lot of cutting and re-clamping of beer lines for each different style of beer; no way of doing fine tuning of flow rate for more or less head; requires keeping a bigger inventory of tubing for different styles.
Option 3: Flow control
Put something in your draft system that allows you to adjust the flow rate without attaching/reattaching anything.
Pros: easy to control, less hassle/mess. Just turn a dial and get the flow rate exactly what you want it to be, to perform on-the-spot adjustments for the perfect pour.
Cons: more expensive, although I've seen plastic inline flow controllers like this $2.50 USD one
I have the Perlick 650SS tap on my kegerator and it works like a charm. If you're using a picnic tap or want to use a tap without built-in flow control, and you want something nice, you can get an inline flow control compensator like the one made by CM Becker, or (less expensive but still solid) make one using a stainless steel NPT ball valve and two hose barbs (clamps and plumber's tape not included).
Edit: info/links
Alright, The wood, nuts, bolts, screw, L brackets, plastic, plexi-glass, wire, air compressor, duct work reducer (to create funnel), and pail can all be bought at a hardware store outlet. (I had most of those all on hand)
Everything else
Pneumatic cylinder -crusher 25$
loading cylinder 30$
Solenoids 20$
6mm quick connect fittings 15$ you may need to order a converter or adapter to fit the crushing cylinder. I think its 1/4" fittings, so you could order those too but be sure to check
6mm Pneumatic hose 12$
6mm T splitter 6$
Air Pressure Regulator 10$ use to regulate the air to the loading piston as it runs at a lower psi/ can be slowed down some as well.
Shut off valve 6$
Quick connect to airline 6$ What you need may be different. Depending on your set up.
Arduino Uno 15$
12V Power supply 7$
12V to 9V 6$
158$ + construction materials that shouldn't cost more than 50$
Note: Some of this may be found else where for cheaper, but at least you know what you are looking for. Also I rounded everything up.
Let me know if this helps at all.
Edit: Its also helpful to have someone who can weld, so that cost has to be factored in as well. I traded work for work.
LOL :) That list is shorter ...
You'll need a pressure gauge, https://www.amazon.com/dp/B0087UCI8C/ has a relatively low maximum for high sensitivity (easy to see if there's a drop)
You'll need a valve you can hook a hand pump on to (like what you'd use to pump up a bike tire -- I don't recommend an electric pump because of the low pressure you need). https://www.amazon.com/dp/B001PLI4BA/ is in the same threading as the gauge.
You'll need a tee to connect these things to -- https://www.amazon.com/dp/B000BQUTBS/
Finally, connecting the tee to your rig. I take a scrap of tubing, put a fitting on one end, and slip the other over: https://www.amazon.com/dp/B000CFNKBO/ (check for your tube's inside diameter!).
I just made a little u-bend out of (these) (three) (pieces) and run silicone tubing from a ball valve on my solar pump output to the u-bend, then hook it over the edge of my kettle.
You can also get something like a recirculation arm for more efficient whirlpooling or a locline recirculation kit. I haven't used either of these but they look cool
I made this a couple months ago and the recent post of a DIY smoker and a request for more details prompted me to put this together.
Materials Needed:
I've added links to products similar to the ones I used and they're all available via Amazon but most items can be easily found locally for much less. I was able to buy the brass fitting and the vinyl tubing by the foot at a home improvement store. The pipe screens were less than 10 cents each at a local smoke shop. The ebay auction I linked to is by far the least expensive place to get the mini vacuum that I found.
Start by inserting the Small Pipe Screen in the mouth of the Brass Hose Barb. This is a secondary screen to catch any small particles to prevent them from entering the vacuum. Insert the brass hose barb into a 1.5" - 2" piece of 3/8" vinyl tubing. You will connect this to the top of the mini vacuum. If you buy the sizes I indicate they will fit perfectly on the mini vacuum I linked to. Finally connect a 3 foot piece of the 1/4" vinyl tubing directly to the side outlet vent (again these will dry fit firmly) or you can use the flexible plastic piece that comes with the vacuum. I find this a little easier to add and remove and is more flexible.
Once this is assembled, take the large pipe screen and form it into a cup using the back of a pen and insert it into the brass hose barb. This is where you will put your wood shavings. Any shavings work, I started by using larger pieces of hickory that I was shaving down using a microplane but it was time consuming so I purchased some of the PolyScience chips from the kitchen store. They work well and don't burn down quite as fast.
To use the smoker, apply a flame to the wood chips until they start to ignite and turn on the vacuum. Once the vacuum starts you can remove the flame and it will give you about 20-30 seconds of smoke. Believe me this is more than enough. It produces a nice dense smoke that can be very potent.
I put together a quick (and not my best work) video of the gun in action.
Hope you enjoy!
Another thread suggested this 20w pump with this fitting and I've been happy with it for the 6 months I've had it. I run my pump 24/7 to keep the water circulating and so far still working fine
This one: https://www.amazon.com/dp/B0018X2XT4/
And this adapter: https://www.amazon.com/dp/B00AB5X28G/
Here's my nice stainless 1/2" setup. I had a brass 3/8" setup but it's slow and I was paranoid of lead leaching out of it.
Spigot + bulkhead
1/2" barb
Bazooka screen
Silicone tubing
You might forego the bazooka screen and just use a brew bag like https://www.brewinabag.com/. Or perhaps a false bottom if you have some extra cash to burn. The 12" bazooka screens don't fit, so you have to be a little careful with stuck sparges if you get this 6".
BTW I'm using the 10 gallon cylindrical cooler, not the rectangular kind.
Dude, look at that link. Those pipes are included.
Listen, you can't have auto coolant lines incapable of being pressurized. A key feature of engine coolant lines is the fact that they are capable of holding pressure, which allows them to absorb more heat which may be passed through the radiator. If there's an opportunity for coolant to lose its pressurization, the entire engine heat dissipation system has effectively been hamstrung. The entire system will no longer be able to rise above a boiling temperature.
What's more, the Miata doesn't have a great cooling system to begin with. This is something which solomiata commented on years ago. You can see the home made fix on that site, but it's been further perfected by flyin' miata and is still for sale here with a great explanation as to its necessity.
Honestly, I would sooner bypass the heater core in its entirety than allow for a potential depressurization. Just go out and buy a 5/8" barb union, and tie the lines together until you can replace that pipe.
Since this is a main supply, and apparently carries a decent amount of pressure, you might should use brass coupler with hose clamps:
(Pick appropriate size...)
Anderson Metals Brass Hose Fitting, Union, 5/8" x 5/8" Barb link:https://www.amazon.com/dp/B003CESS6E/ref=cm_sw_r_cp_apa_i_wd12Cb962MKWV
Stock exhaust on there? Mine has hose clamps holding the exhaust cover on the pipes. One of them broke and had a similar sounding noise. Just went to Home Depot and found a replacement for a buck. Something similar to the link below.
https://www.amazon.com/dp/B002088BII/ref=cm_sw_r_sms_c_api_2UYBxbAC8EFZV
I do the same as chino. They do sell 3/8" barbs (this looks like one ) that would make the connection look cleaner, but my local shops only stocked the standard 1/4" and 5/16" barbs. It is a tight enough fit for me that I am not sure the hose clamp is that critical, but I add one on the liquid side just to be safe.
I suggest this Gates Fuel Line Hose instead. It's top quality reinforced hose. I also suggest these hose clamps. That petcock seems OK. It should be replaced because it will likely go out while you own it, and this might be why the scooter stopped running suddenly.
I just bought these and they're threaded on both sides so that what you linked to (or these which I also bought) should fit. I put them on some 5gal buckets and the seal is working great. Pretty happy with the setup so far :)
Never heard of it. But here's the parts to do that.
Carbonation cap with fittings.
Mini CO2 regulator with adapter
Co2 Tank
Tubing
Hose clamps.
This is basically what I use...
The basics:
Extras, that make things nice and easy:
If you feed drain-to-waste, you'll want to come up with some way to collect runoff. Maybe something like THIS small HD tote, with a few holes drilled through the top. Just set your plant on top and it will collect all your runoff.
I've used a trash can in the past (I've got a jockey box now). Works pretty good. Regarding a co2 splitter, I just a brass t for my portable setup. Works great.
https://www.amazon.com/gp/product/B000LNOSFO/ref=oh_aui_detailpage_o02_s00?ie=UTF8&psc=1
Yes! That's the one that i have, and i love it.
Is it expensive? Yes.
Are there better alternatives? Probably.
But i absolutely love mine, it is a bit of a beast to disassemble and sanitize every time, but its not overbearing. I just got tired of loosing so much when i racked, and now i barely loose any mead from primary to secondary.
p.s. get these attachments. that way you can easily just let it siphon on its own.
1 & 2
The key is in the joint between water bottle and the pressure source (I just use the garden hose). It needs to allow enough pressure to build up within the bottle, and unhook when you release the bottle. I hooked up something like this to my garden hose and put several layers of masking tape on the top left part to snugly the water bottle over it.
Fill the water bottle with 1/3 water (so 2/3 air), and hook it up over the masking tape. Hold it vertically (upside down) and turn the water on, pressing down to hold it in place. Do NOT hold your face or any other body part over the bottle. The incoming water will compress the air inside to about half its normal volume. When there's about 2/3 water inside the bottle you won't be able to hold it any more, so let the bottle take off vertically. It should go about 25 or more feet in the air.
I think I've got it figured out, but I could use a help figuring out / confirming the parts and connections for a recirculating line cleaner for my keezer.
When I purchased the Mark II Keg & Carboy Washer it came with an inline attachment for the post that allows you to connect tubing on the side. I've done that and attached a swivel nut with a 1/4" barb so that I can hook up a gas or liquid disconnect and divert some of the flow into the gas or liquid dip tube while cleaning a keg.
Using the same pump and the abovementioned setup, would getting a pair of these (is this the right size threading?) and attaching them to either end of a length of tubing do the job? This would, in theory, connect the swivel nut at the end of the keg washer tube to the swivel nut of the beverage line that runs to a tap faucet (after removing the quick disconnect).
edit: to point to a different hose fitting (1/4" NPT rather than 1/8" NPT)
I just made a double keg setup out of two corny kegs, a Danby mini fridge, and a 5lb CO2 cylender. I'm using a single gauge regulator for now with a manual splitter so I can alter the CO2 and force carb one keg when I need to - but I wish I had a dual gauge/barb regulator to adjust both air lines.
Not sure what a temperature controller is? And please buy a decent regulator. It's like the power supply for your computer - you skimp and the whole thing shits the bed.
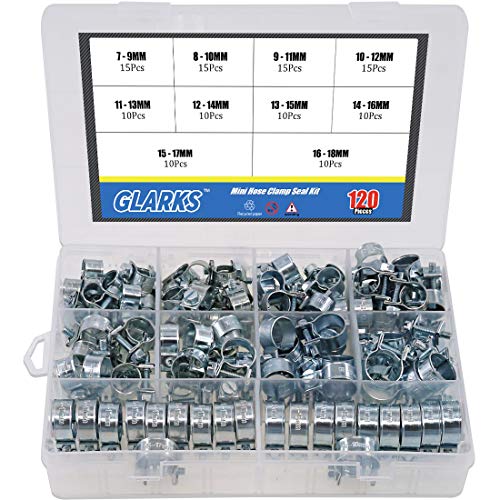
Also, buying something like this clamp kit will save a ton of time if something breaks or you want to fully swap out lines.
My biggest understanding item building it was the disconnect systems on the kegs. Most corny home brew systems are in/out post connections. Commercial kegs are sankey-type, which are completely incompatible with your ball-lock in/out post connections, so you'll need to swap ends to use a commercial.
You sure it is not male on the Air Injection Iron Eater Filter valve? Male connection on the valve side is what is shown in the manual you posted.And I see now they want the ferrule compression fitting to attach directly to a 3/8" male threaded tubing connection on the Iron Out and not go to 3/8" NPT. Not very common in 3/8" (much more common in 1/4" as that is the setup for an ice maker).
If you verify the connection is male on the Iron Out valve, you'll want to get a ferrule tube to insert into the end of a plain end 3/8" tube, a 3/8" female ferrule nut, and a 3/8" ferrule sleeve. Harder to find in small qty's on Amazon, but here is the smallest quantity I can find of a complete kit.https://www.amazon.com/LTWFITTING-Compression-Insert-Sleeve-Ferrule/dp/B07FD18R9SEdit: AH, I see in one of their diagrams that they have the 3/8" ferrule nut screwed on to the connection on the Iron Eater valve to remove for your use on your tube. They most likely provided you with a little parts kit that has the ferrule tube and compression sleeve (probably along with the little filter). So you would unscrew the ferrule nut, place it on to your 3/8" tube, slide the compression sleeve on the tube. (if one side of the compression sleeve is tapered more than the other, face it away from the nut) then put your ferrule sleeve in to the plain end of your tube, then tighten this down to male connection on the Iron Eater valve.
If you can't find they provided you with the ferrule tube and the compression sleeve in your parts kit that came with the Iron Eater, you can order them individually:
3/8" Ferrule Sleeves: https://www.amazon.com/LTWFITTING-Compression-Sleeves-Ferrel
3/8" Ferrule Tube Inserts: https://www.amazon.com/LTWFITTING-Compression-Insert-COMPRESSION-FITTING/dp/B00MP1R2AI
But you can also get the little kit as well packaged specifically for this application with the filter.
https://www.amazon.com/Brine-Fitting-Kit-5600-5600SXT
Sorry I was on my phone before. let me see what i can find. I can't find the exact coupler I used but I might be able to find something else with some searching
ed: you're in luck, found a two step way using items available on amazon that connects to the 1/4" flare you originally tried to shove the hose directly onto. when i got my oven in, i needed it working THAT DAY, and the local hvac supply place didn't have 1/4" flare swivel couplers in stock.
http://www.amazon.com/LASCO-17-5911-4-Inch-Female-Adapter/dp/B008E5CVKA/ref=sr_1_1?ie=UTF8&qid=1419741989&sr=8-1&keywords=1%2F4+inch+female+flare+swivel
http://www.amazon.com/dp/B006PKL6Z2/ref=biss_dp_t_asn
You may also want a hose clamp or two to go with that
http://www.amazon.com/Pro-Tie-33200-4-Inch-5-Stainless/dp/B006IOZ3YU/ref=sr_1_1?s=industrial&ie=UTF8&qid=1419742116&sr=1-1&keywords=1%2F4%22+hose+clamp
when i did it locally, i found a 1/2" Flare to 1/2" NPT swivel, and had to get some teflon tape and put a 1/2" NPT x 1/4" barb on it instead.
Will this work?
https://www.amazon.com/EDGE-INDUSTRIAL-Reducer-SPLICER-Fitting/dp/B07CSGSKY3/ref=sr_1_2?crid=J2IHP0RSX8GJ&keywords=hose+barb+reducer+1%2F2+x+3%2F8&qid=1554670559&s=gateway&sprefix=hose+barb+%2Caps%2C201&sr=8-2
These:
https://www.amazon.com/Dixon-DC20S-Interchange-Quick-Connect-Coupling/dp/B00835GNUA/ref=sr_1_3?keywords=Dixon+stainless+quick+connect&qid=1566216607&s=gateway&sr=8-3
https://www.amazon.com/Dixon-Valve-Coupling-DCP21S-Quick-Connect/dp/B00835H2SM/ref=sr_1_7?keywords=Dixon+stainless+quick+connect&qid=1566216648&s=gateway&sr=8-7
plus some of these for spots where you can't or don't want to use a threaded plug:
https://www.gwkent.com/pneumatic-plug-tc-adaptor.html
Are you talking about a hose clamp?
https://www.amazon.com/Precision-Brand-B-HS-Stainless-Clamp/dp/B007Q4YD38
try a few of these
http://www.amazon.com/Precision-Brand-B20HS-Stainless-Clamp/dp/B007Q4YD38/ref=sr_1_7?ie=UTF8&qid=1410393896&sr=8-7&keywords=hose+clamp they are 4 to 8 dollars (depending on the size) each but they are reusable so when you get done with them you can unscrew them and use them on a later project
or just go to http://www.amazonsupply.com/ and search for pipe/tube/cylindrical clamp and see what amazon has to offer
thieves are creatures of opportunity. It doesn't really matter what your bike's made of. What matters is how much of a pain in effort and time you can make it to steal. So it really comes down to a simple list of things:
`the D-lock is not just a big padlock that connects the two ends of a cable. It has to be around your frame and around a secure object at the same time. Please do not make this mistake!
Or custom-ordering screws that require a pentagon-shaped screw tip to turn, that's a rare tool thieves are unlikely to have. You'll have to order the tool, of course.
hose clamps locking down the quick-release levers of your wheel hubs.
here is Hal grading people's lock jobs. Follow his advice.
Yeah this is what your looking for http://www.amazon.com/Anderson-Metals-Fitting-Connector-Female/dp/B000BQL8RC/ref=pd_sim_sbs_indust_1 and the barb the chamber is talking about is most likely the one attached to it.
Ok so no experience doing high volume Ejuice bottling, but had an idea for you.
First thing is use gravity, So get a container for the storage of the juice you are dispensing into the smaller bottles. Something large and that you can suspend from above. Also something that you can drill a hole into. Once you have this drill a hole towartds one edge of the bottom. Find yourself a stainless steel valve and get some stainless fittings to go from the bucket into the valve. Just screw one side into the valve and place a nut on the inside of the bucket to tighten it up to the hex part. Maybe get a longer one so you have plenty clearance on the handle. Use silicone or simiar food grade washers to seal this up. Maybe even a caulking if there is a food grade type.
At this point you have two choices. You can go straight into a barb fitting, then some flexible hose down to where your bottles will sit at. Just open the valve fill to weight close and move on. Or....
If it were me I would go into barb fitting then tubing then back into barb fitting and another valve. I would then measure this section between the valves to be the exact amount I want in each bottle. After the second valve it would go back into barb then hose for a final stretch of tubing to the fill area.
This way you would open first valve fill area to second valve, close first open second, fill bottle, close second, rinse and repeat.
Open valve 1, close valve 1, open valve 2, close valve 2, bottle filled. If you did around 3/8" to 1/2" on the tubing diameter even heavy VG should flow well just with gravity.
Once again I have never created a setup like this, but the problem intrigued me. Also just listed stainless fittings in general. I assume your doing this commercialy, and would use food grade which I googled to be 304, you may already be well aware of all of this, just thought I'd add it.
Yes sir.
This is a barb valve https://www.amazon.com/FPT-BARB-Stainless-Steel/dp/B0064OJDUO/ref=sr_1_1?ie=UTF8&qid=1498193537&sr=8-1&keywords=barb+valve+1%2F2+1%2F2
This is camlocks https://www.brewhardware.com/category_s/1844.htm
All it is is a quicker way of changing tubing without the need to pull a tube off your barb valve.
The great thing about the brew hardware website is they explain how to install each and every part they sell.
Anderson Metals Brass Compression Hose Fitting, Connector, Barb x NPT Female
http://amzn.com/B003CEN5BW
Not sure your size exactly it this should point you in the right direction.
You may want to switch out that Tailpiece with something like this one with a non-threaded Branch outlet that will better fit your hose. And if needed buy a hose clamp to securely keep it in place.
Sure, that should work. Just make sure that you clamp down all your hoses and double- and triple-check for leaks. Keep some extra hose clamps on hand. They should be super tight, but not so tight that they cut through the tubing.
I just finished up a fruit beer a couple weeks ago. To filter out the particles I used an aquarium micron bag and clamped it onto the end of the hose with one of these. All in all, it worked out pretty well.
One of these attached to your regulator with a couple of checked shutoffs would let you shut off each keg individually, which is nice sometimes. It'd let you dial your pressure up for carbonating on one keg while shutting the gas off to the other, for instance.
But just a simple 5/16" barbed tee to split the line works fine, too, if you're okay with unhooking a keg while messing with the other.
I just meant to check the cheap stuff before you buy a fuel pump. Sounds like the pump is probably your issue though. I'd get a Walbro 255LPH from amazon. Oh and make sure to be EXTREMELY careful taking the hoses off the pump assembly because if there's any rust those metal lines will break off, which is not fun to deal with. I had to drill out the holes and then I pushed one of these through the hole and tightened this on the other side and then used some JB weld to make the tank air tight again.
I picked up this and this and an extra gas post to do this.
That barb fits the same size hole as a standard airlock. When cold crashing or pressure pushing I just pull out the airlock, replace it with those pieces, and connect the gas QD.
It works well in a bung, but didn't work great in a grommeted lid since there isn't much to support the barb... I was able to get it to mostly work by adding some keg lube and holding it straight while pressure pushing.