Best proximity sensors according to redditors
We found 63 Reddit comments discussing the best proximity sensors. We ranked the 30 resulting products by number of redditors who mentioned them. Here are the top 20.
We found 63 Reddit comments discussing the best proximity sensors. We ranked the 30 resulting products by number of redditors who mentioned them. Here are the top 20.


Yes, that looks like an IR sensor.
https://www.amazon.com/KY-022-Infrared-Receiver-Accessories-Arduino/dp/B07869GP74/ref=mp_s_a_1_3?keywords=1838+ir+sensor&qid=1558299912&s=gateway&sprefix=1838+ir&sr=8-3
Some newer cars have infrared lights shining forward to assist collision prevention systems. I’d be worried about interference when parking near a vehicle with those systems.
Check this out. It actually looks like the type of ultrasonic sensor some cars with parking assist systems have in their bumpers.
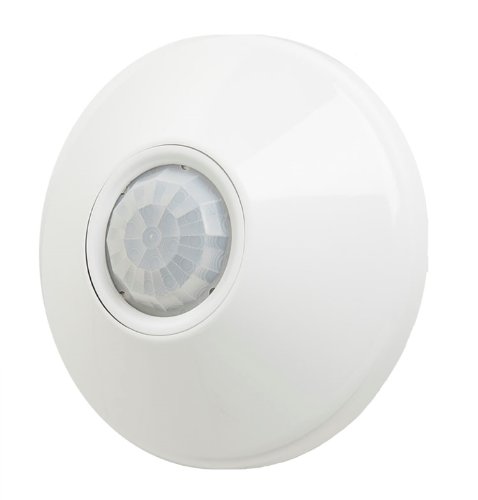
Occupancy sensor to turn off the lights or control HVAC
https://www.amazon.com/dp/B004QXKDYK/ref=asc_df_B004QXKDYK5247486
I had done something similar. DIY stuff - JSN SR04T waterproof ultrasonic range finder along with a nodeMCU (ESP8266) . The sensor is fixed on top of the barrel and twice a day it measures the distance to the water level. You should Mount it about 20cm above the max. water level because that is the minimum distance it can measure. You will need microcontroller to calculate waterlevel. Here is an arduino tutorial to get you started.
when I replaced my dead probe, I ordered from Amazon, https://www.amazon.com/DC6-36V-Tubular-Inductive-Proximity-LJ12A3-4-Z-BX/dp/B01F58UDA8/ref=sr_1_9?s=industrial&ie=UTF8&qid=1486673633&sr=1-9&keywords=LJ12A3-4-Z-BX The savings should cover a 6-pack for when its over
They have waterproof ones, I made a similar parking sensor using this one:
diymore DC 5V Waterproof Ultrasonic Distance Sensor Measuring Ranging Transducer Module with 2.5M Cable for Arduino https://www.amazon.com/dp/B01J5KZU8M/ref=cm_sw_r_cp_apa_i_vu5UCbQ64NZTE
I can shoot you the code if you want.
Here's everything I purchased:
Here you go, if 2mm detection distance is okay. Prime shipping~
Let me see if I can organize it into something reasonably understandable.
First up, the controller: https://i.redd.it/zmxxkfwqy9g31.jpg
Stuffed in that box are:
For the valves, I'm using a 1" Motorized Ball valve for the outlet (https://www.amazon.com/gp/product/B06X9B4P45) and a 1/2" Motorized Ball valve for the inlet (https://www.amazon.com/gp/product/B06X99PHJJ)
Each of the relay modules control one of the ball valves. The valves are 2 wire, reverse polarity and operate on anywhere from 9 to 24v, so I just use battery voltage. In their normal closed position, both relays on the board are set to ground. When I want to open/close the valve, I switch the appropriate relay on the module to on (+12v).
The ultrasonic sensor is set at the top of the tank and measures the distance to the surface. It's not the cleanest of signals, but it will give a rough idea on where the water level is in relation to the top of the tank. You can then transform that into a rough percentage.
I use ESPHome on the NodeMCU, just for simplicity. The code is pretty long, but not very complicated. Just a bunch of different switches to abstract the base functionality into something cleaner for Home Assistant. I'll clean it up and put it in a github account or something like that and link it here later, likewise with the Home Assistant code that I use to run it.
Use a capacitance sensor. Same price but senses anything. 1-10 mm adjustable sensor is $7.35 on Amazon. http://www.amazon.com/gp/product/B00542U3M4?psc=1&redirect=true&ref_=oh_aui_detailpage_o05_s00
Amateur here, but I've used https://smile.amazon.com/dp/B008FZC8F2 for my 3d printer. This won't work?
This was actually fairly easy to setup and only cost about $8 and 30 mins of my time.
First you need to order an Inductive Sensor:
https://www.amazon.com/gp/product/B008FZC8F2/ref=oh_aui_detailpage_o01_s00?ie=UTF8&psc=1
Then I printed out a new sensor mount and glued it right next to my hot end.
Then in the Marlin Firmware, I enabled the auto bed leveling code and flashed the Arduino board. Next I set the boundaries of my bed and where I wanted the sensor to check. All you have to do is twist the sensor up and down to adjust how close the hot end is to the bed. After the sensor was mounted, you just plug the brown wire to +12v and the blue wire to ground. The Black wire goes to the signal pin on the z-min endstop. Supposedly you need to solder in some resistors inline (the youtube video below explains it) to lower the voltage being sent to the ramps, but mine works fine without the modification.
Now I never have to worry about the nozzle being to close / too far from the bed...
Here's a great youtube video that helped me get it all setup:
https://www.youtube.com/watch?v=EcGFLwj0pnA
I've spliced multiple accessories including led lighting into the 12v terminals of the cr-10x without any issue. Currently I'm printing with my bed at 65 degrees and print head at 210. I'm in the US on 120v drawing ~(2.6 after heating -3.15 amps during heating)/~220 watts. You can easily power multiple devices off the 12v terminals without any issue.
The readings above include includes:
12v Noctua Fan - https://www.amazon.com/Noctua-Cooling-Blades-Bearing-NF-A4x10/dp/B009NQLT0M
12v Proximity Sensor (ABL) - https://www.amazon.com/uxcell-LJC18A3-B-Z-1-10mm-Capacitance-Proximity/dp/B0756XDQM4
5v Lighting - Partial strip - https://www.amazon.com/Lighting-Control-Findyouled-Backlight-Monitors/dp/B01M28RKH5
I'm using a mix between Marlin 1.1.8 and the custom firmware provided by www.th3dstudio.com. (If your considering doing ABL and your not super familiar with electronics I highly recommend th3dstudio.com It's important to support the engineers/developers that bring the amazing improvements in 3d printing to the masses)
I usually use octoprint with pi3 or pi zero but for these readings I had nothing plugged into the micro usb port.
If you have any questions or need some more information about how I do my wiring I would be happy to help!
Not quite. The board I have (which is fairly common) has two pins for trigger/echo. I've wired them together. So I write HIGH out then LOW then read it back. I presume writing to the ECHO pin does nothing.
Indeed on my board it works just fine. I can read distances and actually compare them to a ruler to get somewhat precise results. I mean even with two wires it's hardly a super precise mechanism anyways.
edit: To add... the boards I'm talking about are things like this. It has a speaker and a mic with a little control circuit to trigger the echo pin only if the signal is received. The trigger comes in one pin and the echo leaves another. In my "1 wire" setup they're simply wired together. So I'm setting the "echo" pin high but that doesn't appear to do anything negative.
Everything he said is spot on. I have 4 cheap Chinese printers and those are all the recommended upgrades regardless of the brand.
I recommend this power supply. It can provide 50% more power and has a cooling fan.
These mosfets have worked very well for me and lowered bed heating times significantly as well as make your printer a lot safer.
Personally I haven't had any issues with the bed connector, but maybe some epoxy or hot glue would keep the wires from moving around too much.
One of the best upgrades I did was to flash Marlin onto the board as the stock firmware is kind of crappy.
This also allows the use of a Inductive proximity sensor which makes leveling the bed significantly easier.
The bearings he recommended, the Drylin ones, will make the movements of your printer a little smoother and a lot quieter.
The belts stretch. The ones from China are rarely reinforced. I'm lazy so i just tighten them every so often. But it would be worthwhile to just start with the higher end reinforced belts.
That aside, once your printer is up and running and somewhat calibrated, head over to thingiverse and search for your printer. There are thousands of upgrades available.
Good luck!
I had to buy this bed sensor before I got a good level.
URBEST 8mm Detecting Distance Approach Sensor Inductive Proximity Switch NPN NO DC 6-36V Cylinder Type https://www.amazon.com/dp/B01M1777XK/ref=cm_sw_r_cp_apa_i_XcBtDbJDC8Y2P
I am also using a Anet. the A8[ with this Sensor.] (https://www.amazon.com/gp/product/B008FZC8F2/ref=oh_aui_detailpage_o02_s00?ie=UTF8&psc=1)
I was also [following this video] (https://www.youtube.com/watch?v=G-TwWfUzXpc) But several things didn't work right.
I shall try what you did right now and see what happens.
If you do end up needing a replacement. This is the one I got. Works great and not too bad of a price. https://www.amazon.com/gp/product/B00DUYSWXK/ref=oh_aui_detailpage_o01_s00?ie=UTF8&psc=1
No, its PNP. Says so right on the sensor.
EDIT: Here is the link. http://www.amazon.com/Cylindrical-Inductive-Proximity-Approach-LJ12A3-4-Z/dp/B007Q813UA
Alternative solution: https://www.amazon.com/Uxcell-Capacitance-Proximity-Sensor-Switch/dp/B00542U3M4
Doesn't require you to switch out your bed, works just fine with glass, PCB, aluminum, steel, your hand, whatever.
I actually just ordered this inductive sensor from Amazon: https://www.amazon.com/gp/product/B01M1777XK/ref=ppx_yo_dt_b_asin_title_o00_s00?ie=UTF8&psc=1 . In the reviews someone used it with success on our machine and said it was a significant improvement. Looks like an easy install by cutting and splicing the wires near the sensor. Seems like many people have success with this.
​
I'll check out the tinymonsters firmware, that also seems to be pretty popular. Is there any functional difference? Or is it just better behind the scenes?
https://www.amazon.com/gp/product/B01M1777XK/ref=oh_aui_detailpage_o00_s01?ie=UTF8&psc=1
I checked the voltage and it seems to be right.
4.5v when open
0v when closed
Will do. So far, things have been pretty straight forward. Marlin config has taken a bit, I will post the final Configuration.h and Configuration_adv.h when I'm done.
​
The biggest challenge was the Z-Probe. The logic on the endstops for the SKR is 5V, but the printrboard and probe are 12V. There was talk on the interwebs about solving the issue with a voltage divider with resistors - but that maxed out my electronics knowledge. A 5V inductive sensor was only $15 (for 2) so I bought them and it works perfectly and reliably.
https://www.amazon.com/gp/product/B073XD44CW/ref=ppx_yo_dt_b_asin_title_o02_s00?ie=UTF8&psc=1
​
I'm down to calibrating everything, and I'll do a final update once it's all done. My first print will be a board tray that can be fit up inside the metal plus underbelly. Right now, everything is wire spaghetti behind the printer.
On my machine, I have added the following upgrades:
I hope this helps!
It's an inductive sensor.
https://www.amazon.com/gp/product/B008FZC8F2/ref=oh_aui_detailpage_o07_s00?ie=UTF8&psc=1
I have my blue wired to the negative(-) on the board, and the black goes into where the red is on the end stop.
Brown (NPN) 6-36v
Blue - Negative on the Anet board where 12v comes in for main power.
Black - wired into the red plug on the Z endstop.
My probe: https://www.amazon.com/gp/product/B008FZC8F2
I'm using the LJ18A3-8-Z/BX that was suggested in this Instructables. The problem I'm having is with the placement of the sensor. I first designed this bracket that mounts on the X carriage above where the filament cooling fan mounts. It fits nicely and is fairly close to the nozzle. The problem is if the nozzle contacts the bed first the whole carriage rotates up. This rotation cause the sensor to lift further away from the bed, which drive the nozzle lower... I'm going to design a new bracket that will attach to the linear bearing block. This will have the opposite effect if the nozzle impacts the bed. The sensor will be driven lower which should trigger the sensor sooner.
EDIT: Also, since it is an inductive sensor the 8 mm range is for steel/iron. The range for aluminum is about 4.5 mm.
Alright, I finally got around to it. My switch is NO https://www.amazon.com/gp/product/B008FZC8F2/ref=oh_aui_search_detailpage?ie=UTF8&psc=1 and I changed these settings:http://imgur.com/Sd57MTu
I use a LJ18A3-8-Z/BX sensor and used this guide to set it up. I made a custom bracket that fits onto my custom entruder carriage. I find myself having to adjust the z-offset regularly and I'm not sure why. I don't know if my sensor is moving in the bracket or if the sensor is just that sensitive to temperature/humidity. Overall I like it and I think it is better than manually leveling the bed.
Occupancy Sensor.
Here is one on Amazon
https://www.amazon.com/Sensor-Switch-CMR-Contractor-Occupancy/dp/B004QXKDYK
The circuit, washers, and fabric are decidedly more expensive than this, when all's said and done. They're somewhat similar if you're thinking in terms of just the actual hardware, but paying the employees that make sure the washers themselves are level first, and to assemble the more complicated system first is also a factor. This literally just screws into place.
This is for the Arduino starter kit.
This is just the distance sensor.
I'll start with the non-printable mods:
Replaced the PSU with a 750w ATX PSU I had lying around.
If you do this, you will more than likely need to add a power resistor to the 5v rail. I also removed all the original wires and connectors from the PSU and resoldered just what I needed with better rated wire.
Glass bed on top of the aluminum. I just went to Lowes and got them to cut a few pieces of single pane glass.
Mosfet circuit for the heated bed:
https://www.amazon.com/BIQU-Power-Module-Expansion-Printer/dp/B01HEQVQAK/ref=sr_1_1?ie=UTF8&qid=1493092441&sr=8-1&keywords=3d+printer+mosfet
Upgraded Y Carriage:
https://reprapchampion.com/collections/heated-beds/products/anodized-aluminum-y-carriage-plate-upgrade-v2-for-prusa-i3-reprap-3d-printer
New Belts:
https://reprapchampion.com/collections/linear-motion/products/10-meters-6mm-width-gt2-timing-belt-for-reprap-delta-3d-printer-kossel-rostock
Geared Pulley to replace the smooth one:
https://reprapchampion.com/collections/linear-motion/products/3d-printer-idler-pulley-aluminum-dual-ball-bearing-3mm-bore-16-teeth-gt2-belt
Upgraded Heated Bed, this bed heats up slow and I also lost a little bit of build volume. I plan on getting something better here very soon. Once it's up to temp it works well though.
https://reprapchampion.com/collections/heated-beds/products/new-improved-mk3-aluminum-reprap-3d-printer-prusa-i3-heated-hot-bed-build-plate
Inductive Sensor for auto level:
https://www.amazon.com/gp/product/B01LWNCY4C/ref=oh_aui_search_detailpage?ie=UTF8&psc=1
Copper Tape Because the inductive sensor can't see glass I put this on the bottom side.
https://www.amazon.com/Tapes-Master-10ft-Copper-Foil/dp/B00Z8MCJW2/ref=sr_1_6?s=industrial&ie=UTF8&qid=1493092625&sr=1-6&keywords=copper+tape
Firmware:
To get the sensor working, you'll have to change the firmware unless you only want to use it as a limit switch. The only option that i'm aware of is Skynet which is based on Marlin and works fairly well. You can find that on their facebook page: https://www.facebook.com/skynet3ddevelopment/
Blue LED Extruder Fan (because the original broke). I don't remember where I got this from. I'd like to find an RGB one! ha
I added a bunch of WS2812 LEDs controlled by an Arduino at the moment, I am using OctoPi so eventually i'll have that control them but at this point they're set to UV colors because it looks cool.
Printed mods:
Frame braces:
http://www.thingiverse.com/thing:1857991
http://www.thingiverse.com/thing:1430727
Y Carriage Risers:
The Y carriage sits too low and will smack into the Y axis motor so I made these risers to solve that:
http://www.thingiverse.com/thing:2226564
Y Belt Clamp: You'll need one for the new carriage, but I cannot find the one that I used.
Auto level bracket: Though I only have PLA and it kept warping so I made a metal version of it:
http://www.thingiverse.com/thing:2006986
Anti-Z Wobble I modified this but no longer have the file, I also printed a cylinder to wedge into the hole above the lead screws.
http://www.thingiverse.com/thing:1858435
Bearings I used:
https://www.amazon.com/Beerings-Malt-ABEC-Skateboard-Bearings/dp/B005NFXHQG/ref=sr_1_2?ie=UTF8&qid=1493094188&sr=8-2&keywords=beerings
Belt Tentioners I can't remember which ones I finally used.
I think this is everything. If I remember something else i'll post it.
Do you think something like this would be okay? https://www.amazon.com/dp/B07CWR234L/ref=cm_sw_r_cp_apa_FiGJBbMH1XX65
You can replace the sensor. This is courtesy of Jason Cook; sign up on facebook for the CR-10S user group and you can read his entire post there!
"Having trouble leveling the CR-10s Pro? Is the leveling sensor not repeatable and leaving you with bad first layers? Here is my solution:
URBEST 8mm Detecting Distance... https://www.amazon.com/dp/B01M1777XK…
The probe is extremely repeatable and does not seem to be significantly affected by temperature or humidity. I have mine set so that it detects the bed 2mm high and then the tiny Machines firmware remembers the offset on a power cycle. It nails the first layer every time and when probing the bed, the nozzle is high enough that it does not leave plastic dots on the bed. I was always having to tinker with the old sensor settings and had a lot of bad prints. Now, I just hit print and it works perfectly every time.
I hope this helps. I love printing with my CR-10S Pro now."
Like this, or this?
To my knowledge, the most affordable option would to purchase an Inductive proximity sensor which purpose is to detect metal objects within a certain range.
http://www.ebay.com/bhp/inductive-sensor
http://www.amazon.com/Amico-Cylindrical-Inductive-Proximity-LJ12A3-4-Z/dp/B007Q813UA/ref=sr_1_1?ie=UTF8&qid=1381861724&sr=8-1&keywords=inductive+sensor
It is a glass plate on aluminum. Specifically this bed Anycubic 43188-247109 Ultra Base 3D Printer Platform with Aluminum 12V/24V Dual Power MK3 Heatbed, Tempered Glass Plate, Durable Build Surface for Prusa I3 220x220mm https://www.amazon.com/dp/B075375HBY/ref=cm_sw_r_cp_apa_q31TBb1HR4FW4 and this sensor at 12V BALITENSEN LJ18A3-8-Z/BX 8mm Approach Sensor Inductive Proximity NPN No Switch DC 6-36V https://www.amazon.com/dp/B078SF8SJ8/ref=cm_sw_r_cp_apa_.41TBbMVVGJGN no idea why it didn't work.
Certain sensors, like the HC-SR04 distance sensor, require very reliable, low-latency real-time processing in order to measure the echo time. Raspbian isn't a real-time OS out of the box, so measuring sound wave travel time isn't very practical without some hackery.
I personally have a distance sensor pointed at my sump tank to measure water level, and I have that hooked up to an Arduino that buffers data from sensors, and in turn I have that hooked up to a Raspberry Pi.
Also, as /u/icarus901 mentioned about sensors being consumables, definitely buy sensors in bulk.
As for the controllers themselves, I have them in Ziploc bags because I'm cheap :P
Just read you are using 12v to power the sensor. I have mine powered through the 5v+ sensor pin. I would not try this with the 12v unless you want to fry the board.
This is the sensor I believe i am using https://www.amazon.com/SMAKN-3-wire-Approach-Proximity-LJ8A3-2-Z/dp/B00NIAQLK2/ref=sr_1_9?keywords=inductive+sensor&qid=1570131253&s=gateway&sr=8-9
works fine on 5v
The ones I use claim a working range up to 4m. I've never tested them to that kind of range before though
https://www.amazon.com/Waterproof-Ultrasonic-JSN-SR04T-Integrated-Transducer/dp/B07FQCNXPP/ref=mp_s_a_1_3?keywords=waterproof+ultrasonic+sensor&qid=1573248470&sprefix=waterproof+ultraso&sr=8-3
an $8 inductive sensor also just plugs into the z-endstop, but you would have to solder the connection on yourself. https://www.amazon.com/URBEST-Detecting-Distance-Inductive-Proximity/dp/B01M1777XK
But if you want something plug and play get a BL Touch: https://www.amazon.com/BLTouch-Leveling-Sensor-Premium-Printer/dp/B01FFV2TOS
with all of these options you have to update and flash the firmware to enable and allow autoleveling.
What about the 24v? Are there any considerations for the increased voltage on the Tornado? Is there a picture somewhere I can follow so I don't fry anything on the MKS?
And how about this sensor, bueno?
No problem!
This
Look it up on thingiverse, too. Tons of mounts for it that you can print out. You'll see them on pretty much everyone's head.
https://www.amazon.com/Elegoo-HC-SR04-Ultrasonic-Distance-MEGA2560/dp/B01COSN7O6/ref=pd_sim_147_4?_encoding=UTF8&psc=1&refRID=TPBMW2PJ392W4FE64FX1
these should work too, if you find a way to make them more resistible.
What?! We measure time of flight all the time. That's how RADAR works, and it's how all laser distance sensors work. I have a TOF laser sensor on my desk right now that costs less than $3.
https://www.amazon.com/HiLetgo-VL53L0X-Distance-Measurement-Breakout/dp/B071DW8M8V/ref=sr_1_3?keywords=TOF+arduino&qid=1566745175&s=gateway&sr=8-3