(Part 2) Best pullers according to redditors
We found 90 Reddit comments discussing the best pullers. We ranked the 52 resulting products by number of redditors who mentioned them. Here are the products ranked 21-40. You can also go back to the previous section.


I would use more heat, and employ a bearing puller.
And then I would throw away that bearing and use a new one. I doubt you need to replace the case.
This is a good example of why it's super important to keep the bearing square to the hole and use a proper bearing driver to insert it.
You’re going to want a bearing puller with really slim jaws. Do not pry unless you find a way to leverage off the wheels not the windings. Wd40 won’t help because it is formulated to displace water. Get a penetrant for stuck bolts. Heat would be great but it would probably melt the varnish on the windings.
Here’s what you’re looking for. Thin jaw puller:
amazon link
Source: i do this for a living
Update: link didn’t work. I don’t do that for a living
Alright... ignoring the fact that your asking how to install gears implies heavily that you don't know the first step... OR the first thing. Here's the basic run down. I'm not going to go into detail on torque specs, or specific procedure... i'd be here all night on a how-to that most people don't give two shits about. I'm also doing this ONLY for the 8.25. DANA 44's are too rare in stock, and DANA 35's don't deserve to be rebuilt.
Tools needed:
Parts needed:
On a 8.25...
Go for a drive. If everything was done right, you should now have more power, and no rear end noise. if you do... you need to take the rear apart again, and reset the gears to clear the noise.
I'm sure i forgot something, like thrust washers. Don't crucify me for it. If you want a REAL guide, you need to do more research.
Good job. I know you're finished, but there's a tool for this. It attaches to the end of a slide hammer.
Shankly Rear Axle Bearing Puller, Axle Bearing Puller https://www.amazon.com/dp/B072KYKPVV/ref=cm_sw_r_cp_apa_7QP5BbV2DG90N
I bought mine (OTC) from the pawn shop (I work on a fleet of crown vics for a security company). Super easy with this tool.
We have a kitchen cupboard full of Nuun electrolyte tablets because my SO subscribed to them on Amazon and never unsubscribed. I'm looking forward to them being used. They are super great though.
I've been meaning to go through this thread from last year to see what people recommended.
My recomendations are;
A big vacuum insulated growler (why is that the American word for drink bottle?!) to put in your bike basket/pannier so you can have a cold drink after hours of riding around.
This screw top pot of smelly stuff for clearing your sinuses. It's herbs that smell like vix vapor rub and it's great, especially on the playa.
This battery operated personal mister that goes in the cup holder my bike already had.
Pickle flavored candy canes. These didn't even make it to the playa last year. I ate them all within a day of them being delivered.
If you use rebar (like for monkey huts, I don't think lag bolts are really an alternative there) this will be your favorite thing at pack down.
https://www.amazon.com/Sunex-3905-Reversible-Puller-2-Ton/dp/B000X2566I/ref=mp_s_a_1_8?ie=UTF8&qid=1542564292&sr=8-8&pi=AC_SX236_SY340_QL65&keywords=small+puller&dpPl=1&dpID=41X7uxBmMQL&ref=plSrch
Cut the head so that it will chuck up in a drill, run it up tight to grab the pad , once it gets enough tension it will run the foot in. Hold the assembly and give it a little more with the drill to grab tighter, then reverse the drill to spin it out, hold the assembly again in reverse to loosen up from the pad.
Bonus is it will be adjustable to different size pads, you can modify it some to stop parts from flipping around once you fine tune the settings.
For cheap and simple you could just get a hitch-mounted winch bracket. Of course it will only pull you backwards not forwards, and depending on your use case you may not be willing to sacrifice your departure angle clearance.
For even more cheap and simple you could just get a basic hand-powered "come-along" puller. Not quite as "manly" as an electric winch but almost as good and about 1/10th the price.
And unlike a cup n cone, you can bring these beauties back to like new every time :) you will however need some way to get the cartridges out and back in squarely, or you can damage the hubshell. A tool like this is the cheap way to remove though they can be pretty finicky. A proper slide-hammer bearing puller can be fairly expensive. Then you can carefully tap the new bearing in with a socket the same size as the outer race of the cartridge (never tap the inner race when installing or you will damage the bearings!), or alternatively shell out some money for a proper bearing drift. Good luck with the overhaul!
Just going to throw this out here.
Pit Posse PP1692 Motorcycle Wheel Bearing Remover
There are many import versions of these, quality is as functional as the MP or other name brands. I actually consider these to be a disposable tool as they will suffer wear over the years. I once had a complete MP set, I now have a import set as the last time i needed to replace the driver handle and 3 arbors, it was just as expensive & got a case out of it.
Generally I have found having the correct size for the bearing makes a big difference. 19mm puller for 19mm bearing....
This is especially true when you last used a say a 20mm to drive out a 24mm(assuming your set skips 21-24). The puller gets splayed out and becomes more difficult to use again on smaller bearings. It also causes more damage on the arbor both in where you drive the wedge and on the portion that contacts the bearing.
Buy a import set, fill in the odd skipped sizes you need and replace as they wear out. For a DIYer, you might wear one or 2 out if you do all your freinds wheels too.
Most shops tend not to put much faith in any repair attempts done by customers, thus they will want to repeat whatever troubleshooting steps you already performed.
While you will only use the tool once, this $16 tool is cheaper than your shop visit:
https://www.amazon.com/Lisle-46950-Relay-Puller-Pliers/dp/B002NR2Z56
and there's the [ahem cough] Amazon return policy.
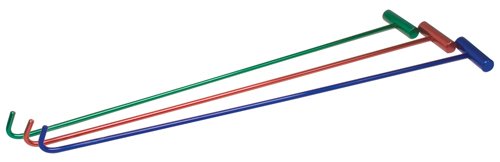
This is correct. Here's the middle one here:
https://www.amazon.com/RoadPro-R-7845-Heavy-Wheel-Puller/dp/B001JT11GI
And the green ones:
https://www.amazon.com/RoadPro-RP5PIN-Brushed-Aluminum-Assorted/dp/B001JT0H1S
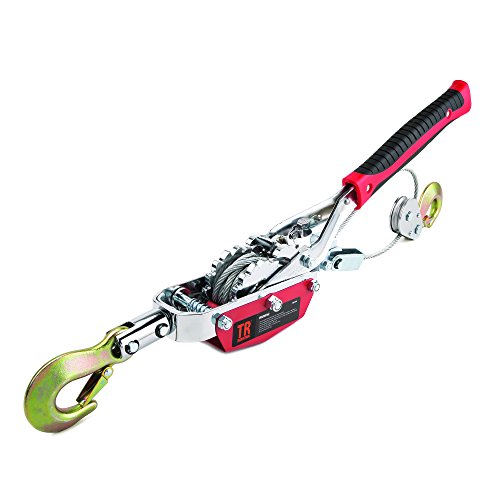
I try to hype the more power puller whenever I can 6000lbs straight line pull. I sometimes use it to uproot small trees.
Also, a valve-stem puller is hugely helpful, packs down small, and weighs hardly anything:
http://www.amazon.com/Supply-Tire-Valve-Stem-Pullers/dp/B002KR38WS
If you are using Park Tool BB30.3, you need to be careful, like using rubber mallet. CAAD8 so it's alu shell so you can be a bit more harsh but be gentle.
If it's not coming out, I haven't tried it but the linear bearing puller is said to work.
https://www.amazon.com/FIT-TOOLS-Arm-Bearing-Puller/dp/B013WLBDOK/ref=pd_sbs_263_10?_encoding=UTF8&pd_rd_i=B013WLBDOK&pd_rd_r=VJRCVX7WMBBFF7HZSCJ9&pd_rd_w=exiGG&pd_rd_wg=9kThP&psc=1&refRID=VJRCVX7WMBBFF7HZSCJ9
You need a hub puller. They come in two types: one that bolts to the hub, and a more universal claw type one.
The bolt ones never fit right and tend to stretch the bolts, and the claw ones never fit right and tend to slip off. I would suggest just buying an assembly at this point. As others have pointed out, the annealing on the inside tends to make it impossible to get the old one out, and a pain in the butt to clean the surface to get the new one in.
Those pullers are mainly designed to pull pulleys off shafts (think automotive applications). In any case they're cheap and yes it's a design flaw.
There are other pullers with smaller ends that would be more suited for what you're doing, such as these:
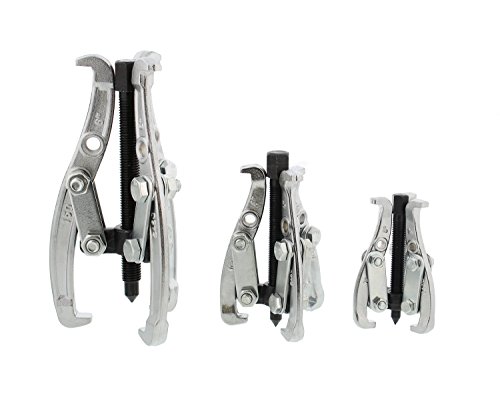
ABN 3-Jaw Gear Puller Set – 3”, 4”, and 6” Inch Removal Tool Kit for Slide Gears, Pulley, and Flywheel https://www.amazon.com/dp/B06XPQKWV5/ref=cm_sw_r_cp_apa_i_hXPCCbDQEY7YV
Use one of these.
They are made for pulling steering wheels, but they fit our rotors perfectly. Two bolts will thread into the rotor, then the middle will press against the axle in the center (leave the axle nut on until you get the rotor off).
FYI, the screw that you're looking at is probably the end of a slide hammer ... Chryslers are notoriously easy to steal this way. I had a customer who got so sick of her Neon being stolen that she asked us to leave the ignition switch broken and just wire up a couple of hidden switches to start it.
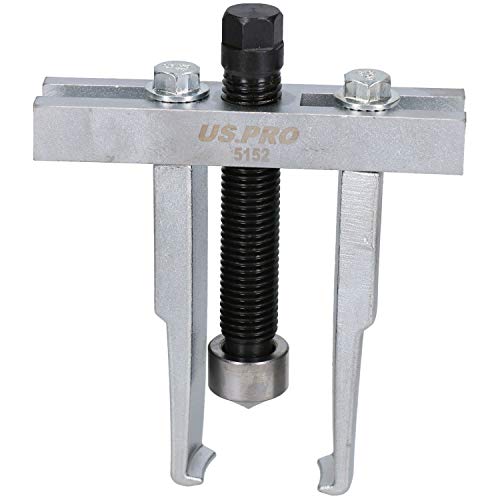
Gear puller. Like this: https://www.amazon.com/ABN-Inch-2-Jaw-Gear-Puller/dp/B077KDWL4H
I had this same issue a while back. I used two different items. I tried using a gear puller, but it wouldn't fit below the motor pinion. The claws were too thick. I ended up using a Windscreen Window Wiper Blade Arm Puller to get it going. Then I switched to the gear puller. I forgot what size the gear puller was, but here it was something like the one I linked below. Some heat couldn't hurt as well.
https://www.amazon.com/Pro-Grade-18212-4-Inch-Adjustable-Puller/dp/B002O16UGQ/ref=sr_1_4?ie=UTF8&qid=1523555996&sr=8-4&keywords=gear+puller
https://www.amazon.com/Windscreen-Window-Puller-Remover-Removal/dp/B01HJBM2WG/ref=sr_1_1?ie=UTF8&qid=1523555789&sr=8-1&keywords=windshield+wiper+blade+puller