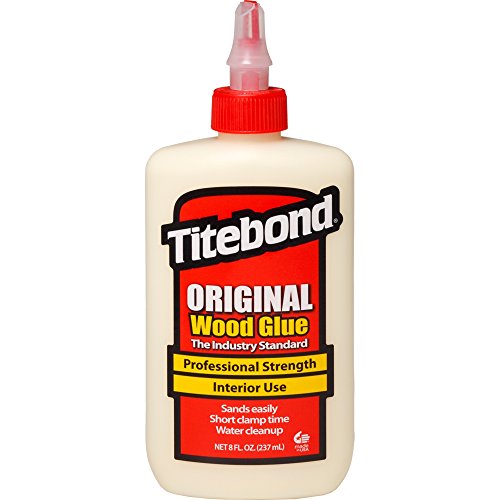
Best wood glue according to redditors
We found 100 Reddit comments discussing the best wood glue. We ranked the 45 resulting products by number of redditors who mentioned them. Here are the top 20.
We found 100 Reddit comments discussing the best wood glue. We ranked the 45 resulting products by number of redditors who mentioned them. Here are the top 20.


True, but the result of baking soda plus superglue looks like wet granulated sugar. This looks more like powdered plastic resin glue but I'm not sure on that either.
https://www.amazon.com/dp/B07PKFKT27/ref=cm_sw_r_sms_apa_i_k7IWDbAGRDBEX
It won't be labeled as horse glue, but as animal glue.
The gaps are pretty big, and assuming you don't have very consistent temperature and humidity in the house, they will expand and contract over time. Using wood putty to fill those gaps will work for a while, but will eventually break and fall out. Instead you can use a wood-colored caulk, such as https://smile.amazon.com/Sashco-Conceal-Textured-Caulking-Cartridge/dp/B0082NUIEA/ref=pd_sim_328_2?_encoding=UTF8&psc=1&refRID=RT9KETRB0C5RT6E38H3E
For very large gaps, you can use rope (as they did when building old houses): https://www.youtube.com/watch?v=7focJeab0pM
Your best bet is to insulate from below as well. That will be more effective at keeping your heat/AC inside, though it won't address the visual appearance of those gaps.
Final note: those are beautiful antique floors. Probably original to your house, I would guess they are heart pine from old growth forests. They are probably long boards (10' plus) so this is really an uncommon classic. Take good care of them, and if you ever change your floor, at the very least make sure you sell these to a shop that knows their worth!
Great ideas in this thread; I'll put in a plug for the GlueBot - good deal less than $50, but there is a little accessory kit you could add to bring it up closer to $20. Maybe for an occasion other than Valentine's Day.
It is definitely something I didn't know I needed until I used it.
Time for some Liquid Fusion
You missed some glue. Next time make sure you jump through hoops to be sure to get all the squeeze out up from that porous oak.
Or use a glue that has no effect on finishes or stains
As someone working through this but a few years ahead of you, I'll pass along the list of stuff I've bought and/or wish to buy...
Hand Tools
Power Tools
Also, there are fluids to consider
Of these, I'd focus on the hand tools, fluids, and the Dremel. You can always ask someone to buy you a saw for Christmas. If you have these things on hand, there probably won't be a job come along that you can't handle at some basic level. I'm assuming you don't need yard grooming tools, because that's an entirely different list.
No no no. Don't use wood glue! If the guitar is worth anything to you use hide glue. First, remove the glue using hot steam, or a rag damp with 160 degree water (this will take a long time and you will have to make sure it is very dry afterwards [48 hours drying at least]). Heat the glue with the right proportion of water (start with a dryer mixture and add until a "goopy" consistancy) up to 145-150 degrees Fahrenheit in a disposable jar and use a paint brush to apply a thin layer underneath the bridge. Then, while the glue is still hot, affix it exactly where it was prior. Use a band clamp and a light weight, or more suitable clamp and let it sit for 24 hours. This should be sufficient time for the glue to set. Then, re-string with nylon strings and play. If you set the bridge right it should be good as new. It might even be better. So yes, you can repair the guitar yourself, but it is still reccomended to go to a luthier. Why don't you head over to the subreddit?
Glubot - it looks funny to a non woodworker, but it is an amazing thing to have around the shop. It makes glue ups about 100 times more enjoyable. Maybe get some silicone brushes to go with it.
Magnifying Lamp - a great addition to any shop. Be sure to get one with a long arm like this one so he can mount it behind his bench and still be able to use it.
Incra Rulers - these are the best damn rulers you'll ever use. The slots make consistent marks that are very reliable. A 12 inch T ruler would be best, but this one is also cool.
Wool Socks - if you live in a cold climate and his shop isn't heated, this would be an awesome gift. I got these socks specifically and they are awesome. Me feet never overheat, but they keep me very warm and are very comfortable. This is a damn good deal actually... I might order these now.
I don't recall exactly. Like I mentioned most of the 2x4's were leftover that were laying around I had to buy 4 or so to supplement what I had on hand. In addition to that I bought the following tools as I didn't have them before and I was just getting started;
) or so later which I have a lot leftover from
So roughtly;
The cost included a lot of startup costs for tools for me which will be long lasting. You could save quite a bit of money by buying used but in my local market planes are really hard to come by and hand saws are non-existent.
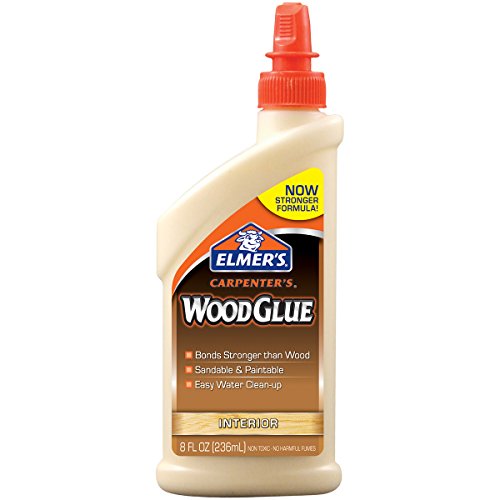
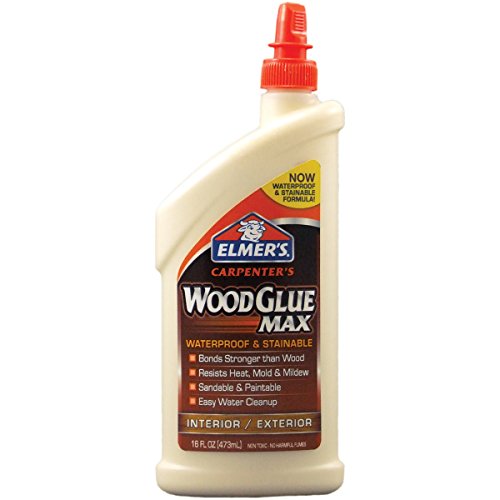
https://www.amazon.com/Elmers-E7310-Carpenters-Interior-Exterior/dp/B0045PXPH6/ref=sr_1_1?ie=UTF8&qid=1527550346&sr=8-1&keywords=elmers+wood+glue
The proper glue is 7 dollars and has enough glue to last you indefinitely for your music maint needs.
It is actually cheaper than most super glues.
I don't advise using super glue. My friends have toasted enough necks by their nuts because they super glued their nuts.
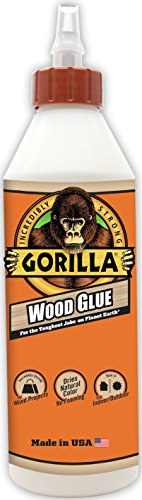
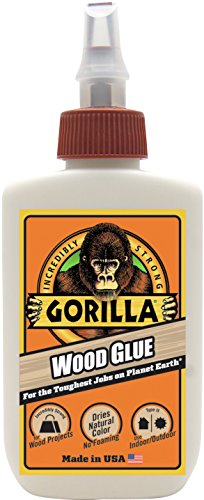
I was thinking the same thing at first, but I'm giving the OP the benefit of the doubt that he means Gorilla Wood Glue and not the original Gorilla Glue.
Our team uses a variety of different types: Gorilla Glue, Titebond, and more. Gorilla Glue is really good, but just be sure that you wipe off the excess or it will expand. Titebond is really reliable but it takes a very long time to dry. Zapagap is pretty pricey but it dries insanely fast and it is really strong.
Here's a link to all of the glues: 1. Gorilla Glue can be found at Home Depot 2. Titebond We put the Titebond in to smaller containers which can be found here 3. Zap a Gap
EDIT: We also use something called InstaSet Accelerator. It should be used only in emergencies along with zapagap.
I don't think people realize how expensive it is for a company to build speakers. The general consensus is that there is a 1000% markup, meaning a $1000 pair of speakers only are $100 in parts. The company has to spend money to design and research the speakers. All of that is done in a building that they pay for. Next, they've got to build the speakers. Someone personally has to screw in each driver and apply every vinyl finish. They have to pay people to do that stuff. Next, they get shipped to a distributor. Speakers are big and heavy, so that isn't cheap. The distributor takes a cut of the money. They then send the speakers to a dealer. Once again, shipping costs. The dealer also needs some money, so they raise the price to make some money.
I'll throw out an example. The Buchardt S400 is a good one. It is made out of parts that anyone can buy. They use this $20 tweeter with a waveguilde attached, this $34 passive radiator, and this $71 woofer. So, they come out to about $125 per speaker, and $250 for the pair. They most likely get bulk discounts, but we can ignore that. Anyways, you get about $250 worth of parts in $1800 speakers.
Anyways, besides what comes when you order stuff, you've got to get some other parts.
You'll need a pair of binding posts for every pair of speakers you make. I use these ones, but really any of them should work.
You'll need polyfill to fill the speakers.
Screws to screw in the drivers.
Speaker wire, for inside of the speakers as well as to wire it all up when you're done. Since you're spending this much on the setup, banana plugs to plug in the wires might make you feel better. You won't need them, but it is definitely much easier to use them.
Alright, so that is really all of the stuff that you'll need inside the speakers. Now we can talk about the building stuff.
Clamps. You'll be gluing the speakers together, and need to hold them in place while the glue dries. Speaking of, wood glue.
You'll need a soldering iron for soldering everything together inside. That one comes with solder as well, as far as I can tell.
However, you want to finish the speakers would be last. Spray paint, vinyl wrap, whatever you want really. You could even get paint and a roller and paint them like that. You'll most likely want to sand and prime them first.
I think that's everything. Anyways, that Buchardt example is one of many examples. These Von Schweikerts are $35k and only have like $5k in parts, or something like that. I looked them all up once but I don't remember. Anyways, this is all to say, a pair of $400 speakers like the Monitor Audios don't have $400 in parts. It's much less than that.
You could try PerfecRepair. I use it occasionally to repair damaged sticks. It works very well.
Not sure if its 1 or 2, but I use this stuff:
After letting it set for a few days, I warm it for a few seconds with a blow dryer to make it a little easier to peel in one move.
There is a LOT of info in this sub on cutting board finishes / glue. A quick search should return what you're looking for. That being said, I'll give you what I use here:
Glue - Titebond III. It's water proof (not resistant).
Finish - A mixture of beeswax and mineral oil. It needs to be re-applied occasionally, but it's super easy for beginners. Stay away from salad bowl finishes until you've made a few boards and want to try something a little more durable.
Woods - Hard maple and walnut are the easiest, but anything tight grained will work. Stay away from open grain woods (oak, etc.).
First, you want to avoid softwoods and stick with your basic hardwoods (oak, maple, cherry, ash, poplar and a few others. No rainforest hardwoods, as they tend not to have happy reactions in many people).
As long as the cherry does not touch the glue, there should be no problem. Remember that a very thin bead of glue is more than adequate for almost all purposes. I would recommend A simple wood glue like http://www.amazon.com/Franklin-International-5063-Titebond-Original/dp/B0002YWZPW/ref=sr_1_1?s=hardware&ie=UTF8&qid=1367548726&sr=1-1&keywords=titebond+original+wood+glue
Most say a mineral oil rub is all you should use, but others may disagree with me. DO NOT put anything on the inside of the bowl or anywhere else that may come in contact with embers or flame.
I made one but I decided that I was going to go balls deep and try one of the most difficult designed mau5 heads out, the disco head. Long story short it cost me about ~$300 to make, not counting 2 others that I messed up on.
Materials:
-Head
-Eyes
-Head Mount
-Mouth Mesh
-[2] Led lights for coloring the eyes
-Superglue for mouth
-[2] Plastic glue for Headmount
-About [6-10] Rhine stone glue bottles
-[3] bags of Rhinestones
-Foam Ear material ---> With Ear template
-Washers -[4] Threaded Rods -Wing nuts
-Chrome Spray paint
-Lastly, Insulation Strips [White]
+++++++++++++++++++++++++++
Stuff I had: Dremel, stubbornness, no life, sharpies, too much free time.
+++++++++++++++++++++++++++
Use any of the above tuts to get the general idea.
The template for the ears, (mine are huge).
Once the mouth is cut and you accounted for the eyes (pop the eyes in half and trace them on.)
Spray paint the whole head chrome, in light mist layers. The more layers the smoother the finish.
Once that's done, enjoy the 90+ hours of putting each rhinestone on, one by one.
Profit.
Oh no these things are stout. When I built them I used proper wood glue (not just dipping the dowels in water) on all the joints, and used a ratchet instead of that dinky hex key it came with. Just don't turn them the wrong orientation when setting them up. The "shelves" should be horizontal; if you turn it sideways by accident and the individual slats are load-bearing, you might have a swaying left-to-right issue.
The only problem I really had was the carpet. My floors aren't completely plumb near the baseboard and the shelves tilted away from the wall. Those things came with anchoring kits (for liability reasons, "hey dummy we gave you a wall anchor") and I thought of using them but instead had a better idea. I took heavy cardboard and some wooden door casing wedges and made a little platform under the shelves to tilt them back.
They're pretty solid, I'm not worried about my kids knocking them over.
Hopefully Amazon ships to your country.
I just assembled this over the weekend. It was a little more work than I thought, so here is what I’d say to do:
Get this hobby knife (or something like it): SE 813PK 16-Piece Hobby Knife Set with Aluminum Collet Chucks https://www.amazon.com/dp/B0002BBYIE/ref=cm_sw_r_cp_api_FRGhAb4HDSWWY
The pieces were very difficult to punch out and several big pieces splintered in places (not to the point of structural integrity). After a couple of this (I know I know, I tried to change my technique), I used the flat chisel like piece to begin punching them out. Took a lot more time but it worked. Pressed the chisel down and lightly tapped with the hobby hammer I got from Meeple Reality.
Speaking of which, get this hobby hammer (or something similar, the light weight is important. I got big hands but it is fatiguing swinging the little bigger guys): Cousin Craft and Jewelry Mallet, 8-Inch https://www.amazon.com/dp/B001144WTE/ref=cm_sw_r_cp_api_SJHhAbJ83KX36
Once the glue is in, or you got the pieces together, hammer them in. Check for gaps in the joints.
Speaking of which, get this wood glue (or something like it) : Gorilla Wood Glue, 4 oz. https://www.amazon.com/dp/B00HDM9I3S/ref=cm_sw_r_cp_api_MOGhAbT804887
The first half or so I applied it to every joint. Keep a paper towel handy or something to clean the excess that seeps out.
The last couple of intricate pieces I only glued the outside supports. The intricate pieces inside didn’t require it. I’m pretty sure it’ll hold. If it doesn’t I’ll glue it when it happens.
Ok, I think I got it down. I wrote this over 4 sessions as time permitted quick style, so if something is weird or doesn’t make sense let me know. I have so little DIY experience , so if I can do this, you can do this.
End of discussion :p
https://www.amazon.com/gp/aw/d/B0002YQ3KA/ref=mp_s_a_1_1?ie=UTF8&qid=1502036539&sr=8-1&pi=AC_SX236_SY340_QL65&keywords=titebond+iii&dpPl=1&dpID=41RDbuNSm-L&ref=plSrch
There are larger sizes available but this is a good size for the first one you buy
Okay so It's a pretty labor-intensive process, so be forewarned
I didn't want to just draw the parts by hand because I wanted the shield to be game accurate, so I took this picture and had it printed on a poster at my local staples, I used the largest poster size, so this was about $20. I then cut out the entire shield from the poster to draw the base, and cut out each of the detail pieces to trace.
I cut and sanded everything with a multi-use dremel. The wood that I used was 1/4 inch birch, which is easy to cut and sand. I got a big sheet at home depot, and I ended up only using half. (I might use the other half to make the Master Sword Scabbard later this year) I would recommend using 3/4 inch wood or layering more pieces than I did, because my shield doesn't have anywhere near as much depth as I would like.
So I cut out the smaller shield pieces for layering by tracing the large shield piece, then taking a 2-3 inch block of wood and running it around the inside edge of the first trace. I made sure the three pieces were centered on top of each other before supergluing them together.
I filled spaces on the layered shield with wood bondo, sanded that down as smooth as possible, then filled all the little holes with wood filler, of course you have to sand this too. Then I painted it with this, but you can use a lighter shade if you want a different look. Finally, I covered the whole thing in newspaper except for the little parts where the border shows through (the silver triangles) and I painted those silver.
For the border I cut the border out of the poster and traced it on the birch, cut it out with a dremel, then cut it into sections and sanded it down. I laid it down on top of shield base (after I had filled it in with the bondo) and filled the gaps between the border parts with bondo. What this does is reconnect the border pieces in a curved manner that perfectly fits on the base. When the bondo dries, add more bondo on the reverse side of the border to strengthen the connection. Then you can sand it down smooth. Spray paint that shit silver and you're good.
For the triforce, pointy decals, and bolts for the border, I cut them out of the poster, traced them onto particle board, cut them out and sanded them to look 3-dimensional. I painted them, and that's that.
Attach all the pieces together using wood caulk. The last step is adding Hylia's Crest, which was frustrating to figure out at first. What I ended up doing was cutting out the details from the poster, tracing them onto this and cutting them out. These decals were a little too pink for me, so I painted them with this glossy red paint. Finally I peeled off the backing and stuck them on the shield.
To hang it up, I pounded some small nails into the back and hung a metal wire between them.
Thanks for your interest. I'd be happy to answer any other questions you have!
This: https://www.amazon.com/PerfecRepair-Cigar-Repair-Crack-Sealer/dp/B072BD918F/ref=sr_1_1?keywords=cigar+glue&qid=1569934592&sr=8-1
Uhh, I've never seen hide glue in that configuration, just in a regular bottle like that. In luthiers' shops I've been in, you have to warm it up to melt it properly before you use it. That probably has some weird additives that keep it liquid and stable, but I'd worry they also make it not ideal for luthierie.
Edit: You actually want something more like this.
Dressmaking pins are far far far easier than the shitty tacks and are cheap as chips. Decent woodglue is a must. Get some extra blades for the knife as they blunt quickly. Get a few sheets of sandpaper of various thickness, I also used Tamiya sanding sponge as it's good for the 3D of the hull. Soak planks a decent length of time.
Don't be discouraged if something doesn't fit well, lots of adaption is required at times as things don't often fit as they should due to the nature of the beast. My keel took quite some adaption but you wouldn't know looking at it. Careful with doing too many hull planks at once, if they're wet then they shrink so can leave gaps.
Patience patience patience
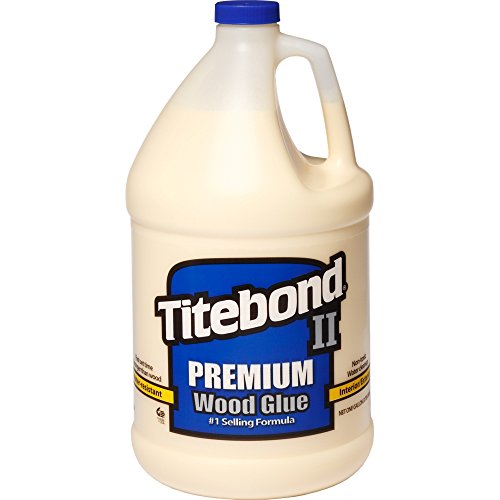
>http://www.amazon.com/Franklin-International-5006-Titebond-Premium/dp/B0000223UQ/ref=sr_1_4?ie=UTF8&qid=1343614206&sr=8-4&keywords=titebond+II
$20/gallon. Not really that much, IMO.
If you buy a wood desk from Office Depot, IKEA, or anywhere else, ALWAYS put it together with a squiggled bead of Titebond Wood Glue on the surface of every joint and place a dab of glue into every dowel and screw hole. It will not come apart or wobble. Just be sure to wipe away the excess glue with a wet towel as you tighten the joints.
As an example, a sizable particle board corner desk with built in cabinets on each side that I bought in 2000 at Best Buy is still in use by my Dad and has been through moves from FL > NC > OH > WI (and now three different homes in WI) in the last 18 years and has never come apart.
I have done this for 25+ years and have never had a piece of furniture assembled in this way fail on me.
This is the stuff in case you aren't familiar - You can get it at any Lowes/Home Depot locally: https://www.amazon.com/Titebond-5063-Original-Wood-8-Ounces/dp/B0002YWZPW?psc=1&SubscriptionId=AKIAILSHYYTFIVPWUY6Q&tag=duckduckgo-osx-20&linkCode=xm2&camp=2025&creative=165953&creativeASIN=B0002YWZPW
I need wood glue. My kitchen chairs are adorable old antiques but they're just all kinds of broken.
Add 1/3 of the flour weight of this to your base:
https://www.amazon.com/00203-Weldwood-Plastic-Resin-1-Pound/dp/B001003J16
So if your recipe calls for 3c of flour, use 2c of flour and 1c of this resin powder.
Titebond 3 is what you want. It's a little expensive but definitely worth it.
I have a glu-bot for woodworking and I'm thinking of buying one for leather as well -
https://www.amazon.com/FastCap-Glu-Bot-Glue-Bottle-Ounces/dp/B0006IUW8G
One of the primary values of the glu-bot for woodworking is that you can use in multiple orientations, but it is also amazing at keeping glue for long periods of time and is fairly cheap.
You need one of these instead.
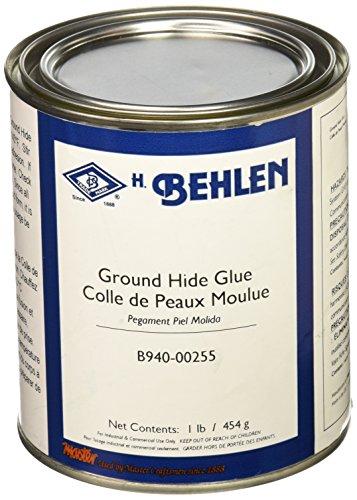
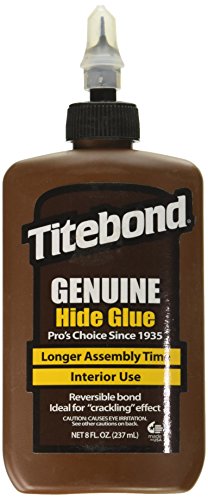
There are several types of hide glue that will give you extended "open time" (the length of time before the glue sets) that you need. The easiest to use is the Titebond Liquid Hide Glue, which is already mixed and liquified. Ground Hide Glue must be heated in a double boiler or glue pot to liquify and use it. Some folks around here (/u/joelav for example) prefer it to most any other glue types. Either one will give you extended "open time" and the ability to steam the joints apart if things go awry.
Man I probably will do it if it doesn't sell I'm still worried it could be seen that something was repaired which might be more worrysome than the actual flaw from a customer's standpoint. Is this the glue you're talking about?
https://www.amazon.com/Franklin-International-5013-Titebond-8-Ounce/dp/B0002YXE7K
http://www.amazon.com/gp/product/B0006IUW8G/ref=s9_qpp_gw_p469_i7?pf_rd_m=ATVPDKIKX0DER&pf_rd_s=desktop-1&pf_rd_r=1217VWZTFEHZX0Z5Y76W&pf_rd_t=36701&pf_rd_p=1970559082&pf_rd_i=desktop
I just started about six months ago, and I thought I would add some pretty un-sexy things to the list... but Im so happy with them
Silicone Glue Brushes Are completely reuseable
Digital caliper Since grabbing this I have used it countless times when making cuts to match
Edit: Apparently I can't bullet point :(
Here is the amazon link for that glue http://www.amazon.com/gp/aw/d/B0045PXPH6
Not yet. You still need This
Depends where you are.
Oplaser is based in the UK and I'm in France.
It took 15 days between my order and package arrival, with only one notification from the the delivery agency (Parcel2Go.com)
Beware that the box arrived unassembled, you have to assemble it yourself, so you have to get some wood glue (like this one : https://www.amazon.fr/gp/product/B0001YS16U/ref=oh_aui_detailpage_o01_s00?ie=UTF8&psc=1) and a strap to help you fix every part together (https://www.amazon.fr/gp/product/B001W7HYDQ/ref=oh_aui_detailpage_o01_s00?ie=UTF8&psc=1)
But in the end, the product is really great, worth the investment.
sorry for bad english ...
My door was messed up exactly like this, because whoever installed my door physically bent it somehow. I adjusted the strike plate of the lower knob, not the deadbolt, by removing the strike plate, filling it with wood putty, and re-installing the lower knob's plate from scratch in the right spot, once the putty was set. This way it held the door shut even with pressure from the weather stripping.
Then, I removed and reinstalled the deadbolt strike plate and the hole behind it so the dead bolt lined up with this new held-shut position. I used some lipstick to mark the spot on the wall the deadbolt struck when I closed it. Worked like a charm.
If you have one big strike plate for both, I think it should work the same way, so long as your top and bottom locks are spaced out exactly like the plate is. If they're not, maybe you can get two individual plates?
I have next to no DIY skills and this actually wasn't bad to do at all. Just watched some youtube videos and went to town with a chisel & drill. The chiseled area kinda looks like shit but it's on a door frame and people aren't really looking too hard at it :).
edit: this is the epoxy i used https://www.amazon.com/gp/product/B000H5O7Y8/
FastCap Glu-Bot Glue Bottle (16 Ounces) https://www.amazon.com/dp/B0006IUW8G/ref=cm_sw_r_awd_4VFevb0V4S2SZ
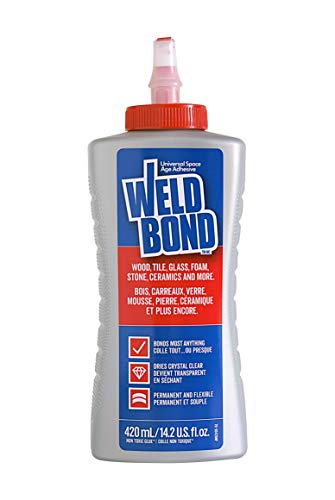
Weldbond. https://www.amazon.com/Weldbond-8-50420-Multi-Purpose-Adhesive-Glue/dp/B00RM70OGE
Let me start by saying that this would be the bare minimum. This is assuming that you have all the experience to use these tools effectively as someone who has the appropriate skill and knows to do things like not bear down on a saw when cutting, keeping everything square, how to mill boards by hand, how to not kill sandpaper in a few strokes, how to tune and sharpen a hand plane, ETC.
2x$8.69Vise grips Two vise grip clamps. Clamps can be universally adjusted and clamped in almost any direction with some quick thinking. One is never enough.
$9.99Cheap set of chisels Everyone needs a chisel. These will be made from a milder steel, but it's better than nothing.
$22.00Generic ryoba saw A ryoba saw will double for crosscuts and ripcuts. They go as far as you can take them provided you treat them right.
$18.62Bench Plane You need to be able to take down material in terms of thickness. A simple bench plane will due for now.
$20.61Block Plane A block plane will help slightly with end grain smoothing where the bench plane cannot.
$3.47Bundled Sandpaper You need to finish your products somehow. I would get a generic bundle of sandpaper and use it sparingly and tenderly.
$12.85Square Keeping things square is vital.
$6.79Mallet Hammering your chisels is going to be very important since you cannot use a 2x4 reliably.
$3.47Wood Glue Need to be able to glue things together.
$11.80A set of card scrapers Remove material smoother and faster. You don't want to waste sandpaper if you don't have to, and these are quite versatile.
$8.06A bastard file A bastard file will do for now when it comes to heavier shaping and sharpening your card scrapers.
$15.92A small drill viseKeeping something secure in place is very important. A small vise will accommodate small and narrow pieces of lumber and can be bolted to a bench.
$3.97Assorted finer sandpapers You need something to keep your chisels constantly sharp, especially when it is such a mild steel as a set of 9.99 chisels.
$15.59Wipe on polyurethane You need to be able to finish your products somehow.
Comes to $170.52 I would use the rest to make a bench and two sawhorses out of some 2x4's.
For the glue I would use a UF type, like this. Get the glue as far back in the gap as possible using a butter knife or something. Then put some very heavy and even weight on top and let it sit 48 hours. Keep the area as moisture free as possible in the future, and I recommend not using the heated dry in the dishwasher.
For example, I just ordered this because I can't stand the circular shape of this.
Once you have removed everything bad, I would use a wood hardener like this:
https://www.amazon.com/Products-164440-PC-Petrifier-Water-Based-Hardener/dp/B00081FW1I/ref=sr_1_12?keywords=Rot+fix&qid=1566419161&s=gateway&sr=8-12
And I typically use Bondo because it is cheaper, but an expoxy is better (this is just really expensive)
https://www.amazon.com/Products-PC-Woody-Repair-Epoxy-Two-Part/dp/B000H5O7Y8/ref=sr_1_6?keywords=Rot+fix&qid=1566419309&s=gateway&sr=8-6
Then you can paint it. More here:
http://www.woodweb.com/knowledge_base/Polyester_Versus_Epoxy_Wood_Fillers.html
https://www.parts-express.com/dayton-audio-18-ultimax-subwoofer-and-cabinet-bundle--300-7099
https://www.amazon.com/Polyfill-Stuffing-Polyester-Pounds-Schonfeld/dp/B0085A87NY
https://www.amazon.com/Titebond-Ultimate-Wood-16-Ounces-1414/dp/B0002YQ3KA
https://www.amazon.com/Behringer-NU3000DSP-BEHRINGER-iNUKE/dp/B005EHINAS - 1250 watts RMS into 8 Ohms (bridged) for series voice coils.
Cabinet + driver is $425. Polyfill is under $10 per pound, less if recycling pillows. $11 for the wood glue. $280 for the amplifier, $240 if using Amazon Warehouse deal. Total cost is right around $750, a touch higher if you need to rent some clamps for 24 hours to put it together.
Of course, my whole post is sort of wasteful because I see that the driver is out of stock.
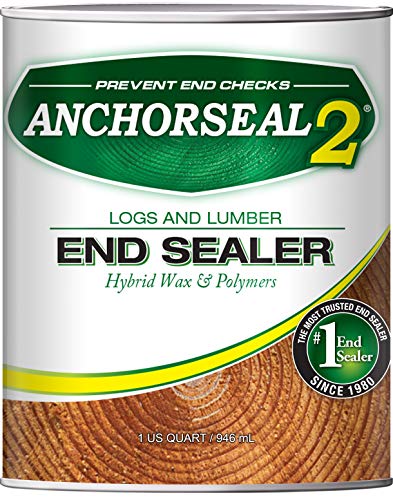
https://www.amazon.com/Anchorseal-Green-Wood-Sealer-Quart/dp/B0013J1FYW
but most paints (thick) will do
Edited the post above so that you can see exactly what I was talking about.
Some of the other stuff I didn't mention will be listed below.
Tried this as my marking knife , rather than the narex at first. Didn't sharpen easily for me, so I got the Narex Marking Knife.
Needed a coping saw so I could start doing dovetails easier. This is the one I have chosen. Does the job well enough, nothing to write home about.
The Glu-bot Sure you could use a mustard bottle, but I'll be damned if this little thing wasn't a bit useful. Being able to squeeze glue in any direction is very useful. This is one of those 'you mock the crap out of it until you try it yourself' items. Remember 6 of these gives you 96 oz of glue, but is the same cost as a full gallon and the cost of the gluebot together.
For sharpening: use one of these. Yes, freehand sharpening is fairly easy and quick. But at first using training wheels is both easy and convenient. It gets you a sharp blade everytime because it takes that pesky human error out of the equation.
After I did a long bit of youtube videos and making my own projects, i ran into this book. It solidified my understanding of a lot of woodworking knowledge. I don't know if it is a beginner type resource, but it definitely helped me out.
> There is special end sealing paints
Anchorseal. It's basically paraffin wax suspended in water.
Glu bot for the win. Nice job. I like the inlay. https://www.amazon.com/FastCap-Glu-Bot-Glue-Bottle-Ounces/dp/B0006IUW8G
Here's a better image of the pieces. https://imgur.com/a/PSuOZRn
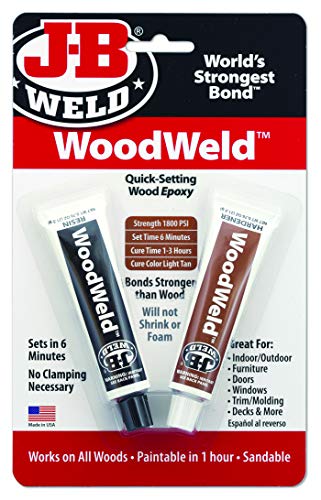
Will be trying out this epoxy (smallest I could find on Amazon) https://www.amazon.com/J-B-Weld-8251-WoodWeld-Adhesive/dp/B004NB3OMS/ref=sr_1_8?keywords=wood+epoxy&qid=1551207459&s=gateway&sr=8-8
Will also be getting slightly larger set screws (I think that's what the gold pieces are called?) and screws. I was missing one anyway so this was a good kick in the butt to finally give this stool some care.
Thanks so much for the advice everyone!
You may or may not have to go that route but this stuff will do the job if you decide to use it.
Another fun option, the makers of self watering planter suggest wood glue
Link 1: https://www.thingiverse.com/thing:903411
Glue itself: https://www.amazon.com/Franklin-International-1414-Titebond-3-Ultimate/dp/B0002YQ3KA
I did the same thing and used Weldbond to glue it back. and it works fine on Hatchbox wood PLA Here
I'd like it to fit in my current space and those measurements do, they're very close to the existing table that is in this space.
About the glue joint:
If I choose to do biscuits, what's the easiest and best way to do it without owning a biscuit joiner or should one really purchase a biscuit joiner?
If I go with dowels, what's your dowel size that would be used on a 2"x12", assuming your typical 2" label coming out to 1 3/4"?
And I forgot to ask in my original post, Is this wood glue acceptable? Of the multitudes of woodworking videos I've watched on Youtube (wood whisperer, Frank Howarth, etc) they seem to mostly use titebond.
Edit: Also in regards to sanding the edges in preparation for a butt joint, what grits are you supposed to be using and how do you make sure that your sanding doesn't make the edges uneven? I don't have access to a jointer, is that something I should have done to the boards prior?
Not sure if you are in the states, but here is a good link for one: https://smile.amazon.com/dp/B0006IUW8G/
For $8 you can't design and print it for less, especially out of a material glue won't stick to.
I'm going to be buying one of two different epoxy fillers.
https://www.amazon.co.uk/Milliput-Epoxy-Putty-Superfine-White/dp/B002CNEWAM/ref=sr_1_1?ie=UTF8&qid=1480860814&sr=8-1&keywords=white+epoxy
or
https://www.amazon.co.uk/gp/product/B004NB3OMS/ref=ox_sc_act_title_3?ie=UTF8&psc=1&smid=A3P5ROKL5A1OLE
I've been reccomended the second one but the issue is that it means I'll have to paint it since it's a browny tan colour cure. Therefore might end up buying the white Milliput instead.
Totally smokable. For the future, though, dont put tape over it. You can get a jar of cigar glue on Amazon for $10USD and you just use the brush to glue it back together like in the picture. It's made of the same stuff they use to glue it together at the factory, so it's safe to smoke.