(Part 2) Best electrical wall plates & accessories according to redditors
We found 411 Reddit comments discussing the best electrical wall plates & accessories. We ranked the 200 resulting products by number of redditors who mentioned them. Here are the products ranked 21-40. You can also go back to the previous section.


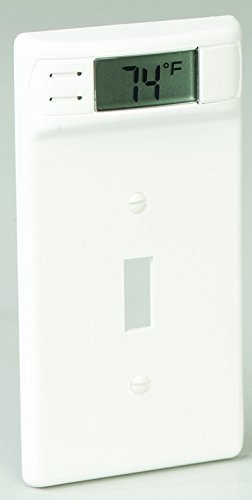


Switchplate with built in thermometer
https://www.amazon.com/ic-innovations-12100-Thermometer-Plate/dp/B000H5TD6A
Let's look at some numbers then.
You need a cable tester, that's $370 for this, the bare minimum tester you can use.. The right tester is like $7k to buy, probably around $500 to rent for a week, so we're cutting corners.
Then, you need a spool of plenum cat6a. It makes no sense to use cat6, because you can't do 10g over it for any real distance. That's $275, again, the bare minimum you can buy.
Then, you need a tool set. $60, they're cheap, but you'll only use them once. I don't buy cheap tools, your company is less discerning.
Lets spec for 10 wall plates. 13.95 for keystones, $12 for wall plates, 10 mud rings for $85 because you need retrofits for existing construction for a section total of 110.95
Then you need a patch panel to punch all the cables down. That's 47.81 for the bare minimum. Make sure you punch it right the first time, because you'll get maybe 3 punches out of a port before you have to toss it.
You'll also need this $32 fish tape, and this pull string for 14.73
To hang the cable, you'll need these plus some zip ties and some screws to attach everything. Also, you'll need a couple rolls of plenum velcro to wrap cables and get everything tidy-ish. Let's be conservative here and call that $50 all told.
That's 950.49 before you've even paid taxes or shipping, but whatever, we've left off the biggest cost here.
Your Time
Now, let's assume you make 20 bucks an hour (it's probably more). You probably cost the company 30 bucks an hour with everything else they pay for to have you employed (again, it's probably more). You'll spend 15 hours to complete this project provided you work fast and don't make mistakes. That's two full workdays in fairy tale land where you're already good at this. So let's call it 20 hours of learning how to cable and making mistakes and actual cabling, plus say 2 hours to clean up the mess you'll make (there will be mess).
All told, it'll cost the company 1610.49 for this install.
100 bucks more than you were quoted to have a guy with zero experience to install a network that will be critical to business operations for years. Sounds like a deal!
thermometer switch plate cover
​
https://smile.amazon.com/ic-innovations-12100-Thermometer-Plate/dp/B000H5TD6A/ref=sr_1_4?crid=OROLXO64L204&keywords=thermometer+light+switch&qid=1570991837&sprefix=thermometer+light+%2Caps%2C197&sr=8-4
I have an Ecobee4 thermostat (although Alexa doesn’t work as well for me as I hoped) w/ Ecobee remote sensors mounted in every room. Not only is this great for managing the temp in the house overall, but now I can include temp changes in my automations and geo-fencing.
In addition, although I find them a bit slow to respond when using them as room entry motion sensors, the Ecobee remote sensors are great for automatically turning off the lights when a room is no longer occupied.
I also recently added some non-HomeKit “smarter” switches in my bathroom and laundry room. In the laundry room, I put a simple Lutron (not Caseta) motion sensor switch to auto turn the light on/off when someone comes/goes from the laundry room. Works fantastically, it’s simple, and not too expensive.
In my bathroom, I added three new Lutron (not Caseta) switches.
The first two of those switches are far more programmable than I thought... reading the instructions really paid off! :)
The Lutron Claro wall plates are really great as well. They are very clean, simple, and modern looking... and their 2-part design makes it really easy to adjust all your switches for a precision installation (i.e. flush and straight).
In my bedroom, my bedside lamps are controlled by 1 Lutron Caseta lamp dimmer w/ remote. I use the same style Caseta lamp dimmer for a few other standalone lamps... and even used one to automate (just on/off) my outside LED holiday lights last winter (the dimmability of which was fantastic, as they are normally way too bright).
In conclusion, before spending a bunch of money, my advice would be to think carefully about how you/others use certain rooms and if a motion detection switch would suffice or if a more complex automation control is needed. Also... do the math. As others have pointed out, one alternative may be way more cost effective over another when you factor in the number of bulbs and/or switches involved.
One last thing... I am renting a room to a guy who's on a totally different schedule than me and as such, I never knew if he was in his room sleeping or out of the house elsewhere. So... since I had previously added him to my HomeKit household... I use a combination of geofencing with his phone, and the Ecobee motion sensor in his room, to switch on/off a particular lamp when he comes & goes. That way... it's easy for me to know if I need to be quiet, or if I can rock out with my socks out.
*EDIT: Added a bunch of links and more...
What is above/below you? Attic? Unfinished basement?
If it is an attic, you can drop a line down into the wall and do it professionally. Just need fish tape, a couple gang boxes, some keystone jacks, and wall plates. All can be had for <$50
Unfinished basement, same thing, drill down, fish down (easier because gravity) and look for where the cat5 comes out in the basement, if possible use any existing conduits for previously ran LV wiring. Then go to modem location, fish down with your fish wire, and find it in the basement. Tie down your cat5 and fish it through. Ezpz
Also, avoid powerline adapters. Those things are hot garbage, and should only be used when all other options have been exhausted. As a tech, I have seen so many repair tickets for those peices of garbage alone. Run cat5, buy a wifi dongle & router that supports dual band, but do not use powerline again.
toolless keystone jack 2-pk
keystone wallplate 5-pk
cat5
LV gang box
You can buy these from Amazon
Amazon
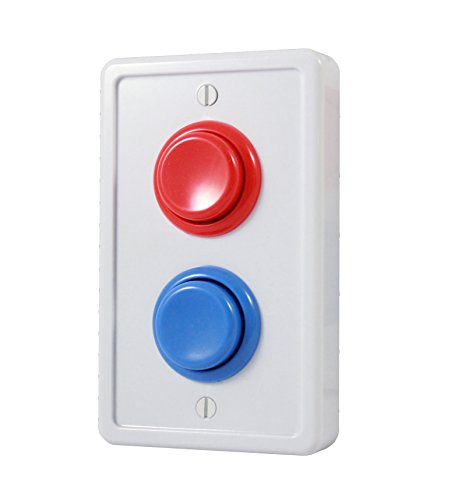
Arcade Light Switch Plate Cover, Single Switch (White/Red/Blue), 1-Gang Standard Size Rocker Wall Plate, Game Room Decorator, Kid Bedroom Wallplate, Faceplate Replacement https://www.amazon.com/dp/B01I2TPJN8/ref=cm_sw_r_cp_apa_YCSZAb2KGNJ11
might go with this one... https://www.amazon.com/Art-Plates-Michelangelos-Switch-Single/dp/B000KLAUD6/
I saw someone in a video put a retractable key chain thing like that behind a wall plate like this in the ceiling and it looked really professional.
https://www.amazon.com/iMBAPrice-Cat5e-Cat6-Keystone-Plate/dp/B00G2E8MXK/ref=sr_1_72?ie=UTF8&amp;qid=1484013619&amp;sr=8-72&amp;keywords=wall+plate
Lutron caseta is much simpler than it looks at first. You will need the wireless switch and the wall plate hat matches the number of switches in a location (e.g. a 5-switch install needs 5 switches and 1 5-gang wall plate).
For most people, the switch you want is
LUTRON P-PKG1W-WH Caseta Wireless 600-watt/150-watt Multi-Location In-Wall Dimmer with Pico Remote Control Kit, White
https://www.amazon.com/dp/B00JJY0S4G/ref=cm_sw_r_cp_api_O2YRybNK0JMVR
The single gang wall plate is:
Lutron CW-1-WH 1-Gang Claro Wall Plate (1 Pack), White
https://www.amazon.com/dp/B000MAW4XE/ref=cm_sw_r_cp_api_F5YRyb2VD4WGE
And you will need one bridge (you can get a bundle of 2 dimmers, 2 picos, and a bridge but that bridge isn't the pro model which you may not need, I got it just in case, but I'm not using any of the additional integration capabilities):
Lutron L-BDGPRO-WH - Smart Bridge Pro
https://www.amazon.com/dp/B00Z8AXQCQ/ref=cm_sw_r_cp_api_N-YRyb1VWE0P8
You can also get a plug in dimmer for Lamps which acts as a range extender, and the non-dimmer switch for other devices such as potentially a ceiling fan or lights that just don't need dimming.
Hope that helps!
If you want your switch to have a more "finished" appearance, get a pico wallplate bracket, a claro wall plate, and then a caseta lamp module.
Depending on how your current lightswitch is configured, you may be able to use a two gang wallplate on your current switch and the new switch.
Get these: https://www.amazon.com/dp/B01CGTOK4O/ref=cm_sw_r_cp_apa_D4ghzbM72C0P1
That way you can see where to go but it's not so bright it wakes you up. Then you just do the half-lidded thing to try to stay half asleep and poop. Voila!
Would probably be better to just get a light switch cover like this, and put the Hue Dimmer on top of that, or get a 2-gang cover and put the Hue Dimmer next to it.
Also, I'm pretty sure the Hue products do not require an internet connection, but at least a LAN connection for the Bridge to speak with your phone. The Hue Dimmer and Hue Tap communicate directly to the Bridge, which then communicates to the bulbs, so no internet connection needed there either.
pull the bulb out and buy a double cover from homedepot, thatll get you going and safe for today.
https://www.amazon.com/Leviton-88006-Combination-Wallplate-Thermoset/dp/B000HP5INW
then while at home depot buy a new switch, and remove that light bulb holder.
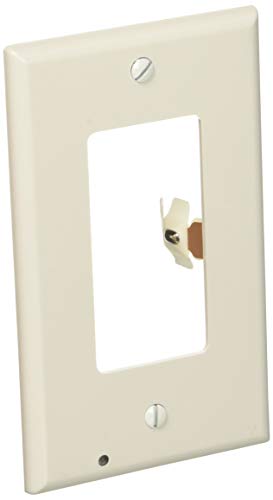
You could use something like this. You replace one opening with a non rocker cover that looks like a switch but doesnt move. Not ideal but works
https://www.amazon.ca/gp/product/B075M518YN/ref=ppx_yo_dt_b_asin_title_o08_s00?ie=UTF8&amp;psc=1
I guess the true solution would be to remove the 3-gang for a 2-gang box and repair the drywall but not sure its worth that effort.
Just block them off.
decora
toggle
Light switch cover (I also need this)
Have your front door area decorated as Platform 9¾
Have different rooms as House common rooms
Laminate or otherwise reinforce this and place in your front garden
Cushion covers
Looking at this stuff is making me want it all.
The device in your picture is called a 3-gang plate.
My solution when I needed to do this in my home was to get a Samsung Smartthings hub. It's compatible with Alexa plus a ton of other stuff so it's a sensible purchase. I highly recommend it.
Once you have Smartthings, you can get any z-wave or zigbee devices and they can be controlled either through the Smartthings app or through Alexa.
GE Z-Wave switches: https://smile.amazon.com/gp/product/B0035YRCR2/
3-Gang Paddle plate:
https://smile.amazon.com/gp/product/B0000V2UMU/
By regular, you mean the small “toggle” switch instead of the large flat “decora” switch? You can find some switch plates that mix and match between the styles but I’m not sure if you’d find one decora flanked by two toggle. You could always switch the toggles to decora as well to get a uniform look. Alternately, since you’re hard wiring the one you’re replacing with the pico you could push it to one side so it was toggle-toggle-decora like this one
The pico itself and its wall mount can go anywhere you put a decora. Hell, since you’re not hooking it to power you could put it anywhere you want! Here is a pico/wall mount bundle (though it’s actually $5 cheaper to buy them separately since you wouldn’t use the wall plate in this bundle in favor of the combo one above.)
Caseta does require a hub called smart bridge pro to integrate with HA, as it speaks its own proprietary wireless protocol. The “pro” part is important, a normal bridge won’t report the pico button presses you need to listen for. You can find them around $70 on eBay. A better deal, if you want/need a dimmer to use elsewhere in the house, is this starter kit (note the pro bridge) that you can find for $110-130 as the dimmer runs $50. The msrp for this is about $200 (and it’s seldom on amazon)
Lmk if you go this route and I can send you a config snippet to translate the pico presses to turn off/dim/change color on hue lights. It also requires a custom component that you use instead of the built in one (though there’s been talk of merging them). It’s super simple, you just grab it and drop it in the custom component directory.
It is a thermometer apparently
https://www.amazon.com/ic-innovations-12100-Thermometer-Plate/dp/B000H5TD6A
Note: This statement only pertains to running cat 5e for computer networking, and not for audio video / other uses.
To write your house for a network, you'll run your wires like you would for telephone back to a central location. You can leave them hanging out of the wall but it's best to terminate them into either a structure wire panel, or into an X by Y wall plate. From there, you would use a switch / hub / router. At that point, you build your network as desired. If you want to know how to build a network, that's a much more involved answer.
An X by Y wall plate is just like any other wall plate in your house, but instead of having 1 or 2 RJ 45 jacks, would have multiple rows of them. A structure wire panel is kinda like a circuit panel for your low voltage stuff (structure wire). If can be a central hub for your Audio Video / Network / Phone systems, or any combination of the three. The advantage of a panel is it puts the wire and some of the equipment behind a wall, giving a cleaner look.
I got 3 gang plates with 1 or 2 smart switches each. I'm sure there are 4 gangs out there as well.
3 gang, 2 smart switches: https://www.amazon.com/gp/product/B075MQ7LPN (previously I bought the leviton, but it was too cheap and it cracked)
3 gang, 1 smart switch: https://www.amazon.com/gp/product/B0015APNOC/
Hope that gives you a starting point to search from.
I have the same issue so i went with the following:
1 x Lutron Connected Bulb remote
1 x Cree Connected Light bulb
1 x Lutron PICO-WBX-ADAPT Pico Wallplate Bracket
1 x Lutron Claro Wall Plate
I leave the light permanently "on", and removed the chain. The bulb is controlled by the remote, which i then put on the wall outside the storage closet so it looks just like a normal light switch for the room.
All up, about $50, no wiring needed, looks like it is meant to be there, and best thing, if you end up expanding your Home Automation with a hub, the remote talks to Wink (although Wink are having trouble with the cree connected bulb lately. The remote also works with GE link bulbs, but you need a Wink hub for that to work.
Adventure time ! Woo light switch I just collected all the toys from McDonald's where I work. I think I have a few extra.
If you need extra wall plates, Amazon has some good ones that look just like the ones from Lutron. Currently, a 10 pack is $17.50.
They also have double gang and larger gang sizes if you need them. I've got about 20 of their double gang plates in my house, and they look nice.
And....? Scroll down and look at what other people also bought. You'll find this switch plate.
oh wow the dimmer is a great idea! i never thought of that, i found this on amazon a while back, sadly no dimmer :-/
Arcade Light Switch Plate Cover, Single Switch (White/Red/Blue), 1-Gang Standard Size Rocker Wall Plate, Game Room Decorator, Kid Bedroom Wallplate, Faceplate Replacement https://www.amazon.com/dp/B01I2TPJN8/ref=cm_sw_r_cp_api_i_BjccBb3W3BV55
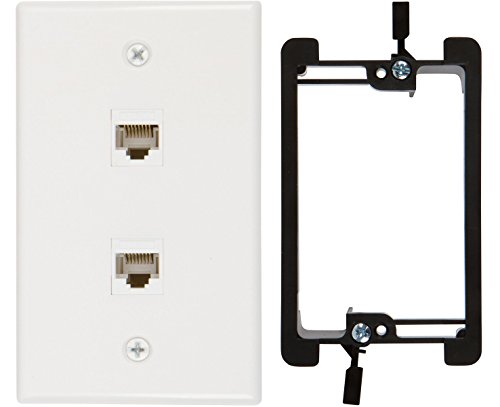
>So 2 Ethernet wall plates per room or is that in addition to the 2 that will terminate in the closet?
No, just a single plate with 2 ports. There are 4 ports, 6 port or even 8 ports wall plate as well
https://www.amazon.com/Buyers-Point-Female-Female-Voltage-Mounting/dp/B01EMKYYFA/
>or is that in addition to the 2 that will terminate in the closet? And then 4 extra cables to the panel above where my future media center may be?
Your closet will be the terminating/originating point so it will be full of ethernet cables. You terminate all those cables into something called a patch panel. Then you wire the patch panel to a switch. Your modem/router will ideally be close by but it's not a requirement, it will work with any of the port throughout your house.
>
From each room's closet to the wall platesor from a single central area that I imagine will host a switch and that isn't too far from where the modem/router will be?A single central area to all the rooms in your house. That's what I mean when I say closet. Most people keep that central patch panel, switch, modem and router together in a closet.
You need 3 gang plate but since your only going to be using 2 gang. Use this plate, this switch blank. Left switch left alone, center change to switch blank, right smart switch size opening. Sorry, but I didn’t search down the links in light almond or ivory (I can’t tell from the pic which color you have), but this is the concept you need.
Alternatively you could change the left switch to decora style, use a decora switch blank in the middle, and smart switch on the right, with a 3-gang decora plate.
Again sorry that I got you all white link (it was faster) but whichever route you take you’ll be able to get the components in the correct color.
Adventure Time
these for the light switches :D
This?
https://www.amazon.com/Smooth-White-Gang-Combo-Plate/dp/B07HLS3Y2R/ref=sr_1_2?crid=2KHUDIX0LIHSY&amp;keywords=3+gang+wall+plate+with+blank&amp;qid=1566242385&amp;s=gateway&amp;sprefix=3+gang+wall+plate+with%2Caps%2C231&amp;sr=8-2
Not that I'm aware of. Your best bet would be to get a light switch plate that has an additional switch slot or something like this and a lightswitch cover. Put the double plate over the single switch, stick the switch cover over the switch in the ON position, and use the hue dimmer's sticky mount on the blank switch area.
It's a couple extra bucks, but won't leave any marks when all taken down.
Crude Mockup
There are lots of options. Here are a few.
&#x200B;
Use a low voltage plate, run your cable out the wall and either terminate ends and plug directly into switch or into a patch panel:
https://www.monoprice.com/product?p_id=3997
&#x200B;
Use key stone plates and terminate in the wall at the plate and then use patch cables:
https://www.monoprice.com/product?p_id=6837
&#x200B;
Use a structured media box, either recessed or surface mounted. Can install a small switch in these too:
https://www.amazon.com/Leviton-47605-21E-21-Inch-Structured-Enclosure/dp/B00022749G/
Assuming you have SmartThings (based on the /r), you can use any Z-wave or Zigbee switch. I've tried multiple (reputable) brands, based on what's on sale, and my experience has been they're all pretty much the same. But all mine look like modern paddle switches, there are other options out there.
It's debatable, but I'd call the 'gold standard' to be the GE switches. I was just providing a link to them in a thread yesterday and noticed they were on sale for $33, which is a damn good price. Looks like they rolled out an updated version so they're discounted, and personally I don't think the upgrades mean much. I just picked up 4 more, because... why not.
When those aren't on sale I've been going to Zooz. I like their small company attitude and they have terrific customer support. And they frequently have sales. You can get them on Amazon, but the sales are on their website.
These are the types of wall plates that I use. Easy to find in single, 2-, 3-, and even 4- gang. I have a custom made 7-gang at my house, so everything I've bought since was done to match that style.
But again, all these are because I wanted modern paddle switches and the "decora" style wall plates. You can get smart switches in traditional rockers, or modern version like the Caseta switches (which still use the decora shape).
How about $15?
Frankenstein Switch Plate Cover (Toggle, Grey) https://www.amazon.com/dp/B079SMKJGJ/ref=cm_sw_r_cp_api_i_FEf7CbQQDFM6Q
I want to do something similar to this
https://www.amazon.com/SnapPower-Guidelight-Outlet-Coverplate-Lights/dp/B01CGTOK4O/ref=sr_1_17?ie=UTF8&amp;qid=1474575727&amp;sr=8-17-spons&amp;keywords=snap+on+wall+plate&amp;psc=1
For my last birthday, my brother got me this cool lumos light switch. There are lots of options for similar products online and it's a project that you could probably easily make yourself with supplies from a craft/hardware store.
I had a friend give me a wall transfer once that she made with her cricut. It looked something like this and it's been on my wall for ages. Same friend also made me a couple pillows with the same machine that had Dumbledore quotes on them. Imagine this but with "Happiness can be found even in the darkest of places..." on it.
I've also given out an "After Harry Potter" set of books before. For those who read Harry Potter and think "what now?" I'm sure this could be catered to the receiver, but the set I gave my friend had Miss Peregrine's Home for Peculiar Children, Lev Grossman's The Magicians, a printed and spiral bound set of Pottermore writings (or the ones that were available at the time), and The Unofficial Harry Potter Cookbook. I think I had one or two more, it was a couple years ago.
I also handmade a pair of Luna's radish earrings for a friend once. I followed a tutorial online and it was surprisingly easy - just required a pair of earrings, some wire, and a few beads and they looked great.
I guess it all depends on what kind of gift you want to give her. There is a Harry Potter application for just about everything. If your girlfriend doesn't have a lot of the standard merchandise already, you might try just checking out the local bookstore. With the release of Cursed Child, most bookstores in my area now have entire tables dedicated to Harry Potter gear. Last time I was at a Barnes and Noble I walked out with a Marauder's Map blanket. I've been sorely tempted by that 3D Hogwart's puzzle a time or two as well. And when I went on the WB studio tour, I got this really cool wand necklace. It comes in an Ollivander's box, though it is a bit pricey.
Good luck. Happy birthday to the gf!
3 gang 1 blank toggle plate
https://www.amazon.com/dp/B00GCFULJW/ref=cm_sw_r_cp_apa_i_N7dwDbV9ZW08P
zooz zen24 toggle style to keep uniform
http://getzooz.com/zooz-zen23-24-toggle-switch.html
Man, you need a nice cover plate now!
First things first, we need to know the actual product you're using. There is no "Ring Pro 2." There is either the Ring Video Doorbell 2 or the Ring Video Doorbell Pro.
They have vastly different power requirements, and one will be doable without much modification and a basic transformer and chime swap (the 2), and the other will be complicated and require modifications, possibly an electrician, and a way to cover them (the Pro).
If it's the 2, you can install a Nutone C915 16VAC@10VA transformer in the box where the AC power comes in (the Nicor box is split into two halves, high and low voltage). Be sure the breaker that powers the doorbell is off first. Then the wires just get swapped like for like to the wires on the back of the new transformer: black to black, white to white, green to green/bare. That would connect to the back of the transformer and it would screw into the high voltage side of the Nicor box.
Then, with the wires leading to the button, you would connect one of them (doesn't matter which) to one of the transformer yellow wires (again it doesn't matter which) with a wire nut and tuck it into the low voltage side of the Nicor box. Then you'll have one button wire and one transformer wire left, and those get connected to a basic mechanical chime. Connect the yellow transformer wire to the trans terminal on the chime, and the other button wire to the front terminal on the chime. Then you mount the chime over the whole Nicor box and new transformer, covering it up, being careful to ensure the yellow wires don't get pinched where they run from the front of the transformer over to the other side of the Nicor box. All the mechanical chimes (per brand) are the same inside, and generally all that's different is the cover. You may need a slightly more expensive chime with a larger cover to completely cover up the transformer and dual box of the Nicor. I recommend going with a Nutone (or Braun, it's the same company) for the chime too. Avoid Hampton Bay and Heath/Zenith, as they're low quality and fail frequently and tend to hum while the battery in the doorbell is charging.
If it's a Doorbell Pro, well, it's not going to be easy. It can't go there and meet code still. The 16VAC@30VA transformer that the Pro requires is way too big for the Nicor box and can't just be mounted in the wall. It would need to be wired somewhere else that meets code and new wires run from it to the existing Nicor location. Not fun or easy or cheap. There are two other options for powering the Pro, though with either you would have no mechanical chime, so you'd have to use a Ring Chime (or Echo devices or the Ring app alerts) to have any sort of notifications at all.
Option 1: Ring sells on their website, not on Amazon, a plug-in transformer for the Pro. It cannot be lengthened or connected to other wiring, you plug it in and run the wire to the Pro, but this will require drilling somewhere to get the wire to the Pro.
Option 2: Replace the Nicor high voltage side with an electrical outlet and buy a cover plate with one blank side (like this) and [one of these plug-in https://smile.amazon.com/MG-ELECTRONICS-MGT1640-TRANSFORMER-40AH/dp/B001DPNQ0M/). You'll also need about 12" of 18ga SOLID NOT STRANDED bell wire. It can be more than 2-stranded if you use thermostat wire, for example, which generally has a sheath on the cable but comes with 2-6 wires depending. Sheathed cable will look better, and if you can find white, even better. Your local home center should have it. You can use just bell wire too, which is generally just two wires twisted together and are different colors, but the sheathed cable will look better. Your local home center will have a variety but make sure it's solid core and 18ga.
You mount the outlet into the high voltage side of the Nicor box. Drill a hole in the blank side of the cover place where it looks nice and is big enough to pass through the wire you're using. Strip both ends of the bell wire to about a half inch. Do the same with the button wires. Attach one of the leads of the wire you're using to one of the button wires with a wire nut. Next take the Pro Power Kit v2 and peel off the tape to expose the bypass mode holes on the long edge opposite the two black wires. (You won't use those black wires. Just leave them there.) Take the other button wire and push it into one of the bypass holes on the power kit and make sure it goes in all the way and tug on it to make sure it's seated and the clamp is biting into the wire. Do the same with the other conductor of the bell wire—insert it into the other bypass hole. Now pass the bell wire through the hole you drilled in the wall plate, and drop the Pro power kit and wiring into the low voltage side of the Nicor box, and affix the cover plate over the outlet and empty space. Connect the bell wire to each of the two outer terminals on the transformer (again doesn't matter which is which, just use the outer terminals if you happen to get a 3-screw model) and tighten the screws. You'll need to remove the screw meant to hold it in place, since your outlet won't have that hole. The orange washer just pulls off and the screw comes right out. Then plug it in, turn on the breaker, wait for the Pro to charge up and indicate it's ready for setup and begin setting it up. Once you know it works, I'd recommend a strip of 3M command adhesive behind the transformer just so it can't fall out since it's heavy and you can't use the mounting screw on that style outlet.
OK, that about covers it, if any of that makes sense to you.
I was thinking more along the lines of these. An in-wall enclosure or a small rack mount.
https://www.amazon.com/gp/product/B000VDPBXM/ref=as_li_tl
https://www.amazon.com/dp/B00022749G/ref=cm_sw_r_cp_apa_i_Ee4rDbAZZB0DH
Source: https://www.amazon.com/gp/aw/d/B000KLAUD6/ref=mp_s_a_1_18?ie=UTF8&amp;qid=1518722881&amp;sr=1-18&amp;pi=AC_SX236_SY340_QL65&amp;keywords=light+switch+plate&amp;dpPl=1&amp;dpID=51d%2BJSrH0hL&amp;ref=plSrch
For lights, I definitely recommend Hue! I've had color bulbs in and on almost constantly for about 3 years and haven't had to replace them yet. If you're worried about someone accidentally turning off the switch, you can get guards like these or Lutron makes a dimmer that should work well [here] (https://www.amazon.com/dp/B07RJ14FBS/ref=cm_sw_r_cp_apa_i_PsVADbPK2QAEW).
Also not a certified electrician, but you can use a blank wall plate, or if you have a multi-gang switch box, you can use something like this to use the same plate you already have: https://smile.amazon.com/dp/B075M518YN
(our local code requires one switched light in every room, and the builder didn't install ceiling lights/fans, so they switched one outlet in every single room - I hate switched outlets, and we installed ceiling fans with lights, so I removed them)
it's actually part of a two switch box so I figured I'd just pull the one switch and install a cover like this
May or may not help you depending on the trim etc in your home I have tall mop / trim boards on the floor. I removed one cut a small access hole. Then straight up from that I created a hole and used one of these: https://www.amazon.com/Arlington-LV1-10-Voltage-Mounting-Bracket/dp/B000UEAJWU?th=1 paired with https://www.amazon.com/Buyers-Point-Female-Female-Voltage-Mounting/dp/B01EMKYYFA/ref=pd_lpo_vtph_60_tr_img_2?_encoding=UTF8&amp;refRID=ZXV79125ZGP0YVBZ5BEN&amp;th=1
you simple plug an ethernet cable into the back drop it down into the wall. Then where my small access hole was I cut a notch and drilled a small hole this allowed the ethernet cable to drop through the floor. Secured in the notch the mop board was put back in place. This hid the cables and meant you could not see any of the work that was done. In the room below I did the same thing but with the crown moulding hiding my notch. This allowed me to run the cables inside the wall with minimal effort / damage / repairs with the two ethernet cables running to another wall plate thus I have plug and play access to the router. I ran dual lines however you could run just 1 and attach another network access point (router / switch etc) To add extra ports or to extend wireless range.
The other option is install another router downstairs and use it as a wifi extender / repeater. However since I prefer hardwired connections the above sufficed for my needs.
Amazon link.
Pick up a plate with 2 openings that covers a 3 gang box:
https://www.amazon.com/Smooth-White-Gang-Combo-Plate/dp/B07HLS3Y2R