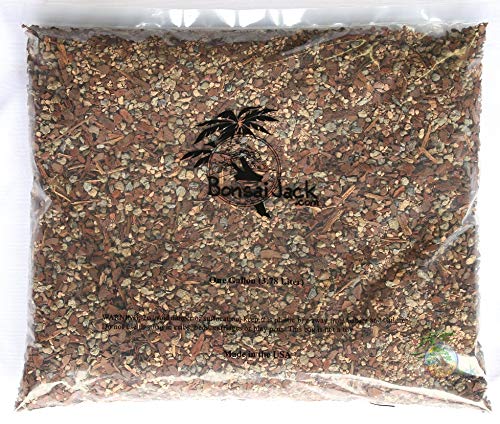
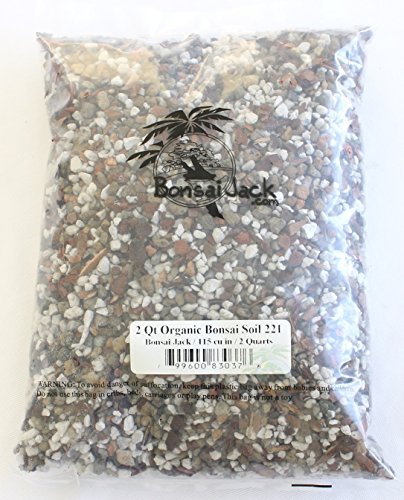
Best garden soil according to redditors
We found 289 Reddit comments discussing the best garden soil. We ranked the 135 resulting products by number of redditors who mentioned them. Here are the top 20.
We found 289 Reddit comments discussing the best garden soil. We ranked the 135 resulting products by number of redditors who mentioned them. Here are the top 20.


Combination of parts from Amazon and ebay. Not all of them are necessary, fittings and Brute trashcans and such are from Home Depot.
Runs the lights, pump, fans, and other electronics. Kind of excessive. 5A would be enough.
https://www.amazon.com/gp/product/B01E6S0JS4
Don't cheap out on these. Crappy plastic check valves really screwed me early on.
https://www.amazon.com/gp/product/B01KZOCQMA
Needed for priming the pump or flushing the nutrient reservoir.
https://www.amazon.com/gp/product/B018HMFG7O
This was roughly 4x what I actually needed.
https://www.amazon.com/gp/product/B00B8PAAJW
Transplanting the sprouts into this was weird, but they took well to it.
https://www.amazon.com/gp/product/B004IAM29K
Everything I chose was 5/16 inner diameter.
https://www.amazon.com/gp/product/B01CGVJ9QG
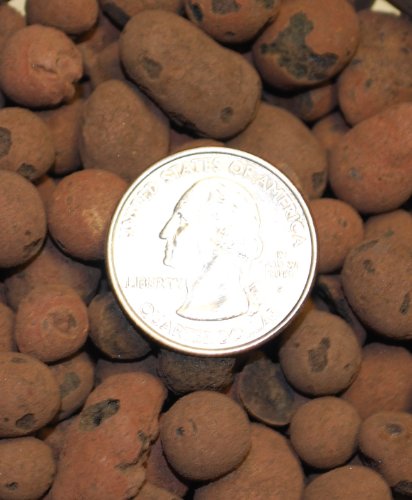
Hydroponic pots, specifically for Leca substrate.
https://www.amazon.com/gp/product/B00N9AE9BE
I think that dripping from two feet aerates the water naturally, but this can't hurt.
https://www.amazon.com/gp/product/B00L17IPEO
https://www.amazon.com/gp/product/B01339F5ZO
https://www.amazon.com/gp/product/B01339G2F6
Wait for sales on these! The 270W light is $80 now, but I got it for $60.
https://www.amazon.com/gp/product/B00RWQ4B50
To make the door airtight.
https://www.amazon.com/gp/product/B011CXIPO6
This will be enough for a bunch of grows. A little goes a long way.
https://www.amazon.com/gp/product/B017H73708
Will also last a long time. Only takes a few drops to balance a gallon.
https://www.amazon.com/gp/product/B000BNKWZY
This thing was bigger than I anticipated.
https://www.amazon.com/dp/B00E582DV2/
For making the irrigation loops.
http://www.ebay.com/itm/302176243137
Loud as heck. Ended up using a quieter fan I had around.
http://www.ebay.com/itm/272508816366
Quiet as heck. Rated for 2.1GPM. It's enough, but I think that a 5GPM pump would have been better.
http://www.ebay.com/itm/272403296601
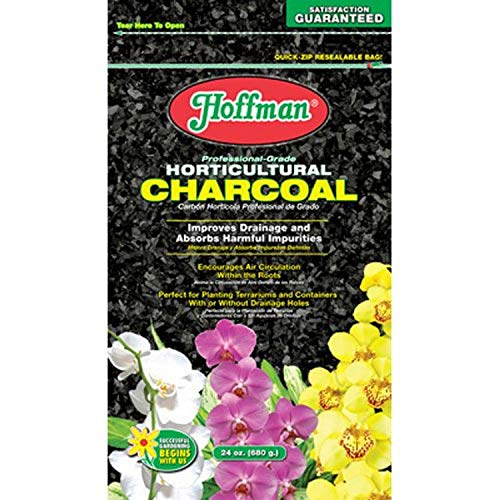
If not for grilling, it might be horticultural charcoal. Some people use it to amend the soil.
https://www.amazon.com/Horticultural-Charcoal-Perfect-Plants-Containers/dp/B07GBCDG4F
LOL I refuse to paint flames bahahah!
And the top-dressing is red crushed coral, but underneath is my own mix of half pumice, half coconut coir-I found it to be the fastest draining mix that keeps my plants happy :D
As far as the dirt for it goes, i see a lot of success with Miracle Grow Organic Potting Soil. Gotta make sure its organic and doesn't have other materials that might leech nutrients and chemicals. Miracle-Gro Organic Choice Potting Mix is what many use I think.
Found this on amazon. Looks like him
It’s actually a bonsai soil mix from Amazon!
Bonsai Soil Mix - Premium Professional, All Purpose, Sifted and Ready to Use Tree Potting Blend in Easy Zip Bag - Akadama, Black Lava, Pumice & Charcoal -"Boons Mix" (1.25 Dry Quart) (1.25 Quart) https://www.amazon.com/dp/B01N117UG8/ref=cm_sw_r_cp_api_i_qUlWCbC30A0HC
Lithops are tricky little buggers to take care of. They're very sensitive to water aka very prone to rot. In the summer, they're dormant and should receive little to no water. Every 10 days sounds excessive; I know one grower went 10 months without watering hers due to its unique growing cycle. I'm guessing your friend is overwatering and these might be a goner.
Additionally, I think using straight Miracle Gro cactus soil is too rich for them. Again, lithops are particularly sensitive to water and that potting mix has too much organic material in it that will hold too much water. Some people have had success with 100% inorganic substrate, such as potting in all pumice. I personally use a bonsai mix similar to this--no bark, mulch, etc.
Good luck!
If you're looking for gritty mixes, I know a lot of people swear by Bonsai Jack but it is pricey. I've also heard a lot of good things about Fat Plants!
Personally, gritty mixes didn't work well for me because I kept forgetting to water, so I just bought some coco coir and pumice (both readily available on amazon!) and mixed it in equal parts and then potted my plants in that. It's worked out nicely so far!
I tried to be frugal with this tank and do DIY where I can.
So that's about $170 for tank's setup, not including fish or plants! I think that's pretty good for a 40B :D I used old filters and heaters from my 29G that I had to take down when I moved here. I will have to upgrade the filter soon.
The plants I have in there now are:
Planted Aquariums Central is so amazing! I always try to order my plants from them. They have great prices, super healthy plants, and always include bonus plants with my order.
My stocking list is still in the works. I want a large school of Glowlight Tetras (have 5 in the tank already), a school of corydoras, and a centerpiece fish. I'm having a hard time deciding on the centerpiece fish. Many people have GBRs and I want other options I have before getting them. If you have a suggestion, let me know!
That light will rock a 2'x4' area. Get the 3000k version. It is great for flowering, better than 3500k, and the sheer light output of them means they will veg well also.
If you want what is probably the best coco mix to use, I would suggest Mother Earth Coco Plus Perlite Mix
It is probably the best quality coco I have ever seen. Already has the correct amount of perlite in it, and it is so clean that if you pour 0 ppm water through it, run-off comes out at 0 ppm. All you have to do is charge it with cal/mag and start growing. It is the only one I have seen that doesn't need flushing endlessly to remove salts before use.
Switch to coco and you will not go back to soil once you have it mastered. I run DWC now, but my experience with coco saw roughly twice the growth during veg than I did previously in soil.
If you plan on doing plant training to establish more main colas on each plant, 4 plants in 3 gallon fabric or air pots will fit nicely.
When you are ready to transplant, get a big tub of room temperature water to dip and soak the rootball in to remove the soil around the roots. Put a generous amount of Mykos on the sides and bottom of the hole in the coco where you plan to set the plant. Be gentle in these steps and you should have no problems.
An air pump and stone are cheap, and should solve your problem. Air bubbles are totally key in hydro reservoirs.
Also try to keep the temperature of your reservoir (and your whole grow area, unless you have CO2) below like 80F or you're gonna have a bad time. This applies to soil as well.
Consider trying a non-organic fertiziler. Organics are great and can give better results, but they expensive, and more likely to crap up your system and smell weird (in my experience).
Soil has a whole bunch of drawbacks IME. It can be stinkier indoors than a well run hydro system (especially if you use awesome worm teas and such). You'll probably get a lot more bugs, especially fungus gnats. You have to be more careful feeding the soil plants, because if you feed them wrong, it's not as simple to detect and fix as with hydro. It's also amazingly easy to overwater in soil.
You can get awesome results with soil or hydro. I personally prefer hydro because it's easier to keep clean (once you get a good routine set up), and the plants grow really fast with great results. If you really aren't cool with the hydro setup you've got going now, consider coco drain-to-waste instead of actual soil.
For the implementation can you germinate them in Jiffy Pellets? That way you have consistency in a small package. The down side is if the netting could interfere with initial root development. I leave the netting on and have never had a problem with a wide range of plants.
https://www.amazon.com/Count-Jiffy-Pellets-Seeds-Starting/dp/B000EHJN7K
You can fit 40 small Jiffy Pellets in a 5 gallon bucket. Much more in a 20 gallon tote.
http://imgur.com/a/6zqbj
20 gallon tote:
http://www.homedepot.com/p/HDX-20-gal-Tote-2020-0108/202523597
I keep the lights on to help prevent molding. You may want to see the results of germination under etiolation conditions which is the nice thing about the 5 gallon buckets.
For a 5 gallon bucket, use a "40 watt equivalent" white LED bulb. You can cut a hole in the bucket and snug fit a light socket like this below. A "60 watt equivalent" LED bulb gives twice the light if there's stem elongation issues from too low of lighting levels. Also use higher color temperature bulbs.
http://imgur.com/a/9ykG6
Use a LED bulb that says "suitable for damp locations" or something close since the RH is going to be around 90% if you don't have any ventilation going on.
Wrapping the base of the bulb and where the light socket meets the with electrical tape for protection from the energized parts of the inside of the light socket is a good idea. Here's an example of how this tape wrapping looks:
http://imgur.com/a/XLd3c
edit clarification
Yeah, those Zilla kits all are pretty much terrible. You're better off not using a kit at all actually, since they are way overpriced compared to buying/making the things you need individually.
Definitely go for the 20 gallon long tank. That size tank is actually ideal for a single adult leopard gecko. Instead of the lights, you'll want to heat the tank with an under tank heater under one side that is controlled with a thermostat. That's not optional, since a UTH can get very hot if it isn't controlled. I use the Hydrofarm thermostat, and recommend it. It certainly isn't the best out there, but it does its job and you can't beat the price. Be sure to have a digital thermometer that can read the actual surface of your gecko's substrate, not the little ones that stick on the glass. A thermometer with a probe alongside an infrared temp gun works wonders.
I'd personally also ditch the reptile carpet for tile as well, since my guy kept snagging his toes and jaws on the carpet and the tile is a breeze to clean, but if yours does fine with the carpet it should work fine, just don't use sand. Be sure to have three hides: one on the cool end of the tank, one on the warm end, and a humid one. Exo Terra is my personal favorite for hides, but store brand ones work fine, or you could even make your own.
I can't really say how old your gecko is without pictures, but if you got it from a pet store it's probably pretty young. Be sure you dust its food with calcium and vitamins. Vitamin D3 is particularly important. Repashy Calcium Plus is great, since it's an all-in-one powder, but I know alternating Repti-Cal and Reptivite works as well.
Crickets are a great thing for it to eat actually, better than mealworms. However, variety is always nice, but I don't have a lot of tips on getting a gecko to try new foods since mine isn't picky. Dubia roaches, if you can get over the ick factor, make an even better feeder than crickets, and phoenix worms and Calci-Worms are also great options. I'd stick to feeding your gecko as much as it can eat in a night if it's a baby. You do need to catch and remove any crickets that aren't eaten in 15-30 minutes. I always try to corner them and grab them one at a time, even if that can take a while.
Also, be sure you're gutloading crickets before feeding them as well. Basically, feed them nutritious food before feeding them to your gecko. I recommend either Bug Burger or Cricket Crack, but there are a lot of options out there. Toss in some bits of carrot, potatoes, greens, or fruit as well, or use some gel polymer to keep them hydrated.
Sorry for the massive wall of text, but hopefully this helps! Good luck with your little buddy!
start them in that coco coir. also more seeds are available.
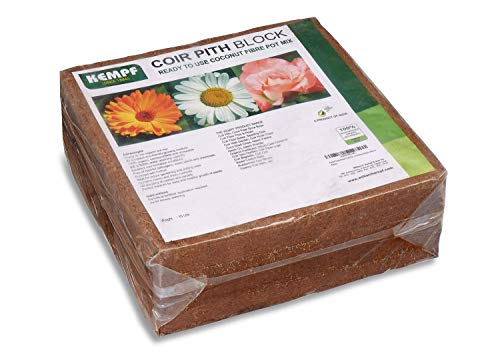
http://www.amazon.com/Kempf-Compressed-Growing-Potting-10-Pound/dp/B003MOD2HY/
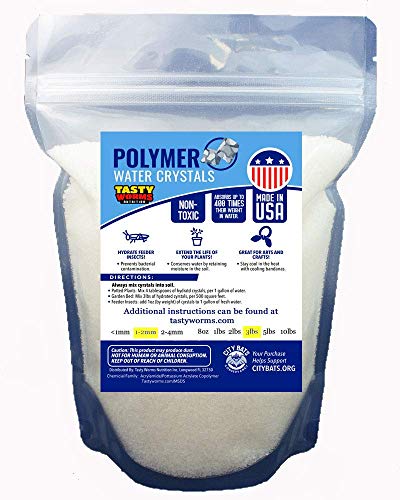
Polymer crystals
You're very welcome! I'm happy to share all that I've actually recently learned. I've been searching for concise, helpful information for a while and found it at the same time I was discovering the gritty mix. This person Al (alias tabla) shares a lot of amazing and accurate information. I'd highly recommend browsing gardenweb and reading specifically Al's posts. I'll summarize what I've learned from Al and provide extra links at the end. Please note that this information pertains to containerized plants, not plants that are growing in the ground.
Six factors affect plant growth, that is air, water, light, temperature, soil, and nutrients. Whichever of the six is most lacking will be the most limiting. For succulents, water, light, and temperature are pretty well understood. For example, we all know a succulent without enough light will etiolate. Obviously, it's seeking more light. But what I've learned is that the plant is doing this by putting all it's energy into stretching. This extra expended energy can lower it's immune system, making it more prone to pests and infection.
I've had mealy bugs before. I used an insectisidal soap but lost a lot of my plants. I was searching for a solution to mealy bugs when all the while, the true problem was with my plant's overall health. If I had kept them healthier, they wouldn't have been so suseptible to the bugs. So what was I doing wrong?
I suspected that a lot of the issue had to do with the soil, so I researched on Reddit and saw that people often recommended Al's gritty mix. And this was the solution that made the most sense to me. Let me emphasize that fixing the soil for your plants will win you 90% of the battle to keeping your plants healthy. If your plant has healthy roots, you will have a healthy plant. Let me explain why.
The roots play a role in receiving all but one of the six elements: light. One particularly important element is air. The roots need to be able to take up oxygen as well as water. This is why root rot happens. It's not because of too much water. It's because the water causes a lack of oxygen to the roots. (If it were too much water, how would plants, even succulents, be able to grow hydroponically?)
Air is the reason why the gritty mix is so good for plants. It is a potting medium that when done correctly, completely elimiates the perched water table and gives your plants roots enough air to breathe. The recipe is simply 1 part pine bark, 1 part turface, and 1 part granite. Before I get into what these things are and why, know that the main take away is the particle size. You need to make sure the particles are approximately 1/8 of an inch each, by screening/filtering out the components.
A perched water table (PWT) is the saturation point where the capillary action in the soil is canceled out by the force of gravity (source). Every different type of growing medium has a different perched table and the container size does not affect the height at which the water perches. This is why taller pots are often better for your plants: they leave a lot of "unpearched" aeraeted dirt available for your plants roots to thrive.
Instead of learning about a PWT, people are often taught that drainge is important, especially for succulents. Then, their natural reaction is to use a sandy mix, to add rocks, or to add a drainage layer. Unfortunately, these are not good solutions. Sand is very fine and will cause water to perch even more. Rocks added to a soil won't do anything because you still have that fine soil in there, retaining a lot of moisture in between the rocks. But perhaps the most interesting is a drainage layer.
Remember that with PWTs, a particular growing medium has a particular PWT height. The height is correlated to the size of the growing medium's particles. Adding a drainage layer such as a layer of large rocks underneath organic potting soil, actually RAISES the PWT, reducing the space your plant has to take up air. Since the medium has not changed, the PWT remains at the same height above the drainage layer. In other words, it's as if you've just shortened your pot. Crazy, right?
If you want to experiment with a PWT and have a plant potted in organic potting soil, you can water it and let the water stop flowing out. Then, with your plant over the sink, lower it slowly and jerk the pot upward. All that excess water that drains out - that's the PWT.
The goal here in explaining all this is to show why elimiating the PWT is beneficial. You could probably grow a plant in a pot of 1/8 inch sized particles of glass than in a pot organic soil. Remember though, I'm just talking about potted plants. Obviously plants that are planted outside in the ground do fine, but I believe that's because there's no PWT issue.
Going back to the gritty mix - this mix is fabulous because it eliminates the PWT, which means it eliminates the issue of "overwatering". The recipe calls for three ingredients: pine bark, turface, and granite. Pine bark is the only organic ingredient, but it's just a filler. It's water retention properties equal roughly the average of turface and granite, so it is a cheap alternative to using just turface and granite.
Personally, I skip the pine bark because it was expensive and because it can decay in the long run, causing some unwanted odors. However, it is perfectly fine to use it if you please. Most people recommend it, although I don't think it's necessary.
Turface is key to the gritty mix. Turface is clay that has been fired to a certain temperature so that it does not break down. This ingredient is so important because it retains a lot of water while also letting water drain freely. It sounds like a contradiction, but it works because it's so porous. When you first use turface out of the bag, you'll actually here it "sizzle" because all of the water is going into the turface and rehydrating it. Over time, turface will slowly give off water, keeping your plants roots hydrated without drowning them.
Granite is the opposite of turface in terms of water retention. It retains little water and is used to balance out the turface's water retention. Knowing this, you can customize the ratio of turface to granite to accomodate different plant's water needs. However, don't take this to mean that if you use 100% turface, you won't need to water your plant as often. That isn't necessarily optimal for the plant. (Tip: if you buy crushed granite as chicken git, be careful to read the label and make sure it's not crushed oyster shells).
If you're curious, the water retentativeness of other common substrates are ordered by: turface > pumice > perlite > granite.
Let me just say again that putting your plant in high quality soil will significantly improve your plant's health, which will help you avoid a lot of issues with your plant in the long run. Using the correct potting medium is key! I'll touch briefly on water and nutrients. If you would like to know a little more about light, I can elaborate there as well.
Water and nutrients should go hand and hand, especially in a gritty mix where there's little organic matter to provide the nutrients a plant needs. You should fertilize your plants at each watering using Foliage-Pro or any fertilizer with a 3-1-2 NPK (nitrogen, phosphorous, potassium) ratio. The reason is because nearly all plants, with very few exceptions, take up nutrients in this ratio. You will see bloom booster fertilizers increase the ratio of P in the mix, but this is not ideal and again, I'll explain why.
Plants need a 3-1-2 ratio of nutrients. If you increase P, it's essentially the same as decreasing N and K. When N is reduced, it slows vegetative growth without reducing photosynthesis. Since vegetative growth is slowed by the lack of N, yet the leaves are still producing energy, it leaves a surplus for the plants to spend on producing flowers and fruit. This may be great for plants that are meant to last for a short period of time, but if you want your plant to last longer, using anything but a 3-1-2 fertilizer can be limiting because the excess nutrients are a limiting factor.
If you are fertilizing at each watering, which I recommend, you should fertilize at half the recommended dosage. You don't want to make the water too "salty", in a sense, to the plants. Too much fertilizer can cause the same phenomenon we see when we cure pork with salt. The salt will extract the water from the plant's cell, resulting in what we call fertilizer burn. On regular plants, this looks like brown burnt tips on the plants leaves, as opposed to the whole leaf being burt due to sunburn. As the plant releases water through it's leaves, it drags the fertilizer to the tips. Salts accumulate there, causing the burn pattern. (I'm actually not sure what a fertilizer burn looks like on succulents - I should check on that).
The larger pot is good given you want the base of the trunk to beef up. Trunks are grown by having a lot of foliage and foliage needs lots of roots and lots of roots needs lots of soil. You should water it when the soil becomes dry. In the summer this will be pretty much every day it doesn't rain.
What you do next depends on how aggressive you want to be. I'm guessing you used regular potting soil in the repot and didn't reduce the existing soil from the original pot, just slip potted it? If so you should get some actual bonsai soil, get rid of all the soil on the outside of the original root ball, but not all of the soil, leave the core root ball with soild and put it back in your large pot using only the bonsai soil. This soil will promote good drainage and make it easy for the plant to quickly build a big root system. Then fertilize heavily until July at which point back off a bit until fall.
There isn't much to style until it grows a lot and develops a lot more branches. You can direct the growth to what you want but since you like the horizontal nature it has now it will be a while before you have additional branches to style. Also, I see you have it outside, but be sure to keep it outside year round. Given you have it on a balcony you might want to provide it some wind protection for a while after repotting and during the coldest days of the year.
Nice cheap light
https://www.amazon.com/gp/aw/d/B00XC3LBI2/ref=mp_s_a_1_20?ie=UTF8&qid=1498932753&sr=8-20&pi=AC_SX236_SY340_QL65&keywords=RoleadRo&dpPl=1&dpID=51mUVXHUvzL&ref=plSrch
Seeds
https://www.seedsman.com/en/cannabis-seeds/flowering-type/autoflowering-feminised-cannabis-seeds?dir=asc&order=price
Grow tent
https://www.amazon.com/gp/aw/d/B01NGZ216U/ref=mp_s_a_1_4?ie=UTF8&qid=1498932973&sr=8-4&pi=AC_SX236_SY340_QL65&keywords=grow+tent&dpPl=1&dpID=51K5M7TCfmL&ref=plSrch
Personally I like soil. Easier to diagnose and remedy in my opinion. Can't cheap out on the soil though. Fox farm gives good results and can be found at almost every nursery or online.
Heard decent things about this
https://www.amazon.com/gp/aw/d/B010NQR5WQ/ref=cm_cr_srp_mb_bdcrb_top?ie=UTF8
Inline fan
https://www.amazon.com/gp/aw/d/B06XJYR2R7/ref=mp_s_a_1_15?ie=UTF8&qid=1498933348&sr=8-15&pi=AC_SX236_SY340_QL65&keywords=inline+fan+carbon+filter+combo&dpPl=1&dpID=41zr9rEHVKL&ref=plSrch
If you can squeeze any extra money out I'd put it into the lights.
Also check the side bar and all this stuff can be found in there. I just smoked so I'm feeling especially helpful lol.
Anyway remember it's a weed and will grow you just have to have the patience to let it. Also remember to have fun.
Good places to start.
http://www.growweedeasy.com/basics
https://www.youtube.com/playlist?list=PLHWaWOfju3y4PIoQtO4B6KWQIY6wng_UD
I've coded these posts to upload automatically every week. hope you enjoy the timelapse!
Days from germination: 52
Seeds
Medium
Schedule
Nutrients
Grow Setup:
|Item|Link|Price|
|:--|:--|:--|
|grow tent| https://amzn.to/2oeJ92h |$110|
|inline fan| https://amzn.to/2p47iJb |$102|
|grow lights x 2 | https://amzn.to/2nBbdNn |$540|
|blurple light | https://amzn.to/2p3ZaII | $100|
|humidifier| https://amzn.to/2nBQzwC | $71|
|tower fan| https://amzn.to/2nBQzwC | $47|
|clip fans| https://amzn.to/2paof53 | $21|
|grow bags| https://amzn.to/2ontyNK | $13|
|coco coir x 2| https://amzn.to/2omfi80 | $50
some other items:
|Item|Link|Price|
|:--|:--|:--|
| humidity monitor| https://amzn.to/2p47fNy | $10|
| eye wear| https://amzn.to/2oloARE | $15|
| raspberry pi| https://amzn.to/2nrAvO5 | $50|
| webcam x 2| https://amzn.to/2og81H4 | $70|
| ph tester| https://amzn.to/2mJiA4R | $15|
All in all it's cost just under $1000 USD
I actually grew mint in the back of my all-in-one 4.3g planted when I had it set up in my dorm room this spring! It grew like crazy, but that area of my room didn't get much natural light, so all the mint leaves wanted to grow up under the bulb after a couple weeks. It was really neat and made use of the unoccupied space in the back of the tank.
I grew the mint in hydroponic plant baskets that I designed, modeled, then 3D printed. It was originally a personal project idea, but it turned out to be my entry for a 3D printing competition. For my growing media I used LECA, which are those expanded clay balls. The water flooded the b (and plants)askets about 0.5-1" up. The roots were healthy and grew down through the holes and dangled in the water. As far as growth goes, you can always cut mint back as much as you want since it grows like a weed. Everything worked like a charm for me!
No, I planted it in a jiffy peat pellet https://www.amazon.com/Count-Jiffy-Pellets-Seeds-Starting/dp/B000EHJN7K. After it opened its starter leaves I transplanted, removing as much of the peat as possible without exposing the root. Put a layer of the bigger rocks on bottom, set her in there and filled the void with little fish tank rocks, finally topped it with another layer of the bigger ones.
Here's what I have so far and my quick write up.
My dad started the tomato plant that I am using in soil. He had too many for his garden, so I used that instead of starting one from seed in rockwool. My next plant will be started from seed.
I picked up a 5 gal bucket and Lid from Home Depot. <$5.
I cut a hole in the Lid to fit the 3" Net Cups. I put one right in the center. I quickly found out the cup it too small to support the plant so I had to use a support stick. I just bought this 6" net cup bucket lid.
The plant is supported in Expanded Clay balls. I chose this material as apposed to 'Hydroton, Coco coir, Viagrow stones, pearlite...' because from my very little research I found the clay to be the most environmentally friendly and easiest to use, disclaimer: I could be very wrong here.
The nutrient solution used General Hydroponics Maxi Grow. Simple to use, add X scoops per X gal of water. I am about to switch to Maxi Bloom. She is flowering and starting to produce fruit. I do now know when the best time to switch solutions. I am learning by experiment here.
To keep the nutrient solution oxygenated, I used this Air pump,two of of these air stones, and tubing. Any items will do, I used this products because I know an employee of Penn Plax and got them for cost $. Any pump will work, I got a two outlet pump for future expansion.
You should also be sure to have the correct pH for your particular plant. Here is a chart and a great site. I used this pH Test Kit and pH adjust.
It's that simple. Right now the plant is outside and gets about 8 hours of sun. I plan on keeping it outside as long as possible, then will bring it in and have to choose a light source for it.
tl;dr What I used for my first DWC tomato plant experiment. Step 1: Click all links above. Step2: Buy. Step 3: Tomatoes
Edit: Also, Watch this video
Mom found some asparagus seeds last year and wanted to plant them. I checked a few local sites and most suggested that they would not grow very well in our Texas (8b) weather. But, we had some spare soil and containers so we gave it a shot.
We planted a few seeds in small seedling trays. When they were a few inches tall we transplanted four of them to 5 gallon containers in a mushroom compost and top soil mixture, with a little fertilizer mixed in. I was going to chunk the tiny one but Mom saved it and threw it into a 2-liter bottle that had been cut in half, with the same soil mixture. We did nothing but water them, and once or twice fertilize them with a little watered down epsom salt. They grew really well, even the tiny one I was going to throw away.
We didn't bring them inside for the winter, just cut the tops down to about 1 inch and covered it with mushroom compost and some more fertilizer. In January they started popping up shoots, except for one that seemed to have died until a couple of weeks ago. Still not sure it will survive, but it has put out a couple of puny shoots.
She didn't want to put them in the ground permanently yet, since the spot where she wants them is in front of an old shed in her back yard that is going to get remodeled this year. So I bought some cheap 15 gallon containers from the little hippy garden center I shop at.
We transplanted them yesterday. We used the same soil mixture, but threw in about 2 Tbsp of those water absorbing crystals.
They have grown extremely well since the new shoots started coming up. The biggest plant it already almost three feet tall and the thickest shoot is almost as thick as a standard AA battery. I'm not sure she will be able to wait until next year to start harvesting. Actually I am not sure if she is supposed to wait until the beginning of the fourth year, or if she can begin harvesting in the third year.
Next year we'll put them in the ground permanently and hopefully she'll have fresh asparagus for the next 15-20 years. Anyone got any tips, or warnings, for growing these in zone 8b?
depends on what you order...
http://www.amazon.com/Pumice-Small-Grain-Bonsai-Cactus/dp/B00IIUCZH0/ref=sr_1_2?s=lawn-garden&amp;ie=UTF8&amp;qid=1464304365&amp;sr=1-2&amp;keywords=pumice
http://www.amazon.com/Turface-6-Quarts-MVP/dp/B010CQS1N4/ref=pd_sim_86_2?ie=UTF8&amp;dpID=51JmZvEMMVL&amp;dpSrc=sims&amp;preST=_AC_UL160_SR160%2C160_&amp;refRID=10HZTE4HWZ5BR919QXGD
http://www.amazon.com/Hawaiian-Volcanic-Cinders---Hydroponics-Growing-Media/dp/B00E56EPEC/ref=sr_1_1?s=lawn-garden&amp;ie=UTF8&amp;qid=1464304398&amp;sr=1-1-spons&amp;keywords=lava+rock&amp;psc=1
I'm concerned I might actually be under-watering, I've been just splashing a bit of water in the container. Last night I went down and they were bone dry, so I gave them a good soaking, hoping that maybe I'm just under watering. We'll see on that front. Here's the rundown on what I've been doing.
- Growing Medium - Soil - Roots Organic
- Nutrients - Bio Thrive 5ml/gallon - General Organics Grow Box -
- LED light - VIPARSPECTRA ULTRA
I've got this PH Tester and have been keeping my PH between 6&7.
Hmm. I just searched and found this one for $21.41 per 5 gallons. One 1-star review said it was 60% fines, which is a good thing if you're growing mesembs!
EDIT: some other reviewers are saying they received less than what was stated though, and that the pH was too alkaline or something.
This is the best bang for your buck, though yes you can use the Miracle-grow crystals.
Coconut coir, mix it in, makes it fluffy. it's not terribly expensive either. The one I use
Just when you rehydrate.. use a wide container or a garbage bag.
Mother Earth Coco Bale | 5kg |... https://www.amazon.com/dp/B01M69KV51?ref=ppx_pop_mob_ap_share
you have described my set up. its kinda like a shoe box inside a monotub.
i can get two trays in one STERILITE 32 Quart Gasket Box, 4qt of perlite, no liner.
150g dry coco coir, add 750ml boiling water, let cool.
then mix with one qt jar grain spawn, split into two food trays and let get
colonized for 10-14 days.
then uncover put into tub with hydrated perlite with a hydrometer, mist as necessary.
mine are prone to side pinning, but that doesn't bother me one bit.
the cake will shrink, sometimes i flip them and dunk them, others i just bottom or top water depending how what i think it needs.
Here! What kind of mushrooms do you grow?!
No, they need soil with basically zero nutrients and to a lesser extent, acidic. Topsoil has far too many nutrients and will kill them, clay based soils are alkaline and will kill them.
The ideal mix is peat moss mixed with sand and/or pearlite to help it drain. Other common soils are just dead spaghum moss and washed coir fiber.
If you're really looking for something you can get outside, honestly, all of the above are more or less dead leaves and twigs and stuff along those lines (peat moss is just the deal leaf/moss litter that piles up in a bog...mostly moss). If I needed to make something up from outside, I would probably take dead leaves and (dead or alive) moss, wash off all dirt, and try to grind it up into something that holds water, but I would think it would have to be practically all moss for that to work.
My suggested items to bring.
I'm hoping you already planned on the bags, but you're gonna want them compared to pissing and shitting into an empty bucket.
The kitty litter is obvious. It absorbs moisture and clumps shit together. Good for poo. Bad for the volume of peeing you do. Scoop some on top post shit.
The water crystals are for the pee. throw some water crystals in the bottom of the bag to absorb the piss.
The carpet deodorizer is pretty smelling baking soda. Sprinkle that on top to help with any stink.
does the air channel look like it is meant to have "anything" in it? A normal channel will be at or about 5/32" of an inch.
I think your answer may lie in using the expanded clay such as [Nording Keystones] ( http://www.smokershaven.com/browseproducts/Nording's-Pipe-Keystones-100-gram-Large-Bag.html) however if you look around hydroponic supplies you may be able to find a suitable generic substitute, as this is commonly used as a growing medium. The most common form is the "pebbles" which are a trifle large to use in the bottom of the bowl at 8 to 16 mm. The 8mm would probably work, remember these are round for hydroponics, so 16 mm is .63 Inch in a bowl that is only .6 wide, and is 1.5" deep. i mean, they could be broken with a hammer, but I am sure that you can find smaller "expanded clay pellets". ... and I think I have with ones for growing orchids Here on amazon and $9.11 gets you two pounds, as compared to the $8.50 for 100 grams (less than a 1/4 pound).
You put the pellets in the bottom of the bowl to absorb any moisture in the smoke, throw out when they get clogged and dirty (5 bowls approx, on the Keystones).
I have read that some people drive over them with a car. Other folks have even said they have just given up on breaking them down. They toss them in whole.
1/2 inch isn't too bad, really. The ones I have are about 1 - 1.5 inches. I think I'm going to toss them all in a 5 gallon bucket and drop a sledgehammer on top of them. I personally would like to see them 1/4" - 1/2".
Remember there are other types of aeration. I'm also going to use rice hulls from a local beer craft store. I'm also kicking around the idea of using activated biochar (it's aeration and good for soil life). Hence, my 1/3 aeration is going to be mix of things.
Also, someone sells pumice stone on Amazon:
https://www.amazon.com/gp/aw/d/B008YSVPHW
The problem is it's like $30 for 5 gallons. That's not even 1 cubic foot. It's fancy, don't get me wrong, but jeez.
Anyway, good luck with your soil build.
Shit, they actually ran out.
&#x200B;
But there were a lot of other options I had found on amazon for about 0.03 cent per gram more expensive, I had spent about half an hour to forty minutes calculating values of products lol
&#x200B;
Things that are called "coco pith" are exactly the same as well btw
I'm not really sure what you have in it, so its hard to tell by looking LOL. My favorite mix, which I've seen the best results, including pots without drainage holes (I get a lot of requests for terrarium arrangements), is an equal mix of:
The grittier, the better!! I don't like sand because I feel like (unless its coarse sand) the sand just soaks up water, instead of draining quickly.
Oh I meant to drill the holes into the ceramic and just repot it into there without the plastic pot. I just moved it outdoors under a partially shaded area with only the plastic pot, since it has drainage holes.
I have this soil already, from a failed previous bonsai :(. I saw people talking highly about it here so Ill just use it for this one and hope for the best.
Mother earth coco:
https://www.amazon.com/dp/B01FG87H2O/ref=cm_sw_r_cp_apa_i_A0plDbNKJ9KN0
Bush Doctor Coco Loco:
https://www.amazon.com/dp/B00HP30LWW/ref=cm_sw_r_cp_apa_i_H1plDb4423RYZ
My advice: stop trying to do G2G from cakes to monotub; everytime I have tried spawning cakes to a monotub, it has resulted in contamination.
I have never worked with Penis Envy before, but I have found I can leave jars, whether they are cakes or grain spawn, for up to a couple weeks after they are done colonizing. I would wait for the other jars to colonize and then spawn them into a monotub all together.
I'm assuming you have just started growing. If you are going to use coir, it's vital to get the brick and not the bag. Here is a link, but I get mine from the local pet store. Pet stores sell the bricks in their reptile section, it's typically used as a bedding for reptiles, but it can also used for growing plants.
http://www.amazon.com/Natures-Footprint-Coconut-Coir-Brick/dp/B004W8BMS0/ref=sr_1_2?ie=UTF8&amp;qid=1397229833&amp;sr=8-2&amp;keywords=coir
If this is your VERY FIRST GROW, I would just let you know, Penis Envy can be a more difficult strain to grow. Feel free to experiment but if you don't have experience, sometimes experiments go badly awry with contaminants, and then you have wasted time, wasted effort, and wasted money.
I recommend sticking to a specific tek. I believe it's good to get a couple PF grows done, to get the idea, before investing in a PC and doing a monotub, although a monotub will produce WAY more than cakes, when done correctly.
I have my own method, but this dude's tek is my bible.
http://www.shroomery.org/forums/showflat.php/Number/17897163
If you want simple, cheap and portable then DWC is the way to go. My DWC lettuce setup was super cheap to build and can be moved around easily, and I've had several very successful lettuce grows with it. I just bought a $15 container store plastic drawer and drilled some holes in it for net pots, and piped in some air for airstones. I used two of these powered by one of these. Medium is rockwool based in clay pebbles housed in standard plastic net pots.
So tallying it all up...
Container - $30 (could probably have found something much cheaper)
Air pump - $16
Air stones - $6 x 2 = $12 (could also have probably gotten away with smaller/cheaper stones)
Net pots = $6 (for a dozen, so that's 9 sites plus 3 to grow replacement seedlings to swap in)
Clay pebbles = $10
Rockwool = $16 (for a sheet that will last you through many harvests)
Lettuce seeds = $2
Grand total = $86 for absolutely everything needed (assuming you're using sunlight) you need to grow.
There's a few places I noted where you could probably buy cheaper than I did, so You could probably do the whole thing for under $70.
In terms of tools for assembly you will need a dremel or something similar to cut the holes, since the plastic is pretty tough. I suppose you could manage with some very heavy duty shears, but it would probably be a nightmare to cut by hand. And a drill for the air hose holes. Some black spray paint to keep down algae growth in the water supply would be good too.
Can't speak to climate, but leafy greens are pretty hearty and have continued to thrive during a few very high temp days here, so I suspect they'd do fine in Florida temps.
That's a pretty neat.
Do you currently have a terrarium, and if so, how much light does it get? My only concern is that type of grass probably likes full sun, so it may need to be by a bright window and/or supplemental lighting to be happy. This can easily roast plants however (especially in smaller closed containers), so make sure it is ventilated or doesn't get too hot.
If you want to know specifically how to set up a terrarium, its pretty easy.
You don't need any fertilizer, and I like using a dose of Superthrive if it looks like my plants are struggling.
You could also grow the sod in a container within a larger terrarium if you only have a little bit. If you want a baseball theme, you have plenty of creative options (like using a cubs helmet as a container, etc.).
Unless I'm mistaken (I could be) this is the same stuff.
https://www.amazon.com/Medium-absorbing-crystal-polymer-Insect/dp/B0051V40AO/ref=sr_1_2?ie=UTF8&amp;qid=1465923779&amp;sr=8-2&amp;keywords=gardening+water+crystals
It's ridiculously absorbent. Whether putting it on the bottom of your fridge is a good idea, you won't know for sure until you try.
for art!
The Lego Movie! Because all craziness and wackiness aside, that movie looked just beautiful!
for science!
coconut coir! for when I'm feeling scieny and planting all sorts of plants! Woooo botany!
Thanks for the contest!
ATM, this is the plan. Would love more insight if you don't mind.
https://www.amazon.com/Count-Jiffy-Pellets-Seeds-Starting/dp/B000EHJN7K
and put in this with lids
https://www.amazon.com/Durable-Black-Plastic-Growing-Without/dp/B000E7MTUI/ref=sr_1_5?ie=UTF8&amp;qid=1524088888&amp;sr=8-5&amp;keywords=10+Plant+Growing+Trays+%28No
then directly into soil.
We do have rabbit issues and I've read to be sure to protect them from a small age.
General rule here for planting outdoors is mother's day to avoid the last frost.
And we do have a boatload of rabbits so when placing in it's final spot
https://www.amazon.com/NATURES-LIVING-SOIL-Organic-Concentrate/dp/B07BDKTT7Q/ref=mp_s_a_1_10_sspa?keywords=fox+farms+ocean+forest+potting+soil&amp;qid=1569302877&amp;s=gateway&amp;sprefix=fox+farms+&amp;sr=8-10-spons&amp;psc=1&amp;spLa=ZW5jcnlwdGVkUXVhbGlmaWVyPUFCS1ZVSVBHWVg1VjkmZW5jcnlwdGVkSWQ9QTAzMDE4MDcySjVJS0g3VUZBRENTJmVuY3J5cHRlZEFkSWQ9QTA5MzU3MzMxSU1RQlJER0xYOFg2JndpZGdldE5hbWU9c3BfcGhvbmVfc2VhcmNoX210ZiZhY3Rpb249Y2xpY2tSZWRpcmVjdCZkb05vdExvZ0NsaWNrPXRydWU=
This is what I used but there are definitely better ones out there but so far I think it does the job.
If you don’t want to buy separate soil amendments, you can purchase this all in one, ready to go soil amendment.
Alright, here is everything in my shopping cart. I think this should cover everything I need, basically everything but PH test liquid and up/down haha(already have those):
General Gear:
Nutes/Grow Medium/Container:
13 items for a total of literally JUST under $400... Subtotal (13 items): $399.47
Am I missing anything else? Oh shit a drip tray, but I guess I can only buy 5 of this one and can't find one of any that look like they would work for cheaper than 5 of these.
Subtotal (14 items): $415.46 now... Am I missing anything else? This all look good?
edit - had to make the bullets format right
Also it recently had a trunk chop that was growing straight up (from the store not me). I was wondering if I was still able to prune back branches because I read that work should not be done often to the tree. Is giving it a break my best option?
edit: another question while I'm at it. One plant I bought was from amazon, the other in the store at walmart. I feel like the soil is low quality. I would like to change it. Do you guys have ideas for top quality soil? does something like this work?
my cardboard was pretty much soaked completely long before i transferred them outside. I read online and many people say its not the best (stunts growth).
I wanted to use peat pellets which are tiny pellets of soil that expand when you add water then you just pick them up and drop them in the soil when the sprouts are sprouted or peat pots which is basically compressed soil that you fill with more loose soil an the compressed soil loosen over time with water making it easier for the roots to go through. But i didn't use them because i got too excited to plant so i just ate some eggs and used the carton i had :p
https://www.amazon.com/HTGSupply-3-5-Gallon-Bubble-Culture-Hydroponic/dp/B015TL6N3W/ref=sr_1_39?ie=UTF8&amp;qid=1487712759&amp;sr=8-39&amp;keywords=htg+supply
Here is the kit, it comes with smaller version of the air pump i've got, same manufacturer though.
I am growing in Hydroton (clay pebbles) and using General Hydroponics Maxigro and maxibloom
Airstone: https://www.amazon.com/Active-ASCL-Stone-Cylinder-Large/dp/B00564IT5S/ref=sr_1_4?ie=UTF8&amp;qid=1487712848&amp;sr=8-4&amp;keywords=air+stone
You should be able to find airstones much cheaper than this at a local pet supply store. I happen to have an awesome little hydroponics shop near me where they stock airstones for maybe a few dollars.
Hope all this helps! let me know if you have any more questions.
no that was right Perlite and flush..... maybe more perlite next time? Ive heard of people usually sitting between 25%-40% I use roots organic Since its pre-mixed and nute content is a bit lax to reduce early burn... Pair that with general organics Box lets me have more control on the nutes for my plant instead of the soil over saturating.
Alright, awesome thanks man. That's a bit more than I need so I think I'll use this,
http://www.amazon.com/Natures-Footprint-Coconut-Coir-Brick/dp/B004W8BMS0/ref=sr_1_2?ie=UTF8&amp;qid=1414981257&amp;sr=8-2&amp;keywords=coco+coir
Its not soil, for what it's worth, it's coconut shells, like this:
https://www.amazon.com/Natures-Footprint-650g-Coir-Brick/dp/B004W8BMS0
it's a sterile planting material.
When I started I had nothing but disasters. Then I went to coco and general organics. Then I got some traction and started having success. Ive since moved on to more intensive stuff. I say Coco choir and get the general organics starter kit.
http://www.amazon.com/General-Hydroponics-Box-Starter-Kit/dp/B004PS4B08/ref=sr_1_1?ie=UTF8&amp;qid=1422591266&amp;sr=8-1&amp;keywords=general+organics
http://www.amazon.com/Kempf-Compressed-Growing-Potting-11-Pound/dp/B003MOD2HY/ref=sr_1_1?ie=UTF8&amp;qid=1422591247&amp;sr=8-1&amp;keywords=coco+coir
Just follow the instructions, its easy, its cheap, it works, and its pretty dang hard to kill your plants this way.
Edit: I did pull 1.25 pounds on 2 big plants in a scrog with a 600 watt HPS like this in about a 3.5x3.5 foot scrog. It was my second ever grow.
It was a $5 ceramic pot from Walmart that was bigger than the one it came in. Forget what the bonsai purists say about what pot goes with what tree. Get one that you like that you think looks good with your tree. Bonsai is living art so have fun with it!
As for the soil I like to mix some Miracle Gro potting soil with either the tropical or all-purpose blend soil from tinyroots on amazon. I found the bonsai soil was too aerated by itself and the potting soil helped it retain a little moisture.
https://www.amazon.com/Bonsai-Tree-Soil-Purpose-Blend/dp/B007GS9ZGO
Keep in mind I haven’t even had this tree for a full season so I may not be the best advice :)
760ppm
PH rises from 5.5 to about 6.5 in 36 hours like clockwork.
Pen was calibrated last month
Water heater set at 62F (gets to 68-70 for a few hours around noon.)
Have a massive 6 port pump (only one valve open) with this 4x2” air stone in a 20 gal res: Hydrofarm Active Aqua ASCL Air Stone Cylinder, Large https://www.amazon.com/dp/B00564IT5S/ref=cm_sw_r_cp_api_i_OqjSDbC6Z2Z7H
Honestly big stores are not that great with carrying stuff for succulents. When I first bought the Miracle gro cactus soil I thought it would be great too. I'm sure all of us had that idea with Miracle Gro.
I've got my perlite and bonsai jack from Amazon. I've seen people pick up free pea gravel or pumice or perlite from the free section of Craigslist. My succulents are all small though so I don't need too much soil. I just but a bag of the miracle gro cactus mix, a bag of perlite and mix them together as needed. I have also in a pinch gone to the Dollar Tree to pick up those little white rocks they have in the floral stuff section.
Topping your soil is entirely optional, so if you don't want to go for that no need to.
I'll go look at likes for what I've previously used and put them into an edit.
Edit:
So here's the perlite I got: https://www.amazon.com/gp/product/B01LZDOLRI/ref=ppx_yo_dt_b_asin_title_o01_s00?ie=UTF8&amp;psc=1
It works fine, but if possible I'd look for some that comes in consistently small bits. This one is a mix of all sorts of sizes, but like I said, that still works.
This is the bonsai jack. https://www.amazon.com/gp/product/B0194E9SZU/ref=ppx_yo_dt_b_asin_title_o00_s00?ie=UTF8&amp;psc=1 I use this more as topper because I notices my small succulent's roots were drying up too much if I purely used bonsai jack. It has no water retention. Bonsai Jack would work better as soil for big succulents with thick roots.
Now this one I never ordered but the picture is a nice example of how the soil should look. I personally would also add in a little bonsai jack or perlite to make it a little less organic, but how it is in the photo would work too. You'd just have to water less than I do. https://www.amazon.com/Organic-Succulent-Cactus-Soil-Gallon/dp/B00GA9YIHG/ref=sr_1_19?keywords=succulent+soil&amp;qid=1571007887&amp;s=lawn-garden&amp;sr=1-19
Mother Earth Coco Bale | 5kg | 100% Natural Coconut Fiber https://www.amazon.com/dp/B01M69KV51/ref=cm_sw_r_cp_api_i_4vRXDbEDV35PZ
Kempf Compressed Coco Fiber Growing Medium 11 Lbs. Block https://www.amazon.com/dp/B003MOD2HY/ref=cm_sw_r_cp_api_i_pwRXDbFTHN8Z1
Or others similar if you want coco, I like prebuffered better than bricks but for shipping this is better
if planting in soil, I like to use jiffy peat pellets.
http://www.amazon.com/Count--Jiffy-Pellets-Seeds-Starting/dp/B000EHJN7K/ref=sr_1_1?ie=UTF8&amp;qid=1334178202&amp;sr=8-1
you soak them in water for 5-10 mins, they swell up to the size of an old film canister. Just use a pencil to poke a small hole in the top, drop the seed and GENTLY cover it with soil. You don't want to pack it down, but you don't want light shining on it directly.
I leave them in the jiffy peat pod until I see the roots busting through it (usually about a week or two) and then I just plant it in either the 7" container, or you can plant it in a party cup, then transplant it into a bigger container if you want.
You can plant the seedling directly into soil but make sure the soil is suitable for seedlings - I used fox farm ocean forest exclusively, but some people find that it kills their seedlings because it's too strong.
Well,they both have just the dirt I got them in for their soil. That soil is suspended in the pumice for airflow and drainage. I'm not sure what will happen as the roots start to outgrow their soil. Either Ill have to add soil, or the roots will take hold just meandering through the pumice without a real medium. Example pumice Link
Most of us are making our own spawn from raw material.
Welcome aboard!
You can buy pre-made spawn online from a few sources.
My basic recipe is for 7 quart jars:
I use this coco coir, because it is not treated with tric
of this http://www.amazon.com/Natures-Footprint-650g-Coir-Brick/dp/B004W8BMS0/ref=sr_1_1?ie=UTF8&amp;qid=1452306019&amp;sr=8-1&amp;keywords=natures+footprint
this is what I use
I've got everything in my amazon cart now for a set up like you are looking for.
I purchased soil amendments from mephisto genetics as well as seeds and will have no need for extra nutrients. Also if you are fine with autos they have a great Black Friday sale going on.
http://mitch386.wixsite.com/mephistogenetics/product-page/35d08695-5331-6aab-5143-8d51f0df1fe1
These are the lights I'm going with, getting two.
Roleadro 300W LED Plant Grow Light Full Spectrum, 2nd Generation Series https://www.amazon.com/dp/B01HI3AFYM/ref=cm_sw_r_cp_api_WR4nybSHBEVW8
32x32x63 tent
Giantex Indoor Grow Tent Room Reflective Mylar Hydroponic Non Toxic Clone Hut 6 Size (32''X32''X63'') https://www.amazon.com/dp/B00PXK7ICK/ref=cm_sw_r_cp_api_2S4nybD1879PC
As far as soil I'm going to use coco coir for one plant and then a organic mix I used for my garden.
Nature's Footprint 650g Coconut Coir Brick https://www.amazon.com/dp/B004W8BMS0/ref=cm_sw_r_cp_api_AX4nybG2P84VD
As far as my ventilation fan I have one lying around the house and am using a cold plasma generator to neutralize odors instead of carbon filter.
I would buy bonsai jack soil, but I don't know how much extra they'll charge you for shipping or if it's even available in your country.
When I search amazon.es, I can find products made with peat moss and sand which isn't very good for bonsai. This 2mm-5mm clay soil would work very well for bonsai. And in Japan they use akadama which is very expensive in my country, but looks much more affordable for you.
Growing in cheap coco that seems to be developing mold, off to a great start so far. I'm assuming that's not normal however I've seen conflicting reports.
https://www.icmag.com/ic/showthread.php?t=175672
These are clones that were transplanted to 3.5 gallon hempy buckets 2 weeks ago. Perlite on the bottom, coco coir the rest of the way up. The clones were cut from a plant 2 weeks into flowering (no choice).
Feeding lucas formula + calmag +slica blast. The dessicated/curled leaves seem to have developed after my last feeding. Too much silica? I still don't know how often to feed/water these fuckers. Some say every day others say every 3 days. How much run off should I be seeing? The tap roots on most of them have finally reached the resevoir, I guess because it seems to be emptying (no gushers when I tip the bucket after sitting a day or two).
Don't buy this shit
http://www.amazon.com/Compressed-Fiber-Growing-Medium-Block/dp/B003MOD2HY/
General Advice:
Fertilizer:
Bugs:
Fungus:
OP, there's a polymer that absorbs 100x its weight in liquids and it's used in haz mat products and many other products today.
It's reusable. This one absorbs 10x its weight in water.
Non-mobile: http://www.amazon.com/dp/B0051V40AO/ref=mp_s_a_1_1?qid=1426168201&sr=8-1&keywords=water+absorbing+crystals&dpPl=1&dpID=51HKei-0L4L&ref=plSrch&pi=AC_SX200_QL40
^That's ^why ^I'm ^here, ^I ^don't ^judge ^you. ^PM ^/u/xl0 ^if ^I'm ^causing ^any ^trouble. ^WUT?
This is a 4x4 Flood Table built for a 5x5 tent. Just need to find good medium and I'll be popping seeds :) Glad to be back at it!
Current Plan:
> ##Ebb & Flow:
> Finished Table
> Tray: 4x4 Botanicare Tray
> Fittings
> Pump: Active Aqua Submersible Water Pump, 400 GPH
> Drain Hose: 1/2" Inside Diameter)
)
> Pump Hose: 3/4" Inside Diameter
> Rubber Grommets: 1/2 inch
> Stand: 5x5 Wood Frame (Building this weekend)
> Reservoir: 55 Gal.
> Air Pump: 95 GPH
> Air Diffuser: 4x Air Stones
> ##Medium:
> Germination: Starter Plugs
> 6 inch Net Pot
> Hydroton (but willing to be convinced otherwise!!!)
> 4 x 4 Coco Mat
> ##Environment:
> Tent: 5 x 5
> Light 1: 1100W DE HPS bulb w iPower Ballast & Extend-A-Wing reflector
> Light 2: 600W of QBs
> AC inside, Venting Outside with 450CFM fan
> ##Nutrients:
>
> Flora Trio
> KoolBloom
> Diamond Nectar
> Armor Si
> Floralicious Plus
> Humboldt Snowstorm
> Mammoth P
> * Hydrogaurd
> Strain: Sweet Amnesia (from seed)
ANY AND ALL ADVICE IS APPRECIATED!!!
Like this? Is this pH acceptable?
https://www.amazon.com/Gallon-Bonsai-Succulent-Cactus-Gritty/dp/B0194E9SZU/ref=sr_1_4/141-7053598-7478105?ie=UTF8&amp;qid=1527300212&amp;sr=8-4&amp;keywords=bonsai+jack+succulent+soil&amp;dpID=61GI9pqmoPL&amp;preST=_SX300_QL70_&amp;dpSrc=srch
Here.
The soil mixture is around 70-ish% Hoffman Organic Cactus and Succulent Soil Mix and 30-ish% Bonsai Jack Succulent and Cactus Soil Gritty Mix
I have been growing for the last 4 years and I've learned a thing or two. I agree you shouldn't be switching up your soil regimen so frequently. Stick with soil or coco and roll with it (even if you fail a few times) the lesson will be learned.
I have grown in soil with success but the reason I'm writing this is to make you aware that I've tried growing in general hydroponics coco coir and it is terrible. The ph is not nearly as stable as this product by cannna https://www.amazon.com/gp/aw/d/B010OG1MVA/ref=mp_s_a_1_1?ie=UTF8&amp;qid=1500811502&amp;sr=8-1&amp;pi=AC_SX236_SY340_QL65&amp;keywords=canna+coco+coir&amp;dpPl=1&amp;dpID=418-8Gl8kBL&amp;ref=plSrch it's very ph stable and I can even germinate in it. The general hydro coco not so much
I had to buy my ingredients online - nearby brick and mortar retailers didn't have what I needed, either. And I haven't been able to find a premade mix that wasn't in an expensive small bag - I have a pretty big collection at this point and it seemed more economical to make my own.
I used this brand of turface, this brand of grit, and this brand of bark. I didn't want to buy huge amounts in case I (or my couple of "guinea pig" plants) didn't like the mix, at this point I'm trying to source bulk amounts for decent prices.
This is my first grow so I just started looking at things on Amazon to be honest. Here is the link for it. I like the cosmetic effect also!
http://www.amazon.com/gp/product/B004IAM29K?psc=1&amp;redirect=true&amp;ref_=oh_aui_detailpage_o03_s00
This tank is about 7ish months old. IF you use soil it has to be organic potting soil, since it doesnt have any metals or additives that could be harmfull. This is exactly what i used. The other thing i learned is when you use soil in a tank, you want to plant heavily at the start because theyre will be a abundance of nutrients. That is what will cause the algae blooms.
I'm using that same exact soil and also bought it from Amazon! I hope its not the soil. Mine would most likely die if I repot it again.
This is the soil:
https://www.amazon.com/gp/product/B007GS9ZGO/ref=ppx_yo_dt_b_asin_title_o02_s00?ie=UTF8&psc=1
I was given this tree, this soil, and these pellets for my birthday recently. I live 10 feet away from a window at work and the idea was to keep the tree either next to my desk or on the window sill where it will be facing the east and be in sunlight from sunrise to about 3/4pm every day.
I have no idea how to get started, absolute no idea. This is what the tree looks like.
I've been looking for these commercially for a bit, and have found these. http://www.amazon.com/gp/aw/d/B0051V40AO/ref=mp_s_a_1_1?qid=1426168201&amp;sr=8-1&amp;keywords=water+absorbing+crystals&amp;dpPl=1&amp;dpID=51HKei-0L4L&amp;ref=plSrch&amp;pi=AC_SX200_QL40
(I'm on mobile, so ignore the weird formatting)
I got my tree for Christmas 2018 (yes, the dreaded 'surprise' bonsai). The tree was 5 years old when I got it. After receiving a lot of conflicting information, I decided to move it up to a bigger pot with new soil about three months late (March of this year). (Definitely a bad choice I think, or I repotted it incorrectly, because it stopped new growth in it's tracks for about a month).
I keep it inside due to the unpredictable weather in my area. I have a grow light. Before I repotted it, the grow light seemed sufficient and it was starting to thicken. But after repotting, it has appeared thin for several months.
The tree does grow leggy shoots, but I've noticed that the leaves on these shoots stay a pale green color even after reaching full size. I'm guessing that's from lack of light? Before I water it, I check the soil to make sure that's is not wet or super dry... I water when it's only ever so slightly damp, just to avoid over drying it. The soil mixture is roughly 3/4 inorganic: https://www.amazon.com/dp/B01N117UG8/ref=cm_sw_r_cp_apa_i_zhgrDbYRF8REF
and 1/4 dirt from my compost heap.
There aren't any roots sticking out from the drainage holes, but there is one root nub sticking up from the soil... could be from repotting incorrectly?
Like I said, I keep it mostly indoors because of how unpredictable our weather is... while it might be 90+ degree heat during the day, it might get below 60 at night. We also get alot of rain and cold cloudy days during spring and fall.
I got a massive one from amazon for about two dollars more, arrived in 3 days! in case you're interested
I thought I'd share my experience for the community, and hopefully my experiences help or encourage others to give this a shot on their own. I had absolutely no experience growing anything when I started, so if I can do it, so can anyone else!
I've got an equipment list of the stuff I'm using since it took me a long time to figure out what to buy. This doesn't include the $1.50/week for RO water from the local grocery store, the electricity, or the other stuff I ended up buying afterward for my clones.
No grow tent or ventiliation is needed for my scenario since I have full access to a basement. It's perfect since there is a water heater and a boiler in the same room so the temp is always pretty constant, there is plenty of CO2 from the gas that the appliances burn, and the humidity is also pretty constant.
A few of the mistakes I made that I'd fix next time:
The images have some details about my grow, but I'll be happy to answer any other questions folks might have.
Item | Cost | Product Link
---|---|----
Seeds (OG Kush Feminized, 20ct) | $80 | Marijuana Seeds NL
Coco Coir | $17 | Kempf Coco
300W LED Lighting | $80 | GalaxyHydro
Plastic Pot | $0 | Craigslist - Free
Light Timers | $12 | Light Timers
pH Tester | $18 | pH Pen
pH Up and Down | $16 | General Hydro
Jeweler's Loupe | $6 | Magnify Me
Nutes | $35 | Canna Coco 1 & 2
Perlite | $13 | Black Gold
CalMag | $17 | Botanicare Supplement
TOTAL | $294
Also, THANK YOU to everyone in this sub. There is a ton of info out there about growing, but this place is the best location I found for timely info related to my new hobby.