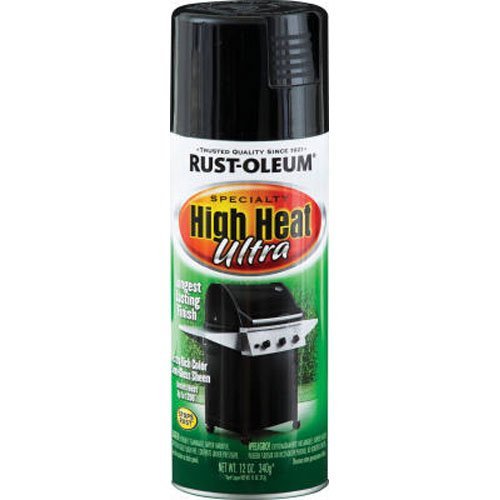
Best household appliance paint according to redditors
We found 22 Reddit comments discussing the best household appliance paint. We ranked the 8 resulting products by number of redditors who mentioned them. Here are the top 20.
We found 22 Reddit comments discussing the best household appliance paint. We ranked the 8 resulting products by number of redditors who mentioned them. Here are the top 20.


Most likely high heat spray. Used it when I constructed a mini blacksmith forge. It Comes in a Rustoelum can.
here
Sure, after taking whatever part I was going to paint off the bike I would:
I hope this all helps you, this was my first time doing it and it was intimidating at first. I practiced on a couple old pipes i have sitting around and realized it was easier than i thought. I was doing this in a small garage so I used a medical mask the whole time lots of dust and spray. Also gloves would be a good investment. If I managed to miss anything or you have more question that i might have skipped let me know. And remember the thing that will give you the best quality is prepping before painting. patience is key.
tl:dr clean, sand, clean, prime, clean, paint.
I re-finished my 870 recently. http://i.imgur.com/vcYaJgt.jpg
Take some steel wool and strip the shitty old park off. Degrease with Break cleaner or acetone. Buy a can of this: http://www.amazon.com/Rust-Oleum-248903-Automotive-12-Ounce-Degree/dp/B003CT4AKC and spray all the metal with it. Bake it in the oven according to the instructions (but do the 3rd round of baking @ 450 not 600+) (NOTE: DO NO BAKE THE TRIGGER GROUP/BOLT).
(the wood was done with pine tar and leather dye)
The total cost for re-doing the metal was 10-12$ and it is at least as durable if not more durable than something like duracote.
I sandblasted mine and painted it with [high heat spray paint](Rust-Oleum Automotive 249310 12-Ounce BBQ Black Spray, Black https://www.amazon.com/dp/B006ZLQNO0/ref=cm_sw_r_cp_apa_i_e1ePCb3GCGXV4). It has held up for many rides.
Use stove paint. Can handle much more heat than engine paint can:
https://www.amazon.com/Stove-Bright-High-Temp-Paint/dp/B006BKMK1A
If you want it black I suggest high temp paint
I would use a primer. It will give something for the paint to really bind to because metal is non-porous. Make sure you get a metal primer.
Rust-Oleum Automotive Rust Primer: https://www.amazon.com/Rust-Oleum-249331-Automotive-12-Ounce-Primer/dp/B003CT4AO8/ref=sr_1_2?s=hi&ie=UTF8&qid=1479909567&sr=1-2&keywords=metal+primer
I prefer using Rustoleum brand. They have automotive enamel paints and they look great. I just used this:
https://www.amazon.com/dp/B001UE7MW4/ref=twister_B002LSIFOC?_encoding=UTF8&psc=1
On my lug nuts and they look great. A good gloss finish too. There are many paints you can use, just stay away from arts and crafts-y paints and make sure its good for metal use. As long as you use several even, thin coats of paint on top of primer, you should be in good shape!
Also, I would recommend repainting the whole wiper blade. It will look spotty if you don't plus its small enough that it should not take much more time to do. Happy Detailing!
A can of black Grill Paint will tolerate the heat and cover that mark.
http://www.amazon.com/Rust-Oleum-248903-Automotive-12-Ounce-Degree/dp/B003CT4AKC/ref=sr_1_2?ie=UTF8&qid=1414706936&sr=8-2&keywords=grill+paint
If the metal is rusted through, then it's probably not worth it. But, if the metal is still good underneath I would say to go for it!
Making a really hot fire inside the grill works phenomenally well. After that, I used a sander to get all the rust off I could.
You want to make sure the surface is clean before you paint, and it is helpful to use a primer. For the paint I used a high temperature spray paint designed for the purpose. The surface needs to be clean before you apply it, and you can't apply the paint anywhere that touches open flame.
Remove any paint that is not sitting directly on the tub by lifting it off. But don't go too far with it. Get some 300 or 400 grit sandpaper, and sand the edges of the remaining paint, so the paint will not end over the tub at a 90 degree angle. You want it sloping down to the tub essentially, as much as possible. Sand gently. And lightly sand the entire tub area that is missing paint too.
Clean the entire area with nail polish remover or a similar cleaning solvent. Use this product with your windows open. Spray, let it dry, or make sure at least that it’s not dripping, and spray another coat. You can put as many coats on as you like. This is one of many similar products. Good luck.
Yeah, I thought about that too after I posted my reply. Another possible option would be some flat black automotive exhaust system paint.
You're on the right track. The single barrel UDS upright is really only 4 main parts. You have your drum, a fire basket, grate, and lid. I'm at work otherwise I would take pics of mine and walk you through it. Might be able to still do that later but here are a couple things to look at to get you started. link cross section
I have a heat deflector on my charcoal basket as well. It was cheaper to just make a clover shape deflector out of 3 pizza pans with a bolt through the edge. All about getting creative.
Here's a write up of how I made mine:
Now I don't move mine far so I never installed the castors that I was planning on using. I had the basic design in my head of using angle iron and basically making a permanent hand truck that attaches to the side of the drum and all you had to do to move it was tilt the drum onto the wheels and you're off.
This is a pretty rough write up and I apologize for the lack of pics. If I can find my build pics, I'll post them here. Let me know if you have any questions or if I can help!
Thanks, the paint I was referencing is RustOleum's here...seems ok for high heat, but perhaps you're right when it comes in contact with a flame.
Perhaps a shield of some kind is in order?
Seconded (thirded?). I bought a can of high heat paint off amazon for a rebuild that I ended up letting a buddy use on his Sporty's pipes. disassemble the whole shebang and tape over the ends, paint it on a nice day, let it totally dry. This stuff goes on almost like primer so it didn't need much prep work either.
http://www.amazon.com/Rust-Oleum-248903-Automotive-12-Ounce-Degree/dp/B003CT4AKC/ref=sr_1_3?s=hi&ie=UTF8&qid=1375303554&sr=1-3&keywords=grill+spray+paint
To add to this suggestion, this paint works well:
https://smile.amazon.com/dp/B003CT4AKC/ref=cm_sw_em_r_mt_dp_U_alFVCbDETHETK
Gromet
Gromet https://imgur.com/a/LUm2luQ
Impresa Products 2 Pack Thermometer and Probe Grommet for Grills - Compatible with Weber Smokey Mountain Cookers and More - Compare to Replacement 85037 - by https://www.amazon.com/dp/B07BC4TYQ5/ref=cm_sw_r_cp_apa_i_CcXZCb1AF0HA6
Krylon K01618777 High Heat Satin Black https://www.amazon.com/dp/B000YQ0BNQ/ref=cm_sw_r_cp_apa_i_jjXZCb1MKDZCZ
This is what you want. Should be able to find it at Lowes also.
Do they need to be chalkboards, or would dry-erase be an option?
If you can make dry-erase boards, I'd go for the sheet metal and appliance paint.
Try magic eraser if you think it's build up. For the scratches try touch up paint
Like this https://www.amazon.com/dp/B000RNPGKE/ref=cm_sw_r_sms_awdb_t1_xXKNBb0K73T7A or https://www.amazon.com/dp/B00HYHLK56/ref=cm_sw_r_sms_awdb_t1_zZKNBb2XPAS33
http://www.amazon.com/Rust-Oleum-7881830-Appliance-Enamel-12-Ounce/dp/B0009XB40I
That sucks. Get some good paint to repair it and it shouldn't happen again.
Edit: https://www.amazon.com/gp/aw/d/B003CT4AKC/