(Part 2) Best hunting game handling products according to redditors
We found 203 Reddit comments discussing the best hunting game handling products. We ranked the 113 resulting products by number of redditors who mentioned them. Here are the products ranked 21-40. You can also go back to the previous section.


For those interested, here is the process I follow. This is the second skull I've done and both have turned out nicely. I know it looks like a lot of work at face value, and there is a lot of time that goes into it, but I was super nervous the first time I tried this, did a lot of research on how to do euro mounts and ultimately almost bailed out and paid someone $150 to do it for me. I ended up sticking it out and am glad I did both times. I know it's cliche, but if I can do this, anyone can do it and there is an immense amount of self pride that you get from seeing it hanging on your wall. Good luck and I look forward to seeing pictures of others who attempt to do their own DIY euro mount!
Some folks will use a pressure washer instead of steps 9 and 10, but I prefer this method as it removes the grease which can cause the skull to yellow over time.
At this point your skull can be mounted if you are satisfied with the appearance. The remaining steps are my preference and help with the cosmetics only.
Once the skull is entirely covered, wrap the entire thing in Saran wrap and place in front of a space heater. The heat is necessary to activate the bleaching agent. Heat the skull for about an hour, rotating every 10 minutes or so to ensure even heating.
While the skull is heating, prepare a new cooler full of hot water; no soap this time. Once the skull had been heated, cut the Saran wrap and submerge the skull to the base of the antlers and use your air compressor to bubble the surface and cavities again to remove the bleach and clean the skull.
Let the skull dry thoroughly. As the skull dries out will lighten up, but if you're unsatisfied with the color you can repeat the cleaning process as needed.
This also brings out a lot of unseen character in the antlers. Let the stain set for 10 minutes or so and wipe them down with a clean dry cloth.
Now you should have a beautiful skull with a nice, dark rack ready to mount. My mount of choice is the Walnut Hollow Country Solid Wood Deluxe Euro Skull Display Kit from Amazon.
-------------------------------------------------------------------------------
Product Links:
RaptoRazor Scrambler - https://www.amazon.com/dp/B07K3KQ6DR/
Salon Care 40 Volume Creme Developer- https://www.amazon.com/gp/product/B004OKDW20/
Salon Care Quick White Powder Lightener - https://www.amazon.com/gp/product/B004OKG9PW/
Walnut Hollow Country Solid Wood Deluxe Euro Skull Display Kit - https://www.amazon.com/gp/product/B003UV9QH4/
​
------------------------------------------------------------------------------
Sources of inspiration/information:
EDIT: Here are the two articles I found that inspired me and were sources for my slightly modified process:
https://www.instructables.com/id/European-Mounted-Deer/
https://www.huntaddicts.com/do-it-yourself-european-mount/
here
here
here
here if your a lefty
here
amazon sells them. may not be the same exact one OP has but they have a couple models to choose from.
https://www.amazon.com/HME-Products-Truck-Hitch-Hoist/dp/B06ZZS6M9L/ref=pd_lpo_sbs_200_t_0?_encoding=UTF8&psc=1&refRID=TM0WM1FQTHN1JRQ7SKNR
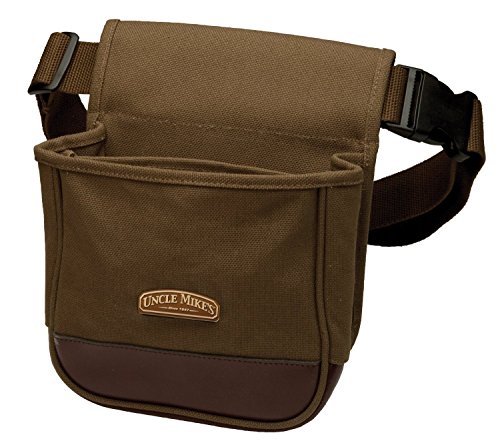
Not exactly a mag pouch, I actually use an Uncle Mike's Shell Pouch that used to be for trap shooting. The nice thing about the pouch is that the inside is separated in half by a small wall, which allows you to place stuff like magazines and shells on one side while keeping speedloaders and spare BBs on the other.
A clean place is fine; like a large table. It's pretty simple to not cut the intestines and bladder. Even easier and cleaner if you hang the car as from a tree. They even sell these devices that enable you to processes a carcass from the receiver hitch on your vehicle.
Link: (just to show, I don't make any money on referrals.)
http://www.amazon.com/gp/aw/d/B006VWVFHI%3Fpc_redir%3D1411900140%26robot_redir%3D1&cd=1&ved=0CCAQFjAA&usg=AFQjCNGhCPMbe8L2cWEwlu2hKOjzZxbf8Q&sig2=4mKlL1mHwT3HIPgx33V6KQ
Yeah, it's a closed loop so you'll need to thread your belt through. Know the single sheath has velcro strips to attach to things, but it's a bit bulkier.
pebble time steel
I got this belt ten years ago on Amazon, the Volkswagen one is no longer for sale
Amazfit Bip
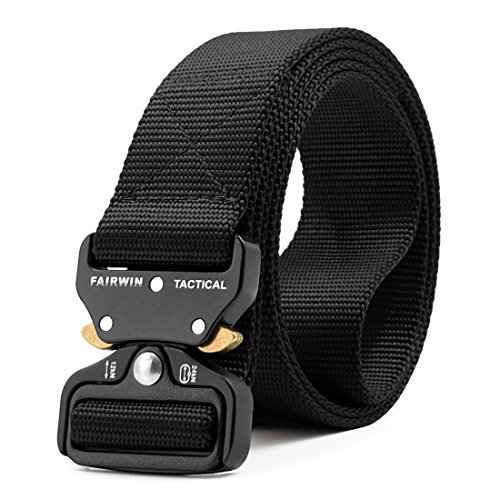
Fairwin Tactical Belt
Silky Yoki, 530 odd grams + sheath. Not cheap though
https://www.amazon.com/Silky-Saws-Chopper-Black-Silver/dp/B006J1HH7S
About half the weight of a decent parang. Pack a tourniquet too though...
Shame on you lot downvoting for bushwacking - there's plenty of other hiking in the world besides the ConUS, some of it requires cutting growth because there are no trail crews...
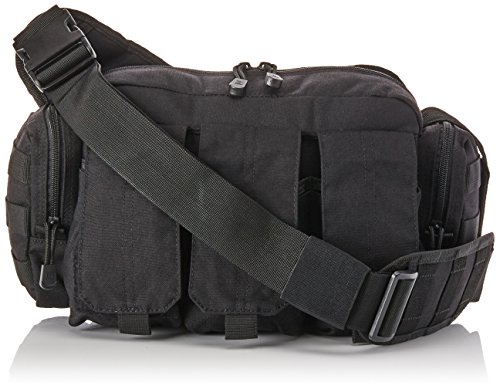
This was bought as a gift: http://www.amazon.com/Large-Tactical-Range-Duty-Gun/dp/B005724R0K/ref=sr_1_25?s=sporting-goods&ie=UTF8&qid=1420846201&sr=1-25&keywords=small+range+bag
Currently $32 on Amazon.
Will be used at the range once it is not needed.
I was using a duffel bag, but I got this for Christmas:
http://www.amazon.com/Large-Tactical-Range-Duty-Gun/dp/B005724R0K/ref=sr_1_3?ie=UTF8&qid=1395616394&sr=8-3&keywords=range+bag
It's got 2 inner Velcro pockets that are great for throwing brass into.
https://www.amazon.com/Rattler-Scaletech-Snake-Protection-Gaiters/dp/B00542NJ5W
Tell her to buy some of theseand suck it up, if your gonna be a geo in the us, you're probably gonna spend some time out west, and snakes are gonna be there. That or buy some decent high boots and wear reinforced carharts. Also you should be sure you've got a sat phone and the closest emergency department. Out there they will usually have rattler anti-venom. But its gonna be a long time. You get bit, calm the fuck down, you probably aren't going to die if you're a healthy adult, but if you bring your heart rate up and keep there, you're not doing yourself any favors.
:(
I had an awesome one back in the day that dropped into the spare tire well. It had a couple of compartments that had plastic lids to organize things. With the CV being phased out everywhere, they're available at state surplus sites for pennies on the dollar.
OK, so since that's not an option, here's what I'd suggest.
First, get yourself a couple of tackle boxes. One for your basic crime scene stuff (powders, tape, brushes, etc), one for your first aid stuff, one for odds and ends.
Next, invest in an under-bed storage tote. The long one. Measure your trunk first, then find one that's the right length. That will hold your bulkier stuff. Make sure to get one that hinges in the middle.
Then, it's all about the bags. Active shooter bag, bag for stuff you need but don't keep in the cabin, etc. If you're as paper dependent as we were back in the day, consider one of those hard-sided hanging file holders.
Take homes for the win!
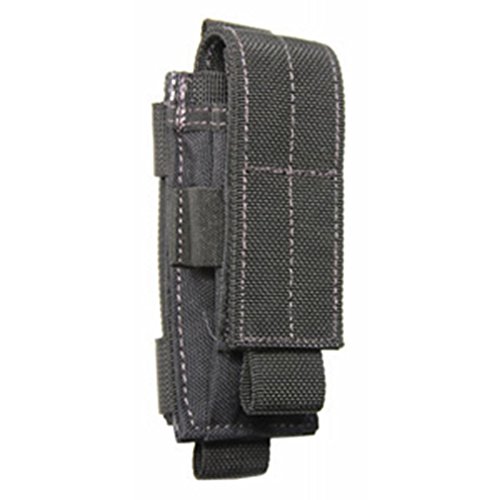
I use(d) a Maxpedition Single Sheath for my Leatherman. You might probably find it locally at the tacticool store, police supply or army/navy surplus store ($18 @ Amazon).
In the vertical position, the loop will fit over the 2"-buckle. If you like the horizontal position, the loops open with velcro, and will be less hassle than undoing the velcro on the belt each morning/evening (or you could leave it loose/large enough to slip over the buckle).
thanks :) got it on Amazon here is the link https://www.amazon.fr/dp/B07QHSP2CP/ref=pe_3044141_189395771_TE_dp_1
I’d suggest https://www.amazon.com/UTG-Super-RDM20-Absolute-Co-Witness/dp/B07G4G38DC
I have the version that fits the hs507c and it is pretty decent for $17. It is obviously not top-of-the-line, but it locks down very firmly.
It's off german amazon, I can only find a green version on US amazon, but google also has some results
[belt] (https://www.amazon.com/gp/aw/d/B076PWD8WM/ref=mp_s_a_1_1?ie=UTF8&qid=1516436560&sr=8-1&pi=AC_SX236_SY340_QL65&keywords=tactical+military+belt&dpPl=1&dpID=51F48IDu0lL&ref=plSrch)
pants are sold out in my area but i found a [link] (http://www.uniqlo.com/au/store/men-uniqlo-u-wide-fit-pleated-pants-4073140018.html#colorSelect) to them in the AU store
I’ve been using this belt since Christmas to much love, has saved me from a few jams.
Fairwin Tactical Belt-1.7 Inch Web Nylon Tactical Belts for Men-Carry Tool Belt (Black+Brown, Waist 30"-36") https://www.amazon.com/dp/B07SB628N3/ref=cm_sw_r_cp_api_i_IGSpDb8AR4E7X
Not that particular one.
Used it to apply pressure for somebody.
Also the material could easily lift a person in a jam, assist in climbing a tree, etc. it’s super strong.
Something similar to this. Definitely made it easier for the hike out.
[amazon] (https://www.amazon.com/Fixed-Hitch-Mount-Irrigating-Gambrel/dp/B006VWVFHI/ref=sr_1_1?ie=UTF8&qid=1478548010&sr=8-1&keywords=Hitch+mounted+game+hoist) really does have everything.
Uncle Mike's Law Enforcement Side-Armor Standard Car Seat Organizer, Black https://www.amazon.com/dp/B006U0Z482/ref=cm_sw_r_other_awd_rsp3wbEMFE5YV
I just switched to this thing (I was using my 5.11 Rush 72 backpack as a patrol bag, but it was too cumbersome). It's study, doesn't take up much space, and fits my 48oz Nalgene that's too big for cup holders. It fits the basic stuff I needs on a regular basis: accordian file, clip board, ticket book, extra patrol gloves, Leatherman, small evidence bags, Clorox wipes, traffic vest, etc. Obviously it will only work for solo cars. If you're riding doubles than I would get something larger to keep in the trunk. And don't feel like you need to fit everything in one bag. I also use a 5.11 bail out bag for my active shooter stuff since it can be worn over my shoulder. I keep my own first aid bag (agency bags are usually improperly stocked... it's easier to maintain my own snd stock it from our supply closet). My agency also gives us these bags with some basic hazmat supplies (gas mask, filter, tyvek suit, camelback, boot boots covers, etc).
I ditched my patrol bag and went to the Uncle Mike's seat organizer. I have no regrets, it's easier to find stuff and doesn't fly off the seat if I have to slam on the brakes.
I'm an arborist who lives in northeastern USA, so I have little experience with palms. I do have experience with silky brand hand saws, which are excellent. I can't imagine their machete would be much different. Here's the Amazon link: http://www.amazon.com/Silky-Saws-Chopper-Black-Silver/dp/B006J1HH7S
I travel with this
http://www.amazon.com/gp/aw/d/B004RJ3R1O/ref=mp_s_a_1_3?qid=1420350531&sr=8-3&dpPl=1&dpID=51RXuxG9u1L&ref=plSrch&pi=AC_SY200_QL40
Also have bellroy travel wallet
http://www.amazon.com/gp/aw/s/ref=is_s_ss_i_3_5?k=bellroy+travel+wallet&sprefix=Bellr
Here is the desktop version of your link
Ammo pouch ~$25
Friend had this one and he liked it. I have a very similar one from a local brand. UNCLE MIKE'S Uncle Mike Shell Pouch Deluxe 42140 Brown Canvas Card https://www.amazon.com/dp/B0048KAHOW/ref=cm_sw_r_cp_api_Di9mybSZ2Q661
I use this. It's a tactical bag, but I added some padding on the bottom for protection. The webbing is so convenient for odds and ends and the pouches work well for small to normal sized lenses.
It's spandex, so as long as you get a size that fits you, it will stretch comfortably and give you a full range of motion. Bodysuits are some of the most comfortable cosplays to wear!
I actually took my own advice and bought this belt on Amazon (plus two thigh holsters) for my Tigress cosplay. It would work just as well for Nightwing! I definitely want to do a fem!YJNightwing sometime in the near future, so I'll definitely use it for that.
If $25 is out of your price range for a quick costume, there's also this $15 utility belt.
Foam armor is an awesome idea, though with the costume due in just over a week, it might be tough if you don't have experience making foam armor. Look up some foam construction tutorials, and if you think you have time swing by JoAnn/Harbor Freight/Lowe's/Home Depot to get materials.
Oh, good point on the theater not approving of the escrimas. x) Better safe than sorry in that case.
As an ex-cop who still teaches SAR, First Aid, CPR and more, I'm all about being prepared.
I have one of these in all my cars and trucks.
It's 2 feet long, takes up no space, and would be invaluable for helping someone trapped in a car, or child or dog on a hot day.
Go through the side windows if you can. They crumble. The front, rear, and apparently the sunroof are laminated, and and a bit more trouble to remove. You may have to peel the whole thing out of your way.
Alternately, you could just get a small hatchet at any hardware store.
Be prepared!