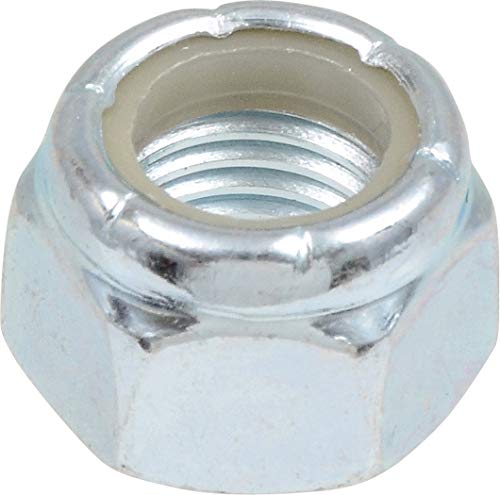
Best locknuts according to redditors
We found 25 Reddit comments discussing the best locknuts. We ranked the 16 resulting products by number of redditors who mentioned them. Here are the top 20.
We found 25 Reddit comments discussing the best locknuts. We ranked the 16 resulting products by number of redditors who mentioned them. Here are the top 20.


I think the pen grips might rip easily, but I get what you're saying. Maybe gluing a nut on its side, and then attaching a jump ring and a key ring?
You can be assembled and printing with the included tools in about half an hour, with no prior 3D printer experience. That's not a problem.
Actually getting the most out of the printer though, that depends on what you want to use it for.
I use it for making functional prints, replacement parts, and sometimes cool trinkets. I am not an artist, if you want to model and print sculptures, good luck. I haven't a clue.
If you're like me and want to make what I make, here's a list of things you should get:
Things you should print:
Things you should download:
While I'm making suggestions, I'd say you should get some PLA and PETG to start with, ignore ABS entirely. It's slightly cheaper per kilogram, but there are toxic fumes to worry about and it really needs an enclosure to print (well).
PLA is cheap enough, but doesn't flex as much as ABS so it's better for different applications. PETG is like the best parts of PLA and ABS, but you have to print at lower speeds.
I print at 45mm/s, 5 second minimum layer time using both PLA and PETG and it works perfectly. 210C/60C for PLA and 250/70 for PETG.
If you have any questions, you know where to find me. :)
Nuts and bolts on Amazon are kinda weird in that there is some predatory pricing taking advantage of how damn many search results you're going to find. The part linked from the first thingiverse page is $7 for 10 locknuts. You can get 100 of them for $8 if you do some searching on your own. I've actually bought these and they're fine:
uxcell® M3x0.5mm Zinc Plated Nylon Insert Hex Lock Nuts Black 100pcs https://www.amazon.com/dp/B015A3DT2W/ref=cm_sw_r_cp_api_K5roxbXPHB1XJ
There are some silver locknuts for cheaper, or normal nuts if you just want to use blue thread locker with them. You may be wondering why the hell you would want 100 of these... The answer is that M3 nuts and machine screws are ubiquitous for assembling 3D printers, accessories for printers and printed contraptions in general.
Source: a certain company forgot to include half the specialty screws and nuts in my printer kit, had to learn way too much about finding them on my own.
Anyway, if you're in the US pm me with your shipping address and I'll front you a few of these guys. They'll probably survive in an envelope.
DSLRs are really front-heavy, which can exacerbate vibrations. I'd find a way to balance its center of gravity directly over the mount.
What kind of mount is it?
EDIT: ALSO: You need to secure the top of your camera as well. You can get a simple hotshoe mount like this and improvise some hardware. Basically you want to make a tripod that mounts to the top of the camera to either the base of your mount or additional suction cups.
You may want to toss in this and these and these for the Z-Brace. I know they are a little overkill on quantities but its either 100 for $10 or 10 for $7. Assuming you dont already have this stuff laying around.
All you need is a cheap red dot sight (there's no recoil on a camera so your cheap sight isn't going to lose its zero), a short section of picatinny rail, and a hotshoe to 1/4" tripod adapter. You'll have to drill and tap the rail section to 1/4"x20 and once it's all put together and aligned superglue everything together so it doesn't move. I had the pic rail left over from another project so I saved ten bucks there. You obviously don't need 10" of picatinny rail so just cut off as much as you want. For extra cool points use an Eotech
The lens is a Rokinon 500mm mirror lens.
Carbon Steel Lock Nut, Zinc Plated Finish, Right Hand Threads, Self... http://www.amazon.com/dp/B000NBKLM8/ref=cm_sw_r_udp_awd_HtkSub0YB4D93
Nyloc nuts.
Absolutely not necessary (really), but I also bought new screws that are a little harder and the hex socket is less likely to deform.
Also not necessary, but nice to have is a miniature metric wrench set.
As I said, it's not hard, but does take a couple hours. Go slow, take a break if needed. There's a video somewhere on youtube of someone doing this which should alleviate any concerns about the difficulty. Remember, if you do this, you're obligated to post the before and after 7x7 bed level image from Octoprint.
Other people have suggested using a lock nut on the back. Do you think that would be sufficient? I was thinking about using these.
I spent about $150 dollars, and got everything from Amazon.
3S 4S Lipo Battery Charger, HOTRC... https://www.amazon.com/dp/B07QV1ZM1N?ref=ppx_pop_mob_ap_share
Tattu 14.8V 1300mAh LiPo Battery... https://www.amazon.com/dp/B013I9RSEU?ref=ppx_pop_mob_ap_share
SKYRC SK-600092-01 4.3” FPV... https://www.amazon.com/dp/B07HMHS9W6?ref=ppx_pop_mob_ap_share
Spotter V2 Micro FPV AIO Camera... https://www.amazon.com/dp/B078PK98HC?ref=ppx_pop_mob_ap_share
Grifiti Nootle Recon 5 Flex Arm... https://www.amazon.com/dp/B07KJL39QK?ref=ppx_pop_mob_ap_share
SMALLRIG 30mm Diameter 1/4"... https://www.amazon.com/dp/B0081D1YGC?ref=ppx_pop_mob_ap_share
Assuming your camera has a cold shoe/hot shoe, you could use a Cold shoe to 1/4"-20 adapter and an iPhone tripod mount.
http://www.amazon.com/The-Hillman-Group-180180-100-Pack/dp/B000H5OM5C/
There you go, set for life.
It's just standard 1/4"-20 threading, it says it in the description. Here is a $5 alternative: http://www.amazon.com/SMALLRIG-Hot-Shoe-Adapter-Monitor/dp/B006LB5YLM/ref=sr_1_1?s=electronics&ie=UTF8&qid=1413131523&sr=1-1&keywords=hotshoe+tripod+mount
It's an M6 Jam Nut (proper term) It's about 3.2 mm thick on mine, which looks a little skinnier than yours.
Amazon.com link, but should be findable in a hardware store
I was going to say that this is an incorrect clamp...but the manufacturer lists it for flexible cord...go figure. I never looked into them but always assumed that it was only for NM. TIL.
Something like this would be better suited: http://www.amazon.com/dp/B00I7E5JMU
I'm not sure if that is the right diameter for your project though.
Thank you! Doing some research in your suggested made me want to do this approach:
1 - Drill holes into the trees and use a sealer to prevent infection.
2 - Use the W-11-008 wire (not flexible, supports 1640lbs), and clamp a swage domehead on the end. I was reading swages are better for loads than rope clips.
3 - Thread non swaged end of wire through 1 stainless steel washer, tree, and the other tree. Pull tight and mark on wire where the wire exits the tree.
4 - Remove wire from second tree, cut at mark, and insert a swage stud on the end.
5 - Remove wire from trees, and rethread with more washers on domehead swage and add washers on stud swage.
6 - Add a lock nut and tighten.
If the wire is too loose, add more washers. If the wire is too tight, loosen lock nut.
Wire the top hole first, as the trunks would slightly bend when wires are tightened, and wire lower hole second.
This would be a much cheaper and easier solution. What do you think?
Buy
($6)Wires:For the MOFSET mod
($1o)MOFSET
($6)Wire spades:For the MOFSET mod
($8)Assorted M3 Bolts:You need some for a few mods and for the bolts you will inevitably strip on this
cheapwonderful machine($13)Longer assorted M3 Bolts:For a few mods
($9)M4 Bolts:For one of the mods
($9)Metric allen wrench set:Had to order one of these since metric tools aren’t common round these parts
(~$20) PLA of preferred choice- You’ll run out of the sample bit quick so go ahead and order a roll or two to be prepared. You will note some upgrades require ABS so a small spool of that to your order will also help.
($6)M3 Lock nuts:Critically needed for a simple mod
($10)Threaded rod and nuts:Please note that this item seemed difficult to find online. I recommend going to your local hardware store and getting two 5/16” rods of at least 16” in length. They should have an assortment of threaded rod in various lengths available. Also note that the pitch of the threading matches the nuts you buy. Further instructions regarding this can be seen in Azza’s Z-Axis braces below.)
($6)9mm Wrench for the nozzle: Don’t wait for your first clog, go ahead and have this on hand to remove/change the nozzle. Note to only tighten/loosen the nozzle when heated.
Below is the order of printable upgrades I recommend but I suggest you mix in a few other prints along the way because this is a hobby after all and you should be having fun. It helps to have your quality as tuned in as much as possible for some of these so be patient and keep trying if you need to.
Print
Spool holder- temporary : Until you can mount your spool on top of the enclosure or any other personal preference.
Belt tensioner- print x2
Z-brace
Shielded stop button
Cable relocator : It’s a pain, but if you spend the time to do this and turn your extruder motor 90 degrees then you can get the full Z height without ruining your cables. It does involve opening all the cables to the PSU and feeding a few extra inches back through the cable chains.
Cable shroud : Looks nice if you do the cable relocator.
The following need to be printed in ABS:
M3 Bed Nut retainer: 10/10 upgrade. I know they look worse than the nice metal stock ones, but these help keep your bed level longer.
CiiCooler
Glass bed Holder
Now that the first major round of printed upgrades is done it’s time to shift to a few more supplies to pick up to really fine tune the machine.
Buy
($5)Radial fan: For CiiCooler
($5)Glue sticksThis and a glass bed is magic
($25)Borosilicate glass 8” x 8”
($26)Y-Carriage plate upgrade: This has been a nice upgrade as I now only need to relevel the bed every couple weeks instead of every print. Check out this guide for a ‘how to’ as well as a free upgrade by shifting your Y pulley over.
($15)rechargeable dehumidifier: For keeping in the bin with your opened filaments
($9)Extruder gears: Might be able to hold off on these, but will need eventually. If for some reason you have a Maker Select with metal X-axis blocks (V1 and V2, but not V2.1) then this is a must. You can follow this guide for a how to.
($28)Metal extruder plate and lever: Not needed, but nice.
($14)Noctua 40mm fan: Not needed, but makes the printer a lot quitter. A LOT quieter.
($50)MicroSwiss All Metal Hot End: The destruction of my PTFE tube by this point pushed me to doing this upgrade. If needed you can follow this guide for replacement. Remember to tighten/loosen when the nozzle its hot.
($6)Ceramic cotton: Tore off the stock one when replacing for the all metal hot end by accident. At least its thicker than stock
Now that the printer is in its final form, its time for the enclosure which is a stacked Ikea Lack hack.
Print
Spool holder
Pi Case
120mm fan cover
Fan grill
120mm fan PSU modification: I edited this to fit upside down since my PSU is mounted on the underside. This was nice since I blew the 40mm fan anyways so it made everything a lot quieter than before.
IKEA Lack filament guide
Webcam holder: This is one I designed specifically for the webcam I happen to have lying around. The camera mount piece can be changed out no problem though for what ever webcam you have or buy. The SketchUp file is included on Thingiverse for such purpose.
Buy
($20)2x Ikea Lack: Luckily there is one right down the street from me. I am located in North America though, so we do not have the STUVA, if you live literally anywhere else you may check in to this as an alternative.
($80)Plexi glass for enclosure: Could be cheaper alternatives, but it looks cool
($9)Foam pads for feet
($42)Raspberry Pi3: For OctoPrint. I also suggest using a different USB cable than the stock one provided by Monoprice or you will have issues.
($9)2x 120mm fans: Used for the power supply cooling and enclosure
($6)Rocker Switches so that the enclosure fan can be on for PLA, but off for ABS
($15)Dimmable LED lights
($10)8mm LED light connectors
Total:
$250 printer + $452 upgrades/parts + ~$80 PLA/ABS to date
Any m3 nylon locking nuts will work. Should be able to buy them in any hardware store. https://www.amazon.com/gp/aw/d/B015A3DRO2/ref=mp_s_a_1_4?ie=UTF8&qid=1511555342&sr=8-4&pi=AC_SX236_SY340_FMwebp_QL65&keywords=m3+nylon+nut&dpPl=1&dpID=41jHPPYWzLL&ref=plSrch
This would work
http://www.amazon.com/Crown-Bolt-85230-Zinc-Plated-25-Count/dp/B004XMZZU6/ref=sr_1_1?s=industrial&ie=UTF8&qid=1382645805&sr=1-1&keywords=5%2F16+nylon+nut
Does this look right?
These are the clamps I used. 2.75"was slightly too big, so drop it down to 2.5"
https://smile.amazon.com/gp/product/B0058W7X0A/ref=oh_aui_detailpage_o01_s00?ie=UTF8&psc=1
Here's the nuts to use. You only need two, and a four pack only costs $.69 at lowes.
https://smile.amazon.com/M6x1-0mm-Stainless-Steel-Nylock-Insert/dp/B016B26S6U/ref=sr_1_6?s=industrial&ie=UTF8&qid=1502800236&sr=1-6&keywords=m6x1.0+bolt
Nevermind, found a bag of 100 here on Amazon.. Thanks all! http://www.amazon.com/gp/product/B000NBKLM8/ref=oh_details_o00_s00_i00?ie=UTF8&psc=1
for ref, amazon nuts: https://smile.amazon.com/dp/B01KYBYLAO
The whole printed extruder assembly, ABS print cooling shrouds, extra nozzles.
M3 screw kit.
M3 square nuts.
M3 lock nuts
I bought these: https://www.amazon.com/gp/product/B075ZZW7VL/