(Part 3) Top products from r/3Dprinting
We found 185 product mentions on r/3Dprinting. We ranked the 3,284 resulting products by number of redditors who mentioned them. Here are the products ranked 41-60. You can also go back to the previous section.
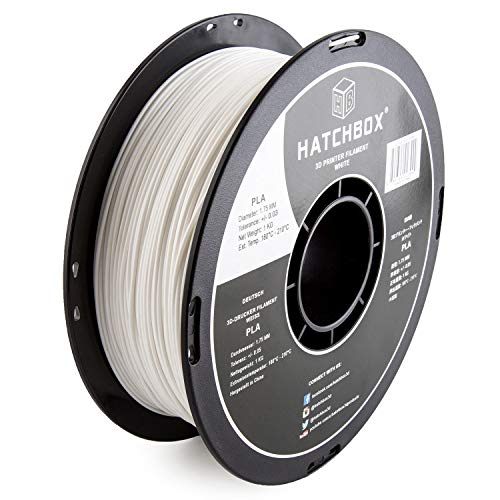
41. HATCHBOX PLA 3D Printer Filament, Dimensional Accuracy +/- 0.03 mm, 1 kg Spool, 1.75 mm, White
Sentiment score: 7
Number of reviews: 9
1 KG (approximately 2.20 lbs) Spool; Eco-Friendly, Odorless. Less Warping1.75mm Filament Diameter (Dimensional Accuracy +/- 0.03mm)PLA (Polylactic Acid) 3D Printer Filament Vacuumed Sealed With DesiccantRecommended Extrusion/Nozzle Temperature 180°C - 210°C (356°F - 410°F)Spool Diameter: 7.88" ...
 Show Reddit reviews
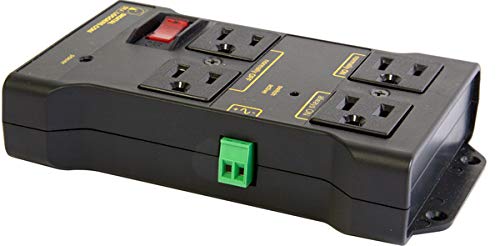
42. Iot Relay - Enclosed High-power Power Relay for Arduino, Raspberry Pi, PIC or Wifi, Relay Shield
Sentiment score: 2
Number of reviews: 9
Safe, Reliable Power ControlOne circuit, 4 outlets, 2x NC, 2x NOWires to your Arduino, Raspberry Pi, PIC, or other microTakes the place of a relay board. Fully assembled and ready to use.Includes surge supression, debounce, safety breaker
 Show Reddit reviews
43. Capricorn Bowden PTFE Tubing XS Series 1 Meter for 1.75mm Filament (Genuine Capricorn Premium Tubing)
Sentiment score: 6
Number of reviews: 9
Brand: CapricornLength: 1 MeterID: 1.95mm ± 0.05mmOD: 4.0mm
 Show Reddit reviews
44. HICTOP Auto Leveling Desktop 3D Printer Prusa I3 DIY Kit High Accuracy CNC Self-Assembly 10.6" x 7.9" x 7.4" Printing Size【Filament Not Included】
Sentiment score: 4
Number of reviews: 9
CONTROL BOARD: Uses ATmega2560 with integrated RAMPS 1.4 onboard. Supports dual extruder. No need to buy another board to do upgrade.VALID CUSTOMER SERVICE: Hictop offers life time after sales service, You could contact us at any time for any help.PRINTING SIZE: Prints max size of 10.6" x 7.9" x 7.4...
 Show Reddit reviews
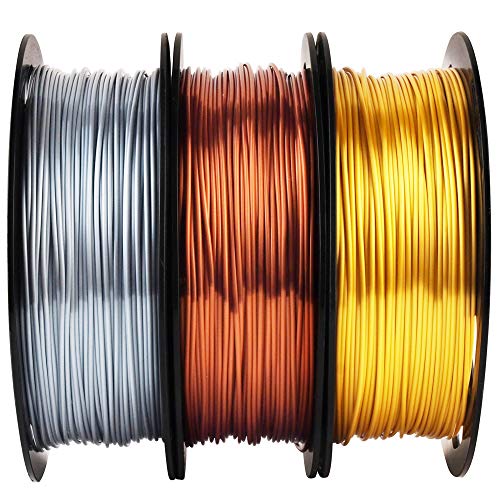
45. Shiny Silk Gold Silver Copper PLA Filament Bundle, 1.75mm 3D Printer Filament, Each Spool 0.5kg, 3 Spools Pack, with One 3D Printer Remove or Stick Tool MIKA3D
Sentiment score: 2
Number of reviews: 8
<b>Popular Silk Metal Colors:</b>Include Silk Filament Shinning Colors: Gold, Silver, Copper PLA Filament,<b>Strong Compatibility:</b>High Quality, No Bubble, Low Odor, Eco-Friendly, Universal Compatible with Diverse FDM 3D Printers in Market<b>Package:</b> Pack Contains 3 Spools, Each Spool Contain...
 Show Reddit reviews
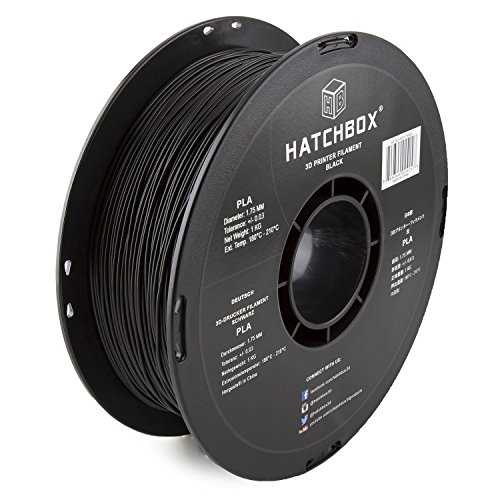
46. HATCHBOX PLA 3D Printer Filament, Dimensional Accuracy +/- 0.03 mm, 1 kg Spool, 1.75 mm, Black, Pack of 1
Sentiment score: 2
Number of reviews: 8
1 KG (approximately 2.20 lbs) Spool1.75mm Filament Diameter (Dimensional Accuracy +/- 0.03mm)PLA (Polylactic Acid) 3D Printer Filament Vacuumed Sealed With DesiccantRecommended Extrusion/Nozzle Temperature 180°C - 220°CSpool Diameter: 7.88" - Spool Width: 2.69" - Spool Hub Hole Diameter: 2.20"
 Show Reddit reviews
47. Gizmo Dorks PEI Sheet 8" x 8" (203mm x 203mm) 1mm Thick 3D Printer Build Surface with 3M 468MP Adhesive, Made in The USA
Sentiment score: 6
Number of reviews: 8
MADE IN THE USA: Single 1mm thick sheet installs quickly on top of existing flat build platforms (e.g. borosilicate glass) using the 3M 468MP adhesive transfer tape.ABS and PLA filaments (along with many other materials) print directly on to PEI surface without the need for additional adhesives, tap...
 Show Reddit reviews
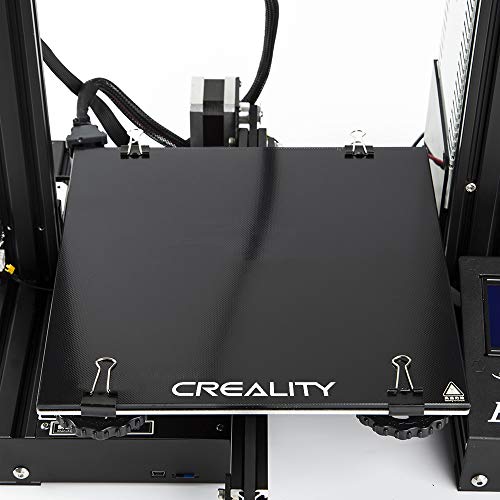
48. Creality 3D Printer Platform Heated Bed Build Surface Tempered Glass Plate for Ender 3/Ender 3 Pro 3D Printer 235x235x3mm
Sentiment score: 2
Number of reviews: 8
Very easy to take off the models, NO tools to remove modelsUse clips to fix the glass plate on the hot bed.Higher temperature higher sticky. The models will stick on bed firmly when temperature is highFit for Ender 3 and Ender 3X 3D printer.If you have any question or problem,please feel free to con...
 Show Reddit reviews
49. Alumilite Amazing Clear Cast 10590, 8 Oz of Clear Coating and 8 Oz of Casting Resin
Sentiment score: 6
Number of reviews: 8
Easy to use and long lastingThis package contains two 8 ounces bottles of clear coating and casting resin (mix portions out of each bottle together in order to create a casting)Also includes two stir sticks, three measuring cups that fits up to 2 tablespoons of liquid and easy to follow instructions...
 Show Reddit reviews
50. FYSETC 3D Printer Motherboard Accessories 0.31 in OD 0.78 in Length Compression Springs Light Load for Creality CR-10 10S S4 Ender 3 Heatbed Springs Bottom Connect Leveling - 10 Pack
Sentiment score: 3
Number of reviews: 8
Please Note: The length of it is 20mm which is not suitable for CR10 series products)Die Spring: compatible with most 3D Printer Bed, great Ender 3/2 TronXY X5S heat bed springs, flat top and stiffer;(Note: The length of it is 20mm which is not suitable for CR10 series products)Hole Diameter (OD) : ...
 Show Reddit reviews
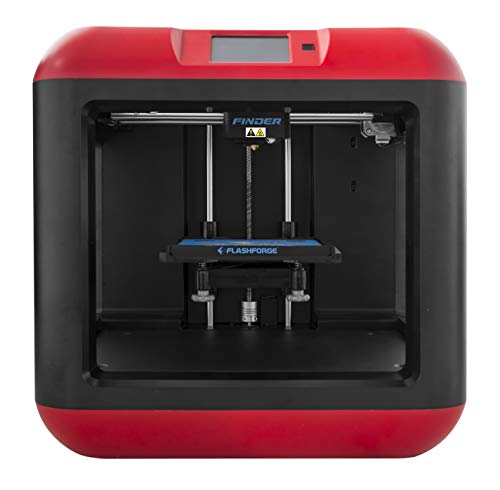
51. FlashForge Finder 3D Printers with Cloud, Wi-Fi, USB cable and Flash drive connectivity
Sentiment score: 4
Number of reviews: 8
Slide-in build plate allows printed objects to be easily removed3.5-Inch full color touchscreen with intuitive icons makes for easy operationSturdy, plastic alloy construction ensures stable printsSafe, non-heated build plateWi-Fi, usb and flash drive connectivity.Positioning Precision: 0.0001 inch ...
 Show Reddit reviews
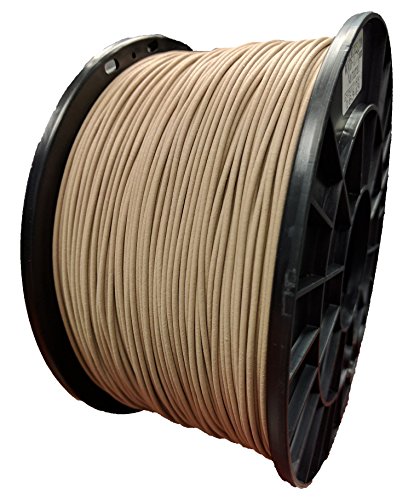
52. MG Chemicals Wood 3D Printer Filament, 1.75mm, 1 Kg (2.2 lbs.) - Wood
Sentiment score: 2
Number of reviews: 8
Wood / PLA blended Filament1.75 mm diameter, Wood filament, 1 Kg net weightSuggested print temperature ranges from 185°C to 230°C (365°F-464°F)Diameter tolerance: 1.75mm: 1.75+/-0.1mmCompatible with all fused-filament 3D printers models (sold separately)
 Show Reddit reviews
53. JGAURORA 3d Printer A3kit Prusa i3 DIY 3d Printers Self Assembly Metal Frame LCD Display Heated bed
Sentiment score: 4
Number of reviews: 7
JGAURORA 3d Printer Kit A3S, Metal frame, sturdy structure, 3d printer beginners' choice
 Show Reddit reviews
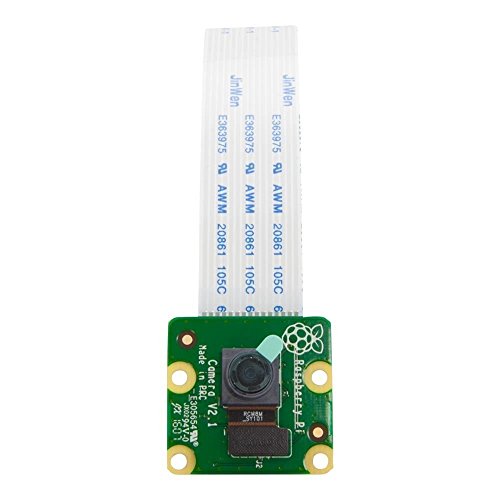
54. Raspberry Pi Camera Module V2-8 Megapixel,1080p (RPI-CAM-V2)
Sentiment score: 2
Number of reviews: 7
Second Generation Raspberry Pi Camera Module with Fixed Focus LensSony Exmor IMX219 Sensor Capable of 4K30 1080P60 720P180 8MP Still3280 (H) x 2464 (V) Active Pixel CountMaximum of 1080P30 and 8MP Stills in Raspberry Pi Board2A Power Supply Highly Recommended
 Show Reddit reviews
55. [New Arrival] HICTOP Filament Monitor Desktop 3D Printer Kits Reprap Prusa I3 MK8 DIY Self-Assembly Printing Size 10.6" x 8.3" x 7.0"
Sentiment score: 1
Number of reviews: 7
FILAMENT MONITOR: Alarms and stops printing when filament is empty. Resumes printing once filament is replaced. Will save your time and filament by not having to reprint.IMPROVED PARTS: Includes newer T screw rods, injection X axis holders, 24V/15A power supply. Higher accuracy and stable printing i...
![[New Arrival] HICTOP Filament Monitor Desktop 3D Printer Kits Reprap Prusa I3 MK8 DIY Self-Assembly Printing Size 10.6" x 8.3" x 7.0"](https://m.media-amazon.com/images/I/51e6TUincQL.jpg) Show Reddit reviews
Show Reddit reviews56. CHPOWER CR-10 Extruder Upgraded Replacement, Aluminum MK8 Drive Feed 3D Printer Extruders for Creality Ender 3, CR-10, CR-10S, CR-10 S4, CR-10 S5
Sentiment score: 1
Number of reviews: 7
UPGRADE: Right hand extruder kit - Perfect replacement for Creality 3D Printers ENDER3, ENDER5, CR-10 Series, CR-10 S4, CR-10 S5, CR-10 Mini, CR-10S, CR-10 Plus. Upgrade your Creality 3D Printer Extruder with our New "Metal Anodised Aluminum" Upgrade Kit.STABLE and DURABLE: Full metal aluminum alloy...
 Show Reddit reviews
57. uxcell LJ18A3-8-Z/BX 8mm Approach Sensor Inductive Proximity NPN NO Switch DC 6-36V
Sentiment score: 0
Number of reviews: 7
Product Name : Inductive Proximity Switch;Model : LJ18A3-8-Z/BX;Wire Type : DC 3 Wire Type (Black, Brown, Blue);Switch Appearance Type : Cylinder TypeTheory : Inductive Sensor;Output Type: NPN NO(Normal Open);Diameter of Head : 18mm;Detecting Distance : 8mmSupply Voltage : DC 6-36V;Current Output : ...
 Show Reddit reviews
58. Gizmo Dorks PEI Sheet, 8" x 8" 3D Printer Build Surface Polyetherimide Ultem
Sentiment score: 3
Number of reviews: 7
 Show Reddit reviews
59. [Gulfcoast Robotics] Thermistor Upgrade for Maker Select Plus and Wanhao Duplicator i3 Plus 3D Printers.
Sentiment score: 1
Number of reviews: 7
Drop-in replacement for stock thermistor on MP Maker Select Plus / Wanhao Duplicator PlusAlso compatible with MP Maker Select V2.1 and Wanhao Duplicator V2.1Easy to mount with M3 HEX STUBCan hold temperature up to 300C with ceramic glue and fiberglass insulation on leadsDesigned and manufactured by ...
![[Gulfcoast Robotics] Thermistor Upgrade for Maker Select Plus and Wanhao Duplicator i3 Plus 3D Printers.](https://m.media-amazon.com/images/I/31OXL-XQ-8L.jpg) Show Reddit reviews
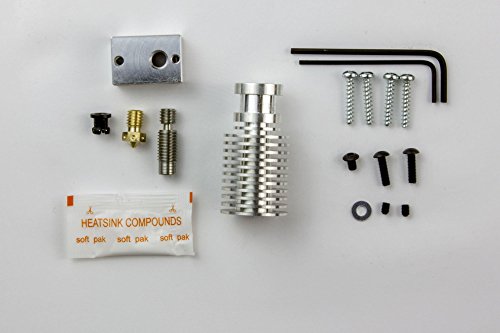
Show Reddit reviews60. E3D All-metal v6 HotEnd Full Kit - 1.75mm Universal - Direct, 12v - Approximately 120mm PTFE (ASSEMBLY REQUIRED)
Sentiment score: 1
Number of reviews: 7
High Quality Printing: We've kept our sharp thermal transition that gives the high quality printing performance users have come to expect from E3D HotEnds. A sharp thermal break gives better control over filament output so you get more immediate start and stops when extruding as well as retracts tha...
 Show Reddit reviews
I'm looking for my first printer, something that is relatively quick to assemble, not because of inexperience with electronics, but lack of time at home with wife and kids and work.
My budget is around $400-450 USD. Primarily would be using this to be building prototypes of products for a company I'm looking to start. A majority of these prints would be likely be molded and cast.
PLA is probably going to be more than adequate for some of the parts, but for others I may want to be using ABS. One or two ideas may require flexible filament. The range of sizes may be anywhere from 1/2" square to one that might be 5-8" tall by 4-6" wide and deep, nothing massive, but I don't think a Tiny version would be best for me. (Also, I have 3 young boys, so you can bet they'll want me to be printing toys for them as well...)
I'd like a printer that can spit out prints that need very little post-processing, and can practically go from bed to mold box. For one product, it will be really hard to sand, since the clips will be really tiny.
I've been doing research, reading and watching reviews, scouring this sub and I feel overwhelmed and lost. At first, I was looking at a $200-ish printer (something like the JGAURORA), and adding some mods to bring it up to a decent level.
Then I saw the CR-10S and that looked like a winner, until I read about boycotting Creality (I know it was a firmware issue, but don't understand all the details). Yesterday I read that Creality is possibly in the good graces again? I have to admit I'm confused. I like the V-Slot construction with dual lead screws, and perhaps the ability to swap out V-slot to make it bigger, if needed (is that do-able, or would I need to purchase the larger versions to get that capability?).
After trying to wade my way through all of the choices, which seemed to almost all have something wrong with them, I thought about just biting the bullet and overspending to get the Prusa Mk3, but I don't really have that kind of cash without it becoming an issue down the line. So ideally, I'd like to keep it to sub-$500.
I'd be setting this up in my little lab in my unfinished basement. There isn't a whole lot of heat down there during the upper midwest winter months, but it's not freezing either. The summers don't heat up the basement either, so it's a relatively stable environment. I'm going in with the understanding that I'll need to build an enclosure of some sort to contain the heat, or perhaps add some more if required. IKEA to the rescue).
Can the good folks here help me out???
Improvements/add-ons
• Filament Roller Guide. You will thank yourself later to further prevent the filament from grooving an indentation where it feeds into your extruder. It utilizes bearings but its a fantastic design. I had mine for ~2 months when I started noticing the groove already being made.
• XT60 Connector clips - if you want a little "cable management"
• LCD Cable Clips - Also if you want a little "cable management". There is also an LCD Cover for the PCB to keep dust and whatnot out.
• Any fan covers you find that suit your style as you dont want filament going into the box in the bottom left (not entirely too sure what it holds).
>
>
>
Physical Upgrades
• Upgrade the bed springs as my originals started to sag a little. Not exactly sure on what the technical name for those springs are but those are the ones I purchased and I have been happy with them.
• Borosilicate glass bed. I use to use the stock mat, tape method, and hairspray method. All of those worked for a little bit but were a complete pain and mess to deal with from time to time. All I do now is use some isopropyl alcohol and clean my glass bed every once in a while but past that I require NO adhesion for my bed outside of tiny pieces that require a brim, skirt or whatever support needed to keep it adhered. As long as your print bed is leveled as best as possible (have a nice filament "squish") you will have no issues.
• Some other things you could look into if you plan to print with other kinds of filament outside of PLA would be: Micro Swiss steel nozzle, Capricorn tubing and an upgraded extruder like the e3d. Keep it simple for right now though while you learn your rigs because I strongly feel no ender 3 works the same and my preference for which program (MatterHacker, Slic3r or Cura) depends on how I feel how the model appears and how its coming out. Also, grab yourself a handful of replacement nozzles if you continue to use the brass ones. They CAN wear out if you use the printer like crazy, so its always good to have spares (also can get a variety of sizes too - standard being the 0.1mm I believe?). I snagged a pack of 10 for $5-8.
>
>
>
Last but not least, run a few bed level test prints as well. The best one that I have found which helps me dial in my printing was CHEPs bed level STL file. Video & G-Code file. I use it religiously if I ever find that my bed is out of wack.
There are a handful of other mods/add-ons you can find on Thingiverse and another website (one which we arent allowed to link to unfortunately).
I'm pretty new to this too, I bought my Ender 3 Pro around the same time as you. Quiet printing is pretty high on my list as well as being able to print high-temp exotic filaments in the long term while maintaining reliability.
First upgrades I purchased were stiffer bed springs so I would be less likely to throw the bed out of level while removing prints or working around the printer and Capricorn XS tube since it has a more consistent internal diameter, fits closer to the filament, and can work with slightly higher temps. I also picked up a pack of bowden couplers recently as I noticed the end nearest the extruder is sliding past the coupler jaws on de/retraction; don't worry about that unless it's an issue for you. That's about $30 alone since I don't have a supply shop locally and have to order those parts in bulk. I had a Pi 3B laying around unused and flashed Octoprint onto it. Highly recommended. I have a replacement Noctua hotend fan, buck converters, and 5015 blower on order to quiet the fan noise; about $32. Just replaced the Meanwell psu fan with a 60x25mm Noctua I had lying around (Note: there may be better options in the 92-120mm range to replace part of the PSU housing, but that's what I had laying around). Next upgrade coming is the SKR Mini E3 with TMC 2209 drivers ($28) to eliminate almost all of the stepper noise. Also looking into a replacement for the control board fan and some vibration isolating feet for the frame. As far as higher temp printing I haven't made a lot of progress aside from buying a titanium all-metal heat brake ($11) winch I have yet to install or inspect, and looking into enclosure and electronics relocation avenues.
Either way the mods I purchased came in at around $100 US which should quiet the printer and help with reliability. Also looking into picking up a good M3-M4 bolt kit if any exist in the US.
Here are some links to the things I picked up and will, which may be helpful if you're in the US. Mostly from Amazon.
Type | Name | Link | Price
---|---|----|----
Reliability | 8mm x 20mm yellow springs | Link | $6.98
Reliability | Capricorn XS Tubing | Link | $11.49
Reliability | PC4-M6 / PC4-M10 Pneumatic Bowden Fittings | Link | $11.99
Silence | Noctua 40mm x 10mm 3-pin fan | Link | $13.95
Silence/Various | LM2596 Adjustable Buck Converters | Link | $10.95
Silence | 24v 5015 Radial Ball Bearing Fans | Link | $7.19
Silence/Various | SKR Mini E3 w/ TMC 2209 drivers | Link | $28.81
High Temp | Titanium All-Metal Heat Brake | Link | $11.52
TOTAL: $102.88 US + Tax
Parts already purchased/ bought with printer
Type | Name | Link | Price
---|---|----|----
Reliability/High Temp | OEM Ender 3 Glass Bed | Link | $20
Reliability | Feeler Guage Set | Link | $5
Reliability | 608zz Bearings, using with this(My Remix), this, and this, though I like this design a bit better | Link | $5.98
QoL Improvement | Raspberry Pi 3B w/ Octoprint | Link | $34.46
Silence | Noctua 60mm x 25mm 3-pin fan, goes with this mod | Link | $14.95
TOTAL: $80.39 US + Tax
Future planned upgrades
Hey! Welcome. I also just bought my ender 3 pro as my first printer.
&#x200B;
Here's a great place to start https://all3dp.com/1/20-must-creality-ender-3-upgrades-mods/
&#x200B;
&#x200B;
So far I've done the following upgrades:
1: Metal Extruder. 100% necessary and MUCH easier to do during initial assembly rather than an upgrade. I got mine form Amazon.
https://www.amazon.com/gp/product/B07J44QW8B/ref=ppx_yo_dt_b_asin_title_o02_s00?ie=UTF8&psc=1
&#x200B;
2. 2020 Filament Guide:
You can find this on Thingiverse and is about a hour long print. It actually made a noticeable different in some salmon skin issues I had in my first couple of prints.
&#x200B;
3. Springs:
These just arrived today so I'm not sure how much they will help but one of the main causes of my failed prints so far as been issues with leveling and some of the stock springs I can see are just no good.
&#x200B;
4. TL Smoother:
Another upgrade I havent had a chance to set up yet. That said, my research has come across mixed results. Some people love them and some people Hate them.
&#x200B;
I'm not sure about glass beds and all, the stock plate has been working pretty well for me. I think I'm going to try it alittle more before moving to a glass bed simply cause its a bit easier to maintain but it could be the next thing on my list. I've also been considering an auto-leveler (and ardunio) since it doesn't have that function and having to relevel, watch, pray, reset has already cost me a couple hours of print time.
&#x200B;
I'm not familiar with ESUN PLA+, I've been using https://www.amazon.com/gp/product/B00J0GMMP6/ref=ppx_yo_dt_b_asin_title_o07_s00?ie=UTF8&psc=1
and am very happy with it so far.
&#x200B;
Best of luck with your printing!!
I was in the same position around three months ago.... Previous to purchasing my first 3d printer, I was exposed to the world of 3D printing through my school's 3D printing lab. Due to my exposure to higher end printers ($3,500 +), previous to buying my own cheapish 3D printer, I was able to have a sense as to what a good, ok, and bad print looks and feels like. After doing some reserch on some higher and lower end 3d printer kits, I quickly learned that when it comes to purchasing a 3D printer, you can only buy a printer with 2 out of these three qualities: economical, large build volume, high quality. I decided that I wanted a printer with a largish 3d printing volume that was on the economical side (less than $450). When I made this decision I understood that I since I was getting an economical 3D printer with a largish build plate I was sacrificing not having a quality 3D printer.
I ended up purchasing a Prusa clone; the "Hictop Prusa i3" to be exact. Price: $319. https://www.amazon.com/Arrival-HICTOP-Filament-Self-assembly-Printing/dp/B01ERDWSFU/ref=sr_1_1?ie=UTF8&amp;qid=1483904107&amp;sr=8-1-spons&amp;keywords=hictop+prusa+i3&amp;psc=1
After buying the printer, I told myself that worst case scenario I'd easily be able to get rid of it (and make a small profit) by selling it on "Craigslist" or "Let Go" for a slightly higher price than what I bought it for since I would've sold the printer pre-assembled. (The assembly process is actually not that hard at all... Took me less than 5 hours)
After the printer kit arrived, I spent a few hours a day over a weekend building it. After two days, and some youtube help, the printer was up and running near flawlessly. To my surprise, I was getting incredible prints on both PLA and ABS(the printer has a hot bed). After about a week of printing and tuning the printer (which is not hard at all), I was getting better prints than what my school's top printer was producing. All in all, I am now extremely satisfied with my purchase. I understand that I don't have the best 3D printer on the market, but I know that I have a printer that is worth a lot more than what I paid for it. (With some DIY upgrades like a printing enclosure you can step up the build quality even more.)
Looking back, the only thing I would have maybe done differently would have been spending like $30 more and buying the aluminum version. I doubt that the quality would be any better than the acrylic version I have, but it would've been easier and less scary to build/ carry around. (the acrylic frame can break if you way over tighten a part during the assembly process). Also, if you end up buying this printer, or another clone like it, I would strongly suggest buying it off a trusted website like Amazon. The seller of my printer was extremely responsive and sent me a few parts I thought were slightly damaged (but still totally still usable).
Right-o, sorry about that. It's a Prusa I3 Mk8 I believe and I've been using 1.75mm PLA with it. I have the bed set at 60C, the extruder at 220C. I was having some problems with prints not sticking to the base before, but that bed temperature seems to work. The motors were also skipping and "stepping" the prints before, but I tightened up the belts which took care of that. The printer will shudder a bit when filling in skinny bits, but for the outside layer it seems to be perfectly smooth to me. The extruder has two fans attached to it, one with a heat sink above the nozzle where the feed motor is and another blowing air across the nozzle itself. I'll update if I think of any more information.
Oops, I just realized the text for my post didn't work. Basically, when printing one of the 4 faces (along the x axis) ends up rougher than the other 3. I'm not sure what would be causing it because the face directly opposite of it is nice and smooth like the two on the y-axis. I would think if it was a problem with belts, the motor, etc. that I would see the same effect on the opposite side as well. I've tried different speeds with it to mitigate the issue, but I end up with a similar pattern no matter the speed setting. I also saw it with a different filament (although also PLA) that came with the printer originally. Any help or suggestions you can provide would be awesome, thanks!
Printer:
https://www.amazon.com/gp/product/B01ERDWSFU/ref=oh_aui_detailpage_o03_s01?ie=UTF8&amp;psc=1
Filament:
https://www.amazon.com/gp/product/B00ZBGDR1W/ref=oh_aui_detailpage_o03_s00?ie=UTF8&amp;psc=1
Pretty new to 3d printing but really interested. I basically just want to print stuff that people post and probably dabble in designing my own stuff. I am a technical guy, but I know that the designing of the models is pretty tough. I have sifted through the comments and saw two printers that stood out to me within the range I was thinking of. The CR-10 and the Prusa i3. I don't know which version is good for the CR-10 and I'm looking in the $400 range, but could go up to $800 if you guys think my value would be best there. Here are other printers I was looking at and not sure how everyone feels about those. If anyone can give me some feedback about them it'll help immensely in my decision.
https://www.amazon.com/dp/B00I8NM6JO/_encoding=UTF8?coliid=I3MX1XJ2F9XGZ7&amp;colid=30UBVRH3KC9LH
https://www.amazon.com/dp/B07421SR9J/_encoding=UTF8?coliid=I3SEAHNKKLM0QY&amp;colid=30UBVRH3KC9LH
https://www.amazon.com/dp/B016R9E7J2/_encoding=UTF8?coliid=I205Z5A0OGO6ZD&amp;colid=30UBVRH3KC9LH
Thanks! I used Hatchbox PLA in 'White'
Here's a link
https://www.amazon.com/HATCHBOX-3D-Filament-Dimensional-Accuracy/dp/B00J0GMMP6/ref=sr_1_4?ie=UTF8&amp;qid=1518840025&amp;sr=8-4&amp;keywords=hatchbox+pla
White works REALLY well for lithophanes, best color in my opinion! Best of luck, and thank you for taking the time to comment! :)
Here's my favorites!
Filament standoff arm to keep it from pulling straight down
https://www.thingiverse.com/thing:2917932
&#x200B;
And Complimentary filament guide:
https://www.thingiverse.com/thing:2894097
&#x200B;
Ribbon Cable Clips:
https://www.thingiverse.com/thing:2960375
&#x200B;
I added an SD card ribbon because the micro SD location and size Sucks!
https://www.amazon.com/gp/product/B01D9JIUU0/ref=ppx_yo_dt_b_asin_title_o01_s00?ie=UTF8&psc=1
&#x200B;
Fan cover to get rid of upwards draft, and keep little bits of filament out of the fan:
https://www.thingiverse.com/thing:2935204
&#x200B;
Immediately replace that crappy Plastic extruder with any metal one off amazon.
&#x200B;
Capricorn Bowden Tube:
https://www.amazon.com/gp/product/B079P92HN9/ref=ppx_yo_dt_b_asin_title_o02_s00?ie=UTF8&psc=1
&#x200B;
Powder Coated PEI Magnetic Build sheet! (Priceless!)
https://www.aliexpress.com/item/trianglelab-235-X-235-ender-3-Double-sided-Textured-PEI-Spring-Steel-Sheet-Powder-Coated-PEI/33008374363.html?spm=2114.search0104.3.8.221538feJjwDlN&ws_ab_test=searchweb0_0,searchweb201602_7_10065_10130_10068_10890_10547_319_10546_317_10548_10545_10696_453_10084_454_10083_10618_10307_537_536_10059_10884_10887_321_322_10103,searchweb201603_52,ppcSwitch_0&algo_expid=04b2bf81-a9de-45c6-9ea4-23cf0e249943-1&algo_pvid=04b2bf81-a9de-45c6-9ea4-23cf0e249943&transAbTest=ae803_3
&#x200B;
Change your fans over to Noctua fans, and the printer becomes nearly silent. (amazon)
&#x200B;
I got an EZABL bed leveling kit. Doing BL Touch soon, but The EZABL has pre-configured firmware, which made life easy!
Raspberry pi zero W or 3B+ with octoprint is a must!
&#x200B;
These got me into sexy print land pretty quick!
PEI, Polyethylenimine, is a type of plastic and you can buy it in various forms (including sheets). It's handy because it's nice and sticky to plastics like PLA when it's heated but releases well when it's at room temperature (a few taps along the edge of the base of the print releases most things). The only issue I've had with it is that TPU sticks a bit too well, but TPU's really best printed on a pure glass bed anyways.
I've got a sheet of PEI adhered to a glass sheet and clipped to my print bed. It works great.
What I did may not be the "best" way to get into 3d printing, but it worked well for me.
Before the MK2 came out I was looking for a cheap Prusa clone, but had been warned about the plastic builds so I ended up getting this machine https://www.amazon.com/gp/product/B01CNP3CUO/ref=oh_aui_detailpage_o04_s00?ie=UTF8&amp;psc=1
It's a bit more expensive than the ultra cheap chinese printers, but it actually worked really well. I learned a lot building it, but I eventually decided I wanted to try something more advanced, so I started building a D-Bot.
I used this printer to print all the D-Bot pieces in PETG, and then recycled the electronics from this printer (which are good quality, and seem to be on par with what you'd order from china anyway) saving me a ton of money building the D-Bot, as the majority of the cost is electronics and extrusion. With this I mainly only had to pay for extrusion and hardware.
Kind of a round about way of getting into it, but it worked well for me :)
For alternative resin I recommend Amazing Clear Cast for half the price; https://www.amazon.com/dp/B00CVYNQ4U/ref=cm_sw_r_cp_api_Yf0.ybCXPKFN7
I've done this exact process with both clear resin and wood glue, they yield almost identical results but wood glue is one part, dries much faster, and is like 3 bucks for a huge bottle. When thickened with metal powder the wood glue fills cracks even better then one coat of resin.
"Wood glue dires rather than hardens"
I'm not sure why you'd need the part hardened?
"you can't rely on it being perfectly clear."
Wood glue is an opaque off-white color, it's obviously not clear. You mix enough metal powder in and then buff it with steel wool to a polished finish or use a patina.
My personal recommendation (hictop prusa) is about $270. For $330 you'll have plenty of choices on Amazon. In hindsight I wish my printer had a metal frame but after some tuning it's a good work horse with a large print area. Good for the price just don't expect 1 micron resolution.
EDIT: just found two that I really want. Both with metal frames, one for sure has auto leveling (very very very good to have) and it's $520
HICTOP Auto Leveling Desktop 3D Printer Prusa I3 DIY Kit High Accuracy CNC Self-assembly 10.6" x 7.9" x 7.4" Printing Size【Filament Not included】 https://www.amazon.com/dp/B015IHMOSK/ref=cm_sw_r_cp_apa_omnKzbNWBYW4W
HICTOP CR-10 3D Printer Prusa I3 DIY Kit Aluminum Large Print Size 300x300x400mm https://www.amazon.com/dp/B06XSF5MGT/ref=cm_sw_r_cp_apa_OmnKzbTRAT56S
HATCHBOX 1.75mm White PLA 3D Printer Filament - 1kg Spool (2.2 lbs) - Dimensional Accuracy +/- 0.05mm https://www.amazon.com/dp/B00J0GMMP6/ref=cm_sw_r_cp_apa_i_EBHPCb8CJ9QV2
Its only $20 and you could crank out a lot of minis at high quality. I'm not familiar with other printers other then my monoprice mini v2. So i can't attest to the quality/price. If you're interested in just minis for now then i would honestly get: Monoprice Select Mini 3D Printer V2 - Black with Heated (120 x 120 x 120 mm) Build Plate, Fully Assembled + Free Sample PLA Filament and MicroSD Card Preloaded with Printable 3D Models https://www.amazon.com/dp/B073ZLSMFT/ref=cm_sw_r_cp_apa_i_nFHPCb6W5JNDZ
Its print ready right out of the box and user friendly. Lots of mods to do and lots of youtube videos to guide you along the way, a great beginner's 3d printer. Plus it doesn't break the bank.
Country: USA
Budget: $400-$500
ok so I had the Monoprice Maker Select and it just conked out on me. So I'm looking to get a replacement but my budget is limited as I didn't expect to have to replace it. I know for a fact I want something easier to level. I hated leveling the bed. SO far I have it narrowed down to a few choices:
Flashforge Finder - Pros: Guided Leveling. Cons: Small build area.
Da Vinci Mini - Pros: Super cheap, Auto-Leveling. Cons: SMall build area (though slightly larger than the flashforge.)
Da Vinci Pro - Pros: Guided Leveling, Large build area, can use multiple different types of filaments. Cons: None that I can see.
PowerSpec 3D Pro 2 - Pros: Dual extrusion, Fully enclosed, medium sized build area, good with flexible filament. Cons: Manual Leveling. I don't know anything about this one, only that it is a rebranded Flashforge Creator Pro.
Before I make the purchase I would like to get some opinions from some people that have or had these printers. If you know of a better suggestion feel free to post it. If you have reasons why these are crap, etc.
>https://www.amazon.com/gp/product/B079P92HN9/ref=oh_aui_detailpage_o05_s00?ie=UTF8&psc=1
https://www.amazon.com/gp/product/B07F1K1LTC/ref=oh_aui_detailpage_o05_s00?ie=UTF8&psc=1 (a bit more than 20$ now sorry! lol)
You get enough from these two products to upgrade more than one printer as well, I love capricorn tubing, I wish it was just standard with every printer also just double checking that you're using 1.75mm filament I don't know the CR10 that well if that's an option that wont work with these products if you're using a larger filament. Good Luck!
Zwave operates at 900mhz in the us...the one i posted will hook to your wifi for control..... control is an app on my android pjone/tablet..... you can get cheaper hubs in it $50 range when i got mine, but they are not internet connected or app controlled...... a hub is required to do zwave..... but not all sensors connect to all hubs.....
Saw this today....with it, a RPi, and a smoke detector that has a digital output you could do the same... or use a cheap pair of temp sensors... one for ambient temp, the other above the printer... have it read both every second and if the top one rises super high and super fast assume a fire.. might be able to wire directly from detector to control circuit.....
https://smile.amazon.com/gp/product/B00WV7GMA2/ref=ox_sc_act_title_1?smid=A3D4241373L385&amp;psc=1
I also use these.. turns off the water in case of a leak...or tells me i left the garage open....working on a circuit to let me remote close it and 'accidentally' lock the wife out...j/k
https://smile.amazon.com/gp/product/B01LXR0B8Q/ref=ppx_yo_dt_b_search_asin_title?ie=UTF8&amp;psc=1
https://smile.amazon.com/gp/product/B01JGMZNNG/ref=ppx_yo_dt_b_search_asin_title?ie=UTF8&amp;psc=1
https://smile.amazon.com/gp/product/B01JGMZNNG/ref=ppx_yo_dt_b_search_asin_title?ie=UTF8&amp;psc=1
I recently purchased the Ender 3 Pro, and these are the things I've done so far:
Thingiverse: Ender 3 Tool Holder
Thingiverse: Ender 3 Filament Guide
Amazon: Nozzles in 0.2mm, 0.3mm, 0.4mm, 0.5mm
Thingiverse: Nozzle Case
Thingiverse: Ender 3 V-Slot Tool Holder Tray
OctoPrint (OctoPi) on Raspberry Pi 3 B+
Amazon: Raspberry Pi Camera Module v2
Nozzles
PTFE. This is the cadillac option. Cheaper tubing is very cheap, like $5 for 5 feet or something.
I didn't mention these as I haven't installed them, but stepper dampeners. Please see the stickied thread on /r/ender3 about these, if you want to order them!
The springs I ordered. Note: I couldn't quite replace the one where the wires attach to the bed. I didn't play around too much, I just left that one on there. The other three have held solid, and the next time I'm adjusting my bed, I'll try to put that one on there as well.
Hope that helps!
Edit: Reddit markdown not liking my links, I'll try to fix them
Hi, I have the tempered glass one with ridges, they don't say it needs anything. I think If you use a glue-stick on it would stick forever. When I had it placed good it worked without anything, but something happend and it unleveled itself.
https://www.amazon.com/Creality-3D-Platform-Tempered-235x235x3mm/dp/B07FSM8DK9/ref=sr_1_4?keywords=ender+3+glass+bed&amp;qid=1566487149&amp;s=industrial&amp;sr=1-4
The idea on using the glass to space it is great! I will try it!
Thankyou for respoding :)
yeah these printers are actually a great starter printer. I also did not know what I was printing (thought it was a dove at first) because it all comes up as 'gcode' on the SD card.
I bought this filament from amazon for $23 although it looks to be out of stock. they have plenty of other colors, and I can attest to the glow in the dark working well. fun for kids
i was randomly looking around for printers out of curiosity and stumbled across this on amazon, thought it looked pretty SWEET with good amazon reviews
https://www.amazon.com/dp/B01CNP3CUO?psc=1
problem with most printers is they don't seem to have as robust a community as monoprice does (they seem to have a pretty hoppin facebook group and stuff) so it's harder to recommend (people don't talk about it / recommend it often, they've heard monoprice is the way to go, vicious cycle 8))
edit looked for reviews done by non amazonians, there might be a video or two on youtube but iono finding info on kits is pretty hard
"Amazing Clear Cast" is cheaper than XTC
https://www.amazon.co.uk/Amazing-Casting-Products-Various-Clear/dp/B00CVYNQ4U/ref=sr_1_1?ie=UTF8&amp;qid=1466331013&amp;sr=8-1&amp;keywords=amazing+clear
(Allegedly food safe too)
I have a Flashforge Finder and I highly recommend it. It's right at $500. It's incredibly user friendly compared to a kit. There's almost no setup and fiddling, it prints well out of the box. The software is good, the touch screen interface is cool, and it's been reliable.
https://www.amazon.com/FlashForge-3D-Printers-New-Model/dp/B016R9E7J2
This was actually fairly easy to setup and only cost about $8 and 30 mins of my time.
First you need to order an Inductive Sensor:
https://www.amazon.com/gp/product/B008FZC8F2/ref=oh_aui_detailpage_o01_s00?ie=UTF8&amp;psc=1
Then I printed out a new sensor mount and glued it right next to my hot end.
Then in the Marlin Firmware, I enabled the auto bed leveling code and flashed the Arduino board. Next I set the boundaries of my bed and where I wanted the sensor to check. All you have to do is twist the sensor up and down to adjust how close the hot end is to the bed. After the sensor was mounted, you just plug the brown wire to +12v and the blue wire to ground. The Black wire goes to the signal pin on the z-min endstop. Supposedly you need to solder in some resistors inline (the youtube video below explains it) to lower the voltage being sent to the ramps, but mine works fine without the modification.
Now I never have to worry about the nozzle being to close / too far from the bed...
Here's a great youtube video that helped me get it all setup:
https://www.youtube.com/watch?v=EcGFLwj0pnA
Directly. Creality 3D Printer Platform Heated Bed Build Surface Tempered Glass Plate for Ender 3/Ender 3 Pro 3D Printer 235x235x3mm https://www.amazon.com/dp/B07FSM8DK9/ref=cm_sw_r_cp_tai_s9RvDbM16RZ7Y is the one I got. It has a coating on it. I have been extremely happy, though it took me another 15 minutes to relieved since it’s thicker and you gotta reset everything.
Only real change is you should wait for it to cool before pulling stuff off, but once it cools, it doesn’t stick. Like... at all. It’s quite nice. Also, it doesn’t warp, which I only found out after, because I was only after a new bed and figured I’d upgrade. Then I read about it ;)
You can't, I've destroyed mine and installed PEI.
https://www.amazon.com/gp/product/B01KBGJU5S/ref=oh_aui_detailpage_o01_s00?ie=UTF8&amp;psc=1
Stick it down with this stuff here:
https://www.amazon.com/gp/product/B007Y7D5NQ/ref=oh_aui_detailpage_o00_s00?ie=UTF8&amp;psc=1
When you use this stuff you just wipe it with rubbing alcohol to clean the surface. Then it gives you near perfectly smooth prints where it touches the surface. The prints pop off easy after it cools but holds tight when it's warm. Personally I find it a waste of money to buy glue sticks/hair spray if you don't have to. Although I did buy glass I never installed it after this worked so well. It's amazing stuff and you'll never have to replace it.
Just like u/tipsygelding said, this is in fact a HICTOP Prusa i3 clone. Here is a link to the Amazon page. It's not available, but from other sites I've looked at, it looks like it's ~$1000, so I'm glad you were able to grab it!
Oh, and welcome to the sub!
https://www.amazon.com/gp/product/B00CVYNQ4U/ref=oh_aui_detailpage_o05_s00?ie=UTF8&amp;psc=1
Clear cast resin works very well and is food safe. I combine it with Raptor PLA that I anneal to survive dishwasher temps. Once coated and annealed, the parts are food and dishwasher safe.
I am very interested in a build log! I just purchased this kit :
"[New Arrival] HICTOP Filament Monitor Desktop 3D Printer Kits Reprap Prusa I3 MK8 DIY Self-assembly Printing size 10.6" x 8.3" x 7.7" https://www.amazon.com/dp/B01ERDWSFU/ref=cm_sw_r_cp_api_aFrLxb63N8RYF"
I don't know if I should return it and get the auto leveling version. I just received the package today and I am super eager to start the build, but I don't know if I made the right choice for the kit. I emailed tech support to see if they offer any self leveling equipment that I could integrate.
What do you think?
Hello there. This is a rebrand of the Wanhao i3 Plus, so if you need some help, googling information about that printer, or its popular rebrand, the Monoprice Maker Select Plus, may give some answers. I have the MPMS+, so I may be able to help you out. Your old heater block had two holes because it is able to take two different sized thermistor screws. Your new heater block can only take one. It looks like an M3 screw hole maybe? It is hard to tell. But yes, you should be able to put your thermistor cable into the hole with the right screw just fine. As for where to put the heater cartridge plugs in, your daughter board should look like this, right? You would plug it into the one labeled heater. Also, I upgraded my thermistor to a screw based thermistor, which I would recommend. I think it would be compatible with the block you have there if you're interested.
Polyurethane won't harm plastic. Someone posted this stuff last year and I gave it a shot, works great and I highly recommend it.
It looks to be the Hictop Aluminum, either the standard or "High Accuracy" model with auto leveling. Easiest way to tell is to check if there's a green sensor at the same height as the nozzle on the back plate with the pillow blocks for the bearings. They're notable for having a somewhat oblong build volume, with a bed that's a decent bit longer than the de facto standard 200mm on one end, providing a significant boost to the size of models it's capable of printing. They're not exactly known for being reliable, though, so if it was in a dumpster, it may very well be for a major fault. Of course it could also just be because someone got frustrated working with a printer, which isn't exactly an unknown phenomenon. Either way, it has a lot of parts compatible with most other printers, so if it doesn't work outright, it's still got a lot of useful components that can be put to good use elsewhere.
I built a cabinet for the noise isolation, since I work in the same room as my printer. I only print PLA, but it's definitely been worthwhile just in the noise reduction alone. Pics here: http://imgur.com/a/5ik2k
Parts:
Cabinet exhaust fan (not installed yet, but will be able to monitor the temp in the cabinet, and if it gets too high, the fan can kick on and start removing some of the hot air): https://www.amazon.com/gp/product/B009CO543S
Shelf legs:
https://www.amazon.com/gp/product/B015R2NIHC
Relay box (rPi controls power to lights and printer via GPIO):
https://www.amazon.com/gp/product/B00WV7GMA2
Door hinges: https://www.amazon.com/gp/product/B01BFW3FA8
Door: http://www.ikea.com/us/en/catalog/products/90291858/
Lights: http://www.ikea.com/us/en/catalog/products/20119418/
I can't seem to find the Stuva cabinet that I bought. They used to have two sizes - one that was shallow and one that was deep enough for the Maker Select. The latter is no longer on their site, but basically just go to Ikea and pick out a cabinet that will accommodate your printer. The rest is really just porcelain to make things a tad nicer for you.
Amazon actually can change a price many times per day based on this. To find the best deal on a given filament you can use this website currently it looks like hatchbox is at an all time high.
Without settings it's hard to say, however you can check out my settings for printing wood fill PLA; this was using MG Chemicals Wood PLA (amazon link, non affiliate).
I had great luck with that, printing with a hardened steel 0.4mm nozzle.
Even if your printer would have arrived with all 4 springs, one of the best, cheapest, and easiest upgrades for the Ender 3 is installing these Yellow springs
I always recommend the FlashForge Finder as someone's first 3D Printer. Comes fully assembled and ready to print (aside from levelling the bed). 14 x 14 x 14 cm build area, high quality prints. I use one for PLA orders for my online shop. It's also built like a brick shithouse.
I love my PEI sheet, at first it was strong enough I had to put my glass in the freezer to remove prints, after a while it dulls a bit, but if you sand it lightly it'll make it grippy again. Also alcohol / acetone wipe down every once in a while helps.
The one I use:
https://www.amazon.com/dp/B074XJLWL6/ref=cm_sw_em_r_mt_dp_U_gSfsDbWX1S36A
These should work. or just search 3d printer bed springs on Amazon and pick one you like. They're super common, and basically all the same. Nothing too special.
> Amazing clear cast FDA Resin
https://www.amazon.co.uk/Amazing-Casting-Products-Various-Clear/dp/B00CVYNQ4U
There are a couple bundles from different brands on amazon that give you 3-4 half spools for $30-40 and look pretty cool.
https://www.amazon.com/dp/B07D7SYS7J/ref=cm_sw_r_cp_apa_i_UZGwCb5XM9N34
https://www.amazon.com/dp/B07JMRNHVS/ref=cm_sw_r_cp_apa_i_z0GwCbBCYJXYY
Don't use glue sticks, use nothing or just use hair spray, it's much easier. Both suave and aqua net have worked for me. You also don't need to use windex, just use alcohol, and you don't even have to clean it every time.
Seriously though as great as glass is PEI is just so much easier to deal with. This is the one i have, but you can also buy them from Prusa (which is what I am going to do next time I buy one).
Hatchbox generally has really good filament. They put the suggested print temp on the spool. 220C is pretty hot for PLA, I print at 180-200C and I still get that glossy finish.
One of the suggested tips for better prints is to print as cold as your extruder can handle, but cold printing PLA dulls the finish on most brands. So go with the manufacture suggested temp. If this is what you're printing with, they recommend 180-210C.
Thanks for the additional info:
Since you commented the other link was not as good because of the Acrylic frame. What about this one which has an aluminum frame?
In the printing world is aluminum OK in place of steel?
I've heard good things about alumilite
https://www.amazon.com/Alumilite-Amazing-Clear-Cast-16/dp/B00CVYNQ4U/ref=pd_cp_469_1?_encoding=UTF8&amp;pd_rd_i=B00CVYNQ4U&amp;pd_rd_r=95RX3FEYH8ACZV3CMAJ7&amp;pd_rd_w=ELYiq&amp;pd_rd_wg=lmfYr&amp;psc=1&amp;refRID=95RX3FEYH8ACZV3CMAJ7
Although, I dont believe it is dishwasher or microwave safe
Right now I'm looking at possibly getting a 3D printer, and these are the 2 I'm looking at.
Anycubic Upgraded Full Metal I3 Mega 3D PRINTER with Ultra Base Heated and 3.5" Touch Screen
And
FlashForge Finder 3D Printers with Cloud, Wi-Fi, USB cable and Flash drive connectivity
Which of these two is best?
&#x200B;
> I'm not interested in a hard wired switch to the Raspberry Pi's GPIO pins; controlling mains power directly seems entirely too dangerous.
I do that, but using one of these, which eliminates any concern about electrocuting yourself. (I got it for about $17 but it's currently $28.) It's basically a two-outlet power strip with surge protection and safety breaker, controlled by the Raspberry Pi.
There's an OctoPi plugin that will turn off the power when the printer is idle, after a configurable delay, and when the temperature has reached a configurable threshold. It also lets me turn on/off the printer and a lamp by clicking its toolbar icon. Edit: this plugin is called PSU Control.
As a bonus, there's another OctoPi plugin that will use the same mechanism to turn off the power if excessive heat-bed or extruder temperature is detected. Edit: this plugin is called Temperature Failsafe.
I bought the pla off amazon, just black hatchbox nothing weird. HATCHBOX 3D PLA-1KG1.75-BLK PLA 3D Printer Filament, Dimensional Accuracy +/- 0.05 mm, 1 kg Spool, 1.75 mm, Black https://www.amazon.com/dp/B00J0ECR5I/ref=cm_sw_r_cp_apip_m1i2vu2NI9Njq
I have a FF Creator Pro (newer version). It's very frustrating but at least I have some abs still and I'll probably just stick to that haha.
I would get some of these to upgrade your print surface. I got them for my printer, and prints stick perfectly Everytime with absolutely no hairspray or tape, just clean it in-between prints.
https://www.amazon.com/Gizmo-Dorks-Printer-Surface-Adhesive/dp/B074XJLWL6?adgrpid=61477283172&amp;hvadid=274674964725&amp;hvdev=m&amp;hvlocphy=9033692&amp;hvnetw=g&amp;hvpos=1t2&amp;hvqmt=e&amp;hvrand=1527745715342828080&amp;hvtargid=kwd-304685224209&amp;keywords=pei+sheets&amp;qid=1535906270&amp;sr=8-1-spons&amp;tag=hydsma-20&amp;ref=mp_s_a_1_1_sspa&amp;psc=1
MG Chemical sells a kilo for 26.46 https://www.amazon.com/MG-Chemicals-Printer-Filament-1-75mm/dp/B018MG4SK6/ref=sr_1_3?ie=UTF8&amp;qid=1474957071&amp;sr=8-3&amp;keywords=wood%2Bfilament&amp;th=1
Not sure how good it actually is but the reviews seem positive.
Did you know Amazon will donate a portion of every purchase if you shop by going to smile.amazon.com instead? Over $50,000,000 has been raised for charity - all you need to do is change the URL!
Here are your smile-ified links:
hot end v6
---
^^i'm ^^a ^^friendly&nbsp;bot
Just wanted to make a comment here that it was the thermistor. I bought this part and replaced it and it's working great again. Hope this helps anyone in the future with the same problem.
Raspberry Pi 3
Raspberry Pi Camera Module V2
5V 2.5A Power Supply so you have enough power to run the Pi and camera.
Micro SD card for uploading the Octoprint image and storing files.
Beyond that the only other things you may need (and are recommended) are a mouse, keyboard, a mini HDMI to HDMI cable or adapter, and a monitor to plug it into (TV with HDMI works). These will come in handy if you need to troubleshoot things or want to do other things with your Pi.
EDIT - oh yeah you'll also need to add a micro USB to USB cable or adapter to plug the Pi into the printer's controller.
I have the same setup than you. However I never use the fan, I think it makes the prints curl up.
I'm about to run out of the filament that came with the kit and just ordered Hatchbox 1.75mm Black PLA , I hope it works well.
I had not trouble with the one that came with the kit, I used 208 C.
It does not come with a PEI sheet. They are something else. PEI is a plastic. It works great. https://www.amazon.com/Gizmo-Dorks-Printer-Surface-Polyetherimide/dp/B01KBGJU5S/ref=sr_1_5?ie=UTF8&amp;qid=1486158310&amp;sr=8-5&amp;keywords=pei+sheet
As a bed plate, its frickin amazing stuff.
https://www.amazon.com/Gizmo-Dorks-Printer-Surface-Polyetherimide/dp/B01KBGJU5S/ref=sr_1_2?ie=UTF8&amp;qid=1487383834&amp;sr=8-2&amp;keywords=pei+3d+printer
Do some youtubing and googling. Never need glue or hairspray again.
Using this sensor:https://www.amazon.com/LJ18A3-8-Z-Approach-Sensor-Inductive-Proximity/dp/B008FZC8F2#Ask and I wired it like this but with a diode instead of the optocoupler.https://cdn.instructables.com/FBL/6JNV/IXGFWVQM/FBL6JNVIXGFWVQM.MEDIUM.jpg Z Probe wiring is like this but without the 5v power because mine is attached to 12v. https://3dprint.wiki/_detail/reprap/anet/a8/improvement/wiring.png?id=reprap%3Aanet%3Aa8%3Aimprovement%3Aautobedleveling
I replaced the old Buildtak bed on my 200x200 RAMPS i3 clone with a GizmoDorks PEI sheet and have been very happy with the results.
https://www.amazon.com/gp/aw/d/B074XJLWL6
At the time of this posting, there's a 10% off coupon (activated by clicking). Different sizes are also available.
You can get the extruder here with a halfway decent tube. That includes a tube but it isn't as good as the capricorn tube, which you can get here. I ended up getting the extruder with the not-as-good tube, and have been running that. I have a capricorn tube on standby in case I need it but so far haven't, so maybe the tube included with that extruder is good enough, but I may also just be lucky.
&#x200B;
There's no instructions included with that kit, so you'll want to follow along with something online. Here's a video from the same channel I linked to earlier that should help.
Thanks for the recommendation! I will give them a try. Wohoo, even on Amazon prime at a reasonable cost: https://smile.amazon.com/MG-Chemicals-Printer-Filament-1-75mm/dp/B018MG4SK6
Cool, thank you very much. I've added it all to my cart and i've thrown on this filament.
I'm using this with my Monoprice Maker Select V2. I removed the build-tak and installed this. (First I installed the 3M adhesive to the PEI, then the PEI to the printbed.)
Main thing I changed was going from a 50c bed to 60c (Sometimes 70c)
https://www.amazon.com/gp/product/B074XJLWL6/ref=oh_aui_detailpage_o06_s00?ie=UTF8&psc=1
&#x200B;
It is working great. It has formed some small spiderweby cracks, but nothing to worry about.
https://imgur.com/cO9tleW
https://imgur.com/5jLuAHH
https://imgur.com/40838J9
&#x200B;
&#x200B;
&#x200B;
Haha! yea so I printed this with a raft after messing around with Cura a bit just to see how it would print. I plan on printing another without a raft.
Yea sorry about that I goofed on submitting:
Printer: Hictop Prusa I3 DIY Kit
I've been thinking of buying my first 3D printer, and found the [FlashForge Finder] (https://www.amazon.com/FlashForge-3D-Printers-New-Model/dp/B016R9E7J2/ref=cm_cr_arp_d_product_top?ie=UTF8). Do you think it is a good first buy?
I was having issues with 150mm/s in the advanced settings travel speed. Lowering that to 45~60 (I use 45, people suggest 60) helped me with the stringies. You can try that.
Have you actually measured your filament yet?
Also, I print my PLA [https://www.amazon.com/HATCHBOX-3D-PLA-1KG1-75-BLK-Filament-Dimensional/dp/B00J0ECR5I/ref=sr_1_1?ie=UTF8&amp;qid=1466749766&amp;sr=8-1&amp;keywords=black+1.75mm+pla] at 210Degrees Celcius and it prints just fine. Maybe try lowering that?
Edit: lowering temperature will help w/ the over-extrusion that I was talking about. Lowering flow rate does too, but usually temperature comes first, then make sure filament diameter is right, then flow.
I bought a heated glass plate also: https://www.amazon.com/dp/B07FSM8DK9/ref=cm_sw_r_cp_apa_i_i-RBCbRVFQ0FN
All I do is maybe 8 back and fourths over where it's going to print then rub it in with my hand.
Like this, or this?
> +/- 0.05mm
Can you explain how this is higher accuracy than (any other) filament? From what I know, even "standard" filaments like Hatchbox claim that kind of accuracy. You can get pretty cheap filament for down to +/- 0.03 mm.
https://smile.amazon.com/gp/product/B079JZ374W/ref=ppx_yo_dt_b_search_asin_title?ie=UTF8&amp;psc=1
Can't speak to whether others have better/worse build quality, but this one's worked for me. I did keep the original screws/metal parts instead of what came with the new one.
So I bought a rasberry pi and the standard rasberry pi camera (https://www.amazon.com/Raspberry-Pi-Camera-Module-Megapixel/dp/B01ER2SKFS), along with a mini usb cable to connect it to the printer. You need a micro usb cable to power the pi (along with an outlet plug). Other than that, you should print a case for it, then you'll be good.
Creality 3D Printer Platform Heated Bed Build Surface Tempered Glass Plate for Ender 3/Ender 3 Pro 3D Printer 235x235x3mm https://www.amazon.com/dp/B07FSM8DK9/ref=cm_sw_r_cp_apa_i_SxkoDb69RT69H.
If you print PLA, you're good to go. Any other you might need glue stick, (it ain't that bad).
I've had good results with MIKA3D. They sell it in 3 packs of silver/copper/gold 0.5kg spools so you can try all three. https://www.amazon.com/gp/product/B07JMRNHVS
Hatchbox is awesome and is in stock.
I fought with a cheaper PLA last night, could not get it to stick to my PEI surface no matter what combination of nozzle and bed temps.
I threw in a roll of Hatchbox and it went down as smooth as cream cheese on a warm bagel!
why not just use something like this? https://www.amazon.com/Iot-Relay-Enclosed-High-power-Raspberry/dp/B00WV7GMA2/ref=sr_1_2?ie=UTF8&amp;qid=1466113573&amp;sr=8-2&amp;keywords=iot+power+relay
They sure do. https://www.amazon.com/CHPOWER-Extruder-Upgraded-Replacement-Extruders/dp/B079JZ374W/ref=sr_1_8?s=industrial&amp;ie=UTF8&amp;qid=1540328899&amp;sr=1-8&amp;keywords=ender+3+extruder is one of them, although any kit for the ender 3 or cr-10 will do. And just in case you're interested in the couplers... https://www.amazon.com/Ivelink-PC4-M10-Straight-Pneumatic-Extruder/dp/B073TTWWN1/ref=sr_1_3?s=industrial&amp;ie=UTF8&amp;qid=1540328976&amp;sr=1-3&amp;keywords=ptfe+coupler you really just need one of each size and they last for a while, but I don't see a smaller set for much less $.
I use MG Chemicals, and really like it.
Sure! This is the specific one I have: https://www.amazon.ca/Raspberry-Pi-Camera-Module-Megapixel/dp/B01ER2SKFS
something like this? seems inexpensive enough to give it a try. extr
Mika3D Silk PLA Bundle
This is what I believe OP has but I could be wrong. I recently ordered it and it prints great.
It is the Hictop 3DP12, the Amazon price is a little higher now.
https://www.amazon.com/HICTOP-Leveling-Self-assembly-Size-Filament-included/dp/B015IHMOSK/ref=sr_1_2/168-6285419-8329745?ie=UTF8&amp;qid=1479876595&amp;sr=8-2&amp;keywords=hictop+auto+level
I noticed that Amazon reviews sometimes mix different models together so they do not always reflect the current model.
For me, the extruder assembly was the problem, and didn't grip the filament enough.
https://www.amazon.com/CHPOWER-Extruder-Upgraded-Replacement-Extruders/dp/B079JZ374W
I bought that and it worked great, then I upgraded to a bondtech extruder and have had zero issues since
Sourcing Wanhao and Monoprice products in Europe is quite expensive.
Do you guys have any feedback about that JGAURORA printer ?
Seems sturdy!
Link to amazon US: https://www.amazon.com/Printer-JGAURORA-Printers-Metal-Precision/dp/B01CNP3CUO/ref=sr_1_1?ie=UTF8&amp;qid=1466561955&amp;sr=8-1&amp;keywords=JGAURORA+3D
The Hatchbox has served me well. I have also used eSun, Ziro marble, and this:
https://www.amazon.com/gp/aw/d/B07JMRNHVS?psc=1&amp;ref=ppx_pop_mob_b_asin_image
Did you just order the E3D HotEnd Full Kit as seen here on amazon or did you order other stuff too?
https://www.amazon.com/E3D-All-metal-HotEnd-Full-Kit/dp/B00NAK9JFO/ref=sr_1_1?ie=UTF8&amp;qid=1487899807&amp;sr=8-1&amp;keywords=e3d+v6
Hatchbox - https://www.amazon.com/HATCHBOX-3D-Filament-Dimensional-Accuracy/dp/B00J0ECR5I/ref=sr_1_2?keywords=hatchbox&qid=1567478130&s=gateway&sr=8-2
I've gone through several kilos of hatchbox and never had a problem. it has become my go-to filamentc for pla, abs, and petg, all the materiels they sell are just solid and it's hard to beat the price.
There are several videos on youtube for first time ender 3 setup. Mostly they cover some detailed orientated techniques like...
Replace the springs as well. They are questionably adequate for the stock bed, let alone one with a glass sheet attached.
This has been recommended as a brush on application in the past.
https://www.amazon.com/gp/product/B00CVYNQ4U/ref=oh_aui_detailpage_o01_s00?ie=UTF8&amp;psc=1
I have the same concern, so I'm getting:
The smoke detector will be mounted inside the printer's enclosure. The SM120X relay will turn on the Iot Relay box via it's normally closed contacts. The printer and accessories are plugged into the Iot relay. Thereby, if the smoke detector goes off, which should happen pretty quickly given the small enclosed space, power will immediately be cut to the entire printer.
As a phase two, I'm going to add a CO2 suppression system:
I'd plug the solenoid into and additional Iot relay, this time wired to the normally open contacts of the SM120X relay.
In the final system, any smoke would cause the printers power to be shut off and the enclosure filled with CO2. Given the amount of CO2 (~40 cubic feet in a 10 cubic foot enclosure, it would not only smother any actual fire, but cool down the printer significantly.
$10/lb is $22/kg so why not just buy actual plastic filament that won't destroy your hotend?
Got mine coming from Amazon [Gulfcoast Robotics] Thermistor Upgrade for Maker Select Plus and Wanhao Duplicator i3 Plus 3D Printers. https://www.amazon.com/dp/B07B3ZYBTM/ref=cm_sw_r_cp_apa_i_UEj-AbEW6YMN5
don't' just limit yourself to pla, the mk2s can print all kinds of stuff.
others have already told you about the rpi3 and wifi. You might consider the rpi cam v2 for your camera. Here's a good video about it, how to mount it, enclosure files, etc
which leads me to my next suggestion, spend 7 weeks watching youtube videos from people like Angus and Tom. There's tons more like Jat.mn, 3D Maker Noob, 3D Printing Nerd, Nillabean, etc... These guys have a lot to teach and you can learn a lot in 7 weeks just watching their videos and participating in their live q&a streams on youtube and twitch.
other things you could buy are endless, but I'm going to throw out there a UPS so you don't lose a 30hr print to a power fluctuation or brown out, a heat gun to get rid of stringy bits, and a rotary tool for cleaning up parts among other things.
The thought of leaving my homebrew printer running while away frightens me, this is a setup to ease my fears of burning the house down.
There are multiple redundancies built in but the basic idea is simple:
Yesterday I came up with an easy way to reboot or turn off the Pi using the relay, basically have the Pi ground hooked up to the 4 channel relay using the normally closed side of a channel, then to reset/shutdown simply switch the relay so the ground is no longer connected.
Note: The fans and lights are controlled via SPST switch not SPDT.
I did try to set the temperature and wait for it to stabalize, but it was nearing 250 and showed no signs of slowing down so I hit the reset button before it caused damage to something. Like I said before, when doing the autotune, it DID stabalize at the desired temperature, but that seems to be the only way of getting it to.
This is the heater I have. I'm not sure what the wattage of it is.
I don't think I changed the #define PID_FUNCTIONAL_RANGE value, It's set as 10 according to my Configuration.h
I'm liking this one so far, although I might try switching over to this one. Since they're mounted to the build plate, they make the model stationary in the frame so only the head is moving around (instead of everything moving everywhere). (Edit Note: you will need an M3x10mm screw to replace the M3x8mm screw on the bottom of the bed so the camera mount can be screwed in too.)
I do like the design that randomperson linked to, but I've got the Multi Material upgrade coming whenever it releases, and that location is needed for motor mounts; so for now I just have a little bracket that hangs over the arduino case to keep everything together.
For hardware, I'm using:
Pi w/some peripherals
Pi Cam 2
Pi Cam extended cable
There is an all metal extruder. Here's an Amazon link to a popular one that I was thinking of getting before I figured out my problem.
Stock springs are cheap and not well under tension. They caused me a lot of balance issues
https://www.amazon.com/FYSETC-Motherboard-Accessories-Compression-Creality/dp/B07GXC1G2B/ref=mp_s_a_1_3?crid=3G99LZGFOMNBI&amp;keywords=ender+3+bed+springs&amp;qid=1556590607&amp;s=gateway&amp;sprefix=ender+3+bed+&amp;sr=8-3
It's an inductive sensor.
https://www.amazon.com/gp/product/B008FZC8F2/ref=oh_aui_detailpage_o07_s00?ie=UTF8&amp;psc=1
I've been making PLA mugs using a resin coating - http://www.amazon.com/gp/product/B00CVYNQ4U?psc=1&amp;redirect=true&amp;ref_=oh_aui_detailpage_o02_s00
I haven't tried it for long-term full submersion, though.
http://www.amazon.com/Hatchbox-1-75mm-3D-Printer-Filament/dp/B00J0ECR5I/ref=sr_1_3?ie=UTF8&amp;qid=1451687154&amp;sr=8-3&amp;keywords=pla+filament
HATCHBOX 3D PLA-1KG1.75-WHT PLA 3D Printer Filament, Dimensional Accuracy +/- 0.05 mm, 1 kg Spool, 1.75 mm, White?
Would this one be goodhot end v6
Try this ones
&#x200B;
https://www.amazon.com/E3D-All-metal-HotEnd-Full-Approximately/dp/B00NAK9JFO/ref=sr_1_3?crid=2RY68WD3KQDGT&keywords=e3d+v6+hotend&qid=1562208147&s=gateway&sprefix=E3D+%2Caps%2C275&sr=8-3 *original*
&#x200B;
Cheap version
&#x200B;
https://www.amazon.com/Gulfcoast-Robotics-Extruder-Printer-Filament/dp/B07B4FHN72/ref=sr_1_7?crid=2RY68WD3KQDGT&keywords=e3d+v6+hotend&qid=1562208147&s=gateway&sprefix=E3D+%2Caps%2C275&sr=8-7
This all I need?
https://www.amazon.com/dp/B00NAK9JFO/ref=cm_sw_r_cp_api_63fyybPVBF44H
I don't think the temperature is off.
I followed the instructions for selecting the correct thermistor.
My hot-end is https://www.amazon.com/gp/product/B00NAK9JFO/ref=oh_aui_search_detailpage?ie=UTF8&amp;psc=1#feature-bullets-btf
I have #5 selected in the Marlin firmware for the thermocouple
define TEMP_SENSOR_0 5 / 100K thermistor - ATC Semitec 104GT-2 (Used in ParCan & J-Head) (4.7k pullup) /
I'm using this to power everything. I modified it so that the "normally on" outlets are "always on", rasp pi plugs in to always on, lights and printer get powered by the 'normally off' outlets which get triggered by GPIO on the pi.
EDIT: link https://www.amazon.com/gp/product/B00WV7GMA2/ref=oh_aui_detailpage_o08_s00?ie=UTF8&amp;psc=1
I just checked my Slic3r settings, the nozzle diameter is set to 0.5mm.
I have this printer.
The specs say it's actually a 0.4mm nozzle diameter (which I just changed in my Slicer settings).
Looking to buy another kit or pre built printer. I have some experience. What do you guys think of this printer: https://www.amazon.com/HICTOP-Leveling-Accuracy-Self-assembly-Printing/dp/B015IHMOSK/ref=cm_cr_arp_d_product_top?ie=UTF8
[I think it might be more than 330 euros I don’t know the conversion](FlashForge 3D Printers, New Model: Finder https://www.amazon.com/dp/B016R9E7J2/ref=cm_sw_r_cp_api_i_1li.AbYGZ918M)
Absolutely!
https://www.amazon.com/gp/product/B018MG4SK6/ref=as_li_qf_asin_il_tl?ie=UTF8&tag=theaudiowizar-20&creative=9325&linkCode=as2&creativeASIN=B018MG4SK6&linkId=e28deb30230bf484fee2f60c396a5aae
I printed it from my Prusa MK2. Mine is from MG Chemicals https://www.amazon.com/dp/B018MG4SK6/ref=cm_sw_r_cp_tai_hGqQDbE6DSE9G
It is abrasive, so you will need a harden nozzle.
The material is MG Chemical's Wood filament. The files are on Thingiverse here
Upcoming lightning deals in Central Time
PLA 2:45am
Jgaurora at 7:25am
dobot printer 8:05 am
another ender 3 at 8:35 am <-----------------------------------
Tiertime 4:40pm
If looking at upcoming lightning deals look under scientific and industrial category.
I believe so... this is what i have : https://www.amazon.com/gp/product/B01CNP3CUO/ref=oh_aui_detailpage_o08_s00?ie=UTF8&amp;psc=1
This is the replacement I used:
https://www.amazon.com/gp/product/B01I4ZQU88/ref=oh_aui_detailpage_o01_s00?ie=UTF8&amp;psc=1
yep... zoomed in on what he was printing and googled it... maybe this one..
https://www.amazon.com/JGAURORA-Printer-Printers-Assembly-filament/dp/B01CNP3CUO
It's the HICTOP Prusa i3
[New Arrival] HICTOP Filament Monitor Desktop 3D Printer Kits Reprap Prusa I3 MK8 DIY Self-assembly Printing size 10.6" x 8.3" x 7.0" https://www.amazon.com/dp/B01ERDWSFU/ref=cm_sw_r_cp_apap_WVQQojJZMjL8X
Looks identical to a Hictop acrylic. 200x270mm build plate.
Edit: earlier version of this model.
Is this what you use? https://www.amazon.com/Gizmo-Dorks-Printer-Surface-Polyetherimide/dp/B01KBGJU5S
https://www.amazon.com/dp/B074XJLWL6
Gizmo Dorks PEI Sheet 8" x 8" (203mm x 203mm) 1mm Thick 3D Printer Build Surface with 3M 468MP Adhesive, Made in The USA https://www.amazon.com/dp/B074XJLWL6/ref=cm_sw_r_cp_apa_T2H9Bb7E9V5RS
I have the same printer you do. I bought that, placed it over the black mat that is installed, secured it with metal binder clips, leveled my bed, built an enclosure out of foam board and print with ABS. Wipe it down between prints with alcohol. No adhesion issues at all. Let your print cool 30 minutes and they pop right off.
Also, tighten your bolts around the rods, they are accessed from the bottom of the motors. Mine were loose when shipped. https://3dprinterwiki.info/wiki/wanhao-duplicator-i3/
https://www.amazon.com/CHPOWER-Extruder-Upgraded-Replacement-Extruders/dp/B079JZ374W
I bought some of this bowden tubing : https://www.amazon.com/gp/product/B079P92HN9/ref=ppx_yo_dt_b_search_asin_title?ie=UTF8&psc=1 for my Wanhao Duplicator clone. I think it makes a difference. (Definitely touches hot end and nozzle in this printer)
I've done that and it's seated. This is the replacement I put in. [Gulfcoast Robotics] Thermistor Upgrade for Maker Select Plus and Wanhao Duplicator i3 Plus 3D Printers. https://www.amazon.com/dp/B07B3ZYBTM/ref=cm_sw_r_cp_apa_fTvLBb3Z93P59
https://www.amazon.com/Creality-3D-Platform-Tempered-235x235x3mm/dp/B07FSM8DK9/ref=mp_s_a_1_6?crid=3FDMZV71B8DWJ&amp;keywords=ender+3+glass+bed&amp;qid=1551067444&amp;s=gateway&amp;sprefix=ender+3&amp;sr=8-6
I just ordered this one - should arrive tomorrow. I’ve read reviews saying it’s so much better than the stock one that this should ship with the Ender 3
https://www.amazon.com/gp/aw/d/B07FSM8DK9
Using this bed
Creality 3D Printer Platform Heated Bed Build Surface Tempered Glass Plate for Ender 3/Ender 3 Pro 3D Printer 235x235x3mm https://www.amazon.com/dp/B07FSM8DK9/ref=cm_sw_r_cp_api_i_4BwJDb8ZYB5F2
FYSETC 3D Printer Motherboard Accessories 0.31 in OD 0.78 in Length Compression Springs Light Load for Creality CR-10 10S S4 Ender 3 Heatbed Springs Bottom Connect Leveling - 10 Pack https://www.amazon.com/dp/B07GXC1G2B/ref=cm_sw_r_cp_api_i_92l7CbYBEGJYC
I've been using these: https://smile.amazon.com/FYSETC-Motherboard-Accessories-Compression-Creality/dp/B07GXC1G2B
This is the filament I use for the metallic octopus. https://www.amazon.com/gp/product/B07JMRNHVS/ref=ppx_yo_dt_b_asin_title_o08_s00?ie=UTF8&amp;psc=1
Got it as part of a metallic 3 pack (gold, silver & copper) on Amazon.
Shiny Silk Gold Silver Copper PLA Filament Bundle, 1.75mm 3D Printer Filament, Each Spool 0.5kg, 3 Spools Pack, with One 3D Printer Remove Tool MIKA3D https://www.amazon.com/dp/B07JMRNHVS/ref=cm_sw_r_cp_api_i_LJX5CbJC0ATAA
I will leave this here.
https://www.amazon.com/Iot-Relay-Enclosed-High-Power-Raspberry/dp/B00WV7GMA2
Do you have pictures? I'm interested in what you actually got.
If you're missing the screw hole for the washer to hold it in, you can get https://www.amazon.com/Gulfcoast-Robotics-Thermistor-Duplicator-Printers/dp/B07B3ZYBTM/ or something similar, which is the same type thermistor, just in a screw mount instead.
Gizmo Dorks PEI Sheet 8" x 8" 1 mm 3D Printer Build Surface with 3M 468MP Adhesive Tape https://www.amazon.com/dp/B074XJLWL6/ref=cm_sw_r_cp_apa_kgyXAbNEW8B6H
The stock Ender 3 extruder is mostly plastic, and the spring in it is very weak. Often the extruder will crack or break, and the filament ends up digging a groove into the arm.
As for bed springs, something like this will do:
https://www.amazon.com/FYSETC-Motherboard-Accessories-Compression-Creality/dp/B07GXC1G2B/ref=sr_1_1?keywords=3d+printer+spring&amp;qid=1554171742&amp;s=gateway&amp;sr=8-1
That would be Mika3D Gold silk PLA. It comes in a bundle with silk copper and silk silver. Unfortunately the seller on amazon only sells it in half kilo spools and only as a bundle.
No problem!
This
Look it up on thingiverse, too. Tons of mounts for it that you can print out. You'll see them on pretty much everyone's head.
I overpaid and got this , but temperature regulation is a big deal, you don’t want melted Teflon or a fire.
One of the biggest upgrades I have to recommend is flashing new firmware. The default firmware doesn't support thermal runaway protection and it's fairly straightforward to upgrade. Here's a video guide for the process.
Second is to upgrade the thermistor. It's not necessary, but the one I have can survive up to temperatures as high as 600C and is easy to remove during cleaning.
The third upgrade is the most tedious and not necessary, but it's what I did after my first heated bed connectors melted to the Melzi board. I upgraded all of the wiring with 12+14 gauge copper wire. It might be an over kill, but it keeps me sane.
+1 for putting a glass bed on the printer. Also the stock extruder gear setup SUCKS! Go ahead and get an all-metal one because that plastic arm will break eventually. The debate rages on about putting sound dampeners on because some folks advocate just replacing the drive controllers (more $$$). Personally I put the dampers on and am really happy with the noise reduction, Also, the fans used stock are all sleeve bearing type. Not a good choice for the hotend which is constantly moving. I say run them until they get noisy/fail and then replace them with some good ball bearing fans (remember if you order replacements that they are 24v, not 12v). Oh and I also put stiffer springs under the bed as well. (See links below)
Links are what I used, there are many options out there....
Glass bed
Creality 3D Printer Platform Heated Bed Build Surface Tempered Glass Plate for Ender 3/Ender 3 Pro 3D Printer 235x235x3mm https://www.amazon.com/dp/B07FSM8DK9/ref=cm_sw_r_cp_tai_CvzBCbDCS9RHE
All Metal Extruder Gear
Luxnwatts Creality Aluminum MK8 Extruder Drive Feed Upgraded Replacement for CR-10 CR-10S S4 S5 3D Printer Part https://www.amazon.com/dp/B076PFHM1F/ref=cm_sw_r_cp_tai_gwzBCb17T787N
Noise dampers
CCTREE NEMA 17 Stepper Steel and Rubber Vibration Dampers with M3 Screw for Creality CR-10,10S 3D Printer,CNC (Pack of 3) https://www.amazon.com/dp/B07C7FRLNX/ref=cm_sw_r_cp_tai_.wzBCb0ANF2QJ
Stiffer bed springs
uxcell 8mm OD 20mm Long Light Load Compression Mould Die Spring Yellow 10pcs https://www.amazon.com/dp/B013G5I4US/ref=cm_sw_r_cp_tai_ZxzBCbGVJ10CA
I got mine from Amazon, only because the Hatchbox one was out of stock for a week and I'm impatient.
https://www.amazon.com/gp/product/B018MG4SK6
Comments are comparing it to Hatchbox, but I have no idea how well it prints because I'm dumb and have a .4 mm nozzle and didn't realize a .5 mm or higher is recommended.
I was looking at this one... which appears to have a larger printer volume with the negative of having to build it yourself...
are you using an all-metal hotend?
Heat creep was really bad on my CR-10 when I switched to a microswiss all-metal. Initially I fixed it by reducing my retraction distance and increasing my retraction speed, but on longer prints it still ended up being too much of a problem and I switched to a new heatbrake that allowed the bowden tube to go all the way down to the nozzle and used Capricorn bowden tube to avoid deformation.
I'm getting much cleaner prints now and zero jamming. I think this heatbrake works with the original CR-10 heatsink
I'm using the LJ18A3-8-Z/BX that was suggested in this Instructables. The problem I'm having is with the placement of the sensor. I first designed this bracket that mounts on the X carriage above where the filament cooling fan mounts. It fits nicely and is fairly close to the nozzle. The problem is if the nozzle contacts the bed first the whole carriage rotates up. This rotation cause the sensor to lift further away from the bed, which drive the nozzle lower... I'm going to design a new bracket that will attach to the linear bearing block. This will have the opposite effect if the nozzle impacts the bed. The sensor will be driven lower which should trigger the sensor sooner.
EDIT: Also, since it is an inductive sensor the 8 mm range is for steel/iron. The range for aluminum is about 4.5 mm.
If I make my own filaments, how much filament would I waste? I assume it's quite possible to screw up making filament just the same way a print can fail.
Also, is it possible to make specialty filaments? Translucent? Nylon? I haven't used much else other than Hatchbox Black PLA, but I'd be quicker to venture out if it was cheaper to do so.
CR-10S, I have it as a tag on every post/comment I make. I assumed people would see that. :/
Ive never actually calibrated my e-steps. Dont even really know what that is honestly. If it is where you measure out a meter of filament and measure how much it says it uses and how much it actually uses, then no, I've definitely never done that. I probably should look into it. I primarily use a .04mm nozzle. I'm tried a couple other in the past but I stick to the stock .04mm nozzle size. Have a whole pack of them. And just changed it the other day.
Yes, it's a bowden tube extruder. I've recently upgraded to a Capricorn Bowden PTFE tube from Amazon. I honestly don't know how much more to mess with that then what I have already. Its surely tight and not moving, cut to the same length as the stock tube, with no kinks. For an advertised "slippery tube", it actually has quite a bit of friction, but no more/less than the stock tube. I took the additional tubing I had (because it came in 3ft) and just ran some PLA through it, unattached. Just seems rough, but again no different from the stock tube.
For relatively bigger prints, I think it has better results. Especially since the amount of ooze that comes out is really only a couple millimeters, so of the travel goes over the part, it really is no problem. Shoot, if there was a way to Always have the nozzle z-hop and travel Over printed parts only, that would probably fix the problem.. i guess.. that way the ooze goes in the infill. But idk
I have had my Di3+ since February, and have installed the following upgrades;
I also went ahead and bought the following;
Using the Raspberry Pi and Octoprint (http://octoprint.org/) I can start, pause, cancel prints and control the printer from my PC in the living room; I can also monitor it from outside the house after port-forwarding my router to my Pi and using noIP (https://www.noip.com/).
Hope this info helps you! Can't wait to see the finished, upgraded printer!
I have my blue wired to the negative(-) on the board, and the black goes into where the red is on the end stop.
Brown (NPN) 6-36v
Blue - Negative on the Anet board where 12v comes in for main power.
Black - wired into the red plug on the Z endstop.
My probe: https://www.amazon.com/gp/product/B008FZC8F2
Ah my bad, wrong thread, this one
https://www.amazon.com/gp/product/B079JZ374W
I am using an Hictop i3 Style 3D Printer Exact Printer for those who are interested
I am printing with Amazon Basics PETG
The problem is that no matter what setting I use my print always fails around this spot.
My temperatures are 235c 245c and 255c with no luck
My print Speeds are 60mm/s, 50mm/s, and 30mm/s
I am using Cura to create the slice.
The print almost feels random. Even with the same settings it might fail sooner or later and it always starts at the bed.
Edit here are some more pictures in better quality plus the other failed benchys https://imgur.com/a/OH7pT6r
TOTALLY forgot the Thingiverse project there includes these two items (May be different in Germany) but no plans on how he would use them:
https://www.amazon.com/dp/B00WV7GMA2/ref=wl_it_dp_o_pC_nS_ttl?_encoding=UTF8&amp;colid=6T7GYD6MLIXG&amp;coliid=ISX3Y7OVC4WJG
https://www.amazon.com/dp/B01F2X3VY6/ref=wl_it_dp_o_pC_S_ttl?_encoding=UTF8&amp;colid=6T7GYD6MLIXG&amp;coliid=I1RX0NNSX35Z92
The plan is to use an arduino to monitor for smoke with the sensor, ad if it senses any trip the relay to kill power to everything including itself. Then some of those fire extinguisher cans to handle any flames. Still wrking out how I'll do the sensor exactly. I'm familiar with Arduino code my my concern is having a print fail due to a false positive. The other is making sure the power stays off once the arduino senses smoke. I'm THINKING since the relay has a Normally Off plug I basically use that to make a "dead mans switch" of sorts. As long as the arduino is on and outputs a +5V signal, circuit stays on. The sensor senses smoke and triggers the 5V signal to go to 0, relay cuts power and nothing can turn it on. That would honestly even work out well for a fire since flames would predictably kill the electronics which in turn would/should cause the relay to trip. The point is have the sensor detect smoke BEFORE flames.