Best buffing & polishing accessories according to redditors
We found 17 Reddit comments discussing the best buffing & polishing accessories. We ranked the 13 resulting products by number of redditors who mentioned them. Here are the top 20.
We found 17 Reddit comments discussing the best buffing & polishing accessories. We ranked the 13 resulting products by number of redditors who mentioned them. Here are the top 20.


Bronze wool, finest i could find with a quick poke around Amazon
Loads of tools in their catalog can be found cheaper if you just take the time to look. Just as many can be easily made but sometimes you have to weigh out what your time is worth to do so. Philadelphia Luthier has a lot of solid tools a better prices. Their fret pullers are the bomb and almost half the price.
This one always got me. The No-Chip Countersink tool at $36 plus shipping. https://www.stewmac.com/Luthier_Tools/Tools_by_Job/Tools_for_Tuner_Installation/No_Chip_Countersink.html
Its an useful tool but you can get the same thing from Amazon for $9 w free shipping. https://www.amazon.com/Dedeco-13110-Carbide-Double-Cut-degree/dp/B00NWHRDB2/ref=sr_1_6?ie=UTF8&qid=1537479617&sr=8-6&keywords=SK-6+Double+Cut
Another is the fret beveling tool. $75 for a five dollar bastard file and a five dollar block of nylon.
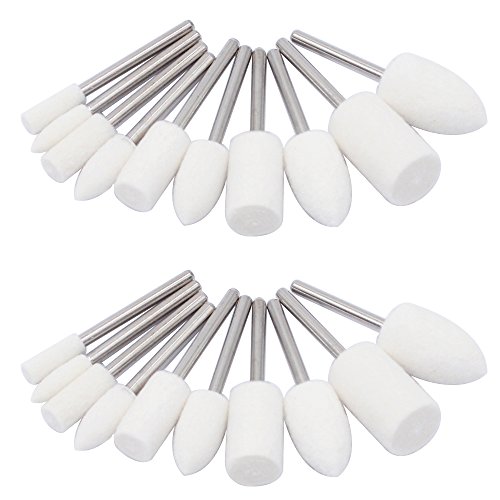
I don't really know. I've never had very good luck with the stones. I think the most useful dremel accessories for grinding away material is either use the sanding drums like these or use rasps/burrs coated in diamond or tungsten carbide like these.
For the brushes, the silver ones are steel or stainless steel, and the brown ones are usually brass. They'll have different effects on different materials based on the hardness. I've used the stainless brushes on steel before to clean it and kind of give it a texture.
For buffing/polishing of things like painted surfaces you'll want something like this or this and some sort of buffing compound. Most dremel accessory kits usually come with 1 or 2 buffing attachments.
I'm not sure if this is sarcasm because the idea is thought to be stupid. Or genuine because the idea is good.
All I know is that it works well for me.
I place the bearing on a MYY bearing remover, and using the cone shaped polishing bit seen here, I touch the dremel to the outer race and spin away. I feel this is fairly safe if you use standard power tool safety precautions. I always wear my glasses!
I'm thinking about buying something like this
or maybe even this
I'd just stipple it. I can tell you what to buy and how to do it including the borders. You'll need the following:
https://www.amazon.com/Dremel-107-Engraving-Cutter-Shank/dp/B00008Z9ZV/ or https://www.amazon.com/Dremel-106-Engraving-Cutter-8-Inch/dp/B00008Z9ZU
https://www.amazon.com/Dremel-120-volt-Variable-Attachment-Accessories/dp/B075174NCV/ (you may have your own dremel, but definitely get a flex shaft for it)
https://www.amazon.com/HTS-401B3-Multi-Grit-Diamond-Medium/dp/B00U0E0KRE
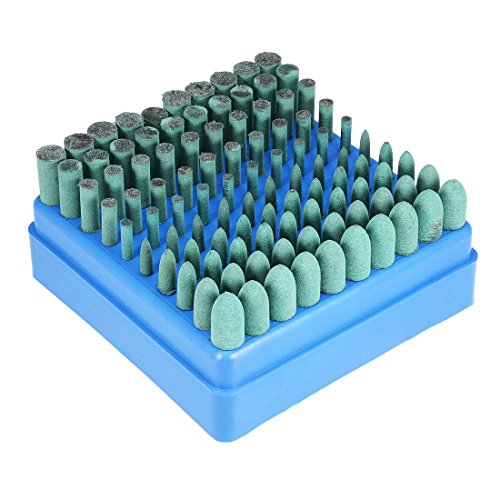
https://www.amazon.com/AUSTOR-Grinding-Polishing-Accessories-Attachment/dp/B078Y5XGM8 (careful with these, light touch and keep it moving)
https://www.amazon.com/Flitz-Multi-Purpose-Fiberglass-Aluminum-Sterling/dp/B000MUSOW4
First use your engraving cutter to cut the borders that you've drawn on with a water-removable Stabilo marking pencil. Try to cut as smoothly as possible, with a steady hand. Don't try to cut it all at once, be patient (be patient for all of this, it took me a whole week doing a little at a time to complete the whole process, and turning my dremel off periodically because I have an older model flex shaft that gets hot after some use - solved this by wrapping the grip with bicycle inner tube)
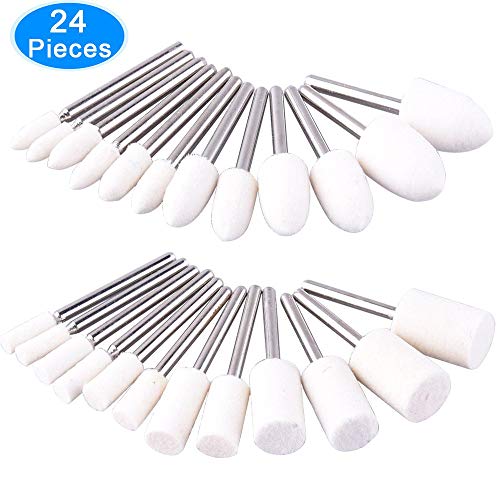
The smoother you cut it the easier the rest will be. Some people just use the engraving cutter for borders, but I followed someone's guide and then used the diamond burs to smooth it out and polish it. Go from the lowest grit to the highest. You can either use the ball bits that are the same size as your cutter, or use the rounded cylinder bits. You can angle the cylinder bits in certain ways to get around curved surfaces, you'll kind of have to experiment with that. Once you get to the highest grit, I found that the only way to get it near-glass smooth was to apply a lot of pressure. It doesn't remove much material and you kind of want it to heat up the plastic to get it smooth. Then, still not satisfied with this, I got those felt wheels and cut the very tip off the smallest one, and used a bit of flitz paste, and then went over all the borders. That got it close enough for me. You can get more advice from the Weapons Stippling group on Facebook.
After you do the borders, I use the round tip on the walnut hollow wood burner on a medium heat setting. You don't want it too hot, not with the P80 plastic anyway. My technique was to press in, not too much but just enough, and drag downwards. A random totally pattern is best, I did a somewhat orderly snake pattern and then went over it again and smeared it out to give it a more organic texture. Then I went over it one more time, lightly and fastly rubbing all along the surface to blend the ridges that were created into the rest of the texture. You can do this several times to get it just right. The result is a texture that is grippy, yet not rough. That's how I like it, but you can experiment. The key is not to heat it up too much and don't stick any of the tips in too deep, and don't try to do it perfectly ordered unless you've gotten good at that with practice and are using an appropriate tip. You can make your own tips out of #8-32 brass screws or buy blanks from OT Defense, or some other place.
A normal vise is fine (you can never seem to have too many, or too many types, but most of what are called 'gunsmith's vice' are just overpriced).
A good set of hollow-ground screwdrivers is imperative Here
After that punches - I like a good set of steel punches (most hardware stores), complemented by a soft-face (brass or plastic) punch.
A soft (plastic) faced hammer is indispensable.
A Bench block
Cratex rubberized abrasives are a favorite of mine.
If he has machine tools (mill, lathe) respond and I'll add to the list, but the above are key for hand work.
My AR9 did this until I dremelled a feed ramp at the 6 oclock position and then polished it out with some 60000grit nanodiamond compound. Now it's got a mirror finish, and no more feed problems, even with widemouth 147gr HPs. I don't know why AR9 barrels don't have more pronounced feedramps.
Here is the original ballistic advantage profile. Other manufacturers use this profile too, here's Spinta Precision. I found my 147grs were hitting the barrel face at 6oclock, there's a lip there on AR barrels that is usually a ramp in 9mm handguns. I corrected this by starting with 200 grit sandpaper cut in to a small strip and taped to a Sharpie. I spent about a half hour going through a bunch of strips to get my initial groove going, paying careful attention to work the grit on the lip and not the chamber. Afterwards, I used a dremel tool with felt polishing cones and lapping compound to smooth out the sandpaper's work. Here is my end result.
Go for the mirror finish!
https://smile.amazon.com/Metal-Polishing-Kit-Convert-Buffer/dp/B00KXMJDAS/ref=sr_1_1?ie=UTF8&qid=1492284747&sr=8-1&keywords=metal+polishing+kit
I cant find a wheel to fit a 1/2 arbor. I suspect it was meant to fit a buffing wheel, look familiar?
You need to find an arbor that adapts 1/4 to a 3/8 arbor, which is commonly found in 3" cutoff wheels
There's a myriad of reasons why this is a terrible substitute for a grinder. Lack of power, lack of speed, lack of usable configuration, poor ergonomics, no guards.
And the slowest headers bro. Clean that shit up.
https://www.amazon.com/dp/B00FALW138/?coliid=I1FBIE3KEW8OTD&colid=26A2VKMS05UI6&psc=0&ref_=lv_ov_lig_dp_it
https://www.amazon.com/dp/B0000AXS0Q/?coliid=I26C4NAR8J4W9N&colid=26A2VKMS05UI6&psc=0&ref_=lv_ov_lig_dp_it
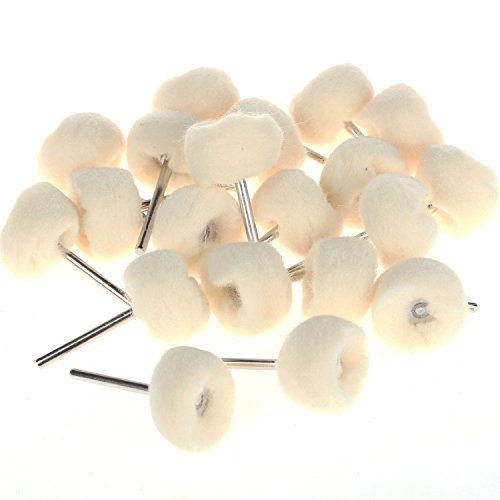
hmmm maybe a rotary tool cotton polishing/buff wheel? https://www.amazon.com/JAZ-Jewelry-Mounted-Cotton-Polishing/dp/B01EC03VRM/ref=sr_1_14?s=industrial&ie=UTF8&qid=1482180315&sr=1-14&keywords=dremel+polishing
Have you tried these at all? I use them for everything. https://smile.amazon.com/Premium-Organic-Polishing-Buffing-Wheel/dp/B01EV8BUM8/ref=sr_1_3?ie=UTF8&qid=1523546023&sr=8-3&keywords=wool%2Bbuffing%2Bwheel&th=1
https://smile.amazon.com/MATCC-Polishing-Buffer-Velcro-Adapter/dp/B071SLWN74/ref=sr_1_4?ie=UTF8&qid=1523546023&sr=8-4&keywords=wool+buffing+wheel
Used a long marker, and angled it in maybe 20 degrees. Traced everything, then used a utility knife with a fresh blade and cut straight down. Peeled the majority of the material back with my fingers, Kaizen foam has layers you can peel back, but it won't come out in that layer perfectly clean. Test fit everything, cut away more where needed, in small increments because I wanted it super clean looking. Once I got the outline exactly how I wanted it, took a dremel with an abrasive stone head, and pointed it straight down and used it to clean up the lumpy, messy, bottom. Even punching straight down to remove material (especially for the magazine slots this was necessary) it was very effective. Just had to be careful with it, and it worked like a charm! Cleaned up the corners with some careful exacto knife work.
FastCap Long Nosed Pattern Marker https://www.amazon.com/dp/B002NQPEE6/ref=cm_sw_r_cp_apa_i_5k.1Db4YZ6WX8
(I didn't use this set, just using this link to show what I mean by abrasive stone head, I used a cylinder for the flat top, to flatten)
Oudtinx 100 pcs Abrasive Stone Points Electric Grinding Dremel Accessories Polishing Grinding Head Wheel Tool Kit For Dremel Rotary Tool (Red) https://www.amazon.com/dp/B07FN7G7JK/ref=cm_sw_r_cp_apa_i_Vn.1DbBJJHE0A
Can’t say that I’ve used this particular brand but this is the style I use for polishing yacht railing. 3m has a similar product and are about $10-12 a pop for their 4-1/2 wheels.
uxcell 4 Inch Nylon Fiber Polishing Wheel Sanding Buffing Disc Abrasive Wheels for Angle Grinders 10 Pcs https://www.amazon.com/dp/B07KC71TYT/ref=cm_sw_r_cp_api_i_PUWZDbM2RYX83
If you can use a da sander to get the tube to at least 180-220 then 320. Then hit it with the polishing wheel. Makes quick work of it. Best of luck.