(Part 2) Best jewelry making tools & accessories according to redditors
We found 460 Reddit comments discussing the best jewelry making tools & accessories. We ranked the 147 resulting products by number of redditors who mentioned them. Here are the products ranked 21-40. You can also go back to the previous section.


![Coopache Invisible Ring Size Adjuster for Loose Rings – Ring Guard, Ring Sizer, 6 Sizes Fit Almost Any Ring. [12pcs]](https://m.media-amazon.com/images/I/41xTqcIA87L.jpg)


Here's some great ring sizers. You spin the plastic around the band. Really reasonable and work well. Invisible Ring Size Adjuster for Loose Rings – Ring Guard, Ring Sizer, 4 Sizes Fit Almost Any Ring. [12pcs] https://www.amazon.com/dp/B079HMMRWD/ref=cm_sw_r_cp_api_livWBbQC19AE8
I have some items that can't be resized. I'm still losing so they are handy. Be sure to check your vehicle. They can fall in between the seats.
Here's a copy-paste I put together that might be useful.
Equipment Essentials
Honing Supplies for Restoring a Few Straights
To hone:
First, you need to flatten your stone, making sure you've removed the top 1/64th or so of stone material to reach the true grits (the top is a bit rough on Nortons especially).Make sure your stone is perfectly flat. Use the DMT or the sandpaper I described above for this.
Next, clean your SR in soap/warm water. Dry it, and put a piece of electrical tape along the spine and fold it over (like a book binding) if you'd like (not necessary, and I don't do this, but some prefer the look of the end product).
I like to clear the edge of possible errand burs before I hone, so I drag the shaving edge against my thumbnail or a glass bottle. These burs can cause issues, and may make for a rough feeling edge. I've found that this is a good way to remove them. It may be unnecessary for some/most blades, but it's part of my bevel setting routine, and by doing this, I've notice good things and increased consistency when I hone.
Now, to hone. You're going to get your razor sharp in these stages:
Setting the bevel:
While all steps are important, this step is foundational. Place your razor on your bevel setting stone, keeping the razor spine and edge completely flat on the surface togehter. Do tiny circle strokes (circular motion down the hone) so you do about 30-40 tiny circles as you move own the bottom hone. Repeat on the other side of the razor, moving up the hone in the opposite direction (and counter-wise circle direction). Now do 15 x strokes. This is a set.
Repeat doing these sets until you can shave hair on your arm or leg by very slowly grazing over the tops of the hair - it should catch and cut with a bit of a tug.
It will take many many of these sets with a 4k stone, and less with a 1K.
Once you can shave hair on your arm or leg all along the bevel (toe to heel) with uniform sharpness and cutting, you may be set. Do another 10 or so x-strokes, very lightly, very perfectly as a final sharpening for your bevel. See if this helps your edge.
Once you're happy with your bevel, strop it and shave. If it's painful, it's likely your bevel isn't set. If it's decent, you're ready to move on.
Polishing the bevel
Now move up to polishing. On the 4K and do 35 light x strokes. Go to the 8K and do 35 light x-strokes. Repeat this back and forth going 4K 30, 8K 30. Now keep this up, decreasing the stroke number by 5. When you're at 10 strokes, just do 25 on the 8K.
Always check for sharpness along the edge by trimming a bit of arm hair. You'll learn a lot from an edge by doing this.
Following the grits up in this fashion should give you a fairly polished bevel. It's best to go higher than 8K with a high grit chinese hone from a woodworking store, or a naninwa 12k, but 8K will do for now.
Truing the edge:
Strop about 30 passes on your chromium oxide, clean the blade, and the perform 200 passes on leather - all spine leading, done very lightly.
The Shave
After all this, you should have a great edge. Give it a test shave and compare it to your pro honed blade.
While honing, you'll likely get frustrated, but keep at it! If you're getting aggressive with the razor, just give it a break, and come back later. If the shave is no good, post back here and we'll help you diagnose.
Some thoughts:
I tired to present information that's very searchable. Straight razor place has archived many of the ideas that I just presented. I highly recommend researching on your own and reaching a personal conclusion. What follows are my personal opinions.
This equipment I suggest is not necessarily the best, nor is it bad at all. It's great way to get started and find out what you like in a stone/routine. Some ideas to consider if you upgrade your set:
The back and forth honing I recommend is a honing series called pyramid honing, where you go between two different grit hones to ensure you don't form a wire edge or a bur. I like to recommend this for folks getting into honing since this is one of the most documented methods for get a razor to shave ready from a bevel set. A quick google search on pyramid honing will give you plenty of reading. I don't hone this way any more.
I highly recommend honing your razor as sharp as possible on one stone, strop as I've outlined, and give it a shave. For example, sharpen as much as you can at the 4K stage, and strop it 200 times. If it shaves ok, you're on the right track. If not, you've got more work to do at that level of stone. You'll be amazed that such a low grit can shave so well. If it's painful to shave after your lowest stone.... you're not done, and moving up the stones will not benefit your edge. Repeating this process of shaving up all the stone grits (4K, 8K, 12K) will help you get a feel for what honing at the different levels provide. Shaving off my 1K bevel provided me the biggest leap in edge quality while learning.
Don't limit your techniques. Once you can confidently bring a restored razor to shave with consistency, I'd recommend playing around and experimenting. Though this, I've developed some strokes that are critical to my routine, and used effectively with every blade I sharpen.
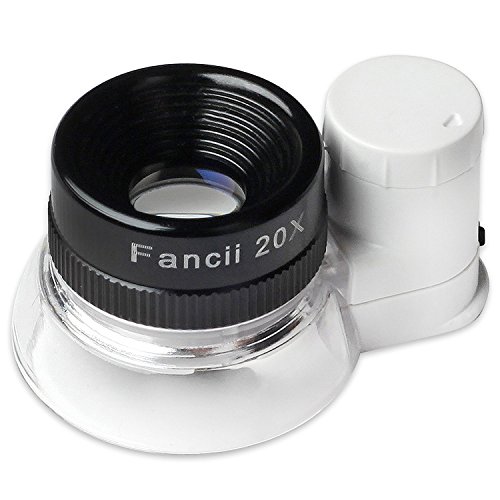
Buy a Jeweler's Loupe btw. They're cheap. This is the one I use:
https://www.amazon.com/gp/product/B015VGEBS4/ref=oh_aui_detailpage_o02_s00?ie=UTF8&psc=1
Yep! Mine is the same way -- fits great during summer but is annoyingly big during winter. I've thought about buying [these things] (https://www.amazon.com/RING-NOODLE-1-Petite-1-Narrow-Adjuster/dp/B00GUTWY5E/ref=sr_1_4?ie=UTF8&qid=1475253457&sr=8-4&keywords=ring+size+adjuster+for+loose+rings) to help it fit better but haven't bit the bullet yet. Also, congratulations! :-)
heh, diving right in then?
I got these ring adjusters. The work well for my wedding rings. I’ll get them resized when I’m where I need to be.
Ring Size Adjuster with Jewelry Polishing Cloth,3 Sizes Fit for Any Rings,Clear Ring Sizer ,Perfect for Loose Rings,Pack of 12(2mm/3mm/4mm) https://www.amazon.com/dp/B072FGK4FH?ref=yo_pop_ma_swf
I bought a 30x jeweler's loupe off of Amazon for less than $6.
https://www.amazon.com/gp/product/B008BXQVO2/ref=od_aui_detailpages00?ie=UTF8&psc=1
I use this to check to see if the nib is out of whack.
These cheap "jeweler's loupes" on amazon do the trick usually. They claim up to 60x or something, I don't really believe that, but they work. You really don't need much.
I have one like this https://www.amazon.com/Bluedot-Trading-jewelers-loop-60x-Jewelers-Magnification/dp/B00MMP6YJW/ref=zg_bs_8090802011_34/131-9874862-0971406?_encoding=UTF8&psc=1&refRID=KZZ0NZVTM7TRMRNBQ9E2 (mine has some different brand but they're from the same factory anyway I'm sure) but I've seen various others from just searching "jewelers loupe" on amazon used and they all worked fine.
With how cheap they are it's also no big risk.
Awesome !
Get some ring sizers like these and keep them handy. I had a friend who lost quite a bit of weight and before she even thought of it, her ring slipped off her finger and I don't think she ever found it again. https://smile.amazon.com/Adjuster-Invisible-Transparent-Silicone-Tightener/dp/B07G5Z9X4G/ref=mp_s_a_1_7?keywords=ring+sizers+for+loose+rings+women&qid=1572872233&s=instant-video&sprefix=ring+sizer&sr=8-7
Sorry for the wall-o-link. I'm not great with reddit formatting yet. I'll get the hang of it eventually. I just don't know where to practice.
I have the same issue and got these ring size adjusters off Amazon that work perfect! They keep my diamond on top and you can just pull them off if your knuckle is in one of its sausage phases. It looks a little strange on the under side of your finger, but no one ever notices and I don't feel it at all.
Amazon Ring Adjusters
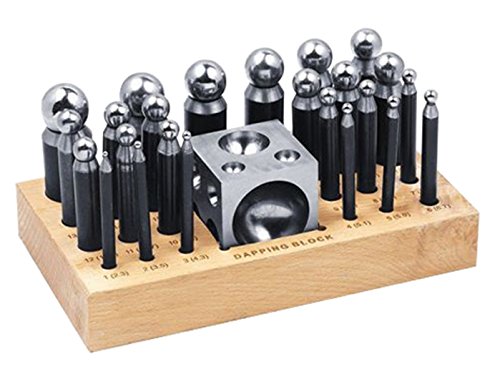
For those looking, search amazon for metal shaping tools.
for the specific balls on a stick, https://www.amazon.com/Dapping-Doming-Jewelry-Making-Forming/dp/B00FBP2HGO/ref=sr_1_18?ie=UTF8&qid=1518492859&sr=8-18&keywords=metal+shaping+tools
2-3 probably, just depends on how you want your trichomes clear/cloudy/amber. She should continue to get fat, mine our. I've bought several different microscopes and this is my favorite
https://www.amazon.com/dp/B074SJJM32/ref=cm_sw_r_other_apa_JPh7BbW036QNH
This one is the one I use (but shop around there may be better prices like on Ebay):
https://www.amazon.ca/Blue-Trading-Jewelers-Loupe-Magnification/dp/B00MMP6YJW/ref=sr_1_2?ie=UTF8&qid=1503593427&sr=8-2&keywords=60x+loupe
SE - Loupe Set - Dual 10x+20x, 10x, 30x, 3 Pc - MJ361830C https://www.amazon.com/dp/B001C9LG60/ref=cm_sw_r_awd_7l-IwbFE08DGC
Here is the link to the Canadian Amazon, same thing but skips the duty and import fees.
I'm currently wearing this size adjuster from Amazon: https://smile.amazon.com/gp/product/B07WQ8LCRM/ref=ppx_yo_dt_b_asin_title_o02_s00?ie=UTF8&psc=1
I bought a cheap pack of ring size adjusters from Amazon and they’re great! I started Keto the week I got engaged and have lost about half a ring size since then. I can’t feel the sizer on my finger, and I’m not accidentally sliding my ring off when I wash my hands anymore!
I highly recommend this one-piece style of loupe for cards: https://www.amazon.com/Fancii-Illuminated-Jewelers-Magnifier-Triplet/dp/B015VGEBS4
You just set it on top of the card and look, you don't have to hold anything or adjust the distance, it's already pre-calibrated and the light works better than the fold out or pop out kinds of loupes.
I don't wear rings, but I'm planning to order one of these for hubby before he loses his.
I suppose "lube" is the incorrect term. It's contact enhancer, metal conditioner, or stabilant. It keeps the both the RAM and DIMM slots from corroding and prevents heat creep which can cause data corruption and false memory failures.
I'm gonna copy a comment I made over on trees... Short answer is a container of steel screens in the top left and a jewelers loupe in the bottom right.
Everything is all labeled out here
I bought my grinder on [amazon for $7] (https://www.amazon.com/dp/B0023X32MA/ref=cm_sw_r_awd_KRYRub1MSFKSW). It works awesome.
I also got the screens (100) on [amazon] (https://www.amazon.com/dp/B007BQTC5U/ref=cm_sw_r_awd_tTYRub0BVP71J) for $4.
The empty green travel container is what I put a bit in if I'm heading over to a friends for the night. That and the two clear ones are from my recreational shop (WAent).
I don't use the normal sized lighters much, usually I choose the mini lighters.
I bought both the [zig zag roller] (https://www.amazon.com/dp/B002Q7WRDI/ref=cm_sw_r_awd_xUYRub0X73KSK) and the [blackberry juicy jay's] (https://www.amazon.com/dp/B00ESM6AMI/ref=cm_sw_r_awd_bXYRub1X7WAV1) at my smoke shop for $5 and $2 respectively.
My friend gave me the big old nug the other day so I just stashed it in here so I didn't mix strains.
The tweezers is for "handling" the nugs to put them in the grinder. I don't want to lose ANY crystals.
Burn gel (lidocane) because I'm clumsy as FUCK when I'm at a [6+].
Eye drops for dry eyes.
Hand sanitizer because I get stamped ash all over my hands from the way I hold my lighter.
Doob toob for obvious reasons. It's from a disposable e-cig from before I quit smoking.
I got the rainbow storage tube from the dollar store. I keep stems and glass screens in it. Sometimes I keep a few grams in it too if I have more than one strain.
Watermelon gum because it is my favorite taste when I'm high. Tic-tacs to take a minty toke. Emergency kit Kat for reasons.
A 30x21mm jeweler's loupe to look [closely] (http://imgur.com/f2knddq) at my [weed] (http://imgur.com/QRjZVc8)...and maybe [doritos] (http://imgur.com/BOS4v4t).
Edit: here is the link for the [jeweler's loupe] (http://www.amazon.com/dp/B008BXQVO2/ref=cm_sw_r_udp_awd_BxZRub1S2EF44).
the one i got from amazon works well.
You need to watch the crystals turn amber.
Buy one of these jewelry loups, https://www.amazon.com/LuckyStone-Microscope-Jewelers-Magnifier-Magnifying/dp/B00DH5N2LO/ref=zg_bs_8090802011_6?_encoding=UTF8&psc=1&refRID=DAJBJKDMZ139D30S83Y0
This one seems good but I'm not sure if the blacklight is strong/large enough. I want to illuminate a whole card. Also it seems bulky / awkward to use.
also I am not sure if 60x zoom is too much or not
I wanted to ask for advice in a store in person
I can totally relate to the frustration of a poorly performing pen. I'd answer that you need to invest a little effort to enjoy an effortless writing experience -- kinda the theme with fountain pens.
Fountain pens are often, if not usually, imperfect out of the box. Maybe there are machining oils still left in the cartridge or feed. Maybe in transit the pen got bumped around and the nib became misaligned. Sometimes you get a bum nib that's just not quite up to snuff. These kinds of problems can result in scratchy nibs and/or inconsistent flow.
The good news is that fountain pens can be tuned -- not only to resolve issues like the above but also to meet your personal preferences (e.g. heavy vs light flow; feedback vs glassy). And in even better news, many of the most common problems can be solved by yourself without needing to send a pen to a nibmeister.
To start, you should buy a loupe, which will help you inspect your nib up close and diagnose what's causing your issues. I like this one. (They also come in single packs, but the two pack is like 50 cents more.)
Next, you should have a look at some of the guides available online that will get you started with tuning your pens. Here are a couple good ones from two of America's best known nibmeisters: (1) John Mottishaw; (2) Richard Binder.
I'd bet that if you get a loupe and use it to inspect the pens that aren't to your liking, you'll see why and figure out how to fix it. It's probably little more than a matter of aligning the tines and flushing with some soapy water.
Hope that helps, and good luck!
There’s also this kind, which don’t seem as bulky. I just bought these exact ones and they work perfectly. It’s pretty hard to notice when the size adjuster is on even when looking directly at it from the palm side, and overall it’s really comfortable
You're on the right track waiting for summer to make sure your ring is not too tight on hot summer days. Don't rush into resizing it. My fingers change a LOT between summer and winter, and it's better to be too loose than too tight.
Rather than alter the ring just for the season, I wear these in the winter, and they work great.
Once summer rolls around, and you've seen some hot days, bring it into a local jeweler and see what they say. If it's a plain metal band, it should be super easy to resize, and I'd expect it to cost on the order of $100 (or less). If it's got designs carved or stamped into it, or tiny stones, it will be tougher.
As far as work holding, Amazon sells something like what you're describing for about $20 here
Alternatively there is a desk-top version of roughly the same thing here
Also, have you considered adding weights to your brushes? I know people with that have tremors bad enough that they have trouble using silverware. They say that weighted utensils like these make a world of difference. I imagine the same principles might apply to painting.
Also, shaky hands or no, that mini looks badass for sure. Great work :)
The easiest way is to go in to any local jeweler, and ask them to check your ring size. It's usually free, easy and accurate. Be sure to check any fingers you are interested in wearing a ring on. Just type the sizes in a note on your phone, then you've got several different fingers if you ever need to know.
The next easiest is order a ring sizing gauge set from somewhere online. Amazon has some. This way however, isn't free. It does get you a ring sizing gauge though if you ever need to use it again.
Just got this one in the mail, has 30x and 60x. Comes with two of them, so maybe buy with a buddy? Has bright LEDs on each magnifier. Pretty solid overall, definitely recommend.
https://www.amazon.com/gp/product/B074SJJM32/ref=oh_aui_detailpage_o00_s00?ie=UTF8&psc=1
already have uv light, is this a good enough loupe?
I use the same one - it's also very easy to hold against your phone's camera and take pictures with.
Same one but a couple bucks more because Prime: https://www.amazon.ca/gp/product/B00MMP6VRW/ref=ox_sc_act_title_1?smid=A3DWYIK6Y9EEQB&psc=1
Don't waste your money on those expensive magnifiers. This is really all you need. Maybe 40 or 50x but any higher will be too hard to keep stable and at this level you will be able to see all you need to.
Besides a nylon hammer and a jewellers mandrel (which really should be made out of steel; the less expensive aluminium versions are solely for measuring) I would suggest to invest into a rathburn ring stretcher, a punch & die set from harbor freight will do the job sufficiently and those coin centering cards.
That would be my basic tooling, maybe an dapping block (together with the dapping punches) additionally such as this one.
these ones look pretty easy and comfortable jewelry stores use metal and fit it to you. but at least the rubber ones are good til you reach goal weight! <3
I use one of the 30x ones from this set, you could probably find one individually for $6 or so. 30x vs. 40x or 60x may not matter much for you. They're really common and there's nothing particularly special about that set. I already had them because they're also really useful for working with tiny electronics. :) It works to hold it to the lens on my phone, too.
When I started growing cannabis I tried getting one of the adjustable hand microscopes, but I found it much harder to use that the loupes I already had unless I cut buds off the plant and held them flat.
These tweezers are pretty sweet. They'd come in handy when putting jewels on my nails!
You could look around Etsy for a style you like! Since a lot of stuff on Etsy is handmade, the maker should also be able to modify the ring to fit your size. Price there can range from $3 to $50 depending on what you're looking for (though some can be a lot more expensive). Etsy also sells vintage and costume jewelry rings if you know what size to search for!
If you get a plastic ring sizer like this one, it will also be easier know which size to ask for/get!
These tweezers are 95 cents with free shipping They'd be useful for when I am sewing things and need to pick out stitches when I mess up. :)
You will find them on my "Art stuffs" list
only .98!
Beer me!
http://www.reddit.com/r/askscience/comments/e1sa0/my_kids_asked_santa_for_a_microscope_for/ Some not bad advice in that thread. Let me second a stereo-microscope. The stereomicroscope in my lab is easily my favorite to play with. I'd start by reading this
I think something like this or something like this which are, as far as I can tell, modified dermatologist scopes, might be good for a 5th grader. (Reviews are pretty good indicators on this, though don't trust zoom numbers most zoom 20-30x and the rest is all digital.) I spent a summer volunteering at a place with something like these, they are fun. Also if you want something that doesn't take pictures but is a pretty neat field scope you should check out, this, this, or this (note, jeweler loupes do not have lights built in). If you want something kind of medium range, most sites recommend Celestron scopes as pretty good. If you really want a compound microscope (and you know how to operate a microscope, I can't emphasize this enough, otherwise it will not work!) this is recommended by the microscope buying guide. (Also as someone else said, you will run out of stuff to look at pretty fast with a compound scope.) Though that site has a number of nice compound microscopes.
So I've seen a lot of " is this ready" posts and wanted to share my experience.
I bought one of these back in July when I had an auto finishing up and it was great.
Blue Dot Trading 2 in 1 Jewelers Loupe, 30x/60x Magnified Jewlers loupe (jewelers-loupe-30x-60x) https://www.amazon.ca/dp/B00MMP6VRW/ref=cm_sw_r_cp_api_i_2epFDb8Y7Z4EW
They are super cheap and with the led on you can see the trichs perfectly. I'm still not sure if the trichome colour is the most scientific way to do it, but at 50/50 milky / amber, mine turned out well.
With the loupe you can almost nail it down to the day when to harvest.
Just wanted to share how cheaply and easily you can time your harvest as we approach the end of the season.
Also great for checking out weird growth, diseases and pests if you are unfortunate enough to have them.
Good luck and good growing everyone.
For the lazy
Not anymore, as I’m a perfectionist, and I didn’t like the way a number of my domes had appeared on previous builds, so I invested in a doming kit like this one on Amazon. I got mine at Harbor Freight.
It’s useful for builds like this, as well as for builds with spherical elements. For example BB-8 or the Death Star. It also helps make the final product look more round versus having sharp corners on seams or inconsistent bends. I’ve got those two builds posted here on r/metalearth and can be found on my profile also if you want to take a look, and maybe you’ll find that you might want one as well.
I would love to test out and review the Magnifier Glasses Headban
http://www.amazon.com/dp/B01C4P1NTU
Free Products for Amazon Reviews. We need Reviews on some of our new products. We have headbands, Mascara, and a new Makeup Brush Organizer, Magnifier Glasses. Great if you also do you tube videos.
http://www.amazon.com/dp/B0070YFUV8 - Eyelash Extension Mascara
http://www.amazon.com/dp/B01BTC0O44 - Circle Makeup Brush Organizer
http://www.amazon.com/dp/B01BN1OMO4 -- Square Makeup Brush Organizer
http://www.amazon.com/dp/B01C4P1NTU - -Magnifier Glasses Headband
http://www.amazon.com/dp/B01BYOKMS0 -- Headband Purple
http://www.amazon.com/dp/B01BZ907Z2 -- Headband Blue
http://www.amazon.com/dp/B01BYMQKCO --Headband- Blue Diamond
The headbands we will have to choose which one and they ae so much fun because you can wear them over 50 different styles in under 1 min. They are so easy to put in and do a style great for moms on the go students or that messy hair day now gone in just 1 min. Just twist your hair here is the You tube link to show you. https://www.youtube.com/watch?v=akZNaDFw8i4
If you are interested and can leave a photo in your review for Amazon then please write me at:
[email protected]
Yeah I have two similar to this. Yeah I guess I'm waiting until I hit my goal weight, realistically I probably won't have to because I don't think I can lose much more in my hands. They are the lankiest piece of me right now.
Sorry it took so long, I don't hang out here much ... :-)
Scanner Bed glass - Yeah, I tried glass from a picture (the frame and pic were just junk), but it wasn't level and not very thick, so that didn't work well. I got pretty jazzed when I realized I had a dead flat piece of glass sitting in the corner of my office! One of those "OH!" moments, LOL.
Here's the mounting plate I printed from Thingiverse:
https://www.thingiverse.com/thing:2230682 (Universal Hotbed Mosfet Mount).
The install instructions come with the unit, but here's the low-down:
It's basically simple:
1.Disconnect from AC mains! (after you disconnect, turn the power switch ON for 20 seconds, THEN BACK OFF. LEAVE UNPLUGGED!). Do this BEFORE you open the control box!!
2.Next you disconnect the bed wires from the current PCB, and connect them to the output of the new board. (Labeled "Hot Bed")
3.Then you connect the input of the board to the original connection points on the main PCB. Mine came with the wires. (Labeled "Control In")
4.Now you have to make some leads for power. This is the only "tricky" part, and if you don't immediately know how, get someone else to do it that's electrically savvy! Use 4 spade terminals and 14 gauge wire. DON'T USE SMALLER WIRE, IT'S A LOT OF CURRENT. Some people say 12ga (heavier), but it's a short run, 14ga is fine.
5.Connect your new leads to the power supply's 12V output, be sure to get polarity right, and connect to new MOSFET PCB. (Labeled "DC IN").
Tip: Personally, on ALL connections below 200 volts, I always use a little DeoxIT on the connections. It improves conductivity without being a "short" hazard, and protects against oxidation of the connects. Something that's a problem in hot electronics boxes.
Don't go overboard! Just enough to dampen the connection, NOT wet!
Here's the one I use most times (there's one specifically for gold connections, different formula):
https://smile.amazon.com/Booster-Electric-Connection-Enhancer-Lubricant/dp/B0002BBVN2/ref=pd_bxgy_23_img_2?_encoding=UTF8&amp;pd_rd_i=B0002BBVN2&amp;pd_rd_r=WGKXZGQG9QJK3PKPYGSJ&amp;pd_rd_w=dQcRF&amp;pd_rd_wg=BbLju&amp;psc=1&amp;refRID=WGKXZGQG9QJK3PKPYGSJ
----(REGULAR FORMULA ABOVE)
And here's the Gold contacts one:
https://smile.amazon.com/gp/product/B0015A7CYG/ref=oh_aui_search_detailpage?ie=UTF8&amp;psc=1
I use this stuff on EVERYTHING that has electrical contacts. No more slapping the remote control because the batteries have a bad connection, LOL! Again, be sparing with it, wipe the brush off WELL before applying, you don't want running liquid, just a very light dampening of the contacts.
Magic stuff - all the "Roadies" for the major touring bands use it by the case. Don't want to be the guy to to track down a "Hum" in two miles of cables with 15 minutes to showtime for The Rolling Stones, eh? Expensive stuff, worth EVERY cent.
Have fun!
PuterPro
> I’ve been meaning to try the gold band to see if it’ll fit again. Guess I’ll find it tonight.
I stopped wearing my engagement ring and wedding band for the same reason. I found my band and it fit! Aaaaand now it's loose. Lost the e-ring though, whoops...
If your wedding band is loose, you can use something like this to get you by for a while. After that it's best to get it re-sized, fortunately that isn't too expensive (ballpark $50), most rings* can be brought down 1 - 2 sizes. After that it's time for a new ring, lol. If you work with your hands a lot, you might want to look at getting another silicone band, though, because they're flexible and therefore very comfortable, and can be safer than traditional metal rings. (*Titanium, tungsten, etc can't be resized.)
Something like this may work if it's only a small size difference. https://smile.amazon.com/Adjuster-Invisible-Transparent-Silicone-Tightener/dp/B07G5Z9X4G/
Amazon has a ton of nice looking tungsten and titanium rings for super cheap. I can share some of the ones on my list if you'd like.
The hair method is pretty unreliable, it varies from strain to strain. Just get one of these 30x jewelers loupes and look at the heads of the trichomes. When they seem at least 50% amber, 50% cloudy is a good time to harvest.
I use DeoxIT Gold on the USB connector pin and it solved the problem.
https://www.amazon.com/DeoxIT-Gold-Brush-Contact-Conditioner/dp/B0015A7CYG/ref=sr_1_cc_8?s=aps&ie=UTF8&qid=1550135163&sr=1-8-catcorr&keywords=deoxIT+gold
It's never too late on my posts. Here you go :D
Necklace would work - or, there's these: http://www.amazon.com/RING-NOODLE-1-Petite-1-Narrow-Adjuster/dp/B00GUTWY5E...
i can easily see the blue line with one of these, which fit on a keychain
http://www.amazon.com/SE-Loupe-Set-Dual-10x/dp/B001C9LG60/ref=pd_sim_op_3?ie=UTF8&amp;refRID=0P8J0B8YSF68S4GM553V
loupes also effective in seeing the blue line in a stack of 100 or so cards very quickly
I thought I'd share my experience for the community, and hopefully my experiences help or encourage others to give this a shot on their own. I had absolutely no experience growing anything when I started, so if I can do it, so can anyone else!
I've got an equipment list of the stuff I'm using since it took me a long time to figure out what to buy. This doesn't include the $1.50/week for RO water from the local grocery store, the electricity, or the other stuff I ended up buying afterward for my clones.
No grow tent or ventiliation is needed for my scenario since I have full access to a basement. It's perfect since there is a water heater and a boiler in the same room so the temp is always pretty constant, there is plenty of CO2 from the gas that the appliances burn, and the humidity is also pretty constant.
A few of the mistakes I made that I'd fix next time:
The images have some details about my grow, but I'll be happy to answer any other questions folks might have.
Item | Cost | Product Link
---|---|----
Seeds (OG Kush Feminized, 20ct) | $80 | Marijuana Seeds NL
Coco Coir | $17 | Kempf Coco
300W LED Lighting | $80 | GalaxyHydro
Plastic Pot | $0 | Craigslist - Free
Light Timers | $12 | Light Timers
pH Tester | $18 | pH Pen
pH Up and Down | $16 | General Hydro
Jeweler's Loupe | $6 | Magnify Me
Nutes | $35 | Canna Coco 1 & 2
Perlite | $13 | Black Gold
CalMag | $17 | Botanicare Supplement
TOTAL | $294
Also, THANK YOU to everyone in this sub. There is a ton of info out there about growing, but this place is the best location I found for timely info related to my new hobby.