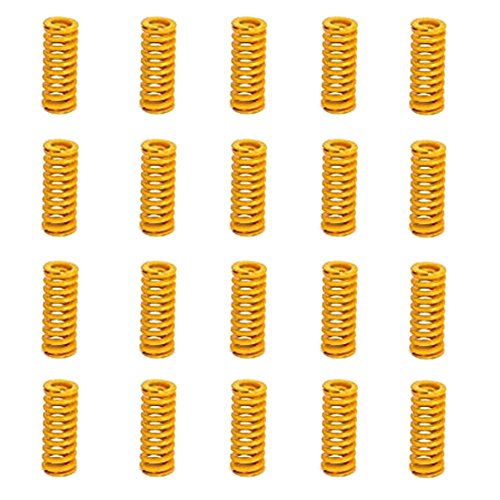
Best mechanical compression springs according to redditors
We found 83 Reddit comments discussing the best mechanical compression springs. We ranked the 25 resulting products by number of redditors who mentioned them. Here are the top 20.
We found 83 Reddit comments discussing the best mechanical compression springs. We ranked the 25 resulting products by number of redditors who mentioned them. Here are the top 20.


Buy better springs like these: https://www.amazon.com/SIQUK-Springs-Compression-Creality-Leveling/dp/B07K9PBML5
The stock springs are garbage and don't hold anything in place. A slight bump will knock it out of level.
I did something similar, I looked for a product I could purchase (like spring loaded tension rods for curtains) and ended up just making my own by taking a 2" x 4" x 2" shorter than the actual distance between the floor and the ceiling (in my case the distance was 94", so this was a standard 2"x 4"x 8' cut down 2" in length). I drilled a 1/2" diameter hole two inches deep into the center of one end. I then inserted a three inch spring
(like this:) http://www.amazon.com/Forney-72613-Compression-32-Inch----016-Inch/dp/B00G34QAEC/ref=sr_1_1?ie=UTF8&qid=1462463591&sr=8-1&keywords=small+compression+springs+3%22
and a threaded leg
(like this): http://www.amazon.com/Tempest-Furniture-Leveler-Thread-Diameter/dp/B00Y8BDWL6/ref=sr_1_15?ie=UTF8&qid=1462463658&sr=8-15&keywords=threaded+leg
A little adjusting with the nut on the threaded shaft and these spring loaded tension boards held up no-see-um netting around my porch for years. I could staple or screw into them if necessary and after painting they blended right in. I chose strong springs you really had to lean into them to compress them. I made four of them for about twenty dollars, whereas a single curtain tension pole of adequate size was $80.
It's generally better to use it stock and upgrade as you discover the need to.
The only (purchased) upgrade you really need from the get go is [better bed springs] (https://www.amazon.com/gp/product/B07KF9LZ2L/ref=ppx_yo_dt_b_asin_title_o02_s00?ie=UTF8&psc=1). The stock ones are terrible at maintaining the bed at level. If the bed it comes with is warped, then also a glass bed, but that's the only reason you would need one. Mine wasn't warped and it's just fine. After that, aluminum extruder because the plastic one will start to wear eventually, and capricorn tubing.
A Pi, auto leveling, new electronics, micro swiss are all much more in the "luxury" upgrade category in my opinion. I don't have any of those and I don't feel any particular need to after three months of having the printer.
Make sure you also look into what's called "luke's hotend fix." I struggled with an underextrusion goblin for a while until I did that and upgraded to an aluminum extruder and capricorn tubing. Goblin banished.
I recommend also getting some calipers, though they're not necessary, and a set of feeler gauges has made bed leveling easier and more consistent than using a sheet of paper.
edit: I misread and thought you were trying to save money. Anyway, I still recommend using it mostly stock for a while to get familiar with it before upgrading a bunch of stuff. Out of those, after bed springs, extruder assembly and tubing I'd probably go for the electronics and hotend since bed leveling comes pretty easy to me now.
I used these when refurbishing a keyboard with corroded springs:
https://www.amazon.com/gp/product/B076MGMWYP
The original springs fit loosely on the plastic top plate; these are tighter, but basically a perfect fit on my board. YMMV
​
These better match the OEM dimensions, but I haven't tried them:
https://www.amazon.com/uxcell-0-4mmx12mmx15mm-Stainless-Compression-Springs/dp/B076LN8SMZ/
It's possible that while removing a previous print you knocked the bed out of level. One of the best upgrades I usually recommend is heavier duty springs to replace the stock bed level springs.
Something like these:
https://www.amazon.com/gp/aw/d/B07FY47BX7?psc=1&ref=ppx_pop_mob_b_asin_title
Great printer, the Ender 3 is very popular right now because it is fully open source. Which means if you have any questions, then there is lots of community support for it right now.
Out of the box everything is great, the only thing I would suggest is to spend a few bucks and upgrade the bed springs right off the bat. I've had mine a few months. Once I got my bed level it has been running great.
Also buy a few roles of PLA filament, because it only comes with enough to get a few test prints. Oh, and replacement nozzles, because they will eventually wear down and need replaced.
> Mostly, it’s keeping the bed leveled that’s the hard part
I got you fam https://www.amazon.com/FYSETC-Motherboard-Accessories-Compression-Creality/dp/B07GXC1G2B/
I've been using these: https://smile.amazon.com/FYSETC-Motherboard-Accessories-Compression-Creality/dp/B07GXC1G2B
When setting your springs make sure you wind them all the way tight and then back off two turns.
Also upgrade to the yellow springs. https://www.amazon.com/FYSETC-Motherboard-Accessories-Compression-Creality/dp/B07GXC1G2B
Again, I am a super novice...
​
I switched out to a glass bed simply because my stock bed was warped. The tip could touch on the corners and a sheet of paper would slide right through in the center. Once you get the bed level though, I don't think your adhesion problem will be as much of an issue. The magnetic bed it actually pretty nice. I actually ended up turning my bed down a little, to like 55. I was at 60, and it was working, but I was having adhesion problems as well and figured it might be a combination of speed and filament being too hot to stick with a temp that high. I also run my PLA at 210.
​
These springs made leveling the bed much easier. Springs
This was the bed I went with. I like it a lot.
What you absolutely MUSTTTTTTT!!!! order? Nothing. The printer works as is. But if you want to do yourself a favour, here's a list of what I consider essentials:
- New springs, both bed and extruder. I don't have a link for an extruder one as I upgraded my entire extruder drive frame and that came with a better spring
- A new removable bed. Creality glass bed or glass with a PEI sheet is my bed of choice
- Thermal pad to avoid the annoying bed clamps. Cut squares out of it, lay them in a checkered pattern alternating between thermal pad and nothing and place your bed on top. They will hold the bed in place and help with heating
- Stepper dampers if your printer is anywhere near where you spend your time, it sounds like a bloody jackhammer right out of the box
- New tube fittings, the stock ones are terrible and will give out in a matter of weeks at best. They also barely hold onto the tube
There are a ton of other great upgrades, but I think a good idea is to get a feel for it yourself.
What you can do, however, is check out some printable upgrades. I have this thread where people contributed with their choice of printable upgrades. It's a great list you can refer to later. Essentials on that are the fan guard and LCD back cover simply because the Ender 3 as is has the fan and back of the LCD exposed and that makes it crazy vulnerable to dust and gook damage
Even if your printer would have arrived with all 4 springs, one of the best, cheapest, and easiest upgrades for the Ender 3 is installing these Yellow springs
I got this set from Amazon and it's way more than you need. I've sent a few sets to other friends who have gotten Ender 3s and still had leftovers for when I bought my second one.
There are several videos on youtube for first time ender 3 setup. Mostly they cover some detailed orientated techniques like...
Sure
These are what I have
These are the ones I bought.
I got my Ender 3 Pro about a month ago, performed some upgrades and ran into a few problems, but with some weird caveates.
I'm trying to print multiple miniatures on a single print, but seem to be getting a lot of oozing or stringing issues, but when I test with retraction tests, the test comes out perfect with identical settings. Additionally, when googling around, I couldn't find anything except for potentially a nozzle clog or potentially hydrated filament (possible, I'll test this later)
​
I've tested a few other prints as well, a benchy and a testcube, they print fine. Really curious about what's going on. Do I need to spread the prints out more, use different settings, or is it more of a mechanical issue?
​
I'd appreciate any help you guys have to recommend!
​
So, lets get down to it:
Printer: Creality Ender 3 Pro
Surface: Creality Glass surface
Upgrades: Aluminum extruder upgrade
Capricorn Tubing
New bed springs
In addition to these, I've tightened the X and Y bolts on the runners to reduce wobble -- there's no more wobble, maybe they're too tight? I don't think so, I've had good prints with these settings, but not with a few things.
Settings:
Basically the same as the "normal" settings for the Ender 3 on Cura 4.0.0
But in addition: (And what I think may be important is bolded)
adhesion_type = raft
layer_height = 0.12
support_tree_enable = True
support_type = buildplate
brim_outside_only = False
fill_outline_gaps = True
infill_pattern = cubic
infill_sparse_density = 25
material_final_print_temperature = 180
material_initial_print_temperature = 180
material_print_temperature = 185
optimize_wall_printing_order = True
raft_margin = 10
retraction_amount = 7.5
retraction_speed = 20
speed_print = 30
support_angle = 40
support_conical_enabled = True
support_infill_rate = 50
support_interface_enable = True
support_pattern = lines
** NOTE ** Standard supports are turned off, I'm using the tree supports
support_tree_collision_resolution = 0.15
travel_avoid_supports = True
travel_compensate_overlapping_walls_enabled = False
wall_thickness = 1.2
Upgrade your bed springs: https://smile.amazon.com/Adiyer-Compression-Springs-Printer-Leveling/dp/B07KF9LZ2L/
In my opinion, this is the MOST necessary modification to do on any Ender 3. The springs that come with it are trash, and your bed will constantly shift up or down unless you get better springs. I haven't had to re-level my bed using paper in months.
I'd stick with the glass bed if I were you, it really helps if your bed is warped (which it probably is, judging by your first pic). Just from looking, it seems like your nozzle is too close on that second pic. If you're using a piece of paper to level, make sure to check the nozzle height at locations all over the bed, not just on the edge or the center (although the center is probably the most important spot).
Also, just a reminder to clean your bed with alcohol often. The Creality glass bed can be VERY sticky if clean, so it's actually pretty forgiving on that first layer. Your nozzle can be slightly farther away than it should be, but it will still adhere fine. But if the bed is dirty you'll have a lot of trouble.
https://www.amazon.com/gp/product/B07GXC1G2B/. These are a game changer. They are so stiff and leveling the bed is so much more accurate.
I just learned way too much about springs... the problem is I don't know if they use real spring calculations on switches. Spring Rate, Load Capacity, and what not.
These have a Load Capacity 9.34 Newtons which is 952.41 grams they are a little larger diameter but they would probably fit... and the length is correct.
of P.S. that's about 2.0988 lbs
The stock Ender 3 extruder is mostly plastic, and the spring in it is very weak. Often the extruder will crack or break, and the filament ends up digging a groove into the arm.
As for bed springs, something like this will do:
https://www.amazon.com/FYSETC-Motherboard-Accessories-Compression-Creality/dp/B07GXC1G2B/ref=sr_1_1?keywords=3d+printer+spring&qid=1554171742&s=gateway&sr=8-1
https://www.amazon.com/Kasteco-Compression-Spring-Yellow-Storage/dp/B07JJR6C4Q I got these springs that work well. They are stiffer and you won’t have to level as often.
I highly recommend upgrading the springs.
I got these, they are 10x more stiffer and make bed leveling a breeze.
Linear rails are really nice, but honestly I think it's total overkill for a budget printer like this, if you got the cash though go for it.
Just a word of caution though, lots of people have had mixed experiences with the linear rails off aliexpress. some people love em, others have ordered them and they've fallen apart in their hands while installing them.
Me personally, I upgraded all the wheels and bearings to these. they are way more stiffer than the stock wheels and the bearings on those suckers roll like butter. You can just do the bed wheels but I upgraded all of them, was one of the best mods I've bought yet.
Also I'm not sure if this is still an issue, but last I heard the TH3D firmware had some really bad issues with Jerk settings being set WAY too high or acting very buggy. Have you noticed movements that are pretty violent? really high jerk values can throw your bed leveling level off during a print if it's strong enough.
Nice ! I can see you've done your homework lol, all good choices. I'll just give you a few suggestions then since you've pretty much got it covered. The springs I used on my enders were these: https://www.amazon.com/gp/product/B07FY47BX7/ref=ppx_yo_dt_b_asin_title_o02_s00?ie=UTF8&psc=1 You might need longer screws, not sure about that, but you can get those at any hardware store, probably around 35mm m3 screws should do the trick. And the motor vibration dampers i used were these: https://www.amazon.com/gp/product/B07C7FRLNX/ref=oh_aui_search_asin_title?ie=UTF8&psc=1 you don't need them on the z-axis, just the x and y. As far as smoothers go, I think the creality boards currently use a4988 stepper drivers, so you'd probably not see any benefit from tl smoothers. I'd definitely recommend the glass bed, since ender 3 print beds are almost always warped to some extent which can make leveling the bed a real pain in the ass. The hardened steel nozzle is cool, just be aware it's not as good at transferring heat to the filament as a brass nozzle, so it prints slower, and it's only useful if you're planning on using abrasive filament like carbon fiber or glow in the dark filament. Pla, petg, wood pla, and abs don't need it. You can actually print anything you want with a brass nozzle, you'd just replace it more often depending on how much abrasive filament you use. Also, don't know which fan shroud you're planning on, but the bullseye is very good and it uses the stock fan : https://www.thingiverse.com/thing:2759439
Sorry about the wall of text lol.
I would replace the bed springs before you get rid of the glass, I was having to level my bed a lot more often after going with a glass bed so I swapped the springs with some stiffer ones. I only level my bed now once every few weeks.
Here is a link to the springs I bought.
EDIT: Make sure to tighten the leveling knobs as far down as possible (monkey tight, not gorilla tight), adjust the end stop until the nozzle is about a millimeter above the highest corner, and then level from there.
I'd say the yellow bed springs are worthwhile. They're about $5 on Amazon, I bought these:
https://www.amazon.com/gp/product/B07GXC1G2B/ref=ppx_yo_dt_b_asin_title_o04_s00?ie=UTF8&psc=1
They help keep the bed from going out-of-level as quickly, vs the stock springs. They're easy to install, and cheap, which is nice.
There are loads of other upgrades you can consider. A glass print bed surface, as one example, or a PEI print bed. Either can help provide a flatter print surface, vs the stock magnetic one (which will more-readily follow any distortions in the heated bed surface, making your print surface uneven).
Buy these and swap em in.
Less bed wobble, less leveling in the long term.
FYSETC 3D Printer Motherboard Accessories 0.31 in OD 0.78 in Length Compression Springs Light Load for Creality CR-10 10S S4 Ender 3 Heatbed Springs Bottom Connect Leveling - 10 Pack https://www.amazon.com/dp/B07GXC1G2B/ref=cm_sw_r_cp_api_i_92l7CbYBEGJYC
The extruder isn’t needed right away, and if you print a good filament guide you won’t need it at all since the filament wont wear into it. You can also get a sheet of glass or mirror at home depot or lowes for cheaper, which is what I am going to do soon. So far the regular bed has been working fine for me. For the springs, I actually just bought these today: https://www.amazon.com/dp/B07MTGXYLW/. They should work well as they’re marketed towards the printer. The PTFE tube isn’t an upgrade I’ve done but you can for sure.
https://ultimaker.com/en/resources/20441-manage-profiles
Here's the springs:
https://www.amazon.com/FYSETC-Motherboard-Accessories-Compression-Creality/dp/B07GXC1G2B
Probably nothing. There's a good chance you're extruder gear is slipping. IMO the stock spring doesn't put out enough force to grip the filament and there's no mechanism to tension it. I would recommend one of the following:
Pull out some filament and check for solid bite marks. If you don't have any or have very light bite marks you know your issue.
​
It's on my todo list to merge my model with the newest extruder bracket so you can tension the spring easily.
I'm pretty new to this too, I bought my Ender 3 Pro around the same time as you. Quiet printing is pretty high on my list as well as being able to print high-temp exotic filaments in the long term while maintaining reliability.
First upgrades I purchased were stiffer bed springs so I would be less likely to throw the bed out of level while removing prints or working around the printer and Capricorn XS tube since it has a more consistent internal diameter, fits closer to the filament, and can work with slightly higher temps. I also picked up a pack of bowden couplers recently as I noticed the end nearest the extruder is sliding past the coupler jaws on de/retraction; don't worry about that unless it's an issue for you. That's about $30 alone since I don't have a supply shop locally and have to order those parts in bulk. I had a Pi 3B laying around unused and flashed Octoprint onto it. Highly recommended. I have a replacement Noctua hotend fan, buck converters, and 5015 blower on order to quiet the fan noise; about $32. Just replaced the Meanwell psu fan with a 60x25mm Noctua I had lying around (Note: there may be better options in the 92-120mm range to replace part of the PSU housing, but that's what I had laying around). Next upgrade coming is the SKR Mini E3 with TMC 2209 drivers ($28) to eliminate almost all of the stepper noise. Also looking into a replacement for the control board fan and some vibration isolating feet for the frame. As far as higher temp printing I haven't made a lot of progress aside from buying a titanium all-metal heat brake ($11) winch I have yet to install or inspect, and looking into enclosure and electronics relocation avenues.
Either way the mods I purchased came in at around $100 US which should quiet the printer and help with reliability. Also looking into picking up a good M3-M4 bolt kit if any exist in the US.
Here are some links to the things I picked up and will, which may be helpful if you're in the US. Mostly from Amazon.
Type | Name | Link | Price
---|---|----|----
Reliability | 8mm x 20mm yellow springs | Link | $6.98
Reliability | Capricorn XS Tubing | Link | $11.49
Reliability | PC4-M6 / PC4-M10 Pneumatic Bowden Fittings | Link | $11.99
Silence | Noctua 40mm x 10mm 3-pin fan | Link | $13.95
Silence/Various | LM2596 Adjustable Buck Converters | Link | $10.95
Silence | 24v 5015 Radial Ball Bearing Fans | Link | $7.19
Silence/Various | SKR Mini E3 w/ TMC 2209 drivers | Link | $28.81
High Temp | Titanium All-Metal Heat Brake | Link | $11.52
TOTAL: $102.88 US + Tax
Parts already purchased/ bought with printer
Type | Name | Link | Price
---|---|----|----
Reliability/High Temp | OEM Ender 3 Glass Bed | Link | $20
Reliability | Feeler Guage Set | Link | $5
Reliability | 608zz Bearings, using with this(My Remix), this, and this, though I like this design a bit better | Link | $5.98
QoL Improvement | Raspberry Pi 3B w/ Octoprint | Link | $34.46
Silence | Noctua 60mm x 25mm 3-pin fan, goes with this mod | Link | $14.95
TOTAL: $80.39 US + Tax
Future planned upgrades
Those couplers are trash and so is the PTFE tube they sent. They may work for a while but you'll want to swap them sooner rather than later. Here's a list of upgrades you'll probably want to do. You'll also want to look up a tutorial on how to upgrade your firmware so you can activate safety features (thermal runaway protection specifically). This also doesn't include a BLTouch or EZABL (auto bed levelers) as I have yet to make a choice personally.
Couplers and Tube:
SIQUK 3 Pieces Teflon Tube PTFE... https://www.amazon.com/dp/B07FPJHRTQ?ref=ppx_pop_mob_ap_share
Metal Extruder: ( original plastic one will wear out or break)
Ender 3 Creality 3D Upgrade... https://www.amazon.com/dp/B07KSS8FRQ?ref=ppx_pop_mob_ap_share
Bed Springs: (more than needed but oh well)
SIQUK 16 Pieces Heated Bed... https://www.amazon.com/dp/B07K9PBML5?ref=ppx_pop_mob_ap_share
Glass Bed: (goes on top of print bed which is usually warped, printing on an uneven surface not so bueno)
Creality Upgraded 3D Printer... https://www.amazon.com/dp/B07DS2LZF1?ref=ppx_pop_mob_ap_share
Raspberry Pi 3B+ for OctoPrint: (still need microsd card for it I believe)
CanaKit Raspberry Pi 3 B+ (B... https://www.amazon.com/dp/B07BC6WH7V?ref=ppx_pop_mob_ap_share
Stepper Motor Dampers: (silences the motors, no more sounding like dial up internet lol will need to print mounts from thingiverse)
Upgraded NEMA 17 Stepper Steel... https://www.amazon.com/dp/B07DNT72SF?ref=ppx_pop_mob_ap_share
Heat Sinks For Stepper Motors: (once stepper motors have dampers and aren't attached to the metal frame, they can get a little hot)
40mmx40mmx10mm Black Radiator... https://www.amazon.com/dp/B07KWVGGGK?ref=ppx_pop_mob_ap_share
Hot end silicone sleeve: (may not need, mine came with one instead of the old insulation)
Creality Original 3D Printer... https://www.amazon.com/dp/B07HNXJ39T?ref=ppx_pop_mob_ap_share
Extra Filament: (ender 3 only comes with a small sample "spool", this is just a brand I use and have had decent results with. The metallic silver hue shows off detail well)
3D Printer PLA Filament 1.75MM... https://www.amazon.com/dp/B00ME7YUIU?ref=ppx_pop_mob_ap_share
I see these
https://www.creality3donline.com/creality-2pcs-cr-10-ender-extruder-spring_p0153.html
Or should I buy some yellow ones from amazon?
FYSETC 3D Printer Motherboard Accessories 0.31 in OD 0.78 in Length Compression Springs Light Load for Creality CR-10 10S S4 Ender 3 Heatbed Springs Bottom Connect Leveling - 10 Pack
https://smile.amazon.com/dp/B07GXC1G2B/ref=cm_sw_r_cp_apa_i_9YFnDb0DV66V4
I got mine from Amazon by typing ender 3 springs. Personally I got this
https://www.amazon.com/dp/B079RJ5LF4/ref=cm_sw_r_cp_awdb_t1_RqTwCbPKYJ1GR
Way more than I needed, but I'll find a use for the rest. I got these and they took my bed to the next level. I've got a 300mm bed with 8 tramming points, it's a PIA to get stable and keep it that way. These springs keep locked down until something else eventually falls out if whack ;)
These should work. or just search 3d printer bed springs on Amazon and pick one you like. They're super common, and basically all the same. Nothing too special.
Simple fix: lower your z-endstop - the value in the assembly instructions is just a guideline.
Z-binding will most likely not be fixed by dis- and reassembly. It commonly results from the z-stepper being too close to the vertical beam. Some people used spacers that didn't work for me. I printed this adjustable z-motor mount that solved my problems. I have since also replaced the original rigid coupler with a flexible one.
Another thing I've done is to install stronger springs on the bed. (Something like these)
Improvements/add-ons
• Filament Roller Guide. You will thank yourself later to further prevent the filament from grooving an indentation where it feeds into your extruder. It utilizes bearings but its a fantastic design. I had mine for ~2 months when I started noticing the groove already being made.
• XT60 Connector clips - if you want a little "cable management"
• LCD Cable Clips - Also if you want a little "cable management". There is also an LCD Cover for the PCB to keep dust and whatnot out.
• Any fan covers you find that suit your style as you dont want filament going into the box in the bottom left (not entirely too sure what it holds).
>
>
>
Physical Upgrades
• Upgrade the bed springs as my originals started to sag a little. Not exactly sure on what the technical name for those springs are but those are the ones I purchased and I have been happy with them.
• Borosilicate glass bed. I use to use the stock mat, tape method, and hairspray method. All of those worked for a little bit but were a complete pain and mess to deal with from time to time. All I do now is use some isopropyl alcohol and clean my glass bed every once in a while but past that I require NO adhesion for my bed outside of tiny pieces that require a brim, skirt or whatever support needed to keep it adhered. As long as your print bed is leveled as best as possible (have a nice filament "squish") you will have no issues.
• Some other things you could look into if you plan to print with other kinds of filament outside of PLA would be: Micro Swiss steel nozzle, Capricorn tubing and an upgraded extruder like the e3d. Keep it simple for right now though while you learn your rigs because I strongly feel no ender 3 works the same and my preference for which program (MatterHacker, Slic3r or Cura) depends on how I feel how the model appears and how its coming out. Also, grab yourself a handful of replacement nozzles if you continue to use the brass ones. They CAN wear out if you use the printer like crazy, so its always good to have spares (also can get a variety of sizes too - standard being the 0.1mm I believe?). I snagged a pack of 10 for $5-8.
>
>
>
Last but not least, run a few bed level test prints as well. The best one that I have found which helps me dial in my printing was CHEPs bed level STL file. Video & G-Code file. I use it religiously if I ever find that my bed is out of wack.
There are a handful of other mods/add-ons you can find on Thingiverse and another website (one which we arent allowed to link to unfortunately).
Its a great printer. Upgrade your springs and get an aluminum extruder. Those two things were so cheap, but definitely made a difference for me. I use a glass bed with a PEI sheet and have been very happy with it. I use eSun PLA Pro for my minis. Check out Tomb of 3d Printed Horros for their cura profiles and tips!
I ordered these but I will warn you it took a while for them to arrive. But, they were great.
12mm OD 30mm Long Medium Load... https://www.amazon.com/dp/B013G5V9O6?ref=ppx_pop_mob_ap_share
These guys?
https://www.amazon.com/dp/B07QDLXB6S/ref=cm_sw_r_cp_apa_i_NvqrDbBBX19V3
List of mods on my Ender 3 Pro:
I use Cura for my slicer, and use the default setting there for the Ender 3.
Hey I also new on this, got my printer a month ago, I was super exited as everyone here when receive their printer, I read a LOT while waiting for the printer, so I heard that the stock bed springs are crappy, so I ordered this ones FYSETC Bed springs, also ordered the Aluminium Extruder feeder, and read about the leveling, the paper sheath method, which I think you should already heard about, I did it at the first time the printer gave me a nearly perfect first print (demo dog) , after a few prints and on my third print I came home just to find a mess on my printer, so I did my research again, find out it was bed adhesion, and find out that the best way was glass bed + PEI sheet was the best option, while waiting to arrive I tried to clean the stock bed sheet with mineral spirits (did have rubbing alcohol) but it worsened the adhesion, so I used one adhesion sticker that comes with the overture filament, and again flawless adhesion, at least for the first 4 prints, then again the frustration, I tried some glue stick and worked but it leaves a mess on your print so I decided to try painters tape directly onto the aluminum bed (which lucky for me it is perfectly flat) this is the best adhesion I have tried, problem is also makes a mess with the down face of the print, Finally mi Gass-PEI arrived, (3 days ago), it has a great adhesion but is not perfect, also you have to raise the Z limit switch to compensate the 5~ mm of Glass-PEI, find out that it isn't perfectly flat it has a good adhesion and leaves a very smooth down face, but at some section it does't sticks well and leaves artifacts on the down face, I'm currently working to fix this.
Sorry for the long post, need to talk about my frustration and let you know you are not alone on this, once you manage to make a good print is very satisfying, I have a PETG filament waiting to be used but I don't think is a great idea to try it until a learn more about 3D printing and the Ender.
Hi I am also a new guy with the Ender3. I think the first thing you should get at the same time as the printer is Filament, because you will only be able to print one or two very little things with the filament provided with the printer.
Then, leveling or 'traming' of the bed is the most critical thing to achieve. After some research here and at other places the general advice is to change the stock springs under the bed get those yellow ones from amazon or other places. The problem with the original ones is that you have to level you bed almost at each print. But the best thing I did to improve the bed leveling issue, is to change the bed surface for a flexible magnetic build surface.
For the rest you will find out by yourself as you gain experience working with your printer. One other thing I did is to change the position of the filament wheel to put it on the side of the printer so that the filament enters more directly in the extruder reducing the angle of penetration to almost 0. For this just download this file from Thingiverse. I will try to get you the link soon.
Hope this will help for a starter.
Bed springs?
https://www.amazon.com/gp/product/B07FY47BX7/ref=ppx_yo_dt_b_asin_title_o02_s00?ie=UTF8&psc=1
Ender 3 pro.
Creality magnetic build surface.
Black matchbox PLA at 200 C
Print bed at 60 C
Using the most recent version of Cura.
I'm using the "Normal" 0.15 mm layer height preloaded setting in Cura. I'm guessing that this is a bed leveling problem, as the only thing that changed between the first 2 pics is that I installed [new bed springs] (https://www.amazon.com/gp/product/B07GXC1G2B?pf_rd_p=f3acc539-5d5f-49a3-89ea-768a917d5900&pf_rd_r=N121Q03JSDJ7ST88QJ8M). I did have a hell of a time getting them back to being level after the install, but I thought I had it.
Any thoughts?
That's exactly what happens. I too would watch it and think its fine and then come back later and its floating. Go ahead and check the bed leveling as well. It may need to be adjusted anyway.
Side note: If you find yourself constantly adjusting the bed every few prints or so, change them out for some better ones. These are the springs everyone goes for.
uxcell 8mm OD 20mm Long Spiral Stamping Heavy Load Compression Mould Die Spring Green 10Pcs https://www.amazon.com/dp/B07MQD2RPS/ref=cm_sw_r_cp_apa_i_K1NLDb8W4XVPS Are these the right ones?
I want to recommend this product at Amazon.com
FYSETC 3D Printer Motherboard Accessories 0.31 in OD 0.78 in Length Compression Springs Light Load for Creality CR-10 10S S4 Ender 3 Heatbed Springs Bottom Connect Leveling - 10 Pack
by Fuyuansheng
Learn more: https://www.amazon.com/dp/B07GXC1G2B/ref=cm_sw_em_r_mt_dp_U_gPhXDbWZMATD3
Had these for a while and they’re great
FYSETC 3D Printer Motherboard Accessories 0.31 in OD 0.78 in Length Compression Springs Light Load for Creality CR-10 10S S4 Ender 3 Heatbed Springs Bottom Connect Leveling - 10 Pack https://www.amazon.com/dp/B07GXC1G2B/ref=cm_sw_r_cp_api_i_O-MLDbD1EA96T
Here's the extruder: https://www.amazon.com/dp/B07B96QMN2/ref=cm_sw_r_cp_apa_i_uSFjDbRH4ZQE4
Here's the springs: https://www.amazon.com/dp/B07GXC1G2B/ref=cm_sw_r_cp_apa_i_DTFjDb1KAPZ15
There's tons more. All you need to do is search Amazon. Glad I could help.
Also available on Amazon:
https://www.amazon.com/Prime-Line-Products-SP-9729-Compression/dp/B008RG5GVW
Aside from the suggestions about lowering the Z stop....
​
replace the stock springs with something stiffer like this -- if you set things so they are midway tight after homing your host end you will get a more consistent level for longer... in my case I check level on most prints, but only have to adjust maybe every 15~20 prints...
https://smile.amazon.com/Marketty-Printer-Compression-Actually-Perfectly/dp/B07MTGXYLW/
​
Second, if your screws spin on their own... just put a drop of elmers under the screw head between it and the aluminum plate... it just gives it something keep it in place verse free spin...
​
Last, but not least... I use this marked at proper levels so I can swap out bed surfaces (plain, glass, PEI sheet on glass, etc) ... then it is just a few turns up or down to get everything back into the right position and check level...
https://www.thingiverse.com/thing:2725795
I picked up red springs from Tinawood on Amazon and I like them - it seems to have help stabilize the level some, but when I have to force a print off the plate I know I'll likely have to re-level. They're 3-4 mm shorter, but after cranking the yellows down to clear the nozzle, they're long enough to still compress.
I'm considering blue threadlock where the heads sit below the heat bed surface to help deter them spinning and some on the nuts / wheels to keep any resonance from letting them move on their own
It's hard to describe how tight it should be, but I believe I only loosened the arm about a quarter of a turn after screwing it in.
My apologies, I was a little unclear. The bearing should be able to move freely in the air when you push against the lever arm. When you push the lever arm in (like when you change filaments), you should be able to rotate the silver bearing in the air by hand without any trouble.
If you cannot spin the bearing, then it needs to be loosened a bit.
For your extruder spring, are you using a silver spring, similar to the stock bed/extruder springs, or a yellow spring that's commonly recommended as upgrades?
Here's the aluminum extruder assembly. The plastic one that comes on the printer WILL break. It's just a matter of time. They crack from stress after a while and even before that they creep and you'll start getting missed extrusion.
Here's the stiffer bed springs. You won't have to compress these as much to get a good stiffness.
Another really popular upgrade is this glass build plate. It has a special coating that makes it so parts stick without adhesive, and it leaves a really smooth surface on your prints. Parts stick really well then when it cools down they self-release.
The 3 upgrades I linked are extremely popular upgrades. You can get by without the glass bed, it's just an option because the stock bed will wear out eventually.
These were the ones I got:
https://www.amazon.com.au/dp/B00N3XU5KG/ref=cm_sw_r_cp_apa_i_6LMPCb6CJHWN0
But it was for a different machine
Stock springs are cheap and not well under tension. They caused me a lot of balance issues
https://www.amazon.com/FYSETC-Motherboard-Accessories-Compression-Creality/dp/B07GXC1G2B/ref=mp_s_a_1_3?crid=3G99LZGFOMNBI&keywords=ender+3+bed+springs&qid=1556590607&s=gateway&sprefix=ender+3+bed+&sr=8-3
Replace the Bowden pneumatic clamps
https://www.amazon.com/dp/B073TTWWN1/ref=cm_sw_em_r_mt_awdo_uweXCbDCRQK7D
Capricorn Bowden tube
https://www.amazon.com/dp/B07B67GG75/ref=cm_sw_em_r_mt_awdo_VyeXCbA0WGRWQ
Springs
https://www.amazon.com/dp/B07KF9LZ2L/ref=cm_sw_em_r_mt_awdo_zBeXCbD24BJN2
All 3 as they are really cheap.
Bowden Tube
Aluminum Extruder
Bed springs
pretty sure he means these
Replace the springs as well. They are questionably adequate for the stock bed, let alone one with a glass sheet attached.