(Part 2) Best crimpers according to redditors
We found 651 Reddit comments discussing the best crimpers. We ranked the 190 resulting products by number of redditors who mentioned them. Here are the products ranked 21-40. You can also go back to the previous section.


The Engineer PA-09 is one of the best "small pin" crimping tools for hobbyists. They aren't dirt cheap, but they are worth $40-$50 price, which is cheap compared to official tools from connector manufacturers. I own a PA-09 and highly recommend it. If you never crimp the smallest pins, then a PA-20 or PA-21 might be better for you.
-----
Info about each crimp tool:
-----
Tables for "die size" to use for each connector family of each brand JST, Molex, AMP, JAE, HRS:
-----
Amazon:
-----
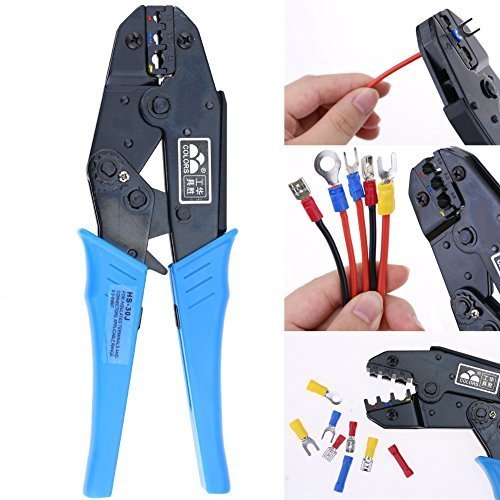
The crimp terminals you'll need are JST SPH-002T-P0.5S for the JST PHR-6 housing. The terminals are cheap (100 for $3) and you can reuse the housing. If you're not accustomed to crimping small terminals, you'll use more than a few of the 100 practicing to get it right.
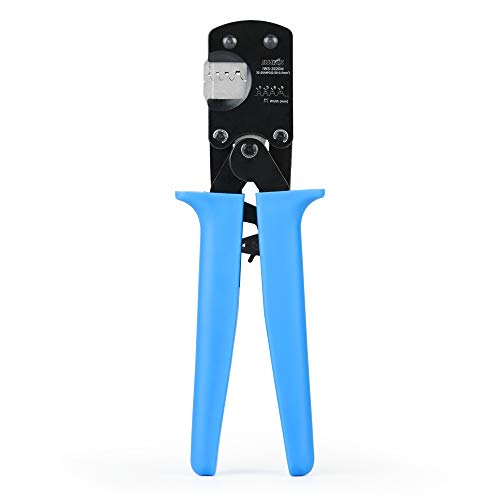
A good (and relatively inexpensive) crimper for those small terminals is the IWS-3220M. I used to recommend the Engineer PA-09, which I still keep in my toolbag, but the IWISS beats it by being less expensive, ratcheting, and it crimps the insulation and wire at one stroke.
They're the alternative. That and relays if OP has the skills. Which is not hard.
http://www.amazon.com/Generic-Connector-Insulated-Terminal-Multicolour/dp/B00SMIRKB4/ref=cm_wl_huc_item
http://www.amazon.com/Signstek-Adjusting-Ratcheting-Crimping-AWG23-10/dp/B00HPRYIL8/ref=wl_mb_wl_huc_mrai_1_dp
https://www.amazon.com/Engineer-PA-21-Universal-Crimping-Pliers/dp/B002L6HJ8W/ref=sr_1_4?keywords=PA21&qid=1571990210&sr=8-4
PCB connector: https://www.digikey.com/product-detail/en/B5B-PH-K-S(LF)(SN)/455-1707-ND/
Housing for cable connector: https://www.digikey.com/product-detail/en/jst-sales-america-inc/PHR-5/455-1163-ND/
If you just want to fix it, I'd say cut/break the plastic away from the crimps, use two pairs of needlenose pliers to pull the pins out of the existing crimps, and put them into a new housing. If you're going to make your own cable, you'll also need crimps, good wire strippers, and a crimping tool: https://www.digikey.com/product-detail/en/jst-sales-america-inc/SPH-002T-P0.5S/455-1127-1-ND/
https://smile.amazon.com/gp/product/B078WNZ9FW/
Get a lot of extra crimps if you go the make your own cable route. Really easy to mess one up and have to redo several if you want to get everything even. In particular you need to be extremely careful with the insulation part of the crimp, or it won't stay aligned with the other side as you crimp it. Took me about 5 tries to get my first good crimp and about 20 crimps to get a full connector with all good crimps and everything even. The tool I linked is the one I use, with the 1.3mm die for the copper portion of the crimp, and the 1.6mm die then the 1.3mm die for the insulation portion of the crimp. It's good enough I wouldn't spend twice as much for the engineer crimpers, let alone several hundred dollars for the "official" tool.
Honestly, if you go the make your own cable route, you're probably better off buying pre-crimped cables, and soldering your own USB connector.
16AWG for the motherboard (24pin+8pin) is highly unnecessary. 18AWG cable can carry 7A (84W) PER WIRE safely under 3ft distances plus it is much easier to group the wires in the angle I made.
16AWG wire can carry about 13A (156W) per wire safely and is more suitable for GPU wiring.
I used any brand wire cutters. Crimp tool is Iwiss: https://www.amazon.com/gp/product/B00OMMZ502
And yes, those are the exact items I bought from moddiy.com.
I had to trim off about 4-5mm off of the end of each connector so that the pin end is flush with the end of the connector.
Just put a new end on the cable. You would use something like this a crimping tool https://www.amazon.com/Signstek-Connector-Crimping-RG-58-LMR195/dp/B00N3PDPYC/ref=sr_1_9?ie=UTF8&qid=1511491613&sr=8-9&keywords=coax+crimper
And then use new https://www.amazon.com/Coaxial-Crimp-Type-Fitting-Connector/dp/B076JHYVFN/ref=sr_1_7?s=electronics&ie=UTF8&qid=1511491716&sr=1-7&keywords=coax+connector+crimp on the ends.
Apologies for my crap links. Or should I say the tech would use stuff like that.
Pex is so easy they are doing away with master plumber certifications in texas.
Here is the cheapest set up.
https://www.amazon.com/IWISS-Crimping-Crimper-Stainless-Clamps/dp/B019DPYQZM/ref=sr_1_3?keywords=pex+crimp&qid=1563965547&s=gateway&sr=8-3
I have made 30 connections with it and they all hold pressure easy.
Don't know if there is a good list, though a few things are mentioned at the bottom of the unofficial V2 BOM. but I'll do my best to say what I used for my V2:
Metric Hex screw drivers: I picked up bondhus 10686 for this build, and it served me well.
Ferrule crimper: Something similar to this ( Mine is actually This guy here., but I'm sure I didn't pay anywhere near that much)
wire stripper: something else I've had forever, but something along these lines
un-insulated terminal crimper: Engineer PA-09 served me very well
Insulated terminal crimper: something else I've had far too long to have the branding. Mine look a lot like these though.
And then it's down to really normal stuff, that you probably already have around: normal screw drivers (mostly phillips), precision screw drivers, scissors, box cutter.
You're bound to want a multimeter for something, at some point.
Oh. And I cut my plexiglas panels on the table saw, since I have one. That's certainly not necessary though. Lots of people doing just fine with scribe cutters like this
You'll notice I didn't include any drill bits or taps. Sorry, I went with the pre-cut, pre-tapped Misumi framing, so I didn't DO any cutting or tapping. I can tell you though, if you're tapping your own, all your taps will be for M5 x 0.8 threaded screws.
Get yourself one of these kits:
Ferrule Crimping Tool Kit, Preciva AWG23-7 Self-adjustable Ratchet Wire Crimping Tool Kit Crimper Plier Set with 1200PCS Wire Terminals Crimping Connectors Wire End Ferrules https://www.amazon.com/dp/B073TZ5BBG/ref=cm_sw_r_cp_api_i_YMQIDb3FS93KX
Makes working with these phoenix connectors much cleaner and easier.
Not very. That crimper is made specifically for the PicoBlade series connectors from Molex. And at that, only one pitch of PicoBlade connectors (there are multiples) It will not work with all terminals in that range. Well, it might or might not but it's really a crapshoot. Molex crimpers are generally made for a specific set of terminals for a specific pitch for a specific connector series, and are not intended to be universal. Not sure if Molex offers interchangeable dies either, although I assume they would. BUT not all of their terminals use this style of crimper either. Some have entirely different form factors with different types of dies.
Also, if you haven't used a Molex crimper they have a spring-loaded button thing on the back that pushes a plastic piece forward between the open die, which holds the terminals. Check out this video. They are not universal either and each is designed for a narrow range of terminals. Molex makes dozens of different crimpers. You can fit other terminals in there sometimes but they won't hold well and will be too wobbly or too big. Some of the terminals require unique finished crimp geometries to fit in the connector housing, and so crimpers for them won't work well for "general purpose" terminals.
I recommend staying away from the OEM crimpers - as nice as they are - until you have a specific need for one or you need to assemble a ton of connectors. If you're putting connectors in something mission-critical or very hard to get to, it may be worth it to get the correct OEM crimper to ensure crimp quality. For most hobbyist purposes though - not worth it IMHO.
Instead, I'd suggest picking up one of these. So far I like it a lot more than the "engineer" crimper which I've also used extensively. The IWISS is actually a "combo" of 2 of their other crimpers and covers a pretty wide range of terminals. It will also crimp both wire and insulation in one step, and the die is sized differently for those portions. Much more convenient, twice as fast to do a terminal. The Engineer crimper requires you to first crimp the wire, then the insulation (or vice versa).
The engineer is OK but it's not nearly as good for small terminals. The clearances inside the closed die are quite large, terminals get jammed in there and misshapen or broken. Or the part sticking out of the die is bent by the crimping process. It's also not correctly toleranced for insulation crimping so you have to do it by feel or you'll just crimp through the insulation altogether. I've pretty much decommissioned that one. The IWISS has so far been very good, just squeeze all the way and done with good insulation crimping.
Of course, if you know you will only use that series of connectors and you don't mind the outlay for OEM crimpers, then by all means go for it. They are super nice to use so if you can justify it then more power to you!
There are different size BNC connectors for the different sized wires you can use. You have to get the right size connector to go with the wire. You need a 50 ohm coax wire like RG-8, 8X, 58, 213, or 400MAX etc.
Not knowing your budget:
RG-8X is pretty good cable and is $0.38/foot here:
​
https://www.dxengineering.com/search/department/cable-and-connectors/product-line/dx-engineering-rg-8x-50-ohm-bulk-coaxial-cable?autoview=SKU&N=department%3Acable-and-connectors&sortby=Default&sortorder=Ascending
​
Next you will need BNC connectors that work with RG-8X cable:
​
https://www.dxengineering.com/search/product-line/amphenol-rf-112533-solderless-bnc-male-connectors?autoview=SKU&keyword=bnc%20connector&sortby=BestKeywordMatch&sortorder=Ascending
​
This is the crimping tool that I purchased:
​
https://www.amazon.com/Signstek-Connector-Crimping-RG-58-LMR195/dp/B00N3PDPYC/ref=sr_1_11?keywords=bnc+crimping+tool&qid=1558446931&s=gateway&sr=8-11
​
​
Short runs of cable won't have too much loss but you will for long runs. This is my favorite cable loss calculator so you can see how much power you are losing:
​
https://www.qsl.net/co8tw/Coax_Calculator.htm
​
Pick a type, a length and power setting and how good your antenna is matched to your frequency. If you put in RG-8X, 7MHz, 100 feet of cable, an SWR of 1.2, and power output of 5W, you get only 4.195W output. Pick RG-58 and you have 3.9W output. Pick the LMR-400 and you have 4.6W output. At a 20 foot long run the difference between all 3 cables is a 10th of a watt. Better cable is more expensive but get what you can afford and try to keep your runs as short as possible.
​
​
When I first started out I was using an FT-817ND and an end fed antenna at the end of 50 feet of cheap coax cable. Needless to say, not many people could hear me. Resonant antennas and short cable runs with good coax will make all the difference in your set up. Come back with any questions.
> That said I'm sure there are literally hundreds of ways to safely make that connection.
With properly soldered XT-60's being one of them. The only people who need to do anything are ones that got the shitty crimped connectors.
I wish it was easier to see from the outside which ones the machine has, as right now a lot of people are skipping straight to "XT-60 == BAD".
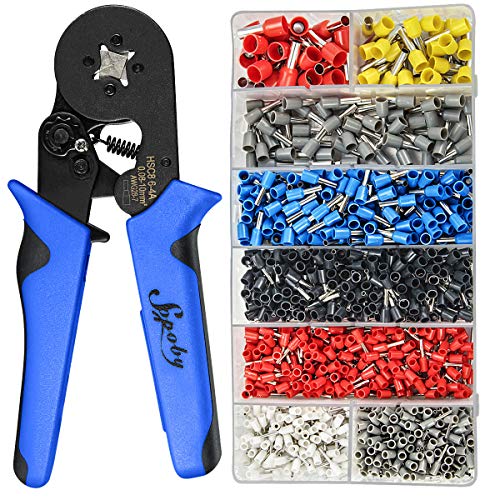
And to /u/magiccak, while replacing the wire with a solid run would be better, your installation is perfectly fine. If you want to remove one more possible hazard, get a set of wire ferrules and the crimping tool and do all the wires going to screw terminals. Something like this, important part being that it can do 24 to 16AWG, though you can easily 'cheat' at the smaller end by doubling the wire on itself, so 22AWG might be enough.
Nieko makes a similarly configured crimpers.
That is a JST connector.
Since this is a gimbal and timing is super important, Id recommend clipping all 4 wires to the same length and re crimp all the connections.
I HIGHLY recommend doing a bunch of test crimps before re crimping those to make sure you do those right.
JST Connectors: https://www.amazon.com/GeeBat-JST-XHP-Connector-housing-Adapter/dp/B01MCZE2HM/ref=sr_1_8?ie=UTF8&qid=1491418207&sr=8-8&keywords=4+pin+jst
JST Crimping tool: https://www.amazon.com/Iwiss-XH2-54mm-Terminals-SN-01BM-0-08-0-5mm2/dp/B00YGLKBSK/ref=sr_1_1?ie=UTF8&qid=1491418309&sr=8-1&keywords=JST+Crimping+tool
How to Crimp JST Pins: https://www.youtube.com/watch?v=c-pTsccCizA
As others have said they are boot lace ferrules. Make sure you get them in the correct size for the cable you are using.
They range from about 0.35mm2 to up to 50mm2. Don't use wire cutters or pliers to try crimping them, it doesn't work. Different styles of crimping tools are available and can get a bit expensive for the professional tools. Something similar to these are useful:
https://www.amazon.co.uk/dp/B073TZ5BBG/ref=cm_sw_r_cp_apa_i_UbX1DbQYHDSAY
Not recommending any as I personally don't like this style but for DIY the style is not bad.
Answers:
73
Reposting something I said earlier on a similar thread...
Hardwiring the DashCam was pretty easy, this is what I got for the job:
[Mobius ActionCam] (https://www.amazon.com/gp/product/B00GPXYVQU/)
12V to USB Power Adapter
Mini Add-A-Fuse Kit
Crimps
Crimping Tool
And finally the instructions for wiring and routing the cable nicely:
http://www.focusst.org/forum/focus-st-electronics/13092-simple-instructions-hard-wiring-radar-detector-other-device.html
There's different fuses you can use depending if you want it on all the time or just when the car is on.
As other people have said the A119 is a really good camera for the price, the mobius is just the one that I happened to get when I got my car.
I got the IWISS IWS-3220M to crimp some cables for my printer, and found them very good, from about 15 crimps, the only time i got the crimp wrong was when I put the terminal at the wrong depth. Plus the IWS-3220M crimps both the wire and insulation, which saves some time if you're doing it a lot...
These are what I use on the tevo and when I put the e3dv6 on the ender I'll use them there too....
I started them about 6 inches back up the wires from the hot end spaced them out so them aren't one big blob.... used different ones for different things so they can't be switched out and if for some reason a wire pulls loose it doesnt short anything... doing it I can swap out the hot end in minutes, do a PID tune and I'm off to the races.
Connectors and max current rating
Jst-sm for the fans and thermistor - 3amp
https://smile.amazon.com/gp/product/B07CTKD7P4/
Mini Tamiya type b for the heater - 10 amp
https://smile.amazon.com/gp/product/B06XSD9JJQ/
Jst-xhp are the white connector for stepper motors - 3 amp
https://smile.amazon.com/gp/product/B07CTH46S7/
Dupont for the black on the main board - 3 amp
https://smile.amazon.com/gp/product/B07CVYPDGS/
These for heated bed - up to 30 amps - solder only, not crimp
https://smile.amazon.com/gp/product/B07H54LZN2/
Crimpers - get the right ones for the pin type in the connectors you buy, you can't use just any old crimper or wing it with these tiny pins and get a good connection that doesn't come apart when things move for hours
https://smile.amazon.com/gp/product/B01N1RFZZ4/
https://smile.amazon.com/gp/product/B00YGLKBSK/
https://smile.amazon.com/gp/product/B00OMM4YUY/
Since I'm on the subject heated bed wires - large enough to carry the current and with the silicone cover and fine internal strands flexible enough to not break with movement
https://smile.amazon.com/gp/product/B01M9IXL5Q/r
Unrelated to your question about automating the valve: PEX is super easy to work with; no need for the Sharkbite connectors. Just pick up a PEX cutter, a cinch clamp tool & some cinch rings.
Then you can use regular PEX fittings - just slip a cinch ring over the PEX and the fitting (leaving about 1/8" of PEX showing between the ring and the cut end of the pipe), put the clamp on, and squeeze until the clamp stops.
Here's an example of how it works but really - it's super easy, even for a beginner, and there will be no fear of a sharkbite fitting failure.
The cinch ring clamp I linked above even comes with a no-go gauge - hold the clamp fully closed, and as long as you can't fit the no-go gauge into the "mouth" of the closed cinch tool, then the tool is tight enough (ie, working properly) to permanently close the cinch ring with no fear of leaking.
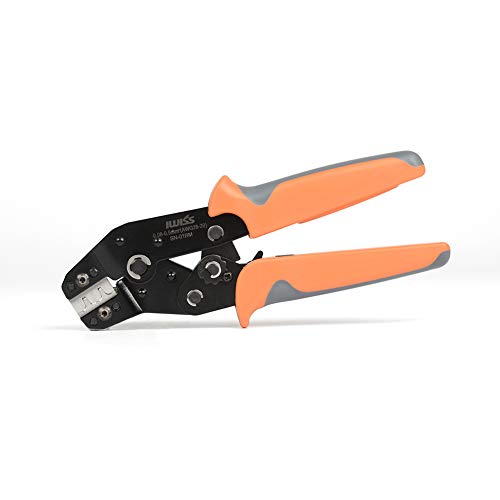
The SN-28/48B crimpers can be sort of hit or miss. I’ve heard the Iwiss SN-48B crimper is better than most of the other SN-48B crimpers. Personally, I would recommend getting a crimper designed specifically for Mini-Fit Jr terminals like the MDPC-X crimper.
https://www.digikey.com/product-detail/en/amphenol-rf-division/182115/ACX2057-ND/1989433
This is a name-brand brass-bodied connector, not a chinesium ebay special.
Assembly is very similar to this: https://www.digikey.com/api/videos/videoplayer/smallplayer/1722313932001
Here's the right crimper: https://www.techtoolsupply.com/Ratcheting-Hex-Crimper-Coax-5-Cavity-p/300-003.htm or https://www.amazon.com/Signstek-Connector-Crimping-RG-58-LMR195/dp/B00N3PDPYC
I use a sharp razor blade to prepare the coax. Don't knick the conductors!
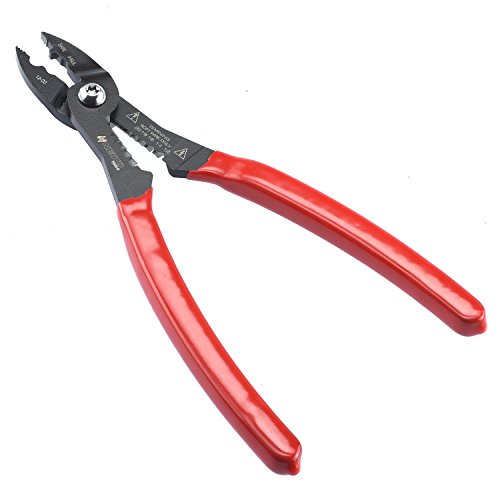
Get him a pair of Knipex pliers https://www.amazon.com/Knipex-09-12-240-SBA/dp/B005EXNWN0/ref=sr_1_1?s=power-hand-tools&ie=UTF8&qid=1475247419&sr=1-1&keywords=knipex+linesman+pliers maybe throw in a pair of diagonal gutters and needle nose if it was a huge favor.
You’d probably want to get a good crimper too.
I have this one.
https://www.amazon.com/dp/B016B39EPQ/ref=cm_sw_r_cp_api_bSFZAbQ5A9GA9
>I'm fairly ignorant of electric systems on boats.
I hope you're comfortable with how basic 12VDC electrics work and are asking about how to wire them in a marine environment.
Preface, I'm not a certified marine electrician but I've done a ton of work re-wiring, custom work on all kinds of sail and power boats.
Tools:
>I do have a cheap harbor freight multi-meter
good, now you're going to need a way to crimp those shitty connectors and some dielectric grease.
Unless of course you want to solder all your connections (this is my preference as it doesn't vibrate loose or corrode as quickly), then follow NASA's soldering method s and yuu'll need some rosin cored solder and and a soldering iron, you'll also need to use a crimp connector without the pre-molded shrink wrap and some heat shrink tubing
Ok... got your tools? great, now for supplies.
You'll need a buss bar on your ground
Measure how much wire you need, (are you re-wiring the mast?) and use 14/2 AWG marine grade wire.
If you're only using 1 battery you can get away with a simple switch like this. From the devices & lights you listed It sounds like you can use 10AWG to connect your battery to your switch then to the 14 gang panel.
You'll need a way to label your wires, I use one of these but if you're doing one job you might want to use something cheaper.
Ok... now on the to the fun part
Plan where you're going to mount your panel and pull a single RED 10AWG from there to your battery shut off switch and another strand from you battery to the switch.
Pull 10 AWG from the battery to the buss bar.
pull all the 14awg from the lights to the panel labeling each 14/2 wire as you go
red goes to the fuse block, black goes to the buss bar then to the negative on the gang block, label everything at the connection points, big red wire goes from battery switch to the bolt on the 14 gang, big black wire goes to the buss bar.
install new things, as each device is hooked up test the fuse and switch, then install the new thing.
Edit: I forgot to mention, use dielectric grease on all metal fittings to reduce corrosion.
edit 1: put a fuse between your battery and shut off ont the red wire
I personally prefer compression crimps for RG6, but if you're after a crimping tool this rachetting one will do the trick.
And you can even replace the RG-58/59/6 die in that with an LMR-400 capable die very quickly.
I find making the cables to be the nicest looking.
I find the tool kit, cable cutter, knife and combs to be necessary. However you could use scissors instead of the knife and cutter, go without the combs, and use paper clips and small screwdrivers instead of the tool kit.
The paracord has a million options and is very cheap. Buy too much.
If you're really careful, you don't need heatshrink. However if you need it, it's really cheap.
I got some of these the wires are only 22 awg but I can't find anything bigger. You would need a soldering iron but you could also just get this plus a crimp tool which would honestly be better I think.
Take a look at Youtube for simple tutorials. You could also change both the male and female ends to better connectors of your choice, just make sure you get the correct crimping tool. Cheers!
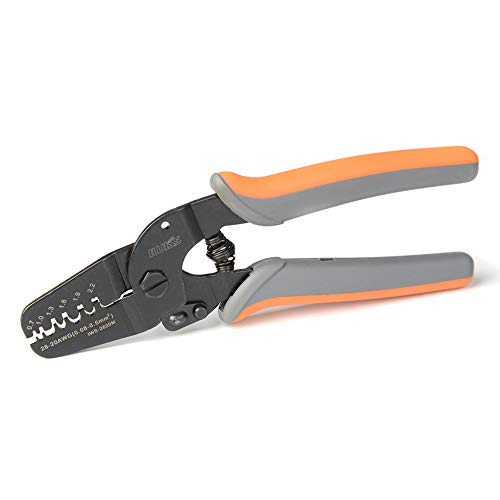
another LPT: engineer crimpers are a thousand times better than the ratcheting style. But double the price, and yes you need two to cover every style of crimp out there.
https://www.amazon.com/Engineer-PA-09-Micro-Connector-Crimpers/dp/B002AVVO7K/
https://www.amazon.com/Engineer-PA-20-Universal-Terminal-Crimping/dp/B002AVVO7U/
vs cheaper ratcheting
https://www.amazon.com/dp/B01N4L8QMW/
Not this exact one. I bought mine forever ago when I was doing my s4 mini. Then it came in handy doing my ghost s1 https://www.amazon.com/dp/B07C98H98N/ref=cm_sw_r_cp_apa_i_dePMDbBKBFDCA
I was going to post this, including an Amazon link, possibly to that same product page. While I await your wisdom, future self who is somehow British, let me add that a decent crimper is worth its weight in gold for this. Pliers will work, but it's a nightmare to do once, much less five times for a 4S balance plug. These look good, I'd link mine but I bought a set meant for larger terminals, and while they work on the small stuff we use, they're not supposed to.
For OP's benefit, (paging /u/Brookshire) the best way I've found to do this is to strip about 1~2mm off the wire, put the terminal in the crimper and close it until the ratchet engages and the jaws are barely holding it, feed the wire into the terminal, and then finish the crimp. The little tabs should be on bare wire, the fingers should be on insulation, and no part of the wire should be past the boxy bit at the end, it screws with the pins fitting when you plug it in. You can add a dab of solder before you put the terminal into the plug if you want, but you shouldn't need to and it might not fit if you use too much solder. The terminal is supposed to go into the plug a certain way, but honestly it's easier to look at a finished balance plug than to have me fail to explain it. ¯\_(ツ)_/¯
You need to use pex. You can can get everything at home depot or amazon: https://www.amazon.com/IWISS-Crimping-Crimper-Stainless-Clamps/dp/B019DPYQZM/ref=pd_lpo_vtph_60_bs_t_1?_encoding=UTF8&psc=1&refRID=NKZDZD8CV5TGQAS14W6B.
Dupont connectors, fittings, crimper:
http://www.amazon.com/Sunkee-Dupont-Jumper-Female-Connector/dp/B00CGWVFWW/
http://www.amazon.com/Sunkee-100PCS-Dupont-Jumper-Connector/dp/B00CGWUV6S/
http://www.amazon.com/SainSmart-Professional-Compression-Ratcheting-Insulated/dp/B00DHCRVSC/
http://www.amazon.com/Happy-Store-2-54mm-Connector-Housing/dp/B00CO86Z6Y/
http://www.amazon.com/Sunkee-100pcs-Dupont-Connector-Housing/dp/B00CGXOVM2/
Wire:
http://www.amazon.com/dp/B003HGHQ24/ref=biss_dp_t_asn
http://www.amazon.com/dp/B003HGHQ2O/ref=biss_dp_t_asn
Exact products i bought. Didn't need the crimper exactly (could just use needle nose pliers), and the insulation on this wire is a little thick for the connectors (doesnt' quite fit into the black connectors when crimped around the insulation, but i wanted the heaviest gauge i could fit, 24 would probably fit better)
Some of the items shipped prime, some shipped from china, so 2 day shipping on the male connectors, and a month on the female. :-p
When looking to attach to a board make sure to measure the pitch, 2.54 is fairly standard, but there's always someone who uses 2mm or something else.
I used these:
https://www.amazon.com/gp/product/B016B39EPQ/ref=oh_aui_search_detailpage?ie=UTF8&psc=1
When building my printer. Worked just fine with dupont 0.1 connector pins. I did not do the E3d ones, I just used the wires it came with.
This is the crimper I use for JSTs. It's a pain though.
Thanks for posting that it will pass through HDMI audio.
I am using the same LCD controller, but I wrongly assumed that the "Speaker" header would only amplify line-level audio coming into the 3.5mm input. This would have saved me from installing an external amp.
In case anyone finds it useful, here is a technical spec PDF that I found for that LCD controller. It indicates that the speaker port supplies an amplified 2x1W 8 Ohm speaker-level output.
The "Speaker" header on the PCB is a JST-PH connector. You can buy these connectors on Amazon and Ebay, which would allow you to make your own wire and connect to different 8 Ohm speakers if you so choose. I recently bought a set of these and the required crimper tool because I've had a few projects come up recently that used this type of connector. You'll need 24 AWG or smaller wire, some good eyes, and some practice in order to do these quickly. Here's what I ordered in case it's helpful:
1470 Pieces 2.0mm JST-PH JST Connector Kit
Hook-up Stranded Wire 24 AWG
Iwiss XH2.0mm XH2.54mm XH3.96mm Dupont D-Sub Terminals JST Pin Crimper
https://www.amazon.com/gp/aw/d/B01KN9YUSU/ref=mp_s_a_1_2?ie=UTF8&qid=1480827739&sr=8-2&pi=SY200_QL40&keywords=neiko+wire+strippers&dpPl=1&dpID=41lOFc9NbKL&ref=plSrch
They aren't the exact same as my snap on pair because the snap on have two places to cut wire. Everything else looks the same. But I have not had them in my hand so I can't positive. But knowing my luck with links it probably won't work.
Read up on? Not particularly. A long time ago I read a book called "The car stereo cookbook" that I learned a lot from, but that is more about the how to set up a good sound system rather than a good wiring instructor. A resource that I can give you, that is invaluable to me, is the12volt.com. Pretty much any car you should be able to find a wiring diagram on there. Other than that watch youtube to learn how to solder and maybe get a nice set of crimp pliers like these http://www.amazon.com/Tool-Aid-18900-Professional-Ratcheting/dp/B0002STTSY/ref=sr_1_3?s=hi&ie=UTF8&qid=1395362735&sr=1-3&keywords=crimper
Intermittent connectivity isn't much of issue as I have had consistent up time.
> remember those signal levels are just at your modem
That's a good point. Definitely have to factor this in.
> Good connectors are good and few to choose from, bad connectors are everywhere and can cause huge problems.
Do you have recommendations on compression tools to use if I go ahead and take on this project?
These are the two things I was going to get to begin switching out the cables.
Compression tools
RG6 Spool
Necygoo Dupont Crimping Tools Dupont Crimping Pliers with 1420PCS Dupont Connectors IDC Cable 0.25-1.0mm² 22-18AWG Dupont Tool https://www.amazon.com/dp/B07C98H98N/ref=cm_sw_r_cp_apa_i_1lzqDbPMT0EMM
I originally used crimpers like those, and they suck-didly-ucked. I had as many bad crimps(if not more) as I did decent crimps. It would just flatten out the connectors too much(instead of curling over properly) and the pins wouldn't fit into the plastic housing. I bought an Engineer PA-21 crimper and I'm getting decent crimps >90% of the time. It's a two-step process, though - you have to crimp the conductor and then crimp the insulator, but ultimately it saves me time since I don't have to constantly redo crimps.
https://www.amazon.ca/Preciva-0-25-10mm%C2%B2-Self-adjustable-Connector-Uninsulated/dp/B073TZ5BBG/ref=sr_1_2?ie=UTF8&qid=1523432368&sr=8-2&keywords=ratchet+crimp+tool
After a quick google search for ratchet crimping tool. Im surprised klein doesnt have one, if you try that search you can look further into more results and possibly product videos.
It you take your time and have good lighting and small needle nose pliers it isn't too frustrating. I bought crimp tips for the bare wires to make them more secure when tightened down and guarantee that a little wire strand wouldn't short anything.
Ferrule Crimping Tool Kit - Sopoby Ferrule Crimper Plier w/ 1200pcs Wire Ferrules Wire Ends Terminals AWG 28-7 (0.08-10mm²) https://www.amazon.com/dp/B07K17VDF2/ref=cm_sw_r_em_apap_rCPfFrGuOHN1Y
I don't know the brand mine are, but these must be the Porsche version of them. The crimp is about 1/4inch wide which gives a much nicer looking and firmer crimp on solderless terminals. Especially nice for life and death systems like Fire Alarm systems.
I often use RJ45 jacks so I can use any standard Ethernet cable and easily change cable lengths.
I love the ratcheting crimpers with the interchangeable dies. You just need the right dies for the job and can crimp about anything. https://www.amazon.com/Hilitchi-Professional-Insulated-Connectors-Ratcheting/dp/B01IQIALJC/ref=sr_1_6?s=hi&ie=UTF8&qid=1496949252&sr=1-6&keywords=ratcheting+crimpers
I think the patent on these must have ran out because they used to be expensive and now there are many makers of varying quality. The last $20 pair I bought worked as well as the $80 pair from 20 years ago.
Necygoo Dupont Crimping Tools Dupont Crimping Pliers with 1420PCS Dupont Connectors IDC Cable 0.25-1.0mm² 22-18AWG Dupont Tool https://www.amazon.com/dp/B07C98H98N/ref=cm_sw_r_cp_apa_i_VOM1CbYJVRSA5
https://www.banggood.com/5xPairs-2S-3S-4S-34Pin-JST-XH-Male-and-Female-Balancer-Charger-Connectors-p-1004603.html?rmmds=search
and
https://www.amazon.com/Engineer-PA-21-Universal-Crimping-Pliers/dp/B002L6HJ8W/ref=sr_1_4?ie=UTF8&qid=1505013754&sr=8-4&keywords=pa-21
Just make sure the wires/metal NEVER contact. Best to crimp one and push it into the new connector before crimping/moving the next.
Edit: if you don't want to front the money for the crimperss, cutting/splicing wires to something like this could work as well...
https://www.banggood.com/10pcs-JST-XH-Connector-2-6S-Imax-B6-Balance-Charger-Cable-Wire-Adapter-Plug-10cm-p-1138762.html?rmmds=search
I’d recommend getting a cheap dupont connector kit and a decent crimper. The plastic dupont housings are a huge pain, if not impossible, to print effectively because of the little plastic clip used to hold in the crimped-on male or female connector. There are plenty of YouTube videos about it once you know what you’re looking for. :)
This is the kit I’ve used for awhile:
QLOUNI 620Pcs 2.54mm Pitch JST SM 1 2 3 4 5 6 Pin Housing Connector Dupont Male Female Crimp Pins Adaptor Assortment Kit
https://www.amazon.com/dp/B0774NMT1S
And this is the crimped I’ve used for dupont and jst connectors (like the white ones for thermistor/endstop)
IWISS IWS-3220M Micro Connector Pin Crimping Tool 0.03-0.52mm² 32-20AWG Ratcheting Crimper for D-Sub,Open Barrel suits Molex,JST,JAE,TYCO-E
https://www.amazon.com/dp/B078WPT5M1
Stay away from the cheaper “jaws” style crimp tools, btw. They’re a nightmare.
With those tools, some female to female breadboard wires, and a pair of snips I was able to wire up a 6-pin header to hook up to the Pi for SPI flashing. For the SKR boards I did a similar thing with the 5-pin SWD connector.
Left both SPI and SWD headers hooked up to my Pi’s GPIO pins and dangling out it’s case so I can just grab the Pi and flash whenever I need to, which is handy when doing a lot of tinkering and bricking things by accident. :)
The ratcheting ones are actually the worst, UNLESS you're using exactly the thickness of terminals that the die is made for. If everything's a match, then crimping to the calibrated dimension also gets you the required pressure. That's almost never the case for hobbyist work using random terminals, so instead you get a crimp to a specific dimension, but totally arbitrary pressure. These gave the worst results in my testing.
Any of the others you linked are fine. Personally I've had exceptional luck with this very compact style, which you can find under a number of names. The toothed nest is for uninsulated terminals (position the tooth opposite the seam), and the () nest is for insulated.
There's another common style, of which the Klein 1005 is a representative sample. These are heavier-duty, but also much heavier, and I've relegated all mine to the back of the drawer.
Whatever you decide on, spend a few minutes and a few terminals doing some practicing and testing with a luggage scale or fish scale or whatever. Write down each technique you try and the pull-force it holds. After a half dozen tests, you'll already have learned more than most of your peers know from years of guesswork.
I bought this crimper and it works great on JST:
https://smile.amazon.com/gp/product/B00YGLKBSK
AFTER I bought it, I found THIS one:
https://smile.amazon.com/Crimping-0-08-1-0-18-28AWG-Ratcheting-Connector/dp/B01N1RFZZ4
Which does JST and many more than the first. Grrrr.
PuterPro
I've run into several people who have tried crimping with crimping pliers or the awful stripper/crimper tool that comes with a case of crimp connectors.
When they see me quickly and easily doing crimps that are perfect every time with my cheap ratcheting crimper, it has been a revelation to them, and in each case they've been converted.
At the minimum to replace the board, I'd say replace the board with a RAMPS, so either 35$ https://www.amazon.com/OSOYOO-Printer-Controller-Stepper-Heatsink/dp/B0111ZSS2O/ or 30$ if you skip the LCD https://www.amazon.com/Wangdd22-Printer-Controller-Mega2560-Compatible/dp/B01G6ON5H8/ (The maker select LCD doesn't work directly with the RAMPS without some modification)
Then you'll need a dupont crimping tool and some housing to redo some wires. For another 30$. You might be able to get away with using some pliers instead of a crimping tool.
Honestly I'd try seeing if you can get a replacement from wherever you bought it from first.
>Any chance you could be more specific on the dupont connectors required?
You'll need 4 pin dupont housings and dupont female connectors and a crimper for them. That's assuming you have something to strip the wires as well. You can find the dupont female pins and housings cheaper places like aliexpress, ebay, etc.. but I recommend buying a quality crimper instead of whatever is the cheapest you can find as a quality tool will make the job a lot easier. If you're really strapped for cash, there's video's of people crimping dupont connectors with pliers online instead of the crimp tool.
>So <motor><cA> => <cB><cable><cC> => <cD><RAMPS board>
The wires transfer over to the same place from melzi to ramps, and pretty much any board. You'll have a X endstop, y endstop, z endstop, then connectors for the X motor Y motor Z motor and extruder motor, and so on and so forth. A ramps guide will help you visualize what to connect where.
>Any idea how big a cable for the power?
IIRC, the stock wires at 18ga, which is fine for the ramps board since it only draws 5A for all the motors, hotend, etc. The only other larger gauge connectors are for the heatbed, which I believe are also stock 18GA. FWIW, I'd go with a external mosfet instead of using the ramps on board ones which are rated for 11A, which is just within spec of what the bed draws.
Add a filter or if you don't have any cable service, disconnect it from the outside and put a 75 ohm cap on it. The splitter looks okay but depending on the number of runs, you could replace it with a three way and reduce the signal loss (3.5db vs 7db). The cable ends don't look great, I'd probably replace them with with compression fittings (use similar to this kit with tester).
I have both goCoax (2.5Gbit) and older Actiontec MOCA adapters. I highly recommend the goCoax ones.
This worked well for my latest bath remodel
IWISS PEX CINCH Crimping Tool Crimper for Stainless Steel Clamps from 3/8"to 1" with 1/2" 20PCS and 3/4" 10PCS SS PEX Clamps https://www.amazon.com/dp/B019DPYQZM/ref=cm_sw_r_cp_apa_RExSzbZNJYG60
I got this kit, when I had the job to do. I like having good tools, and I've used these more than I expected to. The stripper saves a ton of time and frustration.
$1000? Molex Incorporated 63811-1000 is $50. Also check this out, I think this will work for those particular crimps.
those crimpers work but they are actually for non insulated only and tend to punch through insulation, doesn't look like there is an insulated hole on them. For quick work use my trusty old klein but I also have a ratcheting crimper with a few different die sets, the insulated die is a double crimp and works fantastic. This works almost as well for a lot less $$$(I bought the cheap one when I thought I loaned my palidin then realized it was in another toolbox). I'm usually too lazy to solder stuff under the dash(proof of laziness), but anything outside of the cabin I solder and use glue lined heatshrink to make sure the union is not compromised. When I do use butt splices or crimp caps, I make sure to use the right crimper.
I also consider my test light as a must have, computer AND airbag safe. It make signal chasing much easier using the piercing probe and the headlight is handy. Keep the bandaids handy using it though, I've tested the voltage in my fingers quite a few times.
While the plastic trim tools come in handy, I find something like this very handy when you need a bit more nut behind the prying, although I haven't't used the window crank clip remover in a LONG time lol.
Oh, I hadn't considered a dupont crimping tool. I was looking at molex and JST and turned off by the cost of the tools. Being a newbie to electronics, I'm also turned off by the warnings about the cheap tools. Do you think the cheap dupont crimping tools are any good? I.e. this one
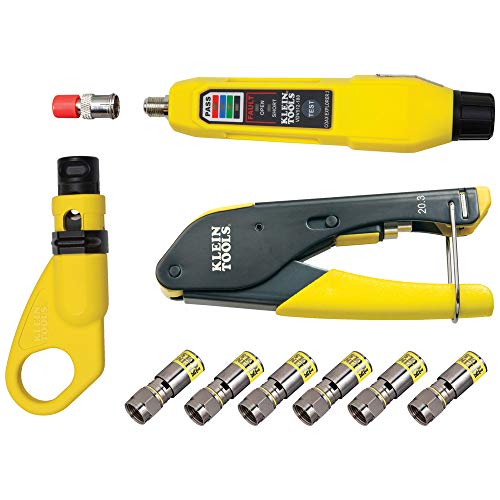
It's probably RG6, not RG59. Check the labeling on the jacket. You need, preferably, compression connectors and a compression tool. This Klein one includes compression connectors for RG6/RG6 Quad.
I believe what you are looking for is a JST-XHP-2 pin. At least, that's what the UM2s and Makerbot Rep 2s I've been working on lately use for fans. I bought this kit when I was re-wiring a bunch of stuff on my UM2:
https://www.amazon.com/gp/product/B01M7TTXPN/ref=oh_aui_detailpage_o04_s01?ie=UTF8&amp;psc=1
The proper crimping tool makes all the difference in the world. Here's the one I have been using the past several months:
https://www.amazon.com/gp/product/B016B39EPQ/ref=oh_aui_detailpage_o04_s00?ie=UTF8&amp;psc=1
If you don't want to buy the correct crimper, you are way ahead finding a terminal on a pigtail and soldering the pigtail to the fan harness. Crimping these JST terminals with a standard crimper like you use on butt connectors will make you hate life. For real...if you don't buy the crimper, I have pigtails sitting around, message me...trying to crimp them with the wrong tool will for real make you miserable and I will be happy to send you a pigtail from the junk drawer.
Oh jeez. Don't buy a new controller for that.
If you spend the same amount on this and this you will have connectors for everything, for life.
Plus, you can add JST Master to your title.
You need the same number of pins as the balance lead has. I got a kit of miscellaneous connectors (https://www.amazon.com/gp/product/B014YTPFT8) a while back and just use those. The crimping tool I use is https://www.amazon.com/gp/product/B00DHCRVSC.
If the only thing you need to replace is the plastic housing, and all the crimped pins are still viable, then you can get the housings a number of ways. For example, I ordered these https://www.amazon.com/gp/product/B00W9LOM4I and only use the housings.
As /u/n1ywb stated:
>Only thing is if you are using stranded wire you'll have to crimp ferrules onto the ends first to use push in's. Or just use screw downs.
Ferrules can make the difference between a low-maintenance high-reliability install and a nightmare. I have this crimper, and it's fantastic.
WRT ferrules themselves, I haven't really seen much difference between the Amazon cheap-o brands and the McMaster-Carr ones. Buuut if you have time, get them from McMaster-Carr or another reputable vendor.
I did my last PC with this: https://www.amazon.com/gp/product/B01N4L8QMW/ref=ppx_yo_dt_b_search_asin_title?ie=UTF8&psc=1
you can pull pins with two staples plenty easy. Its really pretty easy. Just triple check your pinout with a multimeter on the donor and replacement cables.
Here is a universal crimping tool.
http://www.amazon.com/gp/aw/d/B002L6HJ8W/ref=pd_aw_sbs_2?pi=SL500_SS115&amp;simLd=1
https://www.amazon.ca/gp/product/B00DHCRVSC/ref=oh_aui_detailpage_o00_s01?ie=UTF8&amp;psc=1
That's the crimper.
The wire is 18AWG 2mm
I see square and hex crimp tools for ferrules. The hex ones are slightly more expensive. Are there pros/cons of 4 vs 6 sided crimps?
Square: http://www.amazon.com/gp/aw/d/B00HPRYIL8
Hex: http://www.amazon.com/gp/aw/d/B00W4O14D2
When I was asking about this for the ender 3 /u/robbob2112b gave a very detailed breakdown on what they had done.
> These are what I use on the tevo and when I put the e3dv6 on the ender I'll use them there too....
>I started them about 6 inches back up the wires from the hot end spaced them out so them aren't one big blob.... used different ones for different things so they can't be switched out and if for some reason a wire pulls loose it doesnt short anything... doing it I can swap out the hot end in minutes, do a PID tune and I'm off to the races.
>Connectors and max current rating
>Jst-sm for the fans and thermistor - 3amp
>https://smile.amazon.com/gp/product/B07CTKD7P4/
>Mini Tamiya type b for the heater - 10 amp
>https://smile.amazon.com/gp/product/B06XSD9JJQ/
>Jst-xhp are the white connector for stepper motors - 3 amp
>https://smile.amazon.com/gp/product/B07CTH46S7/
>Dupont for the black on the main board - 3 amp
>https://smile.amazon.com/gp/product/B07CVYPDGS/
>These for heated bed - up to 30 amps - solder only, not crimp
>https://smile.amazon.com/gp/product/B07H54LZN2/
>Crimpers - get the right ones for the pin type in the connectors you buy, you can't use just any old crimper or wing it with these tiny pins and get a good connection that doesn't come apart when things move for hours
>https://smile.amazon.com/gp/product/B01N1RFZZ4/
>https://smile.amazon.com/gp/product/B00YGLKBSK/
>https://smile.amazon.com/gp/product/B00OMM4YUY/
>Since I'm on the subject heated bed wires - large enough to carry the current and with the silicone cover and fine internal strands flexible enough to not break with movement
>https://smile.amazon.com/gp/product/B01M9IXL5Q/r
I would recommend the below laser, it works as described. Having a separate control module seems to be something of a personal preference based on the project, I mounted it on the X-Axis carriage above the laser.
2.5W Laser Module
I'm very happy with the below MKS-Base V1.6 (?!?) controller board. Apart from having to replace all of the Solidoodle connectors with JST-XH connectors it has been very easy to work with. There are a bunch of comments about various polarities being reversed, but I haven't seen it yet. I have not hooked up the LCD yet, which is one of the wiring concerns mentioned in the Amazon reviews.
MKS Base v1.6 Controller Board
This crimper is the bomb! I debated this unit (~$17) vs the PA-09 (~$40), and am extremely happy with my choice. The lack of reviews on this one made me a bit skittish, but I have another IWISS crimper that works well and I went with the brand recognition (and it's cheaper.)
IWISS Crimper Tool
I found this one:
https://www.amazon.com/gp/aw/d/B01N1RFZZ4/ref=ox_sc_act_image_2?smid=A3E5YDYCEXB5C3&amp;psc=1
Pretty cheap right? Think it would work?
Just get these.
Those ratcheting crimpers are garbage. The die has three slots, is way too wide and isn't properly sized to crimp both halves of these connectors. Something like this style gives you much more control over your crimps. People usually recommend the Engineer brand from Japan, but I can't bring myself to pay that much for them.