(Part 3) Best kitchen cookware according to redditors
We found 6,555 Reddit comments discussing the best kitchen cookware. We ranked the 2,431 resulting products by number of redditors who mentioned them. Here are the products ranked 41-60. You can also go back to the previous section.


Vegetable steamer.
https://www.amazon.com/Sunsella-Vegetable-Steamer-Stainless-Steel/dp/B00KYDZHSI
Second this! Taking supplements isn't always ideal or efficient. Aside from eating more red meat and organ meats, cooking in a cast iron pan is a safe and effective way to get more iron into your system. There is also this Lucky Iron Fish that you can drop into whatever you're cooking and it will deposit iron into it. Pretty cool.
What type of lid was it that shattered? The normal IP lid should not do this, so absolutely do not buy a whole new machine.
Genuine Instant Pot Tempered Glass Lid, 9 in. (23 cm), 6 Quart, Clear https://smile.amazon.com/dp/B008FUJ2LK/ref=cm_sw_r_cp_apa_i_TZtjDbYXYHZJJ
"can and freeze jars" look like this.
I've done endless batches of chili in them, but don't think it's tempered glass or anything. They do not go from freezer to microwave. It's best to let them thaw out in the fridge the night or two before and move to a lunch container to reheat later that day. I like borosilicate glass food storage containers with the plastic snap lid
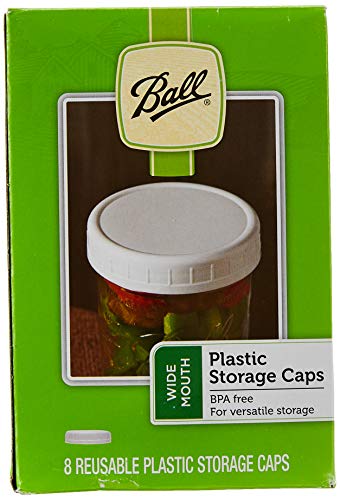
Also, because you're not pressure canning, I would buy these plastic lids and reuse them over and over.
(non-payola amazon link because of photo and server uptime, buy them where you want.)
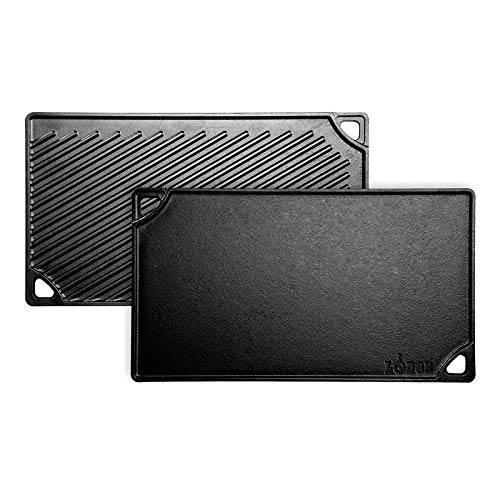
https://www.amazon.com/Lodge-Reversible-Griddle-Combo-Double-Sided/dp/B002CMLTXG
This is one of my favorite things in my kitchen.
Here's what I personally use:
https://smile.amazon.com/gp/product/B008FUUQJW - Extra sealing ring to use when you make sweet things to avoid transferring any smelly savoryness from the other ring.
https://smile.amazon.com/gp/product/B06XKPBT1Z/ - Steaming basket, of course.
https://smile.amazon.com/gp/product/B01KHHFCKS/ - A 7" springform pan to make Cheesecake #17 in. (If you only get one thing, this is the one. Because cheesecake.)
https://smile.amazon.com/gp/product/B008FUJ2LK/ - Tempered glass lid for slow cooking and/or letting people peer into the pot in awe while food is being kept warm.
And if you just want to buy fun things, the mini mitts are nice for getting the cheesecake out right away: https://smile.amazon.com/gp/product/B012D33BD4 And not catching on fire when you want to remove the inner pot or hold it in place while you saute.
I also bought these stackable pans the other day (https://smile.amazon.com/gp/product/B01M130JJL/) but so far all I've used them for was a dual meatloaf. I like them but I can't really think of a lot of uses for them at the moment.
There is an iron fish you can get on amazon that you can throw into the pot while you are cooking stews, sauces etc that adds additional iron to your foods and doesn’t change the taste.
https://www.amazon.ca/Lucky-Iron-Fish-cooking-Standard/dp/B01LX5S5FP/ref=mp_s_a_1_1_sspa?keywords=iron+fish&qid=1563135746&s=gateway&sr=8-1-spons&psc=1&smid=A24GX4JT8SAG0Q
Looks like a collapsible steamer.
Like this:
https://www.amazon.com/Amco-Stainless-Steel-Collapsible-Steamer/dp/B000Q4N2LO
There’s also a little fish made out of iron that was created for developing countries where iron rich foods are not naturally prevalent or are too expensive. Since you can throw it in while boiling water it might sneak some more into your diet. Worth a shot & it will provide one to someone anemic in the developing world who might not be able to get any or very subpar medical treatment for it.
There's a pretty common collapsable Metal Steamer that seems ubiquitous. It has little fit on it and hoists the vegetables up out of the water.
Also, that meal looks tasty!
Woo! I know this one - it's a collapsible steamer : http://www.amazon.com/Amco-Collapsible-Steamer-Stainless-Steel/dp/B000Q4N2LO
I use this set: https://www.amazon.com/gp/product/B01M130JJL/ref=oh_aui_detailpage_o03_s01?ie=UTF8&psc=1
Actually I use it a lot because I like rice with my meals.
Sure!
This is the popcorn popper I'm using to roast (not pictured)
This is the Sweet Maria's sampler pack (4 lbs of green coffee for roasting). Mine specifically came with these four coffees:
Now on to the equipment:
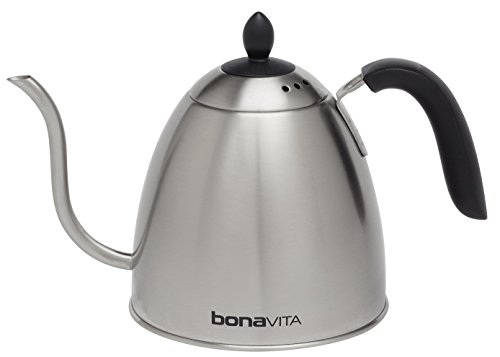
Bonavita BV3825ST 1-Liter Stovetop Kettle
American Weigh Black Blade Digital Pocket Scale, 1000 by 0.1 G
Taylor Classic Instant-Read Pocket Thermometer
Chemex Coffee Maker 8 Cup Classic
Chemex Coffee Filters - 100 Chemex Bonded Unbleached Filter Squares FSU-100
Hario MSS-1B Mini Mill Slim Coffee Grinder
I also have a bodum french press and an aeropress. The scale is big enough to measure coffee, but not big enough to brew on, so keep that in mind if you are thinking about getting one, but it was pretty cheap and I don't mind pre-measuring the coffee and water rather than doing it while i brew. I also have already had some issues with the thermometer head rotating, throwing off the measurement, but it's not really a huge deal because it's easy to rotate it back and I usually just bring water to a boil and then let it drop 10 degrees regardless of what the temp actually says. Overall, loving all my new goodies!
You must be pretty bad at Googling, $25 on Amazon and it was recently on sale for like $17 shipped:
http://www.amazon.com/Lodge-LCS3-Pre-Seasoned-Cast-Iron-Skillet/dp/B00008GKDJ/ref=sr_1_4?ie=UTF8&qid=1427497733&sr=8-4&keywords=iron+skillet
My thought was one of these iron adding cooking things.
how about something like this
No. You can't use a pressure cooker in place of a pressure canner.
At a minimum, the only tested and validated safe pressure canners are required to hold a minimum of six 1L/1Qt jars. Anything smaller can't hold sufficient heat energy to ensure it will properly kill harmful bacteria (particularly C. Botulinum).
In addition, a pressure canner must have a gauge (dial or weighted) that can hold the pressure at a specific setting (generally 5, 10, or 15lbs of pressure). The cooker you've linked has no such gauge.
There are no substitutes or shortcuts here. You need a pressure canner.
I got a case of the wide-mouth Mason jars at a garage sale. Then I got these.
You can easily see what is stored, they take up less room, things like chili and spaghetti sauce won't stain them and the dishwasher makes quick work of cleanup.
TL;DR warning
Are you willing to invest in some tools? Do you like Five Guys? (skinny burgers) The fastest burger procedure that I know of is Kenji's Ultra-Smash technique, which makes a pair of thin patties in no time. Takes about a minute per burger (two patties with cheese). Details here:
http://www.seriouseats.com/2014/03/the-food-lab-maximize-flavor-by-ultra-smashin.html
You can also do a regular smash burger, which is thicker (McDonalds-thin), but takes longer (~1.5 minutes per side, about 3 minutes total per burger):
http://aht.seriouseats.com/archives/2012/09/the-burger-lab-smashed-burgers-vs-smashing-burgers.html
The advantage of the ultra-smash is that it's super quick & you can toss a piece of cheese to melt between two patties, so you can pump out a ton of burgers in no time. You will need a few tools, namely:
It's not rocket science, but getting a proper setup will let you have a workflow that makes cooking for a crowd a breeze. I have a big extended family, so I cook in bulk a lot, but I also use this for just my immediate family because it's so fast to get setup. There is an up-front investment required, but everything you'll buy will pretty much last forever, so it's worth it if you like to eat burgers!
So the first two things you need are a metal cooking surface & a heat source that can pump out a lot of heat. I don't recommend a regular grill because they simply don't get hot enough; you need 600 to 700F to do this. You can either do a compact setup (a 2-burger surface with a single burner) or invest in a quality flat-top setup (more expensive, but lets you do more burgers at once). The ideal surface to do this on is a Baking Steel, which is very expensive. There are knockoffs for cheaper, but I like BS because they have a Griddle version with grooves to catch the grease:
http://www.bakingsteel.com/
You can also do it with cast iron. Lodge has a griddle for $25:
http://www.amazon.com/Lodge-LDP3-Double-Reversible-Griddle/dp/B002CMLTXG
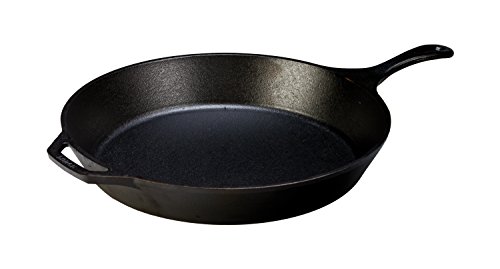
If I'm just doing a single regular smash burger at a time, I use a 12" cast-iron pan. $28:
http://www.amazon.com/Lodge-Cast-Iron-Skillet-L10SK3ASHH41B-12-Inch/dp/B00G2XGC88/
If you do get into cast-iron, read up on this seasoning procedure (i.e. the way to keep it smooth & slippery without Teflon). It's a bit of a pain, but it's worth learning because anything you buy in cast-iron can be handed down to your kids because it lasts forever:
http://sherylcanter.com/wordpress/2010/01/a-science-based-technique-for-seasoning-cast-iron/
You will want a heavy smashing tool as well. I have this massive 2.5-pound cast-iron press. It fits inside the 12" pan above (but not the 10"). $13:
http://www.amazon.com/Update-International-Heavy-Weight-Hamburger-Commercial/dp/B002LDDKZ6
If you plan on doing ultra-smash burgers, you'll need a scraper. This is the one Kenji recommends, but you can probably find something locally: (Home Depot or Lowes)
http://www.amazon.com/Plextool-Wall-Paper-Stripper/dp/B00AU6GQLQ/
Anyway, getting back to the cooking part: you'll need a hi-temp burner. I like Bayou Burners, they sell them on Amazon. I have an SP10: ($50)
http://www.amazon.com/Bayou-Classic-SP10-High-Pressure-Outdoor/dp/B000291GBQ
I use that with my 12" cast-iron pan for when I'm just doing a few burgers for the family. 15 minutes = 5 burgers. You can also slap a flat surface like a cast-iron griddle or Baking Steel on that puppy. Also comes in a square version (not sure how the BTU's compare). I also have some KAB4 burners that I use with my Baking Steel, among other things. More expensive, but larger shell & burner: (more even heat over the cooking surface)
http://www.amazon.com/Bayou-Classic-KAB4-Pressure-Cooker/dp/B0009JXYQY/
For cooking more at a time, you can get a cooktop. Blackstone has a 36" cooktop available, but it doesn't get very hot (don't get me wrong, it's an awesome tool, but I've had trouble breaking 500F on mine, which means you're not cooking 1-minute burgers on it, plus the heating is kind of uneven, so you have to work in the hot spots for faster cook times). Also comes in a slightly smaller 28" version (but it's only like $50 less, so it makes more sense to get the full-sized version because you get so much more cooking area). The nice thing with this setup is that for $299 (or a bit less if you shop around at places like Cabela's), you can cook like 20 burgers at a time, it's absolutely insane! I make epic breakfasts on it. Plus it folds up for transport, which is really handy. We use it for all of our family events & holidays:
http://www.amazon.com/gp/product/B00DYN0438
A better version is from Tejas Smokers. They make camping stove carts that have burners built-in & have griddles available separately. They get super hot, downside is the cost: you can easily spend $700 on a nice setup.
https://tejassmokers.com/Camp-Stove-Carts/23
Oh yeah, Blackstone did just come out with a compact outdoor griddle which can run off those little one-pound green tanks if you want. They go for around $99 ($79 if you have an Ace Hardware near you). I have not tried this, but it gets good reviews. I'd be curious to see what kind of temperatures it can achieve:
http://www.amazon.com/Blackstone-Portable-Griddle-Outdoors-Camping/dp/B0195MZHBK
So that's a basic introduction to the cooktops: you need some kind of decently-sized metal surface, a hi-temp burner, a smashing tool, and optionally (but recommended) a scraper. You will also want to get a strong, high-quality spatula. A good one is $32:
http://www.seriouseats.com/2010/07/equipment-the-due-buoi-wide-spatula-my-new-fa.html
Available here:
http://www.duebuoi.it/x/uk_usd/catalog/p/spatulas~805-16x10.html
If you opt for cast-iron, get an infrared temperature gun (doesn't work too well on shiny metal surfaces like steel tho). $17:
http://www.amazon.com/Etekcity-Lasergrip-1080-Non-contact-Thermometer/dp/B00DMI632G/
A cheap digital kitchen scale is useful too, for measuring out the proper amount of meat. $14:
http://www.amazon.com/Ozeri-Digital-Kitchen-Capacity-Stylish/dp/B003E7AZQA/
This collection of tools ensures that you have the proper workflow: a metal surface to cook on, the ability to bring the surface to a high temperature (and know what that temperature is for precise control), the ability to weigh your meat so you can pre-measure out what you need, the ability to smash the burger down, and also to properly scrape it off. Again, it's not rocket science, but if you have a wussy grill or a crappy surface or weak smashing/scraping tools, you're gonna have a bad time. You just need the right setup to pump burgers out fast!
So on to prep. For ultra-smash, you do a pair of 2-ounce ground beef balls. In the tutorial above, they use a mix of meat for 25% fat. I just grab some regular 80/20 ground plus some salt & pepper. For regular smash burgers, do a single 4-ounce ball (optionally 5 ounces...useful if you have a big cooktop for a bunch of burgers at one time & are only doing a single patty per burger). The nice thing is, there's no special prep required for the meat, so you can make all of your burger balls ahead of time. If you have 10 people & are doing ultra-smash, let's say half of them get 2 burgers, so 15 burgers total, or thirty 2oz balls. If you have 20 people & are doing regular smash, again with half getting an extra burger, that's 30 burgers total or thirty 4 or 5oz balls. So that takes care of prep...adjust as needed. If you're feeding mostly dudes, you'll want to add more seconds (and thirds) to the equation.
There are a variety of buns you can get. Crap buns will make for a crap burger. See if you can find potato buns or brioche buns. Those are pretty soft. Buns aren't overly hard to make, but I have yet to find a decent recipe that takes under 40 minutes, so I usually only doing fancy home-baked buns for my family rather than a crowd. Buying 5 or 10 pounds of ground beef & making smash balls out of them will take you all of ten minutes, but making buns can take forever. Here's a good recipe if you want to try it out tho:
http://smittenkitchen.com/blog/2009/07/light-brioche-burger-buns/
Or this, if you wanna get crazy:
http://www.seriouseats.com/2015/05/fresh-cemita-rolls-mexican-sandwich-burger-bun-bread-food-lab-recipe.html
Or this one, nom nom nom:
http://amazingribs.com/recipes/breads/brioche_hamburger_buns.html
But eh, just hit up Sam's/Coscto/BJ's and buy some hamburger buns in bulk, problem solved. Or find a local bakery that has good rolls. There's a good shootout of buns here:
http://aht.seriouseats.com/archives/2011/04/the-burger-lab-whats-the-best-bun-for-my-burger-taste-test.html
(continued)
These were the things I initially bought when gathering cookware.
Enameled cast iron dutch oven
Cast Iron Wok or a carbon steel wok.
Stainless steel cookset
Pressure Cooker
Cast Iron skillet
Stainless steel roaster
*Pyrex Bakeware
Kinda depends on what it really is. The Lodge L14SK3 is a 15" skillet with about a 12" cooking surface, or there is the L12SK3, which is about 13.25" across the top. You could ask the seller what numbers and letters they see on the bottom near the logo. I think you're looking at the L14SK3, which sells on Amazon for $50, so $20-25 would be a pretty good deal.
Zojirushi.
I've had many other rice cookers, from the target and Walmart brands to black and decker.
Zojirushi is just plain and simple worth it. It will consistently give you perfectly cooked rice...every...single... time.
The reason is it has this thing called fuzzy logic where it's computer can determine how to cook things depending on the weight and what not (not sure how it works exactly, but it works great!). The initial buy in is a bit more expensive than other rice cookers but it's worth the investment. It will last very long.
For steaming, you could use the vegi steamer tray for a pot. It's honestly 100x faster because you don't have to wait like 15 minutes for the water to boil.
This is as good one: http://www.amazon.com/Zojirushi-NS-TSC10-Uncooked-Cooker-1-0-Liter/dp/B0074CDG6C/ref=sr_1_2?ie=UTF8&qid=1394815672&sr=8-2&keywords=zojirushi+rice+cooker
This is the one I have: http://www.amazon.com/Zojirushi-NS-ZCC10-Uncooked-Premium-1-0-Liter/dp/B00007J5U7/ref=sr_1_4?ie=UTF8&qid=1394815672&sr=8-4&keywords=zojirushi+rice+cooker
I can't praise it enough.
Also, this for steaming veggies. Works amazing, I've had it for years:http://www.amazon.com/Amco-Collapsible-Steamer-Stainless-Steel/dp/B000Q4N2LO/ref=sr_1_9?ie=UTF8&qid=1394815756&sr=8-9&keywords=steamer+tray+for+pot
https://www.amazon.com/Ball-Wide-Mouth-Plastic-Storage-8-Count/dp/B000SSN3L2
upgrade!
Seconding the "pot in pot" (aka PIP) method. You can do rice at the same time or other veggies as well. Obviously it is affected by the cooking times for the other dishes. You can search around online and find a lot of people who stack oven safe containers with different foods in the Instant Pot and cook a meal at once. I have done some of the recipes from Jill Selkowitz at This Old Gal and have seen others. I have [these] (https://www.amazon.com/ekovana-Stackable-Stainless-Pressure-Steamer/dp/B01M130JJL) metal tiffin pans that I use for this purpose also. You don't need to buy special pans, though. Anything that is oven safe and will fit below the 'max fill' line and allow you to put the trivet and some water in the bottom of the pot. I have cooked rice this way several times. I also freeze cooked rice and reheat from frozen with a little water in the microwave. You can reheat in the pot, too, if you don't have a microwave.
Maybe you need to buffer the heat coming off the electric coil, so you can adjust it better. Try one of these.
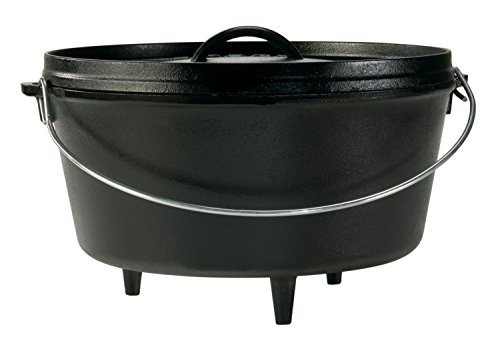
If you're into it, dutch oven cooking over a campfire or using charcoal is relaxing and you can cook everything from breakfast through dessert in there. I have an 8qt deep dutch oven from Lodge and it's a nice way to cook a group meal on a lazy day in camp.
http://www.amazon.com/Lodge-L12DCO3-Deep-Dutch-8-Quart/dp/B00008GKDW/ref=sr_1_1?ie=UTF8&qid=1406222714&sr=8-1&keywords=lodge+8qt+deep+dutch+oven
I always boil directly on the stove (have a glass topped stove). If you have the exposed coils you must use a heat diffuser or just put it in a skillet on top of the burner.
You can take it directly from boiling into water / ice bath without any issues of shock or cracking, it's lab glass and won't have an issue with the change.
> The stove top ones are the dangerous ones.
Even with those, the danger is over stated. If anything, I'm more confident about one I use on the stove, because I can inspect all of the parts easily for damage everytime I use it.
Even an old pressure cooker will be UL rated, unless it's ancient.
https://www.ul.com/marks/
You'll have a blow-out plug, for anything made after 1977 (so within the last 40 years).
https://www.amazon.com/Presto-Pressure-Cooker-Canner-Overpressure/dp/B0016CV0X2/ref=sr_1_3?ie=UTF8&qid=1526768658&sr=8-3&keywords=pressure+cooker++plug
These are still made today; they use weights on top, all three for 15 pounds of steam, two for 10 pounds, and just one for 5 pounds.
If you have to go back further than that, they have parts going back to 1957.
https://www.amazon.com/Presto-Pressure-Indicator-Regulator-Cookers/dp/B00M7VWGES/ref=pd_sim_79_8?_encoding=UTF8&pd_rd_i=B00M7VWGES&pd_rd_r=P6HHAYRW3XD075H1Z6EE&pd_rd_w=Rgk2e&pd_rd_wg=6yMgB&psc=1&refRID=P6HHAYRW3XD075H1Z6EE
It's basically the top, the bottom, the seal, the plug, and the weights.
You inspect everything every time you use the pressure cooker.
Anything doesn't look right, you replace them.
The more modern ones use a twist orifice, instead of weights... that can get clogged with food (you inspect to make sure it's open).
If you get them on sale, either style, they're much less than $100.
https://www.amazon.com/Presto-8-Quart-Stainless-Pressure-Cooker/dp/B0000Z6JIW/ref=sr_1_22?s=home-garden&ie=UTF8&qid=1526768988&sr=1-22&keywords=pressure+cooker
Either way, you have a pressure vessel in your kitchen, the only difference is that the old design has been used billions of times (people have been canning with them for years, same for cooking). The digital ones are nice, but you probably won't get parts for them in 10-20 years.
36 quart for $35 also a good deal.
https://www.amazon.com/gp/product/B0009JXYUA/?th=1&psc=1
Non ref link
Subscribe to this subreddit, good first step.
Visist www.homebrewtalk.com and join up there too, a HUGE treasure trove of knowledge.
Buy this: http://www.northernbrewer.com/shop/essential-brewing-starter-kit.html
Watch the DVD.
Now, I don't know your budget, if you want to just make some beer this should get you going.
If you want my recommendation for stuff to get now:
A good brewpot, large enough to boil all grain and do brew in a bag, here's a pretty badass one:
http://www.amazon.com/Bayou-Classic-1144-44-Quart-Stainless/dp/B000FTLY1K/ref=sr_1_8?ie=UTF8&qid=1396500991&sr=8-8&keywords=stainless+stockpot
A wort chiller:
http://www.amazon.com/Copper-Immersion-Chiller-Length-Drain/dp/B007ZDIIOA/ref=sr_1_6?ie=UTF8&qid=1396501051&sr=8-6&keywords=wort+chiller
A good propane burner, I got this one for free on special a while back and love it:
http://www.northernbrewer.com/shop/the-dark-star-burner.html
This is basically all I use to brew all grain beer, I don't like to get too fancy I just want to make some good beer, and I produce pretty good beer, if I do say so myself.
I agree with loveshercoffee. I would have to say if you want your salsa that way you need to make a fresh batch when you want it. I have made some tested cooked salsa's that were amazing and very shelf stable. If you want to can salsa, please for the love of God follow a tested recipe. I personally would not eat what you put on your shelf. The pH test strips might not accurately test the chopped veggies even if the juice is correct.
Something that has been tested for a pressure canner and has no instructions for a water bath means it needs to be pressure canned. Sorry, but unless you buy a pressure canner for $75 bucks please hold off on trying the peanuts.
we don't want you to die or get sick
Any of the lid accessories are must-buy in my opinion.
A glass lid for slow cooking, and also works great to keep food warm and moist inside the pot after it is done cooking; great for buffet style.
A silicone lid seals the inner-pot and is great for putting it right into the fridge after cooking, rather than transferring into a Tupperware.
These days I use a stainless steel steamer basket for most things I make with the Instant Pot.
Something like this
You should be able to get one right now at Walmart. It won't cost more than 5-10 bucks.
Why a steamer basket is better than the free trivet that comes with Instant Pot:
Basically, a steamer basket does everything the free trivet does, but better. And it lets you do things you can't do with just the free trivet. It might be one of the best value upgrades / hacks you can do for your Instant Pot.
Edit: Sorry, somehow missed the part where you said you have a steamer. I would avoid using plastic in the IP. Suggest you get an all stainless steel one for IP usage.
Here's something pretty solid
https://www.amazon.com/Lodge-L14SK3-Skillet-Cast-Black/dp/B00063RWUM
It's stainless steel.
https://www.amazon.com/Bayou-Classic-1036-Stainless-Steamer/dp/B0009JXYUA
It was the first time we had used it and we cleaned it lightly with tap water. I'm cleaning it with PBW right now. We had used a smaller and lighter pot for our previous biab try's. The pot is certainly my suspicion as well
I use this burner and this kettle.
Any thoughts on the 44 quart SS Bayou Classic pot? I'm about to pull the trigger on it.
http://www.amazon.com/Bayou-Classic-1144-44-Quart-Stainless/dp/B000FTLY1K/ref=wl_it_dp_o_pC_nS_nC?ie=UTF8&colid=22WSWWQDSQRRM&coliid=I11UN4MGGJX0VV
Or you could get something like this:
https://www.amazon.com/gp/product/B000FTLY1K/ref=ppx_yo_dt_b_asin_title_o07_s00?ie=UTF8&psc=1
It already has a pre-drilled basket (and you can cook craw-fish in it if you so desire :) )
Try this first.
http://www.amazon.com/Lodge-Double-Reversible-Grill-Griddle/dp/B002CMLTXG/ref=sr_1_2?s=home-garden&ie=UTF8&qid=1341876329&sr=1-2&keywords=lodge+griddles
The typically recommended options for stove-top would be:
If you just want a standard stovetop kettle then you'll be fine with most reputable brands since there really isn't much that can go wrong with them.
Edit: I just realized I'm not in /r/coffee. If you're not doing pour-overs then pretty much any kettle will work. I'd probably go with a $20 Cuisinart or something.
FYI the Bonvita Stove top gooseneck is even cheaper $35
I like to steam green veggies like broccoli, spinach, asparagus, green beans, etc. Get one of these things, put it in the bottom of a pot, put about 1/2 inch of water in the pot, bring water to boil, add vegetables, cook for ~5-15 minutes depending on veggie type and quantity, toss veggies halfway through, and enjoy.
I will add 1/2 tsp butter and sea salt. It doesn't take much, the vegetables are full of natural flavor. If you're cooking fresh spinach, garlic powder is a good addition.
Try a Heat Diffuser pad. They come in a variety of sizes for Bunsen Burners right up to stove-top for simmering. https://www.ebay.com.au/b/Heat-Diffuser-Other/20651/bn_72956393 and https://www.amazon.com/Nordic-Ware-Tamer-Burner-Plate/dp/B00004W4UJ
You can, but you need one of these: http://www.amazon.com/Nordic-Ware-Tamer-Burner-Plate/dp/B00004W4UJ
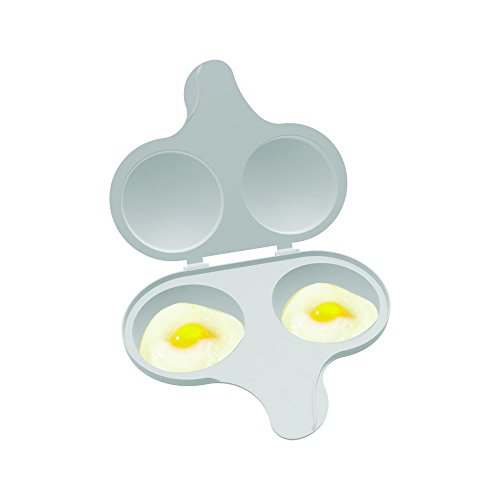
Honestly, if you have the time to eat a bowl of cereal, you have the time to make a few eggs in the microwave. Those microwaveable egg cookers work really well, and they are done in less than two minutes. Might wanna try it someday and see just how it works.
You can just use one of these and do it in 1 minute in the microwave, although you won't get the cool flowery look. Do they taste different boiled compared to microwaved?
Eggs, you can even microwave them! :D
https://www.amazon.com/Nordic-Ware-Microwave-Cavity-Poacher/dp/B00004W4UR/
Nordic Ware 64702 Microwave 2 Cavity Egg Poacher https://www.amazon.com/dp/B00004W4UR/ref=cm_sw_r_cp_api_i_l25YDb56HCDK0
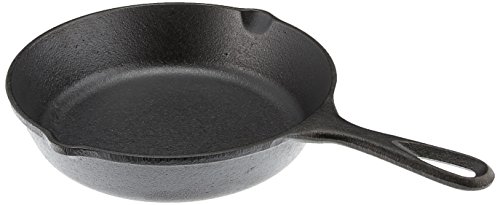
For a dollar more ($10) you can get a great cast iron skillet. No excuse now!
http://www.amazon.com/Lodge-L5SK3-Pre-Seasoned-Cast-Iron-Skillet/dp/B00008GKDG/ref=sr_1_4?ie=UTF8&qid=1372969721&sr=8-4&keywords=cast+iron+skillet
One of my favorite memories as a kid was on our trip to Disney. We didn't have a lot of money but my moms boyfriend at the time was wealthier and decided to take us all on a nice trip. The trip didn't start off great. I'm the oldest and while I was excited to be going to Disney (I love rides) I knew I'd probably be spending a lot of time either babysitting or going on baby rides. I also felt really alone because even as far as the plane ride went we couldn't get seats together so I ended up having to sit in a different part of the plane with people I didn't know. From pretty much the second we got there my mom and her boyfriend began arguing, the timeshare we were suppose to stay in was messed up, etc. My sister and I who were never close (spent the majority of our lives arguing) were stuck in an extremely small room together along with my baby brother. So then started our Disney trip. My mom decided it was a good idea for us to save up our allowance for souvenir money at the parks which was a smart idea EXCEPT she also decided that we should have to use our allowance money to pay for the parking in the park and my brothers stroller rental to help "pitch in". Within the first couple of hours my brother ended up getting separated from us which led to a huge freak out and a lot of arguing between my mom, her boyfriend, and park staff. As a pre teen I was extremely embarrassed but luckily everything turned out fine, he just wandered of. The second day we ended up spending 99% of the day in the kiddie areas to avoid another issue like the day before. Then finally on the third day my sister and I convinced my mom to let us go off to some of the bigger rides by ourselves. Before we went off her boyfriend pulled us aside and handed us the money we had given "to pitch in" and then some. He explained that we shouldn't have to use the money we saved up to pay for anything and some extra for being good sports. And we were off! After some initial arguing about where we wanted to go first (we had a time limit) we were stopped by some park staff. Again we argued because we were convinced we were in trouble or that our mom had freaked out and wanted us to come back, another embarrassment. We were wrong and the staff asked us if we wanted to join in on a little talent contest they were having. So we went with them over to where some other staff, dressed as characters were, along with a bunch of other people. It wasn't anything huge just about 10 people including us. So they went around asking other people to do their "talents" some people sang, one woman did sign language, etc then they got to us. Immediately my sister and I looked at each other and just began dancing. We did the whackiest dances we could think of and hysterically laughing. We ended up winning the "talent show" and my sister got to take her picture with all the characters and get all of their autographs (something which was really important to her). After that we agreed on rides we would go on together, stopped off to get some snacks, and souvenirs before going back. This is an important memory for me because pretty much ever since then our relationship changed. We all of the sudden didn't mind being in a small room together even though we had shared a room our entire lives and hated it. We actually started talking to each other and almost 15 years later we have a great relationship. Haha funny thing is shes moving to Florida soon so maybe one day we'll revisit Disney and win another talent contest. Thanks for the contest and taking me down memory lane!
This is under $20
WOODPECKER
How good of friends are they, or how good of friends do you want them to be? Buy them both one and a couple of handles and you've got two 10" Lodges for ~$40 shipped!
If you get a really big one you can use it as a pressure canner. I have this and it just baaaaaaarely fits a single can, which is better than nothing because it means I can do things like make caramelized onions in a jar.
Moreover, even if you don't think you'll ever want to pressure can anything, a large cooker is nice because you don't want to fill them up entirely, so you can't just think about it as a soup pot: you need to leave room up top whenever you make anything.
There's also no downside to getting a large one except that it takes up more space when you store it. There is no reason to worry about matching burner diameter at all, let alone exactly, but you don't want it to be smaller than the burner because then of course you're just wasting energy heating it up.
So, my suggestion is to go as large as you can without breaking the budget, unless you have storage concerns, in which case go as large as you can before it gets too big to store. Especially if you're going to be cooking for 6-7 people sometimes, you'll want a pretty good sized pressure cooker.
If you need specific numbers, mine's an 8-quart and it's more than large enough for cooking for one person. Cooking for 3 I'd maybe feel a little cramped sometimes but I'd likely be fine. Cooking for 6-7 I might want something even larger but if I'm making food that won't foam up or otherwise require lots of headroom, 8 quarts might still cut it.
You can drain your runnings into a fermenting bucket, and then pour that into the kettle when you have the correct volume. It's what I do.
I have a 36 qt (9 gal) brew kettle and that's fine for a 5 to 5.5 gallon boil (starting with about 6.5 gallons, usually). $72 with Amazon Prime (not sure how much if you don't have Prime).
http://www.amazon.com/gp/product/B0009JXYUA/ref=oh_details_o05_s00_i00?ie=UTF8&psc=1
Most people will agree that Blichmann is top of the line, but you don't need a $400 pot to make good beer. I would recommend a 10G Bayou Classic stainless steel, you can typically find it for under $100 on Amazon.
You'll see a lot of pots out there with lots of different bells and whistles, but those extras are marginally helpful. The 3 main options you will see are: sight glass, thermometer, ball valve
Sight glass - nice to have, fun to see your liquid level inside the pot, but if you take proper measurements and know your boiloff rate, then this becomes almost completely unnecessary.
Thermometer - If you are mashing in your kettle / BIAB, you'll want to check your temperature with a fast reading digital thermometer anyway. The analog thermometers that would be installed are too slow to respond in changes for it to be useful. If you are mashing in a cooler and only boiling in the kettle, then the thermometer really isn't necessary - you don't need a thermometer to tell you whether or not your wort is boiling.
Ball valve - This option is helpful, but less so if you have a regular brew partner. 5-6G of wort weighs 50-60 lb, so depending on your setup it may make sense to get a ball valve. That being said, Bayou Classic makes an 8, 10, and 16G kettle with ball valves for $116 - $160.
The thing is, even if you want all this stuff, it's way cheaper to buy the BC kettle and just add those bits and pieces onto it. You can buy anything you need from brewhardware.com or bargainfittings.com and still spend less than a megapot or blichmann
What I always suggest is to first decide what you're going to can, how much you will be canning at one time and what size jars you will be canning in.
These are important to know because, as others have said, jellies, jams, fruits, pickles and properly acidified tomatoes can be done in a water bath canner, while vegetables and meats must be pressure canned.
Knowing what size of jars you are going to be using makes a difference in what size of canner(s) you will need. If you're canning for a family, you will likely need to use quart sized jars. But if you are a single person or a couple, you will probably only want to do pint jars.
Too, it's customary that jams or jellies are canned in half-pint jars although it is perfectly acceptable to do them in pints if you will use that much jam in a reasonable amount of time once it's been opened. Large mouth jars (both pints and quarts) and their lids are more more expensive than the regular mouth jars. However, meats and things like whole pickles or pickle spears almost require large-mouth jars.
The jar size also matters because some canners don't work with larger sized jars. Also, very large canners will accept two layers of jars which is great for canning many jars at a time but time and energy wasting to use for small batches.
To get started water-bath canning, the only must haves are:
The most affordable places to buy these supplies are going to be somewhere local to you. None are very expensive at all. Some water-bath canners come with a rack inside them, which is both a trivet and a jar lifter itself. New boxes of jars come with lids and rings. The rings (also called bands) are reusable, the lids are not, but anywhere that sells the jars will have more lids. Walmart, Target, K-Mart, Lowes, Home Depot, ACE Hardware and places like that will have nearly everything you need for water-bath canning.
As for pressure canning, you will need:
I highly recommend that you read up and shop around before buying a pressure canner. They are somewhat of an investment at between $70 and $400. When you're ready to select a pressure canner, come back and ask and I know everyone around here will help you decide what's right for you. The inexpensive canners are very good but there are also very good reasons to buy a more pricey one and it takes a whole post in itself to discuss them!
Something inexpensive and very nice to have is a little canning set like this no matter which method of canning you do. These tools will be safer to use rather than winging it and will save you infinite amounts of time and frustration. I've seen these same sets at Walmart for something like $8-$10.
I hope this helps!
Mason jars are really great for basically everything, and the smaller sizes, too. If you're using them for dry storage, get alternative lids.
In my fridge, they're in half liter mason jars with screw tops (here: http://www.amazon.com/Ball-Wide-Mouth-Plastic-Storage-8-Count/dp/B000SSN3L2)
I harvest from my starters. So if I'm going to make a 5gal batch, I'll normally make a 2L starter and harvest 0.5L, pitch the rest.
Actually, I've toasted an egg once. Crack it into a toastie bag and put it in the toaster. It's surprisingly good, but doesn't beat fried.
Wings are a little difficult to do well for a tailgate. The best way I've found is adapted from Alton Brown's method, straight grilling just results in tough, chewy wings. This gives similar results to deep frying without screwing around with turkey fryers which are a pain in the ass, somewhat dangerous if the lot is crowded, and still require about as much effort.
Steam the wings the night before. 10 minutes if thawed, 13 if frozen, pat dry with a paper towel and refrigerate overnight.
Line the grill surface with cheap cooling racks and grill on medium high (shoot for roughly the 425 listed, but it's not crucial). This makes them cook mainly via convective heating. Conduction with the much larger grill grates cooks them way to fast, causing charred skin and tough meat.
20 minutes on one side, flip, and about 10-15 on the other depending on the size of the wings.
His wing sauce is a decent basic recipe, although you can get crazy creating your own.
Just go to Target or whatever and get a steamer basket for $5. Or Amazon:
http://www.amazon.com/Norpro-175-Stainless-Vegetable-Steamer/dp/B001FBCP7O
Ya know, a cheap and easy to find solution might be a veggie steamer basket or steamer rack.
> I think what sets InstantPot apart is the accessories you can get, but don't quote me on that. I purchased a glass lid along with a silicone cover for mine, which I didn't see as readily for the other brands.
> That, combined with the stainless steel inner pot (vs. non-stick coating) are what sealed the deal for me.
~ /u/Justifiably
I mean there's this glass lid.
Recipe ideas for a family:
Recipes: Nothing beats cheap lazy vegan: https://www.youtube.com/channel/UCEjkioV3LO_OIUaSWRxFZ3A
Containers I use: https://www.amazon.ca/gp/product/B01MQTYZE8/ref=oh_aui_search_detailpage?ie=UTF8&psc=1
Regarding Lentils/beef dishes/meaty dishes the following ingredients are a must for me to make them taste hardy and win my omni friends over: Nutritional Yeast also known as Nooch, Soya Sauce, miso paste, and liquid smoke. Also, all lentils are not equal don't just swap red with belugas or with brown.
Apart from recipes
Staples to have in kitchen:
Best cook books for vegan:
For iron, you can use an iron lucky fish - but you have to follow the instructions specifically (boiling for a specific amount of time) and try to include something with vit. C like tomatoes with the same meal to increase absorption.
I take sublingual B12 and liquid D3.
Some people have malabsorption difficulties, so it wouldn't be unheard of that you are having trouble with B12, but you might want to get an opinion from a GI specialist. Also drinking alcohol interferes with absorption, and certain medications.
I use the Ekovana Stackable Stainless Steel Pressure Cooker Steamer Insert Pans from Amazon.
https://www.amazon.com/gp/aw/d/B01M130JJL/ref=mp_s_a_1_1?ie=UTF8&qid=1521468122&sr=8-1&pi=AC_SX236_SY340_FMwebp_QL65&keywords=ekovana&dpPl=1&dpID=51owU4b-K3L&ref=plSrch
I recommend getting one of these heat diffusers and keeping the heat very low. Gives me more consistent results. https://www.amazon.com/Nordic-Ware-Tamer-Burner-Plate/dp/B00004W4UJ/ref=mp_s_a_1_17?keywords=heat+diffuser+for+gas+stove&qid=1568912909&sprefix=heat+diff&sr=8-17
Others may have different or better advice
I have a thin cast iron heat spreader to put between the gas burner and the bottom of the brewer. Like this one
Nordic Ware 8 Inch Heat Tamer and Burner Plate https://www.amazon.com/dp/B00004W4UJ/ref=cm_sw_r_cp_apa_i_ocxwCbMH0EN1F
Enjoy
I don't think it's the pot at all. I have 3, a 12qt Calphalon tri-ply, a 16qt el-cheapo stainless pot and a 25qt All American (a pressure cooker that doubles as a giant pot when I need it to) and I make stews, chilis, sauces, etc all the time and have never burned the bottom.
What kind of stove top do you have? I have cooked on coil stoves before and they are extremely difficult to keep from burning the bottom of stuff due to the very localized heat generation, you could see the coil pattern in the burned stuff on the bottom of the pan. I have seen this on gas stoves as well with small flame diffusers.
What I think you need is this something like this:
https://www.amazon.com/Nordic-Ware-Tamer-Burner-Plate/dp/B00004W4UJ
Which would be cheaper than buying a pan with a thick enough bottom to diffuse the heat of whatever you are cooking on.
One of these things will help. They come in different sizes so get one that is the right size.
https://smile.amazon.com/Nordic-Ware-Tamer-Burner-Plate/dp/B00004W4UJ/ref=sr_1_6?ie=UTF8&qid=1505070031&sr=8-6&keywords=heat+diffuser+for+gas+stove
If the colour really bothers you, maybe try a heat diffuser of some sort?
It seems to be pretty localized, so it's probably from hot spots in your burner. At the very least a diffuser should discolour sacrificially, protecting your pan. As long as you don't look at the bottom, everything's fine.
They tend to be ugly, but this one is pretty sleek.
One quick & easy breakfast that I like, prep time less than 3 minutes:
Get one of these: http://www.amazon.com/Nordic-Ware-Microwave-Cavity-Poacher/dp/B00004W4UR or ask the Internet "how to poach an egg in the microwave" for a free method.
Poach 2 eggs (1min 37 seconds in my micro, yours may vary slightly) then heat up 1/3 cup of salsa (a good, chunky one, no sugar or similar crap added) for about 30 seconds and then dump eggs in salsa . Experience deliciousness. ~180 calories.
Another fast option is make oatmeal on the weekend (I like adding a little cocoa powder so it's like a lumpy, healthy chocolate pudding). You can freeze it in 1-cup measurements in tupperware, then remove from tupperware once frozen and store your "oatmeal bricks" in a large freezer bag (that way you can make a huge batch and don't need to worry about it getting moldy if you decide to do eggs & salsa instead for a few days in a row). Punch all the ingredients into MFP and the # of servings you end up with, and it will tell you the per-serving calorie count. In the morning, grab a "brick" and microwave it for about 3 min. Yum!
I do a similar thing with stew, I have a freezer full of delicious "stew bricks" for when I'm in a rush or it's just a cold day and I want something heathy and warming.
For breakfast, get a microwave egg cooker like this one or this one if you want more than two, and then buy the following at Costco: eggs, cheese slices, microwaveable bacon, and English muffins. Toast muffin(s), nuke bacon 45 - 60 seconds depending on your microwave, and nuke eggs for 50 or so seconds. Layer together with cheese. Voila! Delicious breakfast sandwich in under 5 minutes.
Edit to say: For convenience type items, I really like their microwaveable quiches. They're a four pack of a couple different kinds and they turn out pretty well in the microwave.
Just get a big box of the quaker oats rolled oatmeal, add water or skim milk and toss it in the microwave for 2 minutes.
And I highly recommend something like this: http://www.amazon.com/Nordic-Ware-Microwave-Cavity-Poacher/dp/B00004W4UR
Pop it in the microwave microwave for a minute, bam, you have cooked eggs. I use mine all the time. Use a little nonstick spray before cooking and you can wash it out in about 30 seconds.
Chicken salad is a solid lunch. I often also just make a double portion of something healthy for dinner and use it the next day for lunch as well.
If you wanna change things up with the "scrambled" eggs, might I suggest a microwave egg poacher? Bought this on a friend's recommendation at Wegmans for about $3 - it rocks. 1 minute for 2 eggs (semi-soft). :D
Also, upboats for 24 hour clock usage. And damn, full until 18:00, that's impressive!
I cook a pack of bacon or sausage on Sunday and it eat throughout the week with some microwave poached eggs. They're way better than they sound and only take 1 minute to cook. I use one of [these] (https://www.amazon.com/gp/aw/d/B00004W4UR/ref=mp_s_a_1_4?ie=UTF8&qid=1525624113&sr=8-4&pi=AC_SX236_SY340_FMwebp_QL65&keywords=poached+egg+maker+microwave&dpPl=1&dpID=31wtCfwsirL&ref=plSrch) gimmicky things, but it works very well. You should be able to use something like a coffee mug too.
Buy a new one. They are cheap
http://www.amazon.com/Lodge-L5SK3-Pre-Seasoned-Cast-Iron-Skillet/dp/B00008GKDG/ref=sr_1_3?ie=UTF8&qid=1394327954&sr=8-3&keywords=lodge+cast+iron
Congrats, I just accepted a job offer as well!
No soup for you!
My favorite meat would probably be a nice ribeye cooked medium (or medium rare) mmmmm so juicy and tender.... great now I'm hungry...
I'd summon a million people if I could, but I'll just stick to the one that needs it most, /u/szor needs to put some meat on them bones :)
Oh oh, my kitchen item is this! of all the kitchen stuff I have, I'm still missing a decent cast iron pan.
Don't know if being sarcastic, but they are amazing and cheap!
http://www.amazon.com/Lodge-LCC3-Logic-Pre-Seasoned-Cooker/dp/B0009JKG9M/ref=sr_1_2?ie=UTF8&qid=1393822556&sr=8-2&keywords=lodge+cast+iron
http://www.amazon.com/Lodge-L5SK3-Pre-Seasoned-Cast-Iron-Skillet/dp/B00008GKDG/ref=sr_1_3?ie=UTF8&qid=1393822556&sr=8-3&keywords=lodge+cast+iron
Also I usually try to shoot for 2 inch thick steak. I heat grape seed oil in the skillet, sear on both sides and cover in sea salt and pepper. I pick it up lay it on a bed of rosemary and throw it into the oven at 225 until it comes up to temp. Let rest and then enjoy.
For whatever it's worth, you can get a similar set of Lodge pans from Amazon for about $12 more (but only one silicon handle cover instead of 3):
​
Lodge 12 inch with silicone holder: https://www.amazon.com/dp/B00G2XGC88
Lodge 10.25 inch: https://www.amazon.com/dp/B00006JSUA
Lodge 8 inch: https://www.amazon.com/dp/B00008GKDG
​
​
An added bonus is the lid also perfectly fits the Lodge 8" skillet.
https://www.amazon.com/Lodge-L5SK3-Pre-Seasoned-Cast-Iron-Skillet/dp/B00008GKDG
https://www.amazon.com/dp/B00008GKDJ/ref=twister_B007YYNG3S?_encoding=UTF8&psc=1
https://www.amazon.com/gp/product/B0096K1ZDG/ $60
No idea what kind of knifes you need. I like this set. I avoid serrated knives as they tear the meat.
https://www.amazon.com/dp/B00008GKDJ/ $15
Lodge is pretty much the go to cast iron pan. It's relatively cheap, but it is a pretty simple design after all.
You have 75 bucks left in your budget, I would get this:
https://www.amazon.com/Lavatools-Javelin-Limited-Ambidextrous-Thermometer/dp/B01F59K0KA/
Resist the urge to go cheap on instant read thermometer, it was the single best thing I purchased that drastically improved nearly all the food I cooked - especially steaks.
I think is the closest you can get at low cost and weight.
Edit: You can later use it for cooking.
Everyone needs a cast iron skillet
A dutch oven, a campfire, and/or charcoal briquets. You can "stack" dutch ovens on top of each other, with each oven being a size smaller than the one below it. They do make aluminum dutch ovens, intended to be used by horse or mule pack trains. They are quite a bit lighter than cast iron dutch ovens. Other items that go along with dutch oven cooking are a lid lifter and a lid "rest." You can control the temp of the oven by the number of briquets on the lid.
BTW, the type of lid with a lip all the way around, so that one's briquets don't roll off is really de rigueur. You don't want the type with a "rounded" dome lid.
https://www.amazon.com/Lodge-Lifter-Lifting-Carrying-Ovens/dp/B0000TPDJE/ref=pd_bxgy_img_2/132-7088107-2513867?_encoding=UTF8&pd_rd_i=B0000TPDJE&pd_rd_r=a15db4a3-c5ec-48ae-a51c-e7e82a6be9e0&pd_rd_w=jZOKH&pd_rd_wg=dy07K&pf_rd_p=a2006322-0bc0-4db9-a08e-d168c18ce6f0&pf_rd_r=K9CA053T5P8AKZW5BS1A&psc=1&refRID=K9CA053T5P8AKZW5BS1A
https://www.amazon.com/Lodge-A5-11-Camp-Dutch-Black/dp/B07DR5GTQD/ref=pd_bxgy_79_img_3/132-7088107-2513867?_encoding=UTF8&pd_rd_i=B07DR5GTQD&pd_rd_r=218eacb9-5d6c-4dad-91cf-e16da1dbf183&pd_rd_w=FCwCZ&pd_rd_wg=fzNzP&pf_rd_p=a2006322-0bc0-4db9-a08e-d168c18ce6f0&pf_rd_r=SCQYZACAA61WGGX4V72E&psc=1&refRID=SCQYZACAA61WGGX4V72E
https://www.amazon.com/Texsport-Cast-Dutch-Handles-Handle/dp/B00019H602
https://www.amazon.com/Lodge-L12DCO3-Deep-Dutch-Quart/dp/B00008GKDW/ref=pd_cp_468_3?pd_rd_w=TDeqb&pf_rd_p=ef4dc990-a9ca-4945-ae0b-f8d549198ed6&pf_rd_r=8VGGH6PZZKBJ4R0A6D24&pd_rd_r=875f9396-8df3-4c2e-8746-b23d663c901f&pd_rd_wg=E7Hfs&pd_rd_i=B00008GKDW&psc=1&refRID=8VGGH6PZZKBJ4R0A6D24
https://www.amazon.com/Bruntmor-Legged-Pre-Seasoned-Camping-Flange/dp/B01MSDAZ16/ref=pd_lpo_sbs_468_t_2?_encoding=UTF8&psc=1&refRID=Z9HYH8Z0DMHWE7J87NES
With the acid/tomato thing, I have found that once the seasoning is well established I can make chili and other acidic things without any real issues. Same with soap which I'll use after broiling fish in the pan.
I'd say that my dutch oven doesn't get as much use as my skillets, but then if I had a something like this or the oven listed in the original post, at least the lid would be used often. My current one has a self basting lid that is a pain to clean and season.
Really, the lid is a make or break for the thing. If you want to use coals on top, get one with a lip. If you like to see your stuff cook, find one with a glass top. You get the point.
I have Griswold, Wagner, Lodge, and Benjamin & Medwin pans. The Griswold was a gift from someone that doesn't cook in cast iron pans, and the others were purchased new. The Griswold is used the most, Wagner and Lodge both seem to be fine, but I like the handles and the (semi) polished surface of my Wagner pans a bit better. The Benjamin & Medwin pans were purchased new about 20 years ago and are have the worst quality control. I don't believe they are still made.
The one the OP posted doesn't have legs nor a rim to retain coals. It's an indoor/oven model. For real outdoor cooking one needs to have what Lodge calls a "camp oven."
I've made dump cakes for groups of 40 with mine. There are better cakes for sure, but none easier.
Ahhhh... one of 'dem 'der fancy ones. I've only used ones like this outdoors with wood fire and/or charcoal. Not the kind I would imagine working well indoors.
Yes, lots of others would have chipped in to help, if they knew who to contact.
We walked away from the events of April 27th with a few lessons.
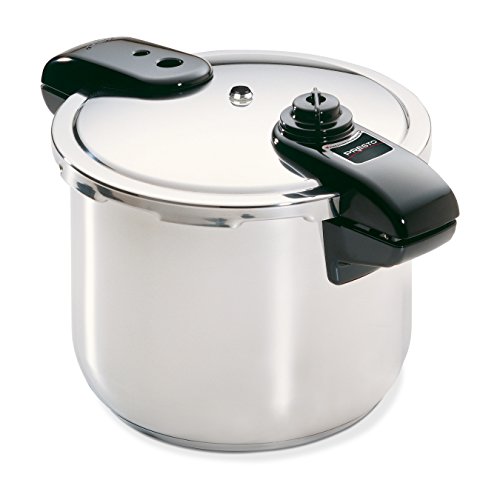
IDK about the elctric models, but Presto makes an very good cooker (nonelectric) for the money. I own both a fagor and a presto and probaly use my presto more, it may not be as "nice" but for almost half the price I dont mind if it gets a scratch or burn...
http://www.amazon.com/Presto-01370-8-Quart-Stainless-Pressure/dp/B0000Z6JIW/ref=sr_1_4?ie=UTF8&qid=1463228260&sr=8-4&keywords=8++quart+pressure+cooker
Just found an 8 quart stainless steel pressure cooker on Amazon knocked down to $50, supposedly originally $100. Presto 01370 8-Quart Stainless Steel Pressure Cooker https://www.amazon.com/dp/B0000Z6JIW/ref=cm_sw_r_cp_apa_i_wz0zDbAPC5KRW
You can usually tell if they're going to be quiet by the absence of a "jiggler" on top - although not a perfect gauge, it works pretty well.
Here's a T-Fal and a Presto that are inexpensive and highly rated.
As always, I have to throw in a recommendation for Hawkins - although their best value is in their hard anodized cookers like this one. The Futura line lets out a fairly constant quiet hiss when the flame is appropriately set. Their more traditional ones (appear like jigglers) don't jiggle, but give a periodic concentrated burst of steam. That's because these are "modified 1st gen" technology. But, I am a fan of the simple lid locking mechanism.
https://www.youtube.com/watch?v=IiCUKA7dDUs
I personally go off Amazon's top rated pressure cooker in an 8 quart size.
Heres a cast iron ( legitimately good sale not kidding look at camelizer) to re-heat it
Ha! I probably have the least manly/cool wishlist ever.
The manliest thing on my list is probably this cast iron skillet.
The manliest thing I've probably ever done was change my tire on the side of the road. I was pretty damn proud :)
Can't go wrong frying with a cast iron! Here is a [large diameter pan.] (https://www.amazon.com/gp/aw/d/B00063RWUM/ref=mp_s_a_1_fkmr0_1?ie=UTF8&qid=1492195064&sr=8-1-fkmr0&pi=AC_SX236_SY340_QL65&keywords=cast+iron+skillet+16+inch+with+lid)
I linked the 15", but there is a 17" as well. You may need a larger diameter heat source for the bigger one though.
I see you have a mash paddle in there, but I don't see a mash tun. Are you going to BIAB or use extract? Then I don't think you need the paddle.
Or do you already have a tun lying around?
If you want an even sweeter all-grain system, consider an extra pot - I'd get one a little oversized, maybe this 36-quart Bayou classic. Then use your smaller pot for hot liquor, and the big pot for boiling a full volume.
You're going to have a hard time boiling 5 gallons of wort in a 20-quart pot. At best I could fit 4.5 gallons in mine, and I had to be very careful for boilovers - I recommend Fermcap-S to help control the foam; 2 drops per gallon as you heat to a boil.
I may have just gotten too cautious with the trub as I was siphoning, but I stopped as soon as everything I was sucking up was extremely cloudy, which could have been about a .5 - 1 gal left still. Also I don't know if 85 degree humid weather in the south caused any faster boil off. But my kettle is definitely a good bit taller than wide (like this one) and I had 12lbs of grain.
I built one and it was pretty easy and not very expensive considering. Warning: The following instructions are probably dangerous. This is what I did, and it's to demonstrate how simple it was to make.
It's maybe two hundred bucks and when combined with an inkbird it makes biab a breeze.
For the fire bowl - A collapsable steamer
http://www.amazon.com/Amco-Collapsible-Steamer-Stainless-Steel/dp/B000Q4N2LO
The grill is going to be trickier, but just about every department/home improvement store sells inexpensive replacement grills that would easily fit in a backpack
Remember that if you're trying to lose weight, it's fibrous veggies you need, not sweet potatoes. The goal is to fill up on the least amount of calories while getting adequate protein to protect your muscle.
You can buy electric steamers. Or maybe one of these will fit in your cooker. http://www.amazon.ca/Amco-10957-Collapsible-Steamer-Stainless/dp/B000Q4N2LO/ref=sr_1_12?s=kitchen&ie=UTF8&qid=1421347817&sr=1-12&keywords=vegetable+steamers
I use a collapsible metal steamer that folds up against the sides of the 6L - like this one
Start simple. The best way to learn to cook for your family is gradually. It'll be trial and error but you'll slowly add dishes to your arsenal. Steaming veggies is also great. Pick up a stainless steel collapsing steamer and you'll have veggies ready in less than ten minutes. I suggest starting with fresh baby carrots, frozen broccoli, frozen peas, frozen corn, frozen string beans. Kids love them and they keep well. Steam them until just tender then remove from heat. Empty water from pot and put vegetables back in. Dress them with butter or olive oil and season with salt & pepper. Once you have that down you can start using soy sauce, sesame oil, garlic powder, parmesan cheese, etc to flavor them. Find a basic chicken soup recipe...then add baby spinach to it after its done...once spinach is the norm switch to kale. Good luck! If you want some more recommendations feel free to PM me.
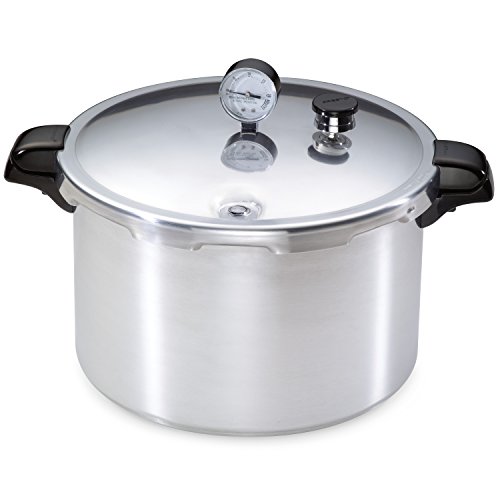
I have a glass top stove and one thing manufacturers are concerned about (with any pot) is if the bottom is bigger than the burner. You don't want the pot to be on the surrounding glass top. Presto canners have a thick metal disc (the one on the left) on the bottom that keeps it the size of the burner but the pot still is large in diameter.
If you can find a larger stock pot (I found one at Costco), that fits your burner size and is no bigger, you could go with that. Canning rings tied together make a good rack on the bottom.
But be warned! You may decide you really like canning and want to get into pressure canning. I do meats and chilies and soups now, when all I used to do were jams and applesauce. You might want to go with the 16 qt Presto as it is able to pressure can and water bath food. If you do get this one, I recommend getting the three piece weight to use instead of the mushroom looking one it comes with. This way you won't have to babysit the dial gauge (which you have to get calibrated every year and can be off right out of the box). If you shop at Wal-Mart you can get one without the dial gauge and not have to get the three piece.
Under $10
Under $20
$$$ I have this guy on my own wishlist! It's good for canning low-acid items like green beans and beets and etc.
As a bonus, here's a fun book: Put 'Em Up. I have it and it's great! Also, you can make things like jam with little sugar by using pectin, or if you aren't into jams and preserves, you can pickle things and can sauces. It's just generally awesome.
I have this one and [this one] (http://www.amazon.com/Presto-1755-16-Quart-Aluminum-Pressure/dp/B000QJJ9NY). The big one is for canning (meat and or low acid vegetables) but I've done huge batches of food in it too.
This is the one we have and we love it. There are cheaper options, but you don't really want to cheap out on something that's essentially a bomb, do you? Also an issue if you're looking at used ones. They may be warped or have bad seals, potentially being dangerous.
Yup, glass jars and reusable plastic lids.
Any thoughts on the Ball plastic lids seen here? I use plastic lids on jars for storing dry goods like coffee. I've used them recently for storing tobacco, since they're only 1 piece lids and I can write on them with a dry erase marker (can do that with a metal lid too, but it's easier to see on white plastic). I was wondering if they are airtight, some say yes, some say no, and I have noticed my tobaccos drying out a bit in them. Your thoughts?
I'm much more amazed by the Toasterbags. Never knew such a thing existed!
Amazon.com link to buy toaster bags: http://www.amazon.com/Set-NoStick-Toast-Toaster-Bags/dp/B0012XGM92
Problem solved.
http://www.amazon.com/Set-NoStick-Toast-Toaster-Bags/dp/B0012XGM92
Enjoy
A collapsible vegetable steamer or a steamer pot combo. Maybe your kitchen set already has this, but my boyfriend hadn't even seen one, ha.
$6.71 for this steamer I need for baby fooooods!
I would think the only advantage a griddle has over a skillet is when you have a really big griddle. That way you can use it for big family cookouts, both indoors and outdoors. Even so, I wasn't about to spend the money on this rectangular cast iron griddle until I found it on sale at TJ Maxx for $20. At that price, I feel I got a great bargain, because I can use it as a baking sheet as well as a grill.
Cheers! If you like the grill pan you may like one of those dual sided griddles (example below). It's great for large volumes or large items - it's what I use for grilled veggies (grill side) or whole fish (flat top). Just heat it to temp in the oven for even heat than transfer to stovetop for cooking.
https://www.amazon.com/Lodge-LDP3-Reversible-9-5-inch-16-75-inch/dp/B002CMLTXG
I was wondering if you'd chime in! I appreciate the info for sure. I'm thinking I'll either buy the 16"x9.5" Lodge rectangular dual griddle (I think I could close the lid with this one) or the 12"x12" Lodge griddle pan instead
It's like a small, difficult to clean, more complicated version of a grill/griddle.
If I had to go stovetop I would use one of either of these:
EDIT: formatting
I spent about 75 or so on amazon, not counting the mill. I picked up a goose neck kettle as well. You can certainly get away with any kettle or pot or whatever you heat your water in, but the goose neck does make it easy to control how much water you pour and where exactly you want it. This is the on I picked up. http://www.amazon.com/gp/product/B005YR0IBU/ref=oh_details_o00_s00_i01
If you can justify, I would go all out. For me personally I had been buying coffee from a shop lately, so if I use my chemex everyday for two months I will break even with what I would have spent at a coffee shop.
If you haven't already, check out /coffee and check out some other opinion and options there!
I think what sets InstantPot apart is the accessories you can get, but don't quote me on that. I purchased a glass lid along with a silicone cover for mine, which I didn't see as readily for the other brands.
That, combined with the stainless steel inner pot (vs. non-stick coating) are what sealed the deal for me.
Most models also have the 'Saute' function, which can sear meats, cook down vegetables, reductions, etc, and move it all over to the slow cook or pressure cook phase, with no loss. Just de-glaze the pan with some liquid after using the saute mode.
Slow cook works fine. There is a clear slow cooker type of lid available as an accessory. I highly recommend that you use it, itmay help overcooking a slow cooker meal.
https://www.amazon.com/Genuine-Instant-Pot-Tempered-Glass/dp/B008FUJ2LK
there is the glass lid to allow for non pressure cooking that wouldn't involve the seal. obviously you wouldn't get the benefits of pressure cooking but it can make your IP more flexible for other tasks.
https://www.amazon.com/dp/B00KYDZHSI/ref=cm_sw_r_other_apa_i_UjVHDbC8VNZJA
I just have a steamer basket like this that I put over a pot of boiling water
Roasting is good, but this also works well http://www.amazon.com/Sunsella-Vegetable-Steamer-Stainless-Steel/dp/B00KYDZHSI/ref=sr_1_3?ie=UTF8&qid=1452469837&sr=8-3&keywords=Steamer+basket
Well, if he can get past the gadgety-ness of it, an electric grill (so he can do it year round!) and rice cooker might be good.
http://www.amazon.com/George-Foreman-GR136B-2-Serving-Classic/dp/B00LU2HXRK/ref=sr_1_2?s=kitchen&ie=UTF8&qid=1449489548&sr=1-2&keywords=george+foreman+grill
http://www.amazon.com/Black-Decker-RC3406-Cooked-Cooker/dp/B000UWD9OW/ref=sr_1_5?s=kitchen&ie=UTF8&qid=1449489490&sr=1-5&keywords=rice+cooker
That with a vegetable steamer (if they don't already have one) opens up the door to lots of easy and healthy meals.
http://www.amazon.com/Sunsella-Vegetable-Steamer-Stainless-Steel/dp/B00KYDZHSI/ref=sr_1_9?s=home-garden&ie=UTF8&qid=1449489827&sr=1-9&keywords=steamer
Also, maybe a simple cookbook could help?
http://www.amazon.com/Complete-Cooking-Two-Cookbook/dp/1936493837/ref=sr_1_4?ie=UTF8&qid=1449463366&sr=8-4&keywords=cooking
As for Blue Apron, I wouldn't recommend it. Their meals are delicious, but most of them have a lot of steps and might be overwhelming for someone that doesn't cook much.
Couple things:
Have your vitamin B levels been tested? Low ferritin is often caused by low B levels preventing absorption of the iron. In that case, iron supplements alone won’t help. Vitamin B is water soluble, which means if you take too much it gets excreted in your urine, so if for some reason you can’t get your levels tested you could just try taking a B supplement to see if it helps.
Vitamin C helps with the absorption of iron. It’s good practice to take some form of vitamin C (orange juice, a supplement) at the same time as your iron supplement. Also a water soluble vitamin.
Have you tried the lucky iron fish? A friend of mine can’t stomach supplements and she says it works well for her. I just got one, haven’t tried it yet: https://www.amazon.com/Lucky-Iron-Fish-cooking-Standard/dp/B01LX5S5FP
I’m thinking dark circles might also be a vitamin D deficiency. Most people in North America are chronically vitamin D deficient. I’m in Canada and I’ve had multiple doctors tell me I should always be taking vitamin D, 2000 IU a day.
Hope this helps!
Look into the Lucky Iron Fish, they sell on Amazon. https://www.amazon.com.au/dp/B01LX5S5FP/ref=cm_sw_r_other_apa_i_0HISDb59YG9GR
If you are trying to do multiple dishes at once, a lot of people on the IP forums recommend using something like these:
https://www.amazon.com/ekovana-Stackable-Stainless-Steamer-Insert/dp/B01M130JJL/ref=sr_1_3?ie=UTF8&qid=1509542983&sr=8-3&keywords=instant+pot+pan
That's the model I have too.
If/when I need to cook more than one thing at the same time (PiP--pot in pot), I'll use various ways and various bowls/containers/steaming baskets/trivets/risers. It's just a matter of figuring out what you have, how much the foods need to be separated, and how everything will fit and balance. Sometimes I'll just cook one thing in the bottom of the inner pot and a second thing on the wire rack that comes with the unit (or on a container on it) or in/on a steamer basket, trivet, etc, with its own legs, or use other risers, or use my stackable bamboo steamers.
https://www.reddit.com/r/instantpot/comments/4iwsd3/which_silicone_steamer_basket_to_choose/d331tff
Some owners in the Instant Pot Community FB group like the 2-part stackable unit called Ekovana Stainless Steel Stacking Inserts. Or some Indian stores/etc carry something similar:
https://www.amazon.com/ekovana-Stackable-Stainless-Pressure-Steamer/dp/B01M130JJL
https://www.facebook.com/groups/InstantPotCommunity/search/?query=Ekovana%20
Any thoughts on using stackable pans like this instead?
If 4 is too low and 5 is too high It sounds like you might need a heat tamer! It's a steel plate that goes over the burner to make it heat your pan more consistently and evenly.
https://www.amazon.com/Nordic-Ware-Tamer-Burner-Plate/dp/B00004W4UJ
On such a large skillet, I'd recommend a heat diffuser. The way it is now, all the heat will be in the middle. You can try something like THIS. It will help spread the heat out. Make sure you get one designed for an electric stove.
I use a heat diffuser, and as a bonus, it's great for heat control when making soups and sauces!
I sometimes use the edge of the flame like others suggest, but I think it gets too hot too fast. I just like the way the slower heat process tastes personally.
Perhaps you can buy or make something like this?
Wow that's gonna be hard. You can go waay 90s, and use microwave egg poachers/bacon racks/griddle/steamer. We had one of those egg poacher things when I was a kid and it worked fine for a long time. I wouldn't expect any of those things to last forever, but they're cheap and should last you at least a couple years.
With those, obviously you could make bacon & eggs. You could also steam cauliflower for cauli mash?
I use basically this to poach my eggs and they turn out beautifully in the microwave
I use the microwave in the mornings to make this! - http://www.amazon.com/Nordic-Ware-Microwave-Cavity-Poacher/dp/B00004W4UR
I love poached eggs in the mornings.
I prefer my eggs poached, but am lazy in the mornings so I bought this gadget a couple years ago. It works wonders.
https://www.amazon.com/gp/aw/d/B00004W4UR/ref=mp_s_a_1_3?ie=UTF8&qid=1502919941&sr=8-3&pi=AC_SX236_SY340_QL65&keywords=microwave+egg+cooker&dpPl=1&dpID=31fckW1XZOL&ref=plSrch
Like the other person said, put the pan in and then rotate it. You can also go with a smaller cast iron pan, like the lodge 8 pan (https://www.amazon.co.uk/dp/B00008GKDG).
As far as the temp, I just wouldn't worry about it. 220 degrees C is only 428 F. The seasoning on pans is typically fine up to higher temperatures than that. 250 C is 482 F. You'd usually only put the pan that high if you are doing a manual seasoning. (Fahrenheit conversions there for reference).
Ah, the great outdoors.
I'd love to have this cast iron skillet off of my 'I could really use' wishlist.
Thank you for giving me motivated to go for a walk today. =)
here’s a link to the cheap lodge pan! Lodge 8 Inch Cast Iron Skillet. Small Pre-Seasoned Skillet for Stovetop, Oven, or Camp Cooking https://www.amazon.com/dp/B00008GKDG/ref=cm_sw_r_cp_api_i_PKoRCb5BYBCQZ
Mondays I can deal with, what I really hate is sunday evenings.
Oh god, I just wanna stay up and play computer games but I have stupid work/school tomorrow nooooo....
This skillet would be nice. I can use it to make delicious, delicious foods...
That or these slippers. I'm pretty sure my apartment doesn't have an insulation...
Cheese Burger Dip:
​
INGREDIENTS
INSTRUCTIONS
TO COOK IN SLOW COOKER:
Lodge cast iron pan.
http://www.amazon.com/Lodge-LCS3-Pre-Seasoned-Cast-Iron-Skillet/dp/B00008GKDJ/ref=sr_1_3?ie=UTF8&qid=1406190835&sr=8-3&keywords=lodge+cast+iron+pan
Nah. You can get a new Lodge 10" for $15.
Lodge makes them in the Tennessee. The are awesome, and cheap too. They come in all shapes and sizes. A good starter is a 10in. Here it is on Amazon for $20. https://www.amazon.com/dp/B00008GKDJ
http://www.amazon.com/dp/B00008GKDJ/ref=wl_it_dp_o_pC_nS_ttl?_encoding=UTF8&colid=WILOBRGT6J2V&coliid=I14JH8NMKXA3YY&psc=1
I second Lodge. I do 80% of all my cooking with these two:
http://www.amazon.com/Lodge-EC6D43-Enameled-Island-6-Quart/dp/B000N501BK
http://www.amazon.com/Lodge-LCS3-Pre-Seasoned-Cast-Iron-Skillet/dp/B00008GKDJ
http://smile.amazon.com/Lodge-LCS3-Pre-Seasoned-Cast-Iron-Skillet/dp/B00008GKDJ
They're $15 on prime. Stop procrastinating and make awesome steaks. Also home fries. My home fries game stepped up dramatically once I started using this bad boy.
I have a 10" Calphalon Cast Iron skillet that I got for like $20 at Target. I have another cast iron skillet 12" that I got from World Market. It's enameled on the outside and bare on the inside and unless I'm cooking eggs just about anything skillet/pan related happens in one of those pans.
I have some calphalon non stick skillets that I use for eggs/fish/etc. But they might get used once for every 20 uses of the cast iron. Aside from that I have some le Crueset enameled cast iron stuff. I have their Wok, and a Dutch Oven, and a big cast iron fish pan like 14" oval shaped thing. It's great for whole fish, but I don't use it for much else.
But if I were starting from scratch it'd probably be something like the following:
Dutch Oven
Stainless 12"
Cast Iron 12"
Cast Iron 10"
Saucier
Multi Pot
Pot 2 qt
I'd possibly get two of the Multi Pots. I know the additional steamer/pasta baskets are redundant but it's nice to have another pot for things like chili or pasta sauce (Although you could use the dutch oven) But with two stainless pots like that you can do sauce in one and pasta in the other. Also looking up another 6-8 qt stock pot it looks like the same Calphalon pot is $75 while the multipot set is $80, and you could always use the additional baskets as colanders.
You'll probably want some decent glassware, casserole dishes, and a few cookie sheets, loaf, and/or lasagna pans to really round out the kitchen. But the pots/pans listed above would be a great place to start. I should get back to work. :)
I had this from Amazon, for $15 you can't go wrong.
I can't recommend a dutch/camping oven enough for campfire cooking. I used to go to summer camp where every meal was dutch oven cooked. A cast iron dutch oven is also a useful tool at home. This is the closest style I could find that you would want for a home/camp use. You need the lip on the lid to hold hot coals, but the legs are pretty unnecessary, especially if you want to use it on a home burner. If you have a gas stove with high grates, then the legs shouldn't get in your way.
The key with dutch oven open fire cooking is watch your food. Otherwise make whatever recipe you'd make at home, just make sure you apply enough oil/fat to the cooking surface. Oven too hot, take some coals off, keep your food moving, it's really not that difficult. If you want to get really fancy, you can bake some pretty epic breads and cobblers in your dutch oven. Just try to use coals, and not burning logs, coals have more stable temperatures, and you are less likely to get smoke and soot in your food. You can use charcoal if you want to be more precise. Each briquette equals fifteen degrees or so, so 15 briquettes on top and 15 on the bottom is 30 * 15 = 450. Enjoy!
If you are going to do a lot of camping with it you may want to look into one that has legs and allows you to put coals on top of the oven too. like this one I have one that I got for Christmas. But I cannot remember the name of it to save my life. Something red. But I LOVE the thing! The legs mean I dont have to worry about a tripod or stand when we use it. We camp at a lot of race tracks so its a little different than camp grounds. We will either dig a hole in the ground and plus the coals and dutch oven in it or I will place it in the tailgate grill we have and use that. Both ways works perfectly!
Made the most killer beef stew while camping last week - dutch ovens are a ton of fun.
Also, it's great to make chili and freeze it, then pop that in your cooler to keep other things warm. Works for meat balls as well, just reheat over a camp stove with a jar of sauce (or make your own). Pesto sauce freezes nicely and can go with all sorts of things. Lastly I highly recommend pre-marinating skewers of meat to grill over a camp fire.
This
lodge 12 inch, 8 qt .
The little recipe book said use about twice as many coals on the lid as on the bottom. But I was using an open fire, and found that I hardly needed any coals on the bottom at all, due to the heat built up on the bed of the fire pit, but I needed as many coals on top as I could possibly fit. It was kind of like a blazing hot shitty game of jenga to deal with, but biscuits turned out awesome!
I have this one
I have been using this one for many years. Normally $60 when in stock:
https://www.amazon.com/Presto-01370-8-Quart-Stainless-Pressure/dp/B0000Z6JIW
This is not an old school version, it has several backup safeties. Here.
Lots of people will say to look at the Instant Pot which is a combination electric pressure cooker/slow cooker/rice cooker ("multi cooker"). I had a bluetooth enabled "IP-SMART" 6qt model of theirs (actually three: first had a safety recall, second was dented on arrival, third still exhibited regulation issues). Lots of people are happy with Instant Pots, but I had a lot of issues with the pressure control being flaky for certain recipes. Additionally, much of what makes slow cookers safe when you are out of the house is their low wattage heaters... typically 250-400W... and low complexity (basically it's a small electric blanket that is wrapped around a very heavy ceramic pot). The Instant Pot has a 1000W heater, and is more complex (microcontroller + a thermocouple), so this negates some of the safety aspects of unattended slow cooking... though it is UL listed and has a thermal fuse in case anything goes wrong.
My recommendation if you are interested in pressure cookers and slow cookers:
$120 for both.. around the ballpark of the cheaper Instant Pots, you gain an additional pot for stove use, pressure cooker is of bigger size, slow cooker is safe unattended and a more conventional shape, and IMO will last longer. You lose automatic rice cooking capabilities but... by a $20-$30 rice cooker and probably get better rice, or just do it on the stovetop.
By the way, no idea what food you like to eat, but these are two of my favorite cookbooks if you are getting started and wanted to build up some experience:
And major shout out to Kenji's (from Seriouseats.com) new book if you want more detailed science information:
This post ended up being much longer than I expected, but those are my recommendations if you are just starting out. ;) The main thing I've learned since beginning to cook is that 90%+ of the recipes online (and even in print) are untested crap, and to look for recipe sources you can trust. The second thing is that a finished recipe is much more dependant on the technique (the steps you use to modify ingredients at specific times, temperatures, and textures) and way less dependent on the ingredients themselves (you can easily sub ingredients for many recipes once the core techniques are understood).
I've had this Presto pressure cooker for almost a year and haven't had any issues with it.
By modern, what do you mean? Is this considered modern: https://www.amazon.com/gp/aw/d/B0000Z6JIW/ref=ox_sc_act_image_3?smid=ATVPDKIKX0DER&psc=1
I'd definitely second the recommendation for a pressure cooker. Also consider the plain old non-electronic kind. This is what I have: https://smile.amazon.com/gp/product/B0000Z6JIW
Electric pressure cookers cook at somewhat lower pressures, so it takes longer. Also, it's about 1/2 the price of the 8 quart Instant Pot.
To expand on this a bit...
Definitely check out Craigslist and/or call Goodwill/SA/thrift shops in your area. Many times they have cast iron stock for next to nothing. Cast iron is cast iron... Unless it's cracked, it's fine. Nothing some oven cleaner and lard/shortening won't turn back to brand new.
I've got quite a few sizes, but I find that I use my behemoth Lodge:
http://www.amazon.com/Lodge-L14SK3-Pre-Seasoned-Cast-Iron-Skillet/dp/B00063RWUM/ref=sr_1_1?ie=UTF8&qid=1395461461&sr=8-1&keywords=lodge+skillet+16
More than anything. Great size for two ribeyes, big enough to brown 8# pork butt before going into the slow cooker, and you can cook an entire breakfast (bacon, eggs and hash) in one pan. It also keeps stovetop spatter to a minimum when doing burgers due to it's size.
It also doubles as a formidable weapon. :)
For cooking steaks... My way is a bit different than /u/AliasHandler, and more like Alton Brown's. Kosher salt steaks 45m-1h before and keep on wire rack. Toss pan in 500 degree oven. Oil steaks with canola oil. Pull pan, set on hot burner. Toss in steaks, sear for 1.5 minutes or so. Flip, add a pat of butter on top, shove back in oven. Cook another 2-5 minutes depending on thickness and doneness desired. Rest 7-10 minutes.
You want that pan HOT. In the summer I'll put the cast in the grill, as I can get it up to 600+ degrees, and get even better sear/caramelization on the outside. After doing it in cast iron, you'll never want a gas-grill-grate cooked steak again. :)
Edit - And please understand that rare doesn't equal raw. Don't be afraid of the pink. ;)
Cast iron! Worth every penny.
I have a lodge 15 inch cast iron skillet as my largest skillet. It's huge and weighs about 10 lbs, but it's fantastic for searing a meal's worth of chicken and finishing in the oven.
Other options that fit are 2 porterhouse steaks or 9 -10 strips of bacon. I rarely use it to cook entirely on the stove top since my electric range only covers 12 inches. Whatever I make ends up in the oven.
Definitely worth it for being my favorite piece, and one that generates the most conversation when guests see me using it!
http://www.amazon.com/Lodge-L14SK3-Pre-Seasoned-Cast-Iron-Skillet/dp/B00063RWUM/ref=sr_1_1?ie=UTF8&qid=1420409798&sr=8-1&keywords=lodge+15
not sure if it's allowed or not but here it is
Lodge L14SK3 Cast Iron Skillet, 15" https://www.amazon.com/dp/B00063RWUM/ref=cm_sw_r_cp_api_i_sRkZDbY8YK1AP
15 inch Lodge skillet under $40...
https://www.amazon.com/Lodge-L8SK3-Skillet-Pre-Seasoned-10-25-inch/dp/B00063RWUM/ref=sr_1_1?s=kitchen&ie=UTF8&qid=1478199914&sr=1-1&keywords=lodge%2Bcast%2Biron&th=1
Cool! Welcome!
The Mr. Beer kits are a great inexpensive way to find out if it's going to interest you. If you like it, here's what I would look into:
As far as tips for starting here: Sanitize, Sanitize. Patience. Time. Sanitize.
Have fun!!
I've brewed maybe 20 all grain batches in one of these and it's held up great, especially given the price.
http://www.amazon.com/Bayou-Classic-1036-Stainless-Steamer/dp/B0009JXYUA/
Yeah, for a typical full boil I start with 6.5g and wind up with a little more than 5g after 60 minutes. I have this 9g pot for $72 and I absolutely love it.
Wort chiller or build an AG set up. I imagine I got my wort chiller before I went all grain or at the same time. Can't recall. For AG I used this. http://www.thescrewybrewer.com/2010/12/screwys-5-gallon-mash-tun.html some of the part number changed like 3-4 years ago, so now probably even more so. I bought an 40 qt aluminum kettle for about the cost of this, but I would have rather bought this. https://www.amazon.com/dp/B0009JXYUA/
So, just to clarify, most homebrewers will start out by doing a partial boil. This basically means that you will only be boiling ~3 gallons of water to brew the beer, and then adding cool water to your wort once it is in the primary before you pitch the yeast. Because of this, most homebrewers will start with a 4 gallon kettle and then upgrade to a bigger one later on down the road.
I did something very similar to Ardentfrost. I definitely agree with what he's saying about kettles. On one hand, you're trying to save money for your first batch by not buying a 7.5 gallon kettle (and wort chiller). On the other hand, you don't want to have to buy a 4 gallon kettle and then a 7.5 gallon kettle in a few months. I ended up buying a 3 gallon Graniteware kettle, a 7.5 gallon aluminum kettle from craigslist, and finally a 36 qt. stainless from amazon. Fortunately, my first two pots were only $20 apiece, and I can probably sell them both on craigslist for just as much.
Like Ardentfrost said, my 36 qt. kettle is too big for an ice bath in my sink, but I already have a wort chiller.
Here are some pots to consider:
Here are some turkey fryers to consider if you want to make a bigger investment.
Both Aluminum and Stainless steel make great pots. Stainless takes a bit to heat up, but holds up really well to Clean In Place cleaners and oxygen based cleaners.
Aluminum has to have a passive oxidized layer built up on it. Just fill the pot up, boil water in it for 30 minutes and the pot is good to go for the rest of its life. The only negative is you can't use Clean In Place/Oxygen/Bleach based cleaner on it. Some warm, non-scented soap works nicely though.
Good luck.
No spigot versions of the 36 and 44 quart pots are on a heck of a sale too. 36 is $52.61 and the 44 is $67.70
44 should be perfect for 5 gallon BIAB.
https://www.amazon.com/gp/aw/d/B0009JXYUA/ref=mp_s_a_1_19?ie=UTF8&qid=1468299288&sr=8-19&pi=AC_SX236_SY340_QL65&keywords=bayou+classic&dpPl=1&dpID=41vXX4VwKKL&ref=plSrch
Something is seriously funky with your link.
That looks nice, but I'm really interested in the valves for ease of transfer. Also, I've got enough existing kettles lying around that if I add one more I don't have to learn this BIAB process.
Here is the desktop version of your link
I would stay away from that starter kit. Not because its bad per se but its not worth 180 bucks. And I prefer plastic buckets over glass carboys. If you want you can convert a cooler to a mash tun but I would start with BIAB and you then can increase the complexity of your system as you see fit.
Here is my recommendation of equipment. I am function over form driven when selecting my gear. I find that these items serve their purpose at a reasonable price and are of good quality and unless you want to start doing 15 gallon batches they should serve you well.
Starter Kit
KAB4 Burner
44qt Pot with basket
Ball Valve for Kettle
Thermometer
Bag for BIAB
I just bought this kettle. As a BIAB brewer the insert is worth the extra money to me.
I would strongly caution against a 35 quart pot. The Bayou Classic 44 quart (11 gallon) pot is only a little more, and it's of dimensions more ameniable to brewing (tall, rather than squat). If you plan to migrate to BiaB, the version with the basket is quite useful; you'll be able to fire your heat source without worrying about scorching the bag.
For ingredients, I would recommend looking around for a LHBS (local homebrew shop). You'll likely not save much money ordering those online, due to their weight/cost ratio, and a LHBS is often the centre of your local community of homebrewers.
With regard to literature, my bible is John Palmer's How To Brew. You can also read the first edition online, but much has been learnt since that was published and the latest edition has current best practices.
That equipment kit is decent, but there are a lot of things in it you'll probably wish you hadn't bought.
You will want:
I just bought this kettle to use with a BIAB setup. bayou classic 44qt
I want to add a Ball Valve, Thermometer, and sight glass to it. Where should I get my equipment at??
Thanks for the reply!
That option seems like a good one. I'm still convinced that there's a way to make a folding directional 2.4GHz antenna that'd be packable, though...I could probably build a Yagi myself. I'm also thinking of some sort of folding quasi-parabola, sort of like those collapsible steaming baskets: https://www.amazon.com/Amco-Stainless-Steel-Collapsible-Steamer/dp/B000Q4N2LO
Get one of these, use it to steam your veggies until they are soft, and sprinkle some of this on em.
So. Friggin. Good.
The Presto 23 qt and 16 qt are both fine canners, and $80 and $70 respectively. I'd spend the extra money and get the bigger one.
This is what I have. Liking it so far.
Do you think 23 qt is too much for a starter pot? I saw that there was also a 16 quart pot, but it looks like it's roughly the same circumference, just shorter, so it would have the same heating problem as the 23 qt, if I understand correctly (though obviously less weight).
My first strain was z-strain. I think it makes a good one for beginners because it seems to colonize very quickly. However, just about any cube is going to be pretty easy to work with. PF tek is a good place to start, but don't be intimidated by grain and bulk. It's not much more complicated and you get yields that are orders of magnitude greater in volume. The biggest advantage of PF tek, IMHO, is not having to buy a pressure cooker.
If you do buy a pressure cooker, I reccomend this one at first. http://www.amazon.com/Presto-1755-16-Quart-Aluminum-Pressure/dp/B000QJJ9NY
It holds 7 quart jars at a time, which is good volume for the cost.
I also try to minimize leaving the house. I like DIY projects so I made airlocks using plastic mason jar lids.
You can also get the entire mason jar fermenting lids pre-fab ready to go
I got silicone seals to make them airtight.
I drilled 9/16" holes and inserted plastic grommets.
Then I use 3 piece acrylic airlocks. I think that 3piece makes it easier to clean and acrylic is sturdier than plastic but that's just me. They make plastic ones.
I found this to be pretty cost-effective especially since I don't already own any reCAP lids. It was an easy-peasy project. Just be sure to clamp the lids to something otherwise you can't drill proper holes.
I am super happy with them; they work great and I didn't have to leave the house ;)
Edited because I hit "save" prematurely
I use these lids on quart jars for sous vide yogurt with great success:
https://www.amazon.com/Ball-Wide-Mouth-Plastic-Storage-8-Count/dp/B000SSN3L2
Just keep them above the water line like this:
https://dl.dropboxusercontent.com/u/26442386/Yogurt%20with%20Plastic%20lids.jpg
Hand (finger) tighten regular lids for creme brule and submerge like this:
https://dl.dropboxusercontent.com/u/26442386/SVCB.jpg
Dude I just made some for like $20 for 8 lids and still have a ton left over I can make. All you need is a drill to make the holes in the lid and boom professional made jars. Picture of the lid. http://imgur.com/gallery/wqLtyFS
Links to products:
https://www.amazon.com/dp/B000SSN3L2/ref=cm_sw_r_cp_apa_i_S80mDbEPKHC9Y
https://www.amazon.com/dp/B07J5N2JJH/ref=cm_sw_r_cp_apa_i_d90mDbMG9WXKG
https://www.amazon.com/dp/B07FJTZSVL/ref=cm_sw_r_cp_apa_i_t90mDbZRZMTXN
Experience tip- these lids wear out and rust after about 5-10 cycles. Next go around buy all plastic lids instead. They don’t rust, are PC safe and are much easier to unscrew when you’re removing the lids to spawn IMO.
Something like this
I have glass containers similar to the Anchor Hocking, but from a competing brand. I agree, they're very easy to clean and it's nice being able to see what's inside without opening them.
I also use glass wide mouth pint canning jars with plastic lids. They fit in my lunch box better than the containers above.
http://www.amazon.ca/Set-NoStick-Toast-Toaster-Bags/dp/B0012XGM92
You just need some of these babies. Problem solved!
Or these
Personally, this is my favorite way to reheat pizza. Toaster Bags
http://www.amazon.com/gp/aw/d/B0012XGM92/ref=redir_mdp_mobile/175-7791405-6566550
I bought these (even cheaper) a few months ago. They're still working fine.
https://www.amazon.com/Norpro-Stainless-Steel-Vegetable-Steamer/dp/B001FBCP7O
This works outstanding for me. I can do 10 eggs at a time.
Norpro 175 Stainless Steel Vegetable Steamer https://www.amazon.com/dp/B001FBCP7O
As an avid veggie-eater, here's a few pointers:
a. Steaming is very simple, just get as steamer basket (something like this, they're available at basically any store with home goods). Cut up some vegetables, put them in the steamer, put the steamer in a pot with just enough water to not quite touch the bottom of the steamer, put the lid on and let them cook. Poke them with a fork after a few minutes, and if the fork goes in with some resistance, it's done. Don't overcook. In my opinion, the best veggies to steam are broccoli, green beans, carrots, asparagus, and spinach.
b. Roasting takes a little more work, but is super delicious. You just need an oven-safe pan (a baking pan, a cookie sheet, something like that) and some oil (I usually use olive oil personally). Good roasting veggies include brussels sprouts, beets, carrots, asparagus, cauliflower, zucchini, and squash. Drizzle cut-up veggies with a bit of oil (don't go overboard or they'll get oily and soggy) and the seasoning of your choice (salt and pepper, seasoning salt, balsamic vinegar, or herbs like thyme, rosemary, and sage, just for starters), bake at 375F until they're done (same fork test as steaming).
c. Stir-frying. Good for leafy greens like spinach, kale, Swiss chard, and cabbage, as well as pea pods, bell peppers, green beans, and most other green veggies. Put a bit of oil in a pan, set to medium or medium-high heat, toss in veggies, stir around until veggies are done, season to taste (tastes good with some sesame oil and soy sauce).
Hope that helps a bit!
You can pick up one of these at pretty much any grocery store or supermarket I've ever seen. You can steam anything with it. Just drop it into a pot of shallow boiling water and cover.
As I've already said elsewhere here, skip the wok, go to a restaurant supply store, and get a carbon steel skillet. They're very much like woks, in that they're thin, cheap, and made from carbon steel. The important difference is that it's shaped flat on the bottom to work on a normal range, rather than round like a big metal bowl. You don't need a wok spatula, use whatever utensil you like. I'm partial to silicone tipped tongs.
A rice cooker is nice but making rice on the stove isn't that difficult. Something to pick up if you can, but not a priority or something to worry about not having. Calling them "very multi-purpose" is down-right dishonest. Yeah you can cook a poofy pan cake in it, and you might once, and yes, you can steam a small amount of stuff in it, but really it's for rice.
It's good to have some extra glass or strainless steel bowls lying around for prep.
If you like fish, I'd recommend this recipe: http://www.eatingwell.com/recipes/ginger_steamed_fish_with_troys_hana_style_sauce.html.
I recently made it with my SO. It was pretty easy, and we loved it. Instead of bass, we went with cod. You don't need a bamboo steamer. I used a metal steamer that I already had for steaming veggies. You can find one on Amazon. I highly recommend it as a kitchen essential. http://www.amazon.com/Norpro-175-Stainless-Vegetable-Steamer/dp/B001FBCP7O/
You could use frozen but I like to buy fresh so that it steams faster. If you don't have a steamer you can get one REALLY really cheap at any home/kitchen store, they're like $5-7. Here's one on Amazon as an example:
http://www.amazon.com/Norpro-175-Stainless-Vegetable-Steamer/dp/B001FBCP7O/ref=sr_1_1?s=kitchen&ie=UTF8&qid=1413872936&sr=1-1
If you absolutely can't get one, boiling is OK... just put the vegetables so that they're maybe half-submerged in water. Cover and cook on medium heat for a bit. Check every so often. Depending on how soft you want your veggies it could take 5-15 mins.
Another option is the microwaveable veggie bags, though personally I can't eat THAT much in one sitting.
30 seconds: Put an inch of water water in the pot, start the fire, put that steamer rack on top of it, put your vegetables in, close the lid.
Wait 5-10 minutes, eat the vegetables.
30 seconds: Dump the water out, rinse the pot and rack once. Done.
It's just easy as using a microwave, only difference is you use a pot and steamer rack instead of a bowl.
get rid of the skin before you run it through the food mill and everthing will be fine. if you have a lot of tomatoes, set up a steamer while you work the mill. as an idea: a boiling pot with water and a steamer basket.
try this:
http://www.amazon.com/Norpro-175-Stainless-Vegetable-Steamer/dp/B001FBCP7O/ref=sr_1_7?ie=UTF8&qid=1426356535&sr=8-7&keywords=steam+cooking
just put frozen vegs in, eggs on top, ready to go
you can also add potatoes but you to chop those a bit first because otherwise they are not done at the same time
staple meal of mine because its easy to cook and clean (just single pot) and u dont have to watch it plus lots of veggies and protein
edit: does not work w/ frozen fish for some reason, the boiling water spills over (not sure why, has to be the fish obv)
I use a cast iron grill pan (here)on the shelf below my dutch oven to absorb the direct heat produced by my gas oven. Also, make sure your dutch oven is on the highest shelf possible/as far away from the heat source as possible. Both of these two tips helped the bottom crust on my loaves immensely.
I put this on top of my Coleman stove and it works well.
https://www.amazon.com/Lodge-Reversible-Griddle-Combo-Double-Sided/dp/B002CMLTXG
You can't go wrong with lodge. My new stove top grill/griddle only set me back $25.
http://www.amazon.com/Lodge-Double-Reversible-Grill-Griddle/dp/B002CMLTXG
Amazon has them for ~$30, though I would recommend checking out your local kitchen supply stores. I see them for less very frequently.
These work great. The only thing I would suggest is that you get a two burner stovetop griddle. They're less than $50, are reversible (flat top option) and heat up very quickly. Possibly one of the most useful kitchen investments I've ever made.
Link
I can't find the one that I have because it's so old, but here is one that is similar cast iron griddle. It is reversible and the grill side comes in handle at times. Works great on a flat stove top.
You might find a griddle that would suit you. https://www.amazon.com/gp/product/B002CMLTXG/ref=s9_acsd_simh_hd_bw_b3nYjEp_c_x_w?pf_rd_m=ATVPDKIKX0DER&pf_rd_s=merchandised-search-3&pf_rd_r=WA7GTKXZD77RQ6W1NE3V&pf_rd_t=101&pf_rd_p=a739796d-be58-56b4-9c29-d4cc8a594442&pf_rd_i=3480716011
I have this and I love it:
http://www.amazon.com/gp/product/B002CMLTXG/ref=oh_details_o09_s00_i00?ie=UTF8&psc=1
As others have mentioned, this thing is pretty much on my stove 24/7. Great for all breakfast foods, making paninis, and grilling meat. When I do steak (which I do on the flat side for optimal heat transfer), it'll get smokey enough to where I need to disable all the detectors in my house first. I'll let the thing heat up for about 10 minutes on high before putting the steak on. Of course, this is because I like my steak crusty on the outside while still rare to medium rare on the inside.
I use this teapot warmer, and kettle. I make my own candles to get the temperatures where I want them, depending on tea type.
https://www.amazon.com/gp/product/B00IMNRO3S/ref=oh_aui_search_detailpage?ie=UTF8&psc=1
https://www.amazon.com/Bonavita-BV3825ST-1-Liter-Stovetop-Kettle/dp/B005YR0IBU/ref=sr_1_4?ie=UTF8&qid=1509732268&sr=8-4&keywords=bonavita+kettle
You could also buy the non-gooseneck electric kettle and a stovetop gooseneck kettle for cheaper
http://www.amazon.com/Bonavita-1-7-Liter-Variable-Temperature-Electric/dp/B008YE3RNG/ref=sr_1_3?ie=UTF8&qid=1408858182&sr=8-3&keywords=bonavita+electric+kettle
http://www.amazon.com/Bonavita-BV3825ST-1-Liter-Stovetop-Kettle/dp/B005YR0IBU/ref=pd_sbs_k_10?ie=UTF8&refRID=1PN1SM6HD90A92STTF8V
http://www.amazon.com/Bonavita-BV3825ST-1-Liter-Stovetop-Kettle/dp/B005YR0IBU/ref=sr_1_2?ie=UTF8&qid=1331318078&sr=8-2
I got one yesterday too!
Welcome to the coffee world fellow Utahn!
As others have said, either the Aeropress or a pour-over cone would be my recommendation for what to start with. Pick up a gooseneck kettle to use with either.
Get a decent burr grinder. A hand-crank grinder works really well if you are only making one or two cups at a time.
As for the coffee beans themselves, I'm not sure of the selection of roasters in Utah county but next time you are in Salt Lake make sure to go to Publik. If you can't find anything of quality in your hometown, a number of roasters ship coffee or have subscription services (Sweet Bloom out of Denver is really good) or you can check out /r/roasting and roast your own beans.
P.S. You will notice that most people recommend that you brew coffee with 205° F water. Lucky for you, water boils at 204° F at your elevation, so don't worry about a temp-controlled kettle or anything, just boil and brew.
The one above is $49.99. The stovetop version is $29.99: Bonavita BV3825ST 1-Liter Stovetop Kettle.
Definitely, yeah. Temp control is really not as important as pour control in this arena, so make sure to look at one of these or one of these if you want to save some money.
I have some pretty weird hobbies (knives and knife sharpening included). I actually don't remember watching videos specifically about roasting in a Whirley Pop, but I think this video is fine, although it's also sort of a plug for a company. I also stir way more than this person.
I would recommend just starting with figuring out the brewing process of coffee before diving into the roasting side of things. A very quick turn-off for a lot of people is the sort of laxative effect coffee has on people, and it's quite bad for some people.
The "minimum" brewing equipment I would recommend is a Melitta pour-over cone, gooseneck kettle (a beaker would probably also work), Hario hand grinder (buying pre-ground is okay, but not great), and scale. If you live in the Bay Area or Boston area, I have recommendations on where to buy beans. If you're anywhere else, I can suggest mail-ordering beans or other nationally supplied coffees.
Bonavita Gooseneck Kettle, 1L - $30 For a kettle which allows very accurate pours. A gooseneck-style kettle is practically a necessity for any pour-over setup such as Chemex or V60
I bourght this:
http://www.amazon.co.uk/Bonavita-1-Litre-Stovetop-Pouring-Kettle/dp/B005YR0IBU/ref=sr_1_3?ie=UTF8&qid=1373529835&sr=8-3&keywords=pouring+kettle
Stil not cheep cheep, but almost half price of the Hario kettle incl. freight to my contry (Denmark).
How nice of you to research your gift. Your choice will depend largely upon how many people she usually cooks for.
I have the 8 quart Ultra (I usually feed 9-10 people) and don't regret it at all. This is the only version with the knob and I love how easy and intuitive it is.
On Amazon, if you click on an Instant Pot and scroll down, there are charts comparing them. Like here.
I regularly use the glass lid you have to purchase separately. There are other gadgets you can get for it, like stackable pots and extra sealing rings (because yours will eventually smell bad), among other things.
You can just type in "Instant Pot Accessories" on Amazon and see what is available.
$35 regular price in Canada, haha. Lucky it's on sale right now!
I had never used a pressure cooker before, but when I made the decision to get one, I decided I was getting everything I thought I might need, so I bought the 6 qt ultra, an accessory kit, glass lid and a cookbook.
I've fallen in love with this thing. The first thing I made was hard boiled eggs for deviled eggs. We've also made barbecue chicken wings, rice, chili, and popcorn.
Originally I'd have recommended a steamer. However, you can get one of these and then go with the pressure cooker. Looks like there's inserts for it to do steaming as well, so there's that also.
http://www.amazon.com/Sunsella-Vegetable-Steamer-Stainless-Steel/dp/B00KYDZHSI
Steam your eggs!
Of course you can buy a dedicated electric eggcooker, but it’s exactly same as steaming...
Get a steam basket, maybe like this and use it to steam your eggs. I steam for exactly six minutes, but try out your own preference!
Cold water after steaming, easy to peal!
This is a steamer trivet
http://www.amazon.com/gp/aw/d/B00KYDZHSI/ref=mp_s_a_1_19?qid=1463282197&sr=8-19-spons&pi=AC_SX236_SY340_QL65&keywords=trivet+steamer&psc=1
But you could use a towel , aluminum foil ..basically anything the keeps it from actually sitting on the bottom of the pot ..and just enough liquid to cover it
Use an iron fish! Indefinite use!
https://www.amazon.com/Iron-Lucky-Fish-alternative-supplements/dp/B01LX5S5FP
Original post: Dug this up at a thrift store. It had some vintage photos of it, with it, but what is it?
Comments:
Author: scoobytardis Body: It’s a reproduction Roman coin. My ex’s mother had a whole set of them that she kept on the coffee table. The size is exaggerated(obviously) and the patina is part of the manufacturing process.
Author: harveym8 Body: Really??? That's so bizarre
Author: scoobytardis Body: I always thought the idea was interesting, but making it so hard to see the detail in the coin kinda defeats the purpose imho. Still a cool find. I haven’t seen any around in years.
Author: PCsNBaseball Body: Why would it be so huge tho?
Author: None Body: [removed]
Author: None Body: [removed]
Author: None Body: [removed]
Author: None Body: [removed]
Author: None Body: [removed]
Author: -ishouldgethelp- Body: Probably to help display more detail
Author: None Body: [removed]
Author: None Body: [removed]
Author: None Body: [removed]
Author: Skystrike7 Body: I've got an actual roman coin. You cannot see a speck of detail on most of them without a magnifying glass and lights because of the extreme wear/corrosion. The detail is highly exaggerated, in actuality, even in this picture.
Author: FittyTheBone Body: I got offered “2000-year-old coin!” at every bus stop in Turkey. Still have one of them! Even though they’re bogus, it’s a cool little keepsake that’s worth the few dollars I paid for it.
Author: cjohnsto1594 Body: My dad has a shield like that and it is pretty cool. He hung it on his wall
Author: NortWind Body: Looks like an oversize reproduction of a roman coin.
Author: plipyplop Body: That's good to hear. From the thumbnail, at first I was like: "Oh no! Someone else found a cluster submunition!"
Author: None Body: [removed]
Author: None Body: [removed]
Author: None Body: [removed]
Author: None Body: [removed]
Author: None Body: [removed]
Author: None Body: [removed]
Author: nigelolympia Body: My thought was one of these iron adding cooking things.
Author: a_lane515 Body: I had no idea these existed. Does it work? It seems so strange.
Author: nigelolympia Body: Supposedly they do. I know using cast iron cookware does the same thing.
Author: BrownWhiskey Body: I thought for sure this was psuedoscience but just read Geerligs PD, et al. J Hum Nutr Diet. 2003 and it seems there's some legitimacy to it. Their research suggests that introduction of iron cookware to developing countries without the resources could reduce the rate of anemia. I'm truly surprised.
----
^Bugs
I've heard good things about this product. Instead of cooking, you can just drink the water it's boiled in. I haven't tried it myself but it's cheaper than new cookware
Iron deficiency anemia solution, The Lucky Iron Fish, Natural alternative to iron supplements for anemia with NO adverse side effects; iron supplement that is Organic, Gluten free and Vegan friendly https://www.amazon.com/dp/B01LX5S5FP/ref=cm_sw_r_cp_api_AoXHzbFEG3FTT
I’m no professional but that sounds like me when I’m anemic. Iron supplements come in lots of forms but can be a bit of a hassle to take cause they make your stomach feel like a ton of nickels and they turn your stool black. This is not an excuse not to take them, just be prepared and take precautions. I take my iron before bed so these feelings pass in the night. Take iron supplements with vitamin c to aid absorption (I always take them with a glass of OJ) and never at the same time as calcium supplements or coffee. And you have to take lots (my Dr says three tabs a day). Liquid supplements are a little easier on the body but expensive and a little harder to find. Other things such as cooking on cast iron or placing an iron fish (Amazon link below) in your liquid food can up the iron in your diet. There are injections and blood transfusions available if you really can’t get enough iron through diet and supplements so it is worth going to your doctor to work out a treatment plan.
https://www.amazon.ca/Lucky-Iron-Fish-cooking-Standard/dp/B01LX5S5FP/ref=mp_s_a_1_1_sspa?adgrpid=69593117028&hvadid=310058151569&hvdev=m&hvlocphy=1002113&hvnetw=g&hvpos=1t3&hvqmt=e&hvrand=11968491825039289426&hvtargid=kwd-298840764201&keywords=iron+fish&qid=1554549380&s=gateway&sr=8-1-spons&psc=1&smid=A24GX4JT8SAG0Q
Look, it is a proven fact that pressure cooking preserves heat sensitive nutrients better than other forms due to vastly reduced cooking times.
Overall food is softer/well cooked, specially with lentils, legumes and beans (I follow a plant based diet).
I actually like that I can cook really faster and tastier with pressure cookers. Reduced gas bills too. Specially with pan racks it is so easy to do multiple things at once.
I actually use one of these types of cookers too. No fancy bells/whistles. Cheap and cheerful, with built in safety.
Stackable Stainless Steel Pressure Cooker Steamer Insert Pans
You probably want THESE
You can also Google stainless steel stackers for pressure cookers
Do you cook the tomato sauce in one of these:
https://www.amazon.com/ekovana-Stackable-Stainless-Steamer-Insert/dp/B01M130JJL/ref=sr_1_2?s=home-garden&ie=UTF8&qid=1505868413&sr=1-2&keywords=instant+pot+in+pot
This solves the scratching issue while remaining cheaper.
The fryer you listed is 12.4 pounds. The dutch oven is 13.4. I'm not sure how this is an issue.
Edit: That's a bit misleading. Your appliance is lying to you by nature of how it works. The target temperature and the actual temperature vary by a substantial margin. Grab a kitchen thermometer and check it out. That's the struggle with the appliance versions, anything short of a professional level fryer is not accurate. Your 375 setting could be anything from 350 to 400, and you would never know with just a little light that's on or off. Add in that it achieves this by cycling on and off rather than a steady level of heat being supplied, and you've got a recipe for soggy greasy food.
Or you can:
700 calories of delicious and nutritious breakfast that I can eat in the car on the way to work.
Time: 5 min (I've got it down to ~4 min, actually), which is less time than I was spending in the drive-thru every morning getting a pair of sausage mcmuffins and hashbrowns.
Cost: $1.25
The "time to cook" excuse is bullshit we tell ourselves because we'd rather spend equal or more time waiting for someone else to make us food that's tastier but not as healthy for us - and almost always more expensive.
Let alone the time savings if you pre-cook a large batch of meals each week or two. Sure, you'll have less variety, but the food can still be delicious, nutritious, and more affordable.
Most modern pressure cookers don't have a rocker weight.
EDIT:
Seriously, they don't.
Where you see rocker weights is on cheaper, older style aluminum ones and on larger pressure canners. Modern pressure cookers have moved to the easier to manage spring valves.
I would start with 6 gallon bucket $8.50 compared to morebeer buy a spigot and airlock as a starting point. Look for a sale on a 7 gallon pot and I think your good.
HERE! toaster bags. my cousins showed them to me when I visted them and my eyes have now been opened. The person who made these is a genius, much more so than the idiots turning their toaster on its side.
http://www.amazon.com/Set-NoStick-Toast-Toaster-Bags/dp/B0012XGM92
these things are awesome for doing this thing!
Does it flip open and closed? It looks like a vegetable strainer
https://www.amazon.com/Stainless-Vegetable-Steamer-Basket-Handle/dp/B00KYDZHSI/ref=sr_1_4?keywords=vegetable+strainer&qid=1574193704&sr=8-4