(Part 3) Best pipe fittings & pipes according to redditors
We found 487 Reddit comments discussing the best pipe fittings & pipes. We ranked the 323 resulting products by number of redditors who mentioned them. Here are the products ranked 41-60. You can also go back to the previous section.


i wouldn't recommend using a blowbag unless you really know what you're doing. you could risk seriously injuring yourself, damaging your plumbing, or flooding your house. but here it is they make them for all different pipe sizes
These are GREAT connetors. They come in multiple diameter sizes too.
Here is the proper tubing too. Again they come in different diameters.
I just redid my kitchen as well so I bought one of these and one of these to clean up the ends, to make sure I got a clean cut every time. If you think you might do more pex work in future, probably worth dropping $20 to get them.
But if this is a one time thing, pex is pretty soft - you could use a hacksaw, or even a utility knife, and just clean up the cut with the knife afterward. Key is to make sure your cut is perpendicular to the pipe, and that there are NO stray bits of plastic around the rim at the cut end Put a little bevel on the end with a knife for best results. And make a little mark 1" from the end of the pipe, so you can make sure it is inserted all the way into the fitting.
Water hammer possibly. Look into a water hammer arrester.
This worked for me when I had the same issue.
Sioux Chief Mfg 660-TK Female Swivel Ballcock Nut by Male Ballcock Thread Mini Rester https://www.amazon.com/dp/B000JRGAMQ/ref=cm_sw_r_cp_api_-t9Izb3WE1SE3
What @boetie69 said, BUT: https://www.amazon.com/dp/B000I19AIE/. <-- if you have no copper soldering skills, this guy should help you out. Now, as a plumber, something like this makes me wince, but not everybody can afford a plumber or do the job the right way.
Hardware stores sell a close cell foam that's gray for insulating pipes to reduce temperature swings or prevent the from freezing.
Search "Gray water line insulation" https://www.amazon.com/Insulation-Thickness-Nitrile-Rubber-Resistant/dp/B07MTJ9R8Y
As others have said, just say NO to saddle taps.
Depending on where the fridge is in relation to the kitchen sink, you could T with one of these under the sink, it goes between the valve and faucet hose. https://www.amazon.com/dp/B07M8JNNNM/ref=cm_sw_r_cp_apa_i_5cqFDbB2P10Z1
Then the poly line can be under/behind/in the cabinets if needed. If the basement is unfinished running down across and back up would be best. You can pull the toe kick and run under the cabinets if you don't want it they them.
If going thru the cabinets keep it as far back as you can, put a trim piece to taste over it. This helps protect it and make it look a little better.
Is there any particular reason you're using that glass? It looks like its already fractured, and may be jagged around the edges. From the looks of it, you may be better off using a brass bowlpiece, it wouldn't look too bad either. You can usually get them at headshops. That way you would just bore a hole slightly smaller then the bowl and screw it in, no adhesive required. Something like this is what im think of: https://www.amazon.com/TWO-Standard-Pipe-Bowls-BRASS/dp/B005MGU5TI
Anywho, good luck!
This pipe is fine. Haters are going to hate on anything that isn't glass, when there are a great many cheaper materials that work perfectly for pipe making. I have been using brass and brass pipe screens for years, and have had no problems with it. Brass fittings are lead free, and that's the only legitimate concern. Otherwise, the pipe may get a little hot, but it has never got too hot for me to not be able to touch the pipe. I do have one recommendation, though. Get one of these off of Amazon. It's a brass bowl that will screw into that pipe and then you'll have a real bowl. You will probably need some Brass Pipe Screens for it too, but none of this is expensive, and the brass bowl comes in a set of 2, so you can have two pipes. I've had the same pipe for over a year, and it still works perfectly. And the major advantage that brass has over glass: you can drop it without it shattering.
https://www.amazon.com/xlshower-XLSSH8FT-Stainless-Handheld-Shower/dp/B004XHYNEK
Grab some insulation and warp that around the whole thing if it gets really cold. Make sure your heat tape is self regulating type when insulating however to prevent it from overheating.
Have you tried using a lower mount for the shower head? I don’t know if you use a shower chair (I do), but if you do having the lower mount is really helpful for hair and means you have to maneuver the hose less. Something like this doesn’t require any “real” installation; it just replaces the original shower head so you can even use it in an apartment.
This is what it sounds like you’re looking for. It’s much longer and made of PVC. I don’t think it’s going to resolve the issue of twisting because I think that has just as much to do with the water pressure, but the length of the hose will make it much less of an issue.
This metal one is even longer, and is cheaper.
Am I just not measuring correctly, and it's 3/4" and 3/8"?
Am I looking for something like this? https://www.amazon.com/Everflow-Supplies-287-EL-NL-Compression-Connections/dp/B01BTY66DK/ref=sr_1_10?keywords=3%2F4+3%2F8+hose+adapter&qid=1565483603&s=gateway&sr=8-10 or https://www.amazon.com/Shark-Industrial-Premium-dishwasher-connector/dp/B07RSPQPB2/ref=sr_1_46?keywords=3%2F4+3%2F8+hose+adapter&qid=1565483603&s=gateway&sr=8-46
You need something similar to this that’s fits yours sink. I would double check your measurements first, but this one will work on most US sinks.
JG Speedfit ASVPP1LF 3/8-Inch by 3/8-Inch by 1/4-Inch Angle Stop Adapter Valve https://www.amazon.com/dp/B003YKF2JC/ref=cm_sw_r_cp_api_cW20AbQK14V7M
There is no union on the wall side. You simply have to cut it out.
Depending on your reason for disconnecting the p-trap, you will probably have the easiest/cheapest install by cutting in between the leftmost 45-degree joint and the down-turning 90-degree elbow to its immediate right. Cut adjacent to the 90deg elbow leaving yourself the most exposed male pipe possible.
Buy a P-Trap adapter that looks like this (not sure what size PVC you have coming from the wall, the one I linked is 1 1/2", you might have 1 1/2" or 2" there, maybe even 1 1/4", should be written on the side of your current PVC)
Glue it to the remaining exposed male piece of PVC coming from the wall with PVC glue.
Toss your old P-trap...its hard piped in and unless your new install lines up perfectly, its useless.
Buy a new one like this It should screw on to your newly installed P-trap adapter with ease just like your drain side currently does.
You will need a pvc cutter to cut the new p-trap to fit, and depending how close you want to get to the elbows, you probably want to hacksaw the hardpiped old p-trap out. I'd probably use my reciprocating saw.
this to this to this
of course you could just buy this
Is it something like this?
https://www.amazon.com/dp/B000I19AIE
If so, when mine clogged up last time, I was able to just unscrew it and screw it back in again, and the line was working again. Did it once and it was fine until I moved out of that house.
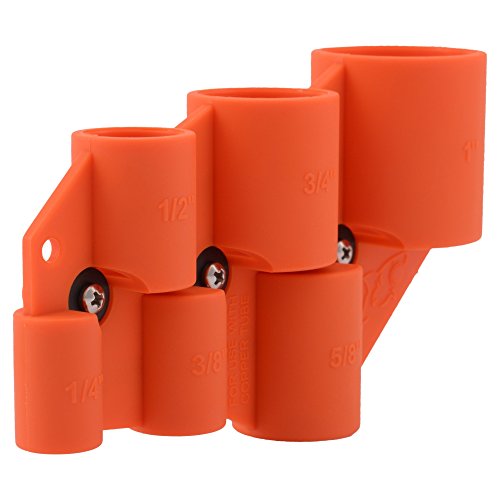
Fyi. Just did this project. I used
Superior Tool 35034 3/4-Inch... https://www.amazon.com/dp/B004Q0QOVE?ref=ppx_pop_mob_ap_share
And
SharkBite Deburring Pipe and... https://www.amazon.com/dp/B000K6QFSU?ref=ppx_pop_mob_ap_share
Make sure your cutting tool is the right size though. It was a breeze for me.
Any bag or bucket will do - it's what you put in it that counts. Something cheap is best, like a 5 gal bucket, since the tools are going to cost you...
The tools I recommend having immediately:
-Hammer (22oz Estwing steel hammer is great, I still have the first one I ever bought 14 years ago)
-Nail puller
-Flat pry bar
-2-lb sledge (if you're doing commercial work you'll be setting a lot of hangers :)
-12" or shorter level (preferably with grade marks - I like these ones
-Set of cold chisels
-Adjustable pliers (some like channellocks, but after using both for many years, I have come to the conclusion that due to mechanical advantages and better engineering, these Knipex pliers are the best pliers on the face of the earth, period. You can get a 3-pack on ebay for less than $100. But you can also just get the 10" ones which you'll use most often for around $30 online.
-"Rat-tail" file and flat file
-4-in-1 or 8-in-1 screwdriver
-utility knife (preferably one that stores blades in the handle and one that easily changes blades)
-Sharpies (or pencils - I prefer sharpies, since they more visibly mark metal)
-12", 8", and 6" crescent wrench. Get something cheap, because eventually you'll want these and they're effing expensive, so you might as well get some basic stuff now, knowing that you'll eventually upgrade when you have about $800 to spend on hand tools.
-5/16" nut driver
That's all I can think of right now....don't get too worried about getting the perfect stuff now, because as you steadily become a master of your craft, your style of organization, tool selection, and approach will gradually become more specific, and you'll go through lots of old crappy "apprentice" tools before you start to have thousands of dollars invested in super-special stuff like this, this,this, this, this, boy I could go on forever. You don't use a lot of stuff very often, but when you need it, nothing else will do. Oh, and pipe wrenches...aluminum Ridgid pipe wrenches.
EDIT: Oh I forgot! If you're doing commercial work and cast iron piping, you'll definitely want one of these.
If the deuce is still in the bowl; you need to manually remove it. If it's still clogged you can try a snake or a DrainKing. Sucks, but that's going to be the fastest way to resolve it.
Sorry I'm late to respond, but if you want to reply to someone, you need to click the "reply" link under their comment. Then add your comment as a reply to them, it will notify them you replied, and they'll know the reply is for them.
This reply is probably a bit long, lol. But I'm bored, so I go into some detail, and give some suggestions on tools n' such you can use for various things. You don't have to use them, obviously.
===
====
I do my mashing in a 5gal stainless steel pot, and I do my fermenting in these 5gal buckets (foodsafe from Home Depot). I use these lids, as it has an extendable spout which is the perfect diameter for a No. 7 size drilled rubber stopper, which I stick the airlock in.
For the actual mashing process. I do the following. So, not far off from what you do, except the starting temperature, since going above 161F can damage some of your enzymes and slow things down. These steps haven't failed me yet.
I mix up the yeast culture as soon as I hit the 150F temp of the mash, by pouring the yeast (1tbsp) into 2cups of warm water with a pinch of sugar, a pinch of DAP (aka diammonium phosphate), and a pinch of Magnesium sulfate (aka epsom salt, I bought at walmart in a large jug). Then I just let it sit while the yeast rehydrates and starts doing it's thing. When the mash is down to around 80F, I pour that mash into a sanitized 5gal bucket, then when it hits between 75F to 70F, I pour the yeast mix into the mash in the bucket, close the lid, put in the stopper+airlock, and leave it alone for about 3 days, before I check on it.
When I check on it, if it has slowed down significantly, or is stuck. I do the following:
That usually accounts for all the stuck fermentation issues.
===
===
Hope this helps!
Here it is. I got the 24 ft version.
Is there a way you could use a cable pipe heater like this? You can also use a livestock trough heater to maintain an open area of water so the fish can breathe. Placing the heater near the intake for the waterfalls might be enough to keep them going. (Just get a pipe heater soon before they’re sold out.)
Bought a swagman xtc rack when I bought my hitch from etrailer a few months ago. They're around ~$215 or you can get the cheaper swagman xc for ~$100 (same thing, but xtc is the update with nicer platforms). They both had around 1000 reviews at 4.5 stars and I've had no problems with mine.
I bought curt's bike rack support strap and it made the rack solid with no worries about wobbling. Just took it on a 5hr road trip with 2 road bikes driving at ~80mph. I could do 85-90 but it would wobble a little so I stuck around 80.
To combat the scratching the frame problem I bought pipe insulation (aka pool noodles) for $5 and put them on over the top tubes so no worries about the rack scratching anything.
Just be aware that the rack can only fit tires <= 2.5inch or else you need to buy the wider platforms from amazon which are like $15 for a pair or something if you have a fat bike.
Here's an example. They come in various sizes. They have a split along the length so they can be opened up and flattened out, as seen in the costume.
http://www.amazonsupply.com/dp/B000FSSPZ4?ref_=sr_1_1_txt
You might already have air chamber shock absorbers, in which case you could recharge them: shut off the main, open all fixtures to drain the pipes, let it sit awhile, close the fixtures, turn on the main. See if that reduces the hammer, and then see how long it lasts.
Otherwise just install the screw-on hammer arresters at the washing machine and any other fixture that's causing water hammer:
https://www.amazon.com/Sioux-Chief-Mfg-660-H-4-Inch/dp/B000H5MQNM
https://www.amazon.com/dp/B000JRGAMQ/ref=asc_df_B000JRGAMQ4949869
https://www.amazon.com/dp/B008RI63BW/ref=psdc_3226897011_t2_B000JRGAMQ
and they are available on amazon prime. https://www.amazon.com/Speedfit-ASVPP1LF-8-Inch-4-Inch-Adapter/dp/B003YKF2JC/ref=sr_1_1?ie=UTF8&amp;qid=1485804435&amp;sr=8-1&amp;keywords=ASVPP1LF
Ferrule puller. Screw into the nut on the back, pulls off brass ferrule. I'd do that before cutting pipe. high grit sand paper 200 grit or so. Gently clean up pipe. Try a new sharkbite valve.
https://www.amazon.com/Superior-Tool-Company-Compression-Fittings/dp/B000L89AZC/ref=pd_lpo_vtph_60_bs_t_1?_encoding=UTF8&psc=1&refRID=CX0R42NTDBF04S794N03
Tubbing: http://www.amazon.com/dp/B000BVS1YK/
Connector: http://www.amazon.com/dp/B003WJRG30/
Cutters: http://www.amazon.com/dp/B000HSAPR8/
No. Even if you do need to shut off the hot, the cold will not need shutting plus DO NOT DRAIN THE TANK. Shut off the supply to tank and open a few hot taps. But.... Check local codes tho I haven't see any against [this] (https://www.amazon.com/gp/aw/d/B003B6JC4A/ref=mp_s_a_1_1?ie=UTF8&amp;qid=1479603482&amp;sr=8-1&amp;pi=SY200_QL40&amp;keywords=Add+an+tee&amp;dpPl=1&amp;dpID=41NYFZBMQoL&amp;ref=plSrch) . Assuming it's a 3/8 compression stop, this goes onto the hot valve for the kitchen faucet then the new line for the d/w comes off the side. Also don't forget that any solenoid (electric) valve must have a [water hammer arrester] (https://www.amazon.com/gp/aw/d/B00D73MFCI/ref=pd_aw_fbt_60_img_2?ie=UTF8&amp;psc=1&amp;refRID=2DQC7YW7K7DW2D8P069E), in my area anyway. That's dishwasher, washing machine, fridge icemaker / filters.
I've never seen the part you're describing all in one piece.
But you might be able to go from this to this to this, to accomplish what I think you are trying to accomplish.
Wouldn't it be fairly simple to just remove the p trap and rinse it out (in a different sink) into a bucket and/or use a long flexible something to get the clog out? That or just buy a new p trap since they are cheap. As far as I know, with most p traps you don't even need a tool and can just remove it by hand.
I have that same one (or one that looks just like it) that we used last winter (I didn't see any warning about using it on hoses on mine).
I didn't have any issues with it, but it was only below freezing a dozen or so nights (maybe 8 that were in the teens), and rarely below 30 once the sun was up.
I taped it to the hose every couple of feet with duct tape, and then put [pipe insulation] (http://www.amazon.com/M-D-Building-Products-50150-Insulation/dp/B002JFWDU4/ref=sr_1_1?ie=UTF8&amp;qid=1448941843&amp;sr=8-1&amp;keywords=foam+pipe+insulation) over the hose and the tape.
They have a thermostat on them so that they only turn on under a certain temp (40 IIRC), so it's possible that the hose didn't spend much time that low (due to the insulation).
It looks like pipe insulation. You can repair or replace it.
In is either one of these two.
Pipe Insulation Inexpensive
Pipe Insulation - a little more money
Amazon? And go get a flexible downspout like this until it arrives. As others have noted, however, having the slip joint past the P trap is a code violation. That said, no one really cares.