Best interior & exterior house paint according to redditors
We found 173 Reddit comments discussing the best interior & exterior house paint. We ranked the 77 resulting products by number of redditors who mentioned them. Here are the top 20.
We found 173 Reddit comments discussing the best interior & exterior house paint. We ranked the 77 resulting products by number of redditors who mentioned them. Here are the top 20.


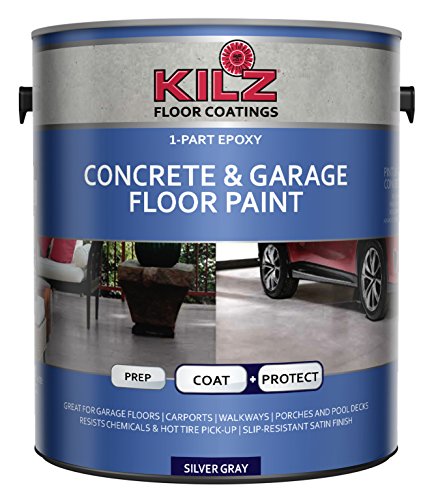


I actually just epoxy painted my bathroom floor. It turned out great and was incredibly cheap. Love the stuff
Edit: I used this
KILZ L377711 1-Part Epoxy Acrylic Interior/Exterior Concrete & Garage Floor Paint, Satin, Slate Gray, 1 gallon https://www.amazon.com/dp/B01M9IQH10/ref=cm_sw_r_cp_apa_gHbUAbPGHV6NM
Disclaimer: I've only had it for a couple months. So far I love it and it hasn't shown any sign of wear and tear. I know it's not the most amazing and strong 2 part epoxy. But It's inexpensive And made for a garage floor. I'm confident in it.
$200 bucks for 50 sqft?
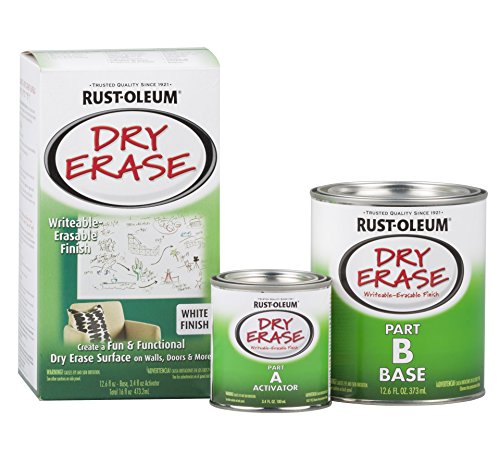
Go down to lowes and buy some Rust-Oleum dry erase paint for $24 bucks instead. You won't get the hipster packaging, but it's a hell of a lot cheaper.
http://www.lowes.com/lowes/lkn?action=productDetail&productId=263503-90-241140
Amazon says that it covers 49 sqft, so you save 180 bucks.
http://www.amazon.com/Rust-Oleum-241140-Erase-Brush-White/dp/B000PGBCOC
I think I know the song!! Haha. "Let's Give Em Something to Talk About" how about looooooooOOOOooooove! I don't know who sings it though. Some country lady?
I didn't work out again last night. I had an inner battle, and a chocolate keto mug cake won (IT WAS SO GOOD) and exercising did not. I feel shitty from my period, but I know that's not a good excuse. But it is what it is! I plan to do it tonight instead.
This weekend should be great. We're going to a friend's house for grilling out tomorrow afternoon, and Sunday is wide open and free. Today is the first day I didn't wear a coat to work in the morning, so spring really feels like it's here! I can't wait to do all the spring and summer outdoor activities, like hiking and going to the Ren Faire. I'm ready for it (BOOM BOOM BOOM).
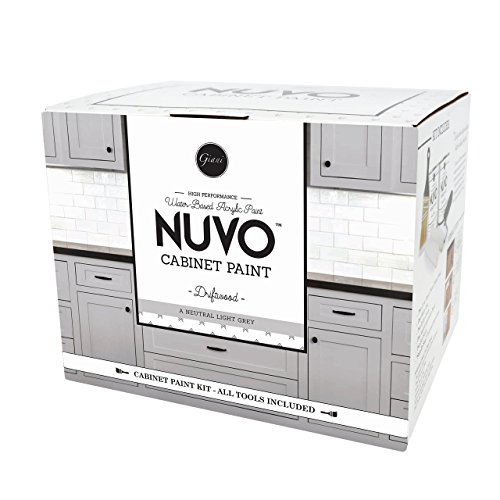
I need B to get out of the house so I can surprise him by painting the kitchen and bathroom cabinets! I found some great backsplash tiles and a really highly rated all-inclusive painting kit on Amazon specifically for cabinets, and I am pumped. All the reviews say you can get the entire thing done in a weekend, which is perfect because that's how long B will always be gone. We've been wanting to paint them the entire year we've lived here, but it's seemed like such a hassle. Luckily, this seems like it takes most of the hassle out. I'm pumped. B has CP and arthritis and a few other medical conditions that makes it harder for him to do stuff like that. It's been in my cart on Amazon for months and now finally B's going to be out of the house so I can do it!! Wheeee! I think he'll be really excited about it.
Okay I'm out. Love you guys!! Hope you have an awesome weekend!!! <3
You'r forgretting FM, AM, TV, GPS, IOT networks and many other type of electromagnetic radiations, they all pass throught you.
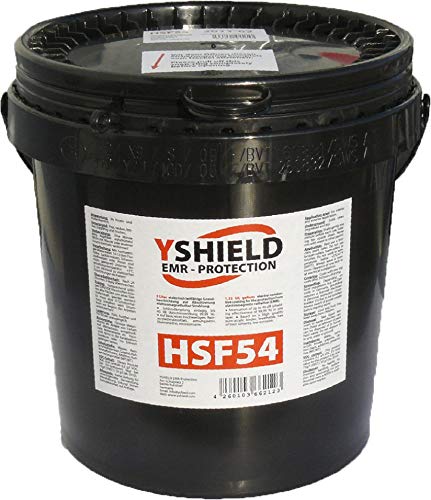
https://www.amazon.com/YSHIELD-EMF-Shielding-Paint-HSF54/dp/B007A0RTES
Gonna build a [Faraday cage](
https://en.m.wikipedia.org/wiki/Faraday_cage) around my bedroom, then my house.
Ooo! EMF shielding paint!
Anti RF Christmas quilts!.
My cell phone will never ring again!
Couldnt resist the sns sale on this pair for about $130. and i knew id be blacking out that boost before i bought. (sorry dont see it available any longer, but its on goat and stockx for 120-160ish depending on size.) i wanted to try the full angelus method since heskicks said it lasted on youtube, and it took me 3 days on and off this weekend.
full photo album progress here with comparison pix in different steps of the method and against "OEM" black adidas boost https://imgur.com/a/5RE2d
STEPS
Day 1 – deglaze and dye. Deglazed before dinner, painted dye layer 1, wait 10 mins then dye layer 2. Let dry overnight.
Day 2 – Dye reducer. Feelgoodkicks on youtube said this was important to eliminate cracking and that purpleish sharpie-like tint, so I tried it. Make sure to very lightly roll a Q-tip over your dye work, otherwise else you can completely remove all your work. Later that day I painted with the flat black paint. Waited 10 mins then did a 2nd layer.
Day 3 – Acrylic Paint. Wait 10 mins and do a 2nd layer. Still looked too glossy to me, so I masked the upper and sprayed with krylon later that day. And a 2nd layer a few mins after as the instructions state to get my finished product. Also added alternate laces and gunmetal grey aglets. Didnt end up using the mink oil since Im worried the boost will gloss up, but I still might try some later.
OVERALL TIPS
With any painting, take your time and do LIGHT layers to prevent chipping/cracking as much as possible.
I didnt mask the upper when painting since i went slowly, but paint brushes are actually easier to use very close to the primeknit than the sharpies were. I normally painted that upper edge first, then used a larger brush to paint the main part of the boost.
Krylon spray was a must. Album has a comparison photo with just angelus finish and its super glossy compared to the krylon finish. Using krylon finish alone, however, the paint rubbed off the boost whenever i touched it. so gotta do both
PREVIOUS POST (sharpie method)
https://www.reddit.com/r/Sneakers/comments/7thl9p/iniki_boost_blackout_oil_based_sharpie_matte/
Since the previous sharpie method rubbed off a bit on my fingers, I retouched with the anglus acrylic finish and then krylon again to get it more matte. Seemed to do the job.
I think for the sharpie method id have to add deglazer and angelus finish. so a total of 4 purchases would be good (deglazer, sharpie, angelus acrylic finish, krylon matte finish)
PRODUCT LINKS
Angelus Leather Preparer & Deglazer 4 Oz - $6.60
https://www.amazon.com/gp/product/B00EU322DQ
Angelus Brand Leather Dye W/applicator - 3 Oz ''Jet Black'' - $6.75
https://www.amazon.com/gp/product/B016QV7XIS
Angelus Acrylic 4 Ounce Paint (Flat Black) - $8.49
https://www.amazon.com/gp/product/B00MPXF6XG
Angelus Brand Acrylic Leather Paint Matte Finisher No. 620 - 4oz - $7.59
https://www.amazon.com/gp/product/B00B5W4LX4
Krylon Matte Finish - $3.47
https://www.amazon.com/gp/product/B005ENZ8CS
Heartybay Nylon Paint Brush Set - $5.98
https://www.amazon.com/Heartybay-10Pieces-Round-Pointed-Nylon/dp/B00V4EG6D6
We use Pure Tung Oil on all of our Western Redceder, Redwood and Pine. Real Milk Paint Pure Tung Oil - Gallon https://www.amazon.com/dp/B007RO1PJC/ref=cm_sw_r_cp_api_rjgWzbG1PSK93
Are they allowed to do this? Yes and no.
They cannot employ jammers. That's a huge fcc violation (if you're in the US).
However, there's plenty of other ways of preventing cell phone use, and all of those are legal. The easiest one would probably be "turn off the femtocell"
Commercial buildings are a nightmare for cell signals. The concrete would be bad enough, but the it's rebar inside that does the most damage. Most commercial buildings are basically faraday cages and special care is needed to ensure you get good enough signal more than a few feet from the wall or in direct line of sight to a window. Toss in sheet metal walls and endless grids of metal shelves and warehouses are especially bad.
The most common way to get around this problem is to have the cell companies install what are effectively iddy biddy cell towers inside the building. Depending on the size of the building, multiple might be used. These can either be linked with a bigger antenna on the roof which interacts with the cell network at large or go through an internet connection.
But lets say they didn't have femtocells but still wanted to block cell phones? In most applications, EMF paint, faraday wallpaper or even just installing a wire mesh on the exterior walls will attenuate the signals to the point of uselessness.
My suggestion is forget the wax. Strip the remaining wax out, and get a product called Envirotex. It's a simple two part epoxy, is food safe, and you can put pretty much any liquid in the horn after. When you do it, there are some procedures (which I can elaborate on if needed) that will ensure a good coating, and will even protect that edge from further chipping.
Now, that said, this post isn't really suitable for this sub. It's not really about heathenry. My suggestion to you is to either PM me if you need more help than this answer, or go ask on /r/SCA. They'll have your answer there for sure if you want other opinions. I'll leave this post up for a short time because I know your problem is a frustrating one to have, but I'm going to have to delete it soon unless you delete it first.
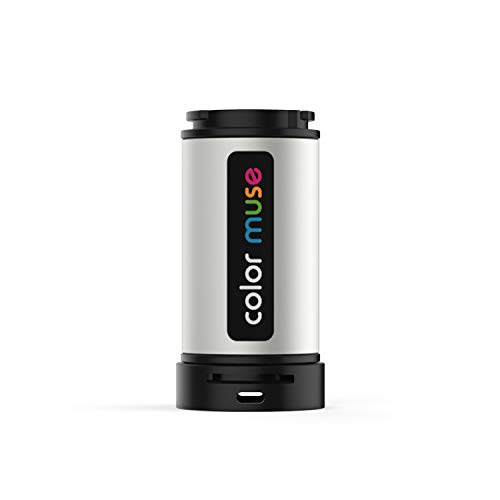
If I had a color reader like this I would check for you when I go to the game next week, but unfortunately I don't have one at this time. Maybe someone who does would be willing to check for you.
The person who does it would want to show up early and walk down to the front of field level. Given the circumstances I think they'd let you check.
I put down white pain about 5 layers to make it look go (go as glossy as possible) Then i used Clear Whiteboard paint that i got from Homedepot
https://www.amazon.com/Rust-Oleum-241140-Erase-Brush-White/dp/B000PGBCOC.
Used 3 layers of that.
I did it in January and they lasted until the end of the year. USing the fine markers made clean up way easier. Each student had their own cloth and my class at the end of the day wiped them down. You might have to replace em every other year id think. I put down some decals aswell and covered them in the clear paint to (coordinate plane 15x15, multiplication table, numberline). Kids picked at the stickers and ruined another teachers desk who did it too but mine stayed great cause i laid down the rules early on that if they messed em up id mess them up.
I would first power wash the concrete. Then get epoxy mortar to fill in the cracks. You can then use epoxy paint on the concrete. Here is one type. Edit. This has a better price. https://www.amazon.com/KILZ-L377711-Interior-Exterior-Concrete/dp/B01M9IQH10/ref=pd_sbs_60_5/130-4275861-1136344?_encoding=UTF8&amp;pd_rd_i=B01M9IQH10&amp;pd_rd_r=2823b7a4-70e2-11e9-88ae-891106fe0638&amp;pd_rd_w=VuDcK&amp;pd_rd_wg=1sdKw&amp;pf_rd_p=588939de-d3f8-42f1-a3d8-d556eae5797d&amp;pf_rd_r=DNFPAZETJYD6DCA8HSZM&amp;psc=1&amp;refRID=DNFPAZETJYD6DCA8HSZM
They make dry erase paint!
Edit: https://www.amazon.com/Rust-Oleum-241140-Erase-Brush-White/dp/B000PGBCOC
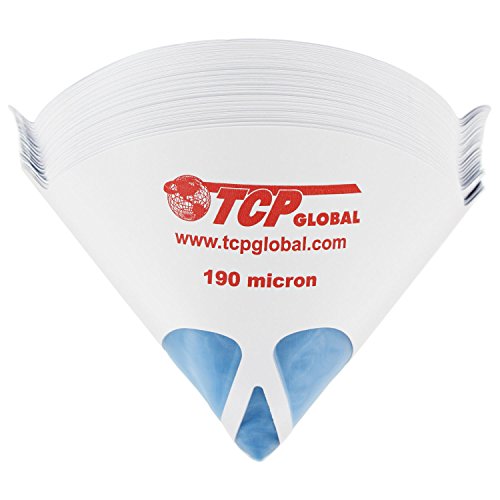
I use these:
https://www.amazon.com/TCP-Global-Strainers-Micron-Filter/dp/B000PA09V0/ref=sr_1_2?ie=UTF8&amp;qid=1492969699&amp;sr=8-2&amp;keywords=paint+filter
I use these to strain it for re-use. I go through a lot of oil for tailgating and thanksgiving turkeys every year.
Disposing of it properly is the harder part. Most of the time I can get a local restaurant to let me dump it in their oil tub (for recycling). The other times it goes into a sealed container and out with the regular garbage.
Well I don't know that it effects me, or that I'm aware of any effects. But I do make sure all cellphones are on airplane mode and at the far side of the house when I sleep.
Also, there's paint for your house which is supposed to block EM frequencies.
Maybe avoid wifi in your house or turn it off at night.
My neighbor had something special done to her wiring to avoid EMF but I don't know what it's called.
Whiteboard paint: Krylon Dry Erase Brush Quart Paint, White, 6 1 https://www.amazon.com/dp/B01MDNMSFJ/ref=cm_sw_r_cp_api_i_njISDbSCQA8JV
This was one of the first projects I took on after buying my house last month. Absolute bitch. Sanding, oil based primer, sanding, painting, sanding 1 more time and finally one coat. Happy with how they came out but I never would do it again. Sorry for the incomplete final picture, we're still 2-3 weeks away from totally completing our frugal kitchen reno.
I used the Nuvo Driftwood Cabinet Kit which I'd recommend.
I use burned pieces of wood with all sorts of cracks and imperfections http://imgur.com/xkuVfVG and what I use and stand by is http://www.amazon.ca/gp/aw/d/B000LNS9CW that.
Get a few different sizes of brush and you'll be set.
>on screen
That's your biggest mistake.
NEVER trust what you see on screen. Even a perfectly calibrated monitor isn't going to look the same as the printed material, because ambient lighting makes such a huge difference - That's why Pantone books even include a "lighting test" swatch in the back of the book that indicates if you're viewing the book under the correct light, as different Pantone inks respond differently to different wavelengths/color temperatures of light.
Go buy your Pantone Formula Coated/Uncoated swatch books. They cost about $135, which I'm willing to bet is less than what it's going to cost you to re-order your client's work. (My first color mistake cost me $270 - i bought my Pantone books the same day.) Then keep it in a dark box, away from light, unless you're using it.
You might also consider getting the CMYK Guide, which has combinations of CMYK (no Pantone inks, just standard CMYK) so you can pick your "normal" CMYK/Process colors from it, rather than from your monitor.
And as stated elsewhere, if you're not actually printing using Pantone inks (called "Spot Colors", used most often for 1-color or 2-color jobs), then don't use a Pantone color to choose from - many Pantone colors CAN'T be represented using CMYK. There's a book for that, as well, called the Color Bridge book - it shows the "closest approximation" to a Pantone color using CMYK inks, but you should only ever be in that territory with a client who has specified Pantone colors for their identity, and is OK with Bridge matching).
Bottom line, don't use Pantone if you don't have to. Never trust your monitor. Always refer to the printed swatch books. And always get a printed proof if there's any doubt (which you did, so good on you there!)
As far as printing vector art (non-solid color) with a Pantone Spot color, you absolutely can, but your AI document has to be set up correctly. Your artwork all needs to be recolored (using the Edit...Edit Colors...Recolor) to use only that spot color - AI will tint the color correctly on that artwork. But again, this only applies if you're actually printing with Spot Colors, not if you're printing 4-color/CMYK/Process (all terms for the same thing).
-[odmg]
Thanks! I used Modern Masters Bronze Reactive Paint: https://www.amazon.com/Modern-Masters-ME396-06-Reactive-Metallic/dp/B000I1QE4C/ref=sr_1_1?ie=UTF8&amp;qid=1467854880&amp;sr=8-1&amp;keywords=modern+masters+bronze
Then I used the green patina activator from them: https://www.amazon.com/Modern-Masters-PA901-04-Solution-4-Ounce/dp/B000I1TH9Q/ref=pd_sim_60_2?ie=UTF8&amp;dpID=41FxhPyOHpL&amp;dpSrc=sims&amp;preST=_AC_UL160_SR160%2C160_&amp;psc=1&amp;refRID=RB53F7QN5E1VNQXPRVQB
This method is a little pricier than some of the others have been doing recently, but it's pretty much fool proof. Since I'm not terribly artistic, I figured it was better to spend extra money and go the easy route :)
rit dye != vinyl dye. Coming from the Nerf hobby, vinyl dye is the best thing for you, just remember to apply it in thin coats. Rit dye will simply not take to ABS, I can tell you from personal experience.
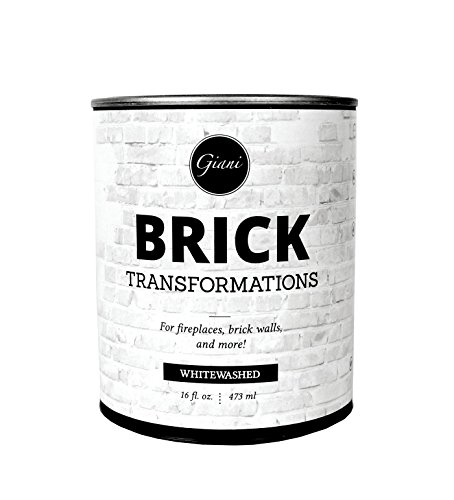
What about something like this. Giani Brick Transformations Whitewash Paint for Brick and Fireplaces https://www.amazon.com/dp/B07DXN2H2N/ref=cm_sw_r_cp_tai_D6oWDb509EVXA paint it all. There should be other high temp paint too for different colors and looks. You may not need high temp paint so confirm first.
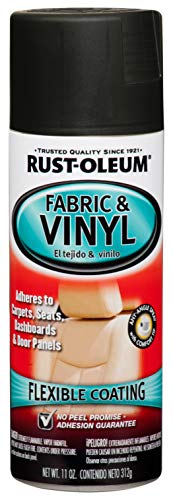
I'm doing to door cards and rear bench in black. Using this vinyl paint, though I would not do the same for leather. I'd just look into a leather dye for that.
Chalkboard Paint
Couldn't find white, but green is better than black or it could make it dark inside.
http://www.amazon.com/Rust-Oleum-241140-Erase-Brush--White/dp/B000PGBCOC/
countertop epoxy resin
e.g.
http://smile.amazon.com/Environmental-Technology-16-Ounce-Pour-On-Finish/dp/B000LNS9CW/ref=sr_1_1?ie=UTF8&amp;qid=1404959896&amp;sr=8-1&amp;keywords=countertop+epoxy+resin
Yes, that's what you need, but it's less than half that price on Amazon.
vinyl dye spray paint
https://www.amazon.com/Rust-Oleum-248922-Automotive-11-Ounce-Fabric/dp/B003CT4AT8
It was pretty simple. Here's what I used:
A little pricey for the torch, but it's great for getting rid of weeds/killing sod. And I use it to light my pizza oven and fire pit quickly.
I have refinished a few tabletops using this method:
Good Luck!
I am going to try growing broccoli, cauliflower, and brussel sprouts. I have seedlings I started that are sitting in an intermediary DWC system to grow while I got these ready.
I chose coco coir based on feedback. The clay balls were going to be too expensive for a full bucket. Perlite is a good choice, but seemed messy. Coco Coir is compostable so I can dispose of it easily when done. I will be using these 5 gallon bucket strainers, https://www.amazon.com/gp/product/B00P83H9Q2/ref=oh_aui_search_detailpage?ie=UTF8&amp;psc=1, in the bucket to help keep stuff in the buckets and out of the reservoir. I will see how successful that is.
They sell them on amazon, something I googled at random https://www.amazon.com/TCP-Global-Strainers-Micron-Filter/dp/B000PA09V0
The goal is the same to filter out any tiny bits of hardened goo. So any fine strainer is likely okay to use.
Here’s my out-of-the box suggestion: If you can find the style of shoe you like in a light or neutral color, then you can paint the shoe with Angelus brand leather paint in metallic silver. I have done this several times when I have loved a shoe but couldn’t find the right color, with great results. Tape the soles and parts you don’t want painted with frog brand painters tape. Painting is in three steps: apply finisher and deglazer and let dry, apply paint and let dry, then apply finisher and let dry. Hopefully you can find the right color shoes, but I wanted to put this option out there just in case. If you decide to do this, message me and I will be happy to send detailed instructions.
https://www.amazon.com/Angelus-Leather-Preparer-Deglazer-Oz/dp/B00EU322DQ?crid=28ONTX97BK2L&amp;keywords=angelus+leather+preparer+and+deglazer&amp;qid=1540669671&amp;sprefix=Angelus+%2Caps%2C174&amp;sr=8-1&amp;ref=sr_1_1
https://www.amazon.com/Angelus-Acrylic-Leather-Paint-1oz-Silver/dp/B00HRJPVS8?crid=275059PK4ATA&amp;keywords=angelus+metallic+silver&amp;qid=1540669816&amp;sprefix=angelus+metallic+%2Caps%2C150&amp;sr=8-1&amp;ref=sr_1_1
https://www.amazon.com/Angelus-Brand-Acrylic-Leather-Finisher/dp/B00B5W4LX4?crid=28ONTX97BK2L&amp;keywords=angelus+leather+preparer+and+deglazer&amp;qid=1540669751&amp;sprefix=Angelus+%2Caps%2C174&amp;sr=8-3&amp;ref=sr_1_3
Brushes
https://www.amazon.com/Angelus-Paint-Angular-Artist-Acrylic/dp/B072LRHFTM?keywords=angelus+brushes&amp;qid=1540669936&amp;sr=8-2&amp;ref=sr_1_2
I would suggest using some of that whiteboard paint or chalkboard paint for the top. Minimizes the number of pieces that can be lost by the drunks.
Easier then what he said is to use this. https://www.amazon.com/gp/aw/d/B00Q0I62IU/ref=mp_s_a_1_3?ie=UTF8&amp;qid=1519869703&amp;sr=8-3&amp;pi=AC_SX236_SY340_FMwebp_QL65&amp;keywords=por15&amp;dpPl=1&amp;dpID=61Gu2KUTGBL&amp;ref=plSrch
You don't have to do anything other then coat it to encapsulate and stop the rust. I've painted frames.etc.. with this stuff it's awesome. Also comes in many other colors like clear,gray,red etc....
I can't really tell, to be honest. I've only had mine for a few weeks and haven't spent much time under it, yet.
That said, if it's steel, Por-15 would be my first choice to cover it. I'd get the small can, unless you have a bunch of rust elsewhere or you want to do some preventative maintenance on other steel parts.
https://www.amazon.com/dp/B00Q0I62IU/ref=cm_sw_r_cp_apa_i_xUVGDbTQ24MXH
The only thing I can think of is getting a lycra wetsuit (cheapest I've seen for a full body one was $40) and then giving it a few coats of vinyl and fabric spray paint.
The burgundy doesn't have a gloss finish and I think it's closer to Deadpool's color.
Sure! Buy this stuff:
Environmental Technology 8-Ounce Kit Lite Pour-On, High Gloss Finish https://www.amazon.com/dp/B001CEMU3I/ref=cm_sw_r_cp_apa_zViGAb88SATC9
There's a couple solutions in the box that you mix together and then pour over your project. It dries to a thick coat of resin. Very cool stuff. Since you're planning on using it as a cutting board, I'd recommend sanding it down a little once dried and applying a food-safe sealant afterward.
Link to Amazon with reviews
Instead of that $130 kind, I used this $20 alternative which works fantastically. I made a table for D&D, and the entire tabletop is painted with this stuff. Used permanent marker to make a 1" grid via vertex dots, and the dots only sometimes come off when I use a magic eraser, which gets EVERYTHING else up.
Shake it and strain it (either order). If it's already in your vat, put a funnel and strainer on the bottle and pour it back in. Or use an extra bottle and collect it first and shake it, it should help it strain better.
&#x200B;
https://www.amazon.com/TCP-Global-Strainers-Micron-Filter/dp/B000PA09V0/ref=sr_1_3?keywords=paint+strainer&qid=1563463430&s=gateway&sr=8-3
&#x200B;
https://www.amazon.com/Pack-Multi-Purpose-Funnels-Reaching-Transfer/dp/B07B3LMQ8P/ref=sr_1_5?keywords=plastic+funnel&qid=1563463681&s=gateway&sr=8-5
Rust-Oleum 241140 Dry Erase Brush-On Kit, White https://www.amazon.com/dp/B000PGBCOC/ref=cm_sw_r_awd_8PRPub0PB2RT0
Thanks! The bases (Pic here: http://imgur.com/aFChvwH) are filled with Envirotex Lite, but any epoxy resin would have worked. The blue color came from a few added drops of acrylic paint.
A long time ago, my boss in the C suite wanted something similar - termination of signal propagation for a sensitive use-case.
https://www.home-biology.com/electromagnetic-shielding-guide/how-to-shield-your-house-from-eleectromagnetic-fields
http://www.lessemf.com/fabric.html
https://www.amazon.com/YSHIELD-EMF-Shielding-Paint-HSF54/dp/B007A0RTES
https://www.mgchemicals.com/products/emi-and-rfi-shielding/
http://www.jemic.com/
You'll likely need to investigate above to determine which are, or aren't snake oil.
I appreciate the feedback so far!
I'm still doing some research. When I went to JoAnn's earlier I explained the situation and had someone recommend the following:
https://www.amazon.com/Environmental-Technology-16-Ounce-Pour-Finish/dp/B000LNS9CW
I thought that what's essentially a varnish of sorts was an odd idea, but bought the box as I had a 60&#37; off coupon, and figured I could return it if I end up not using it.
Does anyone have any experience using a product like this? Would it do the job?
This is my first time using a reactive paint but I would say it turned out nicely with this brand.
https://www.amazon.com/dp/B000I1QE4C/ref=asc_df_B000I1QE4C5452394/?tag=hyprod-20&amp;creative=394997&amp;creativeASIN=B000I1QE4C&amp;linkCode=df0&amp;hvadid=198091577722&amp;hvpos=1o1&amp;hvnetw=g&amp;hvrand=14104163807776835001&amp;hvpone=&amp;hvptwo=&amp;hvqmt=&amp;hvdev=m&amp;hvdvcmdl=&amp;hvlocint=&amp;hvlocphy=9019127&amp;hvtargid=pla-323291408532
Has anyone used a 5 gallon disposable paint strainer bag to strain out any sediment before pitching the yeast? I usually use a funnel with a mesh screen to pour into my 6.5 gallon glass carboy but I read on other forums that people do this and all of them seem to agree that they can't live without doing it. I ordered these on Amazon earlier today and was wondering if anyone here has any experience using this kind of method and what do you think about it?
I made mugs and coated them in 3 coats of bar top epoxy and they're sealed and food safe. http://www.amazon.com/gp/aw/d/B001CEMU3I/ref=mp_s_a_1_5?qid=1449546482&amp;sr=8-5&amp;pi=AC_SX110_SY165_QL70&amp;keywords=bar+top+epoxy&amp;dpPl=1&amp;dpID=51ZB66yipUL&amp;ref=plSrch
You could always just get a plain plastic mannequin and paint it with chalkboard paint or whiteboard paint.
You can also get custom temporary tattoos so you can test your image out on yourself before getting it done permanently.
> now I get little specks/chunks of paint
Did you filter the paint when you pour it into the sprayer? Homedepot, lowes both sells something like this that you need to use
https://www.amazon.com/TCP-Global-Strainers-Micron-Filter/dp/B000PA09V0
&#x200B;
> Also, the other annoying thing is I have a spray booth and I use a hanger with hooks attached to the cabinet door but the spray gun is very powerful and blows the door around.
Yup, this is a common problem. Personally I don't like that method because of that. I just lay the door down flat on 1 face, paint all the doors, let them dry, flip them over then paint the other side.
I would put another thin layer of MDF on it? To cover the imperfections of the screw holes and filler, which is what I assume I am looking at here.
Then I would sand it smooth as you can get it, and paint with matte finish green or blue of your choosing after applying primer to seal it.
Something like this for primer:
https://www.amazon.com/Gallon-Zinsser-Bulls-Odorless-Primer/dp/B012JI5Q9A?SubscriptionId=AKIAJ25BEV7RWHOE3GOA&amp;tag=bobvhtd-20&amp;linkCode=xm2&amp;camp=2025&amp;creative=165953&amp;creativeASIN=B012JI5Q9A
Maybe something like this for the green:
https://www.amazon.com/Rust-Oleum-206540-Chalkboard-Brush-30-Ounce/dp/B0006BAEMM/ref=sr_1_20?keywords=green%2Bchalkboard%2Bpaint&amp;qid=1563819579&amp;s=hi&amp;sr=1-20&amp;th=1
Thanks so much!
Poured on two layers of this epoxy, sanded to 400 grit between each, let them both cure and they came out super glossy so I put down a really thin layer of minwax satin poly. The epoxy definitely brought out a lot of beautiful color and helped fill all the imperfections without covering them up.
Sorry i should have specified a bit more 24 hour cure time that 25 minutes is working time which is standard either way this is what you need
Environmental Technology 8-Ounce Kit Lite Pour-On, High Gloss Finish https://www.amazon.com/dp/B001CEMU3I/ref=cm_sw_r_cp_apa_5.YMybZACC512
I'd watch some youtube videos on finishing table tops with epoxy, they are very helpful
I don't like to use polyurethane because it turns yellow with time. I've switched to Minwax Polycrylic and I like it a lot. On my final coat I use a salt shaker full of RustOleum Epoxy Shield grit while it's still wet. This is a pretty good, but mild, grip.
I was considering covering the top in something like http://smile.amazon.com/Rust-Oleum-241140-Erase-Brush-On-White/dp/B000PGBCOC/ref=sr_sp-atf_title_1_1?ie=UTF8&amp;qid=1409768795&amp;sr=8-1&amp;keywords=whiteboard+paint
it would always be on, but would serve a similar function.
Use a stain instead of latex. Looks better, and much more heat resistant.
https://www.amazon.com/Giani-Brick-Transformations-Whitewash-Fireplaces/dp/B07DXN2H2N
Reiterating what the other commenters have said, you'll want to stick the caps down somehow because when you pour the self leveling epoxy over them, they'll want to float and you'll end up with an uneven surface.
I used this stuff: https://www.amazon.com/Environmental-Technology-16-Ounce-Pour-Finish/dp/B000LNS9CW
Source: Have made that mistake myself.
What I have in my home office.
What I'd recommend if you're not in a permanent place.
https://www.amazon.com/Rust-Oleum-241140-Erase-Brush-White/dp/B000PGBCOC
Alternatively, if you can make a speech bubble out of another material more easily, you could then paint it with whiteboard paint. Just a thought.
you can use those "artist" acrylic paints for model paints. I know quite a few local GK builders who do. The problem with those is you have to filter them first either through a paint strainer http://www.amazon.com/50-Mesh-Fine-Paint-Strainer/dp/B000PA09V0/ref=sr_1_1?ie=UTF8&amp;qid=1318825639&amp;sr=8-1 or through nylon stockings(make sure it goes through 3 layers of stockings though. You can then either use Windex, 91% rubbing alcohol or wind shield wiper fluid(the kind without anti-freeze) to thin it. You're going to want to go for a consistency of milk when you do thin. So when you swirl it around in the jar it's going to flow about as much as milk does.
Same stuff, but thanks for the suggestion. I'm actually using it, and just erasing the ghosting w/ a Mr. Clean magic eraser every once in awhile.
Meanwhile I ordered this dry erase paint, which I'm going to apply in coats with the proper sanding and primer. Will report back here in a week or so--hopefully this works!
If you want to apply a finish, you could try adding a non-skid additive to polyurethane. Something like this: https://www.amazon.com/Rust-Oleum-279847-EPOXYShield-Anti-3-4-Ounce/dp/B001005ZY0
Read some reviews from Home Depot and a customer recommended a ratio of 1 Cup poly to 1/4 tsp additive. The guy used it for his deck but stated no issues walking barefoot.. just enough to add texture and remove the slippery feel of the poly. For the record, I have only used the stuff for curbs and handicap ramps while suspended in paint. Either way, might be worth a test run if your looking for a finished look. As others have stated, unfinished is probably fine too. If the wood gets too smooth (unfinished), you could always just grab some workout gloves for added grip.
That sure can work. I’m wondering if there’s less expensive things that aren’t so tied to Pantone’s. This is the first thing to pop up in a quick search. Appears to offer the same functionality. For a tenth of the cost.
https://www.amazon.com/dp/B01KKEMIF0/ref=asc_df_B01KKEMIF05404520/?tag=hyprod-20&amp;creative=395033&amp;creativeASIN=B01KKEMIF0&amp;linkCode=df0&amp;hvadid=198071503086&amp;hvpos=1o5&amp;hvnetw=g&amp;hvrand=9075597943188084210&amp;hvpone=&amp;hvptwo=&amp;hvqmt=&amp;hvdev=m&amp;hvdvcmdl=&amp;hvlocint=&amp;hvlocphy=1016367&amp;hvtargid=pla-348523270966
If you can actually broadcast a signal strong enough to make cell phones useless inside the building then it'll be strong enough to cause problems outside the building. If you shield the building sufficiently to where this isn't the case then you don't need the jammer anymore in the first place. The proper way to make RF denied environments is with shielding like RF blocking paint. There also isn't some exemption to the FCC regulations for prisons. An easier method of fixing this would be cooperation from cell carriers or something like a stingray.
$6.99
will review, thanks
http://www.amazon.com/gp/product/B003CT4ASE
i think my "vinyl" is not really vinyl,
just some sort of leather texture painted cushion.