(Part 2) Best sanding sheets according to redditors
We found 210 Reddit comments discussing the best sanding sheets. We ranked the 82 resulting products by number of redditors who mentioned them. Here are the products ranked 21-40. You can also go back to the previous section.


Edit: Before you read, these two pieces of wood started the same. The one on the left is the "bad" version based on how I used to finish things.
I'm absolutely no finishing expert, but I've spent the past couple of months getting ready to finish a major project. I have used a lot of shellac and other varnishes in the past, but generally like oil-based poly. Here's now I do it.
This advice probably applies to all woods, but I've been working with Walnut and Maple recently.
http://i.imgur.com/ZywuN6X.jpg This is a bit of a bad example as I didn't fill the grain (and haven't really polished yet), but this shows why sanding matters. If you don't want ridges where the grain is, you have to sand. Again, not the best picture, but sanding and putting on thin coats, slowly, will get you the finish you want.
I'm absolutely not an expert. Just someone that's been frustrated sharing what I've learned. Here's my latest table-top with coat #2 on it.
http://i.imgur.com/DpqiIvO.jpg
Finally, not all sandpaper is the same. For 320, this is the best stuff around. Lasts forever and doesn't clog: https://www.amazon.com/gp/product/B00PPD1CYA
Okay going to make this short and concise. These are all my opinions to make blades.
Going to need lots of belts for it, here are some. Would suggest getting the 50 grit (please remember he will need multiple amounts of these so get a few of them). I would also suggest grabbing the 120 grit to take some deep scratches out. However the 320 isn't necessary as you can do all that by hand with regular sand paper.
Hopefully in the yard or somewhere he can have a workbench set up because having a benchvise is such a luxury.
Hand sanding paper (The fun stuff)
Also a sharpening stone will be very helpful however i don't have much knowledge as the best way to go with these. After doing some research, This stone seems like it would do the trick for the most part
I forgot about these, 2 should be okay if he doesnt already have some
Assuming you do not buy the 320 grit belts, and buy (5) 50 grit, and (5) 120 grit belts.
The total comes to right around 308.36
I failed you by breaking the budget, but your man is worth the 8 extra dollars :b Make him give you a foot rub and take you out for a nice dinner or something to repay the debt haha. GL and let me know if you have any other questions.
Would like to note that all of this is for making the process easier. You can do all of this with 1 bench vise, 1 hand file, a hack saw and some steel. It would just take a long time and be extra tough! But absolutely doable without all of these gadgets
You need this https://www.amazon.com/dp/B075L2D9HG/ref=cm_sw_r_other_apa_i_4PlPDbHSF38T0
Model by youngs66 on thingiverse: https://www.thingiverse.com/thing:1753445
Printed with Hatchbox PLA at 0.16 layer height on my Ender 3. Whole project took about 3 weeks, but I couldn't be happier with the resultsModel by youngs66 on thingiverse: https://www.thingiverse.com/thing:1753445
Printed with Hatchbox PLA at 0.16 layer height on my Ender 3. Whole project took about 3 weeks, but I couldn't be happier with the results
Edit: thought I'd give a more complete outline of the process since people seem to be interested:
Printing
As stated above, this model was printed on my Ender 3. I actually have two Ender 3's, but I stuck mostly to using one due to a lack of filament. The whole thing took about 1 and 1/4 rolls of filament (in my case about 1.25kg). I printed in black Hatchbox PLA using Cura 4.3's new creawesome settings with variable layer height. Most of the files were printed with supports, which I actually found difficult to deal with (as always) and I ended up having to use a brim on every print to make sure some of the larger support towers didn't fall over. My first step was calibrating my printers. I made an iron Man helmet a couple months back and it didn't fit together quite right, so I wanted to make sure that I had my printers properly prepared this time. The model itself was scaled to 94.4% of its original size although in hindsight I should have given more clearance for my big head because Its almost impossible to put on and take off. I don't have an exact figure for the total print time, but it was probably close to 120 hours, most of which were overnight. The hardest part was keeping my bed leveled throughout the whole project. I got to a point where I leveled it before every print, which I know is a good practice, but it's still annoying to have to do without any sort of ABL.
Sanding/Assembly
I started sanding the individual parts as bare plastic with 80 grit sandpaper, then moved up to 100 grit, and then got bored and jumped to 400 grit. All in all I could have used to do a little more sanding because the layer lines are still visible in some places, but it is what it is. After sanding to this point, I assembled the whole thing except the eye pieces using cyanoacrylate. This didn't actually take that long because cyanoacrylate sets pretty quick, but it was still quite a process making sure everything lined up correctly. After it was assembled, I filled in any unwanted seams with wood filler and sanded them down with the same process I used on the rest of the model. After I was happy, I wet sanded the whole thing with 1000 grit sandpaper to give it a super smooth finish. I then applied a few coats of filler primer and wet sanded again with the same grit sandpaper as before. The lenses of the helmet were cut from a piece of transparent red cast acrylic I found on Amazon. It came with a paper backing on both sides to protect it, so I used that to draw the circles I wanted to cut as well as to draw the grid pattern with pencil before I made anything final. I probably could have made the grid better by using geometry or something but I didn't feel like it so I used a ruler and eyeballed the rest. I drew it on the paper in pencil first, and then went back (still using the ruler) and went over my lines with a hobby knife.
Painting
I started painting with a coat of the base gray color. Once I was happy with the finish, I masked basically the whole helmet to paint the gold parts, which was a pain, but I think it would have been more difficult to mask the recessed areas had I chosen to do the gold first. I still had the eyepieces separate and hadn't yet installed the lenses. The bright silver color was done by hand because I figure that would be easier than more masking, especially with the details and tubing. After I was happy with my base paint job, I went back with the silver and did some dry brushing on edges and corners to make it look a little worn.
Electronics
The electronics were by far the easiest part of this project, although there are thing I would change if I were to do this project again. The whole thing is really as simple as a red LED strip hooked up to a 9v battery. The LED strips I used are linked below, although I would recommend not using them for this purpose. They've got a water proof coating across the LED side of the strip that covers all of the contact points so it's pretty much impossible to connect to a strip you've cut. I had to use the LED strip from the inside out and make it one continuous strip across both eyes. The battery holder I got had a switch on it, so that's convenient. After I had it all hooked up, I installed the lenses into the eyepieces, the eyepieces into the helmet and then stuck the electronics in with some cyanoacrylate just to be sure it wouldn't fall out, the battery is held in the front of the mask by some masking tape (I know, not the most glorious solution)
Links
Model: https://www.thingiverse.com/thing:1753445
Sandpaper: https://www.amazon.com/dp/B07MXB5M5K?ref=ppx_pop_mob_ap_share
Metallic Gray Paint: https://www.amazon.com/dp/B00681T1UU/ref=cm_sw_r_other_apa_i_dDNTDb3JRFXTB
Gold Paint: https://www.amazon.com/dp/B0006N6RA8/ref=cm_sw_r_other_apa_i_3DNTDbKYMM9VC
Silver Paint: https://www.amazon.com/dp/B004GJDUN0/ref=cm_sw_r_other_apa_i_YHNTDbWPQ9P83
Wood Filler: https://www.amazon.com/dp/B001733MIG?ref=ppx_pop_mob_ap_share
Red Acrylic: https://www.amazon.com/dp/B006FLYIYM?ref=ppx_pop_mob_ap_share
Red LED strip (again, I recommend a different option): https://www.amazon.com/dp/B01HRMPBQQ?ref=ppx_pop_mob_ap_share
Battery Holder: https://www.amazon.com/dp/B07HQ5RT7Z?ref=ppx_pop_mob_ap_share
Hope this helps!
ive done a handful of mirror finishes, or close to it, with sandpaper, and i strangely really enjoy the process. i cant imagine how challenging it would be to do on the stones. i guess if you have really flat geometries... with sandpaper it only really takes a couple hours, depending on how fast, and how fussy you are. i would recommend a practice with a cheap knife to get the feel, but it isnt hard. you just need to work patiently through a succession of grits. i typically start at 800 grit (depending on the existing finish), onto 1000, then 1500, 2000, 3000 and then 5000 for the last step. i really like these trizact pads for my 3000 and 5000 steps- https://www.amazon.com/gp/product/B00LIXEWXO/ref=oh_aui_detailpage_o05_s01?ie=UTF8&psc=1
i stop there but you can keep going on pretty much forever if you want.
work each grit at a different angle from the last, and sand until all lines from the previous grit have disappeared. do not skimp here.
i dont recommend big jumps in grits until you are in the higher ranges.
also as ref gent said above watch your tip and heel so that you dont blunt your points. areas near the handle can be challenging and you can easily scratch your handle, so i would use a little tape to protect it.
Wow, I don't use anything much coarser than 400 grit; polystyrene is pretty soft stuff.
OP, when I'm using sandpaper, I use stuff like this. It works well wet or dry. For sanding, I use grits up to 2000. If you're feeling lazy and can wait a little while (they ship from the UK), I really like Flory's sanding sticks.
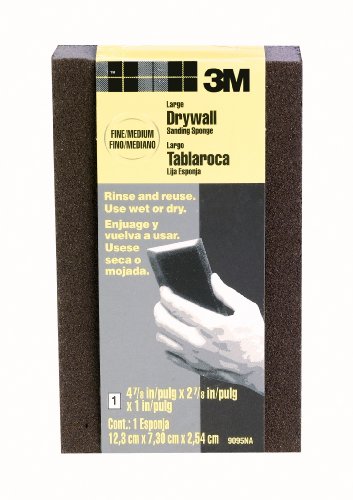
Sanding sponge- used by painters/ decorators for prepping wall surfaces https://www.amazon.com/3M-Sanding-Sponge-Fine-6-Pack/dp/B004MW4GFM
Sanding sticks, you can make these yourself by applying double sided tape to wooden popsicle/ ice cream sticks/ tongue depressors/coffee stirrers and then sticking sandpaper to the tape, using a craft knife to trim off the excess sandpaper. Or alternatively you can use pre-made ones from Revell https://www.revell.com/tools/88-7010.html
Chisels are good for removing large lumps of filler/heavy layer lines, but they are difficult to use and require excellent sharpening. if used properly however, they can give a smooth surface with really clean edges, especially when the sharp edge of the chisel can get right into a corner that sandpaper cant reach. https://www.greenparrotools.co.uk/model-building-hobby-supplies/fine-detail-small-wood-sculpting-carving-chisels-tools
hope that helps!
Thank you!! Absolutely, here's the video that we watched and followed very closely: https://youtu.be/H9xn066qfKo
Some notes:
CRC 05089 BRAKLEEN Brake Parts Cleaner - Non-Flammable -19 Wt Oz https://www.amazon.com/dp/B000LDR9HI/ref=cm_sw_r_cp_apa_i_fbdvDbZNSKSJG
120 Grit Dry Wet Sandpaper Sheets by LotFancy, 9 x 3.6", Silicon Carbide, Pack of 45 https://www.amazon.com/dp/B075WV8PN9/ref=cm_sw_r_cp_apa_i_NfdvDbPYQJ1VG
A. Good for the holes in the caliper and very tight spots (I painted almost all the way to the back of the caliper to make sure it looked red at every possible angle).
Check out this item at Target https://www.target.com/p/e-l-f-blending-eye-brush/-/A-14653397
B. A stiffer brush for the verrrrry tight spots where the caliper meets the brake pad and you do NOT want to have Shakey hands and get anything near those pads.
Check out this item at Target https://www.target.com/p/e-l-f-concealer-brush/-/A-13958833
C. For extra measure when you are doing touch up in those tight spots (this one is $3):
Check out this item at Target https://www.target.com/p/e-l-f-angled-eyeliner-brush/-/A-13586153
https://www.ebay.com/itm/TESLA-HI-TEMP-PREMIUM-BRAKE-CALIPER-DECALS-STICKERS-CAST-VINYL-/362070373338
https://teslamotorsclub.com/tmc/threads/want-painted-calipers-dont-want-to-spend-600-on-them.140873/#post-3346753
My husband didn't want to do this method because prep looked much more intense and he'd figure I wouldn't mind a painting project on a cloudy Saturday afternoon.
If you are in my state, I'd be happy to help. I'm new to reddit so not sure how to do the direct messages but let me know! Hope this helps! Please don't hesitate to ask questions when you start this. 150% worth the effort. It's beautiful and the Tesla service man honestly thought our SR+ was a P3. Even after pulling up the computer to look at the specs, he kept saying,"You're so lucky to have a performance!". I didn't have the heart to tell him it wasn't. Best of luck!!!
Getting a good finish on clear requires three steps:
Products I use:
Here's how I do it.
To get plexiglass crystal clear you really want jewelers polishing cloths
I had a jewelry class in college and made a piece with plexi
These things work great
https://www.amazon.com/3M-Sanding-Sponge-Fine-6-Pack/dp/B004MW4GFM
Try to find the flexible sand paper sheets that are meant to be hand-used. I found them in Loews 3m brand, this is the exact type of sheets i use: https://www.amazon.com/3M-COMPANY-28320SB-UF4-320G-Sandpaper/dp/B00PPD1CYA/ref=sr_1_7?s=office-products&ie=UTF8&qid=1527015867&sr=8-7&keywords=sandpaper+320+grit+3m
I use these cloths on the LCD screen and the resin vat FEP sheet. After cleaning the resin vat FEP sheet and the LCD with paper towels, I give them a nice polish with the cleaning cloth to remove any other smudges or dust. Make sure to have a cloth dedicated to ONLY the LCD screen, as you want the keep the LCD screen pristine and free of dust and smudges.
You'll also want a print curing station to harden the prints once they have been cleaned. I bought:
sand it with one of these. Just enough to scratch off the peeling paint and glossiness. rinse the pad and repeat if it gets too gummed up. don't spend more than 15 mins on this. https://www.amazon.com/3M-Drywall-Sanding-4-875-Inch-2-875-Inch/dp/B00125NQBC
and then paint it with ACRYLIC or OIL paint. Wait 24hrs. Paint second coat. Wait another 24 hrs to dry at room temp with a fan on it to speed it up
it'll last a long time.
the paint you're using may be okay too. but you need to let it dry between coats and give the final coat a good 24-48hrs before touching it. it has to dry at room temp and preferably with a fan on it.
Ah! That makes perfect sense. I also noticed the different grit standards. Here is the specific product I use: https://www.amazon.com/dp/B07D29Z738/ref=cm_sw_r_cp_apa_wTPJBbAB720N1
General rule, up past 4000 grit my thumb can't really tell a difference between the grits, they're all so smooth. It's very very fine at those high grits
I'm not really sure about leather. I know leatherette is generally made of some sort of plastic, so it may damage that.
I'd just sand down the stand with a finer grit (maybe 800 or something) and find some way to get rid of the sawdust in the grooves of the wood.
This may or may not be a terrible idea. I'm not exactly an expert at woodworking. :P
The following is what I use:
http://www.amazon.com/dp/B0002MSY7M/ref=wl_it_dp_o_pd_nS_ttl?_encoding=UTF8&colid=1MZHA7NQKX918&coliid=I381Y10SB6Q4CK
http://www.amazon.com/dp/B000B8UPMO/ref=wl_it_dp_o_pC_nS_ttl?_encoding=UTF8&colid=1MZHA7NQKX918&coliid=I2XWKP0K1DK5HA
http://www.amazon.com/dp/B0002MSY72/ref=wl_it_dp_o_pd_nS_ttl?_encoding=UTF8&colid=1MZHA7NQKX918&coliid=I2DQO3NVC9FF6R
http://www.amazon.com/dp/B0002MSY7C/ref=wl_it_dp_o_pC_nS_ttl?_encoding=UTF8&colid=1MZHA7NQKX918&coliid=I3GP1JSN86DPMD
Hopefully that helps.
Edit: Even modestly using sand paper, this may be more than what you need. See: http://www.youtube.com/watch?v=UbAo4RpM7oM
Good color matching. You can really smooth out the paint to make it look more seamless with a 3000grit sandpaper. Something like this: https://www.amazon.com/3M-03064-Trizact-Performance-Sandpaper/dp/B005RNGL9O
I found it really improved my alters.
Just letting you guys know, you can accomplish the same thing as this device was designed for, but with better results by using Trizact 5000 grit wetsand paper. Then shine it back up with some good polishing compound and a soft cotton cloth. Just a bit of info.
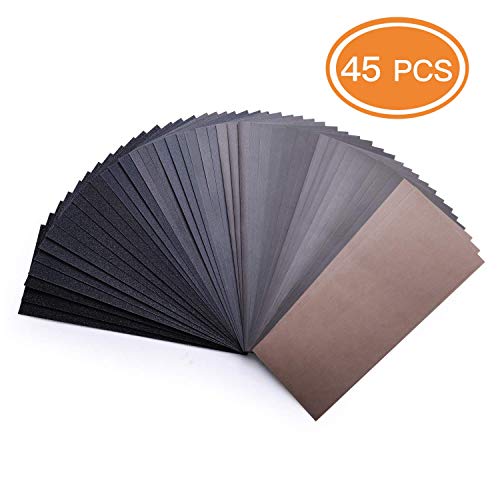
this isn't the exact brand, but i got a set of sandpaper just like this one. and it covers everything and you can get very finely tuned with the sanding/polishing.
https://www.amazon.com/dp/B07H7KFT6F/ref=dp_cerb_1
Yep, this is what I use
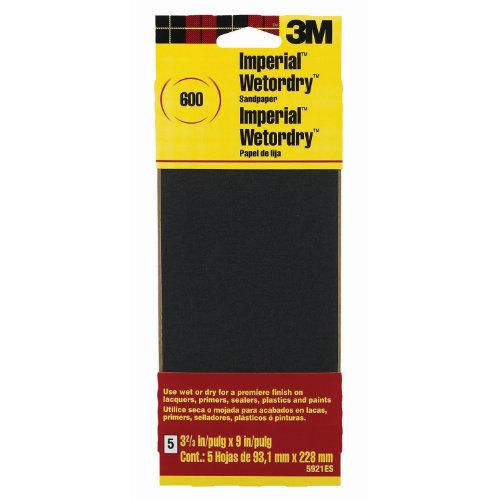
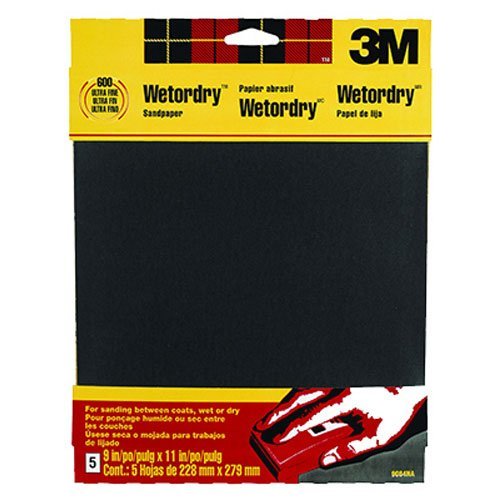
https://www.amazon.com/3M-Wetordry-Sandpaper-11-Inch-5-Sheet/dp/B00004Z4BE
Works well.
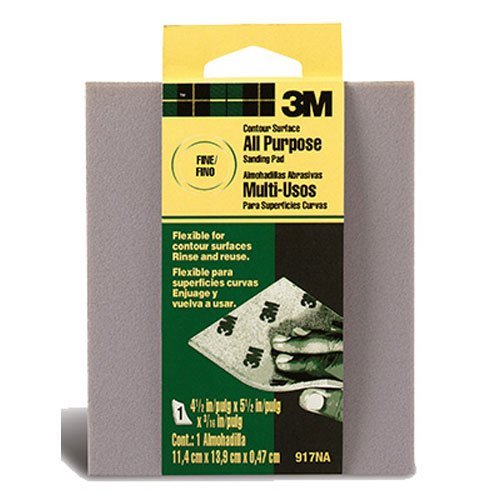
Instead of sandpaper try 3m Sanding sponges. I use fine and superfine grade pads before I prime or paint. They really shine on curved or irregular surfaces.
http://www.amazon.com/3M-916DCNA-Contour-Surface-Sanding/dp/B00004Z49L/ref=sr_1_1?ie=UTF8&qid=1313506209&sr=8-1
http://www.amazon.com/3M-Contour-Surface-Sanding-Sponge/dp/B00004Z49M/ref=pd_bxgy_hi_text_b
3M Superfine sanding sponge. I also have the fine version. I just expected the scratches to be...less obvious I guess? There's also a some discoloration, but that might be me nitpicking. Maybe I'm sanding a larger area than I need to? Judging by the grits you posted it looks like the superfine I have should be the starter and I need something even finer for finishing.
Other than the basics of hand sanding such as sanding in different directions I highly recommend sticky backed sand paper if you can afford it.
Obviously best used with a sanding stick/jig.
You can sand those out with wet-dry sandpaper. Something this. If you have a power sander, you can use this.
Make sure you use water to lubricate, and sand the whole top evenly. Move through the grits until you are at ~3000. Between each grit, make sure you clean the top thoroughly. You don't want any of the old grit on the surface when you start with the new grit.
NOTE: you can stop before 3000 if you want a less polished look.
Then, you can optionally buff it out with an automotive buffer and polishing compound, if you want a polished finish.
Edit: Forgot to say that you should pick a "pattern", and stick to it. If you want it to be swirly pattern like this, use the circular sander. But, a straight pattern is more common.
https://www.amazon.com/dp/B07R64PZ8N/ref=cm_sw_r_cp_awdb_t1_ecJ6Cb128KFMW
https://www.amazon.com/Diane-Rectangular-Pumice-Stone-Tie/dp/B003SZ4C1W/ref=sr_1_9_a_it?ie=UTF8&qid=1503609134&sr=8-9&keywords=pumice+stone
or if you're feeling exceptionally manly
Plus one for /u/staff_guy comment. Get the teflon bushings and you won't have the sticking issue. Also, as you learned, the ca is unnecessary on acrylic and resin blanks. My 2 cents on micromesh is that it's a tad overpriced. FWIW Iwork with a lot of acrylics and resin. I typically use the following items and so long as you don't go too crazy they'll last a long time.
Large pack of 320 Grit as you'll use that the most to get your smooth shape down.
https://www.amazon.com/dp/B00004Z4BF/ref=cm_sw_r_cp_api_KOMiyb353ZW2H
A variety pack of 400-3000 Grit for polishing.
https://www.amazon.com/dp/B01JFX9UWQ/ref=cm_sw_r_sms_c_api_eLMiybQWJ11Q1
Lastly a small tube of tormek for final polishing.
https://www.amazon.com/dp/B00149DIBE/ref=cm_sw_r_cp_api_7SMiybBCXAV66
You'll spend about $25 and that setup will last you for many pens.
Yeah, it's available at the hardware store. It's this stuff. Don't forget to flatten that nagura stone as well.
Concentrate on your angle holding first and foremost, but as that progresses think about distributing the sharpening workload over the stone's entire surface. This way you'll wear the stone more evenly and not need to flatten as often. Also, just fyi, fired mud stones like Kings are harder around the edges than in the center. Thus they tend to wear fastest in the middle. If you ever need to do tip repair by sharpening along the spine, lay the stone on it's side so that it's not a big deal if and when you gouge it. Good luck!
Maybe something like this?
??
http://www.amazon.com/gp/product/B004Q05OCO?ref_=sr_1_1&qid=1420516996&sr=8-1&keywords=600%20grit&pldnSite=1
http://www.amazon.com/gp/product/B00004Z4BE?ref_=sr_1_1&qid=1420517037&sr=8-1&keywords=400%20grit%20sandpaper&pldnSite=1