Best hobby tool glues according to redditors
We found 285 Reddit comments discussing the best hobby tool glues. We ranked the 48 resulting products by number of redditors who mentioned them. Here are the top 20.


11. Testor Model Master 8876C Clear Parts Cement and Window Maker, 1/2 fl. Oz.
5 mentions

Testors8876C


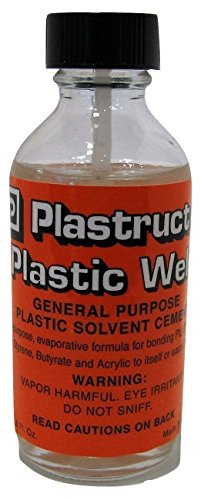
17. Plastruct Bondene Cement for Styrene 2 oz
3 mentions

PLASTRUCT Bond-2 Bondene 2 oz PLSR1000 … PLA3


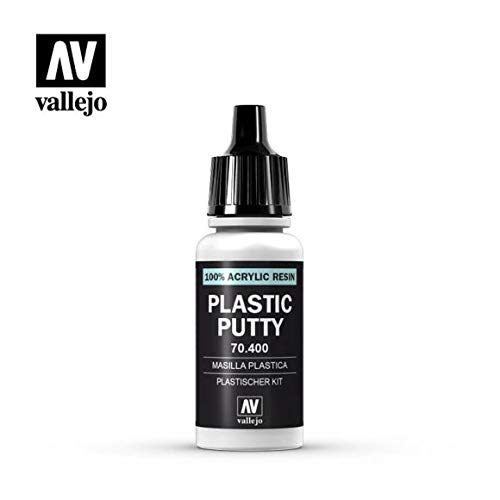
Whatever the question is use Vallejo putty to fill the gaps in, you can use green stuff or liquid green stuff but I don't think it holds much to the vallejo brand.
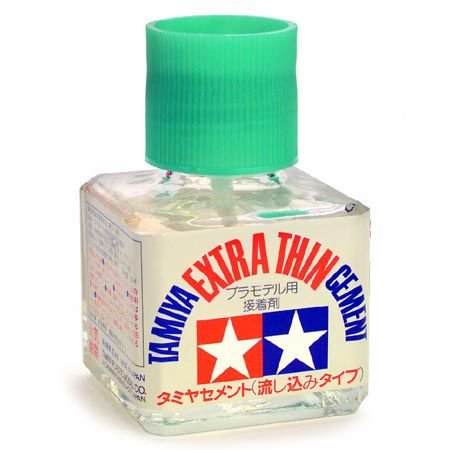
Tamiya make a good Willys Jeep - the more recent version is item # 35219. Amazon link. Get him some Tamiya extra thin cement, an x-acto knife, and consider a starter set of model paints. For brush painting I suggest Vallejo Model Color paints - basic colors for the jeep would be something like black, white, olive drab green and a brown.
From someone who has never put together a miniature model before KDM, it wasn't that bad actually. Some models are a pain in the ass due to how small the pieces are, and fitting into your fingers.
Most of the models are pretty straightforward. You can use vibrant lantern (http://vibrantlantern.com/) to find how to put together any models that the official KDM website doesn't have.
The armor kits take a little bit more in figuring out how they are supposed to go. Armor kits can make up to 4 survivors, and you can mix and match gear so it's really up to you how to decide to build them.
Also, if you aren't painting them, the stuff below is all you'll need:
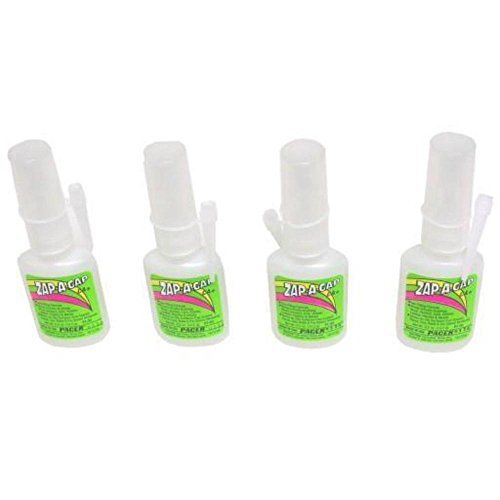
Pacer Technology (Zap) Brush on Zap a Gap Adhesives, 1/4 oz
https://www.amazon.com/gp/product/B00GB0SE60/ref=ppx_yo_dt_b_asin_title_o08_s00?ie=UTF8&psc=1
Pacer Technology (Zap) Zap-A-Gap Adhesives, 1/2 oz
https://www.amazon.com/gp/product/B00SXJJ2OU/ref=ppx_yo_dt_b_asin_title_o07_s00?ie=UTF8&psc=1
Professional 8 PCS Gundam Model Tools Kit
https://www.amazon.com/gp/product/B01GH6B3Z6/ref=ppx_yo_dt_b_asin_title_o06_s00?ie=UTF8&psc=1
Alvin Deluxe Professional Self-Healing Cutting Mat
https://www.amazon.com/gp/product/B0015AOIYI/ref=ppx_yo_dt_b_asin_title_o06_s00?ie=UTF8&psc=1
I used to buy Loctite. It's pretty decent for what it is, but I don't really like those fancy 'squeeze' bottles, so I started looking around for a different brand to buy from.
This is what I buy now and it works very well. Good value, too. It's usually around $6, not $8, which is the highest I've ever seen it. Sometimes it drops down to $3/$4.
http://smile.amazon.com/gp/product/B0000DD1QQ?psc=1&redirect=true&ref_=oh_aui_detailpage_o06_s00
I used this for Glue https://www.amazon.co.uk/Gorilla-Glue-4200101-Epoxy-Syringe/dp/B01MQMM3X1 and this for the filler https://www.amazon.co.uk/Vallejo-20-ml-Plastic-Putty/dp/B000TSBJEO
Airfix and Revell Germany both make starter sets.
This set of larger planes might also be a good choice if the idea is to go for a "bigger" present.
These packages include paint, glue, and a paintbrush. Honestly, the paint isn't great. But as a first time lark, (1) he's likely going to build an imperfect model, (2) he'll probably still have fun doing it.
For further information as to basic toolkits and commonly asked questions, see the FAQ and stickied posts.
https://www.reddit.com/r/modelmakers/wiki/index
Short version: craft knife like an X-acto knife, glue, paintbrush, maybe a sanding stick or two (manicure boards of various grits would work for this), tweezers.
Also, I would recommend this as glue:
https://www.amazon.com/Tamiya-87038-Extra-Thin-Cement/dp/B000BMYWYC
It's designed to flow into the joints of plastic parts and essentially weld them together. It works much better than the tube glues that will be included in those sets.
As for the kinds of results one might be able to expect if one takes time and is careful:
https://www.reddit.com/r/modelmakers/comments/6uqtiv/english_electric_lightning_172_airfix_starter_set/
Speak with u/pukit about it as well, that's his model using nothing more than what's included in the box of one of the starter kits I linked.
It's a good first dip.
Hope that helps.
You could also buy some Tamiya glue. That way if any other plastic items of yours breaks, you can fix it.
Here's a Psylock I did recently. I used the Ms. Marvel body, which I think it's the same as Capt. Marvel. The open hand and head I got from a Mariah Hill from the TRU Shield 3-Pack.
I used Green Stuff for the hair, it hardens to a plastic like toughness but still retains a little flex, so I like using it for hair.
Sword I just got from Casting Cave I think, and painted purple. ClayorNotCustoms also sells a clear purple sword.
Sand down all the joints as best you can, anywhere where plastic rubs plastic. You can prime the figure, then work all the joints and see where problem areas are.
For energy effects I'd try hot glue before melting plastic. Wrap your figure's fist in aluminum foil, then cover it in hot glue in whatever shape you want (like a psychic knife), let it cool. Then take it, and the foil off and your hardened glue shape should pop back over the fist. Water down some purple paint real good and paint it and it should keep it's transparency.
If you have any more questions go ahead and ask.
I'm a full-throated advocate of never buying anything that GW rebrands (clippers, greenstuff, brushes, primer, etc.)
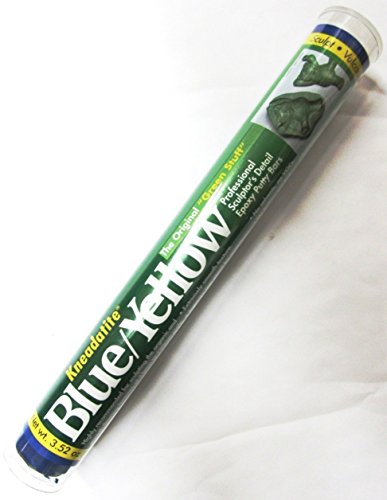
For the cost of a small GW ribbon of greenstuff, you can buy more kneadatite (the manufacturer!) than you'll ever use. Unless, of course, you're a sculptor.
I love supporting my FLGS, but Amazon has a log of it for $13:
Green Stuff Sculpting Putty
Use good glue like the kind that comes with a precision applicator or a liquid glue for joining shell halves or panels. Watch a few youtube videos on gluing.
Do not use the crappy tube glue.
Malifaux minis are pretty darn close to KD in terms of complexity. I really don't think you are going to find anything cheap, but you could probably buy, assemble, and ebay the minis you build (and anything is cheaper than fucking up a KD model). You'll lose a few bucks, but a well assembled mini is worth almost as much as one on the sprue.
I am new to assembly as well, but after about 20 models I don't even sweat it. Everyone on this sub swears by Tamiya liquid cement -- but I think this applicator is 100x better than the brush for most cases:
https://www.amazon.com/gp/product/B0006N6ODS/ref=oh_aui_search_detailpage?ie=UTF8&psc=1
Basically... take your time, clean up every little piece as it comes off the sprue, dry fit a few times to make sure. It's not that hard, it just takes patience. Sometimes I will sand+dry fit a piece a dozen times before it finally fits perfectly. One thing that I didn't realize for a long time is these things aren't perfect -- sometimes a piece just doesn't fit and its up to you to fix it. A couple of the hands on the Phoenix, for example, were real bastards for me. A really great trick I learned randomly on youtube -- you can use the plastic cement as a kind of seam filler by putting slightly more glue than necessary, so it just barely squeezes out the side. Then cut/sand any excess.
I also recommend grabbing a cheap seam scraper and a very nice sprue cutter (the clippers at home depot are not made for plastic). Also maybe some tools for pinning -- for example, I had a resin base that I wanted to put my antelope on, so he had to be pinned to it rather than glued.
If you are going to paint your models, there's a few more things you should get -- a putty you like, some clay shapers, and some way to do some light sanding.
It's not really the same thing-- MEK works but it's nasty shit and will make you unhappy or dead in many exciting ways.
I usually use either Tamiya Extra Thin or Plastruct Bondene:
https://www.amazon.com/Plastruct-PLASTRUCT-Bond-2-Bondene-PLSR1000/dp/B0006O09M4/
A 2-ounce bottle will last you through lots of model kits. You shouldn't need to use much at all if you're doing the capillary action thing.
Paints: Most GW paints are fantastic, there are a few exceptions here and there, but you can easily supplement your GW paints with alternatives from Vallejo, Army Painter and P3. This usually comes down to personal taste for most people.
http://www.thewarstore.com/vallejo-game-color-paint.html
http://privateerpress.com/formula-p3/paints
https://www.thearmypainter.com/
Brushes: GW brushes are a joke, they're the same price as really nice brushes like the Windsor Newton series. If you're going to spend $15-$20(US) on a single brush, get something nice not the GW crap.
Hobby Tools: GW's hobby tools are fine. It's hard to mess up simple metal tools. That being said, they're also 3-4x what they should cost. A trip to your local hardware store should net you the same or better products for about 1/4 of what GW wants to charge!
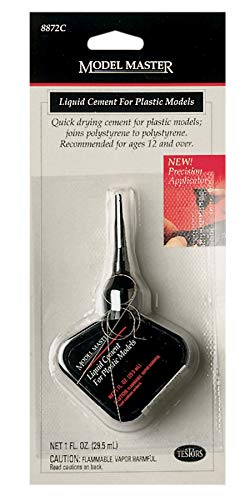
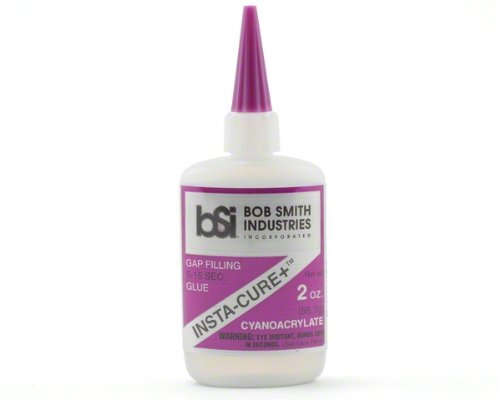
Glue: I hate GW glues personally. I've never had a good experience with them. For plastic assembly I prefer Model Masters and for Super glue I prefer the Bob Smith Industries gap filler medium.
http://www.bsi-inc.com/hobby/insta_cure_plus.html. I would be shocked if you can't find this in any number of hobby/craft stores. Worst case scenario, you can get it from Amazon with a couple of days wait time.
https://www.amazon.com/Liquid-Cement-Plastics-1-oz/dp/B0006N6ODS. Best plastic glue around, the metal applicator tip allows for extremely precise application of glue.
Primer: Everyone has different opinions on primer. If you're just getting back into the game I suggest going with GW primer. It rarely has issues and although extremely pricy, it gives an excellent base coat. That being said, any dollar store matte primer will do the trick.
**Once you're back into things, I highly suggest you look at an airbrush. The miniatures world has changed a LOT in the last 20 years, and now airbrushes are cheap and many paints are already formulated for use with them!
nonononono dont use super glue! What you need is cement glue, I use and recommend Tamiya. I've never used super glue on plastic models so Im not sure what will happen, but play it safe and use the stuff that was designed for these models.
Edit: look to see if there are any hobby stores near you, they most likely can give you advice, and most likely would stock the correct paints and glues
here's my airfix Hurricane mkII that was my first serious build, It's old and I lost the canopy, but I still like it :) Model making can be very fun, those are some nice kits, enjoy them
tamiya glue is pretty good with a nice applicator if you want to be more careful when gluing your models, https://www.amazon.co.uk/Tamiya-87038-Extra-Thin-Cement/dp/B000BMYWYC/ref=sr_1_1?crid=2N0SJ6OUA4GVT&keywords=tamiya+glue&qid=1566379040&s=gateway&sprefix=tamiya+g%2Caps%2C137&sr=8-1
MEK is SUPER dangerous to use. if the fumes get in your eyes, you go blind. get it on your skin and it can cause all sorts of other issues like nervous system complications. its seriously that dangerous. https://www.ccohs.ca/oshanswers/chemicals/chem_profiles/mek.html
it works well for welding abs plastic as it works on the molecular level to bond the pieces together. has use in 3d printing and such, but other than that, i wouldnt use it for modeling.
i suggest not using it due to the dangers in both use and storage (it needs a stable temp).
just pay for the real stuff
http://www.eplastics.com/styrene-glue one alternative.
https://www.amazon.com/Tamiya-87038-Extra-Thin-Cement/dp/B000BMYWYC/ref=sr_1_5?ie=UTF8&qid=1491598947&sr=8-5&keywords=styrene+glue its cheap enough to not worry about the price. its not like you plan on wel
A favorite of mine and a lot of people on this sub is Tamiya Extra Thin Cement: https://www.amazon.com/Tamiya-87038-Extra-Thin-Cement/dp/B000BMYWYC/ref=sr_1_1?ie=UTF8&qid=1478116000&sr=8-1&keywords=tamiya+extra+thin+cement
This stuff is great for small parts, it has a very small applicator brush built in. The regular Tamiya Cement is also good stuff, it just has a bigger brush and is much thicker. The regular cement is more for larger pieces.
The 3 things you need are:
That's pretty much it. If you want to dive in really deep I have a massive post that lists other tools and touches on a lot of customization that people have done. But none of that's mandatory, you can very easily forge ahead with just the 3 tools I linked above.
Damn, that cloak is pretty. Very nice paint my friend. Only critiscm is fill that gap.. it's hardly noticeable but once you see it you can't un-see it. :)
I use this stuff for quick patches.
Vallejo Plastic Putty, 17ml https://www.amazon.com/dp/B000PHCNLC/ref=cm_sw_r_cp_apa_vHTTBbFM6FE8R
Thank you! I love sharing how I did things! The cast was OK (no bubbles, the claws were a little jagged). It's a breeze to assemble (no pinning required), but there were some noticeable gaps after assembly. These were easily-filled with Vallejo plastic putty, which I find easier than liquid green stuff:
Vallejo Plastic Putty, 17ml https://www.amazon.com/dp/B000PHCNLC/ref=cm_sw_r_cp_taa_qfQNDbCZP4KHB
For Contrast Paints, I found these tables really helpful: http://imgur.com/gallery/mb5jHNg
I undercoated the model with Wraithbone Spray. The green scales were done with Militarum Green, the bottom half of the model and any bone bits were painted with Skeleton Horde. I went back over the bone areas and applied Snakebite Leather in the recesses to help them stand out. The tongue and gums were done with Volupus Pink. The blue areas were done with Akhelian Green! The base was done with Basilicanum Grey and Gor-Grunta Fur. I went back over the metal bits with watered-down Skrag Brown in the recesses to simulate corrosion.
I have not had any luck with green stuff so far, but I am loving plastic putty. I think it is easier to use for basic stuff like this, but I say this as a novice.
Vallejo Plastic Putty, 20ml https://www.amazon.com/dp/B000TSBJEO/ref=cm_sw_r_cp_tai_9bfJDbBRE0B47
One of my best friends;
http://www.amazon.com/Tamiya-87012-Plastic-Cement-20/dp/B002CDPZDK
Good luck.
Things I've learned starting out:
Wash the miniatures. I found the easiest way was those little ziploc plastic containers. Warm dishsoapy water in them, throw a few minis in, scrub them with an old toothbrush, rinse them off and toss them into a second ziploc container filled with plain water. Then drain and refill that a few times to get all the soap out. Be careful you don't dump them down a drain.
Take them out of the warm fresh water and put em onto a plate with a paper towel or something to dry. I like to organize them into which model belongs to what at this point.
I invested on a sprue cutter and it has been WONDERFUL for me to remove pesky mold lines and the bigger tags sticking out of models. Also an xacto knife helps.
I got some cheap needle files from Harbor Freight and they've helped get the flash lines flush without any weirdness.
After your stuffs all pretty and moldline free I tend to toss it into a sonic cleaner because I work at a lab. It might be placebo but the industrial strength badass one at work seems to get clean and I mean... why not? But you can do the water and rinse again. Or even just do it once, after the mold line removal. (Side note: sonic cleaners are PRETTY RADICAL for removing paint from miniatures with some simple green. I love it. Saves me a lot of scrubbing.)
Anyway once its dry I personally use this glue and some stuff called green stuff to fill in gaps. Heres a tut showing the basic idea
Once they're assembled I use some good ol elmer's white glue on the bases and dip em in sand and shake them off. Tutorial that shows that
Then prime your stuff. Tons of tutorials about it and tons of everyone saying which is their favorite primer, spray or brush on, different types of primer, different brands. Some stand by Army Painter or Citadel. I've had good results with Rustoleum Ultra Cover 2x White primer. I've recently picked up some TAMIYA WHITE which I hear good things about. Trying them on some Morats tomorrow.
Lots of other good info has been posted too! I also just started probably, shit, 6 months ago, so this is stuff I've had to pick up and learn as I go.
The easiest way to remove paint or plating from parts before gluing is to scrape the spot with an X-Acto #11 razor knife. Be patient and take your time, you can get all the paint off.
Second, when you use your Testor's cement, apply it with a toothpick, and use less than you think you'll need. Amazing that it won't hold two painted parts together, but if you get it on paint it'll take that right off. :)
You can use CA (superglue) as well. I use Testor's Model Master cement (love the applicator) for most plastic-to-plastic, and CA for plastic to metal or rubber, as well as for when I need a faster drying time or if I just can't scrape off the finish.
Finally, you have to leave it be while it cures. Model cement works by melting the styrene. Cover the surface of one part with glue, attach the other part, wipe away any excess that squeezes out, then clamp it or wrap it with a rubber band and don't touch it for at least 5-10 minutes. Moving the parts during curing will ruin the bond.
This shit, right here.
And specifically that one. The metal applicator is fantastic, as it is easy to clean (seriously, why would you use a fat plastic need for plastic cement applications?) and being a thin needle allows you to apply it in hard to reach nooks and crannies.
Tamiya extra thin plastic cement my dude. Will literally weld the plastic back together, better than superglue for fixing clean breaks.
Tamiya 87038 Extra Thin Cement Glue Fine Tip 40ml https://www.amazon.com/dp/B000BMYWYC/ref=cm_sw_r_cp_api_Sc5Fzb0CHHSS1
This stuff right here.
Just use it in a well ventilated area and don't apply it to parts you've' painted cause it'll eat that paint like it wasn't there.
I tried a few different ones and had the most success with this for the model assembly and then any super glue gel for the model to the base.
Our team uses a variety of different types: Gorilla Glue, Titebond, and more. Gorilla Glue is really good, but just be sure that you wipe off the excess or it will expand. Titebond is really reliable but it takes a very long time to dry. Zapagap is pretty pricey but it dries insanely fast and it is really strong.
Here's a link to all of the glues: 1. Gorilla Glue can be found at Home Depot 2. Titebond We put the Titebond in to smaller containers which can be found here 3. Zap a Gap
EDIT: We also use something called InstaSet Accelerator. It should be used only in emergencies along with zapagap.
Probably Green Stuff.
https://www.amazon.com/Green-Stuff-Yellow-Epoxy-Putty/dp/B002MB61RQ
As far as I know, Reaper Miniatures.
Also, he uses "Green Stuff" Epoxy Putty to sculpt additions to miniatures.
I've been experimenting with different things.
Plastruct Plastic Weld makes a pretty solid bond. The only time I've had trouble with it is lately while trying to bond sections of a sword blade that are 0.3" thick and 3" wide. The sections with the most stress on them can snap if I let it flex enough.
I used Gorilla Glue to glue together pieces that left gaps. It expands and fills, so that was handy. The bond seemed strong, so I'm going to try that on the blade pieces next.
I've also used Loctite gel control super glue and it worked fairly well, but I don't believe the bond is as strong as Plastic Weld.
As for finishing prints, my current method is to use XTC 3D to smooth the print. After that, I prime, sand, and paint using spray paints. I will probably get an airbrush soon to try for nicer looking paint jobs.
You really need to be using a thin hot weld type.
I've been using hot welds for 18 years now, and it is what most advanced modelers use. Of all the ones I have used, Plastic Magic from Deluxe Materials is the best hands down.
https://www.youtube.com/watch?v=_v0S8Qrh8Nc&index=3&list=WL&t=1s
https://www.amazon.com/DELUXE-MATERIALS-Plastic-Magic-Adhesive/dp/B01LFP6LVU/ref=sr_1_2?ie=UTF8&qid=1543576591&sr=8-2&keywords=plastic+magic+glue
Do yourself a favor, and buy Bob Smith brand super glue. More glue for less money. Also, they sell "un-cure", in the case you glue yourself to your ... self.
> Am definitely thinking contrast paints are the way to go for starters. Do they come in inclusive sets?
​
Depends on if you remember how to paint, really. It's another way to do things. No sets, AFAIK, but they are intended to replace base, shade and layer paints with one paint, so they're overall either cheaper or better value for money, if you didn't do highlights before contrast paints.
​
Supplies:
--Razor knife
​
--Cut mat
​
--plastic glue
​
--*thick* superglue
​
--Spray primer of choice
​
--cheap arts & craft store brushes
​
--sticky tac
​
--gatorade caps
I did not need to pin him. In fact I've not found the need to pin any of the models because of the glue I use.
https://www.amazon.com/gp/product/B0006N6ODS/ref=oh_aui_detailpage_o07_s00?ie=UTF8&psc=1
That stuff emulsifies the plastic a little to create a nice bond, of course be careful with it, but it works great. The harder you press and hold the parts together until it starts to set up the better it fills in seems too. The applicator tip is very helpful for these tiny miniatures as well.
For the SA use masking tape to hold the disk in place if need be, but if you hold him in place for about 5 min it starts to set up enough to hold the base in place then you can turn him upside down so all his weight is off the leg and let him set up for for a day. Usually this stuff sets really fast, the only things that require more time to set are real "load-bearing" spots like the leg here or the left hand of the Dragon God.
Reminder: this glue essentially melts plastic, but as long as you don't bath your minis in it will not harm your model. It only emulsifies the surface it is applied to. It will not eat your model like acid or something.
Tamiya Extra Thin Cement works perfectly for KDM. The cement actually melts the plastic together for a tight fit. It comes with a fine tip brush applicator which gives you great control. Added bonus is you can’t glue things to your fingers, and it gives you 10-30 seconds to reposition the pieces.
Definitely dry fit all pieces before gluing to make sure they go together properly. Have fun!
Tamiya extra thin cement
Sorry had the wrong wording its Tamiya Fine Primer
I guess i was thinking about (and still screwed up) the name of their glue i use
Try liquid cement for plastic. It fuses the plastic together instead of just gluing them together. Tamiya Cement is what most people recommend, however depending on if you have a hobby shop nearby you can get cheaper brands like Testors.
Just apply to both pieces you want to fix, hold them for 30 or more seconds, and it should be good! However, you should really let it cure for a day or more to really prevent breakage. It's not 100% fixed, but way better than just super glue.
My best guess would be to use a thinner for that type of glue, if one is available. If one isn't, you might need to just gently flick and peel them off or softly sand them down. Wish I could give a better answer :(
Also, I'd recommend making the jump to cement glue as it creates very small seams that can be sanded down to near invisible levels with some patience and a delicate hand. Though if the model kit is of a good quality, you probably wouldn't need to. Tamiya example on Amazon. An example of a model maker using that type of glue. He also gives great tips throughout his videos, if you find yourself a fan of his.
I recommend you pick yourself up a bottle of this to help deal with the sheer off. Apply a coating to the sheered off end, hold it together for awhile, and then leave it be so it can cure properly. It should weld the two pieces together, but with the location of the break, you do run the risk of losing some flexibility in the arm.
I suggest that you use a plastic cement to glue in the parts. That's why I do with accidents like this. Plastic Cement is pretty solid as an adhesive too. Here's what I suggest that you get: https://www.amazon.com/Tamiya-87038-Extra-Thin-Cement/dp/B000BMYWYC
i did something similar with a p bandai kit i got a while ago. was a lot more rigit than i was expecting and i broke a piece off.
I found out about a brand of plastic cement.
https://www.amazon.com/gp/product/B000BMYWYC/ref=oh_aui_detailpage_o04_s00?ie=UTF8&psc=1
it is a solvent that partially dissolves the plastic. put it on and line it up right with where it broke and apply pressure. then let it sit for about a day, then it will be practically like new. seen people use stuff like this to fix seamlines too though that takes a bit of sanding.
Keric has posted some great info but I would add a bit of extra info to that. Buy some gloss varnish so that the Decals look & stick properly. I would suggest using PVA wood glue to glue canopies & clear parts because it's better value for the money. Also, if you're doing any brush painting, buy Vallejo Model Colour paints. I've heard they brush paint the best.
Paint formatting chart to be used for obtaining the correct paints from Vallejo.
Use tweezers to handle the smallest parts. Thin the paints before you paint & Apply a few thin coats instead of one thick coat. I would suggest getting a bottle of modeling glue with a fine applicator nozzle or a brush to apply the glue more precisely. i advise you to keep a tube of plastic putty that's either water or solvent just in case you need to fill any gaps.
Would also suggest you join the Britmodeller or FSM forums for more advice:
http://www.britmodeller.com/
http://cs.finescale.com/fsm/f/default.aspx
More advice: Scale Model Guide Quick Kits
Guide on brush painting
I’ve got some modeling putty that gets the job done and I picked up a sandable filler primer for later. It shrinks a bit after it dries, so I’m probably going to have to pick up another tube of the stuff.
This is what I’m using
I used this Pacer PT01 Zap A Gap CA+ Glue, 2 oz/ounces https://www.amazon.com/dp/B000EYY1ES/ref=cm_sw_r_udp_awd_YY95tb0WDKD6K
It was cheap and holds up really well, I used it for when my Himeji fell and broke her arm and piece of her hair. The trick was to use a reeeeally small amount so the break would be flush, any more and it'll ooze out.
Bought mine off Amazon here. It dries hard and is pretty adherent, and doesn't run when you're positioning the mod. There may be better options, but it's worked well for me.
It takes a lot of time. You need the right tools. Id' have an exacto knife, some clippers, some files, a good glue, and probably some gap filler. Oh, and a cutting board to work off of.
I linked some examples to give you an idea, you can feel free to find a particular product that works for you, although I do really like the Tamiya glue. There are a lot of little pieces so some people might like some tweezers as well. I use cupcake wrappers to help keep the pieces in one place as I'm assembling and keep them from getting lost. I'd recommend not working over carpet as a dropped piece might get lost forever in there.
As others have said, Vibrant Lantern has some great build guides, which are probably required for more complex models like the Phoenix.
Otherwise, don't let the amount of sprues overwhelm you. Pick a miniature to assemble and finish it before moving on to the next one. Most of them are fairly straightforward. I would really recommend you take your time in assembly, as getting the edges filed and gaps filled will pay off in the long run - nothing worse than a well painted model with gaps and mold lines showing. There are plenty of videos out there on how to do this if you aren't sure or just want some additional instruction.
Start with the White Lion and starting survivors. The Screaming Antelope and Butcher will be the next ones to tackle. All of these are fairly easy to assemble.
This is what I use for my customs.
Example
It's really sturdy & you can even get long/thin/sharp details without worrying about them breaking off.
Look up some tutorials & be sure to play around with it.
Haven't used it but a lot of people say "Green Stuff" is good too.
Just whatever you do, stay away from any air/bake dry clays I've yet to see any custom using those turn out decent.
First of all anything I say here are not absolutes and do have substitutes. Each painter has their own way of doing things. This is just my take.
Prepare Your Mini for Painting
Before you do any paint first you need to sand/trim, assemble, fill gaps, and prime your miniature. When you sand/trim your mini you are removing mold lines and areas that don't mesh well with the minis surface, your trying to get everything even. You can use an exacto-knife and files for this. Once you have all the pieces so that they fit together well next you need to assemble your mini. Take the time to dry fit everything before gluing to make sure it all fits together. The type of glue you use depends on what the mini is made of and preference. For plastic, I tend to use super glue 90% of the time since plasti-weld (a chemical that melts the plastic together) doesnt seem to make the joint any stronger, though I could be using the wrong type. You can also pin the mini joints together for added strength. After your mini is assemble now we need to fill those gaps that can ruin a great paint job, I see it all the time and it makes me sad. There are many different types of putty that you can use but I go for green stuff. I mix 1:1, yellow to blue, and using a damp toothpick I wet my hands and smoosh it into gaps until it seems filled. This can be hard to tell sometimes since you cant get a sense of depth. If you want to make sure I will usually brush on some Gesso and check to see if it even. Finally we can prime our miniature. This is required or acrylic paint wont stick to the plastic. Application can be done via airbrush, rattle can, or brush. Since I haven't done much with a brush, but FYI you can use the Gesso above also for priming, and I cant assume everybody has an airbrush I will talk about the cheaper option, rattle can or spray paint. There are many available like those made for miniatures (though I don't think they have a real difference), and brands like Rustoleum and Krylon. Make sure you get a can that is for just priming and not the "prime and paint" type and is for indoor/outdoor use, sometimes the outdoor only stuff can be a bit thick. The brand doesn't matter as much as when and how you apply it. Humidity and temperature are Very important when priming a miniature, if it is to hot and dry the paint will crack and to humid you can get dripping and that terrible fuzzy look. Make sure you read and FOLLOW the directions on the can. When applying the paint do wide sweeps across the miniature with a constant spray. Keep the sprays short and the motion consistent.
Painting
Now you are at the fun part. Again, there are different mediums to paint in, oil, acrylic, pigment. Acrylic is a good place to start. The brand of paint you use is really up to you. You can go to a hobby or art store to get these paints. Don't get the paints that are to cheap the results are not good. Blick is a good store to visit because mini painting is an art that uses artistic mediums. That is what Blick is all about and you will get a wide range of brands there, you don't have to use the mini makers brands. Brushes are very important and if you get the cheapest kind you'll find that they tend to fray and leave little bits of bristles on your mini. For starters stick with the mid range synthetic ones and take care of them, theyll last awhile if you do. Make sure you wash them in your water pot (just a jar of water) often so that the paint doesn't dry on them and clean them every so often. So when you sit done with your brush and begin make sure you thin your paints or they will end up thick and goopy. You can thin with distilled water or you can use an acrylic medium. There are many special mediums but the most useful ones are matte and glaze medium and are used for different painting techniques. Always give your paint time to dry before applying more or youll mess up the prior coat and things will look rough.
Sealing
After you are done painting and have let your mini dry for a few days its now time to seal and protect it by giving it a few coats of finish. This will keep scratches away from your wonderful paint job. Application and selecting is similar to picking a primer but there are 2 options, gloss and matte. Think about what type of finish you want. Most go for matte and some use a mix but few do only a gloss finish.
Stripping
So you messed up. What now? Well you can strip the paint off and try again but you got to be careful here because this process can make the mini brittle. A common used item is Simple Green. Though it does a good job on the acrylic paint it will not remove the primer very easily. To do that I have found Super Clean to work best. But do note, only soak a mini 10 minutes at a time sink Super Clean works by sucking the moisture out of the paint, and the mini. So do a 10 minutes soak, then take a toothbrush and try to brush off the paint, then return to the solution and repeat.
Just shorten the link next time - just use [ ] ( )
Try green stuff:
http://www.amazon.com/Green-Stuff-Yellow-Epoxy-Putty/dp/B002MB61RQ
It's literally called Green Stuff!
Oh god that is terrible.
You want to use this.
http://www.amazon.com/Testors-Liquid-Cement-with-Brush/dp/B0035LOUWK/ref=sr_1_6?ie=UTF8&qid=1457137680&sr=8-6&keywords=plastic+cement
Refill it with this when you're done the small bottle.
http://www.amazon.com/Plastruct-Plastic-Weld-applicator/dp/B00FDFWJD8/ref=sr_1_14?ie=UTF8&qid=1457137771&sr=8-14&keywords=plastic+cement
The models are metal, so regular plastic model cement won't work. I recommend a good gap filling CA glue. Any hobby shop would carry it, and it's available on Amazon.
http://www.amazon.com/dp/B0000DD1QQ/ref=cm_sw_r_tw_s_awdm_V0tLxbFCMCDQP
I just made some food serving trays and had to do a little research on this. I ended up using cyanoacrylate (super glue). I have read they use it for dentistry and emergency sutures, so it's pretty inert after it dries. I usually pack the crack or hole with sawdust and drip the glue into it until it is soaked in. It dries pretty quickly and is rock hard.
Yup have fun! If you got a revell kit which requires gluing, I recommend using Tamiya cement instead of the supplied model cement. I found the supplied stuff tends to add thickness to connections, which will push apart seam lines. What you want to do with this stuff, if there's peg holes, apply a tiny bit in the hole then snap together. Run the thin brush with the tamiya cement along the seam line, this solution will soften and literally weld the plastic together. Apply pressure on both sides to really push together the seam. Some excess material will goo out, this is a sign that the melding is working and the pressure is pushing the 2 together. However dont over pressure to the point where things buck. Let sit and cure, preferably let sit for 12 hr+ (I'm impatient so sometimes I tackle it around the 4-6 hr mark). The plastic will solidify again and here you treat like the nubs, use a blade to carve off the excess and sand away the seam line. This is what modelers do to remove ugly gaps and large seam lines, a bit technical and requires practice, but necessary for certain kits.
If you're hasty and impatient like me and want to avoid waiting/don't care too much about seam lines, use CA glue Which is just fancy speak for super glue. This stuff dries thin and is VERY fast. The purple cap dries in 5-15s, there is a blue cap that dries in 1-3s. Use sparingly, and make sure the part doesnt need to come apart again, as they never will.
Ah yeah, the hasegawa Su-33 is pretty high end, plus expensive. would definitely practice before tackling it. I personally like the reverse swept plane from ace combat more, though I dont know much about the series
Maybe try this brand too: https://www.amazon.com/Insta-cure-filling-Bob-Smith-Ind/dp/B0000DD1QQ
It cures fast and the tube I have has lasted a long time. I have used some department store bands and had trouble. Never used gorilla, though.
https://www.amazon.com/Liquid-Cement-Plastics-1-oz/dp/B0006N6ODS
I use this and swear by it.
https://www.amazon.com/Liquid-Cement-Plastics-1-oz/dp/B0006N6ODS If you're doing a lot of plastic model stuff, treat yourself to one of these. It lets you shift around the piece to set it in place but has a nice sticky hold and after a couple of hours will actually melt the plastics together making them have a solid one piece bond.
If you're using Testors, go with their Model Master line. This one in particular. The cement comes out a long steel tube about the size of a pin, so the flow is much easier to control. These come with two rods to clear any blockages as well.
What happened?
Also, I highly recommend upgrading to this - Better Plastic Cement
I'm a big fan of the Testors ModelMasters variety: http://www.amazon.com/Liquid-Cement-For-Plastics-1-15oz/dp/B0006N6ODS
The "ModelMasters" part is significant because it has a small metal applicator that is very clog resistant.
There are other brands that other people really like as well that have the metal applicator needle, but I can't remember what they are, off-hand.
FYI: You will want to use Plastic Cement for these hard plastic models. It will give superior results when compared to super glue.
I recommend looking for something like this: https://www.amazon.com/Liquid-Cement-Plastics-1-oz/dp/B0006N6ODS
The Model Masters (an offshoot of Testors, so a well-known brand) has a very nice this applique needle to apply very small amounts to precise locations. It'll keep you from ruining your new expensive figures! The game can be played without them. Take your time assembling, fixing, sanding, etc.
KD was my first time assembling minis. I definitely had some trepidation over the whole thing, but really it's not bad.
Now, I admit, I had some guidance from a coworker, but I'll pass all that guidance onto you right now. All you need are the following three items:
Basically, the key once you have these tools is to take your time. Consult a guide like vibrantlantern.com, which another poster mentioned, and which was an invaluable resource to me.
A mini takes me anywhere from an hour (really complex monster), to 20 minutes, generally. They can go much faster once you get the system down, but I like taking time to figure out exactly what the mini should look like (for the armor kits).
Throw on some music, or Netflix (or whatever helps you pass the time without distracting you too much), maybe grab a beer, and make an evening of it.
It's also worth noting that all you need to start playing is the White Lion, and the four Starting Survivors. These all come on a single sprue, and are really quite simple to assemble given the above directions and tools. That will get you through several hours of gameplay just by itself, and then from there you can move on to creating other monsters and survivors as you need or want them.
Hope this helps!
Love your colour scheme! I think your pooched on the windshield. Next time use clear glue for windows https://www.amazon.com/Testor-Model-Master-Cement-Window/dp/B0006NDZDU
Make sure to post more army pics, would love to see an army painted in this colour scheme.
The blood should be much darker than it is. That bright red color makes it look like it's supposed to be red paint. The blood on the base isn't too bad, but again should not be so bright. You can use a darker red color for the blood, and make it look wet by coating it with an acrylic gloss (like Future floor polish, or a clear gloss, or even something like Testors Clear Parts Cement and Window Maker.
Do you perhaps know how GW's current plastic glue works? I've used the really old one that came with a brush (like tamiya's glues), that one melted the plastic slightly in which case 'removing it' doesn't do anything since it's already destroyed detail. In this case you may need to resculpt the detail yourself.
Also don't use any glue debonder/remover, they are acetone based...and acetone will eat plastic.
Your best bet may be isopropyl alcohol at 99% diluted with water. Though even this can melt plastic but is far less reactive then any other remover like acetone/turps/spirits. Trythis at your own risk really. Sorry can't really be much help. In the future you may want to try something like this, it's thin but easier to manipulate since it has a brush.
Just get some of this
There are a few different ways to fill seamlines, with my preference being Tamiya Thin Plastic Cement. Filling seams should only be done if you want to paint, as you get to paint over the filled seam. As for masking, any small measuring tool is helpful. In addition, good Masking Tape can also help.
> I'll be getting a pg unicorn
I don't think there is one yet... Do you mean Master Grade?
I'm not sure on the rubber cement. I use Tamiya Plastic Cement. For markers, I suggest the fine tip gundam markers. These are cool because if you make a mistake, you can wipe it off before it dries. Your strategy looks good. Are you going to be doing nub removal? I use a x-acto knife and very high grit sandpaper to get rid of nubs. You also might want to pick up the Tamiya Basic Tool Set for removing the pieces off runners. As far as changes to kits over the past 10 years, I've noticed that HG and MG kits have gotten a lot better. There's a lot more detail in them now than there was before. Also, a new line of gunpla has come out called Real Grade. These aim to take the quality and articulation of a Master Grade kit, and put it in 1/144 scale. They look fantastic, and have a inner frame that you build.
I like Tamiya cement. I use the extra thin variety most often. It comes with a brush on the lid which I find much easier than trying to squirt the correct amount in the correct place, or trying to scoop it up with a toothpick or whatnot.
https://www.amazon.com/Tamiya-87038-Extra-Thin-Cement/dp/B000BMYWYC
As for the chemistry, really any brand will dissolve GW plastic and meld pieces together, it's just a question of what consistency you like working with better.
To make sure your bikers don't get "stuck" you need to have their legs positioned perfectly or they splay out or pinch into the jetbike seat.
There's a line on their ass that runs across both legs that I've always used to ensure fit. What I do is use a thin plastic glue like the brush on Tamiya, brush it into the leg hole and the part of the joint where it connects, then press the legs on. After that I let it set for maybe about 10s and then I put the biker on a jetbike and adjust the legs a little before the glue sets completely hard.
This allows me to ensure two things. First, that each biker stays on their bike without magnets or anything. And second, that and both of the bikers feet contact the foot rests and both their hands contact the handlebars (I use the same technique for arms).
Would this be a good choice? I was reading up on vibrantlantern.com and they recommended the citadel clippers and GW thin glue. However, this was the closest thing I could find on amazon. Alsow what about these clippers?
Tamyia makes a good primer in rattlecan and handbrush; while you're there, pick up some ultra thin cement - it's awesome for seam fusing.
you'll probably getting a lot of this for the many loose parts of that kit.
I just built my RG Zeta and you couldn't be more right about parts falling off cause of a light breeze. I glued the skirts, vets, and even the chest frame to the gray part that moves the chest up and down just to make it bearable. If you can find it, I'd recommend getting this glue here cause it won't melt the plastic to where it's obvious.
This is what you’re looking for!
https://www.amazon.ca/Tamiya-87038-Extra-Thin-Cement/dp/B000BMYWYC
Super glue or plastic cement is recommended I think.
Tamiya Plastic cement is supposed to be good:
http://www.amazon.com/Tamiya-87038-Extra-Thin-Cement/dp/B000BMYWYC
Here's some info specific to bones:
http://forum.reapermini.com/index.php?/topic/48668-bones-preparation-glues-putties-mould-lines-etc/
Great panel lining work! I'm jealous! It's interesting to see that you opted not to use some of the stickers (like around the toes). Good use of dynamic posing as well.
Very few (if at all any) nubs, but the one on the top of the cannon sticks out to me. Have you considered using thin cement to "melt" the plastic and bond it all together? It works wonders without needing to get messy like you do with putty.
In case you need some, Tamiya makes them: http://www.amazon.com/Tamiya-87038-Extra-Thin-Cement/dp/B000BMYWYC
It sounds like a great idea. So to start off with, do you know what really interests him? Like Tanks or planes or ships, military, civilian, what sort of era (like ww1/ww2/coldwar etc). Tanks is a bit of a wide pool!
In general, Tamiya is often a very good place to start. The kits are pretty easy to put together, they fit really well, look nice when done, have clear instructions and not too many parts. For tanks I would say a 1:35 scale tank is probably the best bet, tanks come in really 4 scales, 1:16 (absolutely monstorously huge), 1:35 (pretty much the standard scale, around 15 cm long or so), 1:40 or 50 something (used for war gaming stuff) and 1:72 teeny tiny tanks. Of the tanks I've built recently, the Tamiya amx-13 1:35 was pretty nice.
Kit aside, you'll be wanting to get him some tools (if he doesnt have any). As far basics I would say; 1) A pot of plastic glue, I recommend the tamiya extra thing (this stuff), a pair of cutters for getting parts off the sprue (I really like the pointy nose ones like this, a pair of tweezers (if he has some lying around they'll do to start with), something to sand pieces with (some use sandpaper, I use sanding sponges, some use sanding sticks), a couple of brushes (small detail and wide flat are what I use the most) and once you've decided on a kit maybe a pots of paint. On the paint front, again I would just default to tamiya acryllic 17ml pots to start with (and buy him some thinner, those paints are like treacle).
As another option, there are some really nice kits by bandai which dont really need any glue and dont have to be painted (look better with both in my opionion) but they are fundamentally click together. Their starwars line of kits are especially great in my view if thats something he likes.
If you have a local modelstore I would go talk to them. Places like hobbycraft carry models but they arent particularly helpful in my expience. If you dont have a hobbystore near you, then the websides I dfefault to are emodels.co.uk (very nice to navigate website, a little expensive), hannants (god awful website design, but they stock basically everything under the sun), wonderlandmodels.co.uk (somewhere inbetween, I have had some poor service from them but most people seem fine), amazon (be very careful with prices, there arent many model supplies on there and the stuff that is seems to get uppriced by bots to silly levels) and ebay (if you find something you really want its often on there for a good 20% cheaper than elsewhere, especially older cheaper kits).
Armor kits come with the original game purchase- yes.
I'd recommend this glue:
http://www.amazon.com/gp/product/B000BMYWYC?psc=1&redirect=true&ref_=oh_aui_detailpage_o06_s00
Anyone that has built minis for a while loves Tamiya. It's FAR superior to most super glues.
ok thanks - so prime, fill, sand, then paint? is it this stuff?
I've been using Vallejo Putty. Works well for me. Mostly filling small gaps in figures with it currently.
I use Perfect Plastic Putty or Vallejo Putty
Both are water based and can be cleaned up using a damp (not wet) cotton bud before they dry fully. Once dry they have to be sanded like any filler.
I also use a medium viscosity super glue mixed 1:1 with baby powder (you can also use baking powder) for bigger fills and gaps where I know I need to sand as it doesn’t shrink and will polish smooth.
Get some plastic filler like this: https://smile.amazon.com/Vallejo-VJ70400-Plastic-Putty-17ml/dp/B000PHCNLC
I can recommend Tamiya, Vallejo and Mr. Surfacer. Check your local hobby store, they probably have these in stock if you don't want to wait for shipping. Model builders have been using fillers like this for ages and they work extremely well with plastics.
Technique wise, use the filler to close the gaps and lines then sand. Take your time with the sanding. You can wetsand if you want to (I personally prefer this). Once things are looking good, follow up with some some filler primer spray and then sand one more time with high grit/fine sand paper. For sanding, some sanding needles like this: https://www.amazon.com/Alpha-Abrasives-Plastic-Sanding-Needles/dp/B01LEC98AU help a TON for fine detail work.
You can also get some needle files, but I find these harder to use and less forgiving of mistakes when working with plastics.
PS: Checkout /r/modelmakers and http://cs.finescale.com/f/. You can learn a ton about techniques that can apply to finishing up 3D printed models.
To add to the good info above: for KDM miniatures you are pretty much guaranteed to need to use putty/epoxy for the gaps on them if you want them to look good painted. Most of the big monsters will have some very noticeable gaps when put together, and it is fairly common on some of the armor kit survivors too (especially the unarmored kit mentioned above - serious issues with "ken doll" arm sockets).
For larger gaps, I prefer milliput superfine white. It is firm enough you can shape it (add water to help change consistency if needed).
https://www.amazon.com/Milliput-Superfine-2-Part-Hardening-Putty/dp/B002CNEWAM
For smaller hairline graps, I really like Vallejo Plastic Putty. It doesn't require pre mixing and is easier to work with if you just need to get it into a tiny gap. Usually apply it then wipe off with wet cloth.
https://www.amazon.com/gp/product/B000PHCNLC
Poots recommends the white top Tamiya cement glue https://www.amazon.co.uk/Tamiya-300087003-Cement-40ml-Toy-x/dp/B000RLWAN2/ref=pd_bxgy_107_img_2?_encoding=UTF8&psc=1&refRID=KNVB9EA392X3E1GTZSAS
Try Vallejo plastic putty https://www.amazon.com/Vallejo-VJ70401-Plastic-Putty-20ml/dp/B000TSBJEO.
It's water soluble in the initial stage, so you can wipe the excess away with a wet cotton swab.
Most of the time, the mating surface shouldn't be completely flush anyway. If two plates were welded or riveted together, they obviously won't be completely flush. Basically, don't be a perfectionist.
The putty is for filling small visible gaps. However, if you find numerous gaps in the finished model, you should probably consider buying a different brand...
Same goes for the injection pin marks. Good companies will design the model so that these marks are either facing inward or being covered up by other parts. You shouldn't need to fill more than a couple of these marks in a model. Otherwise, you should consider buying other brands.
So Ive used Green Stuff, Liquid Green Stuff, and now Vallejho's Plastic Putty, and by far my favorite to use is the Plastic Putty. Green stuff you have to kinda work with a little to get it to behave, but the Plastic Putty gets right in that crack thanks to the needle tip squeeze tube it comes in, and it seals really good too!
https://www.amazon.com/gp/product/B000TSBJEO/ref=oh_aui_detailpage_o09_s00?ie=UTF8&psc=1
> I bought some liquid GS but it was already solid
i'm so sorry -_-
i use this specific GS product and its great
i use these sculpting tools and they're great
"Green stuff" is what miniature modelers use to fill gaps. Don't use the "Liquid Green Stuff" from GW, it's mediocre at its job at best and useful only for the most minute of gaps.
Look for this stuff:
https://www.amazon.com/GF9-Educational-Products-Hobby-sculpting/dp/B0028BZQIK
Wood Fill will not leave a smooth surface at the level of detail you want; it will appear 'chunky' as it dries. Green Stuff remains smooth.
Liquid cement for models tamiya a little goes a long way. And some fine grit sand paper or sticks. The liquid cement melts the plastic together forming a permanent bond or seal then you just sand it smooth with sand paper. It's super easy. Sand paper you can get online or at a hardware store.
Here's a video that might help. There's literally hundreds of videos on the subject. So if you don't like this one just look up seam line removal.
Also remember, practice makes perfect. The more you do it the easier and better you'll get. Don't be afraid to try and experiment.
Have not built that one (its on my list); however, I have used this modeler glue. Its cheap, very good at its job, and its on prime.
http://www.amazon.com/gp/product/B002CDPZDK/ref=oh_aui_detailpage_o04_s00?ie=UTF8&psc=1
https://www.amazon.com/Green-Stuff-Yellow-Epoxy-Putty/dp/B002MB61RQ
Welcome! Glad to hear you are interested in Malifaux and welcome to the hobby! As another user mentioned check out the "Pullmyfiger" wiki on tactics and how to play. Also take a look at r/minipainting on tips and tricks for painting and inspiration! So since you are brand spanking new and have a lot of questions I'll try to cover all I can. As for my background Malifaux is the only mini game I have ever played and when I first started I was new to the hobby as well.
Lets start with minis and gameplay. Glance over pullmyfinger to check out tactics and looks of models. See who you enjoy. When I first started I picked Resurrectionists because I really enjoyed the thought of having undead minions doing my bidding. Think about what type of tactics you want to play with. Do you want to shoot people from behind cover? Do you want to summon monsters? Do you want to be in an enemies face with melee? Do you enjoy trickery and movement based shenanigans? Each faction is balanced faction to faction and each one harbors a wide variety of gameplay. Some have their specialties, but each faction can do just about anything. For example say you like to summon. Ressurs are king of summons yet other masters can summon as well, like Ramos in the Arcanists (electrical creations and spiders), Leviticus in the Outcasts (undead techno horrors), and Somer Teeth Jones in the Gremlins. There are others but you get the idea. Pick a faction you think is cool or looks cool. Depending on what faction you go with depends on which master is good for beginners. Some of the beginner friendly masters for each faction are
{Faction}:{Masters};{Role in order of masters}
Guild: Lady Justice, Perdita, Sonnia; Melee, Ranged, Magic
Ressurs :Seamus, McMourning, Nicodem; Movement/range, Melee/poison, Summoning (expensive start up cost though)
Arcanists: Rasputina, Kaeris, Ramos; Ice Magic, Fire magic, Electric/summons
Neverborn (slightly more advanced): Lillith, Jacob Lynch; Melee, Card Manipulation
Outcasts: Victoria's, Von Schill; Melee, Ranged
Ten Thunders: Misaki, Jacob Lynch; Hit and run tactics, Card Manip.
Gremlins: not enough knowledge to comment :/ Sorry
To let you know I used to have two masters in each crew other than gremlins, until I sold off many of them to focus on three factions instead of all of them.
These masters listed themselves are pretty straightforward but may have advanced interactions with their crew that you will learn in time and with reading and lots of play and practice. This also just lists what the master does. Like Lady Justice herself is melee but the rest of the crew is versatile with melee or ranged attacks and interactions. The box sets always compliment the master well especially for the beginner crews. In all honesty though pick a faction and master you think is cool. The rest will come with time.
Next lets talk about construction and supplies
Each set of Minis comes in a padded cardboard box on a sprue like this.
This is a link to the instructions Wyrd has wonderfully provided. You can look up individual box sets instruction sheets to decide for yourself how complicated a project may be. Its hard to put a difficulty on construction of the minis because they all use small parts.
Each box set comes with the models on a sprue, simple round bases and character/upgrade cards for each model in the box.
The basic tools you will need are
Hobby Knife/Exacto Knife
Needle nose pliers
Miniature Plastic glue/welder
Gorilla Glue
Green Stuff
Table or work surface
These supplies are for construction only. The cement plastic glue stuff is very sensitive. Literally a drop is all you need to permanently fuse two parts together. It actually melts the plastic ever so slightly into each other. Do not get excess on fingers and use carefully. Do not smash the parts together. This is why I like the kind with a fine point applicator like the one I linked. Always do a dry test fit first when constructing even with instructions it can be difficult to see how they parts go together. The Gorilla glue and green stuff is what I use for basing. Needle nose pliers and knife to cut things out and help hold them. Basing can be as simple or as complicated as needed. Sometime I use a very thin layer of green stuff and paint to simulate earth. Sometime I go get tiny tiny pebble off the side of the road to make rock formations. I once bought clock parts off ebay and got scrap from a plumber friend and I glued them into some green stuff to make a techno junkyard. Get creative.
Next once your model is constructed and based now it is time to paint! You will need
Brushes of varying size and type
Primer either spray primer or paint on primer
Paint and washes
Water containers
Pallet, Wet or dry. I prefer a wet pallet
Light
Start off by priming your minis by either spraying with a spray primer or a paint on primer. I like spray primer because it is fast BUT it is more finicky. It can ruin a mini if you are not careful. Don't spray too close, don't spray in high humidity. Use nice even coats. Two to three thin coats is much better than one very thick coat. Wait for each coat to dry before doing the next. It doesn't take long if you use thin even coats. Then go ahead and paint!
I am always trying to do miniatures and save money. I cannot break the bank right now BUT one thing I do not skimp on is quality brushes. As long as you keep them clean a great brush will last you ages. Invest in some decent ones and they will treat you well. Miniature paint is not always required and can get very expensive. I actually got most of my acrylic paint from Wal-Mart. The paint from there though is very thick! You want to water it down to be like skim milk. Again many thin layers are better than 1 thick one. If the paint slicks right off the model it is too thin. The other kind of specific paint to pick up is called a wash. It can be put on in large amounts and will dry dark in crevices but not on raised parts of the model. It gets great shadows and detail. Anyways I know it is a lot of information for just starting out but shoot me a reply or a Pm and I would be glad to answer more questions or concerns!
Thanks!
Sure thing!
I started by mashing some aluminum foil into the general shape that I wanted it to be, and then hot glued that to a 40mm base. I then reinforced the foil with more hot glue with lengthwise bands of hot glue.
Once cooled, I covered the structure in a layer of Apoxie Sculpt, (AS) which essentially resulted in a smooth "tentacle" upon which I could add details.
My next step was sculpting the chitin plates along the back of the structure with AS. I started with the smallest one near the tip, and working one plate at a time, giving each one adequate time to set, worked my way to the largest one at the base. After each plate had set, I used heavy grit sandpaper to touch up the final shape and add some texture to them (think fingernail ridges), and these scraper tools to add the deeper cracks. This is an area where AS is superior to Green Stuff(GS); it cures rock-hard, so it can be filed, tapped, sanded, and drilled with very good results.
From this point on in the project, I used (roughly) 50/50 mix of GS and AS.
I then used a dremel tool with a tiny carving head to carve out space under the edge of each plate and sculpted in the connective tissue there. Looking back, I wish I'd left more of a "ledge" on the plates, so that that connective tissue was more recessed. Live and learn.
Next step was planning out the rest of the structure. I knew I wanted the inside of the tower to be 1) composed of different sections, 2) complex in texture, 3) "Squishier" than the outside, and 4) functional in appearance. I used pencil to draw sections on the model until it was broken up in a way that I liked, and then I planned a few of the details. (I settled on the vertebrae-like structures as a way to separate the sections, the defiler-like texture near the tip, and decided that I wanted structures at the base that looked like they were "rooted" into the ground--I didn't want it to look like it just sat on the surface.
I sculpted the vertebrae next, using this wonderful tutorial by Mr. Pink, one of my sculpting heroes. The defiler texture was added next, using a "Hydra tool"--a rounded off nail set into a handle. Just poke the tool in at an angle where you want a hole to be--I wish I'd done a better job of organizing the holes into a pattern of some sort.
the long lateral sections came next. I put putty down, and then used a large ball burnisher to make the large depression, a smaller ball burnisher to make a smaller depression in the middle of the large one, and a tiny ball burnisher to make the ring of tiny depressions around that second, medium sized depression. Once I had all of those in place, I went back to the medium burnisher for the depressions on the surface, between the large depressions. I can't think of a better way to describe this right now, but I can attempt to clarify if you like.
the tubes at the base were next. Fat cylinders of putty were rolled out and the ribs were sculpted with the back of the narrow scraper I used on the chitin plates. After they'd set, I blended them into the rest of the structure with the putty around it. the tiny spine structure was made similarly to the larger ones, and the concentric circles were made by making a hole, putting a ball of putty into it, and then turning the hole into a doughnut with a hydra tool, and then repeating.
The tiny spikes were shaped, and allowed to cure, and then glued to the model and blended in with texture and stuff.
If you want more general advice, I'll cut/paste an old comment below, or if you want further clarification or whatnot, let me know!
Happy sculpting!
Sorry, I could have given you a link.
Here are a couple of examples of green stuff:
https://www.games-workshop.com/en-FI/Green-Stuff
https://www.amazon.com/Green-Stuff-Yellow-Epoxy-Putty/dp/B002MB61RQ
​
At least with the first type, you mix two different clays together and they harden over time. That means you can form them just as you'd like in the meantime, while it's soft. Hope that answers your question :)
Green Stuff
Exactly this. They sell in a different package where the two epoxies are connected and it doesn't last as long. With these, keep each color in it's own Ziploc bag and it will last forever.
I'm using normal framing wire. It cost $3 for a million feet of it.
Yep that stuff exactly but that's the packaging you'd want to stay away from. The middle where it touches has to be cut away. Look for tubes like this:
https://www.amazon.com/Green-Stuff-Yellow-Epoxy-Putty/dp/B002MB61RQ/ref=pd_sim_21_4?_encoding=UTF8&psc=1&refRID=3VXACGJZ4E2YY0XY4JVB
Or two separate tubes.
With a 4x4 base you're probably looking for something that's 12"+ tall. I think you'll have more luck modeling that yourself than purchasing anything available. I think you'll have better luck buying this and this and testing your artistic ability.
Edit: These might make a nice touch: Melissa & Doug Rainbow Crystals Bead Set
For very large pieces it can get pricey, but it is amazing for detail. http://www.amazon.com/Green-Stuff-Yellow-Epoxy-Putty/dp/B002MB61RQ/ref=sr_1_1?ie=UTF8&qid=1425485701&sr=8-1&keywords=green+stuff
Oil/grease the male connector(s). Buy some green stuff: two part epoxy, yellow and blue, mix em to make green, mold them around the male connector. Remove gently and let dry. Will become as strong as PVC.
Try GW plastic glue Games Workshop Citadel Plastic Glue Thick https://www.amazon.com/dp/B004CDA3GC/ref=cm_sw_r_cp_api_HIUUAb0AQYMK8
Citadel's glues are absolutely terrible. I like testor's plastic cement it comes with a brush on the cap to make application easier, and it's thin so you don't get too much on your figures
weld-on 3 and 4 are thinner than water - about as thin as ether. you'll want a syringe applicator for them.
personally i would attempt to use a solvent bonding solution like PLASTRUCT BONDINE https://www.amazon.com/Plastruct-Plastic-Weld-applicator-2oz/dp/B00FDFWJD8/ref=pd_lpo_sbs_21_img_0?_encoding=UTF8&psc=1&refRID=H3B2FZMWPEHEV608H9JS its cheap, goes far , and can melt and weld the plastic back together, just clamp the controller ring back together, then add bondine, it uses capillary action to flow into the crack and turn the plastic into a liquid, then the pressure from the clamp forces the liquid plastic together, then it dries and leaves you with a solid bond. obviously will snap if you bash it again, but as you aren't using an adhesive, it will be simple to just re-bond it. where as with gorilla glue, if it breaks the bond, you will need to remove the hardened glue to be able to re-glue it successfully
I found this plastic weld works well with PLA, and doesn't cause clouding.
I’ve tried metal screen patches and two different fiberglass screens. Fiberglass is the way to go for sure. I got lucky and found a few sheets of fiberglass screen at a hobby shop that specializes in scale models like trains and architectural models.
As far as cutting/gluing/positioning, I use some cheap calipers to get a rough measurement of the screen dimensions and just keep dry-fitting and moving the screen around with the tip of my knife or a toothpick or something until I’m happy with it. The calipers also come in real handy when cutting plasticard for vehicle armor, or really any plasticard work. Personally, I like to put the screen on the inside, so it involves drilling out the peened post ends as mentioned. When it comes time to glue, I use Zap-A-Gap super glue and these precision tips to set one corner of the screen, then once it’s mostly cured, slowly work around the edge of the screen, gluing and tamping it down and waiting for a section to have some good adhesion before moving to the next section of the screen. It takes a while but the methodical nature helps preserve my sanity when messing with the mesh.
This glue
Here's a big fat messy shopping list I made for someone a while ago. You might find it useful too.
http://www.amazon.com/Quickshade-Ink-Warpaints-Army-Painter/dp/B00HC8D80W
Amazon.com: Quickshade Ink Set Warpaints Army Painter
http://www.amazon.com/Pacer-Technology-Zap-Zap-Adhesives/dp/B00SXJJ2QI
Amazon.com: Pacer Technology (Zap) Pacer Technology (Zap) Zap-A-Gap Adhesives, 1 oz
http://www.amazon.com/General-Pencil-Company-Masters-Preserver/dp/B0009RRT9Y
Amazon.com : General Pencil Company The Masters Brush Cleaner & Preserver 2.5 0z. : Brush Soap
http://www.amazon.com/Army-Painter-Wargame-Starter-Paint/dp/B01BJ55UDQ
Buy Army Painter Wargame Starter Paint Set - PLUS Promo Undead figure
http://www.amazon.com/280715-American-Accents-Primer-12-Ounce/dp/B00KZ6LLZW?
Buy Rust Oleum 280715 American Accents Ultra Cover 2X Spray Paint, White Primer, 12-Ounce
http://www.amazon.com/TEKTON-6655-Needle-File-10-Piece/dp/B000NPUKYS?
TEKTON 6655 Needle File Set, 10-Piece
http://www.amazon.com/Xacto-X3311-Precision-Knife-Blades/dp/B0000DD1N4?
Buy Xacto X3311 N0. 1 Precision Knife With 5 No. 11 Blades
http://www.amazon.com/Most-Wanted-Wargamer-Set/dp/B007H4YR8S
Amazon.com: 1 X Most Wanted Wargamer Brush Set
http://www.amazon.com/Xuron-170-II-Micro-Shear-Flush-Cutter/dp/B000IBSFAI
Xuron 170-II Micro-Shear Flush Cutter: Wire Cutters
http://www.amazon.com/Milliput-Standard-2-Part-Hardening-Yellow/dp/B011BO9R5W
Amazon.com: 2 X Milliput Standard 2-Part Self Hardening Putty, Yellow/Grey
Edit: Of, and I used this guide for making my Thinner. http://www.reapermini.com/Thecraft/15 But I'm going to experiment more, because this is not perfect.
The glue I'm using is a gap-filling cyanoacrylate, specifically this: https://www.amazon.com/Insta-cure-filling-Bob-Smith-Ind/dp/B0000DD1QQ
What I've been doing is applying it to the cracked areas, and smoothing it down. Once that's dried, I've applied more, and smoothed that. Repeating until the crack is filled, and I will sand that after. I have a pretty solid array of fine grit sandpapers, as well as a pretty extensive array of dremel bits. I think some fine grit buffs will help me with these cracks as well as some other rough spots I was hoping to smooth over. Hoping it goes well. I'm actually having some success re-texturing the hair where it cracked by using the same metal bristle tool on the glue as it dries. Gonna need to soak this tool in some acetone when I'm done, though.
This is the glue I love, I also use insta-set which is a spray that will make the glue dry in seconds so you can keep working on the same part without stopping for a bit, great stuff.
This is the only glue.
https://www.amazon.com/Insta-cure-filling-Bob-Smith-Ind/dp/B0000DD1QQ
There is nothing better. It will definitely fix any X-Wing model. You can glue your car back together with it.
Hot glue and foam core are wonderful together, other than having to do a little clean up with the little hot glue strings.
However, IF you are using superglue for anything, please don't buy those little dinky bottles. Try Insta-cure, it's the exact same stuff, comes in multiple thicknesses, and costs the same for a 1 oz bottle as you would spend for one of those tiny tubes. I don't know that I've ever used a bottle fully up, they tend to dry out and harden over a year or two. Most model railroad and hobby stores will carry it, or just buy it online.
id reccomend this glue, i use it for models of any game. i used it on putting together many many points of directorate and other armies.
https://www.amazon.com/Insta-cure-filling-Bob-Smith-Ind/dp/B0000DD1QQ
pinning is ok, espeically with models that are large and have flat connection points like these, although ive never had to pin a firestorm model. they are quite light with the white resin they use.
the thin flakes or other resin flash id just scrape off with a knife. just make sure its clean and give it a good prime.
have fun!
I use Insta-cure+ with some of my models:
https://www.amazon.com/Insta-cure-filling-Bob-Smith-Ind/dp/B0000DD1QQ
Insta-cure+ actually melts the plastic and fuses the two ends together. So you need to be very careful with how you use it.
Edit: Yes the 5-15 seconds to bond on the bottle is accurate. They also make a 1-3 second version... which usually ends with my thumb and index finger fused together.
It will be plenty strong for you to leave it be to cure or work on another part. I use Insta-Cure+ very strong bong within a minute. They have some that cures slower or faster as well. Full strength cure in 2hrs for this one.
This works for plastic and resin models really well.
You could try hobby epoxy. Idk about how the heat generated from it will affect the headphones, or if it even will, but the epoxy I use is significantly stronger than hot glue.
(I crashed my RC plane and ripped the tail completely off and repaired it with epoxy. I crashed it again the next week, and the tail ripped off again, 1 inch away from where it had previously been ripped off. Pretty impressive imo.)
Edit: Here are 2 glues I'd recommend: Epoxy, Super Glue. Watch your fingers, this stuff WILL stick them to anything if you get some on them. (speaking from experience)
Go with a glue in a bottle, not a squeeze tube, and store in in your freezer. The superglues at the store can almost be considered single use, as they do not reseal cleanly.
I've had a bottle of this stuff for 4 years, still good as new every time i used it
https://www.amazon.com/Insta-cure-filling-Bob-Smith-Ind/dp/B0000DD1QQ/
I've never tried it, but I know my FLGS sells super glue solvent next to their racks of super glue. Maybe give that a shot?
It's this stuff- https://www.amazon.com/Bob-Smith-Industries-161-UN-CURE/dp/B0000DD1QS/ref=sr_1_3?ie=UTF8&qid=1483627453&sr=8-3&keywords=super+glue+solvent
Uncure
Debonder. You can get it at any hobby store or from Amazon.
https://www.amazon.com/Liquid-Cement-Plastics-1-oz/dp/B0006N6ODS
This stuff is what I use
I currently use the testors black bottle glue. It's a very thin product and is easily applied in small amounts through a very thin steel tube applicator tip. The red twin pack glue is a thick gel that is a bit more unwieldy to apply. It's been years since i've used the thick gel type and I recomend using the black bottle stuff. It's the type of glue that will melt the plastic and create a permanent bond.
Reading the packaging a little closer it looks like the black bottle now uses a plastic applicator tip. This model master version (still Testors) has the metal tip, which I like. https://www.amazon.com/dp/B0006N6ODS/ref=psdc_2236128011_t1_B00005CA7S
Games Workshop has a glue that is the same as the black bottle Testors/model master but the the GW bottle isn't as good and the applicator tube can pull out of the bottle on you if you're not careful.
From the world of Warhammer I learned about this stuff
Great glue for plastic. I don't know if it will work on the TI plastics but it essentially melts the piece and makes it stick back together. I would try this on that plastic and see.
Flush Cutters: https://www.amazon.com/gp/slredirect/picassoRedirect.html/ref=pa_sp_atf_aps_sr_pg1_1?ie=UTF8&adId=A07771002JJJMUPKY9LNZ&url=%2FIGAN-330-Electronic-Clippers-Powerful-Precision%2Fdp%2FB07RW8VTSX%2Fref%3Dsr_1_1_sspa%3Fkeywords%3DFlush%2Bcutters%26qid%3D1568614943%26s%3Dgateway%26sr%3D8-1-spons%26psc%3D1&qualifier=1568614943&id=3287567174581193&widgetName=sp_atf
Hobby Knife:
https://www.amazon.com/Hobby-Excel-Blades-Safety-American/dp/B0006O5JHE/ref=sr_1_5?keywords=Excel+hobby+knife&qid=1568614967&s=gateway&sr=8-5
Testor's Model Glue:
https://www.amazon.com/Liquid-Cement-Plastics-1-oz/dp/B0006N6ODS/ref=sr_1_9?keywords=PLastic+glue&qid=1568615017&s=gateway&sr=8-9
​
As for paint, I usually buy off of Games Workshop's website. Any order over $60 gets free shipping in the US. Models depend on if I can get them at my local store, or Amazon first. Anything not available at those two I go to the GW website for. Have fun, and good luck.
Just my thoughts on gluing these models. I have built 4 of these HMM models (Shield Liger, Blade Liger Bang Ver. [Pic](https://i.imgur.com/VU5go5C.jpg](https://i.imgur.com/VU5go5C.jpg), Raven's Geno Saurer, and the PK Iron Kong.) I glue all, non-moving pieces, and the reason is because, when you don't do that, the models are VERY fragile. I built the first one (the Shield Liger) without glue, and kept having issues where parts would fall off while trying to pose. I eventually stripped it all down and rebuilt it with glue because of that. I like to pose these models because there is so much articulation to them, that posing them is a joy. Using glue basically makes them an action figure.
​
This is the "glue" I use: Model Master - Liquid Cement for Plastic Models. This stuff basically fuses the plastic to plastic, so that's why glue is in parenthesis, so be VERY careful. I like that it has a needle like tube that allows you to use a very minimal amount, and 1 bottle lasts for many builds. Just my 2 cents from a guy who actively builds with glue.
I was able to assemble my entire core set plus 11/12 expansions with these items:
https://www.amazon.com/gp/product/B0006N6ODS/ref=oh_aui_detailpage_o05_s00?ie=UTF8&psc=1
and
https://www.amazon.com/gp/product/B01D1JYXKO/ref=oh_aui_detailpage_o06_?ie=UTF8&psc=1
The clippers are still going strong and the files work nicely. I have no mold lines or excess glue on my minis and I filled in some gaps with green stuff:
https://www.amazon.com/Green-Stuff-Strip-RPR-75006/dp/B001BR8AU8/ref=sr_1_10?ie=UTF8&qid=1498688095&sr=8-10&keywords=Green+stuff
You can usually find it a bit cheaper. Hopefully, that helps!
well imo, Testor's Liquid Cement For Plastics is the best thing out there for assembling plastic models. Stuff only works on plastic so if you get it on your hands or anything else, you can wipe it off and it's fine. Also it gives you some time to adjust the model unlike super glue. http://www.amazon.com/Testor-Corp-Liquid-Cement-Plastics/dp/B0006N6ODS
You would have to be extremely careful, but you might be able to do it using this.
It has a very tiny, needle thin applicator that should allow you to avoid gluing the joint, but as I said you'll want to be REALLY careful. I think you're probably okay if you just handle it gently though, if you'd rather not take the risk.
I'm pretty sure there is some stuff you could use to make a clear visor. I've never used it, but seen some clear stuff that was used for making windows on car models, etc.
Found it! Full disclosure: I have no clue how, or if this works....
Testor Model Master 8876C Clear Parts Cement and Window Maker, 1/2 fl. Oz. https://www.amazon.com/dp/B0006NDZDU/ref=cm_sw_r_cp_apa_i_6fEqDbKXRM8KQ
I'd highly recommend a solvent cement over any type of epoxy or glue. You don't need to add any material here, you need to repair a break. A solvent cement will chemically melt the pieces back together before evaporating out of the part, leaving a contiguous repaired piece of plastic almost as strong as the original.
Then, after it cures, slightly sand down the offending peg. Not so much it's loose, but if you don't it will crack the part again no matter how you repair it.
EDIT: This is what I personally use.
I use this to bond PLA, works great.
https://www.amazon.com/Plastruct-Bondene-Cement-Styrene/dp/B0006O09M4
I recommend Tamiya, basically the same effect as any other plastic cement, but the bottle has a little brush in the cap which I have found to be much more convenient for application. Specifically, the brush allows you to be much more precise and does not have the possibility of excess glue running down the model.
This would probably work wonders in removing those seam lines.
It's a cheap kit so thats the best kit to practice with a new technique.
https://www.amazon.ca/Tamiya-87038-Extra-Thin-Cement/dp/B000BMYWYC
Get this glue https://www.amazon.com/Tamiya-87038-Extra-Thin-Cement/dp/B000BMYWYC
It comes with a little brush on the cap to apply it, so it makes a thin layer, and it actually fuses the plastic together, so it makes the mini very durable.
Note that it will only work with plastic minis, for metal or resin you'll want superglue..
I think I'll get my hands on this
It's cheaper than MrCementS and also thin. Some lad on youtube did a review and they seem the same.
What glue did you use for her? I bought one and for some reason this glue isn't working at all for me.
https://www.amazon.com/Tamiya-87038-Extra-Thin-Cement/dp/B000BMYWYC/ref=sr_1_1?ie=UTF8&qid=1538196687&sr=8-1&keywords=tamiya+glue
​
If you can, get some [hobby cement] (https://smile.amazon.com/Tamiya-87038-Extra-Thin-Cement/dp/B000BMYWYC/ref=sr_1_1?ie=UTF8&qid=1500940036&sr=8-1&keywords=tamiya+cement) it literally melts the plastic and then fuses it together.
You could maybe try thin model cement ?
I don't know how it would work on that kind of plastic though
Do you have a recommendation for a specific brand? I've had troubling finding a glue that is recommended for rigid Polystyrene. Most of what I get points me in the direction of modeling cement like this https://www.amazon.ca/dp/B000BMYWYC/ref=ox_ya_os_product
If it's just a crack, the Extra thin Cement should work too. Apply the cement into the area of the crack, squeeze the two sides so that the edges come together and a bit of plastic protrude out, and let it cure for a day. After curing, remove the excess plastic with sandpaper / shave with a knife
If you need suggestions on Glue, I like using [Cyanoarcylate glue] (https://goo.gl/images/Y3VYYN). This will work on both plastic and metal miniatures. Most hobby stores will have this with a different store label. You don't need much to glue and it dries really quickly (10-15 seconds)
You could also try using a more advanced glue: Tamiya Extra thin cement. But be advised, this may slightly melt plastics, which is why it is great on large models. I did this with my troll and it worked really well. I wouldn't really use it on small figured if you are novice to miniature assembly. It tends to flow into spaces and basically melts plastic together nearly seamlessly... but take care with it. It dries rather slowly, so I will use a bit of the Cyan glue and then use the Tamiya glue elsewhere on the model. So the cyan will hold quickly which will then allow the Tamiya time to dry and meld the plastic.
I would recommend some snips for removing the miniatures from the plastic spues, a sharp hobby knife, and maybe some hobby files. The snips from Games workshop and the scraping tool are nice, but cost ALOT. You probably get away with just a hobby knife for like 8 bucks... but with as many miniatures you are assembling it is work considering your hands and fingers. =]
A hobby mat / cutting board could also be good to work on but not necessary.
Another option is Tamiya plastic glue; it's just as good. This is the stuff you're looking for: https://www.amazon.de/Tamiya-Extra-Thin-Plastikkleber-300087038/dp/B000BMYWYC/
It works by melting the plastic that it touches, so the two parts fuse together into a permanent bond. The best way to use it is to put a little bit on one or both of the surfaces you want to combine, wait a few seconds for it to start dissolving the plastic, then press them together.
It is great on translucent models because it dries perfectly clear.
I just got this stuff for my brother:
tools
glue
mold line scraper
I'd suggest getting some well reviewed mini brushes from Amazon as well. Make sure you clean them. Enjoy!
Here is an example of a "side cutter":
https://www.amazon.com/Integy-Hop-ups-Precision-Modelers-Plastic/dp/B00W4172V8/ref=sr_1_2?ie=UTF8&qid=1505567090&sr=8-2&keywords=side+cutter
Liquid glue (random sales listing I chose, unsure if cheapest):
https://www.amazon.com/Tamiya-87038-Extra-Thin-Cement/dp/B000BMYWYC/ref=sr_1_2?ie=UTF8&qid=1505567173&sr=8-2&keywords=tamiya+extra+thin+cement
Example of sanding sticks (prices will vary, more than one brand available probably):
https://www.amazon.com/Squadron-Products-Value-Sanding-Stick/dp/B000CDR5K8/ref=sr_1_4?ie=UTF8&qid=1505567224&sr=8-4&keywords=sanding+stick
THIS: https://www.amazon.com/Tamiya-87038-Extra-Thin-Cement/dp/B000BMYWYC
Is the glue you will want to get, hands down. All the models are plastics, and there is no better plastic glue than the one I linked.
Hey everyone!
I'm as new as it gets. So, I made a shopping list after doing some research on everything that I think I need to start. I'll place the links to all the items in the lines below. Everything is on Amazon because... well why not?
Gundam
Glue
Marker
Tweezers
Knife
Cutters
Mat
More Markers!
*Krylon Matte Finish
Am I missing anything?
Assuming you are from the US: https://www.amazon.com/gp/offer-listing/B000BMYWYC/ref=dp_olp_new_mbc?ie=UTF8&condition=new
also there were a couple parts that didn't sit fully flush after our initial gluing
we used tamiya extra thin cement and after letting it sit for a little bit we simply applied a little more glue to the offending crack (one instance was the arm holding the spear) then gently pushed it where it needed to be and held it for 20 seconds or so
I think when we get Allison I'll take pictures at different steps
Tamiya Extra Thin Cement† are my go to plastic glue:
I love the small brush in it for applying the glue I find it easier to control the "precision" tube (like on this) I also find that the tube get stopped with old glue and I don't think I have ever used all the glue in one because of that. But as I said the Tamiya glue do not have that problem.
The design of the glass bottle makes it almost impossible to tip over (I did that 2 times last time I tryed humbrol Liquid Poly)
I like the glue it self, but if you want "extra thin" or something a little thicker is a personal taste and what you are using it for. But extra thin are the standard for model kits and what we are doing is smaller (or same size) than that.
Edit: I forgot to say that if your flgs don't have it you local model kit/train store does, and in general it's a good place to look for hobby supplies.
†(The link are from this guide https://hobbymodelguide.com/best-glue-for-models/ that I like, so there probably a refual link in it)
How big are the gaps?
Anything bigger than 4-5mm I'd use Bondo.
Smaller than that, use Tamiya putty.
Well you clean the resin the same way you would with FW models and I use this glue for resin kits.zap a gap
Super glue works well, but some minis have a very limited surface area or a weirdly shaped joint that limits just how much glue you can get in there. I will often build up joints using this:
https://www.reapermini.com/FigureFinder#detail/02901
In this specific mini's case:
https://smile.amazon.com/gp/product/B000PHCNLC/ref=oh_aui_detailpage_o03_s00?ie=UTF8&psc=1
I wanted the shield to be vertical instead of horizontal because it kept falling off when I put it into my mini-holder. So, I actually attached the bottom of the shield tip to the base, juuuuust a bit to further add to the strength of the bond. Sometimes these attachments are difficult, so using a combination of glue as well as putty can greatly help.
If you do get the kits just make sure you have the proper tools. You don't need glue but I'll recommend it.
Here at the 3 items I'll pick up if you were to get this kit.
Tamiya Model Glue
Sharp pointed side cutters
Sanding sticks are nice to have as well.
Can I use this plastic cement plastic cement
I think most people would use something like Vallejo Plastic Putty:
https://www.amazon.co.uk/gp/product/B000TSBJEO
I agree. The ribbon doesn't last long at all. I buy the Gale Force Nine stuff. Comes in separate tubes so curing hasn't started yet and there is no waste.
You can find some here.
Keep the joining you have but I would still recommend using a glue to keep the parts from slipping and chipping paint. You can also use 'Green Stuff' to fill out those gaps and sand down to a smooth edge. Paint over it and it should look all one piece. I do agree the interlocking pieces will help hold it together under the rough environment of people playing with the sword.
I actually don't play 40k (well to be fair I just got back into the hobby, and I'm pretty much exclusively playing fantasy) but I think my strategy works for 40k as well. I've put magnets on the bases of all of my models using green stuff (epoxy). I then put tin sheets on the bottom of my movement trays, but instead of this step you could just get a metal box or put a piece of metal on the bottom of your current box. The magnets are strong enough to hold the models even when upside down (or even if they aren't the plastic models). It's especially great for fantasy where everything is ranked up in a unit, so moving the unit means none of the models will fall off/out.
Thanks! The Tamiya brand one actually isn't too pricey so, I'll go with that.
Just to make sure: Is this it?
Tamiya Cement is still my favorite.
Late comment but Yo I'm from Brissy & I can let you know what I did
I was in the Kickstarter and while I waited for the game to finally ship I spent ages devouring information from Gambler's Chest and Add-Ons tabs here.
For sleeves, I originally went for the official KD sleeves which were good, but availability for them had pretty much been once-off, so once the expansions came I was shit outta luck. I then went for Swan Sleeves, which are $3.95 USD per 100 Premium (pretty good price for really good quality, albeit shipping is a bit hefty and will change depending on number of packs ordered). 57x90mm sleeves are a perfect fit, but if out of stock then the 60x90mm are also a good fit. I just had a look, and both are currently out of stock, but just keep them in mind, 'cause AFAIK no one else stocks premium 57x90mm and they (imo) are undoubtedly the best fit for the cards.
As someone who's never sleeved before, it takes waay longer than you think it will, haha.
For gear cards, I personally went with the binder option; it's really convenient to be able to organise them like this. This was just using a 3-ring binder from Officeworks and a couple of these coin pages from Amazon.
For the making of the miniatures, while you can make do with a kitchen knife and some nail clippers for removing pieces from sprues, you'll make your life a lot easier investing in an X-acto knife and sprue cutters. By FAR the cheapest knife is from Bunnings, and at $2.50 it is of fantastic quality and comes with 3 extra blades. Sprue cutters you'll have to look around; best I could find was a cheap pair from Amazon that are fine. Finally, plastic cement is an absolute Must imo. Can't recommend it enough - instead of acting like an adhesive like superglue, it essentially melts the parts together and creates a very strong bond. Tamiya is pretty good and works great, but feel free to have a read around forums; people will have preferences for various brands, regular, thin, extra thin, etc. The making of miniatures is daunting at first, but it's not as hard as you might think (although you're like to make a mistake or two at first, but dw about it lol) and resources from https://build.kingdomdeath.com/, vibrantlantern.com/ and forum threads on https://boardgamegeek.com/boardgame/55690/kingdom-death-monster should see you through most of them :)
That's pretty much it. The storing or shelving of miniatures is up to you, as is whether or not a box insert is necessary.
Hope at least a couple of the things I said were useful. Have fun!
I looking for a light weight headset that is the price range from 20-60 dollars. I also wear glasses so it has to be able to work with that.
​
Right now my current painting equipement:
​
Is there anything else I should buy?
green stuff
You can order it off of amazon or ebay, like at this link here:
http://www.amazon.com/Green-Stuff-Yellow-Epoxy-Putty/dp/B002MB61RQ/ref=sr_1_1?ie=UTF8&qid=1465180253&sr=8-1&keywords=green+stuff
It's also often called "Two part epoxy putty"
I'd make them out of two-part epoxy putty. Greenstuff, is the most popular variety for this kind of work. There are tons of articles and videos on how to use the stuff too.
This link leads to a gap filler made specifically for this issue! You mix the yellow and blue to make the green ckay-like substance that fills in any gap!
https://www.amazon.com/Green-Stuff-Yellow-Epoxy-Putty/dp/B002MB61RQ/ref=mp_s_a_1_1_sspa?adgrpid=58824589151&hvadid=274732491114&hvdev=m&hvlocphy=9015551&hvnetw=g&hvpos=1t1&hvqmt=e&hvrand=10939296767922561980&hvtargid=kwd-299414241990&hydadcr=28696_10176914&keywords=green+stuff&qid=1567476058&s=gateway&sr=8-1-spons&psc=1&smid=A3D3WXKRRQPHZM&spLa=ZW5jcnlwdGVkUXVhbGlmaWVyPUFSTU0wMURGVVA4RkomZW5jcnlwdGVkSWQ9QTAxNTg5NjkyMFRVM0dIVjlRVEZRJmVuY3J5cHRlZEFkSWQ9QTAyNzk2NzEyMzRQUEhBN0UyUkNKJndpZGdldE5hbWU9c3BfcGhvbmVfc2VhcmNoX2F0ZiZhY3Rpb249Y2xpY2tSZWRpcmVjdCZkb05vdExvZ0NsaWNrPXRydWU=
I buy Kneadatite green stuff recommended from r/minipainting.
It's $13 for a tube that's at least 3x larger than GW green stuff. Added benefit is that the Blue and Yellow are in separate packages, so it never goes bad.
Amazon Link
green stuff https://www.amazon.com/Green-Stuff-Yellow-Epoxy-Putty/dp/B002MB61RQ
https://www.amazon.com/Green-Stuff-Yellow-Epoxy-Putty/dp/B002MB61RQ this or something similar. I usually buy at local shops because some of them have it cheaper than online does though.
I have been using 1" plastic squares that I got on Amazon. I'd seen a few Kickstarters for stampers to put a pattern onto bases. I figured I could make my own.
I used the Clay to make my positive. I made one of a cobblestone and another of bricks. They are much larger than the size of the base so that I can use any portion to create the impression.
I then used this low melting point plastic. Soften it up and then press it into the clay pattern. Now I have a negative that I can use over and over.
I then got some Green Stuff. Put it on my 1" square base and then gently press into my negative image. Now I have a positive and I can let that setup and glue/pin my mini to the base.
http://www.amazon.com/Green-Stuff-Yellow-Epoxy-Putty/dp/B002MB61RQ
Its a 2 part moldable "plastic"
You mix equal parts, mold it into shape, and when it dries it can be painted and to a lesser extent, sanded.
Personally, and this is just conjecture because I haven't started painting my miibos yet, but I'd just do what I do for miniatures. Get some acrylics, thin them to the consistency of skim milk, put on a ton of coats. With regard to sculpting hit up a hobby shop and ask for "Green Stuff."
http://www.amazon.com/Green-Stuff-Yellow-Epoxy-Putty/dp/B002MB61RQ
http://www.bananaking.net/cento/workshop/conv_green.htm
Don't use polymer clay. It melts plastics and I wouldn't want to test it on these. I believe they're vinyls but I don't know how it interacts.
If you're shy on painting head on over to /r/minipainting and soak up some knowledge. The features on the amiibos are larger but the techniques should carry over.
use a scalpel and side-cutting pliers to carefully cut the base out of the mini leaving just a small piece around the feet.
Get some blank bases and use green stuff to create your 3d cobblestone texture. The exceeding plastic under the feet will help to keep the mini steady and will be completely covered by the green stuff.
I don't have any "methods," since I've never tried to sculpt individual feathers (just a feature "texture" on wings). But I'd suggest using green stuff or a similar two-part epoxy putty, if you weren't already. It holds detail amazingly well and dries almost as hard as plastic, while being much less brittle than modeling clay. Something that protrudes off the edge of a model (like, I'm guessing, your feathers) could still get snapped off, but during normal play, or even if you drop the model from a reasonable height like a game table, it should be totally fine. I'm not a sculptor by any means, but that's the best material I know to recommend.
But as for a "way to sculpt or apply feathers" once you have the green stuff, I'm not sure, and it would depend on how big you want the feathers to be. I can attach some pictures of a project I'm working on to give you ideas, if you want, but I haven't yet added any free-standing feathers. They're molded directly onto the wings of the model, so I don't have to worry about them breaking off.
a very thick and very tacky idea is green stuff
http://www.amazon.com/Green-Stuff-Yellow-Epoxy-Putty/dp/B002MB61RQ
mix the blue and yellow and make green clay that sticks to plastic
Ah yes, I buy the sticks. On my fifth one now since joining the hobby several years ago.
Plastic glue is bae. I swear by it.
https://www.amazon.com/Games-Workshop-Citadel-Plastic-Thick/dp/B004CDA3GC/ref=sr_1_1/136-0045539-8905258?ie=UTF8&qid=1524079419&sr=8-1&keywords=citadel+plastic+glue
It was cheaper at my local Warhammer store.
it leaves obvious seams, but usually works. This is the stuff I got which is just MEK. You can probably get more cheaper as a non-brand name
Plastruct Plastic Weld is my favorite (Plastruct Plastic Weld w/applicator 2oz Bottle https://www.amazon.com/dp/B00FDFWJD8/ref=cm_sw_r_cp_apa_i_BXRFDbW75C1PF)
try this one
Plastruct Plastic Weld
https://www.amazon.com/Plastruct-Plastic-Weld-applicator-2oz/dp/B00FDFWJD8/ref=sr_1_27?ie=UTF8&qid=1494774556&sr=8-27&keywords=model+glue
That humbrol should work well, its a solvent glue. It won't work well on painted surfaces. It need to be clean bare plastic. It works by dissolving the surface of the plastic so two pieces "melt" together. I prefer Plastruct. But any plastic welder I've used has worked well. Try scraping the paint of the bonding surfaces with an exacto knife before bonding. Also, solvent glues are not like regular glues. You put the glue on after you are holding the parts in place and the capillary action pulls the glue into the joint. If you put it on the joint first it most of it will just evaporate before you get the parts together.
Solvent glues also only work on some plastics. Perhaps the combination of the clear plastic and the paint is enough to make it ineffective. As for gluing clear parts like Nacelles or Windows (in other models) generally you want something like PVA. (aka tacky glue, or elemers school glue) It won't be as strong a bond but it wont fog the plastic.
If you're dealing with a nice clean break in the plastic - i.e. no chipping or lost fragments - a plastic welding product should work nicely. These products work by melting the very top layer of the plastic so that it will bond with the molecules of whatever layer it comes into contact with (ideally though you'd probably want to apply the weld to both surfaces of the break).
Have a look at the following for an example of this type of adhesive product:
https://www.amazon.com/Plastruct-Plastic-Weld-applicator-2oz/dp/B00FDFWJD8/ref=sr_1_1?s=toys-and-games&ie=UTF8&qid=1551156641&sr=1-1&keywords=plastruct
​
Also, if at all possible, practice on some scrap plastic, preferably some abs plastic which is similar in composition to the SP shell, so that you can get a feel for how this kind of stuff works.
I use plastic weld for my parts if there is any delamination. It's a thin liquid that you can apply to the whole part if you want. It will seep into any small openings and melt the plastic so that the pieces can bond properly together.
[This is one of the bottles I have]
(http://www.amazon.com/Plastruct-Plastic-Weld-applicator/dp/B00FDFWJD8/ref=sr_1_11?ie=UTF8&qid=1450665680&sr=8-11&keywords=plastic+weld)
Superglue wouldn't hold that.
Your best bets are either 5 minute epoxy, built up as a layer on the inside of the door in order to make the join stronger, or Plastic Weld which will melt the two parts back together but may discolor the clear and painted plastic.
If you choose to go with the Plastic Weld, you need to be careful as it melts the plastic a bit in order to weld the two parts together. If you let it run it will melt and discolor parts you might not want it to. You should pour just a tiny bit into the cap of the bottle and then use a small natural bristle paintbrush to brush the edges of the parts with the solvent, let them sit for a few seconds and then push them together and hold them for 5 seconds until they are bonded, and then if necessary brush a little more Plastic Weld over the joint to help seal the pieces together.
If you're interested in putting them together, this glue works wonders. I've already worked through two bottles of it.
Yea, just use super glue. I use Zap A Gap CA (this stuff, works great. Dries nearly instantly, and works on metal and plastic. It is a bit brittle though, which I count as a plus personally, since if I ever want to rip a model apart for some reason I can just freeze it and snap the glue apart fairly easily.
If you use Zap a Gap or similar they have a removable tip. It seems to stay very clog free with minimal buildup on the tip. Maybe the plastic they use has something to do with it, but my bottle seems fairly clean. That and I like the Loctite control type glues which have the squeeze sides. They tend to let me keep the tip clean as no glue seems to leak out unless I squeeze them. They also have great formulas imo. Gel or liquid depending on your needs.
Plastic Magic has helped speedup the glueing process for me compared to GW plastic cement.
DELUXE MATERIALS Plastic Magic... https://www.amazon.com/dp/B01LFP6LVU
No Amazon considers it an add on item and won't let me buy it alone. Has to be bought with something else making the order more than 25. That's why I was wondering if it matters what brand or if I could pick another one on there like Liquid Cement For Plastics 1 oz https://www.amazon.com/dp/B0006N6ODS/ref=cm_sw_r_cp_api_Bl5FzbVNY0BDB
You can get much cheaper stuff from other companies. That is at a jacked up price on that website.
http://www.amazon.com/Green-Stuff-Yellow-Epoxy-Putty/dp/B002MB61RQ
I don't know if I'm going to paint Amiibo like figures. I've painted stuff like that before. It has a different surface than normal wargaming figures, so you need to basecoat well(especially if you only want certain parts of the figure done, and not just spray the whole thing).
Once you get a good base you can probably be ok, but you'd need a good varnish or seal coat too.