(Part 2) Best drain cleaners & pumps according to redditors
We found 1,918 Reddit comments discussing the best drain cleaners & pumps. We ranked the 961 resulting products by number of redditors who mentioned them. Here are the products ranked 21-40. You can also go back to the previous section.


Nah, they actually flush pretty well. The water level goes up quite a bit but the pressure pushes them through. Suppose if you had a preexisting issue with your plumbing, the story might go differently.
Edit: I should note that worst case, these things mash up easily. So if you did have an issue flushing them you could easily use a snake to clear up the problem. Or your hands if you aren't a sissy.
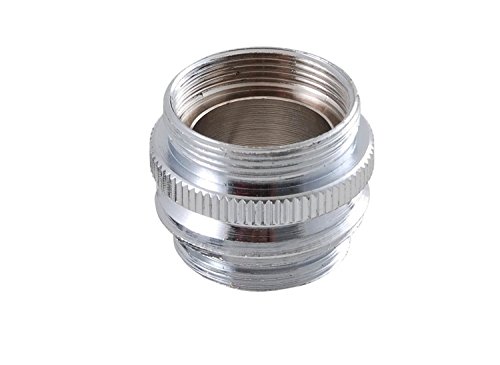
you can get a sink hose nozzle adapter if you would like to use a hose:
https://www.amazon.com/Multi-Thread-Garden-Adapter-Female-10513/dp/B008M6KFD6/ref=sr_1_7?crid=8K7470NSMC5P&keywords=sink+hose+adapter+to+garden+hose&qid=1567541768&s=gateway&sprefix=sink+hose+adapter+%2Caps%2C335&sr=8-7
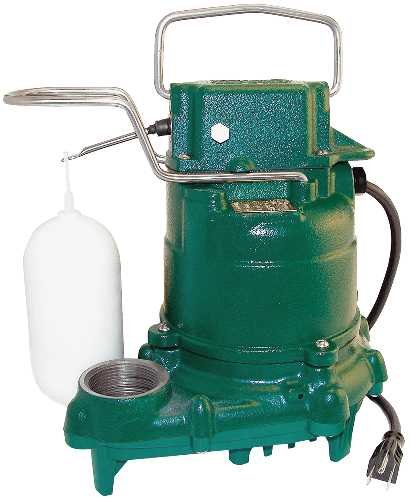
I would buy a new Zoller pump if I were you. A 1/3 HP pump (you would need to confirm the existing pump size) is $160 on amazon . Zoller is a better brand than the product you posted.
Installation involves loosening some fittings, and threading in a new discharge pipe. Pretty simple job.
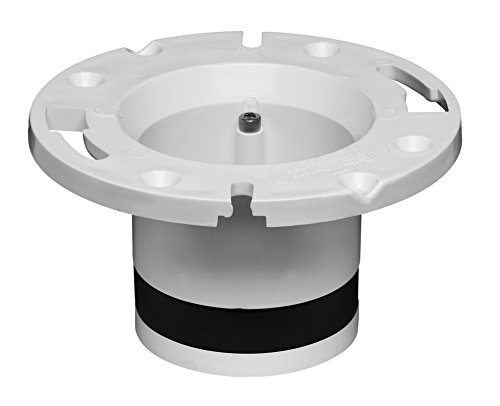
That soil pipe is lead. It's pretty common that they aren't attached to anything, but it's not going to go anywhere either. You need one of these. They come in 4 inch, and (for really old houses) 3 inch sizes. You set that in your soil pipe, expand it to fit snug, attach that to the floor (which is the tricky bit because you may need drill through the tile with a diamond bit), then attach the toilet to the new flange with a pair of hand-tightened toilet bolts. A wax ring goes between the new flange and the toilet. I hope this helps!
Also, if the lead soil pipe is not perfectly round or flush, you can gently hammer it into shape. It's pretty malleable once you start working it.
problem you have is the blades are rusted to the internal housing you can not fix it
Buy a new one that has all stainless steel internals and that won't happen again.
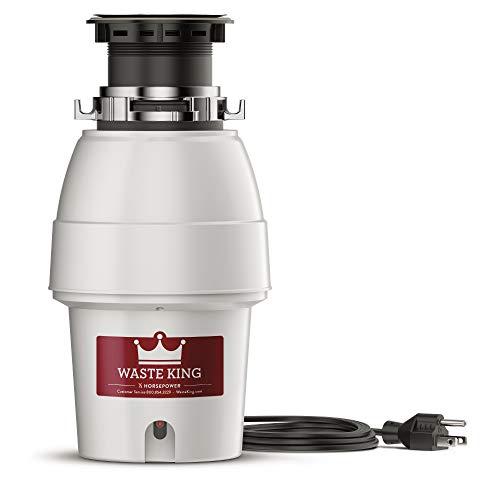
WasteKing has models that are inexpensive and all stainless
https://www.amazon.com/dp/B0014X7B54
Amazon link
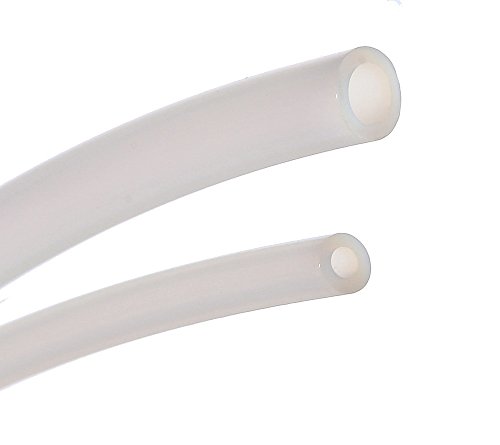
Depending if there is enough left you can pull out the remaining, cut it clean and reinsert it. Otherwise you will need a new tube.
​
https://www.amazon.com/Teflon-tubing-Filament-Printer-Tech/dp/B073RDFTDV/ref=sr_1_5?keywords=bowden+tube&qid=1562686568&s=gateway&sr=8-5
I have 3500W recommended by my electrician that should run my gas furnace via a transfer switch, sump, fridge, and a light or two, just not all simultaneously.
For generators, few things:
I also grabbed one of these: https://www.amazon.com/gp/product/B018LRUDUU
The photos in one of the top reviews speak for itself.
You may also consider a drill pump, it's literally a little pump you attach to a hand drill and has a hose input and output.
here you go
Cast iron I'm assuming? You might be able to pop it off and go with an insert flange:
https://www.thisoldhouse.com/how-to/how-to-repair-cast-iron-toilet-flange
https://www.amazon.com/Oatey-43539-Flange-Replacement-4-Inch/dp/B000DZHDQG
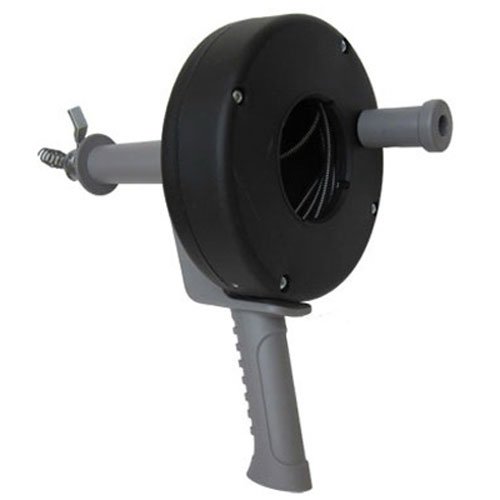
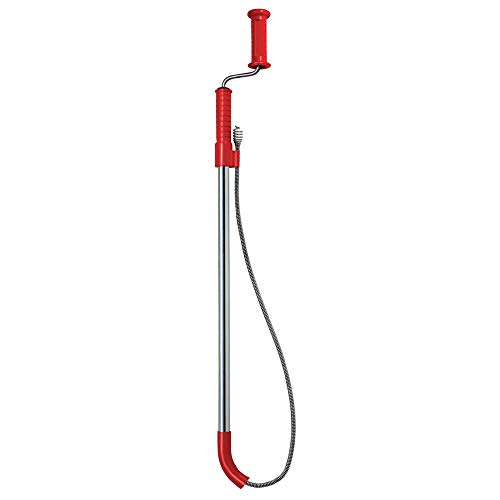
Drano can be bad news for a lot of pipes, especially older galvanized ones. And if it doesn’t work, then you have to deal with exposure to the chemical when trying to manually clear the drain. A snake is the better way to go. Something like this one.
Cobra 85250 1/4-Inch by 25-Feet Pistol Grip Drum Auger
Zipit drain cleaner available just about everywhere. https://www.amazon.com/Cobra-Products-00412-Cleaning-12-Pack/product-reviews/B0018S214Q
I have an unusual setup that requires a bit of explanation.
Before I started using supersoil I used that Bluelab pH controller to maintain a 6.5 pH in the reservoir automatically. Now it's just an overpriced pH monitor.
Since the reservoir is tucked into that corner with a shelf above it, determining the water level was a challenge. The PVC pipe on the right has a right angle that goes down into the res about 3 inches. I blow into that pipe periodically when filling the res and once it bubbles I know it is full. If someone has a better idea I'd love to hear it.
Also, you'll see a pump on top of the res that's for aeration. It feeds an 8inch air stone at the bottom of the res.
The 3rd water line coming from the res on the right going into that cup is just to test the water if needed when the tent is in flower and can't be opened.
The 10gal bucket on the left is for hand feeding with a submersible pump, I hardly need to use that anymore either with this new supersoil setup. (edit: this is unrelated to blumats but thought it needed an explanation)
Plumber here, buy [this pump] (http://smile.amazon.com/Zoeller-Mighty-mate-Submersible-Sump-Pump/dp/B000H5PYR2/ref=sr_1_1?ie=UTF8&qid=1416936374&sr=8-1&keywords=zoeller+sump+pump) . They are very tough and last a long time. If your old on edoes not have a check valve, buy this one to go with your new sump pump.
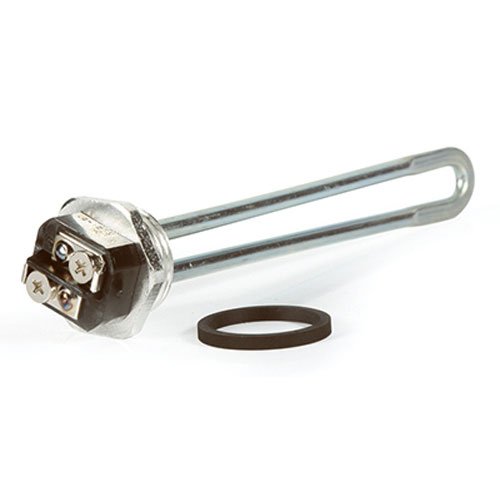
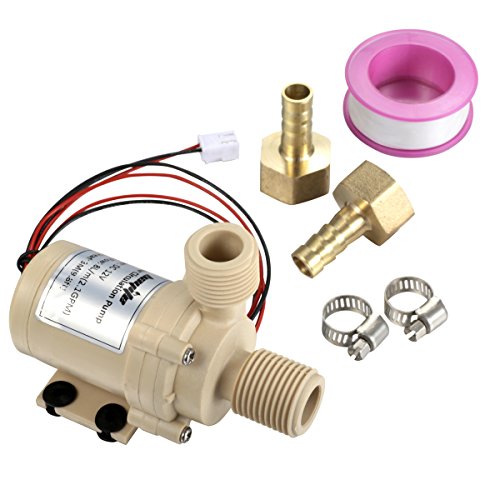
I built a hot water bath using a temperature controller and heating element I got from Amazon. Whole thing cost me $70. Mounted the heating element in a plastic tub, wired up the temp controller, added a small aquarium pump to keep everything mixed well.
Element: https://www.amazon.ca/Camco-02203-2000W-Heater-Element/dp/B0006JLVBW/ref=sr_1_3?ie=UTF8&qid=1487969670&sr=8-3&keywords=heating+element
Controller: https://www.amazon.ca/docooler-Temperature-Controller-Thermocouple-Fahrenheit/dp/B00F05UI8O/ref=sr_1_4?ie=UTF8&qid=1487969690&sr=8-4&keywords=temperature+controller
You will need to remove your aerator and replace it with a 15/16 thread x make hose thread faucet adapter.
Like this one.
https://www.amazon.com/gp/aw/d/B00BHZLR4K/ref=dp_ob_neva_mobile
From there you can leave that on and install a new aerator on that too allow for easy switch outs.
looks like a berm of leaves around the edge of that lake. can you open up a channel to get the water to drain into the woods?
if you really want to pump it out you can do something like:
https://www.amazon.com/WWB-WaterBUG-Submersible-Multi-Flo-Technology/dp/B018LRUDUU/ref=sr_1_18?ie=UTF8&qid=1519656062&sr=8-18&keywords=trash+pump
Not a plumber but this has always worked for me
http://www.amazon.com/Ridgid-59787-3-foot-Toilet-Auger/dp/B000H5XSS4/ref=sr_1_1?ie=UTF8&qid=1393705044&sr=8-1&keywords=toilet+auger
They make adapters to do exactly what you're looking for. It requires removal of the aerator on your faucet and then screwing the new adapter on on. Here's a link to one on Amazon.
https://www.amazon.com/Multi-Thread-Garden-Adapter-Female-10513/dp/B008M6KFD6/ref=sr_1_9?crid=B1MW83MF9BEW&keywords=faucet+to+hose+adapter&qid=1563902791&s=gateway&sprefix=faucet+to+hose%2Caps%2C158&sr=8-9
Very easy 2 minute repair.
Pull off the metal cap on top which covers the vacuum breaker. It pulls straight off - might need a pliers. There will be a plastic piece that you need to tighten a little I think with a Phillips screwdriver.
If that doesn’t fix it then you need a new vacuum breaker kit called a Prier Mansfield Breaker Repair Kit model 630-7500 that has a replacement for the inside plastic pieces.. Runs under $10 and most hardware stores sell them.
https://www.amazon.com/Prier-630-7500-Breaker-Service-Original/dp/B00164C5IO
Nope, just a clogged drain. Most likely gunk built up in the trap.You might try to shove something like this down the drain line. Vacuum the drain and pour some hot water down the drain.
Looks like a Proper/Mansfield sillcock that needs a new vacuum breaker, the parts are less than $10.
https://www.amazon.com/Prier-630-7500-Vacuum-Breaker-Service/dp/B00164C5IO
I bought one of those, but my threads are buried in the faucet, so the flange on the one i got prevents me from using it! do you know of one that is a bit longer? FTR i got this one https://www.amazon.com/LDR-530-2050-Aerator-Adapter/dp/B00BHZLR4K/
What kind of pump is it? I had a 5 year old big box store tether pump that would wake the whole house. Upgraded to a Zoeller m53 which cost me $125 on Amazon and is whisper quite. Don't forget to add in a check valve, which it doesn't look like yours has.
These are what I bought:
http://www.amazon.com/Zoeller-Mighty-mate-Submersible-Sump-Pump/dp/B000H5PYR2/ref=sr_1_1?ie=UTF8&qid=1452683726&sr=8-1&keywords=zoeller
http://www.amazon.com/Zoeller-30-0181-Check-Valve-Inch/dp/B0009WD1L4/ref=pd_sim_60_1?ie=UTF8&dpID=41tvTOSrD7L&dpSrc=sims&preST=_AC_UL160_SR160%2C160_&refRID=1DQ4X69H0CMEEQG9T9PN
It really doesn't even matter. Here's what the drill connectable kind looks like. Here's a manual one. My experience is that it's a purchase you don't need to think about in advance. Just get the first and cheapest one you find when your sink is clogged.
I built a dry box that I keep my PLA in and feed directly to the printer using PTFE tubing.
https://imgur.com/rrc30HL
https://imgur.com/ZxHDLQX
I used the threaded rod holders from this
https://www.thingiverse.com/thing:961881
And the Filament feeders from here
https://www.thingiverse.com/thing:1750875
I also keep one of these in there as well to keep it dry.
https://www.homedepot.com/p/Eva-Dry-4-6-oz-Mini-Dehumidifier-E-333/202847328
Also, I used this PTFE tubing for the runs from the box.
https://www.amazon.com/gp/product/B073RDFTDV/ref=oh_aui_detailpage_o03_s00?ie=UTF8&psc=1
Yes, you need to replace it. there is a seal inside there that keeps the water in. You can replace it with a fair amount of work, but from what I understand it's not worth it.
A few months ago I bought a Waste King L2600 from Amazon.com at a really good price, and it was really easy to install. The toughest part was me installing a new electrical outlet since the old one was directly wired. I have nothing but good things to say about this garbage disposal unit.
My 2 cents :) good luck
I actually just ordered this for a utility sink in my basement.
https://www.amazon.com/gp/product/B008M6KFD6
here ya go
AFAIK, the distinguishing characteristics of a current Mk10 nozzle are a 7x1mm thread and a 4mm bore. Performance 3D makes excellent nozzles and pretty much any generic brass Mk10 should work okay. There was an earlier rev nozzle that was for a 3mm OD x 2mm ID tubing and which had M6 threads. Only way to be sure is to measure but unless you have a fairly old FFC (e.g., laser cut case) it's probably the M7 & 4mm style.
For the PTFE tube, recommend buying a length of 4mm OD x 2mm ID PTFE tubing and cutting your own. Cheaper in the long run and you can cut it to the right length. When the PTFE tube is inserted inside the thermal barrier tube and nozzle there should be a narrow gap, about a fingernail's thickness, between the nozzle and tube. That ensures that the PTFE tube will fully seat once it's all assembled. One example of many.
Draino and similar products usually makes it worse. I swear by Millipedes as a first line of defense in getting hair out of the drain. Keep paper towels handy ... what you get out is disgusting.
Find a pvc flange, cut it as needed to fit, seal with epoxy. Couldn't be any worse than before.
Oatey 43539 PVC Cast Iron Flange Replacement, 4-Inch https://www.amazon.com/dp/B000DZHDQG/ref=cm_sw_r_cp_apa_ujofAbN4FDQ56
Here are some links for the product in the above comment for different countries:
Link: http://www.amazon.com/Waste-King-L-2600-Continuous-Operation/dp/B0014X7B54/ref=sr_1_1?ie=UTF8&qid=1397234017&sr=8-1&keywords=garbage+disposalhttp://www.amazon.com/Waste-King-L-3300-Continuous-Operation/dp/B0014X7B5E/ref=sr_1_4?ie=UTF8&qid=1397234023&sr=8-4&keywords=waste+king
|Country|Link|
|:-----------|:------------|
|Japan|amazon.co.jp|
|Canada|amazon.ca|
This bot is currently in testing so let me know what you think by voting (or commenting).
The heat sticks will help get you to strike temp, but not really to boil. If you do decide on one, I would recommend changing the male plug end to one of these:
https://www.amazon.ca/gp/product/B00I97LLEA/ref=oh_aui_detailpage_o06_s01?ie=UTF8&psc=1
Or just make sure you plug it into a GFCI circuit.
Alternatively, you can punch a hole near the bottom of the grainfather, below the basket line and add one of these:
http://www.amazon.com/Camco-02853-Screw-Foldback-Element/dp/B000KKVZUO?ie=UTF8&psc=1&redirect=true&ref_=oh_aui_detailpage_o00_s00
That will give you far better results than the bucket heater...but you're then drilling a hole in your brand new toy.
https://www.amazon.com/dp/B018LRUDUU/ref=cm_sw_r_cp_api_i_z6wADb2JMQZWA
Best wishes
I use one of these about once a week, because our tub and pipes are pretty old, and that's about all it takes for our drain to start clogging. If the link doesn't work, it's just a 3 or 4 pack of drain snakes, which look like long zipties.
I've tried using a hair trap like this one, but even though I'm also really careful about grabbing my hair before it can go down the drain, enough of it gets away that when I use the hair trap, I have standing water in my shower before I'm done. I'd rather just snake the drain once a week.
The conditioner isn't clogging your drain, it's hair. But it may be helping the hair clump together (which will also make it easier to snake it out). Dran-o and other pipe cleaning chemicals won't do much against these clogs-- before I bought the snakes, my partner ran ~3 gallons of Dran-o down the shower drain and it didn't do much.
If your drain has a raised, silver mushroomy head to it, you might need a snake more like this. That's what we have for our bathroom counter sink.
> Ahh okay yes that makes sense, what do you usually use for insulation?
Foam pipe insulation works well, or a few wraps with Reflectix works well. Reflectix also looks really nice, taped up with foil HVAC tape.
This is the part
I had the same thing and I extended mine anyway. I bought 6 feet of some heavy duty clear hose with the same I.D.
My drain is like 6 feet off the ground. I had to drain into a bucket and put a pump in the bucket. Its a self contained system My plumbing buddy set up.
https://www.amazon.com/Zoeller-105-0001-Laundry-Package-Including/dp/B0009TCDZ2
This might be overkill for your needs but it works great for me.
No this is a little brown pump.
They are cheap and fairly weak.
I would think a chugger should be perfectly capable, how big a hose do you have connected? It says its capable of 18.6ft of head pressure.
Here are some Reddits that may provide you with additional information.
/r/bicycletouring
/r/Bushcraft
/r/CampFireCooking
/r/DumpsterDiving
/r/entomophagy
/r/foraging
/r/mycology
/r/survival
/r/Whatisthisplant
/r/whatisthismushroom
Equip yourself with items that will keep you dry and warm in all kinds of weather.
You need water and a means to carry it, sterilize it and acquire it.
Be able to cook food and make hot drinks. You need to be able to acquire food using multiple options.
Free first aid training.
Free map and compass course.
Get in good physical condition.
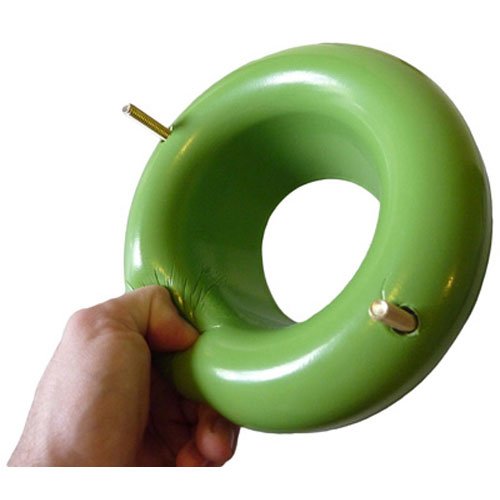
Instead of wax ring, I recommend this:
https://www.amazon.com/dp/B005K89RQU/ref=cm_sw_r_cp_awdb_t1_AVfNBbJ25ZBK4
This way if you miss-align it at all, you won’t risk not having a full seal.
Here's my best suggestion: Take your passenger seat out, run it in through the trunk tail first. A 3 definitely has the interior length to do it, and since you're going alone you don't need the passengers seat.
As for scratching it with straps: Buy some pipe insulation. It's closed-cell foam tubing that can wrap around the straps and deform around the car. Use it under the board and on the straps where they contact the body panels. This will work great if you're only doing a week, but is in no way a long term solution. Amazon: https://www.amazon.com/ft-Polyethylene-Pipe-Insulation-Wall/dp/B007R7VNAA
https://www.amazon.com/DiversiTech-GG-1-Charles-Gallo-Condensate/dp/B00207UAU6
don't think the washer will pump that high,you need a reservoir with a float controlled pump
https://www.amazon.com/Zoeller-105-0001-Laundry-Package-Including/dp/B0009TCDZ2
Can you give us a scenario of when you would use this? I didn't think finding a faucet outside with threads was particularly hard. Finding one without threads seems hard, but I know of one.
Probably right up your alley but please ask permission from someone first, (except in an emergency.) No one cares if you fill a water jug, they require a key for the outside outlets because they don't want some jerk to come along and just leave the water running.
Sorry the terminology is mixed up on my end. I had been on a motorcycle board and was thinking about something else. I meant a sillcock key. I was in a fog of antibiotics and codeine when I replied. :)
http://www.amazon.com/Jones-Stephens-J40-005-Four-Way/dp/B000DZKYVC
Check out this video on why it's helpful. It's a great addition to your filter, especially if you're in any kind of urban area. Once you start looking for these kind of water sources, they are all over
https://www.youtube.com/watch?v=ygfv-nkvjxU
Jones Stephens J40-005 Four Way Key https://www.amazon.com/dp/B000DZKYVC/ref=cm_sw_r_other_awd_RB4Dwb6GVQQM3
He's referring to these. The hose bib valves outside commercial buildings don't have handles to keep people from stealing water. You'll need one to get water to your filter.
HD was incorrect.
You need one of these:
https://www.amazon.com/Oatey-43539-Flange-Replacement-4-Inch/dp/B000DZHDQG
this It uses co2 cartridges to blow out the drain. No, you don't need to take it apart.
http://www.amazon.com/Gallo-Condensate-Blowout-Gun-Diversitech/dp/B00207UAU6
I personally just use my air compressor and preemptively blow it out once a year, otherwise I find I get a clog.
Pretty sure this is what you're after
LDR 530 2050 Faucet to Hose or Aerator Adapter Lead Free https://www.amazon.com/dp/B00BHZLR4K/ref=cm_sw_r_cp_api_mVAKzbPBW7GZP
Been in my new home for a little over a month with no washer/dryer (made sense to wait for black friday pricing). Water is in, 120v for washer is in, 240v for dryer is in. Utility sink is ready (not pictured). One last trip to home depot after work to get a breaker and elbow for vent and I will be up and running. https://i.imgur.com/ocpORPV.jpg
Granted, somewhat temporary setup as I need to install a pump under the utility sink the washer drains into. I just have a hose adapter on the utility sink to go into basement drain. I have the pump already ( https://www.amazon.com/dp/B0009TCDZ2 ), just need to plumb it up and over to the main stack, might have the motivation to do that this weekend.
Part of the reason I didn't buy earlier was also because my water wasn't suitable for washing clothes (super high in iron). So the prerequisite for this was getting clean water. Now that I've got my new pressure tank and water filtration system running, it's time to tidy it up and actually run the electrical properly (cap is on pressure switch now). https://i.imgur.com/6a9miaj.jpg Planning on making a post showing all that once it's ready. Kinda conflicts with my need to run a half dozen loads of laundry, but hey, never-ending amount of cleanup to do in that room anyways.
It's clogged.
https://www.amazon.ca/Ridgid-59787-3-Foot-Toilet-Auger/dp/B000H5XSS4
Look for one that's 6ft. If that doesn't work you'll have to call a plumber with a big snake.
This drain millipede is reusable and easy to use. We have the same type of drain and I use this all the time!
Just get a drain auger and clear it when it gets blocked. This and a toilet snake are two things you need pre-emptively.
http://www.amazon.com/Cobra-85250-4-Inch-25-Feet-Pistol/dp/B006C68TA4/ref=sr_1_1?ie=UTF8&qid=1425299919&sr=8-1&keywords=drain+auger
It's a hose bibb. You might try this bibb key
GAME CHANGER
https://www.amazon.com/gp/product/B00BHZLR4K/ref=oh_aui_detailpage_o02_s00?ie=UTF8&psc=1
Connect this to a faucet in your hose (preferably the sink by the tub, so you can drain there) and connect your hose connection on the wort chiller tubing to it.
This is one we just installed
Very easy to put in and no issues so far!
http://www.amazon.com/gp/aw/d/B0014X7B54?cache=f28fbd65b8788918e576ae7f331f1c1d&pi=SY200_QL40&qid=1411827608&sr=8-3#ref=mp_s_a_1_3
This is the pump I'm using.
The controller is a custom built BrewManiacEX controller. As mentioned in another comment, I plan on redesigning the PCB I'm using over the next few days, then do a full /r/DIY style build thread.
Since you said you're interested:
After many hours of research and planning, I have concluded the cheapest, and, strangely enough, easiest solution for a basic setup, assuming you are starting with nothing, is simply to get one of these. Unscrew the aerator from the kitchen faucet, screw on that part, and attach the water hose to the other end.
Again, assuming you're starting with nothing like me, all parts combined when going with other solutions would cost approximately $40 and up, including using 3/8 tubing and fittings. And that's for the absolute bare bones food safe setup.
I didn't have a garden hose, so that was the most costly expense. I decided to go with this one. Those two parts put me at $24 and some change, plus another $7 for shipping. For about another 50 cents, which would put me over the $25 total, I could get free shipping. So I got some desoldiering wick.
Total project cost: $27.xx
Estimated time to install: About 5 minutes (rounding up for estimated time spent goofing off)
Final note: There were several people reporting sharp edges on that adapter. If you get it, my advice is to wear thick leather gloves, and attach the adapter to the hose first. Then wrap it in several layers of duct tape so when you need to attach/detach it from the faucet, you won't need gloves and it won't cut up your hands.
There is a product called zip-it you should look into. They are cheap and therefore disposable. I used to use them on my shower, my ex was a shedder and I guess she didn't know the "stick it to the wall" trick. http://www.amazon.com/gp/aw/d/B0018S214Q/ref=mlt_base_B0018S214Q
I feel like my dad saying this, but be careful about using Drano. It can turn a fairly simple clogged drain into an expensive plumbing problem. The commercials make it sound like a miracle product but it can corrode pipes very easily. I would suggest trying one of those plastic snakes you can get at the home improvement store. If your shedding schedule is like mine, you might want to invest in a higher quality drain snake. I've got this one which is under $20 on amazon. Being able to fix a small problem like this will really decrease the anxiety when the water starts to reach your ankles in the shower :)
If you do end up using Drano, make sure to run the water for at least 15 minutes afterwards.
Honestly I would skip the plunger and get this instead.
RIDGID 59787 K-3 Toilet Auger, 3-Foot Toilet Auger Snake with Bulb Head to Clear Clogged Toilets https://www.amazon.com/dp/B000H5XSS4/ref=cm_sw_r_cp_api_UcRGyb8EQ3TX6
I have used all sorts of plunger and they never seem to work well. Handles are short, you have your face and hands near a situation you would rather not be near and you are sloshing crap around making a huge mess.
That auger has worked every time I have ever used it, and in about 30 seconds. No huge crap mess and no close up and personal with the toilet.
Toilet clogs that home owners can clear are generally just the P trap getting clogged and this snakes them and you are done in no time.
Plenty of folks use a little DC pump. I've got one that runs my RIMS machine. It's not specifically certified for food contact, but it's all polypropylene and polyphenylene. Both of which are pretty much inert below 150C.
I made my canoe roof ready ( and much quieter in the water when I rest my kayak paddle) by gluing Pipe foam insulation from the hardware store onto the length of the canoes rim. It usually needs replacement once a year.
Another thing i did to facilitate tying the canoe to the car was to install small wire loops on the structural beams of the underside of my Hyundai front and back. I had fixed length ropes on the rear of the canoe with large clips on them that would clip to those loops, leaving only two tie downs with truckers knots on the front. I also usually used two ratchet straps through the open rear doors at the mdsection of the canoe also. ( don't cinch them too tight!)
I bought this one a few months back. I love it.
http://www.amazon.com/Waste-King-L-2600-Continuous-Operation/dp/B0014X7B54/ref=sr_1_2?ie=UTF8&qid=1404848903&sr=8-2&keywords=waste+king
edit: apparently they sell them in 2 packs as well...
I'm a big fan of these ones. They are a squishy foam and work great. Totally reusable.
https://www.amazon.com/dp/B005K89RQU/
1/2 HP for $74, I have installed the 2600 model in my last two houses. Zero problems and simple install.
I recently put in a waste king, and I love it. Super quite, and all of them are pretty highly reviewed on Amazon.
http://www.amazon.com/Waste-King-L-2600-Continuous-Operation/dp/B0014X7B54/ref=sr_1_1?ie=UTF8&qid=1397234017&sr=8-1&keywords=garbage+disposal
http://www.amazon.com/Waste-King-L-3300-Continuous-Operation/dp/B0014X7B5E/ref=sr_1_4?ie=UTF8&qid=1397234023&sr=8-4&keywords=waste+king
Edit: I have the 1/2 hp model, and its never had any issue, and my wife throws EVERYTHING down it.
Oh, these are the heating elements I was planning on using.
http://www.amazon.com/Camco-02203-Screw-In-Heater-Element/dp/B0006JLVBW/ref=sr_1_1?ie=UTF8&qid=1398455516&sr=8-1&keywords=water+heater+elements+2000w
If I wired them individually, I can plug each into a regular outlet, right? Wiring them together, through the nicer PAC box, and then out to 240v?
Oh. I was thinking of something like this: flexisnake on amazon
http://www.amazon.com/dp/B000H5PYR2
What's even worse when you live with someone with long hair is when the dreaded "Why the fuck is the shower draining so slowly?" moment turns into the "Fuuuuuck! We have to clean the drain out!" experience.
My advice? Get a filter mask like this because the stench is like nothing I've ever encountered except for cleaning out grease traps at fast-food places; disposable nitrile gloves are also a very good idea
Next, you'll need a pair of long needle-nosed pliers. These will be used for Stage I: Grabbing the easy stuff. The easy stuff is hair that has managed to drape itself over the bottom of the drain; the part that looks like an "X." Lower the pliers down, with the needles slightly apart and grab some hair, and then pull up slowly*. The purpose for this is to maximize the amount of hair that you pull up each time. have a waste can lined with a bag to deposit the hair in.
Continue until you can no longer fish out any hair this way.
Stage II: Exorcising What Lurks Beneath.**
Stage II Tools:
Take the drain-cleaning tool out of it's packaging, stickit down the drain until you meet resistance, push it in a little further, then twist it around a few times.
[evil chuckle] Now comes the fun part. slowly pull the cleaning tool out of the drain and have someone standing by with the pliers in case the hair tries to make a getaway. What usually comes out the first time will look like a very skinny drowned rat. It will also smell like a skinny drowned rat. Repeat until no appreciable amounts of hair come out of the drain. Then you can move onto...
Stage III: We have to nuke it from orbit; it's the only way to be sure.
Stage III tools:
Follow the directions on the container to the letter! The chemicals inside will dissolve most organic matter very quickly.
Hopefully after this, your drain will run like a raging rapid.
Kinda late to the party here, but one thing that always pays for itself after the first use is a quality toilet snake. Aside from saving a minimum $80 call to the plumber, there's no feeling like seeing a backed-up commode and saying to yourself - "it's cool...I've got this."
Use foam ring: https://www.amazon.com/Sani-BL01-Waxless-Toilet-Gasket/dp/B005K89RQU
Thanks! I think you may have put me on the right track. I went to the front hydrant and it had a different top, which tells me the back had been replaced before. It said Mansfield.
So I found this
https://www.prier.com/images/stories/documents/documents/Mansfield%20Stem%20ID%20Flyer.pdf
Looks like series 400 or 500 hydrant.
So I THINK this is what I need.
https://www.amazon.com/Prier-630-7500-Vacuum-Breaker-Service/dp/B00164C5IO/ref=sr_1_1?crid=31OZ7N0SI11GP&keywords=prier+630-7500+vacuum+breaker+service+parts+kit&qid=1562258968&s=gateway&sprefix=Prier+630%2Caps%2C127&sr=8-1
That being said, the white plastic piece looks a little different from the one I took a picture of..
So long and hard. You can't believe you have it in your hands. You imagine how deep it will penetrate. How moist and wet the hole will be. You picture how pleasurable it will be to do it. It's only a matter of time before you find the release you were looking for. You pat yourself on the back once your done for how well you know how to use your tool. It'll only be a matter of time before you need to take your tool out and go back into the deep moist hole...
http://www.amazon.com/Camco-02853-Screw--Foldback-Element/dp/B000KKVZUO/ref=sr_1_2?ie=UTF8&qid=1458421941&sr=8-2&keywords=camco+1500+w+element
This guy? If so, no, you're fine.
I'm planning on using an Inkbird temperature controller to regulate a heating element in a cooler used as a HLT. Will there be an issue if there is nothing hooked up the the cooling connections of the Inkbird?
2 inch pipe insulation exists: http://www.amazon.com/Pipe-Insulation-Semi-Slit-In-Ft/dp/B007R7VNAA
DANCO Multi-Thread Garden Hose Adapter for Male to Male and Female to Male, Chrome, 1-Pack (10513) https://www.amazon.com/dp/B008M6KFD6/ref=cm_sw_r_cp_api_i_lxD5CbBNCCHWR
I use this to fill up the kids’ splash pool. Maybe it could work? Depends on your sink.
Otherwise, I’ve taken a big pitcher and slowly filled it. Not fun!
Thanks for the input. I do plan on using one of those repair flanges. I am hoping to find a wax ring with some sort of flexible flange/gasket. That will give me a little hope of sealing it property.
Something like this one maybe
I'm looking into going electric for my 2 gallon all grain batches. I don't want to drop a few hundred dollars on a new kettle and induction cooktop, as of right now. Also living in an apartment, so I can't go 240v.
Would a water heater element this size get a good boil on 3 gallons of wort?
Using a 5 gallon boil kettle, FYI. Thank you!
I used this instead. Works great!
https://www.amazon.com/dp/B005K89RQU/ref=cm_sw_r_sms_awdb_t1_mwZMBb1BZ7K5X
I use these https://www.amazon.com/ft-Polyethylene-Pipe-Insulation-Wall/dp/B007R7VNAA
You can get a water heater style heating element and install that into your kettle. If you have 120v (standard for US) then you can get this one, if, however, you have 240v (also US, but for electric driers, ovens, and furnaces) then you can get something with a little more power.
Lye drain cleaner
Drain snake
You can find both of these at Home Depot / Lowes
I'm going to assume since grease was poured down the drain (please don't use chemicals, /r/HomeImprovement hates that) try a big pot of boiling water. Boil a good amount (~I would go gallon at most), mix with a good quarter cup of Dawn, up to around maybe a half cup, dump it all in the sink at once (make sure the trap is re-installed), and just wait.
The boiling water should melt the grease, the surfactant in the Dawn will help rinse it out, and after it comes lose (bubble at first if it's plugged, and it will drain fast), flush with hottest water out of tap along with a dab of Dawn (maybe 1/2 tablespoon, a slight squeeze of an inverted bottle) every ~minute for 3 or so minutes.
After that, it's time to either call a plumer or rent/buy an auger. They have small, hand powered cheap ones, as well as big professional ones. Just be sure of the size of your pipes, be gentle, and buy some leather gloves because that braided steel is spinning fast, and usually covered in literal shit.
Take with a grain of salt
I own a home with a basement/crawlspace drainage/underground spring situation. The sump pump I inherited with the house was always running at first. I installed a 4" pvc line that drains to the alley, plus added 6" gutters and downspout that is on the opposite end of the natural grade of the basement/crawlspace. Then installed This and everything is worry free now.
Might I suggest using PVC pipe foam to cover that. https://www.amazon.com/ft-Polyethylene-Pipe-Insulation-Wall/dp/B007R7VNAA?th=1&psc=1
Sorry I'm late to respond, but if you want to reply to someone, you need to click the "reply" link under their comment. Then add your comment as a reply to them, it will notify them you replied, and they'll know the reply is for them.
This reply is probably a bit long, lol. But I'm bored, so I go into some detail, and give some suggestions on tools n' such you can use for various things. You don't have to use them, obviously.
===
====
I do my mashing in a 5gal stainless steel pot, and I do my fermenting in these 5gal buckets (foodsafe from Home Depot). I use these lids, as it has an extendable spout which is the perfect diameter for a No. 7 size drilled rubber stopper, which I stick the airlock in.
For the actual mashing process. I do the following. So, not far off from what you do, except the starting temperature, since going above 161F can damage some of your enzymes and slow things down. These steps haven't failed me yet.
I mix up the yeast culture as soon as I hit the 150F temp of the mash, by pouring the yeast (1tbsp) into 2cups of warm water with a pinch of sugar, a pinch of DAP (aka diammonium phosphate), and a pinch of Magnesium sulfate (aka epsom salt, I bought at walmart in a large jug). Then I just let it sit while the yeast rehydrates and starts doing it's thing. When the mash is down to around 80F, I pour that mash into a sanitized 5gal bucket, then when it hits between 75F to 70F, I pour the yeast mix into the mash in the bucket, close the lid, put in the stopper+airlock, and leave it alone for about 3 days, before I check on it.
When I check on it, if it has slowed down significantly, or is stuck. I do the following:
That usually accounts for all the stuck fermentation issues.
===
===
Hope this helps!
The clear plastic tube that is zip tied to it is from the condensation pump for my HVAC unit.
You recommend Zoeller but is it better to get a sewage pump over a standard pump?
For a sewage pump, I was looking at this one but I don't know if a 1/3HP is a enough to push water up 8-9ft from the basin to outside the house.
5.55 Free shipping in my Misc Wishlist its a Jones Stephens J40-005 Four Way Key
I have a pittsburgh toilet in the basement. The cast iron flange cracked (may or may not have been my fault). I chipped out the old flange and got a Repair Flange and a 4" no hub. The no hub was needed because a cast iron 90 comes directly to the floor line, so there is a hub there. Now I ordered two different no hubs, and they both fit, however, there is absolutely NO way the PVC pipe was going to fit in the no hub inside that 90 hub. So, I ended up just using the Repair Flange and expanding the rubber to meet the no hub, without the PVC pipe. Do you find any issues with this?
Thanks!
http://www.amazon.com/DiversiTech-GG-1-Charles-Gallo-Condensate/dp/B00207UAU6
This one is pricier compared to the other tool listed. I have it and it works great.
Instead of bleach, I've heard to pour peroxide down it regularly. Can't speak to it, just what I've heard
awesome.
so something like this would do the trick?
Here's an actual serious list of things I got and LOVED and what I'm getting next time:
Also, what's coming your way seems more like Ike than Harvey. If I was looking at that I'd get
Hi all, my goal is to construct a fluid bed roaster capable of roasting a half-pound of coffee per go.
For the motor, I'm looking at this electric leaf blower, and for the heating element, I'm looking to dissect this heat gun.
I'll use a pyrex baking tube, and a cocktail shaker to cap it off at the base. And then some machining magic to couple it to the mounting pipe.
Does it seem like this will get hot enough to roast a 1/2 pound?
I'm trying to upgrade from my current popper setup which can roast a max of 60 grams at a time (and that's with me constantly agitating with a shish kabob stick).
Edit: One possible improvement could be increasing the wattage of the heater to 2000W. Does anyone have a recommendation for a really cheap blower (or just the element itself)? Or would this water heater element work?
If I reclaim the air from the exhaust back into the pump, would this allow a 1500W heater to work?
https://www.amazon.com/Camco-02853-Screw-Foldback-Element/dp/B000KKVZUO
Do not reuse unless you are a seriously cheap bastard. Here is a 12 pack on Amazon for $30. It may seem expensive (come on it's only $2.50 each) - but it's less than half the cost of one plummer call out.
A million times better than a plunger (and if used correctly, less risk of damage)
THIS --->
http://www.amazon.com/FlexiSnake-Drain-Millipede-Hair-Cleaning/dp/B00871R9Z8/ref=sr_1_2?ie=UTF8&qid=1367445302&sr=8-2&keywords=drain+snake
Is fucking amazing. Buy it, see all the crap you get out of your drain, repeat every few years. Do this once and you wont have to repeat twice a month for a long time.
yes
http://www.amazon.com/Zoeller-Mighty-mate-Submersible-Sump-Pump/dp/B000H5PYR2/ref=sr_1_1?ie=UTF8&qid=1426310131&sr=8-1&keywords=zoeller+m53
or
http://www.amazon.com/Zoeller-507-0008-Pre-assembled-Battery-Backup/dp/B002N6VHXI/ref=sr_1_8?ie=UTF8&qid=1426310188&sr=8-8&keywords=zoeller
Well depends I found this one fairly cheap on amazon and you can cut to length.
Amazon Link
I never really had to buy one but I’ve done research seeing if there were better alternatives but they all seem the same to me.
About your clog problem though instead of seeing if it’s a physical issue see if your retraction settings are maybe either too slow, too fast, or the distances are skewed and the optimal retraction is not happening.
Is this correct? https://www.amazon.com/Danco-Multi-Thread-Aerator-Adaptor-10513/dp/B008M6KFD6
Thanks, that's exactly what I did. Purchased a repair kit on Amazon: https://www.amazon.com/gp/product/B00164C5IO/ref=ppx_yo_dt_b_asin_title_o05_s00?ie=UTF8&psc=1
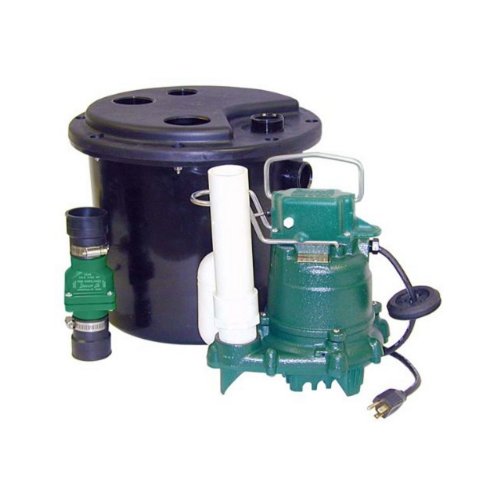
If it is just the washing machine, something like this would work https://www.amazon.com/gp/product/B0009TCDZ2/ref=s9_acsd_hps_bw_c_x_6_w.
If you have a utility tub and bathroom or wet bar, you would install something of the same concept, but larger.
To install it will require you to cut a hole in your basement floor
I brew 5 gallon batches in a 10.5 gallon kettle, and I brew outdoors on a 65,000 BTU burner. I use this false bottom so I can direct fire during the mash. I modulate the amount of heat manually, the amount I need to re-heat the mash depends on weather and how often I pull the lid off.
I also use this pump to recirculate during the mash, it really helps keep the temps even throughout and it gives me a nice boost in efficiency.
GUYS... Just get an auger.
When my bath tub was clogged, I tried everything. Snakes, Drain-o, etc. It took 3 hrs to drain the tub from taking a 5 minute shower. Then I got this: https://www.amazon.com/gp/product/B006C68TA4/ref=oh_aui_detailpage_o01_s00?ie=UTF8&psc=1
AND IT WAS A MIRACLE WORKER! and easy to use.
It's funny, I was originally looking at that exact pump on Amazon. It looks great and I like the price except it looks like it requires a vent to be tied into the vent stack. Is that correct?
I didn't want to have to run an extra pipe and cut into the vent stack. So I'm considering the Hartell because it specifically says it doesn't require the vent and I'm pretty sure it's the one installed in a This Old House video.
Is it just the line that needs to be cleared out? If so just buy one of these
I used this one from Amazon. It didn't fit through the hole either, but I just smacked it with a hammer a few times until the bend in it made it small enough to fit through the bushing.
They sell 12v "brew" pumps on aamazon...supposed to be food safe but its all straight from china so who knows. Yoosan was the brand i bought...i use a chugger to circulate mash but i heard people use these so i bought one for shits and giggles. Can run 24v if you have an old computer power supply...really moves liquid too...
https://www.amazon.com/gp/aw/d/B0196WL55G/ref=mp_s_a_1_3?ie=UTF8&qid=1481382839&sr=8-3&pi=SY200_QL40&keywords=12+pump+food+grade&dpPl=1&dpID=41UOH0yLNPL&ref=plSrch
https://www.amazon.com/gp/aw/d/B0009TCDZ2/
I'd get that one. It's a beast and they're very good about warranty service.
Tie into the shower line if you can. I would skip putting in a ball valve. If the check valve, on the wye, is going to be exposed, you can put in a clear one so you can see what's going on on case there is a problem later on.
http://www.pvcfittingsonline.com is my go to place for cheap PVC fittings.
Note the 1 star reviews. That would be my luck.
You can pull that flange off and replace it with one of these. When you remove the old flange, patch the hole by inserting two pieces of 2x4 through the hole, deck screw them from above and then screw a piece of plywood to the 2x4s. Push the new flange into the pipe and secure it with screws to the plywood patch.
https://www.amazon.com/gp/product/B0009TCDZ2/ref=ox_sc_saved_title_5?smid=A1PTZTHYRQJ1CT&psc=1
If you read the reviews, it looks like many people have used this pump as a washing machine pump.
No problem! A clarification to what u/Seppi449 said; I'm assuming they're actually talking about a hardened steel nozzle. This will allow the students to print with exotic filaments (wood fill, metal fill, glow in the dark, etc) without it damaging the soft brass nozzle. This upgrade is pretty cheap, and it will prevent constant replacements.
I personally would not recommend upgrading to an all metal hotend assembly. The uses for that are pretty small and they can cause a lot more issues for novice users, which I'm guessing many of the students are. When you get a new nozzle, make sure it doesn't specify it's for an all metal hotend. They are different and are not compatible.
You probably ought to also grab a bit of 2mm ID x 4mm OD teflon tubing. You need to replace the little bit of teflon tubing inside the hot end assembly periodically to help prevent jams and keep your printing smooth. The replacement piece is only about 1" long, so a roll like that will last forever. When you replace the existing tube, you want to make sure to keep the length as close to the original as possible, and keep your cuts 90º.
I hope this helps!