Best grommet kits according to redditors
We found 75 Reddit comments discussing the best grommet kits. We ranked the 39 resulting products by number of redditors who mentioned them. Here are the top 20.
We found 75 Reddit comments discussing the best grommet kits. We ranked the 39 resulting products by number of redditors who mentioned them. Here are the top 20.


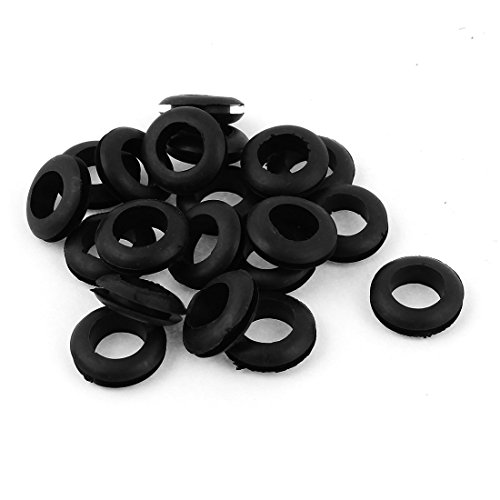


Depending on the size of the downstem, obviously, you're gonna wanna get some rubber grommets with that size as its inside diameter. For example, here's what you would use for a 14mm downstem.
If you're comfortable making holes in the wall, you can use the round desk grommets and fish them through the wall. You would just need a 2 3/8" hole saw for your drill and it makes for a clean, professional look. As long as the TV is staying there permanently, it's a good decision. I used a bead of silicone caulk to secure them, because gravity sucks.
Check this out: HYCC 2-3/8' Flexible Desk Grommet - Color: White - 5 Pack HYCC https://www.amazon.com/dp/B01KNUY3UE/ref=cm_sw_r_sms_awdb_t1_XsI2Cb1K1D4NQ
Yes! Glad to hear I'm not the only one. Tupperware type containers have worked great for me on a number of simple outdoor low voltage projects. I do always make sure to use grommets where the wires pass through though.
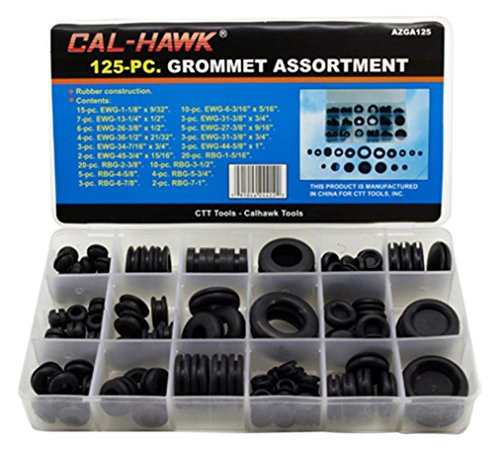
I usually just use an electrical grommet in the size of the drill bit I used for the hole. If you aren't sure of the size, you can get a multi-pack like this and try some until you get a good fit.
https://www.amazon.com/Cal-Hawk-AZGA125-Grommet-Assortment-Electrical/dp/B002X4AFL0
HERE YOU GO! :D
( Example ) Does what it says on the tin. Is adhesive on one side, has a passthrough for a zip tie on the other. Useful for guiding cables along flat surfaces.
( Example ) They tie things. You have to cut them to remove them, but they're stupid cheap. Great anywhere that space is a concern, or anywhere next to a flat surface with mounts.
( Example ) These are best for cables you might change frequently and places where a little bulk is OK. I use them anywhere the cables are hidden, but are coming apart but not away from the hiding surface.
( Example ) These are great in place of zip ties + adhesive tie mounts, because they're easy to open and can hold larger bundles, but not easily bundles as small. So, big sibling metaphor. Oh, and you don't have to cut them to change something.
( Example ) These are basically the same thing, but the "staples" come with the nail in them, but stirrups can use screws. Great for routing single cables, like say, ethernet if it's not in the walls, up to the ceiling, and in the corners all the way to the router. Just don't damage your cable accidentally.
( Example ) These are great for bundles of wire that have to pass a good distance (1ft+) through someplace visible. Spiral of sleeve really depends on context, spirals are fine for all-dark cables, but mixed colors means get a sleeve instead.
( example ): These often come with adhesive backs and you can get corners and intersections and basically hide cables inside a "tunnel" shaped like wall or desk. Oh, there are floor versions too. J-ways are usually just straight strips, but almost perfect for any desk with a vertical back panel.
( Example ) These are good for areas where lots of cables meet. Your surge protector, for example, should go in one of these (preferably the box kind, not the example), and they should be mounted to the wall. Otherwise they're most used for massive networking installations, IIRC. Cable trays are like this, but more open. Use them somewhere hidden, can take the place of loop sticks with longer or thicker cables.
( Example ) These are for basically, getting rid of slack. Or putting your earbuds in your pocket, but slack works great, especially tucked just out of sight with the rod zip tied to an adhesive tie mount.
( Example ) Now this is serious cable management, if you have a drill. Run your cables under the desk, until a central (or several small!) grommets to minimize their visual presence.
Repost, imgur ate the first image album.
I just finished a second crash cart for my SO, and this time I kept track of the parts I used during assembly. So as a gift to the VR subreddits I tend to follow here's some assembly photos and a full parts list should you want to build your own.
Parts list:
(1x) HF / USG Rolling Toolcart $99 with coupon - https://www.harborfreight.com/26-in-4-drawer-580-lb-capacity-glossy-black-roller-cart-61634.html
(1x) Asus VP239H-P Monitor - https://www.newegg.com/Product/Product.aspx?Item=2W2-000Y-00007
(1x) VESA mount - https://www.amazon.com/gp/product/B000VKCIJU/
(6x) Rubber Grommets (requires 1 1/2" bi-metal hole saw) - https://www.amazon.com/Heavy-Rubber-Grommets-Inside-Diameter/dp/B06XKJ4NRF/
(1x) PRIME Power Strip - https://www.amazon.com/gp/product/B003DKJ2VC/
(1x) Best Buy - 9' VR Cable Extension - https://www.bestbuy.com/site/insignia-9-vr-extension-cable-black/5706844.p?skuId=5706844
Additional parts required:
(4x) 1/4" x 3/8" steel rivets (requires rivet gun) - https://www.amazon.com/Surebonder-FPC86S-100-4-inch-Medium-Rivets/dp/B001C2FW3A/
(2x) 1/4 x 20 Rivet Nut for attaching the power strip. (Requires nut setting tool) https://www.amazon.com/uxcell-Plated-Carbon-Nutsert-4-20UNC/dp/B00X74FNVW/
(2x) 1/4 x 20 x 3/4 button cap hex screws - https://www.amazon.com/uxcell-Inch-20x3-Socket-Button-Screws/dp/B015A3ABL4/
1 x 1 cable tie mounts for dressing the wiring inside the toolchest - https://www.amazon.com/Darller-Adhesive-Cable-Mounts-Holders/dp/B071WW8P83/
4" cable ties, black - https://www.amazon.com/C2G-Cables-43036-4-Inch-Cable/dp/B0002GX1XA/
And lots of blue loctite for all the fasteners during assembly.
Optional but makes life easy:
Logitech K830 wireless keyboard - https://www.amazon.com/Logitech-Illuminated-Living-Room-Keyboard-Touchpad/dp/B00ZOPVSKW/
The last 7 photos are from the first VR Crash Cart I built to help illustrate some of the assembly steps involved.
Two I bought, the rest I made.
Clear Polycarbonate Tubing, 5/8" ID, 3/4" OD, 1/16" Wall, 3' Length $9.97 (Prime eligible)
50 Vinyl Grommets 5/16" Bore Diameter 5/8" O.D. $8.99 (no Prime)
9/16" x 3/8" x 3/32" #8 O-rings (optional)
Pipe cutter, and saddle valve for punching, each about $6 from the hardware store.
I can make them for under a buck apiece in materials.
These 1/4" ones weight about a gram a pop
https://www.amazon.com/Lord-Hodge-1073A-0-Grommet-Kits/dp/B00004Y68Y/ref=sr_1_1?ie=UTF8&qid=1421110651&sr=8-1&keywords=grommets
these bad boys
lol picked it ujp at my local smoke shop. and please dontjust start drilling away. you need special kinda drill bit id recommend using these or what ever size of downstem you are planning on using. i prefer 14mm or 18mm but 14mm being my go to choice. also i recommend using these instead of silicon to seal it off. just so u can take it apart to clean it.
These are what I use. https://www.amazon.co.uk/dp/B079N759Q7/ref=cm_sw_r_cp_api_i_gCM5CbDFBNKWH. They work well enough and I reckon they’re a good price. I also use a grommet kit to punch a decent hole in them to hang off my belt. https://www.amazon.co.uk/dp/B076Q95X7W/ref=cm_sw_r_cp_api_i_tHM5Cb4CM3TY5 It’s also useful for other bits of kit to make a decent job of creating holes that won’t fray etc. Hope that helps.
My cabinet is negative pressure... I know less ideal, but designwise worked out better. I have an exhaust fan at the top and a 1” filter at he bottom filtering the incoming air.
I was thinking about connectors like you mentioned, but here isn’t an sfp one. I also though about one of those 3” brush grommets they use on server room floors.
Raised Floor Airflow Management 4" Round Floor Brush Grommet (1 Pack) https://www.amazon.com/dp/B07B3Q7TW4/ref=cm_sw_r_cp_tai_0kkVCb6W9QBJQ
Something like that.
I am not sure where the list is. But I can pull up my amazon shopping and let you know in a minute
Edit: Tubing here
Grommets here
And O-Rings here
No affiliate link
Non-mobile: small grommet
^That's ^why ^I'm ^here, ^I ^don't ^judge ^you. ^PM ^/u/xl0 ^if ^I'm ^causing ^any ^trouble. ^WUT?
https://www.rainbow8.com/collections/glock-series/products/uac-ultra-lightweight-blowback-housing-v2-for-marui-g17
https://www.amazon.com/uxcell-Industrial-Flexible-Sealing-Grommets/dp/B072JW8JY5/ref=sr_1_1?ie=UTF8&qid=1519587533&sr=8-1&keywords=14+x+2mm+oring
get this instead
If you have a wooden desk, the Lepai amp has mounting hardware which can be used to screw the amp into the underside of the desk. It can be mounted towards the desktop's edge towards you off to the side so you can access the dials. Then, most of the speaker wiring will be under the desk and will come over the back or through a grommet to the desktop only where the speakers are.
The only thing is the amp will be upside down. I have that Lepai amp mounted sideways on a wall in my office. It's not that distracting. You just turn dials toward 10 to turn up the treble or bass.
For the headphones, I would suggest a USB DAC to have the headphone always hooked up, so you don't have to plug it in. Using a USB DAC makes the headphone/mic a separate output/input source. Then, you can toggle audio outputs and inputs using the windows speaker icon, or use Voicemeeter Banana or some other mixer, whether physical or virtual. I really like voicemeeter - useful for muting idiots on Discord and having both speaker and headphone on, etc.
Here are some cheap cable management things to help manage the cables under the desk:
Also, talking to a few people I've found that these work well...
Danco #9 O-rings - http://www.homedepot.com/p/DANCO-9-O-Rings-10-Pack-96722/100299667#.UdRhmvkUrEk
with
Vinyl Grommets - http://www.amazon.com/gp/product/B0040D0QKM/ref=oh_details_o02_s00_i00&tag=r601000010-20
I used: https://www.amazon.com/Black-Desk-Grommet-Pack/dp/B000MLCNKW/ref=sr_1_8?ie=UTF8&qid=1485524823&sr=8-8&keywords=1%22+grommet
Not sure if it's the best one but this is the guide that I ended up following for my v2, and it worked fine for me. I did end up drilling a whole on the side of the original panel, since I did not like how the printed replacement looked, but other than that, I pretty much just followed the instructions. If you decide to go the drill route, don't forget to use a rubber ring gasket to prevent fraying of the wires (or pick some up from amazon) .
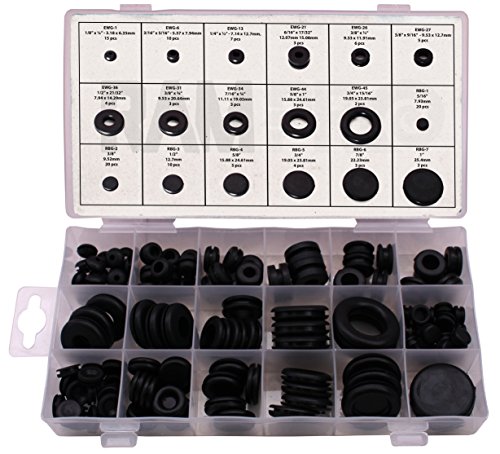
Actually I found these, it has 40 of each size. Should do me better
https://www.amazon.com/180-Piece-Rubber-Grommet-Shop-Assortment/dp/B003NRF052/ref=sr_1_8?ie=UTF8&qid=1503004761&sr=8-8&keywords=rubber+washers
Look at automotive or electrical supplies for a grommet that size. This is Amazon US, but it should give you an idea what I mean:
https://smile.amazon.com/Cal-Hawk-AZGA125-Grommet-Assortment-Electrical/dp/B002X4AFL0/
Yes, the rubber washer trick works. I purchased a variety pack of rubber washers from the local big box hardware store for about $10. Get a variety pack because you can hid them under the knobs and obviously each pedal may have different knob sizes. Plus then if a bigger washer is needed or you need to stack multiple sizes you got them.
Most of my pedals I was able to hid the washer under the knobs and you cannot tell the washers are there unless your looking for them. It obviously makes adjusting the knobs more difficult when you want to adjust them, but the knobs won’t move without a good amount of force. If you need a tighter washer on the potentiometer to make the knob tighter, requiring more force to adjust, just stretch the inside hole of the washer out prior to placing them over the potentiometer.
Like this variety pack
Edit: Added link to a similar product
Good luck. Just occurred to me that you may want to consider a "desk Grommet" like this. I would wait until you're done with the hole and see how it looks. If your edges end up looking messy or you see a bunch of fiberboard, this will hide the edges:
https://www.amazon.com/Desk-Grommet-Plastic-Cable-Cover/dp/B076HJH2WQ/ref=sr_1_3?s=industrial&ie=UTF8&qid=1550704465&sr=1-3&keywords=desk+grommet
https://www.amazon.com/Desk-Grommet-Plastic-Cable-Cover/dp/B076HJH2WQ/ref=sr_1_3?ie=UTF8&qid=1550704138&sr=8-3&keywords=desk+grommet
http://www.amazon.com/Lord-Hodge-1073A-0-Grommet-Kits/dp/B00004Y68Y/ref=sr_1_1?ie=UTF8&qid=1371788465&sr=8-1&keywords=grommet
The quickest, easiest hammocks I've seen were in this cage tour video by youtuber zmashd. She just uses cut pieces of fabric and curtain clips. No sewing, no complicated attachments, they're just as simple as it gets.
I use two types of hammocks. Some hang from the ceiling of the cage and some hang from the walls. I use the pear-shaped shower hooks for the ceiling mounted hammocks and s-hooks for the ones that attach to the walls. Either way, I put size #0 grommets in the corners using a grommet setter. They make fancy grommet machines but I just use the cheap manual kind of setter that needs to be banged on with a rubber mallet. It's noisy but fun.
Ah, you don't want pop rivets, you want grommets. But I suspect that what you ultimately want is something like this, and they come in plenty of colors to boot. The nylon is not really good for grommets, but you could hang the bags on some hooks.
This was what I used to press the grommets into the fabric, not sure if it's the right size, but I also picked up some threaded hooks from the hardware store and screwed them into a rafter.
Lord & Hodge 1073A-0 Grommet Kits https://www.amazon.com/dp/B00004Y68Y/ref=cm_sw_r_cp_apa_HdSZxbQ4FJ1RC
Looks like this one maybe:
https://www.amazon.com/dp/B07HRKQ75G/ref=cm_sw_r_em_apa_i_PgyIDbM0K6GP7
Yeah IKEA had great prices on them, but obviously there's plenty of other shops to get them at. For the wall mounts I used these bad boys from rockler
http://www.rockler.com/heavy-duty-steel-shelf-brackets-black-finish
The truth is, I ONLY used pipes because the far wall desk is drilled into the foundation of the house and the right side is tapped into studs because that wall backs up to my garage. If I had studs on both sides I wouldn't even think of the pipe legs. Those brackets hold a good amount of weight, but everything is only as strong as the weakest point, so the legs are there just in case. I'm also getting file cabinets and plan on building a small cubby to sit between the cabinet and the desk which will make the pipe legs a thing of the past. The corners where the two tops meet I bonded using one of these.
https://m.lowes.com/pd/USP-5-in-x-1-13-16-in-Nail-Plate/3374506
I then drilled holes for the wires and finished them off with these.
https://www.amazon.com/dp/B01I4OWQEQ/ref=cm_sw_r_cp_apis_1494894211474
All in all I'm super happy with the design and how it came out. Don't forget to seal the counter tops with some clear polyurethane. Good luck pal.
Now what would make a difference you could actually see easily would be adding some grommets to those cable management holes. Im guessing those are 1 inch holes so something like this would work niceley.
http://www.amazon.com/Black-Desk-Grommet-Pack/dp/B000MLCNKW/ref=sr_1_10?ie=UTF8&qid=1426092754&sr=8-10&keywords=desk+grommet
Cool. Glad to hear that things are going well for you.
One thing I'd suggest is going to a craft store like JoAnn or Michaels and getting metal reinforcements (grommets) for the holes you poke. Here's a decently cheap kit on Amazon.
Cal-Hawk AZGA125 Rubber Grommet Assortment Set Electrical Gasket, 125 Piece https://www.amazon.com/dp/B002X4AFL0/ref=cm_sw_r_cp_api_k7ldAb0H9Z4AJ
Get one of these:http://www.amazon.com/gp/aw/d/B00X8F8M3G/ref=mp_s_a_1_4?qid=1457066972&sr=8-4&pi=AC_SX236_SY340_QL65&keywords=iec+plug&dpPl=1&dpID=412kcaXxeTL&ref=plSrch
Cut the existing plug off your cable, measure the diameter and drill a corresponding size hole in your box maybe a mm bigger than your cable. Put a proper sized grommet on your hole and feed enough cable through. Strip the wires and attach the new IEC connector.
Here is a nice grommet kit in case you need it, but you can always get just one at your local HD.http://www.amazon.com/gp/aw/d/B003NRF052/ref=mp_s_a_1_1?qid=1457067163&sr=8-1&pi=SX200_QL40&keywords=assorted+grommets&dpPl=1&dpID=51RYtwcNqKL&ref=plSrch
So sorry to see ;(
They aren’t dead yet! Give them some tlc and they may recover fine.
Maybe some help to reduce algae growth:
Can you buy some plugs to put into the empty holes? We are using these rubber plugs to cover our water holes in our Kratky system.
You could also perhaps use cloning collars to block out the light.
And depending upon how thick the tubes are,
Could they be painted black?
If the wires haven't been run yet, you can get something called a cable grommet or bushing like this one. Home Depot or Lowe's probably have something similar. You can also find them that aren't connected at one point so that you can slip them over the wires if they're already punched down on the patch panel. I suppose you could always just cut out a sliver of one side, it wouldn't really matter too much and could be hidden relatively easily behind the bundle of cables.
Large Hook Channel Cable Raceway - 1 Piece - 36" - Black https://www.amazon.com/dp/B00PUV0QQM?ref=yo_pop_ma_swf
GBSTORE 25 Pcs UVB Plastic Kwik Clips Black Adhesive Backed Nylon Wire Adjustable Cable Clips Adhesive Cable Management Clips Adjustable Clamp https://www.amazon.com/dp/B01GZX6G1W?ref=yo_pop_ma_swf
2" Black Desk Grommet Plastic Wire Organizer 6 Pcs | Computer Desk Cable Hole Cover Plug Cap | Great to Hide Cords & Cables through Office Desk, Entertainment Center, TV Stand, Workstation, & Tabletop https://www.amazon.com/dp/B075P4H7F2?ref=yo_pop_ma_swf
AmazonBasics Premium Single Monitor Stand - Lift Engine Arm Mount, Aluminum https://www.amazon.com/dp/B00MIBN16O?ref=yo_pop_ma_swf
Here u go man. And also get some velcro ties.
Here is the desktop version of your link
Hole saw sizes: 1 1/2" for the smaller/lower hole, and a 2" for the larger/upper hole. These sizes typically come standard with a hole saw kit ($14.02): https://www.amazon.com/Black-Decker-71-120-Assortment-5-Piece/dp/B0009ZAEY8/
NOTE! The official IKEA FIXA hole saw kit does not come with the correct corresponding sizes!
My specific hack requires a grommet to achieve a tight yet adjustable fit while utilizing standard hole saw sizes ($7.49): https://www.amazon.com/HYCC-Flexible-Desk-Grommet-Color/dp/B01KNXAPK8
When our new "refurbished" hookah had a leak were the main stem screws into the base, we used a small grommet to seal it. Haven't had an issue since.
To answer your initial question though, use the leaking tire method, cover suspected areas with a mix of dawn soap and water, blow through the hose and see if bubbles appear.
Edit: Fixed Link
Unfortunately, those minimalist tanks are all I have right now. It's really tricky to get the second grommet on if there is already liquid in the tank.
The tanks in the pic are totally simple. I had a few vivi nova shells laying around so I drilled a fill hole in the side, threaded the hole for the smallest screw i had, found those white grommets randomly and a pipe shop, and assembled. It's just a few components- carto, grommets, tank, screw.
To fill and refill, I unscrew the screw, which can be done by hand, luckily. I have a blunt tip needle filler that I use for this. Then I put the screw back in.
I would like to get a nice carto tank here soon, but i have yet to pull the trigger on a certain one. it's a tough choice with so many nice options.
I like being able to have up to a half dozen flavors, each with its own tank, to keep a variety of flavors at my disposal.
If you're interested in building some DIY tanks, polypropylene is popular because it holds up to any juice and won't crack. http://hoopsupplies.com/ is where I got mine. I got clear but they also have a variety of colors. http://www.amazon.com/Vinyl-Grommets-Bore-Diameter-O-D/dp/B0040D0QKM/ref=sr_1_8?ie=UTF8&qid=1369408397&sr=8-8&keywords=5%2F8+grommet these are the grommets I purchased. Enough for 50 tanks here.
I went to home depot, got the smallest, shortest screws I could find, which actually weren't all that small, and grabbed a threader from the next isle over. And that's it, other than the cartos. Let me know if you want any info I left out. It's really nice to have the parts around to build unlimited tanks. Like yesterday when I got six new flavors in the mail from Captivape....
agreed. OP, check this out, worth buying 5,
Maybe these:
https://www.amazon.com/HYCC-2-3-Flexible-Desk-Grommet/dp/B01KNUY3UE
or these:
https://www.amazon.com/Midlite-SpeedPort-Universal-Through-Anchor/dp/B00I0JN4O2
I think you'll find that conduit is completely unneccessary if you're running the holes back to back, but if so take one of those grommets up to a home supply store and find some appropriate-width PVC to wedge between the two.
I've used both of those products for ceilings, furniture, and walls.
Good luck.
Banggood has them in their US warehouse, so you shouldn't need to wait for shipping from China.
Also, Amazon has some cheaper, with prime shipping too.
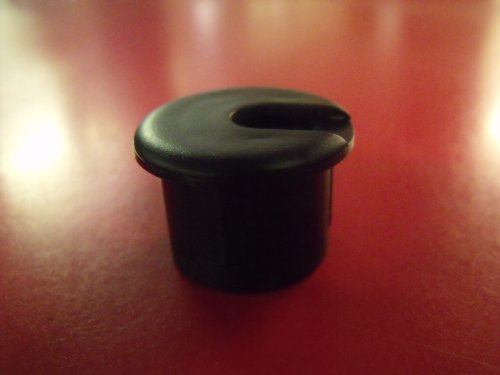
I used the 1 inch plug from this set
It's a rubber grommet or wire ring. Normal ones are usually either always open in the middle or completely closed. I've found this one but I don't know if it fits.
Lord & Hodge 1073A-0 Grommet Kits https://www.amazon.com/dp/B00004Y68Y/ref=cm_sw_r_cp_apa_g6lNzbTXNJ06Z