Best hole saws according to redditors
We found 149 Reddit comments discussing the best hole saws. We ranked the 86 resulting products by number of redditors who mentioned them. Here are the top 20.
We found 149 Reddit comments discussing the best hole saws. We ranked the 86 resulting products by number of redditors who mentioned them. Here are the top 20.


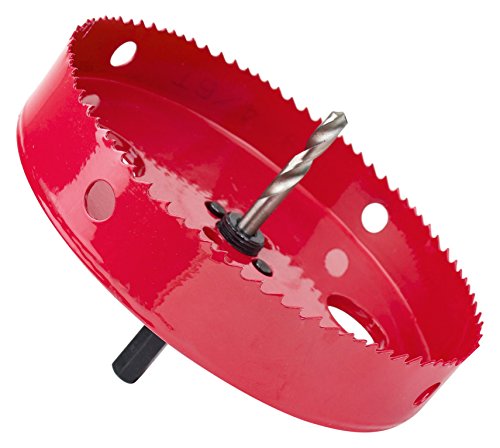
![Diamond Dust Hole Saw [3/4"]](https://m.media-amazon.com/images/I/41XeZtZ3aML.jpg)


Hey folks, for less than $10 you can get a 5/8" diamond hole saw at most hardware stores and make your own bottle bongs.
That's what this subreddit is all about, engineering your own smoking devices. It's really not difficult.
I made these so I can pull from 13 or 18 inches. I used 2x6s for the vertical part and 2x4s for the horizontal part. I had those metal braces from a shitty squat rack I had but someone (I think maybe u/bparsonage) made a similar set up with more wood instead of those brackets. If you do the math before hand you can get the pieces of wood cut to the size you want at home depot of lowes or you can do it yourself if you have a saw. Then you just need a drill and a 2" hole saw bit.
So, this has an existing light fixture which is just screwed to the ceiling with a wire hanging out? If so, this is the best situation.
They sell boxes that you can install from below:
https://www.homedepot.com/p/RACO-RETRO-BRACE-with-4-in-Round-Ceiling-Rated-Pan-2-1-8-in-Deep-with-1-2-in-KO-s-937/203743172
Basically, you cut a hole slightly larger than the jbox, where the wire is. Place this thru the hole, and expand it so that the brace is hitting the joists on either side. Done. It has all the instructions you need. A 4 1/2 hole saw is best, but that costs more than the jbox itself. Does make a CLEAN hole tho.
Now, consider that you rent so check with the landlord.
If you find yourself making more cornhole boards, pick up a 6" hole saw. So much more convenient. Forget the jigsaw...
Ask him for a cost breakdown. $200 a can seems high unless you live in a gated subdivision
Do you have attic access above your kitchen and living room?
You can order these.
TORCHSTAR 12W 6 Inch Ultra-Thin Recessed Ceiling Light with Junction Box, 5000K Daylight, Dimmable Can-Killer Downlight, 850lm 100W Eqv. ETL and Energy Star Certified, Pack of 12 https://www.amazon.com/dp/B07FFPYWHJ/ref=cm_sw_r_cp_apa_i_H2UsDbGWZF79Z
Drwayll hole saw to cut the hole.
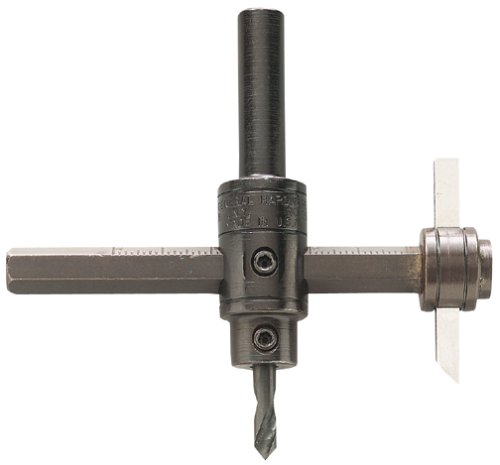
Adjustable Hole Saw Klein Tools 53731 https://www.amazon.com/dp/B00529WW6O/ref=cm_sw_r_cp_apa_i_A3UsDbCWYE5ZT
Then some 14/2 nomex to daisy chain them.
You can just try the kitchen or loving roo. Which ever one is easiest. What do you have to loose? And $2000 to gain.
It's 2 3/8" (2.375"). If you cut 2.25" it won't fit.
I just cut the same cooler as OP tonight (same color and everything!), I used this hole saw and it fits perfect.
I've made a ton of corn hole boards. Get yourself one of these for the holes: https://www.amazon.com/gp/product/B000YC1XUK/ref=oh_aui_detailpage_o05_s01?ie=UTF8&psc=1
Using a jigsaw for the hole looks like shit if you don't do it perfectly
I have built several sets for my friends, somehow I have become the local cornhole guy, so here is some honest critique.
For reference, here is a set I made earlier this summer.
Redskins Cornhole
Redskins Pic 2
I am not trying to be a dick, but you asked for critique. So now I am going to provide some advice. Here is what I do-
If you really want to stain, then stain the whole thing to an even tone and then layout and paint your logos on top. Then polyurethane.
Check out this forum, go to building and customization for lots of great tips.
You don't need a lot of tools, I build mine using a miter saw, hand drill, orbital sander, hole saw, an x-acto knife and paintbrushes. Be careful, if you get good at making them, all your friends will want one.
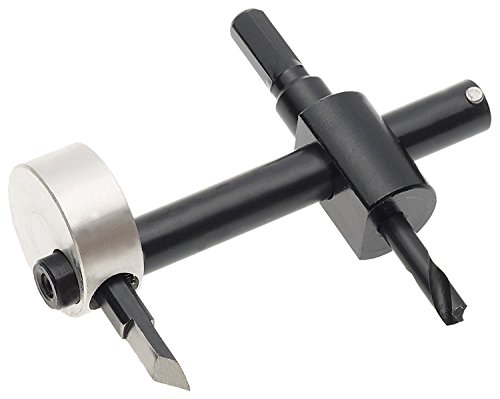
https://www.amazon.com/General-Tools-55-Cutter-Adjustable/dp/B00004T7P1
The stem is a [faucet riser] (http://www.homedepot.com/p/BrassCraft-3-8-in-O-D-x-12-in-Copper-Faucet-Riser-in-Satin-Nickel-1-12A-NSP/205214807?N=5yc1vZbqjn) I pick up from local hardware stores.
That flare near the top keeps grommets on to secure the bowl. The bottom of the stem also has a built in diffuser that I did with a very tiny drill bit.
I secure the stem by a [rubber stopper] (http://www.homedepot.com/p/Unbranded-15-16-in-x-11-16-in-Black-Rubber-Hole-Plug-808238/204273789) that I drill through to create a slip fit. I again picked these up at my local hardware stores.
This one was a pain in the butt because the opening of the bottle wasn't big enough to fit the stoppers I had in, so I improvised using the unique cap of the bottle to fit the stopper in there and used small black rubber grommets to keep the stem air tight.
The hose port is drilled with a [3/4" diamond dust hole saw] (http://www.amazon.com/gp/product/B007M2HB8S) then filled with grommets to create a seal and fit the hose.
The two layered tray is to keep the coals off of the bottom tray. This is because it rests directly on top of the plastic cap and I'd rather not smoke burning plastic lol.
Edit: For anyone interested in the bottle, it's Zing vodka and the light comes with the bottle. It's decent vodka for the price too.
I apologize for any errors in grammar or formatting but I just got out of work and it's 3am. Any other questions, ask on this post or PM me and I would be more than happy to answer them.
Gotcha, some similar cracking happened to me a while back (see my post history; it's El Bongquistador). Sucks, dude, but it'd probably be advisable to start again, and use a diamond-tipped drill bit to make the hole for the downstem. It looks like you're using a 9mm bowl or something on the smaller end, so you could use something like this and rent a drill from Home Depot or something to that effect to make a cleaner cut. If it cracked pretty badly as you suggest, there's likely a risk of microshards being mixed into the water and aerosolized by the bubbling as you pull and it's not worth cheaping out on proper tools at the expense of your lungs.
It looks like he used a jigsaw to cut the hole which would make it rather difficult to get a perfect circle even if he has it well outlined.
If one of his love languages is receiving gifts I bet he would really appreciate this 6in hole saw blade.
https://www.amazon.com/GoSports-Hole-Saw-Design-Cornhole/dp/B06XX3ZF4N/ref=mp_s_a_1_3?dchild=1&keywords=hole+saw+6in&qid=1570403605&sr=8-3
Oh yeah.. I'm fan of cutting my hole to the width of the studs.. way easier to have the support there when it needs to be patched. In a previous career, I did low voltage, basically home theaters and automation... I would do my best to avoid doing my own drywall work and foolishly when I did open up walls I was cutting small holes which then would make the job extra hard both to run my wires and to patch 🤣. There was one remodel project that I straight Swiss cheesed that house up... It was a large project for my company (9k sqft house) and 100% retrofit.. I was using one of these https://www.amazon.com/dp/B012U1VVD6/ref=cm_sw_r_cp_api_i_1PEUDbR6S39EK cutting 10-12" circles all over the house... Like I said Swiss cheese. Thankfully as part of the deal I told them they had to hire their own drywall guy.
If anyone is interested in doing this, this is the bit you need from Amazon.
Just spray it out, drill a little, spray it out, etc. Ceramic bits don't like to be gunked up with the dust, and water helps. The bit I have is about 3/4 inch, I've never tried starting small and widening. There are different types of bits for different types of tile/stone/etc, but mine look like this:
https://www.amazon.com/Amico-Diamond-Tipped-Metal-Ceramic/dp/B00880CFJS
You can use one of these to cut round holes. It'll cut perfectly round holes and even stepped mounting holes for flush mounting drivers. http://www.amazon.com/Hole-Pro-T-200-Adjustable-Cutter/dp/B012U1VVD6/ref=sr_1_10/175-8260483-6063160?s=power-hand-tools&ie=UTF8&qid=1458906927&sr=1-10 This is the first link I found, they aren't all nearly that expensive and you don't need a version with a dust catcher.
Make sure the cutting heads are exactly the same distance apart from the central bit. Go slowly and you get perfect results.
If you can use a drill press:
These are scary as crap, but they do the job: https://www.amazon.com/General-Tools-55-Cutter-Adjustable/dp/B00004T7P1
http://www.amazon.com/Mibro-460271-Circle-Hole-Cutter/dp/B001C00ZRK
http://www.amazon.com/Amico-Diamond-Tipped-Ceramic-Glass/dp/B00899COJY/ref=sr_1_1?ie=UTF8&qid=1341464150&sr=8-1&keywords=diamond+tipped+16mm
Yes, that's an insert ring. It'll basically cover the rough edges and kinda hide the hole to give a cleaner look overall. This is a hole saw that will fit that exact ring - https://www.amazon.com/Vulcan-961641or-Metal-Hole-Saw/dp/B000X2ILXS/ref=sr_1_cc_1?s=aps&ie=UTF8&qid=1486606762&sr=1-1-catcorr&keywords=2+3%2F8+hole+saw.
Basically, mark out where you want to make the hole, then make a dent directly in the center of where you want it to be to keep the hole saw from slipping while the drill threads cut in. Then just attach the hole saw to any drill, put moderate pressure and medium speed at first, and let the drill do the rest. Just make sure you stay as well directly on top of it as you can.
Maybe this, but it is really not good with hand held drills
General Tools 55 Heavy Duty Circle Cutter. Adjustable 1-3/4 Inch to 7-7/8 Inch https://www.amazon.com/dp/B00004T7P1/ref=cm_sw_r_cp_api_mRIqybDSME4FH
If cutting in drywall, not wood, Hole Pro T-200 1-5/8" to 8" Adjustable Hole Cutter - Hole Saw for Recessed Lighting Speakers. Twin High Speed Steel HSS Blades use ¼ Drill Power of a Hole Saw to Cut Sheetrock Plastic Soft-woods https://www.amazon.com/dp/B012U1VVD6/ref=cm_sw_r_cp_api_oSIqybF27HZMP
I can't see the video but based on the comments, is this it?
http://www.amazon.com/gp/aw/d/B00529WW6O/ref=mp_s_a_1_1?qid=1412992191&sr=8-1&pi=SY200_QL40
Sorry, on mobile
I used a Drilax Diamond hole saw and a suction guide over running water. Worked great and very easy. Just any dill will do. Just take it slow and don't press down. Like 3-5 mins per hole.
Edit: make sure it's non tempered glass.
If I were doing it, I'd make a pattern from a 1/4 piece of MDF by:
it involves some specialty tools, but they are inexpensive and it provides a way to make a perfectly routed circle of very precise dimensions.
here's a video that shows how pattern cutting works with a router
I misunderstood, sorry. Thought you had a stainless undermount sink.
This is the tool I use:
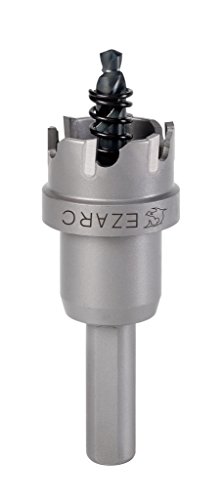
https://www.amazon.com/EZARC-Carbide-Cutter-Heavy-Stainless/dp/B01I416MT4
It looks like what I do is different from what everyone else is suggesting but...
I use one of these bits. To start the hole, Ill put 2-3 layers of painters tape down and drill through that. It helps keep it from sliding around.
As for speed/pressure/heat. I go full speed the whole time (stopping occasionally to get the dust out of the way and check my progress). The only pressure I apply is the weight of my drill. Just enough to grind away. As for heat, I'll only drill 2 holes and then let the bit cool for a while but Ive never used water to cool as Im drilling.
I've gotten perfect holes ever since I switched to a non pointed bit and have never shattered a bottle so I hope you get some of the same luck!!
This woman's kimchi is super spicy. I only used 1.5 cups of hot peppers. Anyway, I've gotten used to how hot it is and find myself craving it. I eat 2 tablespoons of it with every plate. And I drink kefir milk or kefir water. Kombucha sometimes, but that takes 2 weeks to get good. The kefirs take 2 days and are pretty strong.
I mention kefir because if you make milk kefir in a Fido jar for say a day and a half at room temperature. The curds and whey will separate and you strain that whey into a jar with either olives, baby cucumbers, hardboiled eggs and beet juice, asparagus, cabbage (kimchi and sourkrout), pear onions, salsa, Brussels sprouts, garlic, and I'm sure more. You use the curds you made with the milk kefir grains to make fermented hard cheeses, yogurt (awesome for ball jar parfaits, cream cheese,
If you want to get really crazy you can buy a 5\8" glass drill bit off amazon for 6 dollars. Drill holes in the lids. Use either rubber grommets or a drilled airlock grommet and airlocks to let the CO2 buildup release without letting fresh air back in. The company that makes and sells them call them Pickl-It jarsImage. They look identical to what you can make for much cheaper. This isn't necessary but it costs about 5 bucks to do to each jar and the result is that you now have a 40 - 120 dollar fermentation crock.
Buy this jar: http://www.crateandbarrel.com/fido-5-liter-jar-with-clamp-lid/s495151?a=1552&device=c&network=g&matchtype=&gclid=CJ7Whp7ZkroCFabm7AodOmkAHQ
Or at surlatable if you want more than 1 jar, and want 1.5 liters like the legit picklits. I found 3 liter Fido jars at hobby lobby for $5 each. I suppose just look for clamped glass jars with italy stamped on the bottom, not china.
The dehydrated food you weigh after and portion out into serving sizes. If I'm packing them as a lunch I separate atleast the meat from fruits and vegetables. Match each serving of meat with what used to be one or two cups of kale. A solid ammount of tomato chips and mango, peaches, apples or banana leathers. (Go easy on the mango) Blend and fruit rollup your berries. I'm not a nut and grain person, but a granola bar probably wouldn't be bad in there. I suppose you could stuff all these bags into a food saver bag and have like a cheap, fresh and healthy MRE all set and ready. No cooking required. I'm not sure how long the meat would last. So I wouldn't let it sit too long. Plus make sure your jerky sits in a brown paper bag for a few days first. To draw out any more moisture before vacuum sealing it.
A 2.5" forstner bit is a pretty big bit. You might look for a hole saw that size. Hole saws are cool. It's basically a tube with one end filed into a saw profile, and the other end coupled to something you can chuck up into a drill. Typically, these also have an ordinary drill bit that runs down the center, which you use to locate the hole on your work piece. Given that you're cutting through barn wood, I imagine a hole saw would work great.
Edit: found one
Go to your local hardware store and look for a 5/8" diamond hole saw bit. This will make holes that can accommodate standard 1/2" glass/metal downtubes with a bit of room to fit a rubber grommet. A 1/2" hole saw will work, but you'll have to enlarge the hole slightly. You can use these bits with an electric drill or a Dremel.
If you don't have access to a headshop in your area for downtubes and bowls/funnels, you might want to order online. Otherwise, you're going to need to start looking for aluminum or steel 1/2" tubing with screw threads.
ok since no one here has said it yet, yes glass drill bits buuuut, it works waaay better if you get glass hole drill bits like this, http://www.amazon.com/Diamond-Tipped-Ceramic-Glass-Drill/dp/B00899COJY/ref=pd_sim_hi_5?ie=UTF8&refRID=0T0HMMZKXMAB7BVHZQ18 i actually bought the 14 mm but i will warn you now, 14mm glass downstems are only approximately 14mm, its closer to 14.6 or something so you give it like a millimeter so the rubber grommet can fit
So it was recommended you get painting tape so the wood doesn't come up and stuff (I have no idea what that's about but it's what I read) so this was the tape. This is the drill I used to make the hole. And here is the grommet I used to fill the hole (heh heh heh). All in all, a very easy process and makes it look really clean.
The 1080 is great. I am coming from a 970 but it wouldn't drive the Dell u3415w very well at 3440x1440 but this card does it no problem. I have been playing Mirror's Edge Catalyst, Witcher 3 and Fallout 4 for the most part and everything looks fantastic at high resolutions. The card is also super quiet.
If you were interested in the case, it's over here. I like it a lot but like I said in a previous comment, it was given to me but I agree with the finish, it's really good.
http://www.amazon.com/gp/aw/d/B00529WW6O/ref=redir_mdp_mobile/176-0955244-5348615?fp=1&pc_redir=1427534361
Awesome tool when doing loads of can lights!
Dude what tinkering. There's like 2 minutes and 45 seconds of effort there, max.
Get a 5/8" diamond hole saw at a hardware store or home improvement store, and some 5/8" rubber grommets. Then you can drill bottles to your heart's content, and the holes will fit a standard 1/2" downstem, glass or metal.
Don't even fucking mess with plastic for a smoking device, ffs.
Addendum: Thomas & Betts zipties, Legrand Conduit, Surge protector w. long cord, Echogear mount, DeWalt 20v cordless drill, 2-inch hole saw, DeWalt Bits, you might need an HDMI switcher if your TV has limited ports, short ethernet cables for the modem, router, and game consoles since they will sit in view on the shelf. Maybe a short coaxial jumper cable depending on how far the existing one can reach up the wall.
When you affix the Legrand conduits, have one open to the left and the other to the right. It leaves them easier to open in the future. The conduit on the right is the one through which we ran the power cord for the surge strip. We spaced the segment (gap) at that point by about two inches so that the power cords coming down from the electronics could exit and plug into the surge.
You might want a bit like this: http://www.amazon.com/Amico-Diamond-Tipped-Metal-Ceramic/dp/B00880CFJS/ref=sr_1_fkmr0_2?ie=UTF8&qid=1375572778&sr=8-2-fkmr0&keywords=glass+coring+bit.
It doesn't vibrate going through.
I’m looking to do the same for some Sig mags, I went at it with my drill and some standard bits and I feel like the mag was just laughing at my efforts. I’m pretty sure something like this (https://www.amazon.com/Hole-Saw-Rocaris-High-Speed-Stainless/dp/B07H8VGNSH/ref=mp_s_a_1_5?keywords=metal+hole+drill+bits+for+steel&qid=1554262619&s=gateway&sr=8-5) will he needed to drill out a nice hole. Then a good bit of polishing the edges to ensure smooth function. I figure it’s worth a shot.
Invest in this. It is a pain with a jig saw and very hard to get a perfect cut. I have spent many cursing hours cutting holes with a jig saw.
Non-mobile: http://www.amazon.com/dp/B00529WW6O/ref=redir_mdp_mobile/176-0955244-5348615?fp=1&pc_redir=1427534361
^That's ^why ^I'm ^here, ^I ^don't ^judge ^you. ^PM ^/u/xl0 ^if ^I'm ^causing ^any ^trouble. ^WUT?
You mean like one of these? Might pick one up if you say they are better.
there is a circle cutter like this one but you will want a drill press capable of pretty slow speeds if you use that. I've heard horror stories about them coming loose and flying across the shop. I own one, but have never actually tried it out. mainly out of fear...
Are you just asking if normal drill bits can go through ABS fine? If so then yeah they do. For larger holes I use these:
https://www.amazon.com/gp/product/B01I416MT4
http://www.amazon.com/gp/aw/d/B007M2HB8S/ref=redir_mdp_mobile?pc_redir=1395535865&ref_=pe_385040_30332200_pe_309540_26725410_item and a power drill
Buy this
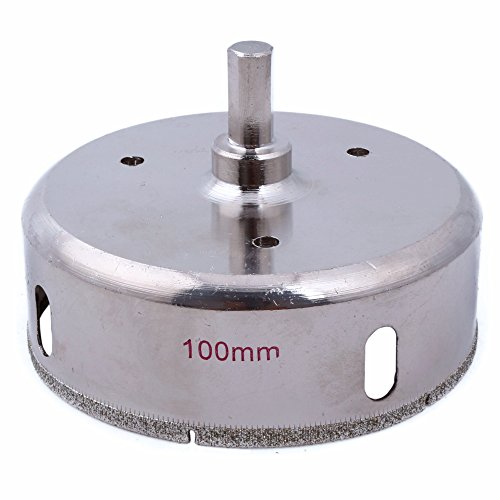
https://www.amazon.com/100mm-Diamond-Drill-Masonry-Drilling/dp/B07H88B9N3/ref=sr_1_4?keywords=diamond+dust+hole+saw+4+inches&qid=1550252796&s=hi&sr=1-4
Watch a video of someone using one before you do it yourself. Measure out from center and start at an angle, go slow, use water to cool the bit so it doesn't wear out (although even mostly dry you'll probably get at least 1 hole out of it.
This is most likely the answer. I purchased this in order to give it a shot. But forever reason it scares the hell out of me. The circles range from 1 inch to 2 inches. There are roughly 50 to cut, and they increment linearly by about 1/32.
Miter saw is a must have too! I dont know what I would do without it. You definitely want to sand as well. All of the sharp edges can tear apart some bags (been there done that). Also, here's a cheap hole saw that I have used with very good success. Although, you need a pretty high powered drill to make it work correctly. I am on my second one, but I have cut probably 25-30 holes before needing a new one. I dont make my own bags anymore, but I did buy some corn from Tractor Supply.
For the DIY-ers out there, get you one of these and one of these and make a sous vide cooler for your Anova.
sorry i thought i replied to you but i guess i didnt.
here is what i bought
http://www.amazon.com/dp/B007M2HB8S/ref=pe_385040_30332190_pe_175190_21431760_3p_M3T1_ST1_dp_1
http://smile.amazon.com/Diamond-Tipped-Metal-Drill-Ceramic/dp/B00880CFJS/ref=sr_1_4?ie=UTF8&qid=1406484782&sr=8-4&keywords=1+2+glass+drill+bit
Plastic? Just use a Hole Saw like the ones plumbers and electricians use to cut holes in junction boxes etc.
Here's an example:
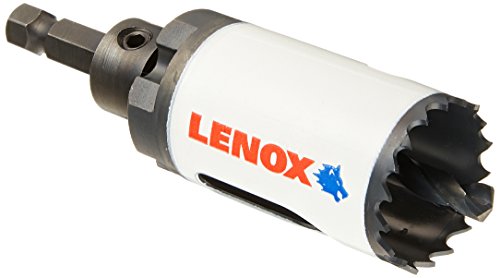
https://www.amazon.com/LENOX-Tools-Bi-Metal-Arbored-Technology/dp/B0052EC44Y
Lenox and Milwaukee are the best brands, but, if you don't need it for "production" levels, other outfits sell far cheaper ones, like Harbor Freight.
Don't know about this specific set, but there are many brands available on Amazon.com.
No worries! Happy to help.
If you decide you don't like where that hole is, or decide that you actually need a grommet, try drilling another one with one of these
here you go
Help Deciding Between 2 Methods To Cut Holes In Aluminium Sheets. I have this piece of aluminium that is part of a pc case that someone messed up cutting holes in. I need to cut about 6" diameter holes in it (its about 1/12" thick). It looks like my best options are circle cutters like these
https://www.amazon.com/General-Tools-5B-Standard-Adjustable/dp/B00004T7P1/ref=cm_cr_arp_d_product_top?ie=UTF8&th=1
or a normal circular hole cutter like this
https://ae01.alicdn.com/kf/HTB11S2JNVXXXXbAXVXXq6xXFXXXa/G-Brand-New-Top-Selling-5PCs-Set-font-b-Hole-b-font-Saw-Set-Drill-Bit.jpg
Which would be better? thanks!
http://420armory.com/home/product/glass-hole-saw-bit-large/ This company offers the rubber grommet and downstem to fit the hole as well, but the hole saw itself is $10.
You can probably get a 5/8" hole saw for $5 or less at your local hardware store. https://www.amazon.com/uxcell-Diamond-Coated-Cutting-Silver/dp/B0087Y81MU/
I'm trying to cut 6" wooden circles out of 3/4 to 1" thick pine boards. I purchased a hole saw and shank to use with my drill press, but am having issues with it.
It takes ~10 minutes to cut one disc because of how slow (vertically) I have to take it. If I use more pressure than the slightest increment down, it jams instantly. I've tried speeds as low as 700 RPM all the way up to 2300 RPM with little difference. Also, even when it hasn't jammed, the cut is very poor. It's ripping a lot of the grain causing me to have to do a lot of sanding to produce a finished edge.
I think maybe the issue is the quick swap shank. The retractable pins don't swivel, which means I can't screw the saw on quite all the way. It has a slight wobble because of this, which I think might be too much for a 6" saw to function properly. I'm thinking of trying this hole saw instead, hoping it fits together more snugly and cuts better.
Before I buy more tools, does anyone have any thoughts on the best way to cut 6" circles 1" thick?
yea i don't either. i had to go out buy a adjustable sized hole cutter and hook it up to my drill press.
http://www.amazon.com/General-Tools-Instruments-55-Circle/dp/B00004T7P1/ref=sr_1_3?ie=UTF8&qid=1418181774&sr=8-3&keywords=circular+hole+cutter
What about this: https://www.amazon.com/Rannb-Cutter-Carbide-Cutting-Stainless/dp/B07P2DZ2RD/ref=sr_1_2?keywords=carbide+hole+saw+4+1%2F2&qid=1569878579&s=gateway&sr=8-2
Generally I don't like using hole saws on metal. You can get metal hole saws, but wood hole saws (which are more common) will not work at all (or will ruin the hole saw)
If you don't already have a metal hole saw, I'd recommend a circle cutter.
http://www.amazon.com/General-Tools-55-Circle-Cutter/dp/B00004T7P1/ref=sr_1_4?ie=UTF8&qid=1374189969&sr=8-4&keywords=circle+cutter
Okay quick PSA on drilling!
> http://www.amazon.com/Diamond-Tipped-Ceramic-Glass-Drill/dp/B00899COJY
I use this style of drill bit, which are avialable in 16 and 19mm. They work great because they don't have a central point of pressure like other types, and it has file etching on the side of the bit as well as the tip. when you drill, you submerge the piece in water and allow it to fill almost all the way. I like to wrap it in a water soaked rag to dampen vibration in the bottle and to shield my hand in case of shattering. certain surfaces are harder to drill on than others, such as rounded areas and or things with texture and design. It's simply a matter of getting that established nitch in the glass to do this I demobilize the piece as much as possible under water, and at a high drill speed give my desired spot a series of sharp taps. be as precise as possible while the bit establishes a nitch in the glass. once it gets going, drill at a medium to slow speed. when you see bubbles it means that you have begun to breach through. this is a good time to stop and check your whole. at minimal speed and pressure, drill through the remaining glass and remove the displaced piece of glass. next using the etching on the side of the bit, wear down the glass on the upper outer part of the whole, and then do the same to the lower inner part of the whole. this will allow your down stem to tilt downward more. Once you have your whole you need to fit a downstem in the most airtight fashion possible. I've used puddies, sealants, glues, and such but I'm personally a fan of a good old fashion rubber grommet. If your hole is good enough, you should be able to get a relatively air tight seal and your can avoid the risk of harmful chemicals. most head shops will carry a rubber grommet compatible for downstems and you can also find them online. Hope this was helpful, let me know if you have any more questions.
> Just spray it out, drill a little, spray it out, etc. Ceramic bits don't like to be gunked up with the dust, and water helps. The bit I have is about 3/4 inch, I've never tried starting small and widening. There are different types of bits for different types of tile/stone/etc, but mine look like this:
>
> https://www.amazon.com/Amico-Diamond-Tipped-Metal-Ceramic/dp/B00880CFJS
Okay that would do the job!! Gah I was going to do a single, large center hole with my angle-grinder (and put steel mesh over that) as I've got a plant needing re-potting and really want to use this one if possible, I wonder if I can find a bit like that locally am going to have to make some calls!
I was thinking you'd start out with 1/8" bits and then work your way up, boring bigger holes each time- if there's a 'doorknob'-type bit for ceramic that'd be ideal for me, would put a ton of 3/4" holes and call it a day! Time to see what local shops have because if I can't buy locally I'll probably just use the angle-grinder as I want to re-pot this guy right while he's starting to flower (right now is 3 days into setting flower buds)
you jest but, https://www.amazon.com/MIBRO-460271-Adjustable-Circle-Cutter/dp/B001C00ZRK
...it should work fine.
http://www.amazon.com/Amico-Diamond-Tipped-Ceramic-Glass/dp/B00899COJY/ref=sr_1_2?ie=UTF8&qid=1346041752&sr=8-2&keywords=amico+16mm+diamond
works a treat
Awesome. I Used this to cut the holes to fit the k cups exactly where I wanted them to sit. I wanted them to sit a little higher so I can easily grab them.
Mibro 460271 Circle Hole Cutter https://www.amazon.com/dp/B001C00ZRK/ref=cm_sw_r_cp_api_9sRxybS7GRE4H
Ok. I dunno what tools you've got or how brave you are feeling.
I can see several approaches: