(Part 2) Best abrasive finishing products according to redditors
We found 264 Reddit comments discussing the best abrasive finishing products. We ranked the 103 resulting products by number of redditors who mentioned them. Here are the products ranked 21-40. You can also go back to the previous section.


DO NOT USE STEEL WOOL!!! Even 0000 can scratch the finish. Use brass as the brass is softer than the steel and won't scratch the finish.
Brass Wool- Skein Pad Wad (Fine Grade, 100 Gr.) https://www.amazon.com/dp/B01CTGGGIM/ref=cm_sw_r_cp_api_i_PHKTCbAMH0TY6
I'd guess it was used as a dispenser for sandpaper or other materials that came on a roll https://www.amazon.com/Sandpaper-Dispenser-Furniture-Restoration-Automotive/dp/B07457VPWY
I think it was u/purplepiratecrab that asked to know how the tumbling was going. Well, I think I’ve had good results with my first couple of test piece. One is an Axiom Tetra Bead-blasted Stainless Steel.
The spinner has good weight and balance, but I never cared for the bead-blasted finish. It was too rough and all the points and corners were far too “hot” for my taste. As it was my first foray into tumbling I threw all manner of media at it - Grits, SS Shot, Ceramic, Dish Soap, Baking Soda, and Polishes. There is plenty of advise online for tumbling stones, but surprisingly little instruction on metal (jewelry) tumbling. But I consumed what I could find.
I am using a Harbor Freight Chicago single-drum tumbler. I had gathered that the rubberized drum that comes with the tumbler was not ideal for metals like Stainless Steel (turns them black). So, following after a YouTube video, I assembled my own PVC drum. You do need to add baffles inside the drum. Otherwise, everything simply clumps at the bottom and nothing actually tumbles.
https://share.icloud.com/photos/08Yoc5CX4Il2v081JWrErA94A
https://share.icloud.com/photos/0NUNMe7gag16MZl6OG4FaAgzA
I ordered 1 lbs of Stainless Steel shot and 1 lbs of Small Ceramic Media from Amazon. Harbor Freight has Grit / Polish packs as well. Add water and a drop of Dawn dish soap and you’re ready to go.
https://www.amazon.com/dp/B017WQV6UM/ref=cm_sw_r_sms_c_api_i_HZNpDbEB0T5MA
https://www.amazon.com/dp/B07DY7PSBT/ref=cm_sw_r_sms_c_api_i_cYNpDbC80MBHD
https://www.amazon.com/Thumlers-Tumbler-Polisher-Accessories-Prepolish/dp/B000BUW610
While rock tumbling can takes weeks, metal tumbling over hours or days can get good results. If you simply want to knock off “hot” spots, 6 hours with some SS shot works great. I did that with a Brass Spinetic Micro-X which had super “hot” corners on it. Quite comfortable after that.
https://share.icloud.com/photos/0EthP9bf8BLlK-E1OPfdYFYoA
The last round with the Tetra involved 7 hours with Ceramic Media, 6 hours with Shot and Pre-Polish, overnight with Shot and Polish, and then 6 hours with Shot and Baking Soda. Even without the rubberized drum you are going to get a lot of black dust in the polishing stage so the soda really cleans that off of SS and cleans your Shot at the same time (otherwise you’re left with gray dull shot at the end).
The results are very satisfactory for a piece with a lot of edges like the Tetra. The photos above don’t really do it justice, but what I ended up with was something very close to UQH’s Fine Stone-Washed effect - smooth slightly soapy feel. Much better than the rough, hot finish it had before. I then sanded and polished the flats on both sides for a nice contrast. The Vortex Buttons from UQHs really makes this a unique piece - far more fondalable than it had been originally.
You do need a bit of patience and willingness to experiment with various combinations to appreciate the varying results. I want to try adding plastic media for cushioning. And If you want truly mirror polished pieces then further sanding and a polishing wheel would be necessary. Definitely more experimentation and learning is in my future. Hope this has been informative. Cheers!
Bronze wool, finest i could find with a quick poke around Amazon
If you want a mirror finish this paste will even polish Tungsten Carbide!
https://www.amazon.ca/TEMO-Diamond-Lapping-Compound-Syringe/dp/B004HR5PJ8/ref=mp_s_a_1_7?keywords=.5+micron&qid=1557882014&s=gateway&sr=8-7
It might be an easy fix, other people have had good success with similar issues (based on the amazon reviews)
https://www.amazon.com/gp/aw/d/B009XUAA4Y/ref=mp_s_a_1_3?ie=UTF8&qid=1485096706&sr=8-3&pi=SL75_QL70&keywords=glass+polishing+compound
I'd just stipple it. I can tell you what to buy and how to do it including the borders. You'll need the following:
https://www.amazon.com/Dremel-107-Engraving-Cutter-Shank/dp/B00008Z9ZV/ or https://www.amazon.com/Dremel-106-Engraving-Cutter-8-Inch/dp/B00008Z9ZU
https://www.amazon.com/Dremel-120-volt-Variable-Attachment-Accessories/dp/B075174NCV/ (you may have your own dremel, but definitely get a flex shaft for it)
https://www.amazon.com/HTS-401B3-Multi-Grit-Diamond-Medium/dp/B00U0E0KRE
https://www.amazon.com/AUSTOR-Grinding-Polishing-Accessories-Attachment/dp/B078Y5XGM8 (careful with these, light touch and keep it moving)
https://www.amazon.com/Flitz-Multi-Purpose-Fiberglass-Aluminum-Sterling/dp/B000MUSOW4
First use your engraving cutter to cut the borders that you've drawn on with a water-removable Stabilo marking pencil. Try to cut as smoothly as possible, with a steady hand. Don't try to cut it all at once, be patient (be patient for all of this, it took me a whole week doing a little at a time to complete the whole process, and turning my dremel off periodically because I have an older model flex shaft that gets hot after some use - solved this by wrapping the grip with bicycle inner tube)
The smoother you cut it the easier the rest will be. Some people just use the engraving cutter for borders, but I followed someone's guide and then used the diamond burs to smooth it out and polish it. Go from the lowest grit to the highest. You can either use the ball bits that are the same size as your cutter, or use the rounded cylinder bits. You can angle the cylinder bits in certain ways to get around curved surfaces, you'll kind of have to experiment with that. Once you get to the highest grit, I found that the only way to get it near-glass smooth was to apply a lot of pressure. It doesn't remove much material and you kind of want it to heat up the plastic to get it smooth. Then, still not satisfied with this, I got those felt wheels and cut the very tip off the smallest one, and used a bit of flitz paste, and then went over all the borders. That got it close enough for me. You can get more advice from the Weapons Stippling group on Facebook.
After you do the borders, I use the round tip on the walnut hollow wood burner on a medium heat setting. You don't want it too hot, not with the P80 plastic anyway. My technique was to press in, not too much but just enough, and drag downwards. A random totally pattern is best, I did a somewhat orderly snake pattern and then went over it again and smeared it out to give it a more organic texture. Then I went over it one more time, lightly and fastly rubbing all along the surface to blend the ridges that were created into the rest of the texture. You can do this several times to get it just right. The result is a texture that is grippy, yet not rough. That's how I like it, but you can experiment. The key is not to heat it up too much and don't stick any of the tips in too deep, and don't try to do it perfectly ordered unless you've gotten good at that with practice and are using an appropriate tip. You can make your own tips out of #8-32 brass screws or buy blanks from OT Defense, or some other place.
what's your machine, and where did you get the media? if you have links, that'd be great- lots of people here really want to try this but results and follow ups are really hard to find!
also it's terribly noisy- that uber cheap $60 harbor freight (we call it hazard fraught here) tumbler. I did use water, but it's totally not supposed to handle it. I was lucky and it was so hot that water couldn't get to the important components before drying to a fine porcelain dust. I can only assume the 60hz, 120v thing isn't quite as high energy as preferred. I actually quieted it to reasonable (save my hearing) levels by making a box out of EVA foam floor mats and setting it over the tumbler. I have plans to make a matryoshka-style deadener out of them, where I just stack on concentric tubes till it's quiet enough for me- though it might need a fan and a couple of tubes to ensure airflow. like I said, this thing gets way too hot.
also, I know that SLS prints do sand/chip more readily, as the have smaller, more segmented and uniform crystals, and produce faster results because of their largely isotropic surface detail and strength. I'm using PLA, which be comparison, is harder than SLS nylon when it comes to chipping and cracking, it's super hard to sand compared to most anyway.
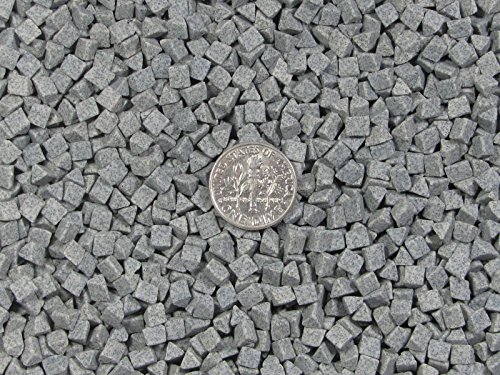
also I know nothing about fluids that should be used. are there any tidbits I should know? I'm considering this media: https://www.amazon.com/Abrasive-Triangle-Aggressive-Porcelain-Tumbling/dp/B06Y5JRVRZ/ref=pd_day0_hl_328_9?_encoding=UTF8&pd_rd_i=B06Y5JRVRZ&pd_rd_r=37e71d38-a7d0-11e9-b724-6d396220776d&pd_rd_w=ufD0q&pd_rd_wg=elKlz&pf_rd_p=ad07871c-e646-4161-82c7-5ed0d4c85b07&pf_rd_r=K4FZMC4RXMD9M6PEPQ6D&psc=1&refRID=K4FZMC4RXMD9M6PEPQ6D
I'm thinking about buying something like this
or maybe even this
Used a long marker, and angled it in maybe 20 degrees. Traced everything, then used a utility knife with a fresh blade and cut straight down. Peeled the majority of the material back with my fingers, Kaizen foam has layers you can peel back, but it won't come out in that layer perfectly clean. Test fit everything, cut away more where needed, in small increments because I wanted it super clean looking. Once I got the outline exactly how I wanted it, took a dremel with an abrasive stone head, and pointed it straight down and used it to clean up the lumpy, messy, bottom. Even punching straight down to remove material (especially for the magazine slots this was necessary) it was very effective. Just had to be careful with it, and it worked like a charm! Cleaned up the corners with some careful exacto knife work.
FastCap Long Nosed Pattern Marker https://www.amazon.com/dp/B002NQPEE6/ref=cm_sw_r_cp_apa_i_5k.1Db4YZ6WX8
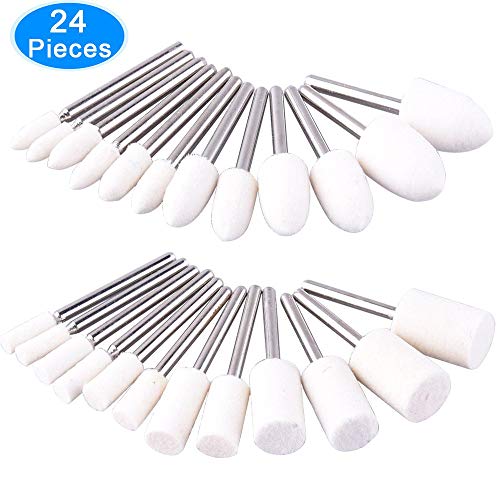
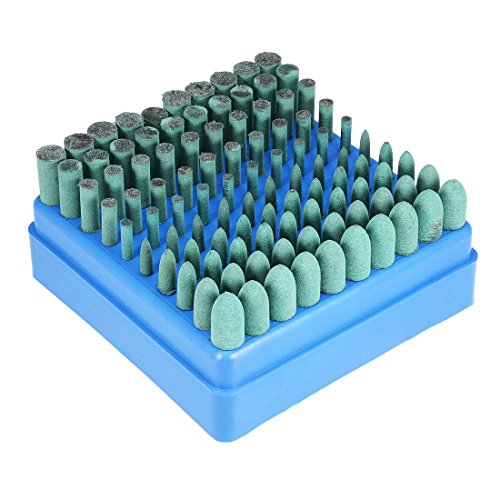
(I didn't use this set, just using this link to show what I mean by abrasive stone head, I used a cylinder for the flat top, to flatten)
Oudtinx 100 pcs Abrasive Stone Points Electric Grinding Dremel Accessories Polishing Grinding Head Wheel Tool Kit For Dremel Rotary Tool (Red) https://www.amazon.com/dp/B07FN7G7JK/ref=cm_sw_r_cp_apa_i_Vn.1DbBJJHE0A
Can’t say that I’ve used this particular brand but this is the style I use for polishing yacht railing. 3m has a similar product and are about $10-12 a pop for their 4-1/2 wheels.
uxcell 4 Inch Nylon Fiber Polishing Wheel Sanding Buffing Disc Abrasive Wheels for Angle Grinders 10 Pcs https://www.amazon.com/dp/B07KC71TYT/ref=cm_sw_r_cp_api_i_PUWZDbM2RYX83
If you can use a da sander to get the tube to at least 180-220 then 320. Then hit it with the polishing wheel. Makes quick work of it. Best of luck.
I had the opportunity to use a tumbler at my (then) place of work. The metal workshop at the prototyping department had a Rösler TE-15 R 360/870 Tub vibrator not in use at the time. We ended up using tumbling media that was in stock, which were Rösler RM 04/10 S (4mmx10mm angle cut triangle ceramic media) and Rösler RM 02/02 D (2mmx2mm Triangle ceramic media). We used Rösler FC 124 S liquid compound (originally intended for tumbling metal parts) mixed with water in a continuous trickle flow, just enough to keep the parts and and media moist without submerging. The tumbler was fitted with a divider, allowing use of both media at the same time in separated compartments.
All of these were acquired directly from RÖSLER BENELUX, I don't know if these can be acquired easily by a regular consumer.
Rösler information PDF about process media: https://de.rosler.com/fileadmin/Files/Prospekte/Gleitschlifftechnik/DE_EN_Consumables_GB_130.pdf
Rösler information PDF about the tub vibrator (tumbler): https://de.rosler.com/fileadmin/Files/Prospekte/Gleitschlifftechnik/DE_EN_Tub_vibrators_GB_129.pdf
The water and compound significantly improved the grinding effectiveness, as well as eliminating airborne grinding dust, which was present in the comparative dry test run we did. I would advise perhaps looking into a method of water sealing you tumbler or replacing the bowl with a (bottom) sealed metal version. The compound's effect might be approximated by adding a little dish soap to the water used to improve dust removal, as non of the metal-specific properties are needed for this application.The tumbling media you linked has a shape comparable with what I used, but appears to be more "grinding". This might help reduce total tumbling time with your less powerful tumbler, though it might also adversely effect the finer part details. To better preserve detail, these smaller media from the same supplier might be more suited: 4x4mm or even 2x2mm.
I will look if i can find any of the tumbled parts and add a photo for reference later.
Sure! I am no expert, but I like my results. Here is what I did.
The whole evolution took less than 20 minutes.
And the slowest headers bro. Clean that shit up.
https://www.amazon.com/dp/B00FALW138/?coliid=I1FBIE3KEW8OTD&colid=26A2VKMS05UI6&psc=0&ref_=lv_ov_lig_dp_it
https://www.amazon.com/dp/B0000AXS0Q/?coliid=I26C4NAR8J4W9N&colid=26A2VKMS05UI6&psc=0&ref_=lv_ov_lig_dp_it
Would this 3K-5K SiC sandpaper work for the CC4 and this 7K to 15K SiC sandpaper work for a Spyderco ceramic or maybe 2?
https://www.amazon.com/dp/B01F7Y384S/ref=cm_sw_r_other_apa_i_ibuZDbZJRN3CP these are what i used
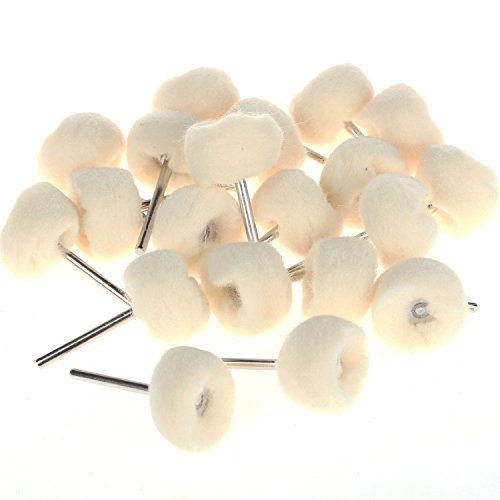
Have you tried these at all? I use them for everything. https://smile.amazon.com/Premium-Organic-Polishing-Buffing-Wheel/dp/B01EV8BUM8/ref=sr_1_3?ie=UTF8&qid=1523546023&sr=8-3&keywords=wool%2Bbuffing%2Bwheel&th=1
https://smile.amazon.com/MATCC-Polishing-Buffer-Velcro-Adapter/dp/B071SLWN74/ref=sr_1_4?ie=UTF8&qid=1523546023&sr=8-4&keywords=wool+buffing+wheel
hmmm maybe a rotary tool cotton polishing/buff wheel? https://www.amazon.com/JAZ-Jewelry-Mounted-Cotton-Polishing/dp/B01EC03VRM/ref=sr_1_14?s=industrial&ie=UTF8&qid=1482180315&sr=1-14&keywords=dremel+polishing
El cheapo special.
http://www.grizzly.com/products/Benchtop-Sandblast-Cabinet/T27156?gclid=Cj0KCQiArYDQBRDoARIsAMR8s_S2yw3C0B4B7yUW8IiEf7c1sdpI33qJZkLcTUBpW6-x2krjgdgqN9EaAnx7EALw_wcB&utm_campaign=zPage&utm_source=grizzly.com
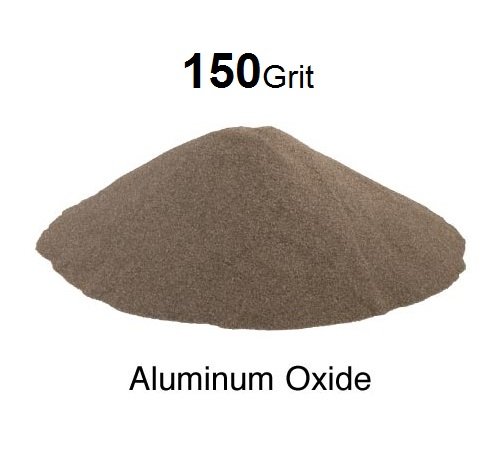
Aluminum Oxide Media:
https://www.amazon.com/Blastite-Aluminum-Oxide-Sandblasting-Abrasive/dp/B01DCO1QCQ/ref=sr_1_2?s=industrial&ie=UTF8&qid=1509991994&sr=1-2&keywords=aluminum+oxide+sandblasting+media
and decent masking tape.
Air compressor
https://www.lowes.com/pd/Kobalt-26-Gallon-Portable-Electric-Vertical-Air-Compressor/50292511
Not quite the right sub, we deal predominantly with glass art however, there is something that may work if the scratches are not too deep. Cerium Oxide Powder can be used as demonstrated on This Page to polish glass. You don't necessarily need an expensive electric buffing tool if they arent deep it will just take some elbow grease. Alternatively if you have an electric drill you can get Buffing Wheels and Cerium oxide powder combos as well
All things considered though I'd first contact the manufacturer and ask about warranty options for a broken (smashed not scratched) jar or if they can supply you with a new one and at what cost. sometimes the manufacturers will really stand behind their products no questions asked. Had huntington Beach send me 2 new crockpots because mine went bad after only a year, never hurts to try.
Whenever I get a new Benchmade I disassemble it and polish the washers and blade tang with a Lanksy leather strop and 0.5 micron temo paste. Polishing the washers and tang make a huge difference.
Lansky Leather Stropping Polishing Hone https://www.amazon.com/dp/B008BS0OCM/ref=cm_sw_r_cp_api_3t9xxb2NYNDXM
TEMO 0.5 Micon 5gram Diamond Polish Lapping Paste Compound Syringe Final Finish https://www.amazon.com/dp/B004HR5PJ8/ref=cm_sw_r_cp_api_6u9xxbSV7G3DE
Here is the mobile version of your link
Need a hard backing and some way to keep your sandpaper pulled as tight as you can. I have one of these and it works pretty well but I also made sort of a hand sanding block out of some oak with some u-bolts I can tighten down. It's also important have fairly clean lines going into hand sanding.