Best light meters & calibration charts according to redditors
We found 142 Reddit comments discussing the best light meters & calibration charts. We ranked the 15 resulting products by number of redditors who mentioned them. Here are the top 20.
We found 142 Reddit comments discussing the best light meters & calibration charts. We ranked the 15 resulting products by number of redditors who mentioned them. Here are the top 20.


Something I don't read others doing enough but makes a world of difference is to use a gray scale card (like this: https://www.amazon.com/gp/product/B004QXU8VI/ref=ppx_yo_dt_b_search_asin_title?ie=UTF8&psc=1 ) for each lighting condition. Just snap a picture of your product with this small card beside it and then take the same photo without this small card. In your favorite photo editing program adjust the whites, blacks and mid levels using the photo with the card and then apply the level settings to the photo without the card. It's so easy to do and takes the guess work out of having the right colors, brightness and contrast. I've gotten a number of 5 star reviews with the customer noting how the colors of my products match exactly to my product photos.
This is good for taking it to another level:
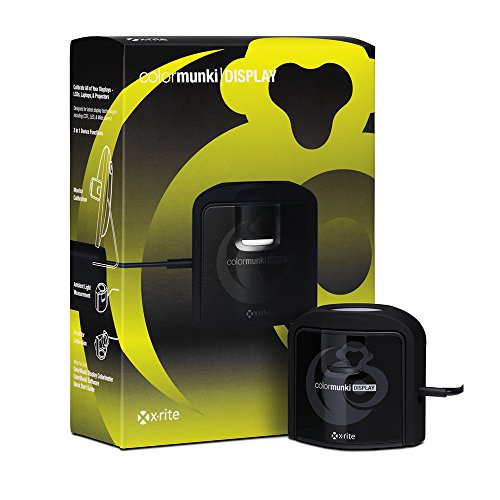
https://www.amazon.com/X-Rite-i1Display-Pro-Display-Calibration/dp/B0055MBQOW
Google "HCFR" and "DISPLAYCAL" free software you would want to use with it. Feel free to PM me for tips on how to use with TVs vs PC monitors (it's designed with software out of the box for PC-connected monitors only).
Using this with the bundled software will at least get your backlight brightness and contrast dialed in, and some color tone and color space/white balance stuff. With the HCFR, DISPLAYCAL or other software like CALMAN which costs money, you can dial it in even more.
Good luck :D
To add to what /u/bard108 said - the preview you seen on the back of the camera's LCD screen is a JPG that the camera processes on it's own according to whatever picture style you've got the camera set to.
jpg vs raw
If you are shooting in JPG mode only, then the files coming from the camera should look pretty close to that on screen preview when you pull them off of the memory card, however if you are working in RAW mode you need to actually use a raw converter (Lightroom, Adobe Camera RAW, Capture One, etc) to get the colors where you want them to be.
white balance
In a few of your images on your website, it appears that you are either using the wrong white balance setting, or you are shooting with auto-white balance and the camera is guessing wrong.
Here's an article about setting custom white balance with Nikon cameras: Setting White Balance
If you are shooting RAW, I recommend getting a pocket sized grey card and keeping it in your kit. Take one photo for each different lighting scenario, with the grey card near the center of the frame and then when you bring your photo in to your RAW processor you use the white balance dropper tool on the grey card to get a neutralized white balance.
Neutral white balance might not be where you want to live (some images feel better if they are warmer or cooler) but it's a starting point for your decision making.
color space
If you ARE shooting in JPG mode, pay attention to which color space your camera is using. Generally you'll have the option to use sRGB or Adobe1998.
Adobe1998 is better if you plan to do editing on the JPG once it leaves the camera, but if you want to just upload the images to flickr (or wherever) without doing any edits whatsoever then sRGB is a better choice.
Anything you want to upload to the web needs to be saved in the sRGB color space because most modern web browsers only really understand that colorspace. If you upload something in Adobe1998 or ProPhoto by accident you'll usually get a weird color cast. ie sometimes skin tones look greenish which is no bueno.
(I will say it doesn't look like this is your problem here though)
calibration
Now... lets talk about that iMac, and color calibration.
Most displays are not calibrated out of the box. The ones that are will cost upwards of $1500 (on the low end) just for the monitor... so what i'm saying is you are almost definitely working on a computer that doesn't have a calibrated display.
That means what you see on the screen will almost never be a close representation of what you will get if you make a print of the photos you're working on.
You actually need a device to calibrate your display, called a colorimeter. The process is pretty simple actually.
You need to set your display at the brightness you prefer working at, and make sure your mac is set to not automatically adjust display brightness because otherwise you'll never be able to realy know what the image's exposure looks like.
Once you've done that, you can run the calibration software process (which is 99% automated and not complex) about once every 2 weeks just to keep things in line.
TL;DR The images you posted to flickr just look as though you need to bump the saturation slider in photoshop/ACR just a bit honestly - but tread lightly. A little goes a long way.
You definitely have a lot of work to do in terms of learning post production and managing colors, but I definitely recommend that you do your best to start by having a calibrated display, and managing your camera's white balance setting - otherwise most of your time spent editing will be for naught.
Picked up a color meter from Amazon
X-Rite i1Display Pro (EODIS3) https://www.amazon.com/dp/B0055MBQOW/ref=cm_sw_r_cp_apa_i_AdSGDbDWHX785
Already completed the rec-709 and imported it onto madvr.. Working my way through BT.2020 now.. Looking forward to see what improvements I get.
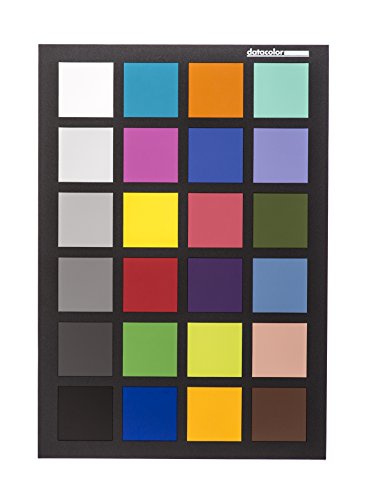
Here's the wikipedia entry, but basically it's a 'known reference value' (18% gray) sheet of plastic.
They're quite cheap to acquire. I use one similar to this one on Amazon.
> do you guys think the AW will go any lower than 849.99 (price on microcenter)?
Watch /r/buildapcsales. This monitor gets posted almost weekly. $849.99 is fairly common, but we've seen a few posts in the last month or so where it's gone a little lower. Here's a few recent but expired examples:
I personally think that Black Friday through Cyber Monday will see this thing hit $799 again, possibly $779 for a new record low. Here's hoping!
Dell online will also price match most national retailers and etailers. I got Dell to price match Microcenter since there is no MC near me (I think they sold it online too, but Dell's online returns are as easy as Amazon).
> , but wondering if colorimeters usually go on sale— especially with Black friday coming up
Prices fluctuate, but I haven't noticed any big sales recently. As per my other post, here's the 3 to watch out for and their current Amazon prices.
Checking CCC for the price history on those, here's what I'm seeing.
If you have to buy today, the ColorMunki is the best value when compared to the other options, and compared to historical prices. If you can wait until the holidays, they all should hit some fairly low prices. I'd still recommend the ColorMunki as I feel it's the best consumer home-use colorimeter, but some like to splurge for the i1DisplayPro as it's a better long term option for multi-device calibration due to the better build quality, durability, and faster sensor.
It's actually fairly simple. You need a calibration device (i've heard good things about this or this , I personally use one of a firm that no longer exists on monitors which probably don't even deserve calibration) and software which can talk to it. Most software is pretty self-explanatory and generates a color profile for your monitor, usually in an .icc file. You can then hand this .icc file to your operating system configuration. If your postprocess stack is color managed, you should then get reproducable colors. There are a lot more subtilities like colorimeter ($) vs spectrometer ($$$) and such.
I'm looking for a monitor calibration tool. Amazon and B&H Photo both list several devices anywhere from $40 to $400. Any opinions on what makes the more expensive ones better? I'm just going to be using it so that I can soft proof my photos; they've been turning out very badly when I have them printed.
Edit: The one I'm specifically looking at now is the entry level Munki Smile. The reviews are all over the place, from "works perfectly" to "turned my screen green." Anyone used this?
I thing your best bet would be to change the color temprature, the right one looks to be set to cool and the left one appears warmer(in the picture atleast). Also try messing with color management in windows. Otherwise you need to get something fancy like this (X-Rite CMUNSML ColorMunki Smile https://www.amazon.in/dp/B009APMNB0) which i am assuming you're not gonna.
this is the only way you're really going to get it calibrated. I have one of these, used it with the ColorHCFR fork that's being worked on by people on AVSforum. You aren't going to get your greyscale right without a meter.
http://www.amazon.com/Xrite-EODIS3-i1Display-Pro/dp/B0055MBQOW
First, budget in a calibration probe because without it, even the best monitor can't be trusted. You really shouldn't get a spyder (they suck) or low end xrite. The cheapest I'd recommend is the x-rite i1 display pro (and you should get the OEM model if you can as it will work with high end calibration software if/when you upgrade). For now, use this with the excellent free and open source displaycal calibration suite. Upgrade to Light Illusion or CalMan when you can afford it/need to. Most consumer and low end pro displays need to be calibrated once a month or so - even those that come "factory calibrated."
Beyond that, 10bit is nice, IPS is a must, and not all displays are created equal. Best bang for your buck in 4K right now is probably the LG 31MU97C-B (4K, DCI-P3 color, 10bit, 31", really pretty) (also I think this is the same monitor but cheaper? Ignore the poor reviews, they don't know what they're talking about). This is the same panel as in the high end Eizo that is finding itself into some color suites, but without the Eizo processing and available for almost a quarter of the price.
Here is an article with some other quality options.
That isn’t a bad option.
I do recommend budget a little more to also get yourself an X-Rite i1Display Pro.
You’ll need it to keep the display calibrated (no the factory calibration isn’t good enough, and yes this is a thing you need to do routinely). Otherwise all the cash spent on a nice display will mostly be a waste.
You need a tool to make sure the colors are accurate for sRGB colors. Something like this. Until you've done that, you can't be sure your screen is actually color accurate.
But as others here have mentioned, I think you're likely running in to a white balance issue. This is why it's good to shoot in RAW, then you can adjust white balance after the fact in Lightroom.
Every LCD panel is different. You need to get a calibrator and calibrate the monitors to be accurate and match.
https://www.amazon.com/X-Rite-CMUNDIS-ColorMunki-Display/dp/B0055MBQOM/ref=sr_1_2?ie=UTF8&qid=1491967748&sr=8-2&keywords=colormunki
https://www.amazon.com/X-Rite-CMUNDIS-ColorMunki-Display/dp/B0055MBQOM/ref=sr_1_1?ie=UTF8&qid=1503551583&sr=8-1&keywords=colormunki+display
$160. This thing is invaluable imo. Does all the work for you. That said if you want to use my ICC profile on your PC you are more than welcome to. Set your monitor to "Racing" mode and set the brightness to 27.
ICC Profile:
https://drive.google.com/file/d/0BxFMoDVxOkvkYTZEc1lmNDduNW8/view?usp=sharing
How to install ICC Profiles:
http://www.digitalcitizen.life/what-and-how-install-color-profile-your-monitor-windows
(Scroll down to "How to install a color profile in windows")
Run it through the tests here: http://www.lagom.nl/lcd-test/?
If you want something more accurate, get a meter such as this one: https://www.amazon.com/X-Rite-CMUNDIS-ColorMunki-Display/dp/B0055MBQOM
You cannot accurately calibrate a display by eye. Your perception of brightness and color varies depending on what you've been looking at. You can try looking through forums for an ICC profile someone else has generated. But remember, that was generated for THEIR display, not yours. Individual displays vary. That profile will probably get your display closer to correct than the defaults, but there is no guarantee of this.
Although older the X-Rite ColorMunki Smile (CMUNSML) is an inexpensive option depending on your region:
If you're in the UK/Europe, the Datacolor Spyder5EXPRESS (S5X100) might be cheaper though:
Note some of those are/might be sale prices due to Cyber Monday!
Failing that, just search your local Amazon and check out reviews of the cheaper options. They all work about the same for non-pro users.
Edit: I just purchased the X-Rite ColorMunki Smile (CMUNSML) as I couldn't pass up the Canadian sale price today. If you want to use newer, open source software with more options look into DisplayCAL, but check the Supported Instruments for colorimeter support.
You can adjust white balance to 6500 or rmaybe just buy a ColorMunki and download displaycal to try and calibrate the LG to whatever the Gateway is at.
​
https://www.amazon.com/X-Rite-ColorMunki-CMUNDIS-Accuracy-Calibration/dp/B0055MBQOM/ref=sr_1_1?keywords=colormunki&qid=1561949413&s=gateway&sr=8-1
There you go
The equipment is incredibly expensive. I study Digital Printing and Graphics Technology, so all my classes are about digital calibration techniques and things like that. We use these to create our own printer profiles and to make sure everything we print is accurate.
you could start by buying one of these http://www.amazon.com/DGK-Color-Tools-Reference-Correction/dp/B001KNP3MQ/ref=lp_3109910011_1_1?s=photo&ie=UTF8&qid=1419966344&sr=1-1
but you get the hang of it after few years
If you need accurate colours, you should be calibrating your displays (which should be IPS or similar technology panels) with hardware like this.
If you can't afford that, Windows has inbuilt colour calibration but you'll just be doing it by eye so it won't be properly accurate. If you have a decent smartphone (newer iPhone or Samsung high end device in "Basic" picture mode especially) that should be a reasonably accurate comparison point.
It will let the camera apply a fine-tuning adjustment to make sure you get accurate focus out of the AF system.
Read your camera manual for exact details on how to do this, but you should find the relevant settings somewhere in one of the AF menus (that's where they are on a 5D3, and I assume the 6D is similar).
The basic idea is that you set the camera up on a tripod and take pictures of a test chart. Make focus adjustments until you are getting accurate AF results. You can buy a test chart like this (http://www.amazon.com/Datacolor-SLC100-SpyderLensCal/dp/B0041L3JS4/ref=sr_1_1?ie=UTF8&qid=1425332338&sr=8-1&keywords=focus+test+chart), which has a nice angled scale so you can easily read off whether focus is off to the front or back. But you can also just take a picture of any target that has plenty of detail, it's just a bit more laborious to get it right.
Edit: for zoom lenses, you'll want to do the separately for the wide and the long ends of the range. The adjustment can vary across the range. Your camera should be able to store a separate adjustment for each end.
I assume you mean the ColorMunki Display and not the Smile?
Color calibration, bro. Get yourself a cheap calibrator like this one and use dispcalGUI to calibrate and profile your monitors. Works a charm.
You need a hardware device to properly calibrate a monitor. I use one of these but there are cheaper alternatives.
If you don't care about GSync, the best deals currently are Nixeus and Pixio both ~615CAD after shipping+tax from amazon.com. They're both 27" 1440p 144hz IPS panels with Freesync.
If you're going to get a colorimiter I'd go for a ColorMunki Display as it's the same hardware as in the XRite i1DisplayPro with some of the pro software features locked. Spyders are overpriced in Canada imo, as well as slightly worse than the Xrite stuff.
Here you go
According to CCC, it's actually at a fairly low price point right now. I got mine for $100 on sale from b&h I think? But that was a particularly good price. Prime day is coming up so it's possible to see more of a sale but the current price is pretty good.
You don't need to get the more expensive X-Rite i1Display Pro. It's largely the same as the colormunki but has a few more "pro" features built in that you'll never use and it can calibrate faster. You'll do it only once every 6 months after the initial setup so the extra money isn't worth it unless you do color work and need to calibrate often. I would also avoid datacolor's spyder calibrators in favor of the x-rite's.
It really is just one of those amazing tools that you can buy and just have forever and it will earn its value back over and over.
Less related to the build itself, but in a budget like this, I thought I'd point it out. For photo editing, you're gonna want a monitor with good color gamut. The previously advised PG279Q will work pretty good.
More importantly than having a good monitor is having an accurate monitor. With a $3000 budget, please at the very least spare the $90 for this colorimeter to make sure the colors are accurate. Your wife may or may not already be aware of this, but regardless, make sure this gets done!
I don't have this set, but I do have a couple of [70 LED units with barndoors] (https://www.amazon.com/LEDwholesalers-LED-Rechargeable-Barndoor-4001/dp/B0040FEWA0//ref=as_li_ss_tl?ie=UTF8&linkCode=ll1&tag=battleforthew-20) that I put on light stands (as seen [here] (https://photos.google.com/share/AF1QipOHXQ-XTL7wRLEB2F3IJBlRsbjVeu--cobJUuF19Q-nrofp1RG1EntmUywmeXtUDA/photo/AF1QipNW2YO3e8SX9KRBmGqQr535w72JhuOugRICPuf1?key=X0FiM2FuWl94V1Z3UTFYaGVsb1hQZWtrdEVXOFhn)), or on top of my cameras (as seen [here] (https://photos.google.com/share/AF1QipOxON4x-wBk5IFnukI2wteBTQ888VUaEAWbPetD15RaGmVlegXdGEaDBZ27KWH_AQ/photo/AF1QipPP_UsTo21emhXwoOhoGnNoFWoBro9lvJvnoc2y?key=Zk5zdWtxOWU5ajk4aHJVdWFNYkJvVVpfb3NCZzVR)).
I don't really trust the color temperature of any LED panel that doesn't have a published CRI, so I use a [color calibration card] (https://www.amazon.com/CameraTrax-24ColorCard-2x3-White-Balance-Guidebook/dp/B004QXU8VI//ref=as_li_ss_tl?ie=UTF8&linkCode=ll1&tag=battleforthew-20) to avoid color casts.
Again, hope this is helpful!
Holla!
I am looking for a gift for my girlfriend. She is just starting out and her biggest bottle neck is a crappy laptop. She has a canon rebel t5 I think so that should be plenty. Her complaint lately is how her edited images colors are way off when she looks on her phone or a print when using her laptop. With this, I see there is monitor color calibrators so I was looking at this: X-Rite CMUNDIS
She is planning on getting a new laptop with her own money and I think the calibrator would be useful for any screen. I also thought about getting a external monitor. Once again she is not professional so I thought something IPS maybe ultrawide? LG UM57 25UM57
And also for a laptop she was asking what she should get so I looked for something portable/sleek, 1080p, ssd, and i5 + and came up with Zenbook-UX305UA
Basically are these good options for someone starting out doing as a side job?
Thanks!
yes
It sounds like you need to calibrate your monitor. I would read up on it on google. I use this device to calibrate my monitors (there are also cheaper ones):
https://www.amazon.com/X-Rite-ColorMunki-CMUNDIS-Accuracy-Calibration/dp/B0055MBQOM/ref=sr_1_3?keywords=ColorMunki&qid=1567110396&s=electronics&sr=1-3
Ah, yeah, in that case it may help.
If you have the patience you should consider purchasing a colorimeter and calibrating your TV. You can do this pretty cheaply if you buy the Colormunki Display colorimeter ( on sale for $150 on amazon right now - http://www.amazon.com/X-Rite-CMUNDIS-ColorMunki-Display/dp/B0055MBQOM/ref=sr_1_1?ie=UTF8&qid=1408992805&sr=8-1&keywords=colormunki ) and use the free HCFR calibration software - http://www.avsforum.com/forum/139-display-calibration/1393853-hcfr-open-source-projector-display-calibration-software.html
The difference between a properly calibrated TV and even the best you can do by eye with a calibration dvd is night and day.
I would suggest checking out Anandtech's Monitor review section. They're incredibly thorough in their reviews. If you're looking for a deal, they recommend Monoprice's 27" IPS As long as you use a calibration tool like the X-Rite i1Display Pro.
This is great: https://www.amazon.com/X-Rite-ColorMunki-CMUNDIS-Accuracy-Calibration/dp/B0055MBQOM
Use it with displaycal software.
Very much so. When you set focus on the target, it was very easy to see front and back focusing with various lenses.
If you are shooting wide aperture, you need to have focus nailed. That is why this adjustment exists on pro bodies for each lens. You can set adjustment for near and far focus. With Sigma zooms, you can set near and far focus for one of 4 focal ranges, using their dock.
This is why it is common for DLSR shooters that are photographing a focus critical shot to use live view (i.e. make their camera a mirrorless and focus on the sensor.) Until dual pixel AF of Canon, this really sucked. Like first generation mirrorless AF.
i1Display Pro is one of the best, and almost all calibration software will work on it.
> Colormunki Display
Thank you for the amazing reply.
The Colormunki Display came out in 2011, right? It has better sensor even though it came out 4 years earlier?
Is this 2011 one, the one you're talking about:
X-Rite CMUNDIS ColorMunki Display CDN$ 168.99
Datacolor S5P100 Spyder5PRO CDN$ 187.16
The Spyder5 express is the same price as the 2011 Colormunki Display.
I used one called Chromapure. I bought the pro version which is $199. But with software you also have to have a colorimeter which will also run you about $200. Would probably be cheaper to pay for a calibration. There is a free option for software called HCFR. It's open source and there are some tutorials for using it such as this one but you will still need the colorimeter. The tutorial goes over the needed items and even links to places to purchase them. I got my meter off of eBay because you can find them for less than other sites stores most of the time. Edit: This is the meter I bought.
The only one I have experience with is [this one](X-Rite i1Display Pro - Display Calibration (EODIS3) Scanner & Software for Color Accuracy Scanning, Profiling, & Multi Device Calibration https://www.amazon.com/dp/B0055MBQOW/ref=cm_sw_r_cp_apip_qRmMDOs9LhFSF). It’s very simple to use. There’s a third-party software that is recommended for implementing the color profile, though. I’ll see if I can dig that up.
I usually don't use those items to clean my machine. But I am sort of strict when it comes to using the laptop. Like I never use it while eating etc. ThinkPads are fingerprint magnets. It doesn't take much effort to get it all greasy. I usually clean my machine once a week with a micro fibre cloth and some lens cleaning liquid, like the ones you use to wipe off TVs and such. And it seems to have worked well for me. I've seen people use those materials that you mentioned to clean their ThinkPads but I don't know much about them since I never used them. One thing I suppose you need to be careful about the X1E is the Carbon Fibre weave on the top panel. Refrain from using anything like a "magic eraser" unless you are 100% sure that it will not do any harm. But having a good personal hygiene helps to not go to extreme to clean your laptop. My slight OCD regarding having clean hands does help in that regard. :-)
For the calibration you need a Display Calibration hardware product like X-Rite or Spyder X. In combination with those hardware and the supporting software, you can colour correct your panels. I bought mine in Australia and they provide the option to have it calibrated directly from the factory. Although, not sure why that is even an "option". For a laptop this expensive it should come calibrated by default for everyone who picks the 4K screen. Also, what is the point of supplying one of the best panel on the market with your laptop where it is not properly colour corrected. Doesn't do justice to this beautiful screen. Anyway, that is just my thought. If you want I can give you the profile file on mine and you can try it out on yours to see if it makes any difference or not. But usually panel profiles differ for every panel, so better to have it calibrated individually. Also, professionals recommend that you calibrate your display every few months. I am thinking about buying one on eBay during Christmas sales, it is a one time investment and just might be worth it over a long period of time. Now all that remains is convincing my other half why I need a toy that I'll only use 3 or 4 times a year. For me, that is the toughest part in this whole "calibration" issue. ;-) .
Hope you enjoy your X1E for years to come. Cheers.
LOL I feel ya, I live in central Oregon where there's trees and more trees.
If your taking Photos with your drone you only want to use the circled polarizer for the most part. Mavic has limited photo capabilitys compared to the DJI phantom pro 4. Reason for this is because you have no aprature control. Without aprature control your photos will look flat and much darker due to the High apprature.
The aprature on the mavic "not exactly sure exact spec" would be something along the lines of Fs-16 "F-stop" so that you can capture the most amount of in focused video. This bennifits video due to the fact you don't have to worry about uniformaty in depth of field across difffent sets of captured video. Video people will Use ND or nutral density filters In place of an aprature because you can still shoot at that Fs-16 keeping your same depth of field but reduce the amount of light hitting the sensor. ND 2 1 F-stop, ND 4 2 FS, ND 8 etc etc. Of course you can do things like Ajust shutter speed and ISO, but when you do that you loose uniformity between your videos.
I always try to stay below ISO 200 with a 125 shutter speed for slow pans and slow flying or Tripod mode, 500 shutter speed for high speed flying or chasing. Then use the ND filters to further adjust my exposure.
As for photos you will want to get a sharpie and mark an area on your lens, then mark your circular polarizer with different keys so you can sorta get an idea how to put it on your mavic. If you hold the polarizer up to the light and look threw it, you will notice when twisting it you will get different levels of hue and saturation. So this is very much trial and error type thing. But once you get it set up it's pretty easy to remember how you put on your lens with the adjustments marks.
If you want to be a protectionist or just have an easier time adjusting your photos or video in post, get your self a large color checker chart. THis will make your life soooooooooo much easier when trying to adjust your final product. https://www.amazon.com/X-Rite-MSCCC-ColorChecker-Classic/dp/B000JLO31C/ref=sr_1_2?ie=UTF8&qid=1502210162&sr=8-2&keywords=xrite+color+checker
The idea is you take a sample photo or video in the location your going to be filming in direct sunlight or average shooting conditions if possible. Then once you go into post you color correct and make all your adjustments to your sample and copy all adjustments to the rest of your photos or video. You will now have near perfect uniformity across everything.
Anything else feel free to ask!
I'd suggest grabbing one of these to see if the lens is missing focus.
https://www.amazon.com/dp/B0041L3JS4/ref=cm_sw_r_cp_apa_5vMSAb8Y014E8
https://lg.encompass.com/shop/model_research_docs/?file=/ZEN/sm/OLED55B6PU.pdf
Page 9. Anyone should be able to do this but would have to be very patient and actually understand what they're doing first. For someone to try to understand that procedure, figure out software, and also learn to use a probe, would take some time but once they had it down could keep all monitors in their house calibrated.
You can get probes that would be enough for a novice on amazon for about $250.
I don't have any advice on software. Everything I calibrate is through LabView or an Agilent/Fluke/Tektronix program. But I've been in different calibration jobs without any significant experience and have been able to learn.
Like the guy said, it's better to have an engineer do it, especially if that resource is available, but there's no reason someone couldn't do it themselves. eevblog also has random information on a lot of things like this as well.
> Once calibrated [the S2716DG] is the best TN panel ever.
Please forgive my inexperience, but how does one calibrate a monitor? Is it the on-board settings display? Do you need external equipment? (If so, $200 for a colorimeter seems a bit much, on-top of the already pricey S2716DG.)
I picked up a calibrator for my monitor, the ColorMunki Smile (https://www.amazon.com/X-Rite-CMUNSML-ColorMunki-Smile/dp/B009APMNB0) and have already calibrated it using the X-rite software, however would like to calibrate using DisplayCAL.
When I load up DisplayCal I cannot get the calibrator itself to show up under the devices tab in DisplayCAL. I know the computer recognizes it because I was able to use the X-rite software but for some reason it's not showing up in DisplayCAL. Any advice or opinions are appreciated!
Every digital camera has a way to do what's called, "white balance", you see it as icons of the sun, cloud and light bulb, some cameras even have the underwater color correction in-camera, but since not every situation is the same, they use a color card with some neutral gray to help the person editing the image.
DGK Color Tools DKK 5" x 7" Set of 2 White Balance and Color Calibration Charts with 12% and 18% Gray - Includes Frame Stand and User Guide
You can find a short video promoting this kind of color balance products:
https://www.xrite.com/categories/color-matching-apps/coloreye
According to the specs you gave your current monitor has a PPI of 90.05 at an aspect ratio of 16:10. The most popular spec is 24" 1920x1080 aspect ratio of 16:9 which has a PPI of 91.79. So not far off to what you have.
If you want to stick to a PPI of around 90-92 you can try to look for 32" 2560x1440p 16:9 monitors. The UI size will be close to what you are used to, though I don't know of any with an IPS panel (which is important in your line of work).
If you want to stick to a 16:10 aspect ratio there's the Dell U2415 at 93.95 PPI.
Lastly, you could look into Ultrawides (21:9 aspect ratio). The Dell U3415W at 109.68 PPI looks good for productivity, but I don't know if you can deal with the curve as some designers can and some can't. Flat ultrawide like the LG 29WK600 is a good option at 95.81 PPI.
Use this PPI Calculator when researching monitors. Higher PPI = sharper image and more work space, but you will need to keep UI size in mind like you mentioned before.
Also don't forget to get a calibration tool like a X-Rite ColorMunki if you're doing professional work.
Some monitors have black crush, i.e. dark gray and black are indistinguishable. People compensate for this by jacking up gamma, which fixes the black crush, but then black is gray and white becomes crushed.
If you're hardcore, get a X-Rite i1Display Pro or cheaper ColorMunki (not tried this one, looks to be the same but slower) and use DisplayCAL to calibrate the monitor. If you're not hardcore, do this black level test. All the low blacks should be visible. But now you probably fail white level test. Hard to get it perfect w/o a sensor.
After I started calibrating I found no need to adjust gamma, because things that were previously uniform black became unique shades of gray. Your eyes might be worse than mine, though.
Buy a color calibrator, or do it very crudely (if you are selling prints I would not do this) and hold your phone next to your MacBook and use the basic software adjustments like contrast, gamma, and rgb settings to match it. A proper color calibrator will ensure your photos are accurate and as even as they can be across all screens. Some of the higher end ones even allow camera and printer calibration. Once again, unless you are just shooting for fun, id STRONGLY recommend actually buying a proper calibrator like these:
Datacolor spyder5PRO or the spyder5elite
x-rite colormunki display or the x-rite idisplay PRO
Buying a colorchecker like this can help you a lot, especially when using cheap equipment that is difficult to control.
Learning how to color-grade footage early on will follow you throughout your career.
If anyone is looking for a monitor calibration device. The colormonki smile is at its lowest price ever on Amazon. Currently $35 https://www.amazon.com/gp/product/B009APMNB0/ref=oh_aui_detailpage_o00_s00
X-Rite ColorMunki Display (CMUNDIS) https://www.amazon.com/dp/B0055MBQOM/ref=cm_sw_r_cp_apa_9aBIAbKFM74X2
Prolly expensive for most people to justify but I needed it for photography. Maybe you could get a used one to help with the price. It's a great tool and it makes the colors match my ips ultrawide.
I’ll check it out. It’s this right? X-Rite ColorMunki Display (CMUNDIS) https://www.amazon.com/dp/B0055MBQOM/ref=cm_sw_r_cp_api_i_T7dqDbT665KKK
I've got this one here. It was super easy to use and the monitors are very close. My only issue I believe is that one is IPS and the other is a much older LCD panel that has a terrible viewing angle.
>My questions begin when I look at all the editing options each one gives.
It's a personal preference, though none of your other questions can be properly answered without knowing what software you will use. While they may provide similar results, how you get there changes with the software choice you make.
I can suggest getting a white balance card and/or a color reference card (this is a cheap one) to help ensure more accurate color when doing landscapes. And calibrating your monitor.
Any recommendations? I’ve come across this same one
Dell's UltraSharps tend to be pretty good, especially their 1920x1200 ones; I have two U2410s that I use for Lightroom and even without calibration they're much more accurate than other screens. The Dells would probably be more accurate than a Korean panel, and for that extra $50-60 you could find a monitor calibrator and software (like this ColorMunki calibrator) and make your screens even more accurate.
You WB is off. Both the temp and the hue look out of whack. Get a gray card like this and be sure to take a shot of it under the lighting conditions before your shoot. Then set the WB from that once you start processing. It will make all you colors be more true.
>You might want to pick up a color slate (similar to what comes with the PADI underwater photographer book) that has the spectrum on it. Flash it up in front of your GoPro once a while so you know what colors should look like and you can go correct it later.
I picked up one of these and it works out pretty nice. LightWorks has a nice feature where you can use an eyedropper and select either the white gray or black card and it will color correct.
Using a Colormunki Display.
http://www.amazon.com/Xrite-CMUNDIS-ColorMunki-Display/dp/B0055MBQOM/ref=sr_1_1?ie=UTF8&qid=1318325216&sr=8-1
You really need to create your own ICC profile using something like an i1 Display Pro
http://www.amazon.com/DGK-Color-Tools-Balance-Calibration/dp/B00AWT2QCE?ie=UTF8&keywords=color%20reference%20chart&qid=1463878067&ref_=sr_1_1&sr=8-1
Just the first result on amazon. Good camera phone would probably work, software I've got is for NEF files (written by some computational imaging grad students I knew back in undergrad) but should be able to do with a camera phone, especially if you can get higher-bit depth RAWs.
I use:
http://www.amazon.com/X-Rite-CMUNDIS-ColorMunki-Display/dp/B0055MBQOM
Some may think I'm silly for dropping the cash on it, but when your ocd gets out of hand, it's been a life saver. No regrets. It creates a color profile based on your display after some testing that it runs through on their app, and viola, my anxiety is gone.
It is very likely that the default calibration of your monitor was pretty good.
With regards to actually calibrating your display, I have this and the best feature is the ability to dynamically adjust the colors based on ambient light. This makes a much more noticeable difference for me than simply calibrating the display once.
Another way is to get a Colorimeter to calibrate/measure 8bit or 10bit color to ensure they are accurate. Which is what most graphic designer/print work professionals use:
https://www.amazon.com/X-Rite-i1Display-Pro-Display-Calibration/dp/B0055MBQOW/
I bought this http://www.amazon.com/X-Rite-EODIS3-i1Display-Pro/dp/B0055MBQOW/ref=sr_1_1?ie=UTF8&qid=1405474564&sr=8-1&keywords=xrite
It basically hangs on your monitor for 2 minutes and tells you what settings to change. It made my drop my blue channel from 100 to 88 and adjust the brightness a little as well.
The result is a little more yellow, which apparently is normal.
A Color Checker should do the trick.
Have you got a camera that can shoot RAW?
https://www.amazon.co.uk/dp/B00LPS46TW + lightroom (there's a specific method to these colour checkers to get the colour/light balance you need) will get you as close as you can without using a spectrophotometer.
This is a decent budget one: https://www.amazon.com/dp/B0055MBQOM/ref=cm_sw_r_cp_apa_i_0UmnDb3P3TRAG
Should use DisplayCal software anyway, so don't have to deal with the manufacturer software which is what all the bad reviews are complaining about.
>all i need to do is plug the DP cable that comes with the monitor into the 1.2 GPU port right, no special cables?
Yes that is correct.
Best way is use a colorimeter like this https://www.amazon.com/X-Rite-ColorMunki-CMUNDIS-Accuracy-Calibration/dp/B0055MBQOM with calibration software, can get cheap old ones on ebay.
http://www.amazon.com/Datacolor-SLC100-SpyderLensCal/dp/B0041L3JS4
Invest in a color card, something like: https://www.amazon.co.uk/Datacolor-SpyderCHECKR-24-SCK200-Color/dp/B00LPS46TW/ref=sr_1_5?ie=UTF8&qid=1551006216&sr=8-5&keywords=color+checker+passport
Resolve can easily correct the captured image using these, then it's a little easier to add your creative grade.
As for a LUT pack? I've never felt the need for one. Admittedly, I'm not a pro nor even a spectacularly prolific amateur, but a decently corrected image is IMHO more than half the battle.
Just buy a chip chart. It is made for this exactly. There is even free software ( Resolve ) that will auto-correct the image from the chip chart.
​
https://www.amazon.com/Datacolor-SCK200-SpyderCHECKR-24/dp/B00LPS46TW/ref=sr_1_2?ie=UTF8&qid=1550376522&sr=8-2&keywords=chip+chart
Nice. Thanks!
Which calibrator do you use? I am considering this one. What do you think?: https://www.amazon.ca/dp/B0055MBQOM/ref=wl_it_dp_o_pC_nS_ttl?_encoding=UTF8&colid=37OHCI4Y1877Y&coliid=I3JRNCS4JIAB1R
The spider's actually kind of suck. These are much more reliable
https://www.amazon.com/X-Rite-i1Display-Pro-Display-Calibration/dp/B0055MBQOW
source: 5 years of color work for broadcast
Thanks. Very helpful.
Another related question. During slates on our show the PA would often hold up a colour chart.
Should I just compile these and throw them at the end of the sequence? That's what I did for episode 1 but the colourist never mentioned it and is away on vacation while I'm prepping Ep. 2.
Exactly.
http://www.amazon.com/X-Rite-CMUNSML-ColorMunki-Smile/dp/B009APMNB0
That's a cheap monitor calibration tool. I ran my ROG Swift through it and have been shocked at how much better the color is on it than my BenQ XL2411z, which also has fairly good colors for TN.
Look into a device like the X-Rite i1Display Pro and the free DisplayCAL software. Love mine.
https://www.amazon.com/X-Rite-i1Display-Pro-Display-Calibration/dp/B0055MBQOW
It was this one
you should invest in some kind of color reference card for your photographs. I feel like the white balance is out of whack in your linked photo, but I can't correct it. A white sheet of paper just isn't a good enough standard, as they vary widely in hue.
Thanks! Do you know why people seem against the Adobe Standard so much (based on a google search of Adobe Standard vs Camera Standard)?
I can't afford a Macbeth chart at the moment, Do cheap alternatives (such as [This] (http://www.amazon.com/Neewer-Photography-Colors-Colorchecker-Classic/dp/B00OZJ5OJ4/ref=sr_1_12?s=electronics&ie=UTF8&qid=1421547835&sr=1-12&keywords=color+calibration) or this or this) to the chart work also? How difficult is it to set up a custom profile with a chart like that?
If you are going to screw with white balance/color management system you need a meter and software. At minimum HCFR and a a colormunki display/i1display pro
http://www.amazon.com/X-Rite-CMUNDIS-ColorMunki-Display/dp/B0055MBQOM/ref=sr_1_1?ie=UTF8&qid=1421683481&sr=8-1&keywords=colormunki&pebp=1421683458220&peasin=B0055MBQOM
If you get the colormunki however you cannot use commercial software like calman in the future.
If your tv has a RGB mode in the settings (it should) where it only shows the red green or blue channel. You can use test patterns and set color and tint atleast without any additional equipment.
They make budget options that when paired with an open source software do a pretty solid job.
I own this model. Highly recommended for the peace of mind. https://www.amazon.com/X-Rite-CMUNDIS-ColorMunki-Display/dp/B0055MBQOM/ref=sr_1_2?ie=UTF8&qid=1480961509&sr=8-2&keywords=colormunki
is this it? http://smile.amazon.com/X-Rite-CMUNDIS-ColorMunki-Display/dp/B0055MBQOM
Since the camera doesn't have a hot-shoe, you're definitely going to have to be more "creative" with lighting.
The gear used in studio portraiture is there because the photographer is controlling all aspects of the shot. You can substitute other equipment to give you similar control, resulting in photos that achieve similar effects. However, without the specialized gear, you'll be improvising. And while you're doing that, you'll need to know what's being accomplished by the specialized gear, and what you can and cannot simulate by other means.
The camera used for most portraiture is generally a DSLR (or 35mm film). The large sensor (in comparison to the point-and-shoots) results in better image quality, and higher resolution images suitable for larger prints. Your camera has a much smaller sensor, so you'll have to be content with the resolution it gives you.
The lenses used are often "fast" -- f/2.8 or wider -- allowing for fine control of the depth of field, and creamy bokeh (the blurry background), which in turn makes your subjects "pop" in the image. Your camera has a single lens, which you cannot change. You should be able to adjust the aperture setting in some of the shooting modes -- you'll have to look at your camera manual to figure out how to do that.
The multiple flashes and flash modifiers allow for fine control the amount, direction, and quality of light. The flashes can be set for varying intensity, moved to different locations, and fire behind softboxes, bounce off walls or ceilings, through a snoot or grid to eliminate spillage, etc. These multiple light sources illuminate the subject, and give depth and texture that gets blown out when using the on-camera flash (note, this happens with both point-and-shoot as well as DSLR cameras -- on-axis flash tends to flatten textures).
Realistically, you only have control of the light. You can use some clip on utility lights similar to these on Amazon, with total spectrum CFLs or incandescent bulbs. You can build some DIY light modifiers (like a screen for a soft-box) to soften the light hitting your subjects. Plus, you can never have enough clip lights for working on stuff around the house!
Combine the clip lights with dimmer switches, and you will be able to vary the amount of light coming from each source. Of course, you'll have to pay careful attention to the white balance of the image, and I recommend getting a grey card or cloth, and shooting that after you change the light intensity. One great tool for this is the Datacolor Spyder Cube, which has 18% grey, white, and black faces, an absolute black hole, and a reflective ball for specular highlights. But again, that adds gear. Without a neutral grey card or the Spyder Cube, make sure you include something white or grey in a test shot to white balance against. If you use something white, just be aware that it's easy to blow out the white when exposing the image, and that makes it lots hard to use as a reference for white balancing...
You can get acceptable results with a single light source (whether that's hot or cold continuous lights, strobes, studio flashes, or something as simple as a North-facing window where all the light from that direction is diffuse reflected light). You can get decent results with a single light and a reflective surface on the other side (effectively behaving like two lights) as the key and fill lights. You get better control with two lights, key and fill. You get better results if you can add a hair light to bring some directional illumination from above. And still better results if you can control the amount of light on the background. In each case, you need to understand what each light is doing and experiment with different placements so that you know what looks best with your subjects.
The other non-gear aspect of studio portraiture is the positioning and posing of your subject(s). That also requires a lot of research and practice...
The best thing about digital though, is you can start shooting right away, and keep looking at what you've done, and keep getting better!
no i mean an actual color calibration unit. One of these to be precise
https://www.amazon.com/X-Rite-i1Display-Pro-Display-Calibration/dp/B0055MBQOW
I've got one and it works great.
https://www.amazon.com/Datacolor-SLC100-SpyderLensCal/dp/B0041L3JS4
All of this is so true it hurts! It's very difficult to find information about the different screens out there. You're right that the info available is just about color space and not other aspects of quality. Also not all reviews out there are reviewing the IGZO model on the laptops that offer it.
Do you happen to know what kind of numbers or specifics I can look for when comparing monitors? Colorspace is easy, because it's a number I can find in the specs. What about display calibration? I've seen some that look like a funky mouse. Is it smart to get something like this?
Accuracy has been something i'm really worried about, but I'm not sure what metrics to look for.
Honestly at this point I'm leaning most heavily toward the XPS 15, but might wait for a new model.
Thinking that you might benefit from one of these.
Calibrate, then look at your previous attempts.
I just went with that one because it was the cheapest option. The Display price on Amazon seems to be much cheaper than the B&H price. https://www.amazon.com/X-Rite-CMUNDIS-ColorMunki-Display/dp/B0055MBQOM/ref=sr_1_1?ie=UTF8&qid=1478906924&sr=8-1&keywords=colormunki
Thanks! Spectrometers aren't that bad. The newer version of the i1Pro I use is about a grand.
Make sure you aren't using any filters at large apertures. I found that this makes a huge difference and can really mess the focus up. Also, get your lens calibrated or do it yourself with one of these
Hard to tell much from the pictures. Miniatures photophraphy is tricky. Here is an awesome tutorial on how to do it to a level of near perfection. But I have some tips from when I started out with just a point-and-shoot camera that might be useful:
Lighting - Someone already mentioned to disable the flash. That's absolutely the right thing to do unless you have a little photo studio setup with seperate flashes setup to key off the camera. Since 99% of the people here don't, what you should use are just some regular lamps. Two lamps slightly above your subject, offset to the left and right, and positioned far enough away to minimize shadows is a great setup. Make sure that they have the same type of bulb that gives off the same color. You can certainly get by with just one light, sometimes even just a room light, but avoid the flash.
Background - Clear backgrounds are best, as it allows the viewers to really just focus on the miniature(s). I used a few clean sheets of printer paper, curving the background sheet so it reduced shadows. The white paper gives the added benefit of "bouncing" light on the model, lighting up the model and reducing shadows.
Camera mode and focusing - Many people use macro mode on their point-and-shoot cameras, but this doesn't always work. Typically this mode is noted by an icon of a flower (for some reason a tulip). Macro mode typically changes a few automatic settings, each camera tends to be slightly different. Play around with this mode and others on your camera to see which one focuses better. Remember that getting close to your mini doesn't make it easier for your camera to focus. The camera has an minimum range on focusing, so you need to find the sweet spot. Cropping a well focused picture is better than trying to fill the frame with out-of-focus subjects.
Tripod - Cheap tripods are awesome for miniatures photography. Even if you're just getting a small desk tripod, a gorillapod, a large sized tripod, or even a phone tripod it doesn't need to be expensive. Expensive tripods are built to be tough for travel, you're likely not doing that, you just need to keep the camera stable and off the floor. You can certainly even get by without a tripod at all if you just stack a few books up or whatever. Really what you need is a way to take a picture with your hands off the camera. Typically all cameras, even phone cameras have a timed shot. Set the timer for the lowest setting, typically 2 seconds. After setting up your shot, and pressing the shutter, you can take your hands off the camera and make sure it doesn't shake or screw up the focus.
Color or White Balance - This can be a bit tricky. Cameras try to automatically adjust to get optimal color from a photo, but sometimes, when lighting or background or subject matter is dominant in color, the pictures end up looking weird. People sometimes describe this as the photo looking too cool/cold (blue hues) or too warm/hot (red hues) and that's usually a sign that the white balance is dorked up. When you take a picture as I recommended with a white sheet of paper as the background, you might see this blue or red hue shift that I'm talking about. You can use a number of free photography editors (like Pixlr) to help you with adjusting this after you've taken the picture. Essentially you're trying to adjust the picture to return white to being white. Trick here is that "white" paper is rarely "pure white" so this complicates matters. Fancier cameras (DSLRs typically) have settings to help adjust and take pictures that are properly balanced, sometimes requiring the photographer to have a reference card to show the camera what white, grey, or black should look like in a photo. Refer to the tutorial I linked at the top of this post for more information on how to achieve this balance using those cards and a DSLR.
That's all I have for photography. Your models look pretty good from what I can see, my one thing... ONE thing would be to drill your weapon barrels, or at the very least paint a little black dot there. Sorry, it's a personal hang-up. As I am a fellow Ork player, I might be able to give you more advice should you need it. Let me know. Here are some of my old blog posts talking about my Orks.
It could be your monitor. I recommend getting one of these if you're serious about digital photography or design of any kind.
I recommend using a colorimeter to make a custom profile. I wanted better contrast and high saturation so I used one of these: https://www.amazon.com/gp/product/B0055MBQOM/ref=ppx_yo_dt_b_search_asin_title?ie=UTF8&psc=1 with display cal to calibrate for like 2.4 gamma.
I've been using a ColorMunki for two years now. Love the little thing. No need to understand how it works, I just put it on my screen once every few months and it does it's thing.
Did my new AOC AG352UCG yesterday :D
I use the colormonki by xrite, love it and made a huge difference when I used to print to my decent canon color copier. Also if you send files out for printing (adorama for example) you should get their color profiles and adjust your images as necessary so it will be wysiwyg.
Black and white probably not that big a deal, but for color it's great.
Every monitor is different, I used to go crazy seeing perfect color rendition on my screen, then looking at the same image on someone else's monitor and eeeekkk! I'm over that now, I reckon 90% or more computer users don't have any clue or care about it.
If they still made plasmas, I'd buy one. The newest, highest-end TVs are getting pretty good, but the OLEDs just aren't as amazing as they are claiming they are. Projectors are still the best for image quality, but they cost an absolute fortune for a real 4k projector and still a ton for a 1080p one (don't trust the Amazon listings, the no-brand "1080p" projectors there are usually 800x600 at best; they just have an HDMI input so they are "1080p compatible".)
I have a color reference sheet that a friend in the printing industry gave me a while ago; i have no idea what the official term for it is, but it's a plastic sheet with the reddest, yellowest, greenest, blue-est, etc shades of each of those colors I've ever seen. It's fun to hold it up to the TV and compare TV green to a 'real' green (and green is so often slightly off-color), TV red to 'real' red, etc. The sheet isn't supposed to be used like this, it's supposed to be used against printed material rather than emissive things so it's impossible to actually get the lighting right for the sheet because the light would wash out the TV image. But if you see it outside I daylight you get a good idea of the full color spectrum. Edit: its a lot like this, except it doesn't have exterior borders so it's easier to hold up to things and compare, and some of the blocks are extremes of the shades rather than 'natural' colors. https://www.amazon.com/dp/B000JLO31C/ref=cm_sw_r_cp_awdb_t1_LZuSDbT4TEZ1R
You people need to calibrate your displays or something. I could see everything just fine.
Get one of these. It's pricey, but it's worth it.
> and the things you could see were tactically awful.
And that is a problem with writing. Which I said is an issue.
That said; the Dothraki thing most people point to isn't actually an issue IMO. They were cavalry, scouting enemy lines and reporting back the way they were supposed to. But yes, there were several other things which were tactically stupid.