Best socket head screws according to redditors
We found 103 Reddit comments discussing the best socket head screws. We ranked the 70 resulting products by number of redditors who mentioned them. Here are the top 20.
We found 103 Reddit comments discussing the best socket head screws. We ranked the 70 resulting products by number of redditors who mentioned them. Here are the top 20.


CHEP has a side mount adapter than doesn't need any special hardware - just the screws that come with the printer.
My only complaint about his side mount design is that it could interfere with the most common style cable chain. But it will work until you can get better screws.
Speaking of which, if this is someone's first printer, they should pick up a package of T-nuts. They're super handy for mounting things on the 2020 extrusion that printers tend to be made from.
And a little assortment of M4 screws to go with it is helpful too, although you can find similar screws at most decent hardware stores.
Wow, I am glad you were able to walk away from that without serious injury. This also happened to me about two weeks ago but I was going at 20mph, fortunately I was wearing a full face helmet and walked away with light scars.
I lost 3 of those 4mm Allen Key bolts and ordered this from Amazon - https://www.amazon.com/gp/product/B07F75DMHF/ref=ppx_yo_dt_b_asin_title_o00_s00?ie=UTF8&psc=1
The kit above has the female bolts that you can use to reinforce the bond between the neck (connector) and main body. If you plan on putting it back together I also recommend using blue threadlocker before putting it back together. You can find it at a auto parts store.
Unfortunately this happens due to importing regulations. From what I was told the bolts are loose due to screening before shipment.
You can replace those big, nasty stock screws with these ones: http://www.amazon.com/gp/product/B00JUV7O2W. Looks way nicer!
Add another one to that group lol. I bought some packs on amazon this and this because I stripped a few pretty bad and noticed that the green screws they send do strip quite easy. It says on the website that they are no longer shipping with the green screws so I wonder what they are shipping the frame with now.
I found some on Amazon and I think I'm set until I die now. About $9-10 for 100 and no allen wrench
These should work?
 
https://www.amazon.com/Stainless-Steel-Phillips-Round-Screws/dp/B012TBN4V4/ref=sr_1_1?rps=1&ie=UTF8&qid=1524932126&sr=8-1&keywords=m2+4mm+screw&refinements=p_85%3A2470955011
 
https://www.amazon.com/Stainless-Machine-Finish-Phillips-Threaded/dp/B00F31PH9U/ref=sr_1_3?s=industrial&rps=1&ie=UTF8&qid=1524932240&sr=1-3&keywords=m2+4mm+screw&refinements=p_85%3A2470955011%2Cp_n_feature_five_browse-bin%3A3177285011%7C3177274011%2Cp_n_feature_two_browse-bin%3A2292861011
Yes, they are handy to have. I bought this and Im glad I have it. Better quality steel than the chinese stuff I have used. I hate when I strip out a hex head because the metal its made from is garbage. You may want to get a kit with some washers and some longer bolts (35-60mm) as well. I find myself needing those. The washers are handy if you are bolting printed parts together, helps to prevent the bolt head from sinking into the plastic. I have also bought little variety packs of different wire plugs/pins for wiring up steppers, controls boards and other things.
There are sets on Amazon with M3-M5 hardware. Here's the one I started with, but note I'm not saying it's the best deal at this time. It's a good place to start. For long fasteners, or larger amounts of just one size, it's usually better to go to Aliexpress or Ebay.
In my own designs I also use a lot of 1/4"-20, although that's mostly because I already had a lot of fasteners that size, plus all three types of taps, plus dies.
motor screws are m3 screws, this is a good place to start but i can't tell how long the screw is so you may want to measure it's length in mm before buying. or if you need it sooner, a local hardware store should be able to match one up for you.
I just went to Amazon.
I got these various bits and bobs:
608 Bearings (about 50 cents a peice)
M2 screws + nuts
M3 Screws + nuts
Got those in, saw that they were philips
Ordered some M2+3 screws + nuts that were hex
Washers came with most of those sets
Some springs, compression and otherwise
Steel ball bearings (I actually don't know what I'm going to do with this)
Nylon Lock Nut set
Might run ya 30-40 bucks but you got a few ways to put things together.
Edit: Some links to get you started
M2 Screws
https://www.amazon.com/gp/product/B01J7NM9JA/ref=oh_aui_detailpage_o03_s00?ie=UTF8&psc=1 - $15
M3 Screws
https://www.amazon.com/gp/product/B01J7IUBG8/ref=oh_aui_detailpage_o03_s00?ie=UTF8&psc=1 - $15
608 Bearings
https://www.amazon.com/gp/product/B002BBICBK/ref=oh_aui_detailpage_o03_s01?ie=UTF8&psc=1 - $6
Nylon nuts
https://www.amazon.com/gp/product/B000K7M37G/ref=oh_aui_detailpage_o03_s01?ie=UTF8&psc=1 - $10
Springs
https://www.amazon.com/gp/product/B000K7M36W/ref=oh_aui_detailpage_o03_s01?ie=UTF8&psc=1 - - $8
Yep. Just check it for you. Its M3 6mm countersunk screw.
Something like this
https://www.amazon.com/uxcell-M3x6mm-Carbon-Countersunk-Socket/dp/B01E5EOIWW/ref=sr_1_26?s=hi&ie=UTF8&qid=1506218941&sr=1-26&keywords=M3+6mm+screw
A small pin screw (included) is used in place of a roll pin for the bolt catch. You will need a small hex/Allen key for this, though I don't recall the size.
The threaded takedown pin hole does accept a #4-40 set screw, though it is not required for assembly. I purchased a bag of 100 #4-40x1/8" set screws from Amazon. If you use one, you will also want to cut down the length of the spring by at least as long as the set screw. Using 1/8" long set screws, I usually cut about 1/8" to 3/16" off the length of the spring.
It's pretty straight forward. Here are the parts I'm using:
Those are the things I bought specifically for this project. The things I already had that helped are:
This post has made me realize I have way to much electronics stuff just lying around...
Do NOT purchase these screws from this Amazon listing.
The head sticks up beyond the bed surface and the screw drive hole or whatever it is called is not centered on most of the screws nor is the cut off the screw drive well cut like is shown in the product image. I'll try to remember to post links to a couple pictures later showing what I mean.
Whatever screws hold everything together(I think they are m3 machine screws? Go online and order a variety pack of that size. It will come in sooooo handy. You’ll end up with thousands of them in no time but it’s good to have an organized set of em around.
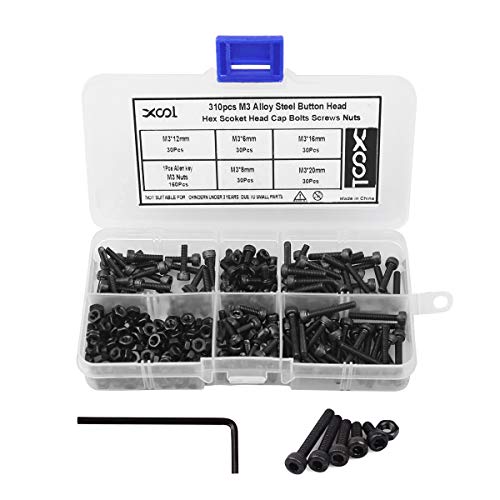
M3 Alloy Steel Hex Socket Head Cap Screws Nuts Assortment Kit, Allen Wrench Drive, Precise Metric Bolts and Nuts Set with Beautiful Assortment Tool Box for 3D Printed Project, 310 Pcs (Black) https://www.amazon.com/dp/B072FKMYMF/ref=cm_sw_r_cp_api_i_nM.OCbB1DY7G7
I'll chime in... had my kit for about 2 weeks now and will share my experience:
Tools
If you don't have some of these, I HIGHLY recommend them.
Assembly isn't too hard, and the directions are pretty good. My main complaint with the directions is that sometimes they don't explain what's important and not important all the time. I spent a lot of time building, taking apart, and rebuilding the base y-axis frame because I thought I did something wrong (it wobbled) to find out that you fix that wobble as one of the last steps.
The 100mm distance that you're required to thread double nuts early in the assembly is absolutely critical by the end of the build for many different reasons. It would be nice if prusa included some kind of printed spacer to make that step foolproof.
Again, assembly is straightforward. I took a span of 3 days to finish mine while dedicating a few hours each night to do it.
Upgrades
A couple of things can be improved on the printer. The printer isn't terribly noisy, but you can make it damn near silent with a few upgrades.
Drill out original rivets, which I assume you did in order to take it apart. Drill pilot holes for tap, be careful not to go too far. Use tap tool to cut threads, make sure to use lube (wd40 works). If you’re unfamiliar with tapping maybe look up a vid on you tube.
Button head screws -
Tap and drill bit
This is the set I bought. Many are usable to replace screws on the Mini V2 (I3)
304 Stainless Steel Screws and Nuts, M3 M4 M5 M6 Hex Socket Head Cap Screws Assortment Set Kit with Storage Box (520 Pcs Hex Button Head Cap Screws Nuts)
https://www.amazon.com/dp/B07KW2N9RD/ref=cm_sw_r_cp_apa_i_8dBACbC68F1VM
I also ordered all these to complete the set up
5-Pack of T-Slot Nuts - Ideal T Slot Nut for Toyota Tunda & Toyota Tacoma Pick-Up Truck Bed Deck Rails - By Mission Automotive https://www.amazon.com/dp/B07739WXJB?ref=yo_pop_ma_swf
The Hillman Group 44018 3/8-16 x 1-Inch Button Socket Cap Screw, Stainless Steel, 5-Pack https://www.amazon.com/dp/B00IZFS0VI?ref=yo_pop_ma_swf
Quick fist clamps https://www.amazon.com/dp/B000CQPANY?ref=yo_pop_ma_swf
Plus Washers at my local hardware store
not exactly cheap or all encompassing but i'd probably go with this assorment
VIGRUE M2 M3 M4 1080PCS Stainless Steel Screws and Nuts, 1080 Pcs Hex Socket Head Cap, Silver https://www.amazon.com/dp/B071KBVZVV/
I just ordered some assorted length m6 bolts on amazon (https://www.amazon.com/dp/B07PV9536J?ref=ppx_pop_mob_ap_share) and found some 1 inch steel spacers at a hardware store
This is the bracket I used. It works fine in PLA, and mounts in the control box to the same screwholes as the mainboard. It fits the extremely common style of mosfet board like this one, which comes from a bunch of manufacturers but are all the same size and shape.
While you're at it, you'll probably want to pick up a set of assorted lengths M3 screws like these ones - both the mosfet and Z brace mods will require you to replace some of the screws with longer ones.
I found this useful:
https://smile.amazon.com/Stainless-Precise-Tapping-Washers-Assortment/dp/B07F75DMHF/ref=sr_1_1_sspa?crid=2PA9RB06RY5JO&keywords=metric+screws+assortment&qid=1568049527&s=gateway&sprefix=metric+scre%2Caps%2C304&sr=8-1-spons&psc=1&spLa=ZW5jcnlwdGVkUXVhbGlmaWVyPUEzSDRGVTFGMjlNOFNXJmVuY3J5cHRlZElkPUEwMDUwNzU4SlVQT1JYQ1RCUVJVJmVuY3J5cHRlZEFkSWQ9QTA2NzY3NzIyMElEWEU5QThIRUxaJndpZGdldE5hbWU9c3BfYXRmJmFjdGlvbj1jbGlja1JlZGlyZWN0JmRvTm90TG9nQ2xpY2s9dHJ1ZQ==
​
It's an entire box of screws. A lot of the projects on Thingiverse also use metric screws, and it's handy to have the box there.
Sorry, had a storm a few days ago and the power went out. I got distracted and forgot.
​
I used 10-32 machine screws like these for the trunions. You'll need ten of them but buy plenty of extras. You'll have to cut the six for the front trunion very short since they will hit the barrel if left to long. The easiest way to that is to put a nut on the screw and then cut it to length, when you take the nut off it helps fix the threads that were damaged from cutting. DO NOT OVER TIGHTEN THESE! Since there isn't a lot of material for them to screw into it's easy to strip them. Put some Loctite on them and get them snug.
For attaching the trigger guard I used socket cap screws since the heads on them are smaller, there isn't much room for them. You will need five of these along with nuts.
Any hardware store should have these, I'm pretty sure I bought them at Lowes or Home Depot. You'll also need some type of threadlocker, I used Loctite Blue #242. The tap for threading the holes is a 10-32 tap (obviously) and it uses a #21 drill bit (5/32 will also work fine). If you've never used a tap before watch some youtube videos or something first. Go slow, use oil, and back it out to clear the chips frequently.
​
Here are some pictures of mine -
https://imgur.com/a/v4oDgAO
15 years and thousands of rounds without a problem. Rivets look better but screws work fine. It's currently painted with BBQ grill paint, I want to Cerakote it but I keep telling myself I'll do it when I eventually get around to replacing the screws with rivets. Chances are I'll never get around to it.
​
If you have any problems or questions along the way feel free to send me a message.
for most of them it doesn't matter which style.
these are button head, but I prefer the socket head type.
I would actually just buy one of those assortments for M 2.5 and M4 as well and that should cover you for almost anything in the future. Nut and/or nutsert assortments are really handy as well, as I've managed to strip out a couple of the threads on the side panels.
I'm glad you asked this. I had been using the screws out of this kit, but as they are nylon, the strip easily and that's how a screw snapped out of the case above. I'd recommend against using these. To be honest, I'm not sure where to get the kind of screws that come in a Pok3r, for instance. A kit like this might do the trick, but it's so many other screws... If anyone has a good source of steel screws for 60% builds, I am all ears.
You have to really watch those cables under your Mini. They can bump into the belt easy.
I just printed the following; you will also need some screws.
https://www.thingiverse.com/thing:2302588
https://www.amazon.com/dp/B014ONCP88/ref=cm_sw_r_sms_c_api_l3BkzbJ4XBJ9Y
Trencher Shovel:
Manufacturer's site for specs: https://www.crkt.com/trencher.html
Amazon link for a better price: https://www.amazon.ca/gp/product/B01M0G10O4/ref=ppx_yo_dt_b_asin_title_o02_s00?ie=UTF8&psc=1
Mounting Pieces:
Quickfists: https://www.amazon.ca/gp/product/B000CQPANY/ref=ppx_yo_dt_b_asin_title_o03_s00?ie=UTF8&psc=1
T-Slot Nuts: https://www.amazon.ca/gp/product/B009SWGLHW/ref=ppx_yo_dt_b_asin_title_o03_s00?ie=UTF8&psc=1
Screws: https://www.amazon.ca/gp/product/B00IZFS0VI/ref=ppx_yo_dt_b_asin_title_o03_s00?ie=UTF8&psc=1
You will need a Drill and a 3/8" or 1/2" drill bit. Drill out the stock hole in the bottom of the quickfist to make the hole larger, the screws will then fit through. Put the T-Nut in the bed-rail and slide it down to where you want it. Screw the Quickfist to the T-Nut and you get what you see above! Insert your tool of choice!
threads and screws have to be the same size to fit so if you use a m5 thread you need a m5 screw to fit the thread. sucks to hear that they are hard to find where you are, you can get them on Amazon https://www.amazon.com/s/ref=nb_sb_noss?url=search-alias%3Daps&field-keywords=wood+thread+insert+m5&rh=i%3Aaps%2Ck%3Awood+thread+insert+m5 screw i used are m5*16mm but had to cut of a few mm because they were to long, something like this https://www.amazon.com/80-20-11-5520-Metric-Socket/dp/B00JUV7O2W/ref=sr_1_1?ie=UTF8&qid=1487508457&sr=8-1&keywords=head+screw+m5 but you also would have to cut off a few mm as they are 20mm but no big deal
This is the part I bought to still get a chin mounted position with a pesky mouth vent.
https://www.amazon.com/gp/product/B00PRIWJAY/ref=oh_aui_detailpage_o00_s00?ie=UTF8&psc=1
I also had a problem with the gopro screws. They were so long they were jutting into my chest and my shoulders when i'd turn my head to turn or check for cars. I bought these which are much lower profile to fix that.
https://www.amazon.com/gp/product/B00JUV7O2W/ref=oh_aui_detailpage_o09_s00?ie=UTF8&psc=1
The assembly feels a little loose since the screws aren't as long as i'd like them to be, but overall it's held together on rides. Got up to 70mph and it was fine. Then again, my windscreen blocks everything aside from the top of my head which still gets buffeted.
Hope that helps!
> I am looking for tools that I will need for general printing and maintenance
Set of tweezers to remove stringy plastic oozing from extruder, soft wire cutter makes snipping end of filament a breeze, assorted m3-m6 hex nuts and bolts will come in handy. Maybe some combination wrenches
And if you want to run octoprint, a raspberri pi, camera, & power supply.
First I center punch the rivets on the bottom with one of these-
Bastex Steel Automatic Center Punch For Stable Hole Drill Indentation. with Adjustable Tension, Push-to-strike Function. https://www.amazon.com/dp/B072HSWV3B/ref=cm_sw_r_cp_api_i_6smvCb6ZKRCC8
Then I will use a 1/4” drill bit to take the head of the rivets off so the body and base can be separated. Just be slow and careful at this point so you don’t damage the base. Sometimes you may need to use a smaller bit on this part so just check and see what works best for the application.
Then I drill down about 3/16” into the rivet with one of these drills and then tap the hole with the tap-
Du-Bro 360 2-56 Tap And Drill Set https://www.amazon.com/dp/B0006O4GYG/ref=cm_sw_r_cp_api_i_KrmvCbDECZ061
Then I install one of these to make sure it fits correctly and holds everything together properly after all the work is done. You could also do a 2-56x3/16” screw if you want one a little bit longer-
2-56 x 1/8" Button Head Socket Cap Screws, Allen Socket Drive, Stainless Steel 18-8, Full Thread, Bright Finish, Machine Thread, Quantity 100 By Fastenere https://www.amazon.com/dp/B00YSS9CYA/ref=cm_sw_r_cp_api_i_ormvCbP5S7Q34
I think that’s about it. Send me a DM if you have any other questions.
M2 x 4mm 304 Stainless Steel Phillips Round Head Screws Bolt 60pcs https://www.amazon.com/dp/B012TBN4V4/ref=cm_sw_r_cp_api_i_aZE9AbJCSJDM0
I have a few boxes of misc nuts and bolts, which happen to include M3x20 (it's a fairly common size)
Something like this: https://www.amazon.com/Hilitchi-210pcs-Stainless-Socket-Assortment/dp/B014ONCP88/ref=sr_1_1?ie=UTF8&qid=1468998197&sr=8-1&keywords=m3+assortment
Get this or something similar: https://www.amazon.com/Hilitchi-210pcs-Stainless-Socket-Assortment/dp/B014ONCP88/
Theres a bunch of mods that require various sizes of m3 screws, having a variety pack around great.
https://smile.amazon.com/Hilitchi-420pcs-Stainless-Socket-Assortment/dp/B014OO5KQG plus https://smile.amazon.com/Hilitchi-180pcs-Stainless-Assortment-Sockets/dp/B017N7ZI72
Those and a pack of M5x10mm that I use with 20mm extrusion T nuts cover 95% of my DIY 3D printer fastener needs.
I think many would be interested if you find a source for better replacements.These might be suitable replacements.
I use these ones for 3.5" disks: https://www.amazon.ca/gp/product/B01E5EOIWW/ref=ppx_yo_dt_b_search_asin_title?ie=UTF8&psc=1 I've used them in Dell, HPE and Supermicro trays. They fit them all
and these ones for 2.5" disks: https://www.amazon.ca/gp/product/B00NQ06EOC/ref=ppx_yo_dt_b_search_asin_title?ie=UTF8&psc=1
Buy
($6)Wires:For the MOFSET mod
($1o)MOFSET
($6)Wire spades:For the MOFSET mod
($8)Assorted M3 Bolts:You need some for a few mods and for the bolts you will inevitably strip on this
cheapwonderful machine($13)Longer assorted M3 Bolts:For a few mods
($9)M4 Bolts:For one of the mods
($9)Metric allen wrench set:Had to order one of these since metric tools aren’t common round these parts
(~$20) PLA of preferred choice- You’ll run out of the sample bit quick so go ahead and order a roll or two to be prepared. You will note some upgrades require ABS so a small spool of that to your order will also help.
($6)M3 Lock nuts:Critically needed for a simple mod
($10)Threaded rod and nuts:Please note that this item seemed difficult to find online. I recommend going to your local hardware store and getting two 5/16” rods of at least 16” in length. They should have an assortment of threaded rod in various lengths available. Also note that the pitch of the threading matches the nuts you buy. Further instructions regarding this can be seen in Azza’s Z-Axis braces below.)
($6)9mm Wrench for the nozzle: Don’t wait for your first clog, go ahead and have this on hand to remove/change the nozzle. Note to only tighten/loosen the nozzle when heated.
Below is the order of printable upgrades I recommend but I suggest you mix in a few other prints along the way because this is a hobby after all and you should be having fun. It helps to have your quality as tuned in as much as possible for some of these so be patient and keep trying if you need to.
Print
Spool holder- temporary : Until you can mount your spool on top of the enclosure or any other personal preference.
Belt tensioner- print x2
Z-brace
Shielded stop button
Cable relocator : It’s a pain, but if you spend the time to do this and turn your extruder motor 90 degrees then you can get the full Z height without ruining your cables. It does involve opening all the cables to the PSU and feeding a few extra inches back through the cable chains.
Cable shroud : Looks nice if you do the cable relocator.
The following need to be printed in ABS:
M3 Bed Nut retainer: 10/10 upgrade. I know they look worse than the nice metal stock ones, but these help keep your bed level longer.
CiiCooler
Glass bed Holder
Now that the first major round of printed upgrades is done it’s time to shift to a few more supplies to pick up to really fine tune the machine.
Buy
($5)Radial fan: For CiiCooler
($5)Glue sticksThis and a glass bed is magic
($25)Borosilicate glass 8” x 8”
($26)Y-Carriage plate upgrade: This has been a nice upgrade as I now only need to relevel the bed every couple weeks instead of every print. Check out this guide for a ‘how to’ as well as a free upgrade by shifting your Y pulley over.
($15)rechargeable dehumidifier: For keeping in the bin with your opened filaments
($9)Extruder gears: Might be able to hold off on these, but will need eventually. If for some reason you have a Maker Select with metal X-axis blocks (V1 and V2, but not V2.1) then this is a must. You can follow this guide for a how to.
($28)Metal extruder plate and lever: Not needed, but nice.
($14)Noctua 40mm fan: Not needed, but makes the printer a lot quitter. A LOT quieter.
($50)MicroSwiss All Metal Hot End: The destruction of my PTFE tube by this point pushed me to doing this upgrade. If needed you can follow this guide for replacement. Remember to tighten/loosen when the nozzle its hot.
($6)Ceramic cotton: Tore off the stock one when replacing for the all metal hot end by accident. At least its thicker than stock
Now that the printer is in its final form, its time for the enclosure which is a stacked Ikea Lack hack.
Print
Spool holder
Pi Case
120mm fan cover
Fan grill
120mm fan PSU modification: I edited this to fit upside down since my PSU is mounted on the underside. This was nice since I blew the 40mm fan anyways so it made everything a lot quieter than before.
IKEA Lack filament guide
Webcam holder: This is one I designed specifically for the webcam I happen to have lying around. The camera mount piece can be changed out no problem though for what ever webcam you have or buy. The SketchUp file is included on Thingiverse for such purpose.
Buy
($20)2x Ikea Lack: Luckily there is one right down the street from me. I am located in North America though, so we do not have the STUVA, if you live literally anywhere else you may check in to this as an alternative.
($80)Plexi glass for enclosure: Could be cheaper alternatives, but it looks cool
($9)Foam pads for feet
($42)Raspberry Pi3: For OctoPrint. I also suggest using a different USB cable than the stock one provided by Monoprice or you will have issues.
($9)2x 120mm fans: Used for the power supply cooling and enclosure
($6)Rocker Switches so that the enclosure fan can be on for PLA, but off for ABS
($15)Dimmable LED lights
($10)8mm LED light connectors
Total:
$250 printer + $452 upgrades/parts + ~$80 PLA/ABS to date
I dunno. Aero doesn't really offer anything that you can't DIY pretty easily other than finish and I do like to rattlecan guns. As soon as we replace the oven in the kitchen, that might be migrating out to the garage to see if I want to get into Cerakote.
> The intergrated trigger guard is really nice
I like the ability to pick and choose, but I usually default to MagPul plastics.
> threaded bolt catch is a god send of making the hardest part of the lower build the easiest
Knipex flat jaw pliers for all the roll pins makes it super simple.
> I like the set screw in the back
4-40 tap and tap wrench along with a phat sack of these. If you chop a couple coils off the safety detent you can tap and thread that for the same screws as well.