Best optoelectronic lamps according to redditors
We found 77 Reddit comments discussing the best optoelectronic lamps. We ranked the 46 resulting products by number of redditors who mentioned them. Here are the top 20.
We found 77 Reddit comments discussing the best optoelectronic lamps. We ranked the 46 resulting products by number of redditors who mentioned them. Here are the top 20.


Not trying to sell anything but I believe they used this
Monitor: Asus 29'' Ultrawide Monitor - http://www.amazon.com/gp/product/B00ENCTVDS/ref=oh_details_o00_s00_i00?ie=UTF8&psc=1
Lights: Daffodil Touch Lights - http://www.amazon.com/gp/product/B00J5DZJJU/ref=oh_details_o00_s01_i01?ie=UTF8&psc=1
Mice: Razer Mabma (I think need to double check) and Apple Magic Mouse
External Hard Drive - Seagate Backup Plus 3TB (Totally worth it!)
Keyboard: something dell?
Computer(s): Running on screen-MacBook Pro Retina Mid 2012. 4GB Ram, 2.3ghz processor.
Custom build - Will post details when I'm home!!
I will take a better picture when I am home too!
Not including the 3d printer or filament, or my soldering iron and other necessary tools:
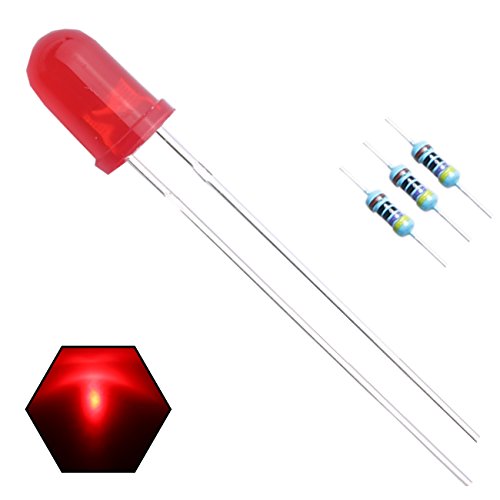
LEDs: $12.57
Resistor 47ohm: $6.12
Diodes: $5.59
Gateron greens: 17@ $.90/per
I would use LEDs and a small 9 volt battery to keep size/weight down. you could add more 9 volts to increase capacity.
http://www.amazon.com/microtivity-Clear-White-Resistors-Pack/dp/B004UZCMRK/ref=sr_1_11?ie=UTF8&qid=1314079567&sr=8-11
To get the 9 volt voltage drop with these LEDs, you would need 3 parallel wired sets that were in series of each other.
It really depends on what your end goal is.
If you want to stick with Atmel, then buy an Arduino or Arduino clone. This will cost you ~$40 or so depending on which model you decide on. With an Arduino, you can use the Arduino libraries, or write low level code (I suggest at least trying low level code). If you decide you want to build projects with stand alone AVR's, then it will be a good idea to purchase a flash programmer as well ($10 to $20). The chips that come with an Arduino contain special code that lets you load new firmware over a serial link (called a bootloader). Raw chips lack this, so if you want to program a bare chip, you need the tool. You can even just use the tool to flash the arduino bootloader onto a bare chip.
If you aren't sold on Atmel, TI offers a very competitive option in the MSP430 Launchpad ($10). There is a port of the arduino code and IDE for this board (Energia), so you can still get the arduino experience if you wish. Otherwise, learning to program MSP430's at the low level really isn't that tough once you get a feel for it. Besides, the cost, a big advantage TI's offering has is that the dev board contains a built in programmer, which can be used on external chips. When you move to a stand alone chip in a project, you can program the bare chip by running 4 jumper wires from the dev board to the project....so there is no extra programmer to purchase. If you were to replace the ATTiny in the project with a MSP430G2210, you could accomplish the same thing and program it with the launchpad
Once you have a dev board, I would pick up a solderless breadboard and jumper wires (less than $10 on Amazon). Based on your project idea, I would also either buy a small resistor pack (~$10) and some LED's, or something like this. That would get you started towards building your project on a breadboard.
I'm using 5mm LEDs for the GC. The pads are super sensitive to getting stripped, so I strongly recommend globbing on solder and connecting the two points, then heating the solder and removing the original LED with tweezers. After that, just pop some solder braid on it to suck up the excess and you're ready to get the new LED installed. As for what LEDs to grab, these are similar to the ones I picked up - https://www.amazon.com/Emitting-Diodes-Waycreat-Assorted-Arduino/dp/B071HV5F6L/ref=sr_1_8?ie=UTF8&qid=1523238346&sr=8-8&keywords=multicolored+5mm+leds - as a general rule of thumb for console LED mods, grab clear bulbs with colored diodes. Colored bulbs are super dim and the color looks washed out, you get way better results with clear ones.
http://www.amazon.com/gp/product/B00J5DZJJU/ref=oh_aui_detailpage_o09_s00?ie=UTF8&psc=1
The led/resistor (resistor is the only thing really needed) makes it think the top screen is connected.
LED is colored, i used these:
https://www.amazon.com/gp/product/B077XBFZH9/ref=ppx_yo_dt_b_asin_image_o01_s00?ie=UTF8&psc=1
its fine, easier to ask sometimes.
I'm going to take a guess that these are way too expensive for what they are.
edit: That is a yes
[[](https://www.amazon.com/LEVILUNA-Magnetic-Levitating-Seamless-Decorative/dp/B077XMBK96)removed link this thread was made by spammers] 190 for the one on the left and 220 Dollaroos for the one on the right.
Yessir! Chanzon 100 pcs 2x3x4 mm White LED Diode Lights (Square Rectangle Clear Transparent DC 3V 20mA) Lighting Bulb Lamps Electronics Components Light Emitt https://www.amazon.com/dp/B01C5HL0PO?ref=yo_pop_ma_swf
What led's are you wanting to use?
The fact is what you will need to do is find out how much power the led's will require to run each, than multiply that by how many led's you require. Example:
THEASE LED'S https://www.amazon.com/EDGELEC-200pcs-Emitting-Assorted-Resistors/dp/B077XBFZH9/ref=mp_s_a_1_5?ie=UTF8&qid=1541525214&sr=1-5&pi=AC_SX236_SY340_FMwebp_QL65&keywords=led&dpPl=1&dpID=51r07AcVK3L&ref=plSrch
Use 20ma each. So if you use 70 of them it will be 1400ma or 1.4 ampre just for the led's. The micro will require a quarter amp. And then you will need transistors to turn the led's on and off because the micro can not source them and lastly power limiteing resistor loss. So my best guess you will be looking at a 3 amp 5v power supply to run this project using the items I listed.
And YES you can wire the power supply in parallel so one plug can power the entire project.
You can look around and find better led's, or use less of them, etc. I just used this as an example. That's all. Hope this helps. Let me know if I can assist you any farther.
P.s. that math is if all the led's are on at the same time!
Here’s a listing of all the included material
eBoot 30 Pieces Photoresistor Photo Light Sensitive Resistor Light Dependent Resistor 5 mm GM5539 5539 https://www.amazon.com/dp/B01N7V536K/ref=cm_sw_r_cp_api_i_-wV6CbC6051BJ
Beadalon Artistic Wire 30-Gauge Bare Copper Wire, 30-Yards https://www.amazon.com/dp/B0048927RI/ref=cm_sw_r_cp_api_i_vEV6CbC9KF2ZQ
MCIGICM 200pcs 2n3904 npn Transistor, 2n3904 Bipolar (BJT) Transistors NPN 40V 200mA 300MHz 625mW TO-92-3 https://www.amazon.com/dp/B06XRBLKDR/ref=cm_sw_r_cp_api_i_UEV6Cb66Z0SC2
3mm Diffused LED Diode Assortment Kit - Pack of Assorted Color LEDs and Resistors (1000 pcs) - Red, Green, Yellow, Blue and White Light Emiting Diode Indicator Lights from Plusivo https://www.amazon.com/dp/B07GBFJ823/ref=cm_sw_r_cp_api_i_dFV6CbWBSS5AD
Would a bundled set like this be usable in my situation?
My ideal value resistors should be 150 Ohms and 100 Ohms. This bundle comes with only 200 Ohms. At that rating, will the LED's be bright enough under a 5v power supply? If it is, then I will just order this set as it is far cheaper than sourcing out the parts individually.
You mentioned 400 Ohms... can I wire up 2 200 Ohm resistors in series to get to 400 Ohms?
Hi DIY!
I'm trying to assemble a list of products (via amazon prime for time and location reasons) to do a project with my partner on his birthday Sunday with a budget of $25-30. I think he'd get excited for (and I can manage!) LED paper circuits. Luckily we have a soldering iron and multimeter around the house. Here are the products I've whittled down to with no idea at all what I'm searching for except advice from tutorials:
Copper tape - Amazon link HERE
LEDs - Amazon link HERE
Batteries - Amazon link HERE
Do these choices look okay, and if not would you suggest any alternatives? Thanks so very very much for any help!
Hey there JVC amp and turntable buddy! I'm rocking the sa-77! That said I would reccomend upgrading the speakers first, I upgraded to KEF Q100s, they go for around 250-300$ and on my JVC sound amazing! Also if your lights are out put in some LED bulbs!
So, I'm realizing now that this project is getting expensive for me if I want to go the LED route... Which I do, really bad. But just the LED strips cost 15+ USD and it's looking like I also need some kind of power supply for the strip itself too? Like I can't just power the strip from the Pi? That sucks, and so buying a power supply is looking like it's going to cost me even more money, also like 15+ USD. And then as I'm reading reviews and stuff on these LED strips, I'm seeing people saying I need a capacitor and a controller? I don't know anything about these things and am lost again. This is quickly moving out of my budget range, and that really sucks.
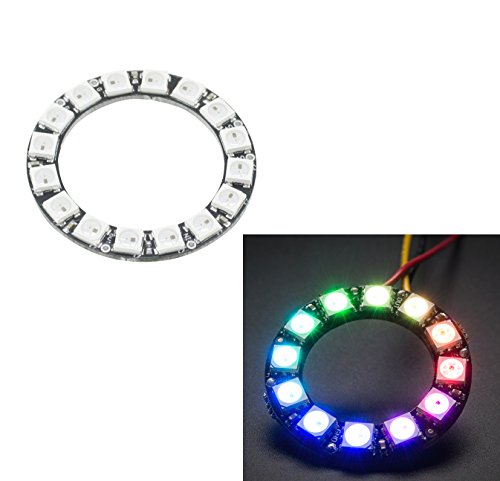
What about an LED ring like this? Would these be reasonably bright and less expensive to power and control? Or would I still need external components for something like this, like a breadboard and those relay wire things?
Actually, #1 should be one of these:
https://www.amazon.com/dp/B077XCM7QZ/ref=psdc_2314207011_t1_B006S21S5U
(An LED that just blinks when dropped into any circuit)
Amazon.
Edit: should also note, I have them powered through a 12v BEC from an old quadcopter pdb but any 12v buck converter will work
EDGELEC 200pcs 10 Colors x 20pcs 3mm LED Light Emitting Diode Assorted Kit 29mm Lead Clear Round Lamp White Red Blue Green Yellow Purple/UV Ultra Bright LEDs Bulb +300pcs Resistors For DC 6-12V Lights https://www.amazon.com/dp/B0785DLY5T/ref=cm_sw_r_sms_apa_i_Nw1PDb57466VW
I used these LEDs:
https://www.amazon.com/gp/product/B0785DLY5T/ref=ppx_yo_dt_b_search_asin_title?ie=UTF8&psc=1
​
I then wired the long wire to a pin in the Teensy. he short wire I soldered to a resistor. The resisters were all soldered to 1 wire than ran to the GND pin on the teensy. Here is my LED code:
​
void matrix_init_user(void) {
DDRD |= (1 << PD7); //init D7 (Blue)
PORTD &= ~(1<<PD7); //turn off D7
DDRB |= (1 << PB5); //init B5 (Red)
PORTB &= ~(1<<PB1); //turn off B5
DDRB |= (1 << PB6); //init B6 (Green)
PORTB &= ~(1<<PB6); //turnoff B6
DDRD |= (1 << PD5); //init D5 (Yellow Green)
PORTD &= ~(1<<PD5); //turn off D5
DDRC |= (1 << PC7); //init C7 (Yellow)
PORTC &= ~(1<<PC7); //turnoff C7
}
uint32_t layer_state_set_user(uint32_t state)
{
// if on layer _NAS, turn on D7 LED, otherwise off.
if (biton32(state) == _NAS || biton32(state) ==_NS2) {
PORTD |= (1<<PD7);
} else {
PORTD &= ~(1<<PD7);
}
// if on layer _ACT, turn on B5 LED, otherwise off.
if (biton32(state) == _ACT) {
PORTB |= (1<<PB5);
} else {
PORTB &= ~(1<<PB5);
}
// if on layer _NUM, turn on B5 LED, otherwise off.
if (biton32(state) == _GUI) {
PORTB |= (1<<PB6);
} else {
PORTB &= ~(1<<PB6);
}
return state;
}
//Lock Key Functionality
void BeginLock(void)
{
lock_active = true;
lock_searching = true;
PORTD |= (1<<PD5);
}
void LockKey(uint16_t keycode)
{
locked_key = keycode;
register_code(keycode);
lock_searching = false;
PORTD &= ~(1<<PD5);
PORTC |= (1 << PC7);
}
void EndLock(uint16_t keycode)
{
lock_active = false;
unregister_code(keycode);
locked_key = 0;
PORTD &= ~(1<<PD5);
PORTC &= ~(1<<PD7);
}
bool process_record_user(uint16_t keycode, keyrecord_t *record)
{
uprintf("KL: kc: %u, col: %u, row: %u, pressed: %u\n", keycode, record->event.key.col, record->event.key.row, record->event.pressed);
if(keycode == KEY_LCK) // lock key is pressed.
{
if(record->event.pressed == 1) //Do nothing special on key down
{
return true;
}
else //On key up, toggle on/off
{
if(lock_active == true) //If lock is active then turn off
{
EndLock(locked_key);
return false;
}
else //if lock off, turn on
{
BeginLock();
return false;
}
}
}
else if(lock_active == true) //Lock is active, need to execute steps that don't involve lock key
{
if(lock_searching == true && keycode <0xFF && record->event.pressed == 0 )
//Lock key pressed, which turned on search. Key needs to be valid. On key up, set as locked key
{
LockKey(keycode);
return false;
}
else if (lock_searching == false && keycode == locked_key) //if the key has already been set, ignore the button press
{
return false;
}
//if searching is false or its a quantum key, then continie on.
//if the locked key has already been set, a normal button push will add to the effect
else
{
return true;
}
}
else //Non-lock related keypresses
{
return true;
}
}
EDGELEC 100pcs 5mm Yellow Flicker Flickering LED Diodes Candle Flicking Lights Clear Round Top 29mm Long Feet DC 2V Light Emitting Diode Lamp Bulb +100pcs Resistors (470ohm for DC 6-12V) Included
https://www.amazon.com/dp/B0785G1SBP/ref=cm_sw_r_cp_api_i_ZCUPCbJM7254D
Here is a similar one (18") for $300
It's a uv led behind the pink eye part.
Here's the link to what I used.
EDGELEC 20pcs Prewired 0603 UV (Ultraviolet) Mini 390-395nm SMD LED Light Emitting Diode DC 3V Micro Litz Length 7.8in. (20cm) Soldered Mini Purple LED Lights for DIY Manual Model Toy Decoration https://www.amazon.com/dp/B07FN6D4K6/ref=cm_sw_r_cp_apa_i_1M8mDb5TM7EAX
Well, breadboards run pretty cheap... And size matters here. Sometimes a smaller board is better, but a large board gives you more room to work with. So I'd recommend getting both! A small board will be nice for smaller projects, but larger boards will be nice for more in-depth prototyping that require more room to work with. And he can always use a small area of a large board when he doesn't need it all... but a large board won't fit into a small boat or airplane if that's what he is doing... So, at a good price, both can be beneficial.
Other than that, he'll need jumpers (male/female), and maybe a ribbon cable. Ribbon cables need a T-board (or equivalent) to connect to the breadboard with, but jumpers just plug into the GPIO pins. With a small breadboard, jumpers are favorable, as they only take up as much space as one pinhole, and they come in many different colors and lengths. A larger board can accommodate a ribbon cable and T-board more readily... a T-board can take up a LOT of space on a small breadboard REALLY quickly.
Word to the wise: if you buy a ribbon cable and T-board, you are going to want to know what type of Pi he has. The original versions had fewer GPIO pins than the B+ and the A+ versions. This means that a larger ribbon cable wouldn't work with the original Pi's. If he has an A or B, a 40 pin cable/T-board wouldn't work as they're designed for the newer B+ and A+. If you need help identifying which board he has, we can help you with a photo or a description of the board...
Also, a resistor kit and a capacitor kit would be good to have, if he doesn't already have them. Most projects require that you use resistors/capacitors somewhere, and the kits usually come with several of the most used resistors/capacitors, which should tie him over for some time.
Then you should get him an LED set. LEDs are nice because they can be used as a "proof of concept" tool. Since everything into and out of the Pi is digital, all you are doing is giving an item voltage. So it doesn't matter if you're using a buzzer, motor, servo, or LED... they will all work interchangeably. He can use an LED to prove that his code and wiring works when the light comes on... then, when it all works, he can swap the LED for a buzzer or something, and everything should still work, just with sound instead of light.
You could also buy him some sort of case, but these aren't always necessary. I don't use on on my Pi, and it works just fine... I just have to make sure I'm not shorting it on anything, or breaking it in some stupid way. These vary so much in design and price, I'll let you search for them instead of providing a link... just remember, like the ribbon cable, cases will obviously depend on the model he has.
Personally, I would stay away from potentiometers and photoresistors since the Pi only has digital inputs. Both of these items would need to be attached as analog items to work properly, and that means buying extra boards for correct functionality. The Raspberry Pi can not natively read analog inputs, so these items would only be frustrating to him since he can't use them without extra parts.
This should get him started in coding and prototyping. If he's looking for motors, servos, or speakers, you can get him those too, but they're not necessary to tinker with a Pi.
There are also kits that offer these items, but they're usually more expensive than they have to be, and they may or may not have everything you're looking for. Also, there are other places to shop for these types of things, but I use Amazon because it was the quickest and easiest place to search for examples of all of these things for this post. If you're smart with your shopping, you can get all of these items for ~$100, and might be able to have them shipped before Christmas... but you're going to have to hurry.
EDIT: Added links since you said you knew "nothing" about these items. This should make searching easier since you can actually see what I'm talking about...
Honestly, i don't like it. Here's why: all you customize is bunch of leds, you can just buy a goody bag(http://www.amazon.com/microtivity-IL188-Assorted-Resistors-Colors/dp/B0060FGA8A/ (comes with tons of resistors, more than you need) from amazon and that makes your entire thing pointless. Also it's damned pricey.
If you included a real selection list of things like different sensors(acceleromters, gyros, magnetometers, preassure, level, light, sound), different actuators(motors, servos, etc..), assortment of indicators(led, ir, 7 segment, led matrix/grid, lcd screen), shields(usb host, xbee, motor drive, relay), ic packets(regulators, logic gates, op amps, shift registers, etc...) and stuff like that at reasonable prices then I could see it being something great, but otherwise i just think it's pointless.
I've decided to mod the stock LED light that comes with the Fluval Spec V. I know I'm going to need to upgrade to something with more power eventually, but in the meantime I wanted to do some experimenting. I ordered a color assortment of 5mm LED's from amazon for like $2 and I plan on replacing some of the daylight white LED's with a mixture of blue and Violet. I want to see if a low light coral can live under the stock light with this mod. I'm hoping that the blue and violet LED's will provide a better spectrum of light for the coral to photosynthesize even if the wattage output is crap. I believe these 5mm LED's are .07 watts each. There are 37 LED's total -27 on the daylight switch and 10 on the moonlight switch. I'm interested to see what combination will look best. I think I will start with 12 White, 8 blue, 7 violet. Or maybe 14W, 7B, 6V. I will be adding pictures of the process and final result as soon as the LED's arrive.
TL;DR I thought it would be interesting to see what effect I can produce with the stock light with some cheap LED's and a test of my soldering skills before I decide to buy a retrofit kit with 3 watt LED's that cost $70+
Just find a nice supplier of LED bulbs, resistors, and battery cases. My cases came from RadioShack and were about $1.50 each, and you can get a bulk pack of 80 LEDs and resistors off Amazon for $9. There are very few blasters that can't fit an LED into their front ends somewhere, and as long as there's enough space in the blaster for your batteries, the wiring real estate is almost negligible.
Of course, it requires a lot less tinkering if you can tear down an existing flashlight and fit it in the case, but where's the fun in that? :P
Edit: Also, that Rayven is beautiful. I need to get myself a Rayven.
Had them for years, go them from amazon.
https://www.amazon.co.uk/Dimmable-LED-Desk-Lamp-Adjustable/dp/B00J5DZJJU
Not sure how much light you're looking for but these might work. Otherwise, you can buy bags of LEDs for cheap.
50pcs Ultra Bright 12v Pre Wired LED Diodes Light-White https://www.amazon.com/dp/B01MYYUS2R/ref=cm_sw_r_cp_apa_i_uK-FDbQGTZQ6V
CR2032 Button Batteries and 3 LED Lights per battery taped on to the top/bottom of the discs with Packing Tape.
edit: See through discs work the best (Champion, Proton)
That depends on the LED, the battery and the circuit. Let's say you get a low current LED (20 mA - https://www.amazon.com/gp/aw/d/B00UWBJM0Q) and an average 1632 battery (130 mAh - https://www.amazon.com/gp/aw/d/B00102JQIE). That's drawing 20 mA from a 130 mA-hour battery so you just divide. You'll get about 6.5 hours of light from it though probably a bit less since you'll want to size your resistor to allow a bit extra current for a brighter light. You would do better getting a 2032 battery - https://www.amazon.com/gp/aw/d/B00DORK4NE. It's only a little thicker and would give you 225 mAh.
Edit: just realized you posted a link to a product. I have no idea how long that would last but i would guess 6 hours would be an upper limit.
ok, I've switched plans to solder an entire system using these LEDs of lower voltage. Now I only ask, will two 1.2 AA batteries be enough to power them and do I need resistors?
Yep, I soldered the LEDs myself. I used the Chanzon Rectangular 2x3x4mm LEDs (recommended by I:C) here which are available from Amazon or AliExpress.
I actually haven't figured out which specific LEDs to get, I've only narrowed down which profile to get (went with 2x3x4 as they have more uniform lighting than 3 mm diamater ones). I'm open to any suggestions if you have any, otherwise I was going to get whatever's readily available like this.
Hey, thanks for asking the question, for your information, base model Diverge TM 2s do not have LEDs, when purchasing a Diverge TM 2, there is an option to add LEDs but it costs extra.
I believe that you are part of the group of people that got upgraded from Diverge TM 1 orders to Diverge TM 2 right? In this case, your order was upgraded to the Diverge TM 2 without LEDs. (I think that is fair, the base model Diverge TM 2 already costs more for me to manufacture than the Diverge TM 1 and should cost extra but the upgrade was free)
For your information, if you wish to add your own LEDs at a later date, then you could look for "2x3x4 box type" LEDs, and "0805 resistors" or "1/8w resistors" for what you need.
Below is an example shopping list of stuff from amazon to get white backlights set up:
I bought the greeen lens colored ones here https://www.amazon.com/dp/B01C5HL0PO/ref=cm_sw_r_cp_apa_uGOUzb3PT6PTV The green colored lens is rated 2.3 V and the clear one is rated 3.1 V so i ordered the clear one, and waiting for them.
The green lenses looked really pretty with kaihua golds, but the light was so faint, that yau couldnt see the green at all with the keycaps. I tried with a couple other leds (white, orange, blue lens) that i have of the same brand and they shine just ok.
Also not OP, but these are ones that I got that will work with click bar switches. But like /u/angelartech said, they must be as flush as possible to the PCB for them to work.
https://smile.amazon.com/LEVILUNA-Magnetic-Levitating-Seamless-Decorative/dp/B077XMBK96/ref=sr_1_4?ie=UTF8&qid=1542837246&sr=8-4&keywords=levitating+moon+lamp
It's a LED bulb.
https://www.amazon.com/dp/B06XPV4CSH/ref=cm_sw_r_cp_awdb_t1_jZcOBbGP3B8D1